Does the box itself need to be broken down. I see keeping anything connected to the drive train free. But like the originals, I wouldn't mind having a welded box. These fasteners bother me. you have steel screws into soft threaded aluminum. I see all kinds of trouble. I can get a guy to spit weld the box. He does small work for me all of the time.
Of course these are really minor details. I am more worried about painting than anything else. I have seen some of these kits for sale, few meet this forums standards.
Mid Production Tiger Kit
-
Greg Stephens
- Posts: 128
- Joined: Fri Nov 07, 2014 11:34 pm
- Has liked: 1 time
- Been liked: 11 times
-
John Fitzsimons
- Posts: 1867
- Joined: Tue Dec 14, 2010 3:11 pm
- Location: IRELAND,Dublin/Meath
- Has liked: 6 times
- Been liked: 812 times
- Contact:
Re: Mid Production Tiger Kit
I would not worry about the screws. One you take it easy and do a gradual tightening up around the tank. Welding is not necessary but iif interested have a look at Nick Farrugia's build on the panzer IV section. He welded his hull together.
If interested in any parts used in my builds contact me at johnfitzsimons@msn.com for a price list.
http://www.armortek.co.uk/Forum3b/viewt ... f=4&t=4770
https://youtube.com/@16rctankworkshop-y ... TlMwTalnX5
http://www.armortek.co.uk/Forum3b/viewt ... f=4&t=4770
https://youtube.com/@16rctankworkshop-y ... TlMwTalnX5
-
Stephen White
- Site Admin
- Posts: 3114
- Joined: Sat Oct 11, 2008 7:05 pm
- Location: Dorset
- Has liked: 1038 times
- Been liked: 2111 times
- Contact:
Re: Mid Production Tiger Kit
Greg, your instincts are sound. John's advice is worth listening to. Mark's design has evolved and been refined over a large production run of this and other types. He always designs with mechanical robustness and repeatability in mind. He's also very responsive to feedback so I think you can always trust that if there ever were any minor problems, they've long since been identified and resolved. That said, assembly does repay a bit of mechanical sympathy and some good fitting skills, normal for any mechanical engineering.Greg Stephens wrote: I am going to bet that I am wrong before I start hacking at armortek's work with a file.
The only problem I've had was of my own making, losing patience with a bush which I was determined to sink despite not setting it up true. I tried what the Army calls "tools small adjusting" ie a mallet and got no-where. I had to be rescued by a former toolmaker who gave me that pitying look reserved for raw apprentices.
I've now had a fair bit of experience of brazing aluminium on these models and it is not without its pitfalls, however skilled the craftsman. Nick did a fantastic job on his Pz IV but in less skilled hands, you run a severe risk of introducing heat stress distortions, which are very difficult to correct and you close off any possibility of disassembly in later life. I'd avoid welding the main assemblies like the plague but I do use brazing for the construction of new fixtures and structures to add to the kit. I know then that if I c**k it up, I can start again without ruining the kit.
The only other bit of advice to add is to be absolutely scrupulous about degreasing and priming, especially where dissimilar metal corrosion might be an issue. Some builders choose to complete sub-assemblies before priming but I'd suggest you try everything first, do any easing necessary then strip, degrease and prime everything (except bushes and bearings) separately before re-assembly.
Hope that's of use - nothing original, I learnt it all by following builds on this Forum.
Enjoy it - after all, you've earned it!
All the best.
Stephen
-
John Fitzsimons
- Posts: 1867
- Joined: Tue Dec 14, 2010 3:11 pm
- Location: IRELAND,Dublin/Meath
- Has liked: 6 times
- Been liked: 812 times
- Contact:
Re: Mid Production Tiger Kit
Greg, this is good practice. Most of my fitting problems were at turret and gun mount stage. In the end I went at it with a power file. Worked out well in the end but I was a bit worried.At turret stage that gradual tightening of screws is very important. Your Tiger looks like one of the more recent models so maybe better. Mine are 2007 late models.
If interested in any parts used in my builds contact me at johnfitzsimons@msn.com for a price list.
http://www.armortek.co.uk/Forum3b/viewt ... f=4&t=4770
https://youtube.com/@16rctankworkshop-y ... TlMwTalnX5
http://www.armortek.co.uk/Forum3b/viewt ... f=4&t=4770
https://youtube.com/@16rctankworkshop-y ... TlMwTalnX5
-
Greg Stephens
- Posts: 128
- Joined: Fri Nov 07, 2014 11:34 pm
- Has liked: 1 time
- Been liked: 11 times
Re: Mid Production Tiger Kit
Every problem so far has been my own inexperience. not the kit. I researched these kits well and lurked on the forum for years.
Still, getting your hands on one is different.
The manual is good. My only criticism would be for more photographs. It is difficult to tell the orientation of the parts sometimes. Fortunately this forum has lots of pics.
The only problem I have so far is with the upper front plate. As I mentioned it was not meeting the lower front hull. I put a 45 degree on the underside and it closed up.
Now I have a similar problem where it meets the glacis.However grinding is not going to bring it closer. Should I have some aluminum tacked on? I have a retired aluminum worker living around the corner with a full shop in his garage.
- Attachments
-
-
John Fitzsimons
- Posts: 1867
- Joined: Tue Dec 14, 2010 3:11 pm
- Location: IRELAND,Dublin/Meath
- Has liked: 6 times
- Been liked: 812 times
- Contact:
Re: Mid Production Tiger Kit
Do some fake weld with milliput.

If interested in any parts used in my builds contact me at johnfitzsimons@msn.com for a price list.
http://www.armortek.co.uk/Forum3b/viewt ... f=4&t=4770
https://youtube.com/@16rctankworkshop-y ... TlMwTalnX5
http://www.armortek.co.uk/Forum3b/viewt ... f=4&t=4770
https://youtube.com/@16rctankworkshop-y ... TlMwTalnX5
-
Greg Stephens
- Posts: 128
- Joined: Fri Nov 07, 2014 11:34 pm
- Has liked: 1 time
- Been liked: 11 times
Re: Mid Production Tiger Kit
Thanks John,
I will take that route. My concern is that I am forcing something or just plain have something backwards. This was the only piece that just would not go.
I could bevel the back edge and split the difference with the front, but there is no point.
Jb weld will take care of it.
If my aluminum gut wants to add a piece on it I may let him but there's no point really.
I have ran into a problem I have seen before. The pannier floor seems to be about 1'16 to wide. (forgive my colonial measurements, I am an American woodworker)
I take it I should file the high spots until the gap disappears.
- Attachments
-
-
-
Adrian Harris

- Posts: 5130
- Joined: Thu Jul 12, 2007 10:46 pm
- Location: Berkshire (UK)
- Has liked: 1484 times
- Been liked: 1687 times
Re: Mid Production Tiger Kit
Squaring off the folds should take care of the excess width.
See here:
http://www.armortek.co.uk/Forum3b/viewt ... 38&p=24059
Adrian.
See here:
http://www.armortek.co.uk/Forum3b/viewt ... 38&p=24059
Adrian.
Contact me at sales@armortekaddict.uk for details of my smoker fan control module
-
John Fitzsimons
- Posts: 1867
- Joined: Tue Dec 14, 2010 3:11 pm
- Location: IRELAND,Dublin/Meath
- Has liked: 6 times
- Been liked: 812 times
- Contact:
Re: Mid Production Tiger Kit
As Adrian says, the folds throw it out of whack. If you look along the profile you should see what is causing the problem. The is the same with every Tiger kit.
If interested in any parts used in my builds contact me at johnfitzsimons@msn.com for a price list.
http://www.armortek.co.uk/Forum3b/viewt ... f=4&t=4770
https://youtube.com/@16rctankworkshop-y ... TlMwTalnX5
http://www.armortek.co.uk/Forum3b/viewt ... f=4&t=4770
https://youtube.com/@16rctankworkshop-y ... TlMwTalnX5
-
Greg Stephens
- Posts: 128
- Joined: Fri Nov 07, 2014 11:34 pm
- Has liked: 1 time
- Been liked: 11 times
Re: Mid Production Tiger Kit
Adrian,
I found your post regarding welding your kit. I am still on the fence about it.
Any advice for my welder if I decide to take the plunge?
I was looking at alumaloy. Any experience with it?
I found your post regarding welding your kit. I am still on the fence about it.
Any advice for my welder if I decide to take the plunge?
I was looking at alumaloy. Any experience with it?
-
Greg Stephens
- Posts: 128
- Joined: Fri Nov 07, 2014 11:34 pm
- Has liked: 1 time
- Been liked: 11 times
Re: Mid Production Tiger Kit
Just out of curiosity is there any reason for me not to pick up my rivet gun?
I was itching for it when I fastened the bulkheads to the deck.
Not that I would do anything like that.
I was itching for it when I fastened the bulkheads to the deck.
Not that I would do anything like that.
-
John Fitzsimons
- Posts: 1867
- Joined: Tue Dec 14, 2010 3:11 pm
- Location: IRELAND,Dublin/Meath
- Has liked: 6 times
- Been liked: 812 times
- Contact:
Re: Mid Production Tiger Kit
I ould stick with the supplied fasteners. Especially the structural components.
If interested in any parts used in my builds contact me at johnfitzsimons@msn.com for a price list.
http://www.armortek.co.uk/Forum3b/viewt ... f=4&t=4770
https://youtube.com/@16rctankworkshop-y ... TlMwTalnX5
http://www.armortek.co.uk/Forum3b/viewt ... f=4&t=4770
https://youtube.com/@16rctankworkshop-y ... TlMwTalnX5
-
Adrian Harris
- Posts: 5130
- Joined: Thu Jul 12, 2007 10:46 pm
- Location: Berkshire (UK)
- Has liked: 1484 times
- Been liked: 1687 times
Re: Mid Production Tiger Kit
I used Durafix aluminium soldering sticks to try and make a welded lower hull for a Sherman project, using a MAPP torch as the heat source.
Although it was only my first attempt, the warping which was introduced during the process was enough to make me drop the idea of doing it myself. I do have a professionally welded Sherman lower hull, which is straight and true, but having tried it, I don't think it offers any benefit over the way Mark has designed these kits and does make things like getting an even paint finish more difficult.
The lower hull is complicated by the location of the suspension bars, and it's handy to have the upper hull top removable to get to the innards. So that only really leaves the upper hull sides and pannier parts.
By all means try it if you have the desire, as lots of improvements have come about by people thinking about things in different ways, and trying different things, but I'm not aware of any welded Tigers going back to the original 2003 kit, so the numbers are against you
Adrian.
Contact me at sales@armortekaddict.uk for details of my smoker fan control module
-
John Fitzsimons
- Posts: 1867
- Joined: Tue Dec 14, 2010 3:11 pm
- Location: IRELAND,Dublin/Meath
- Has liked: 6 times
- Been liked: 812 times
- Contact:
Re: Mid Production Tiger Kit
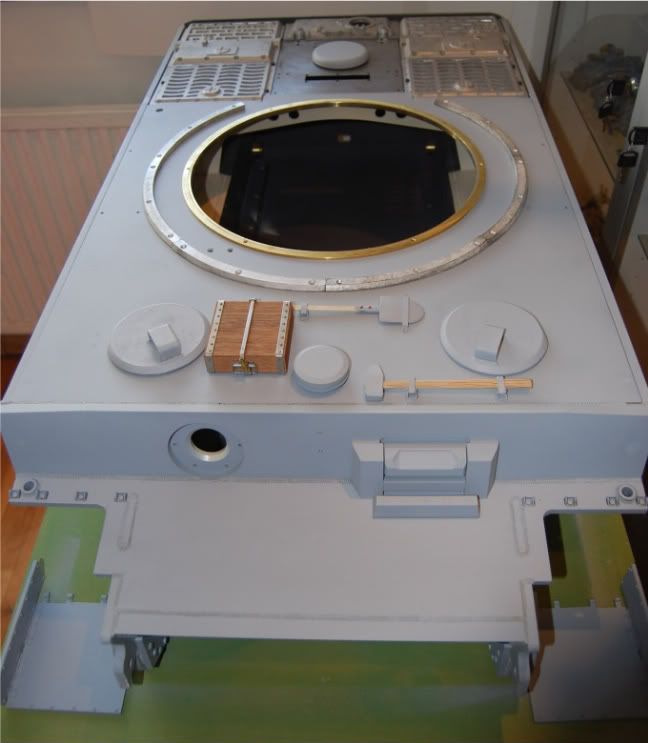
My hull roof is just supported on the brackets. Not bolted down at all. So far no problems and i have easy access to internals although I have added a full lenght floor and now a second dummy floor which covers the electronics.
If interested in any parts used in my builds contact me at johnfitzsimons@msn.com for a price list.
http://www.armortek.co.uk/Forum3b/viewt ... f=4&t=4770
https://youtube.com/@16rctankworkshop-y ... TlMwTalnX5
http://www.armortek.co.uk/Forum3b/viewt ... f=4&t=4770
https://youtube.com/@16rctankworkshop-y ... TlMwTalnX5
-
Greg Stephens
- Posts: 128
- Joined: Fri Nov 07, 2014 11:34 pm
- Has liked: 1 time
- Been liked: 11 times
Re: Mid Production Tiger Kit
John,
I was referring to the bulkheads that seem to only be attached to the roof. However I see some people have modified this to attach them to the panier sides and floor.
I was referring to the bulkheads that seem to only be attached to the roof. However I see some people have modified this to attach them to the panier sides and floor.