M4A4 Sherman tank project

Forum for discussion relating to the Sherman.
John Grima
Posts: 250
Joined: Sun Jul 15, 2007 2:54 pm
Location: USA
Been liked: 48 times
Contact:

Re: M4A4 Sherman tank project

Post by John Grima »

Thanks guys, More progress has been made and the tank is another step closer to completion.

Image

Image

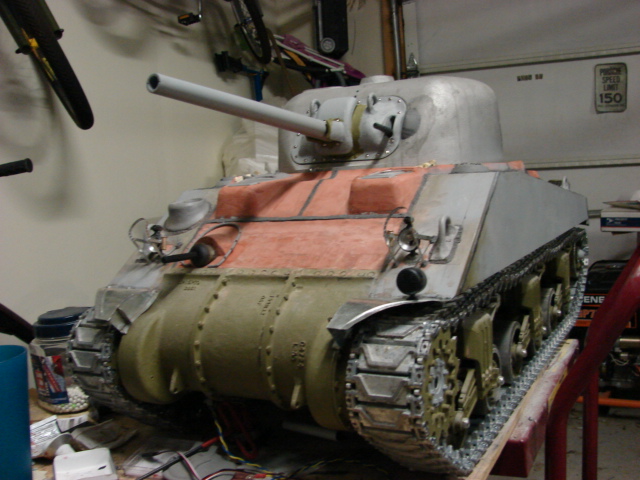
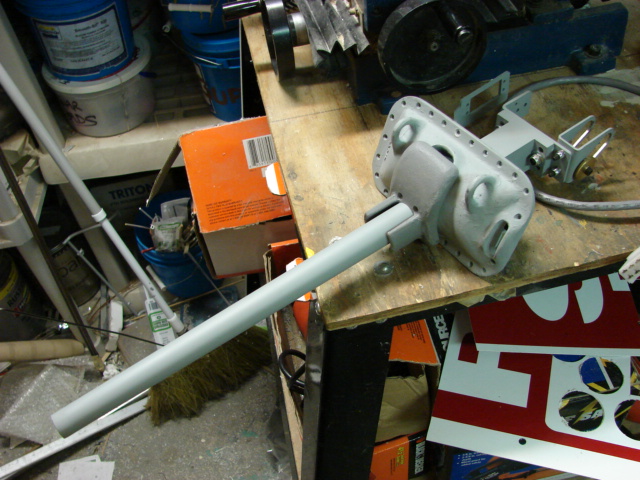
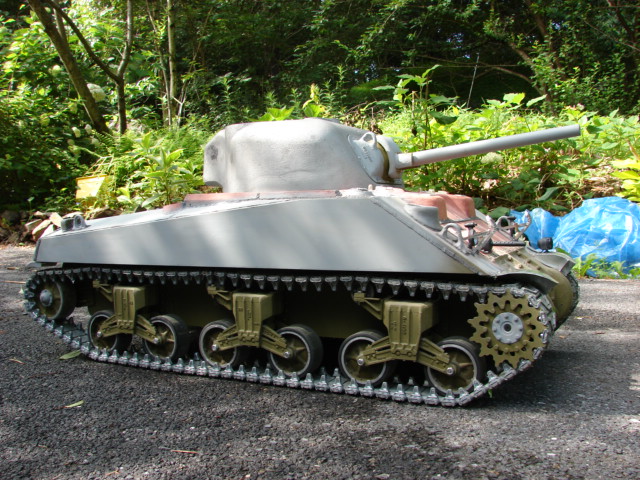
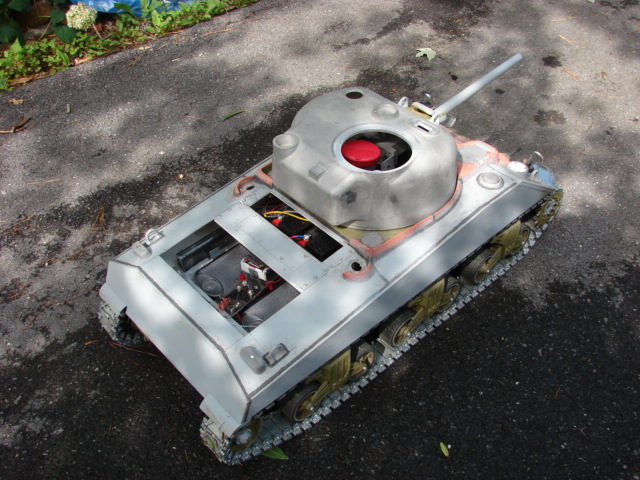
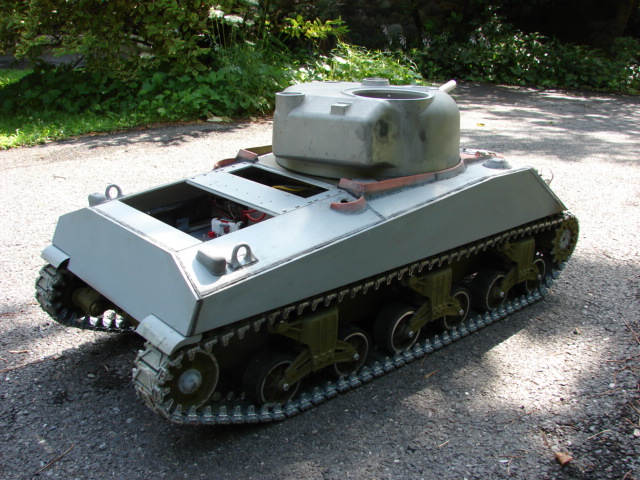
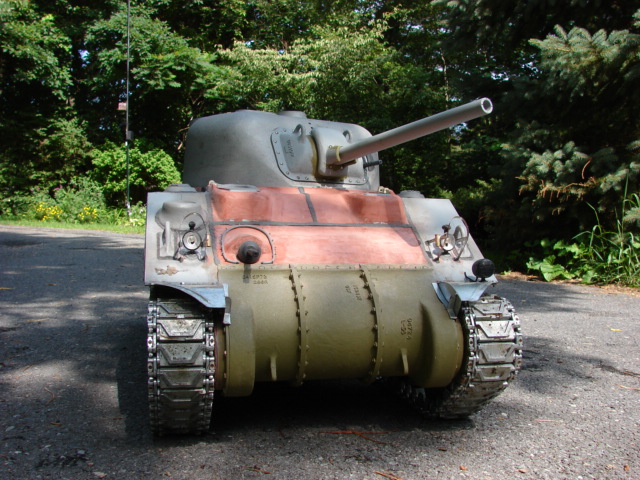
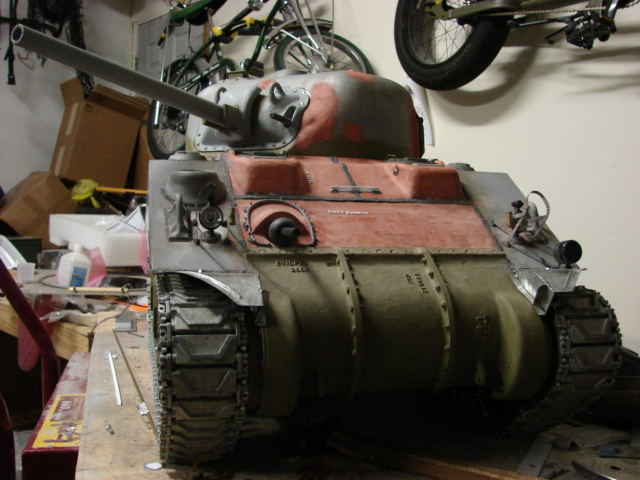
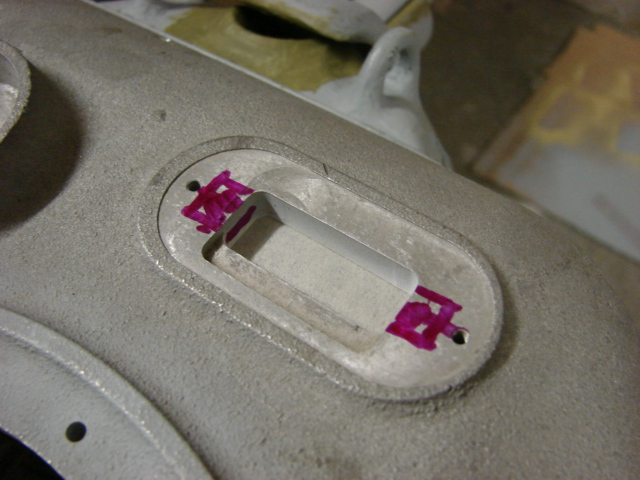
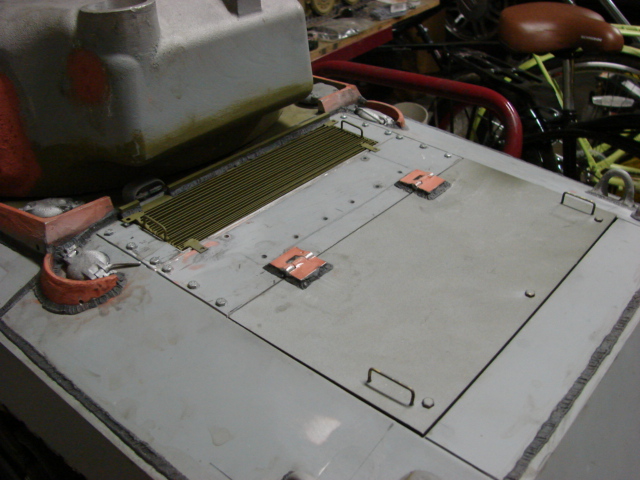
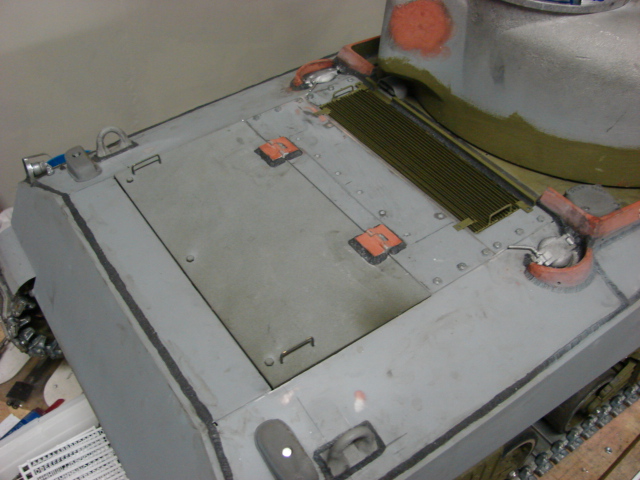
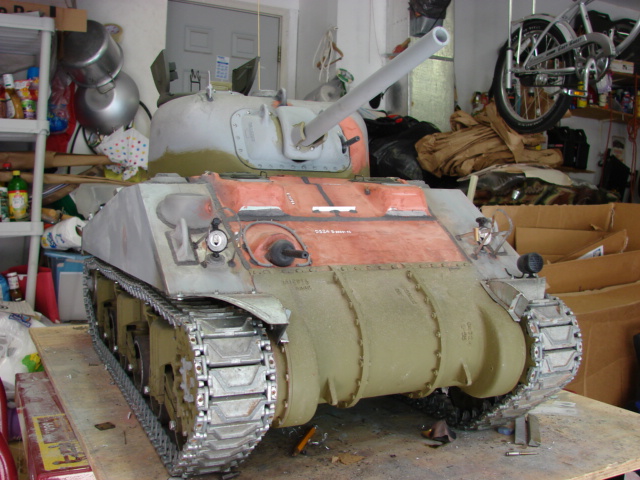
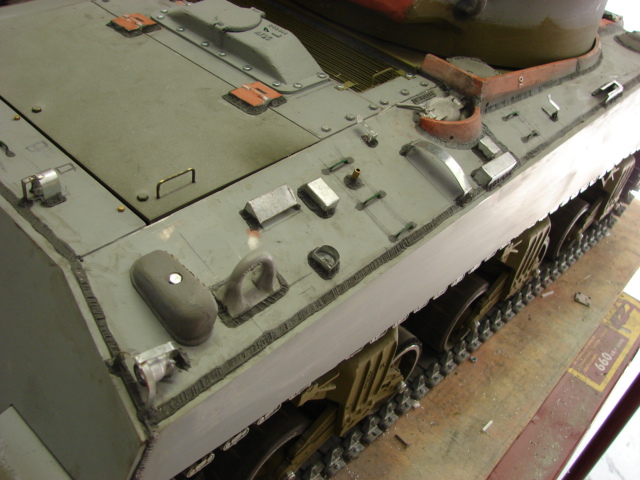
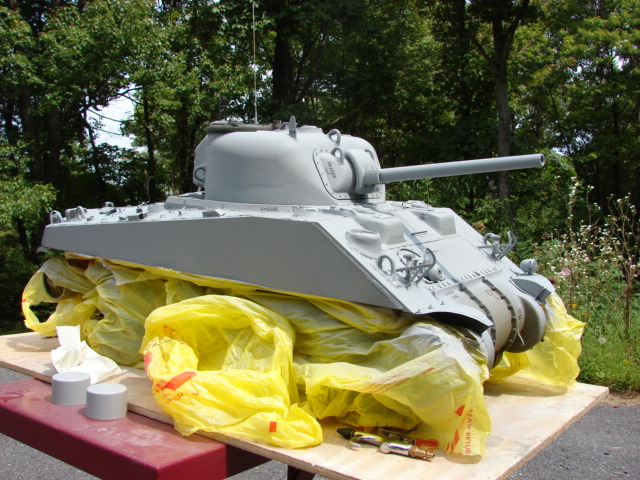
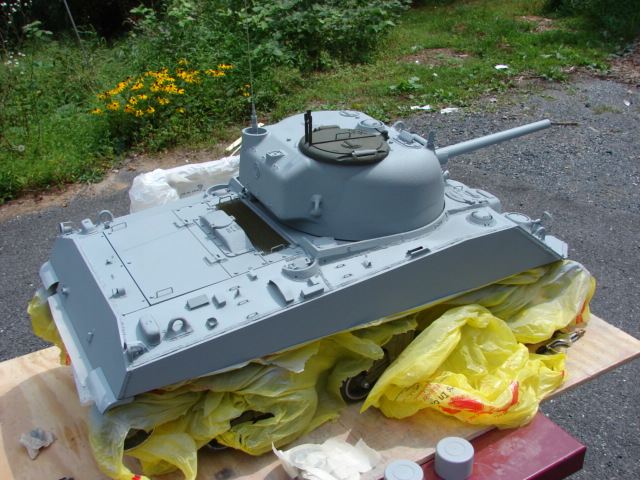
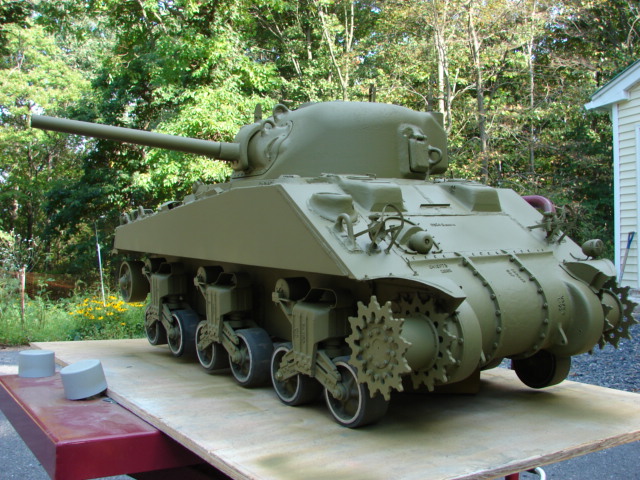
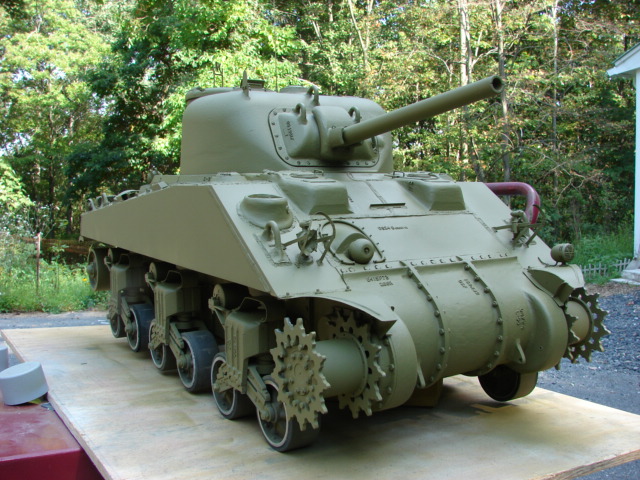
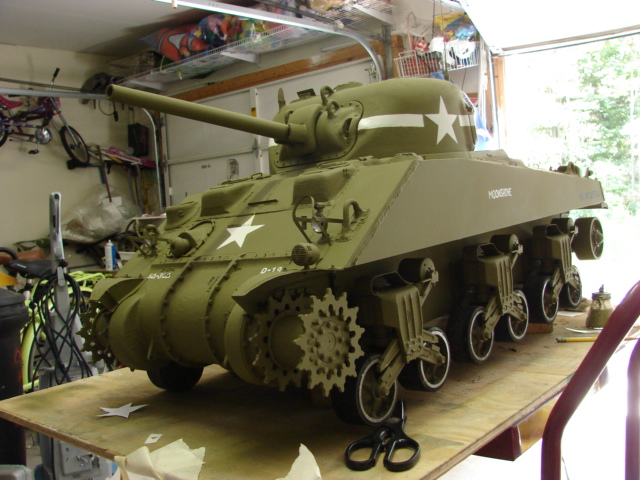
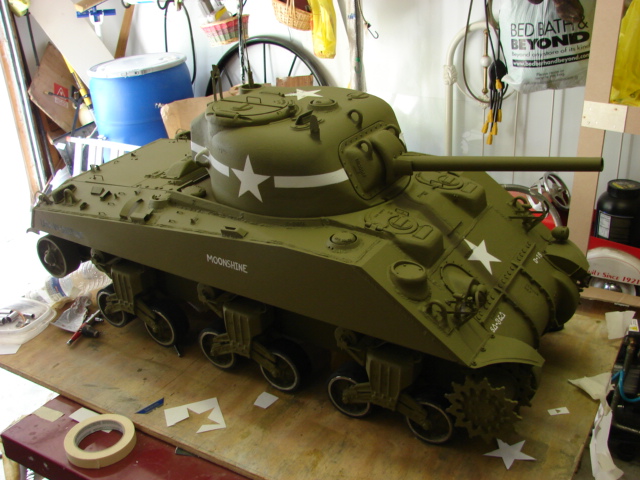
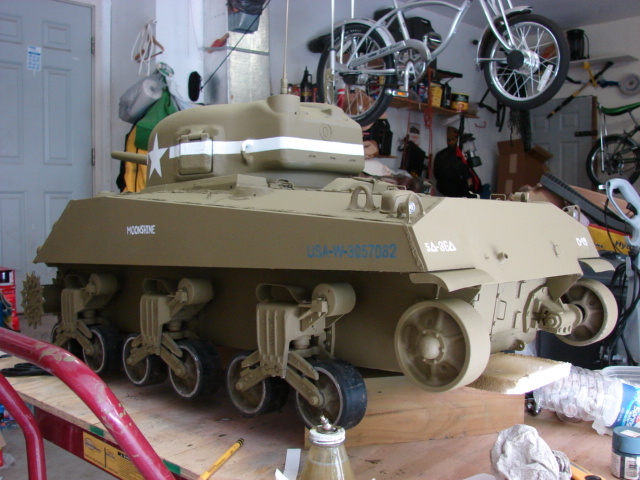
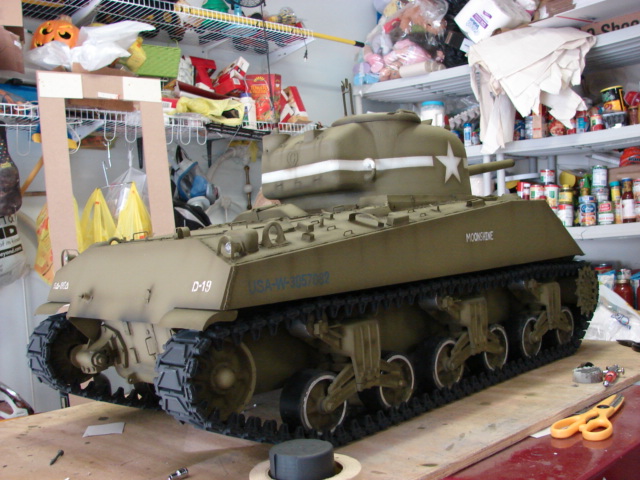
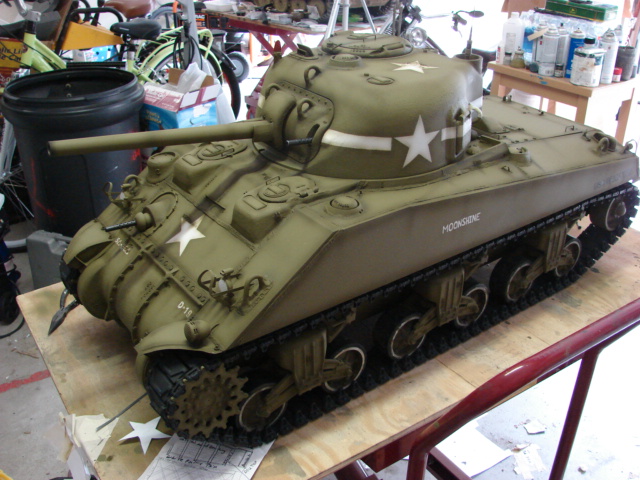
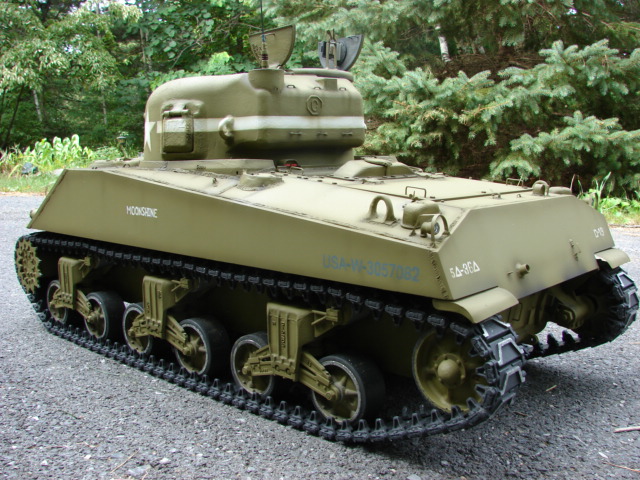
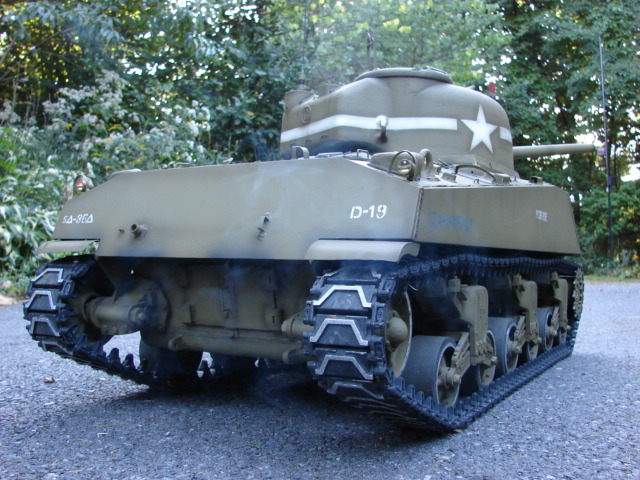
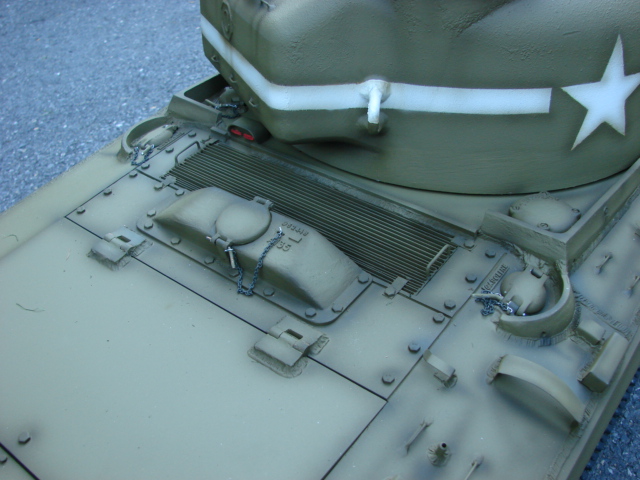
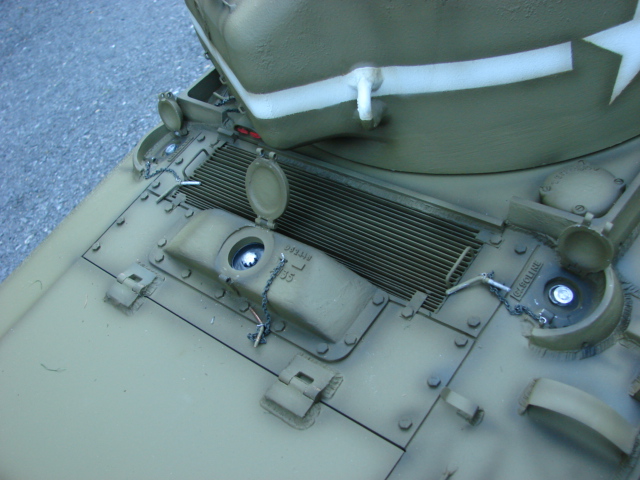
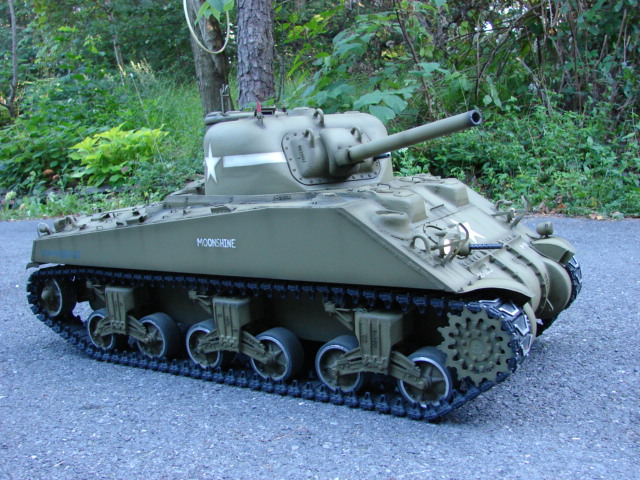
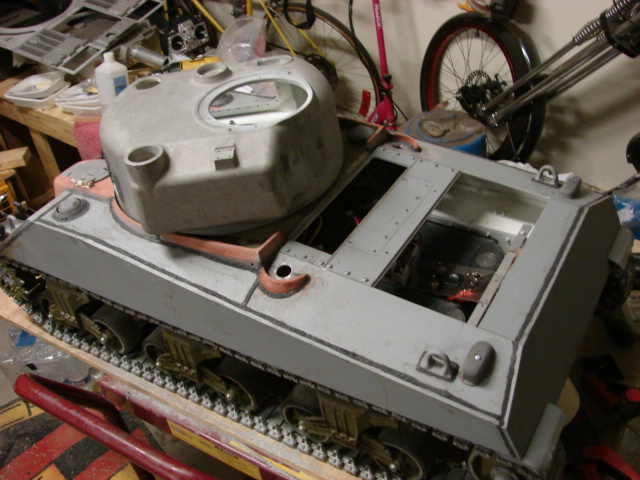
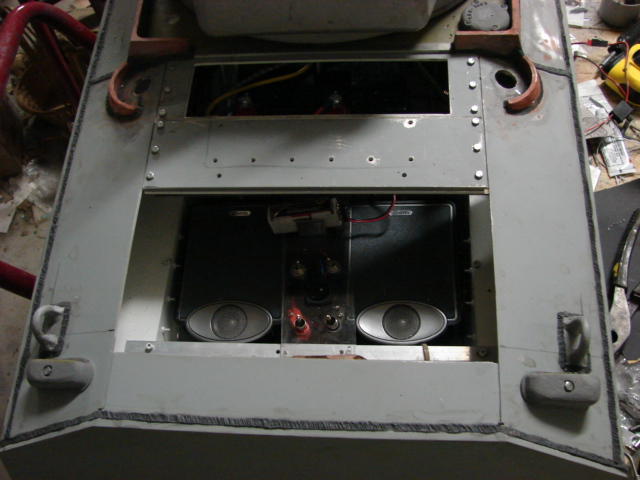
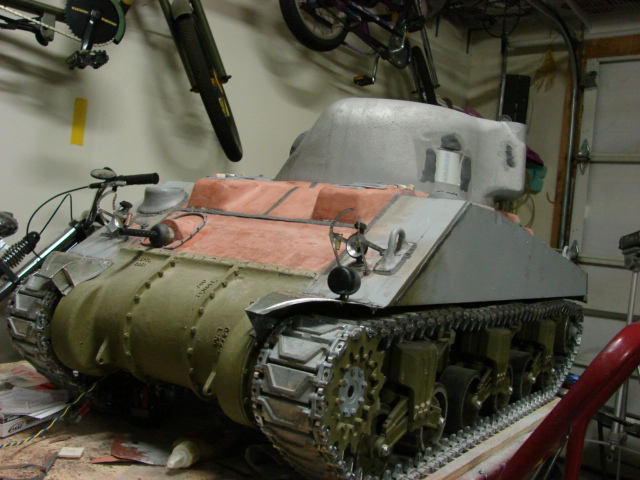
Since the last post the rear deck was mounted,

Image

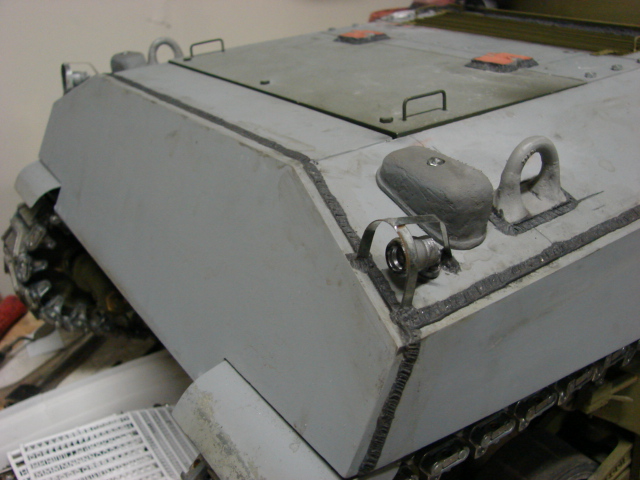
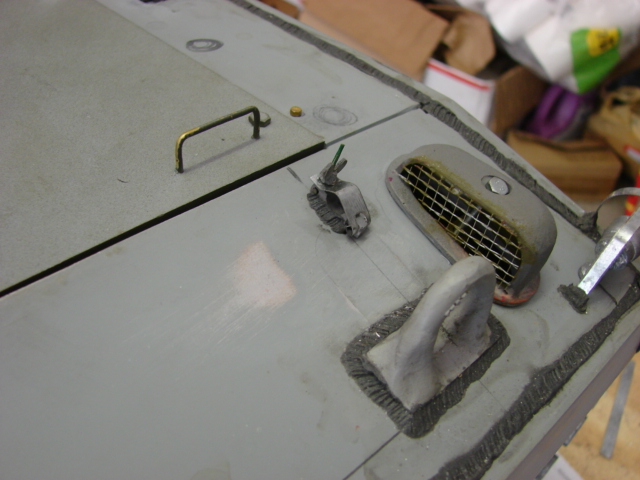
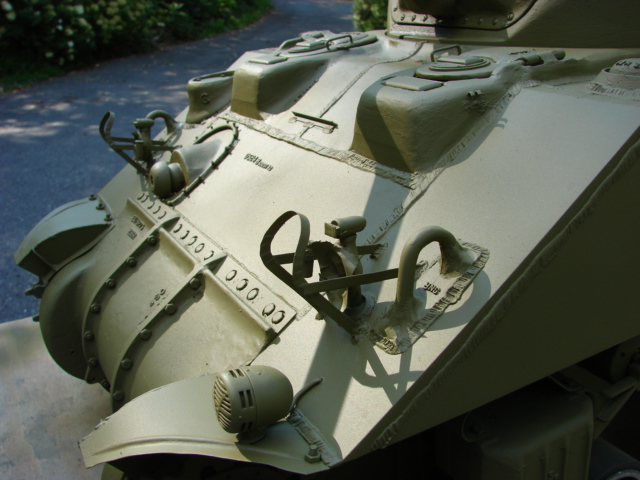
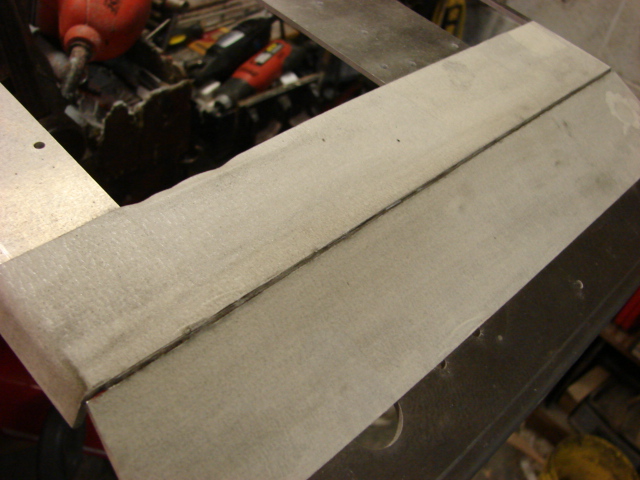
Before I was able to mount the deck to the tank I first had to add the etch lines for the rear plates. On the armortek shermans the rear deck is one pressed metal pan. Because of this the panel lines that are found the real tank are not present. To add them I etch them into the plate with a Dremel. Before I add the lines I mark where the lines go, and use tape as a guide

Image

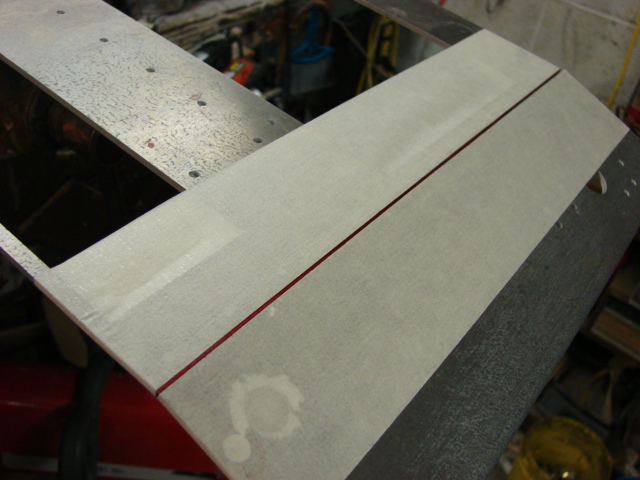
with a steady hand the lines are etched, Once the lines were etched the interior of the plate was primed and painted in flat white, then was added to the tank

Image

Image

Image

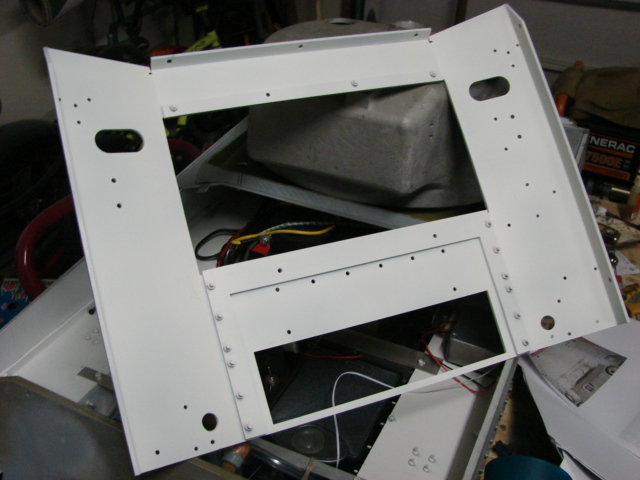
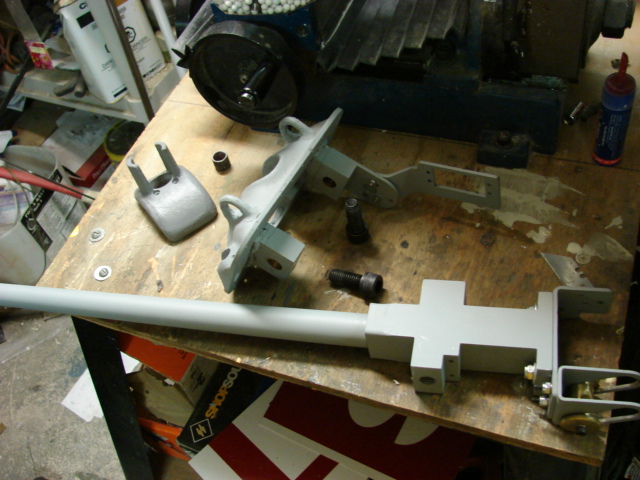
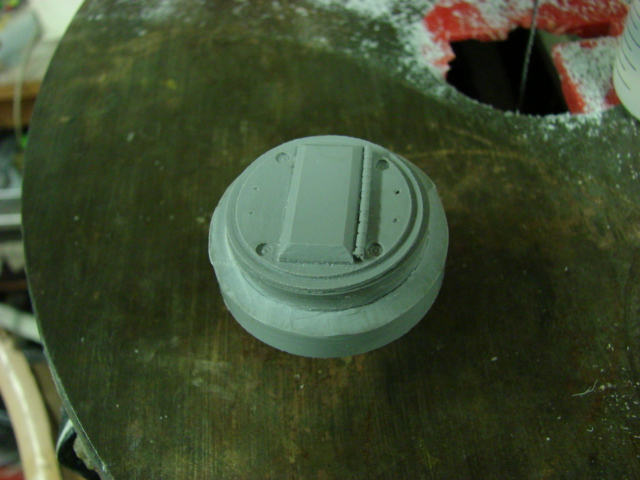
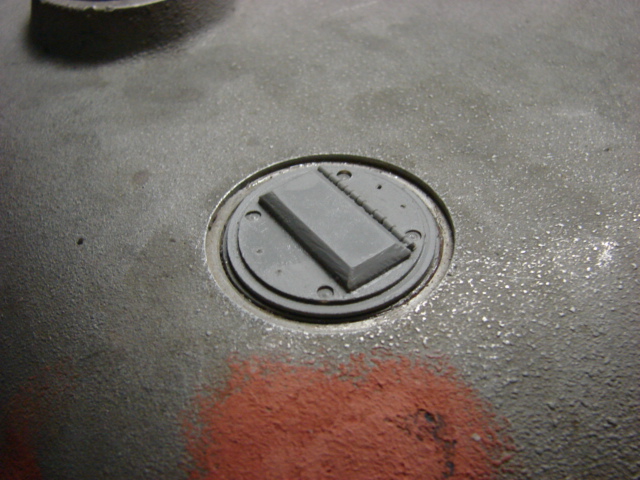
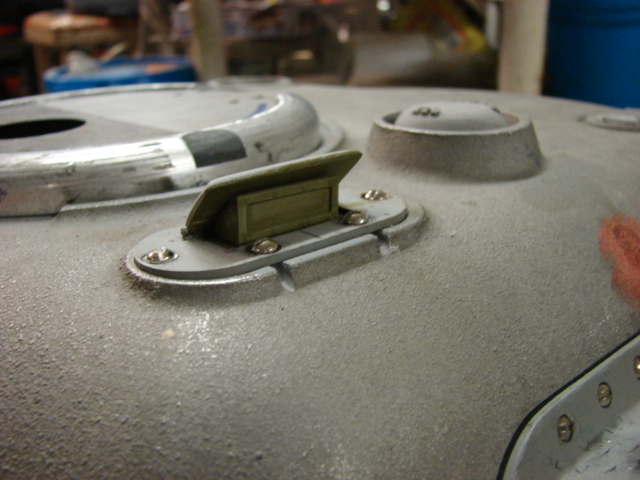
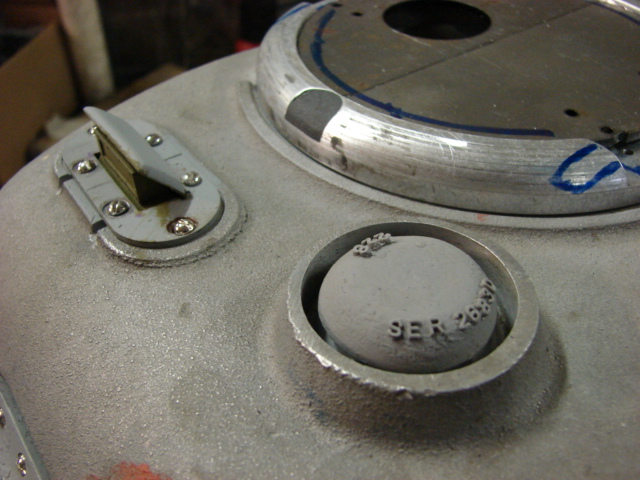
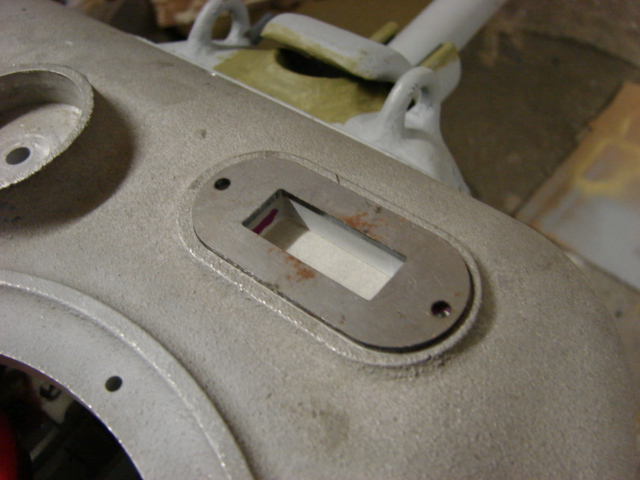
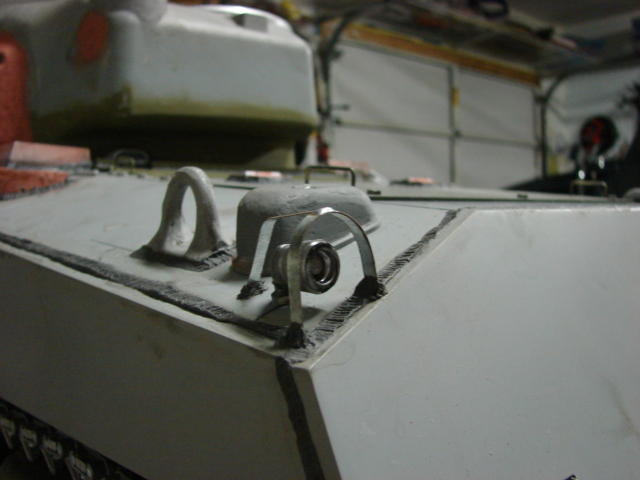
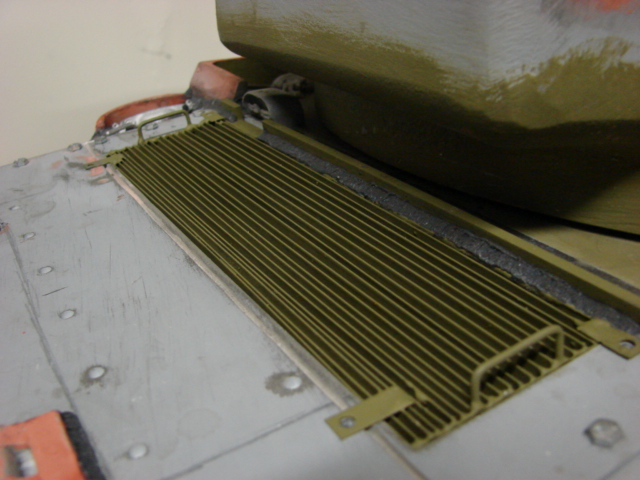
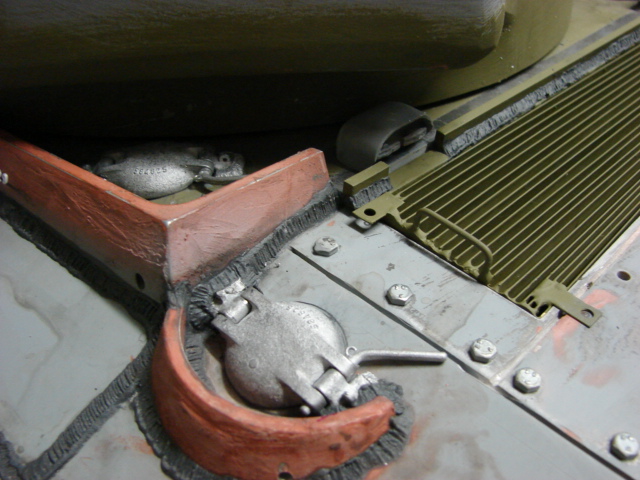
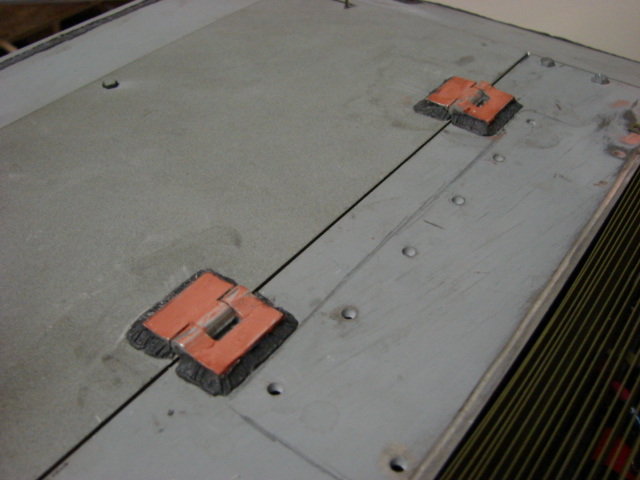
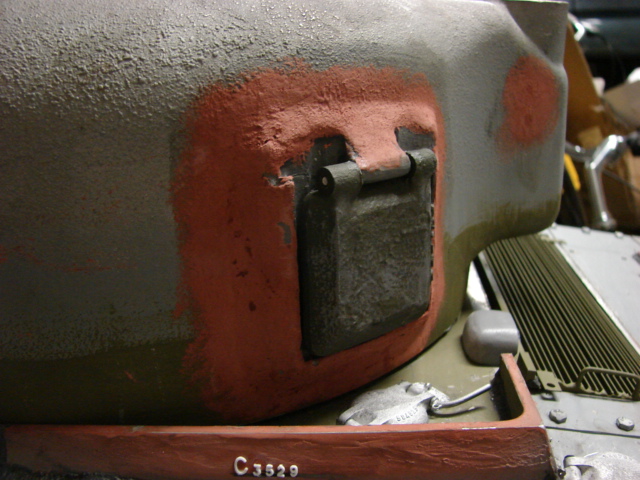
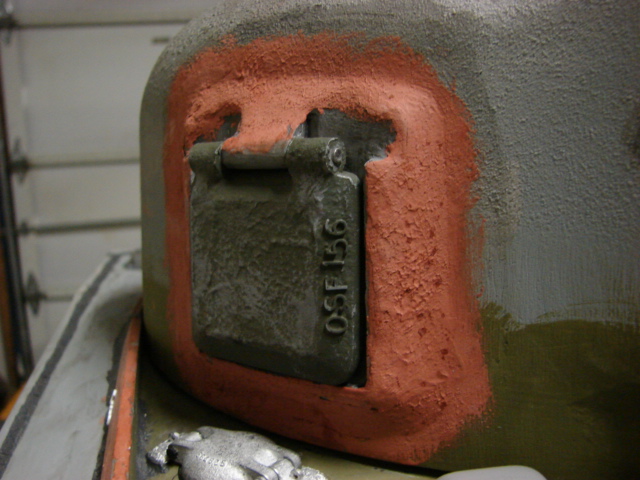
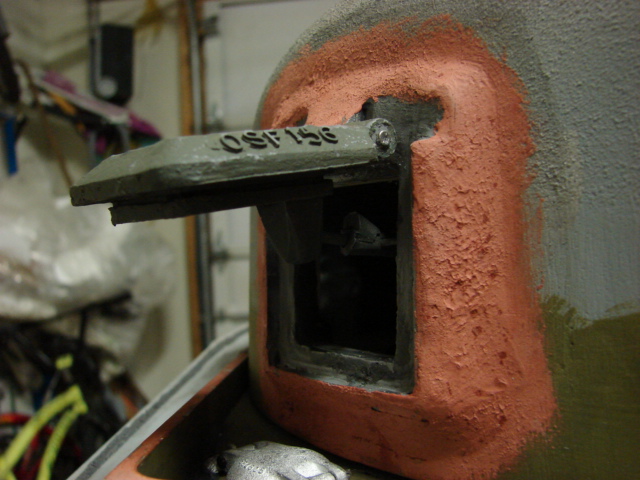
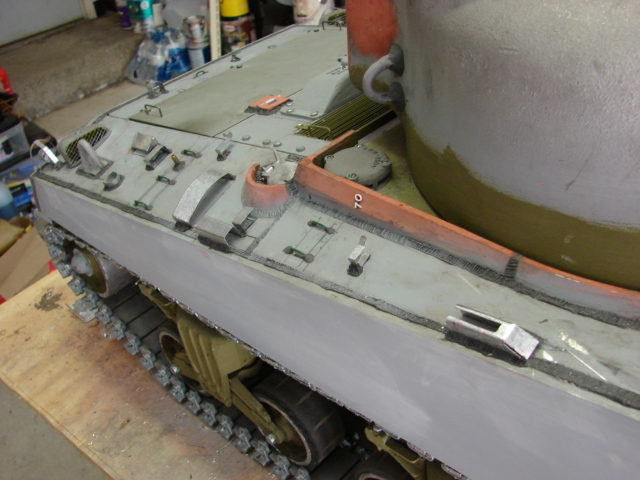
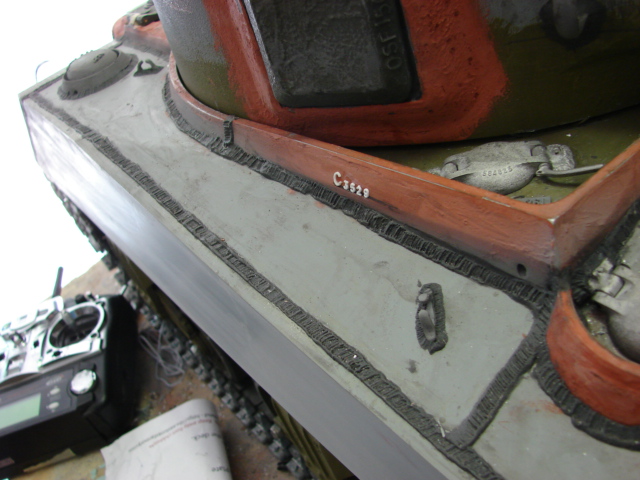
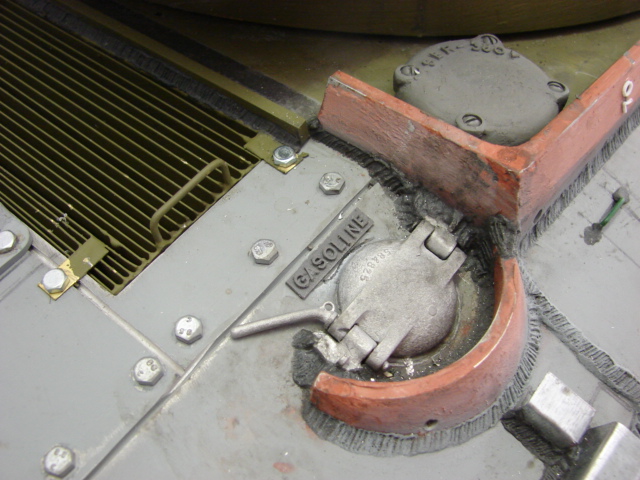
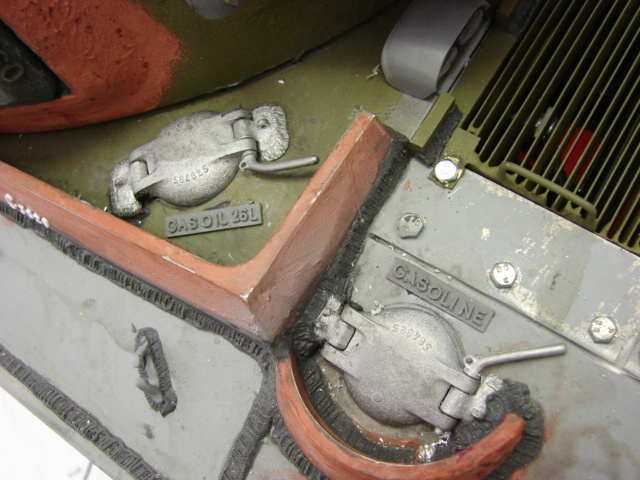
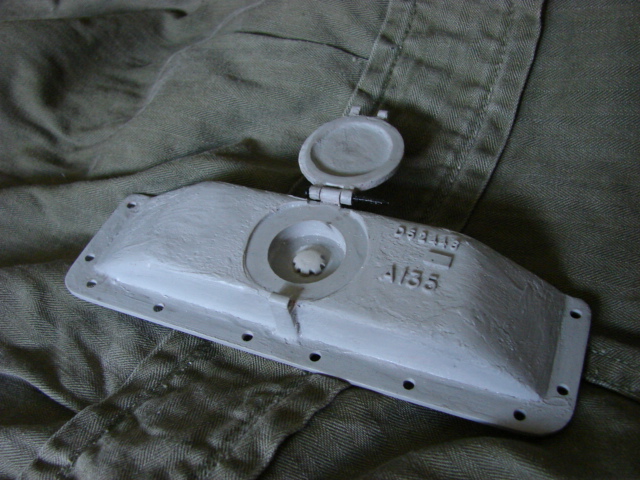
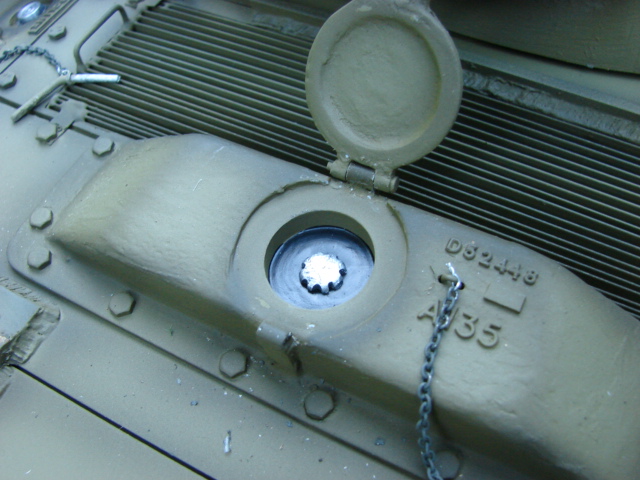
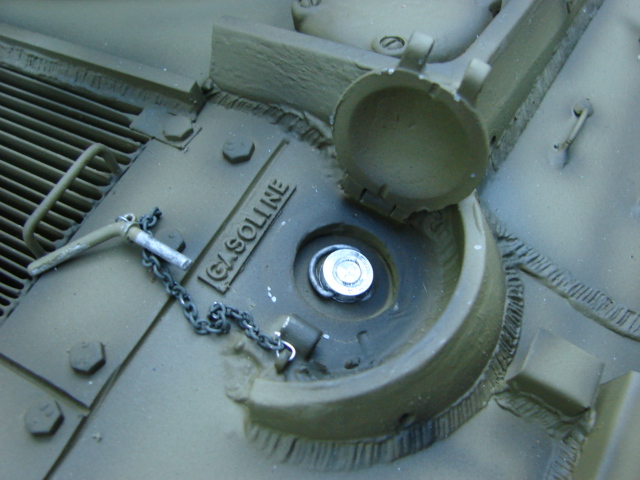
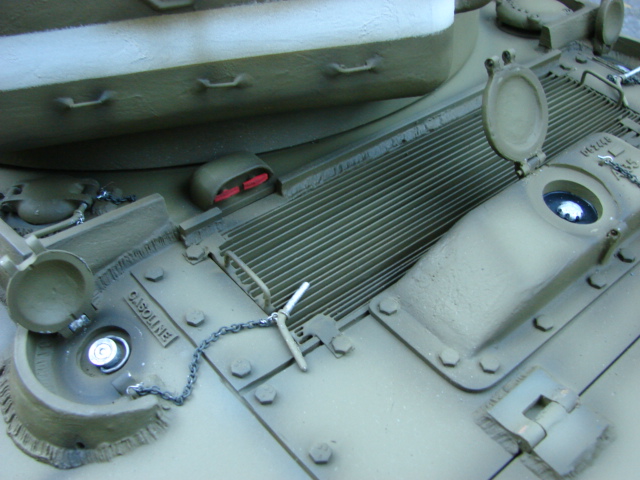
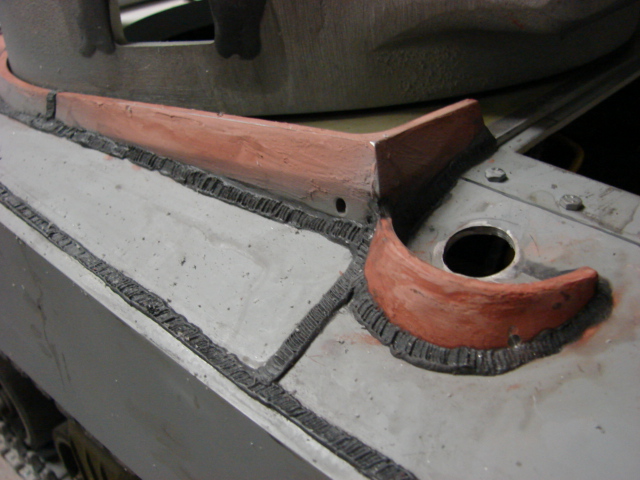
Once the rear deck was fitted I was now ready to add on the rear deck components. This would include the fuel cap guards, rear lift hook, and rear vents. For the guards the kit supplies you with two CNCed aluminum ones that work very well.

Image

Image

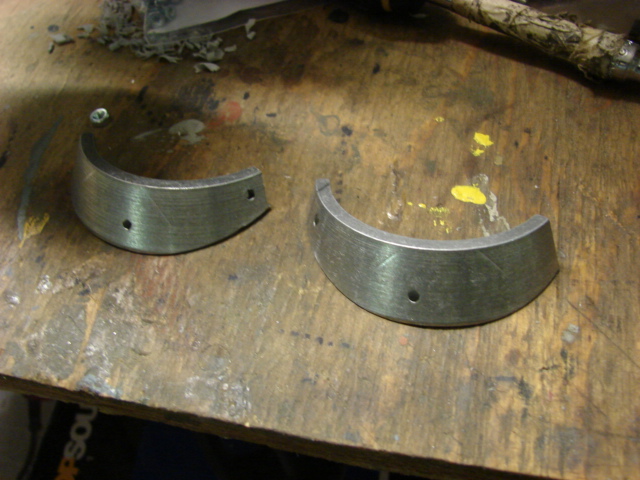
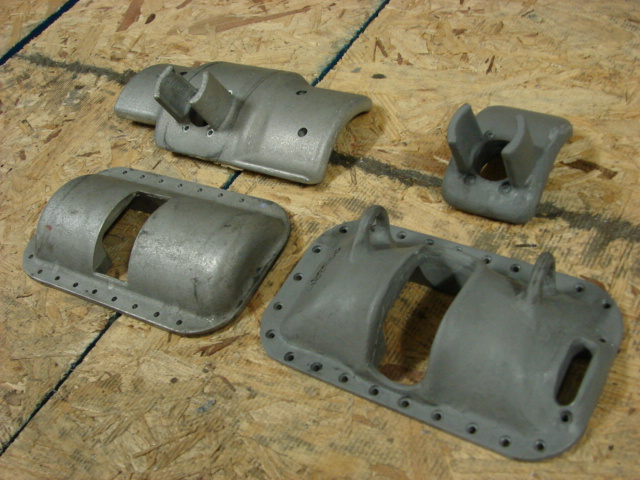
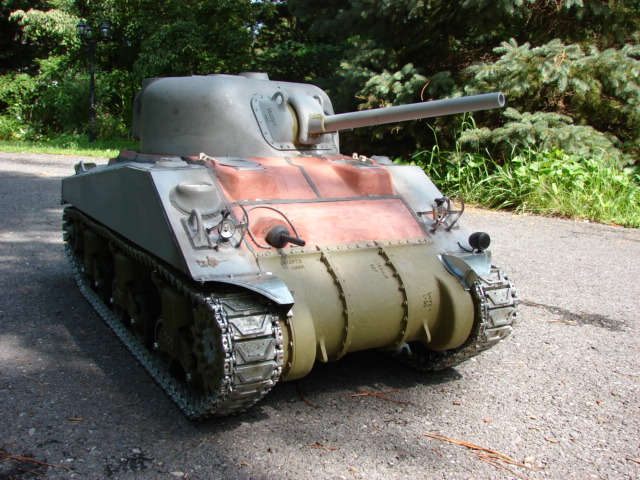
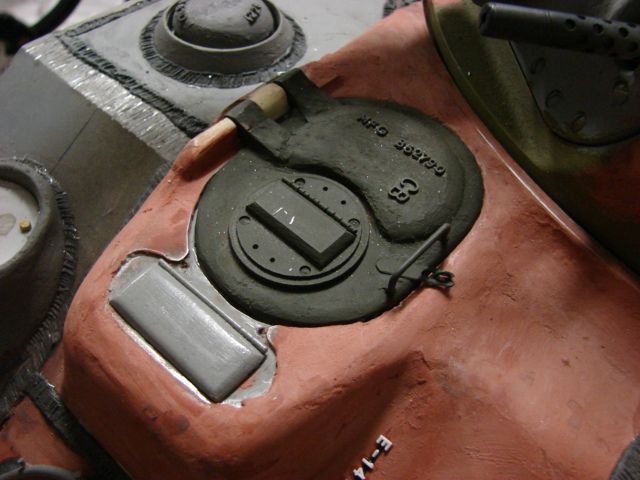
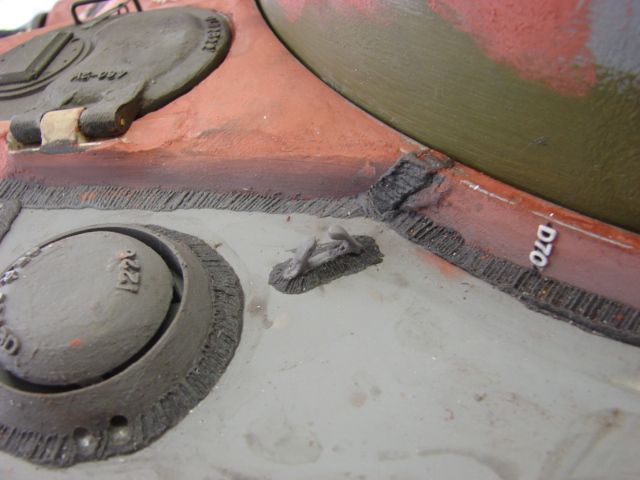
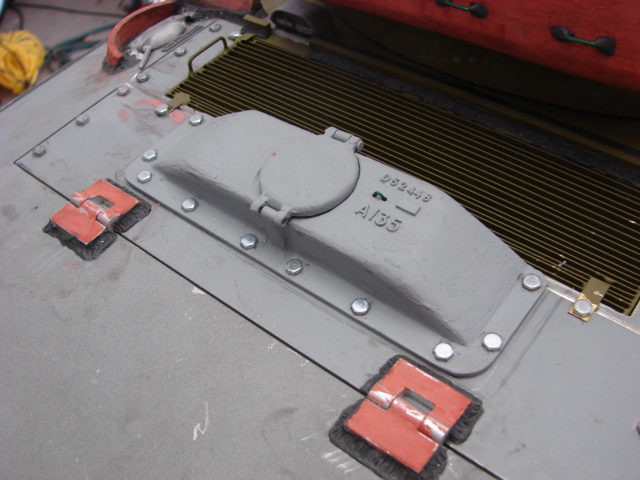
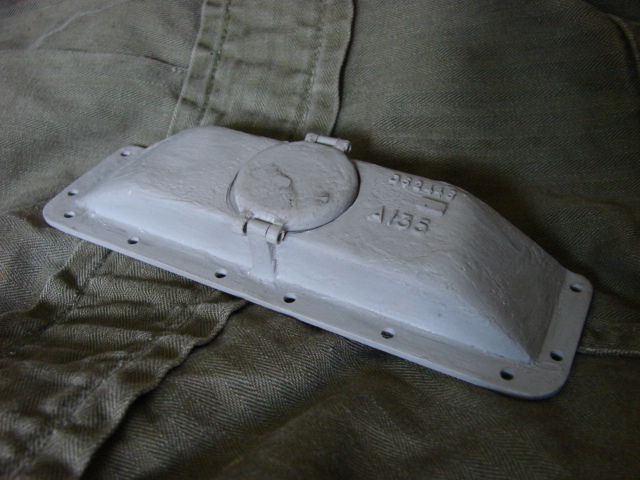
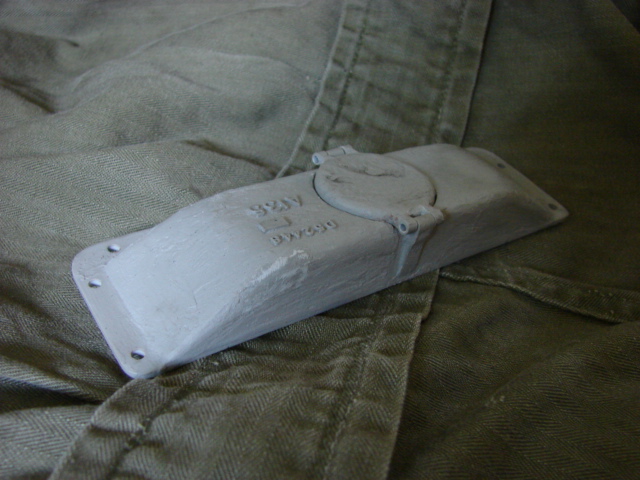
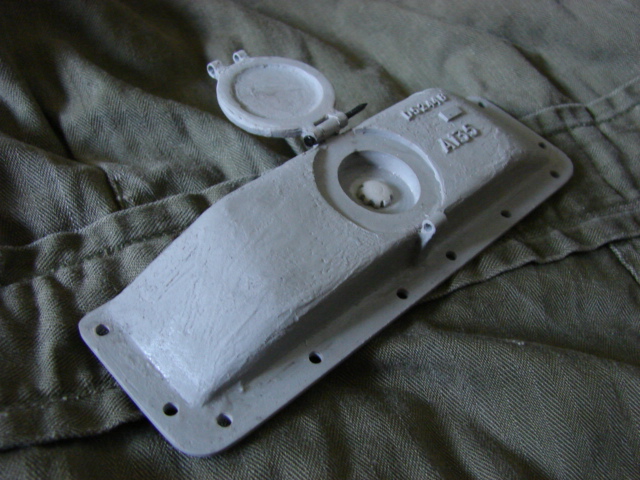
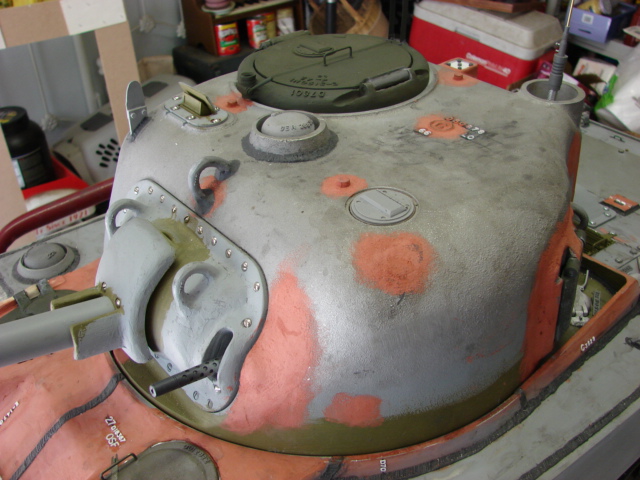
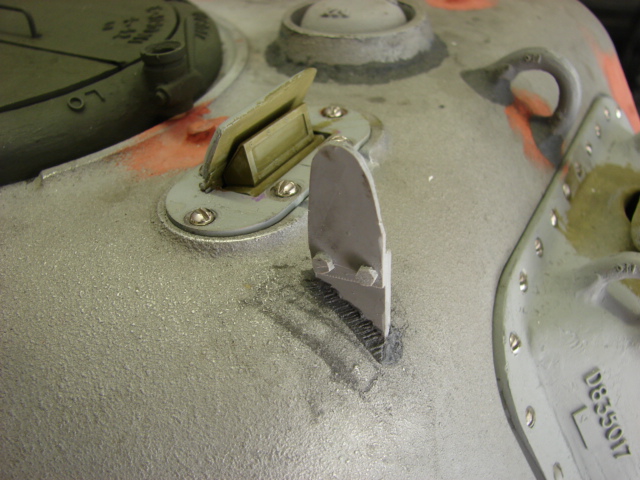
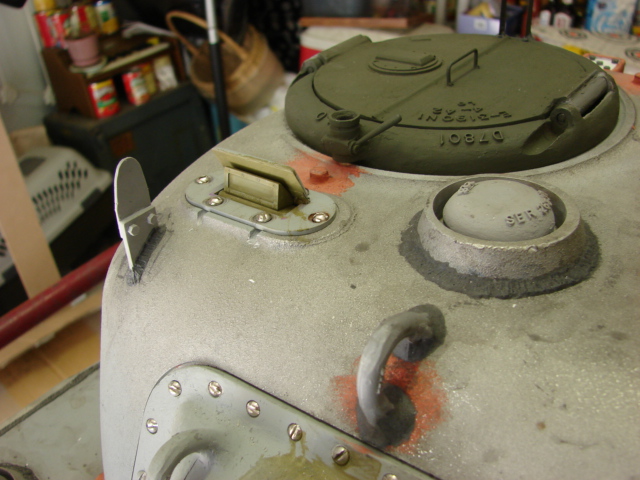
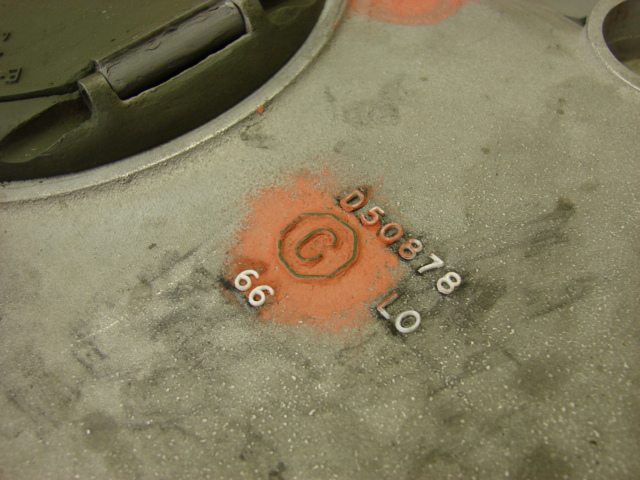
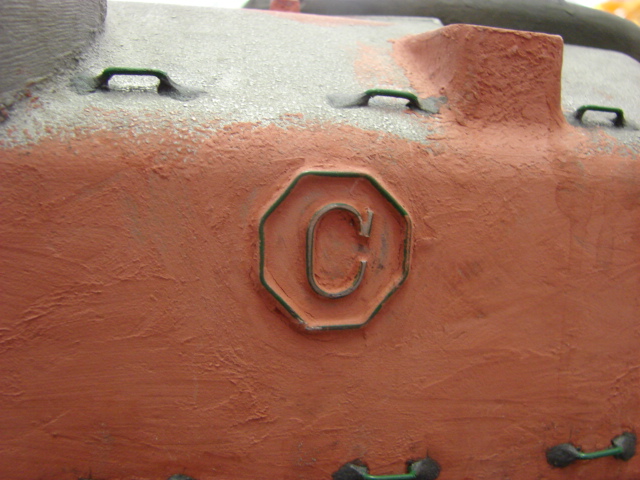
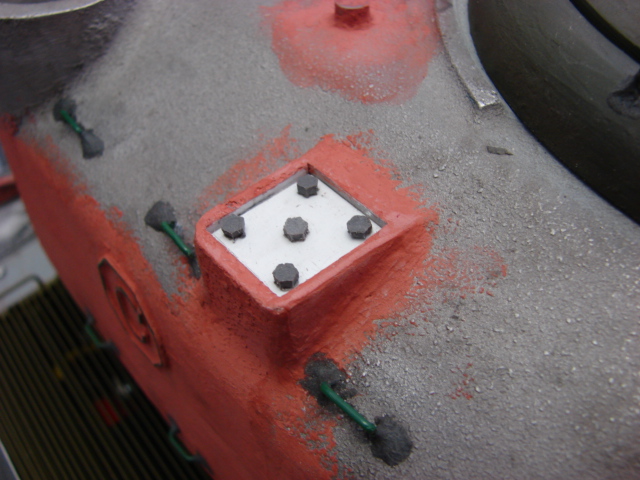
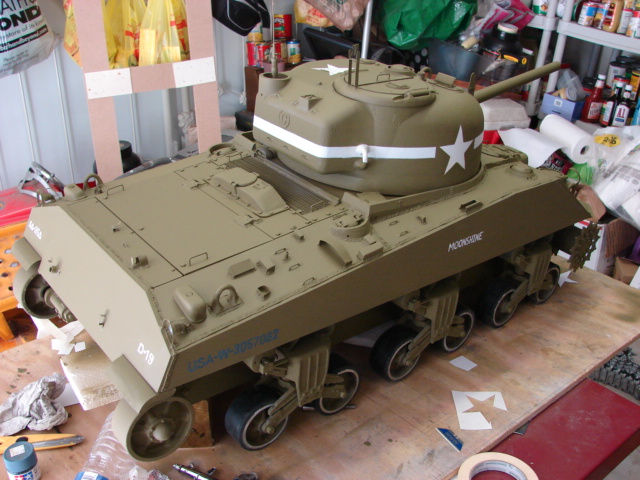
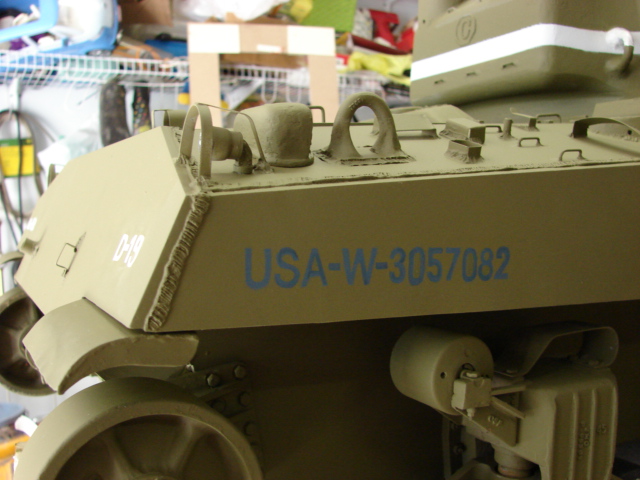
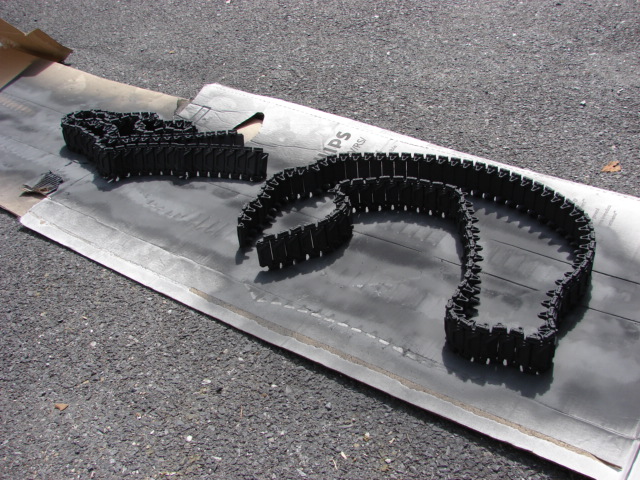
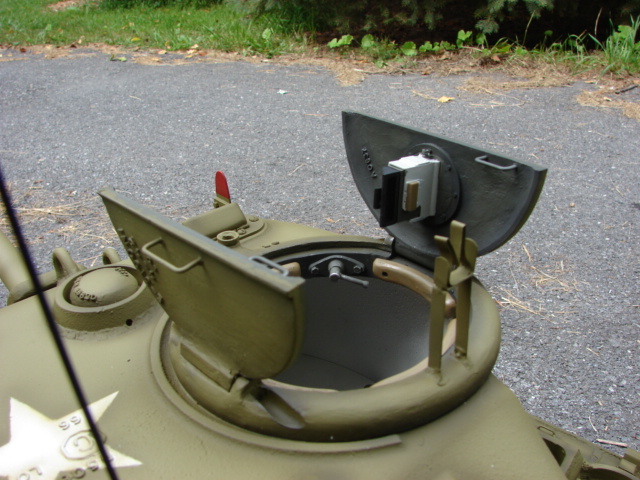
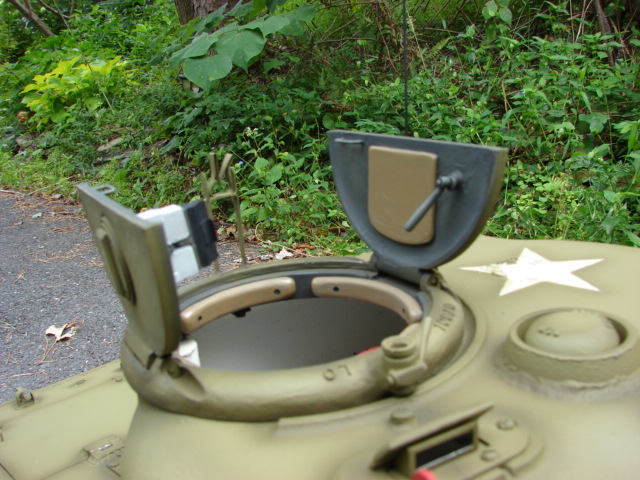
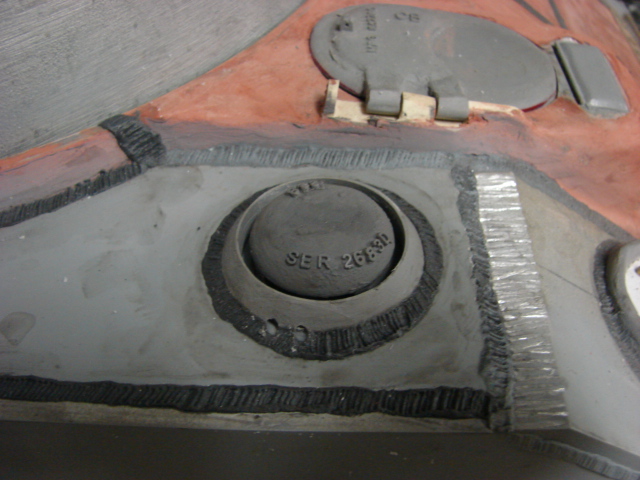
All the bullet splash guards received cast textureing, welds, and their drainage holes. All that will be added to complete the look will be the cast numbers, which will be added as the build continues

Image

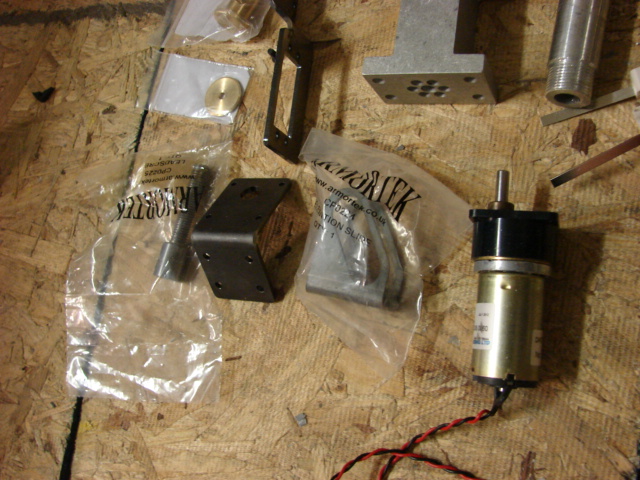
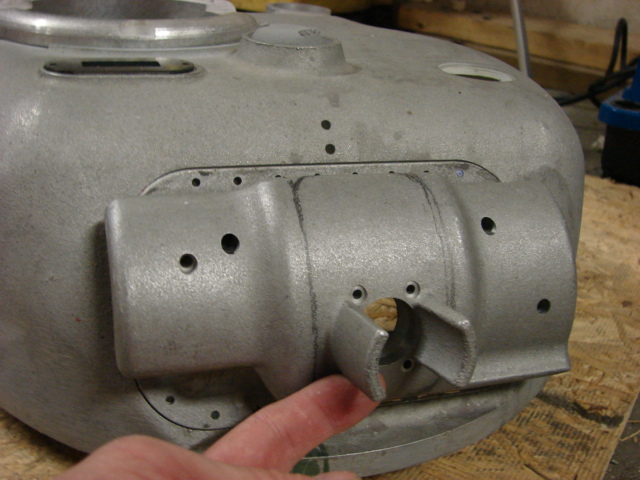
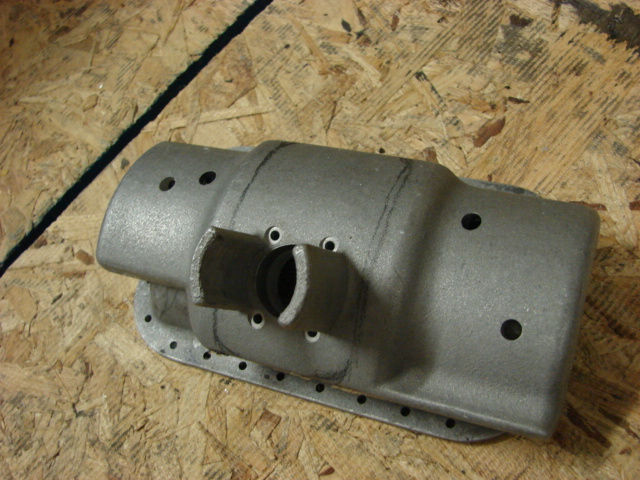
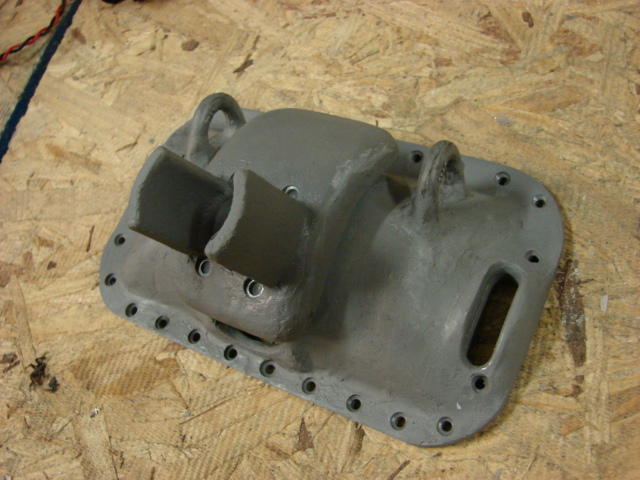
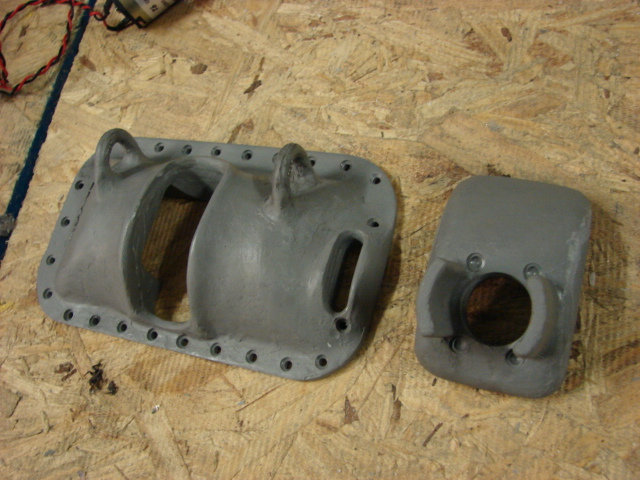
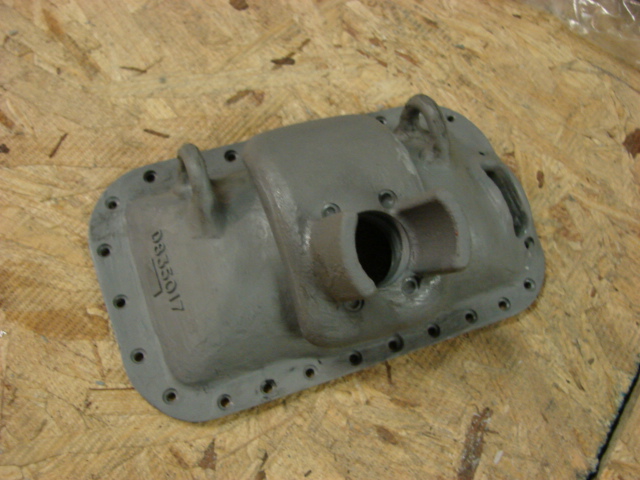
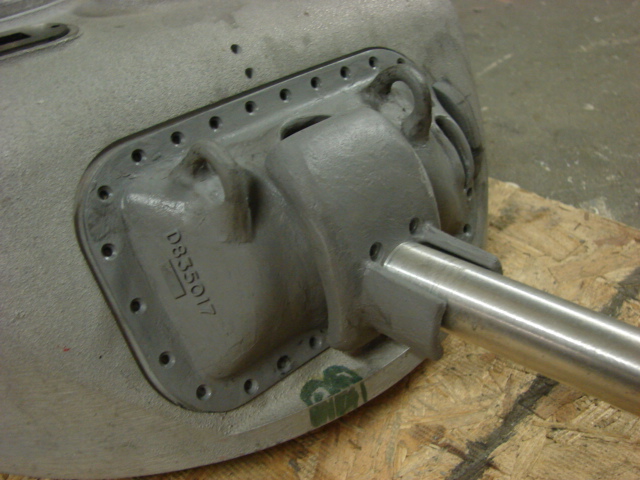
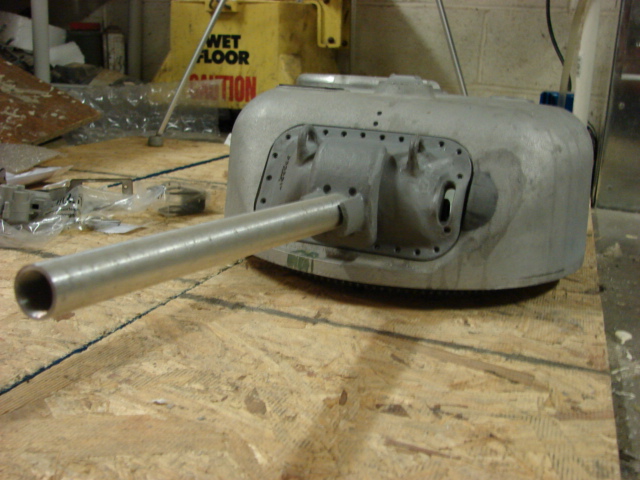
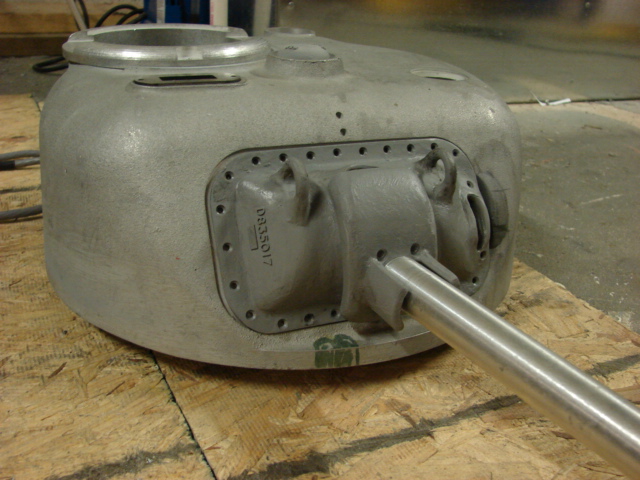
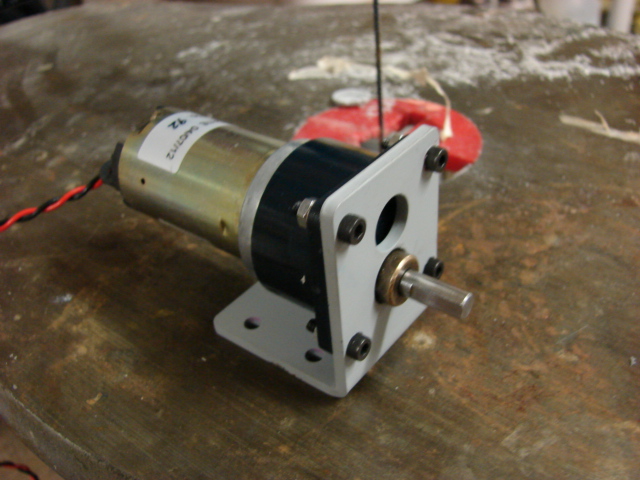
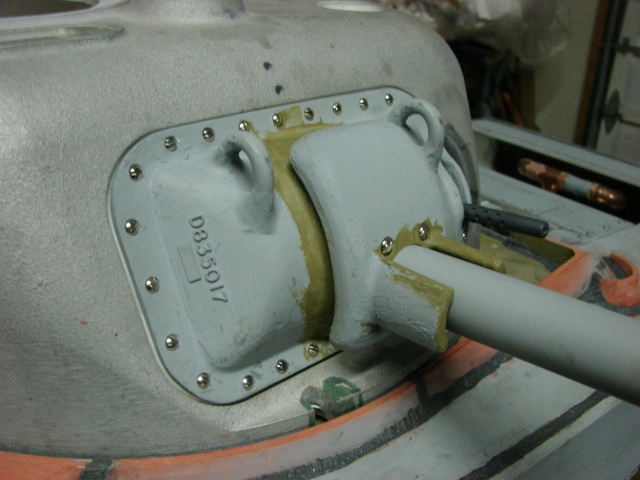
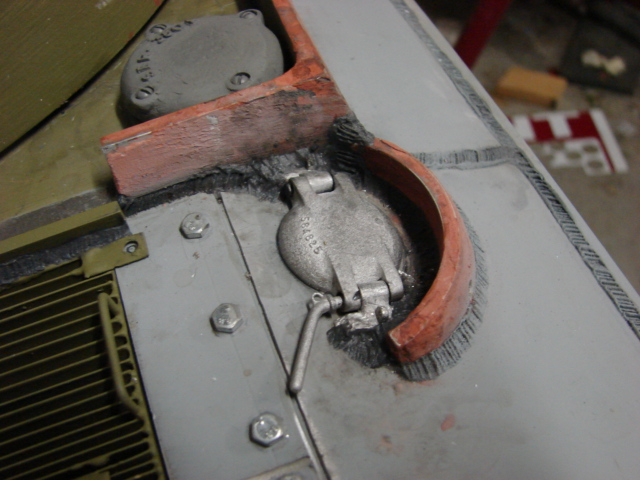
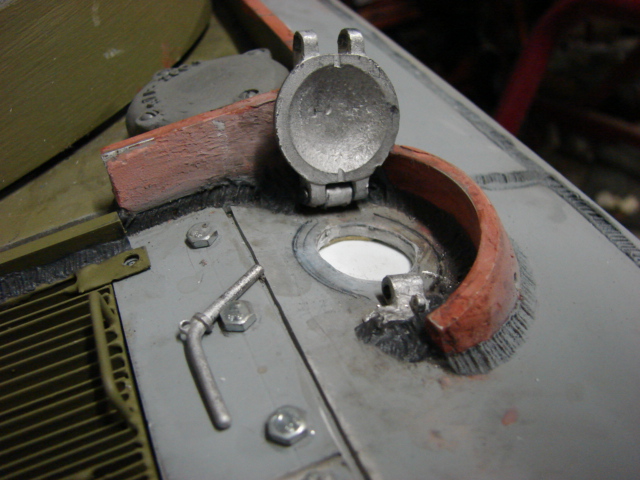
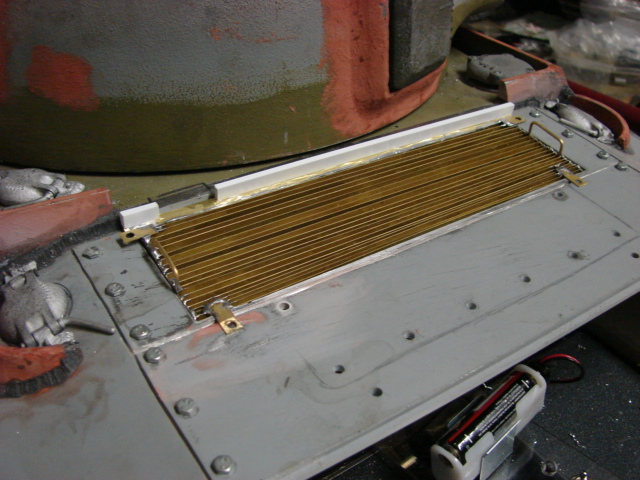
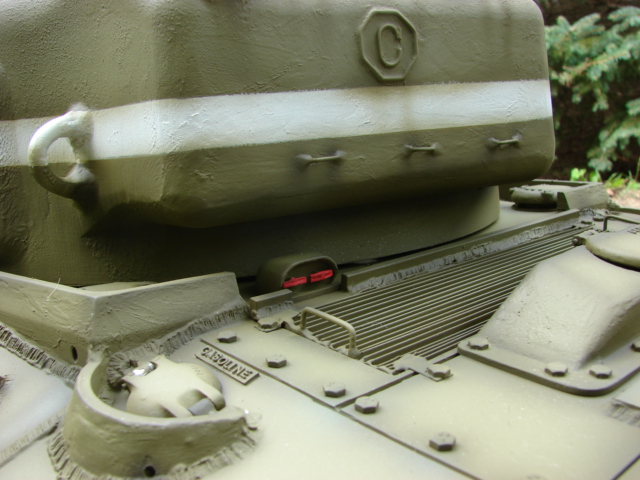
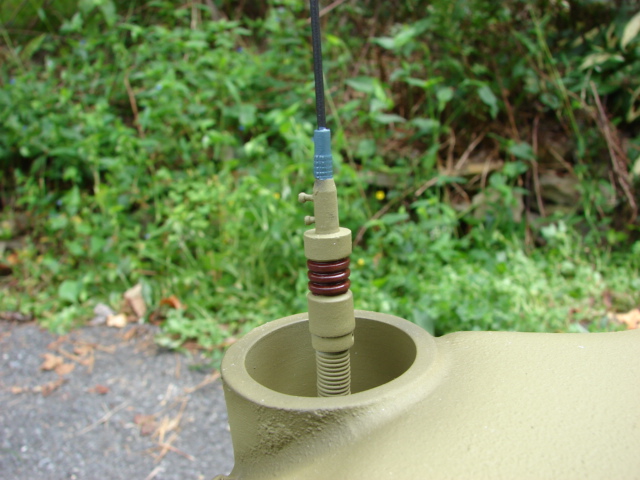
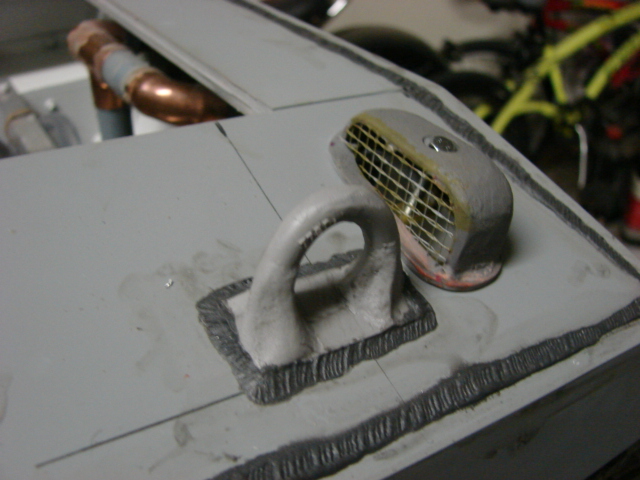
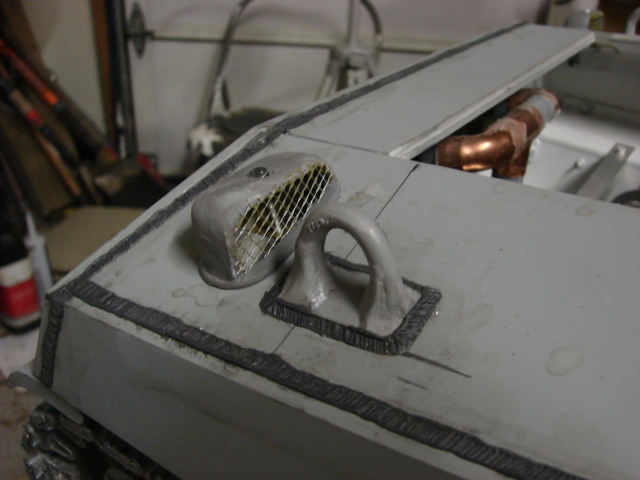
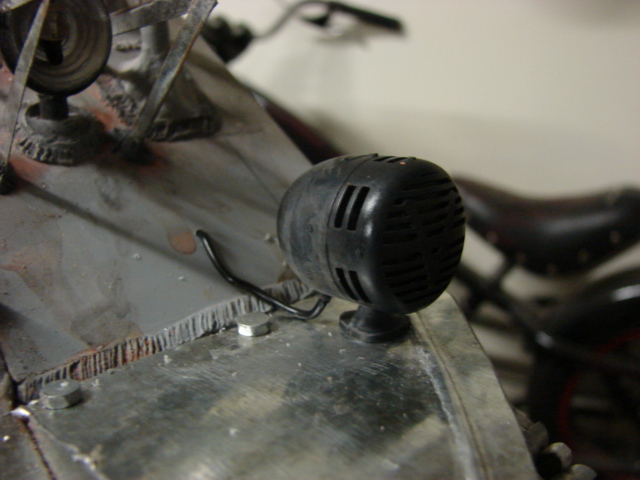
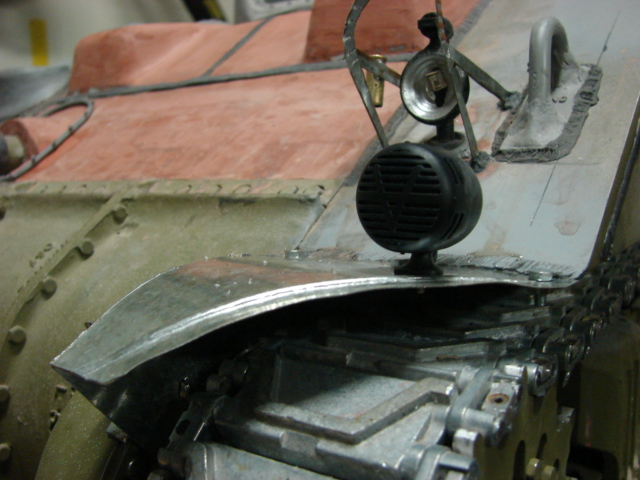
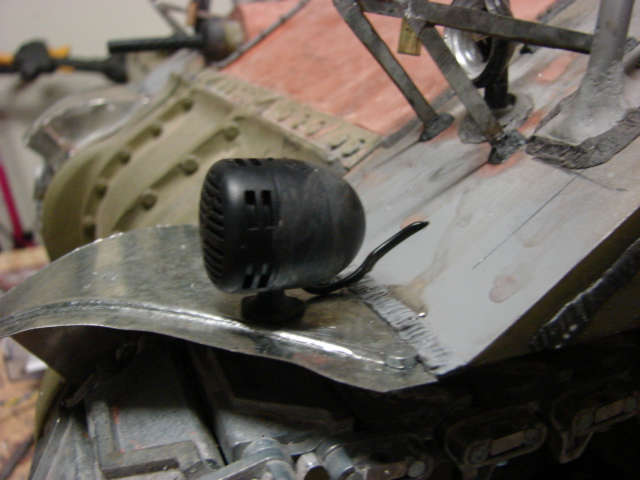
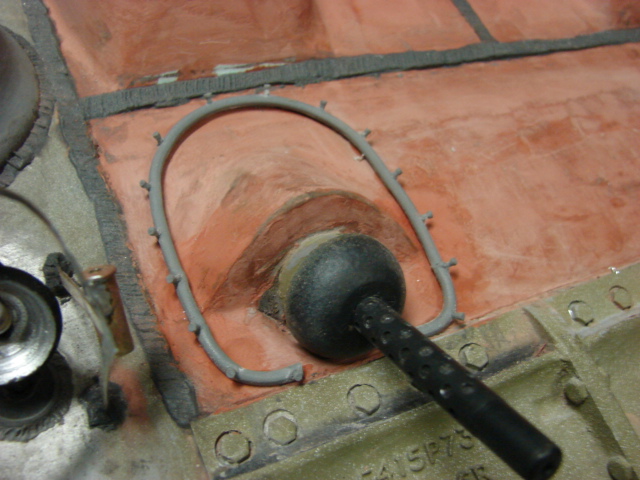
The rear hull blower was also mounted, for the part I swapped out the kit original for one of my own.

Image

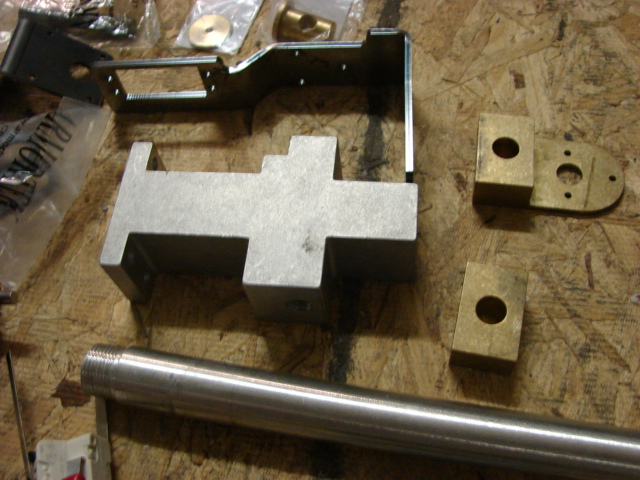
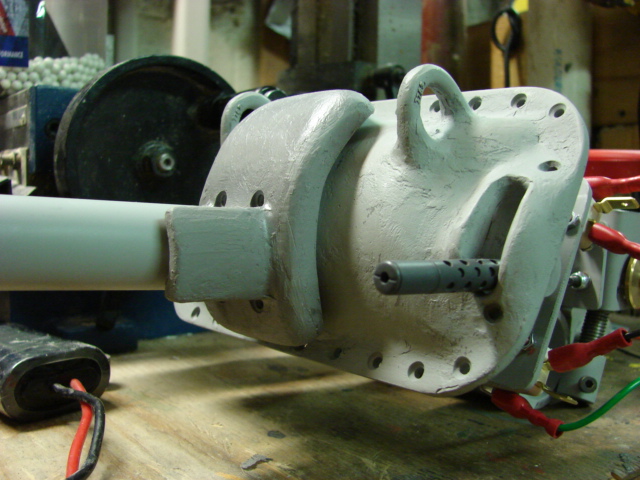
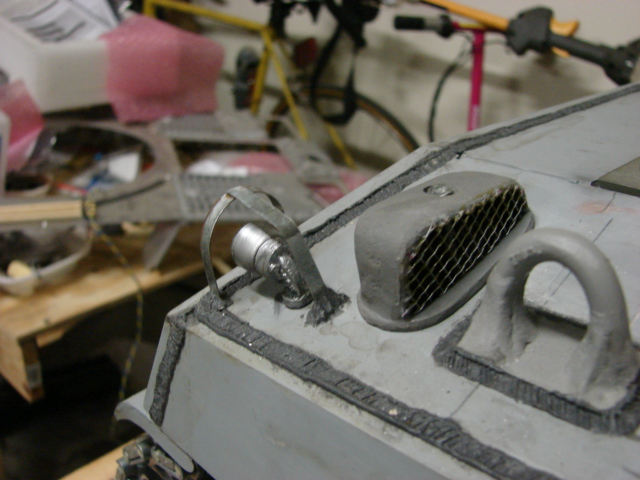
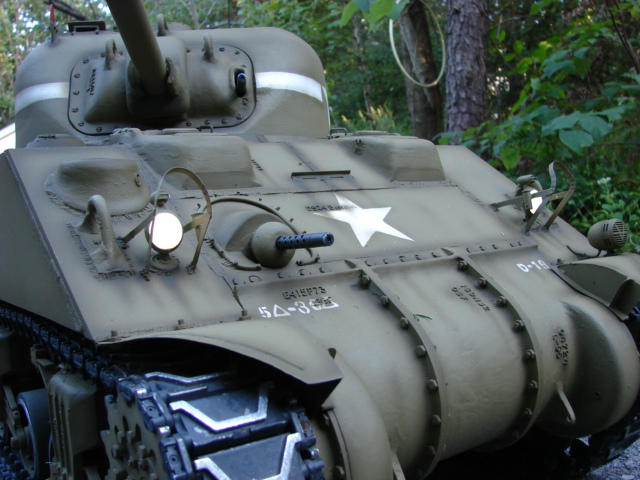
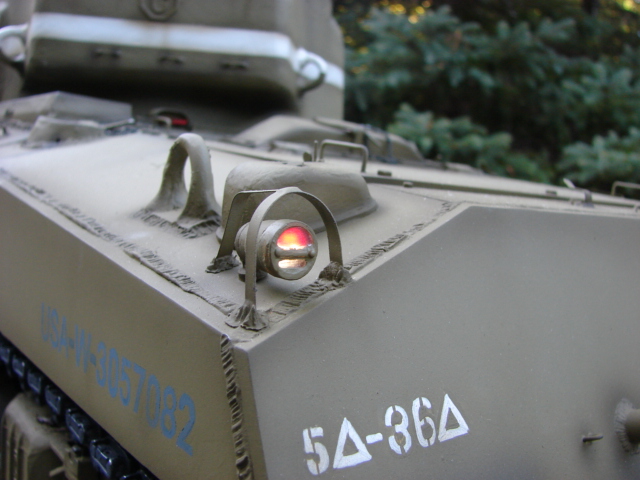
Just like with the rear blower I swapped out the basic kit supplied vent, lift hook, and front blowers with my own sets.

Image

Image

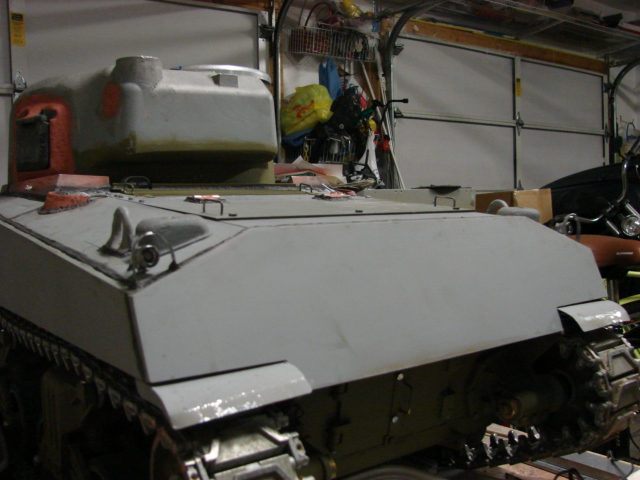
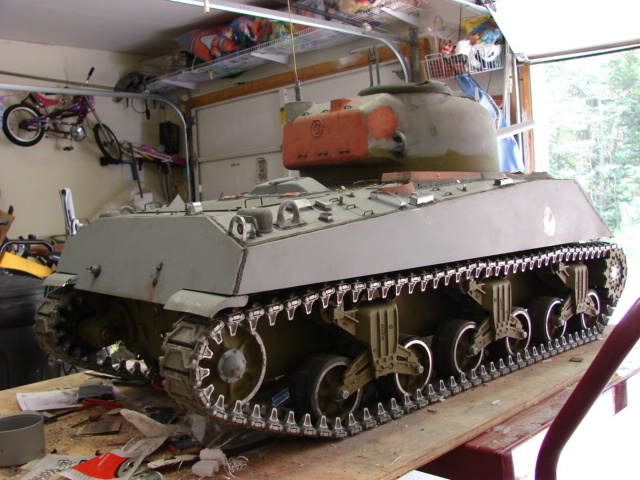
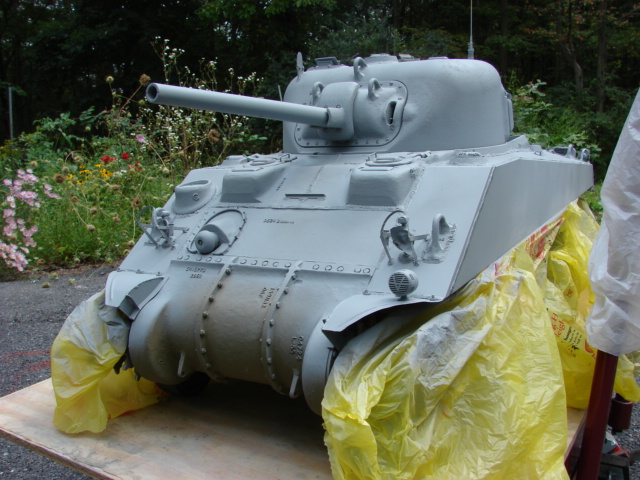
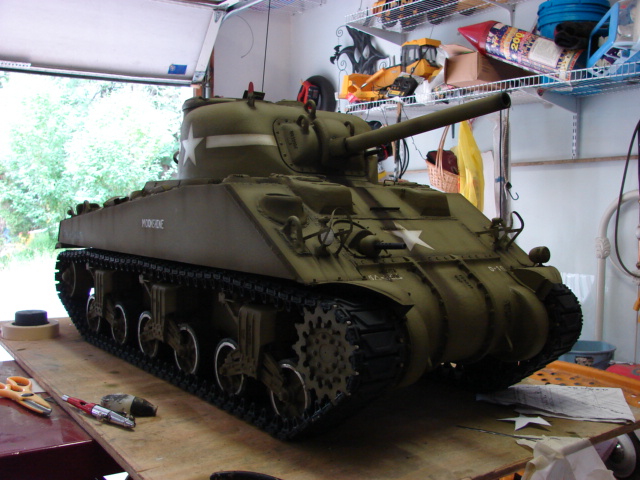
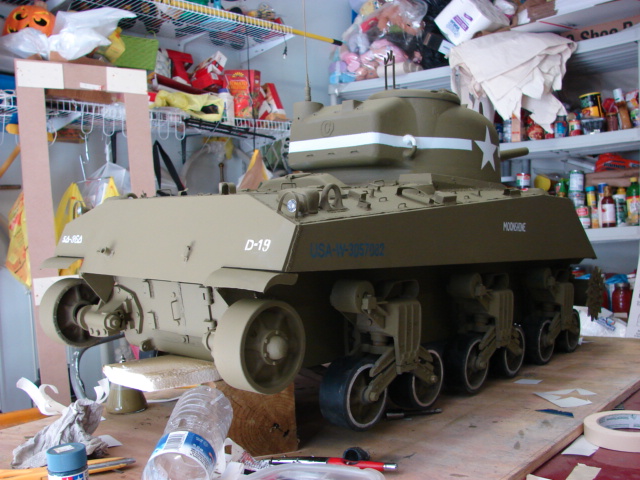
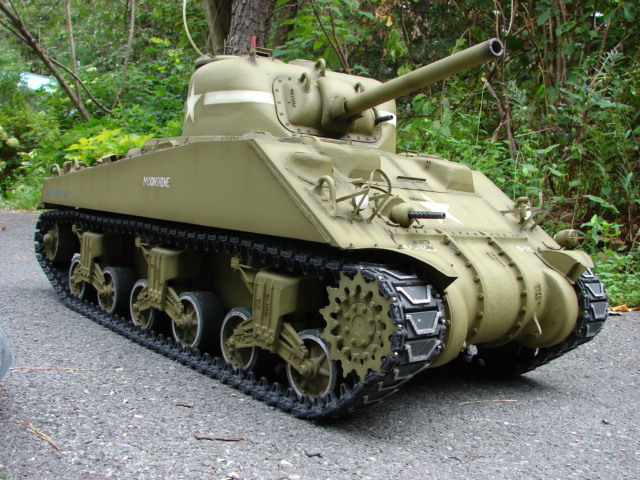
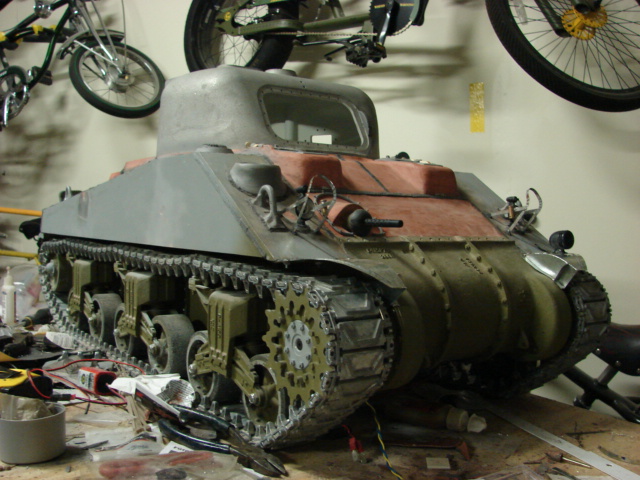
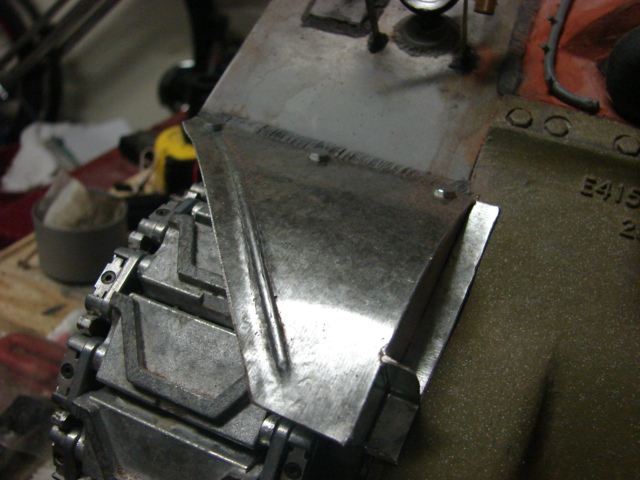
On the tank's bow hull I completed the tin work. This would include the front fenders and the brush guards.

Image

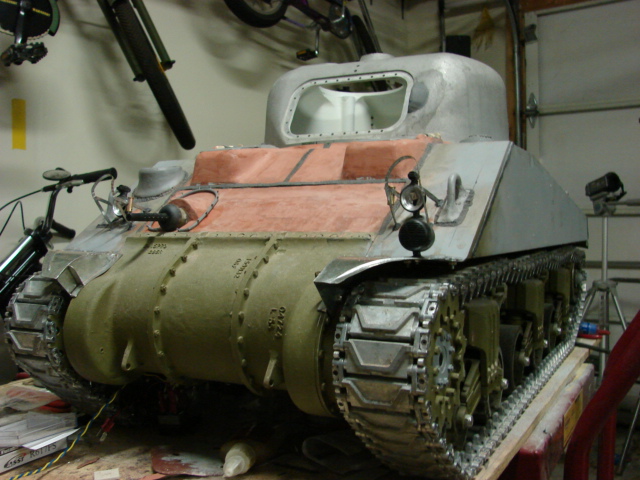
The kit supplied fenders were swapped out for one of my own sets. The fenders are all soldered together and are mounted to the tank's fender mounts via fasteners like the real unit.

Image

Image

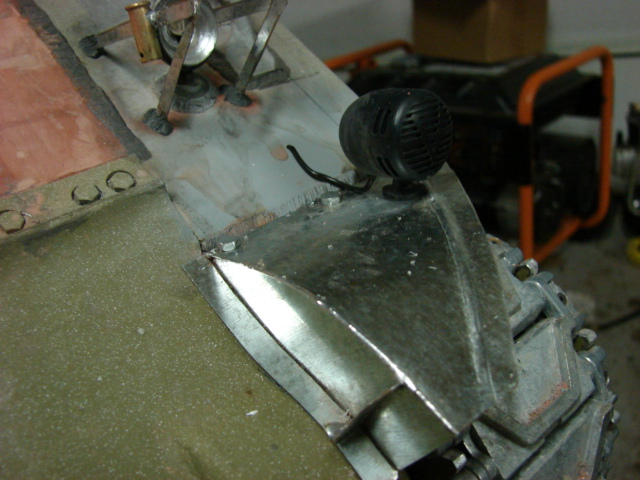
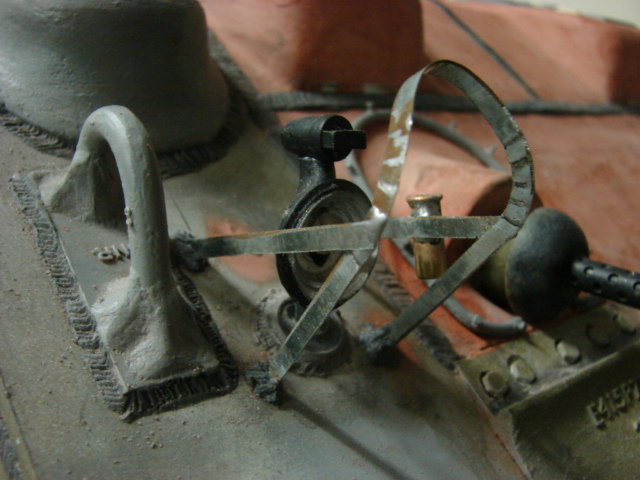
The kit supplied brush guards were not compatible with my head lights so I fabricated a new set that works better for them. Like on all my tanks the guards are all soldered together and have the plunger canister mounted to them. Chains and plunger detail to be added later.

Image

Image

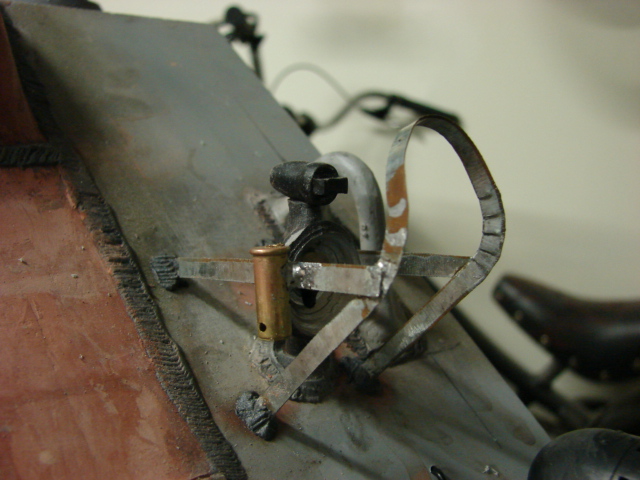
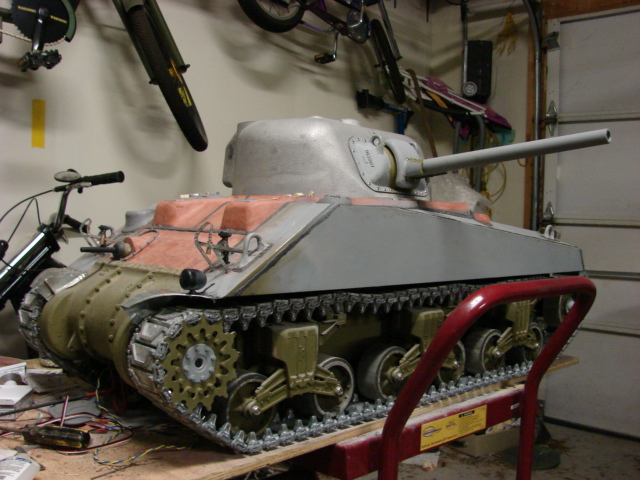
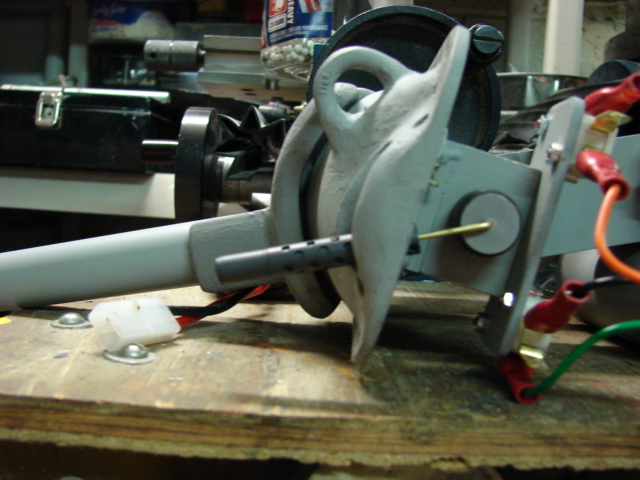
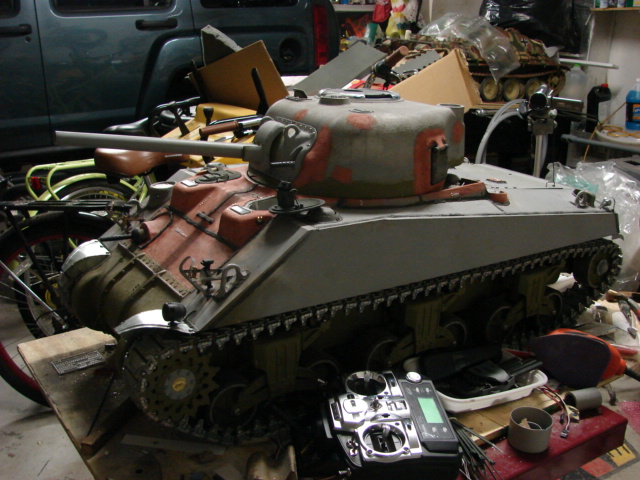
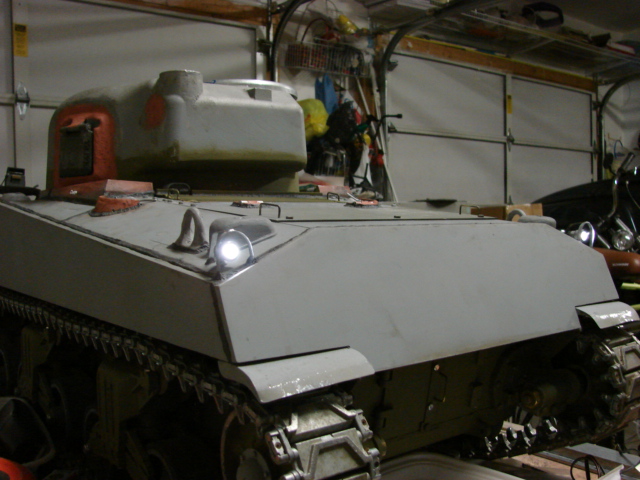
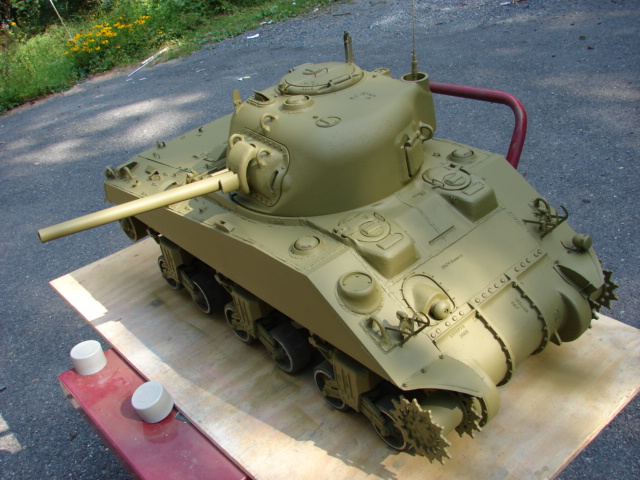
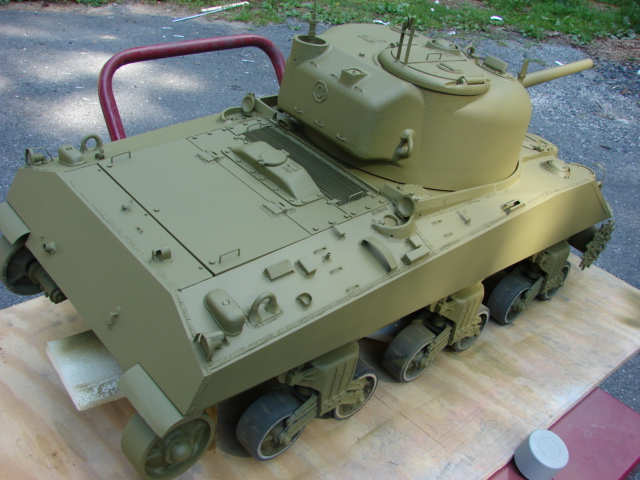
The tank's siren was also mounted. For this tank I went with a different style siren then I normally use. Rather than using my funnel horn I went with the Panzerwerk resin unit instead.

Image

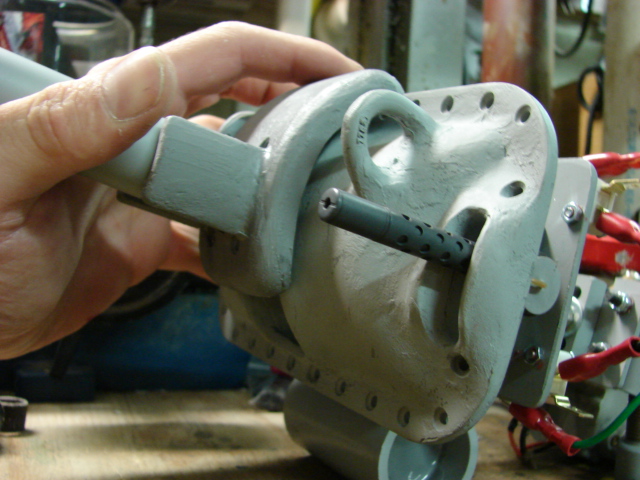
Because of the early period style tank I want to represent the larger panzerwerk siren was a more accurate choice. Also Unlike all my other shermans the siren is not mounted to the hull, or has a brushguard. Instead it is mounted to the front fender

Image

Mounting the siren here is another early war / production trait, Because of the high vulnerability of the siren getting damaged in this location it was moved from this spot to the front hull where it would be protected by the caged brush guard. Like the real one the part itself is attached to the fender via a fastener.

Image

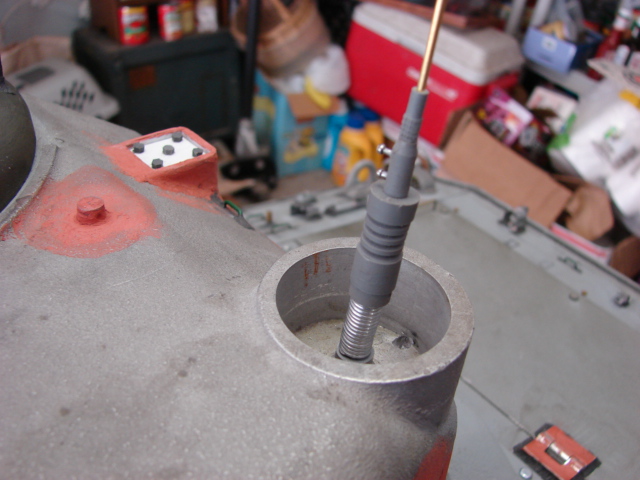
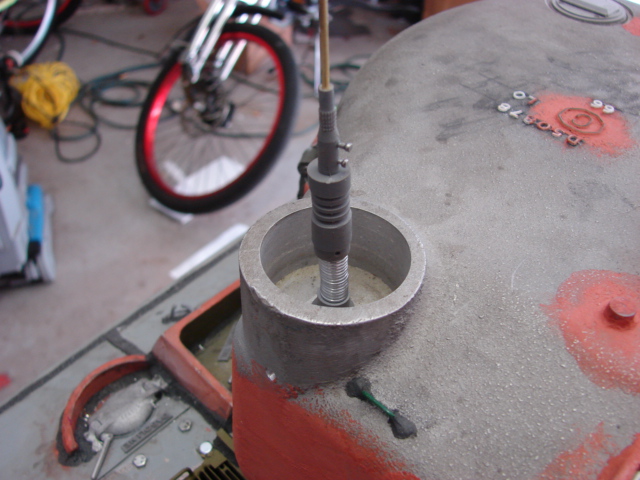
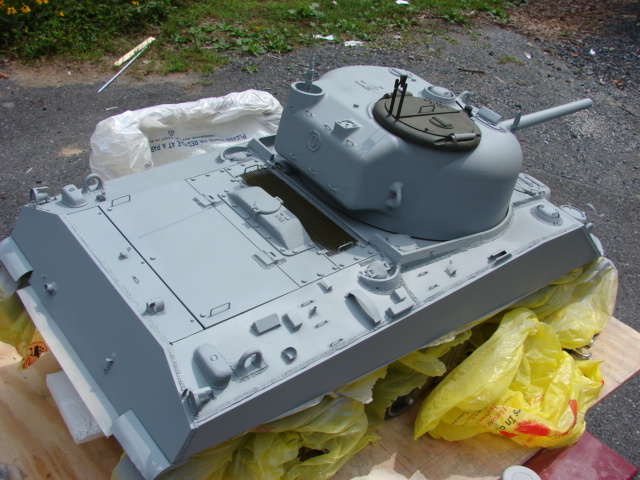
The M1919 Tarpaulin rail was also affixed to the tank, welds will be sculpted soon.

Image

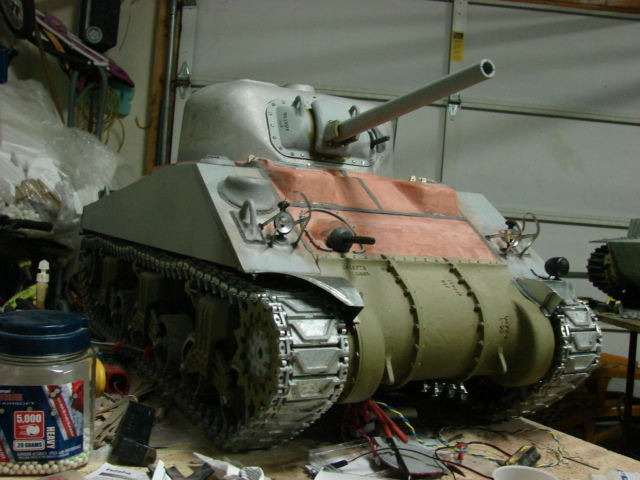
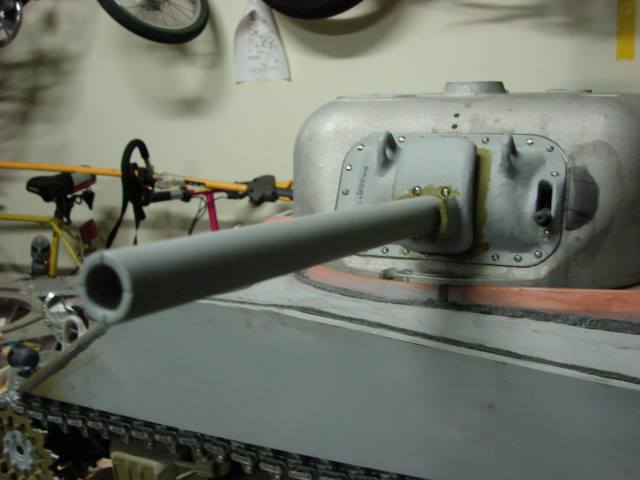
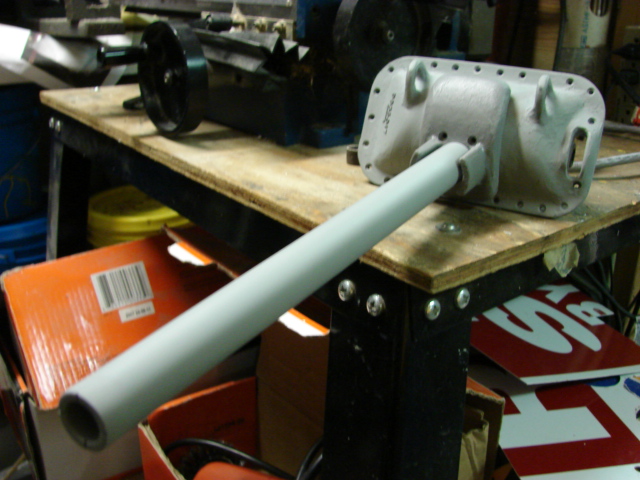
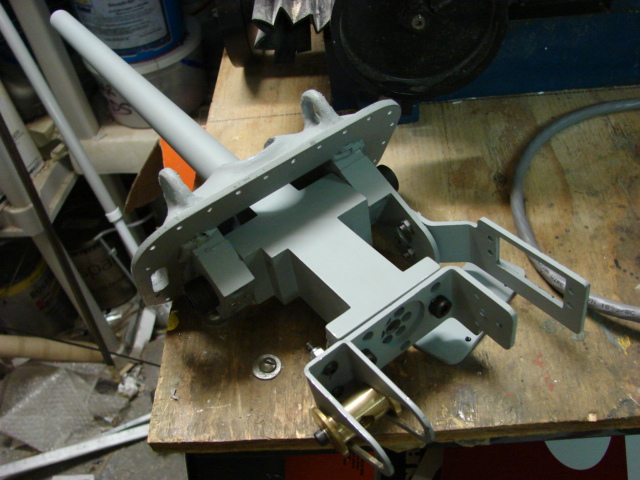
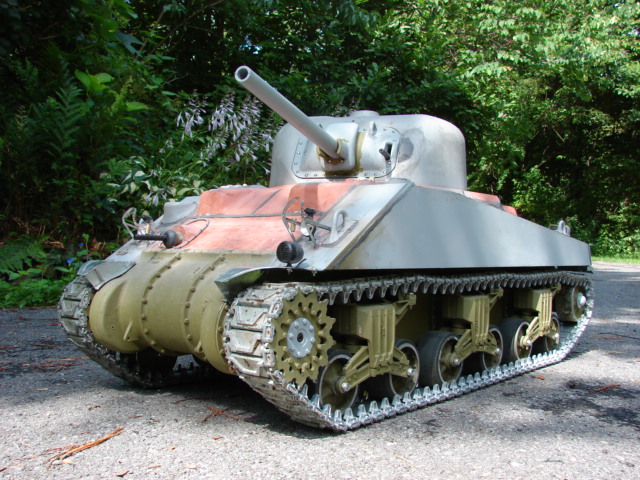
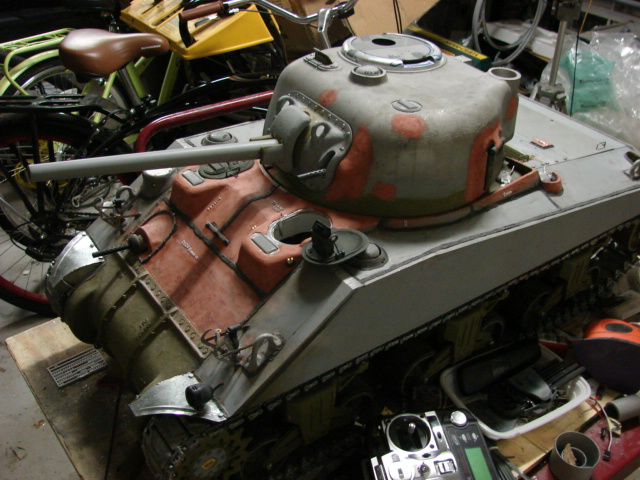
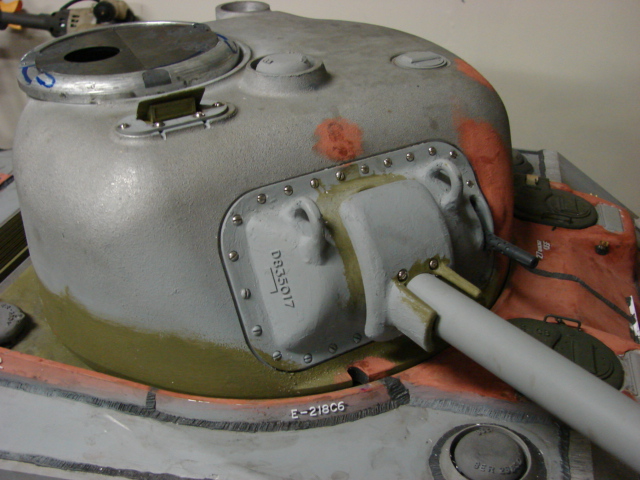
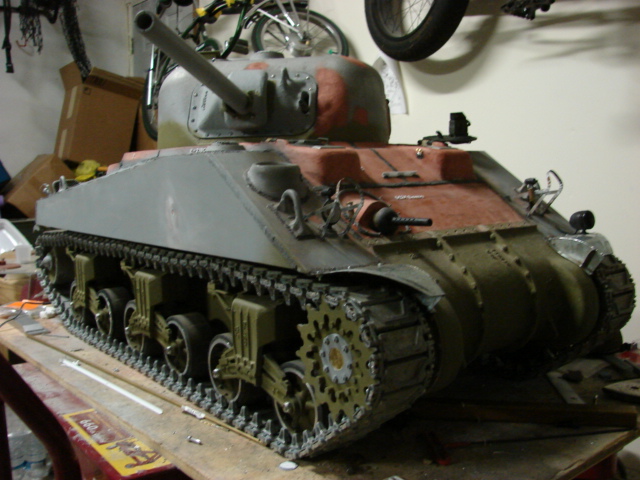
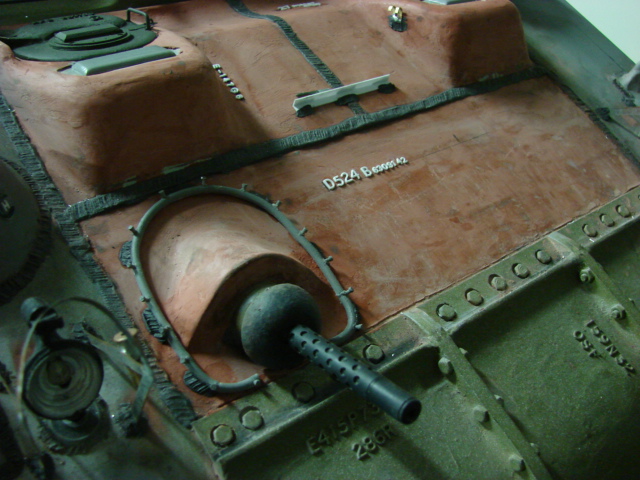
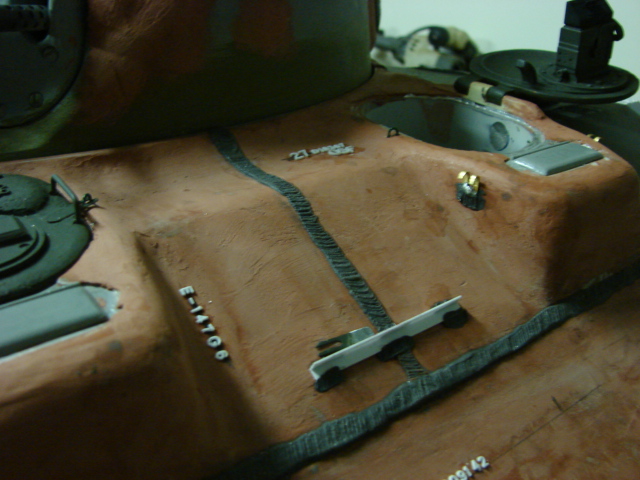
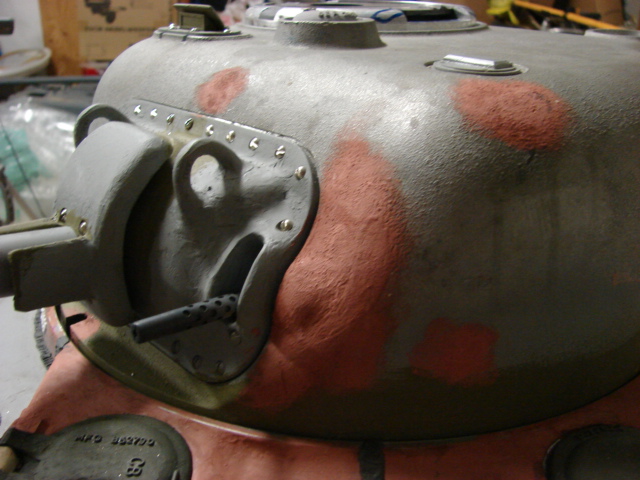
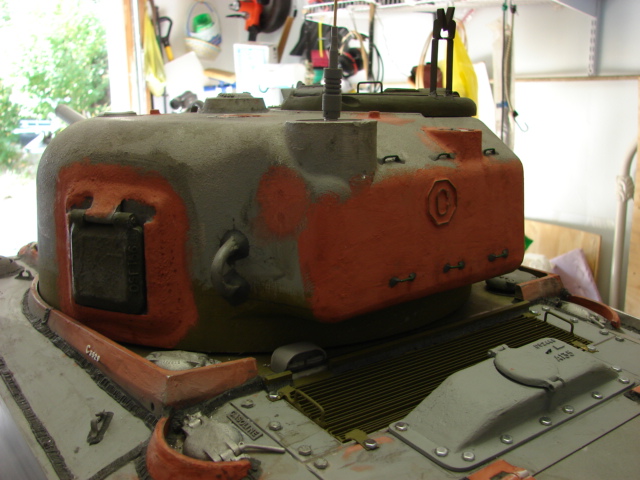
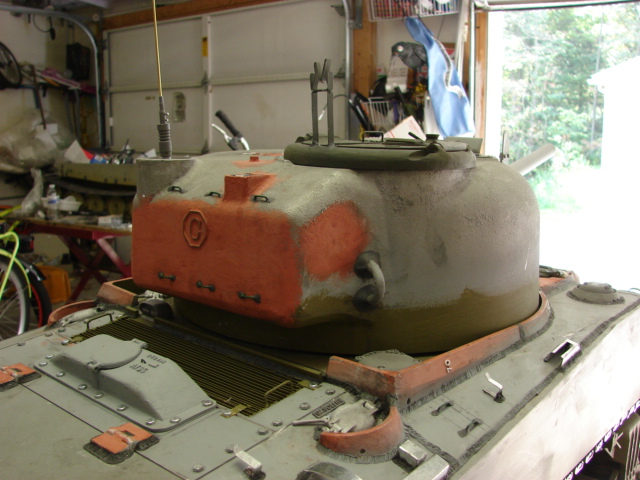
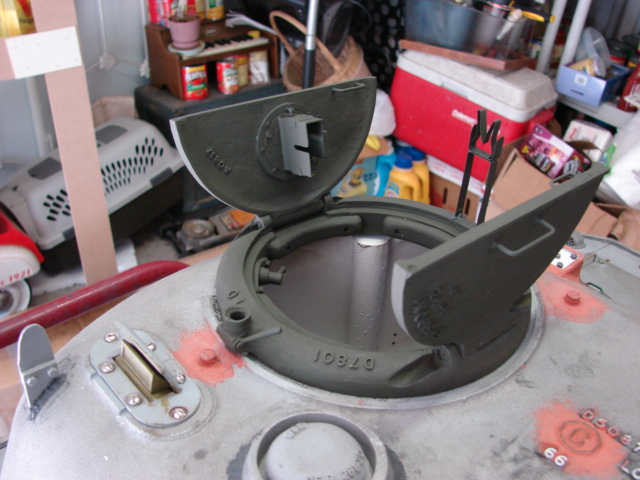
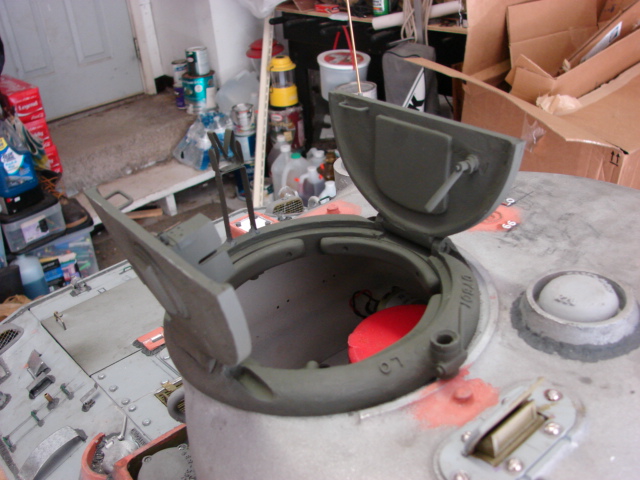
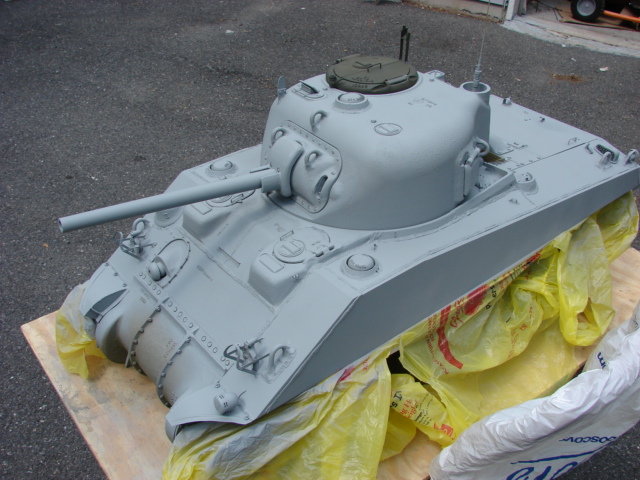
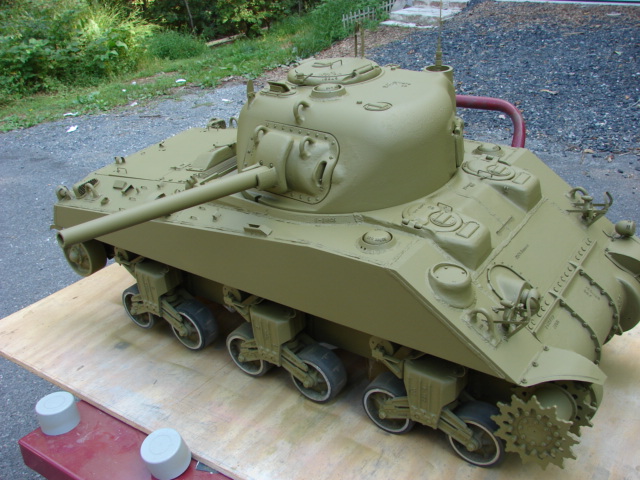
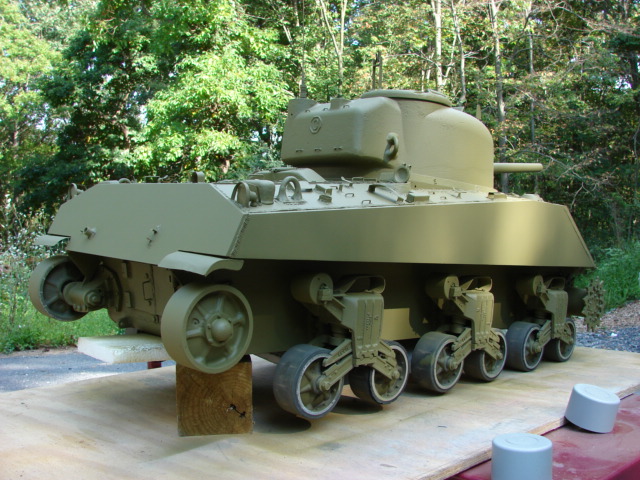
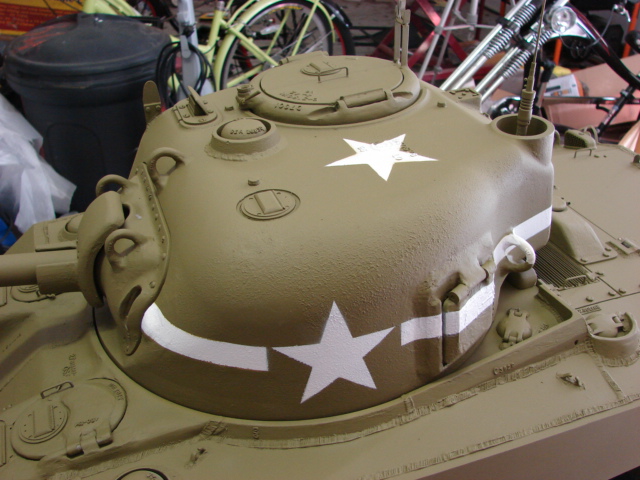
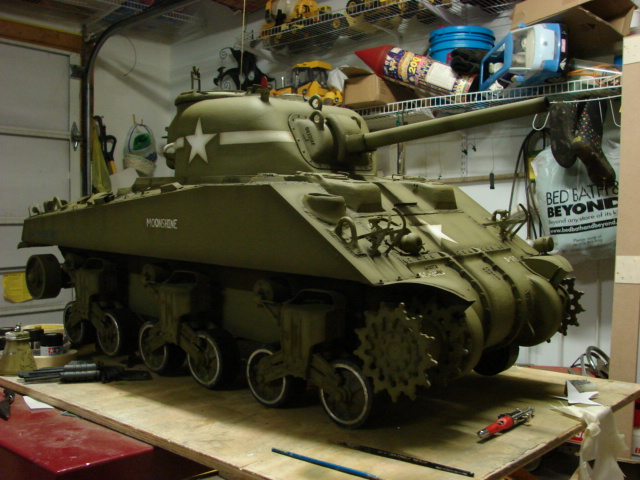
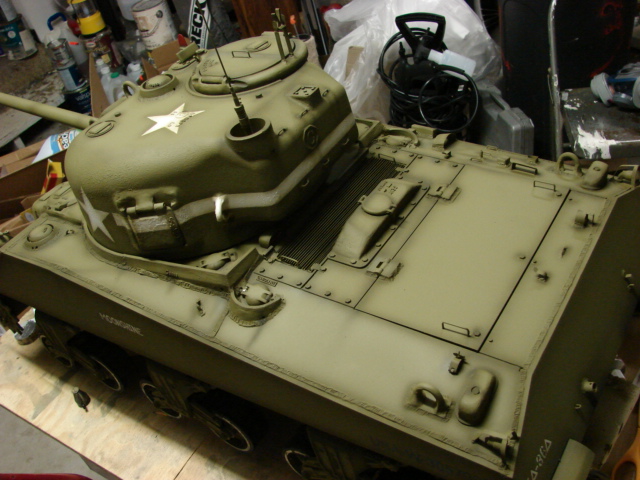
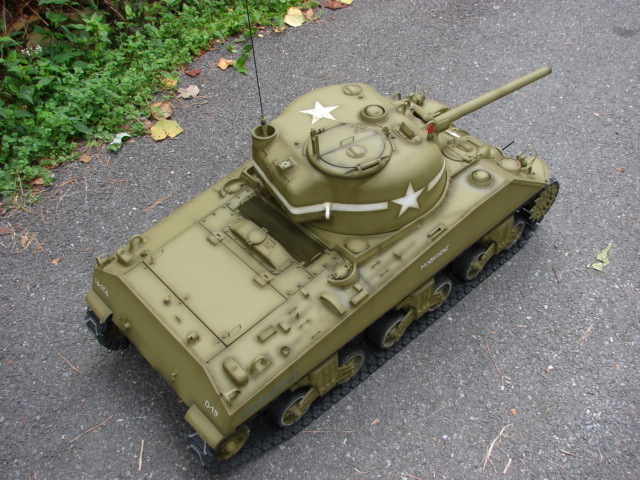
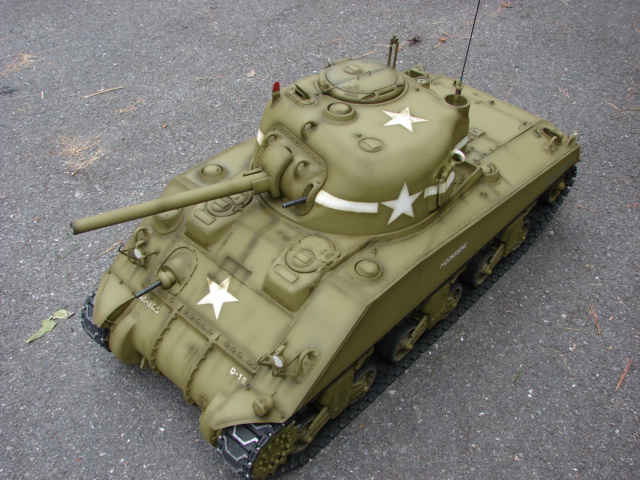
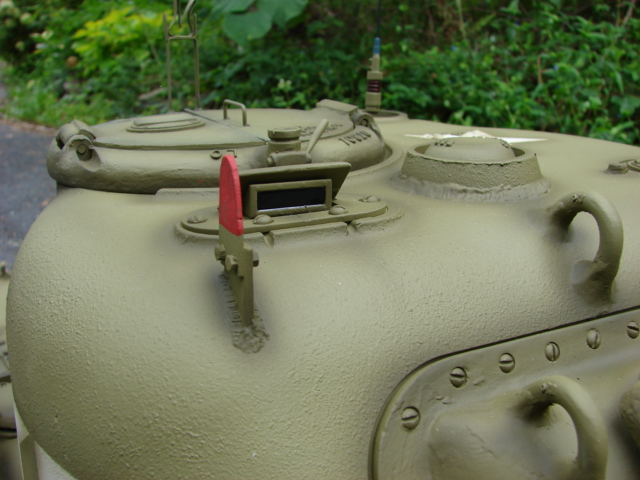
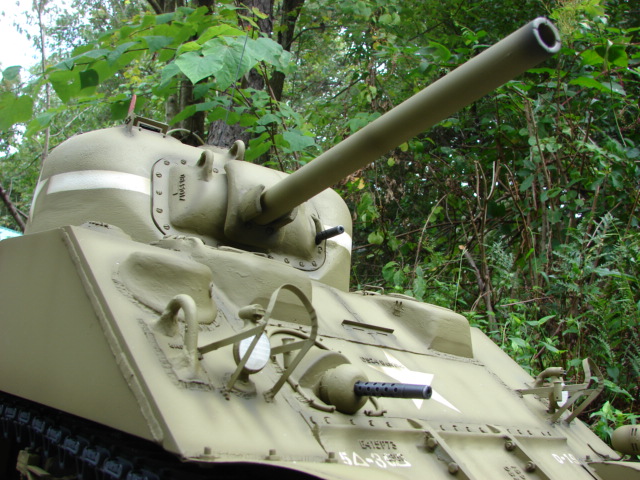
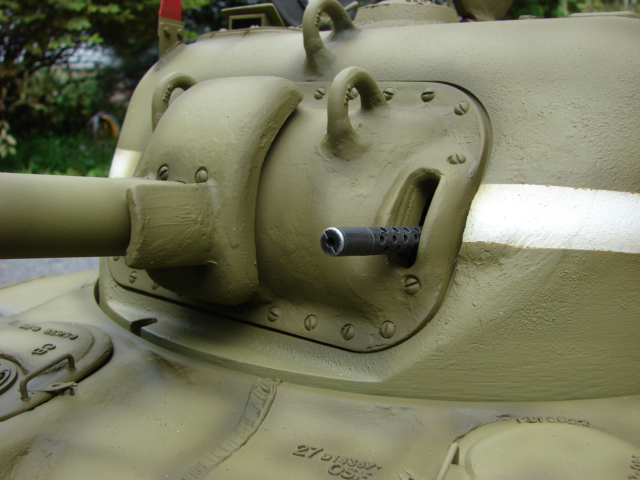
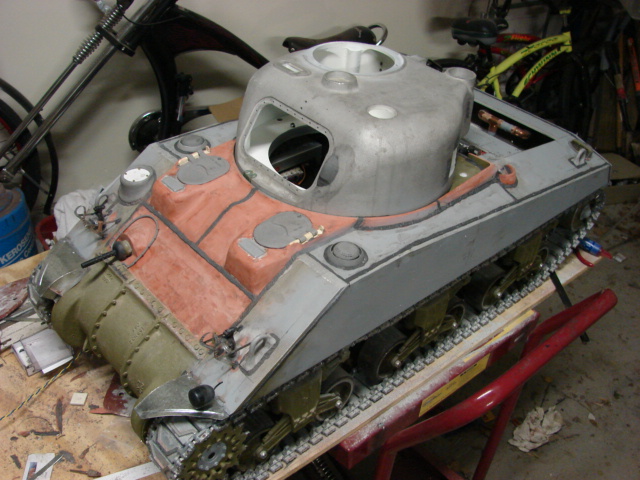
Work was also stared on the turret. this is the biggest difference from my model than the other armortek firefly kits. When I purchased the kit I requested that the kit firefly turret and gun be swapped out from the turret and gun from thier 05 release early M4A3.

Image

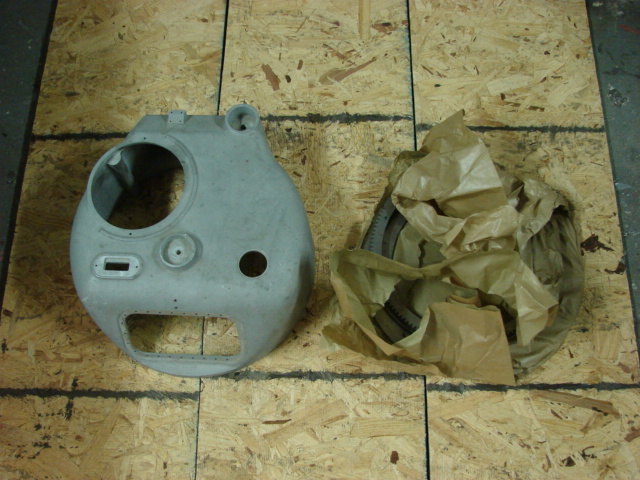
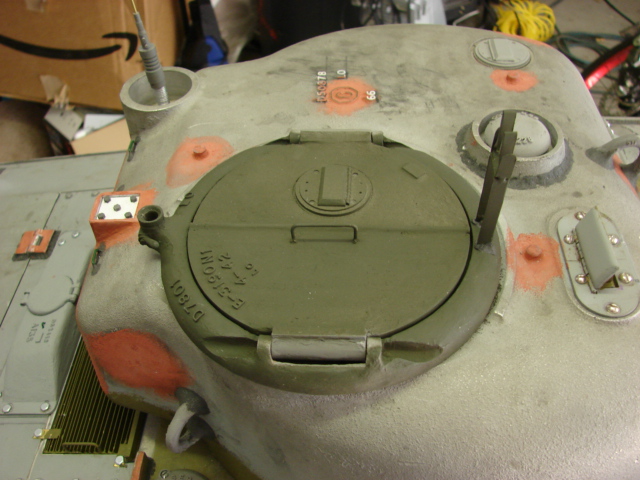
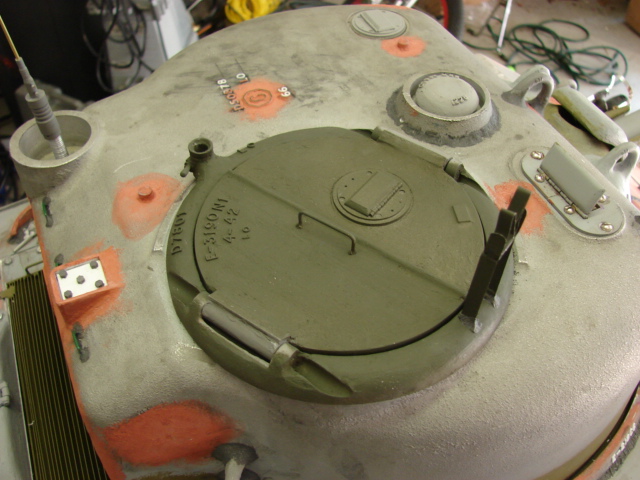
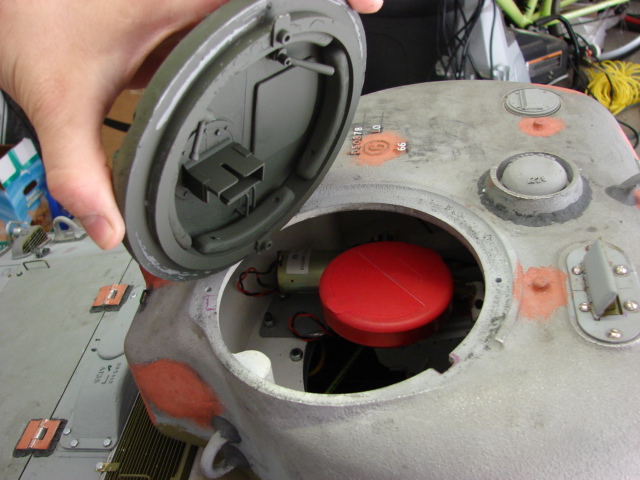
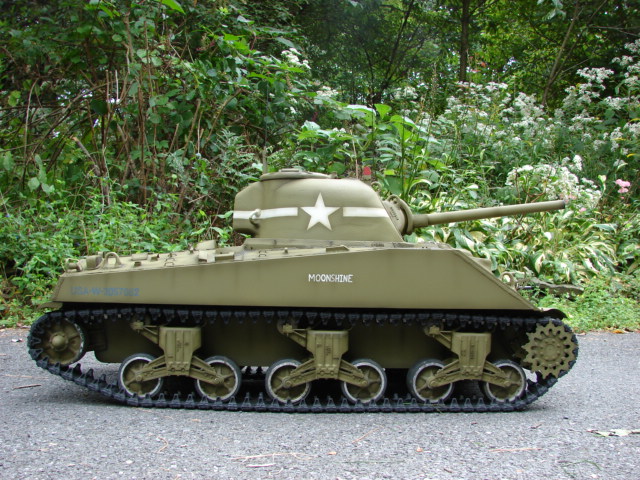
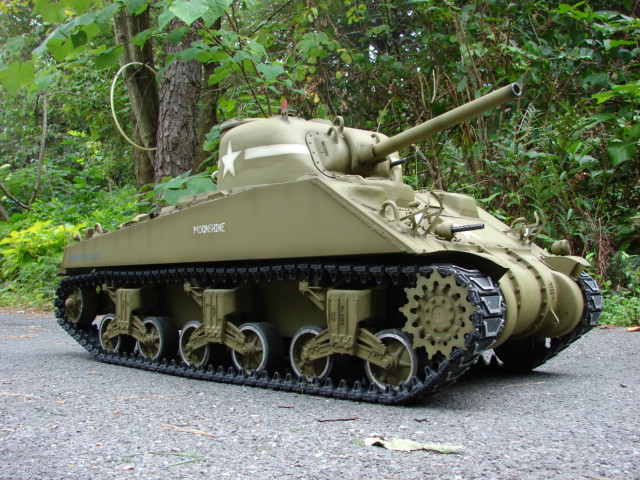
The turret itself is all one piece aluminum casting, has real cast texture to it and has a very realistic feel to it. The turret has a cooking pot resemblance.

Image

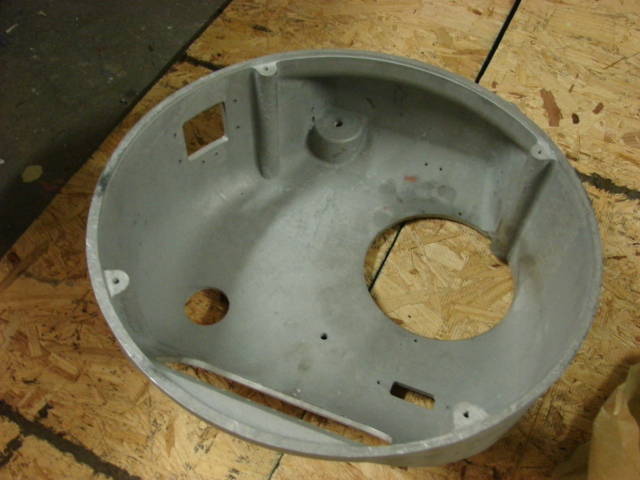
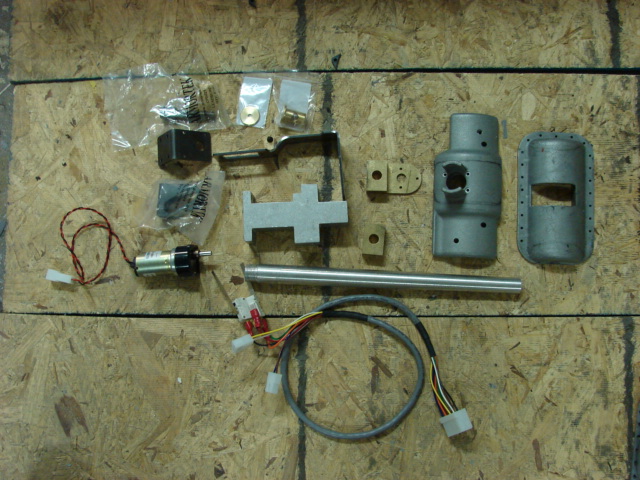
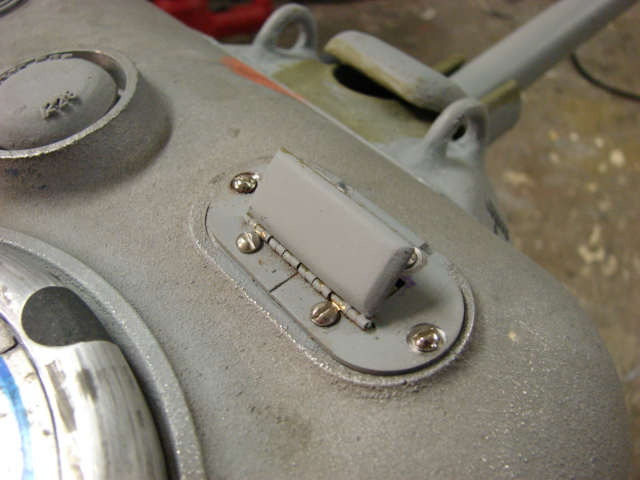
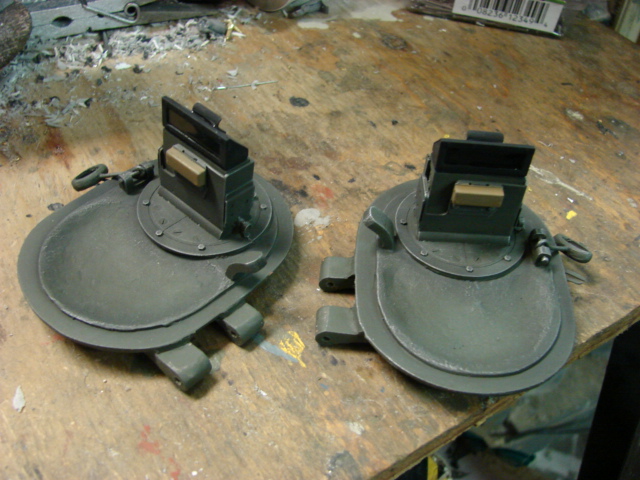
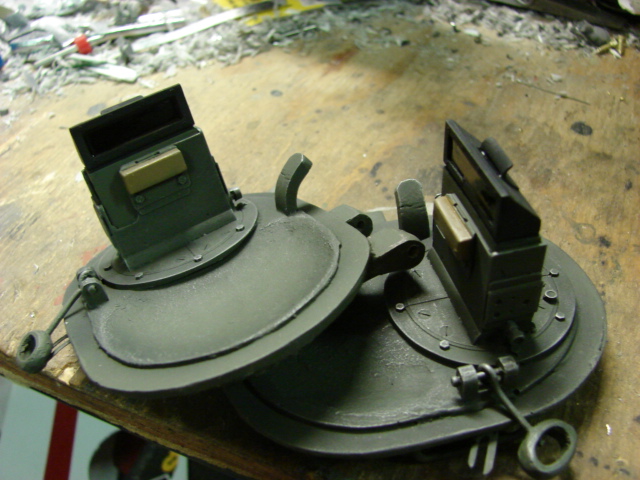
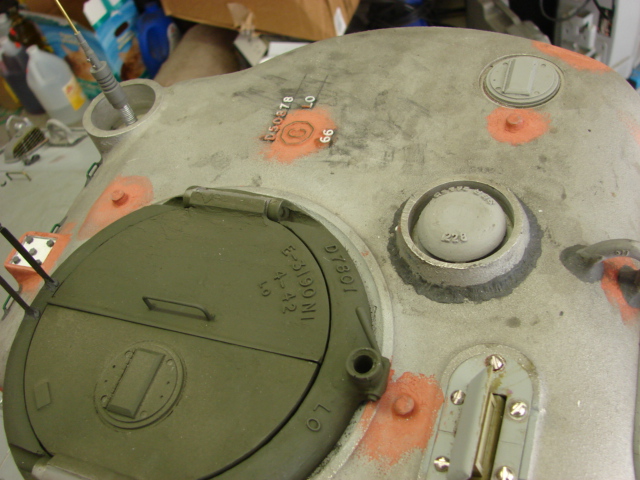
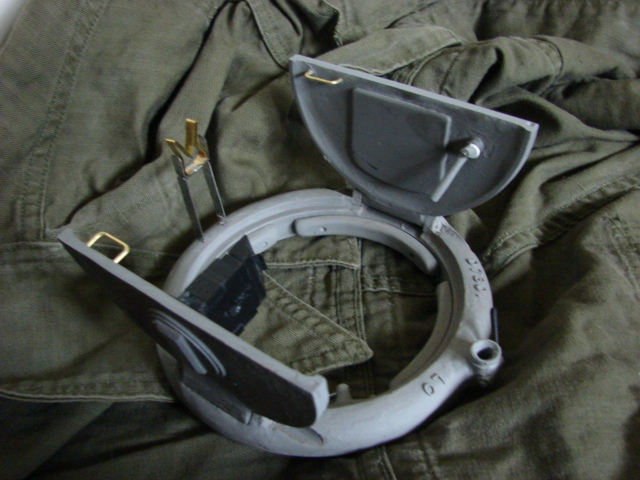
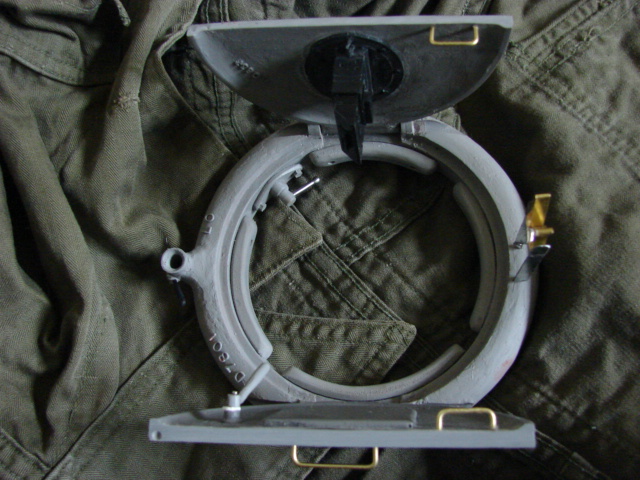
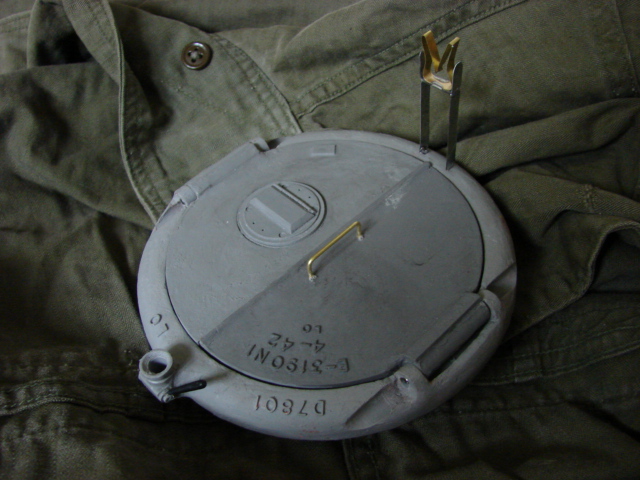
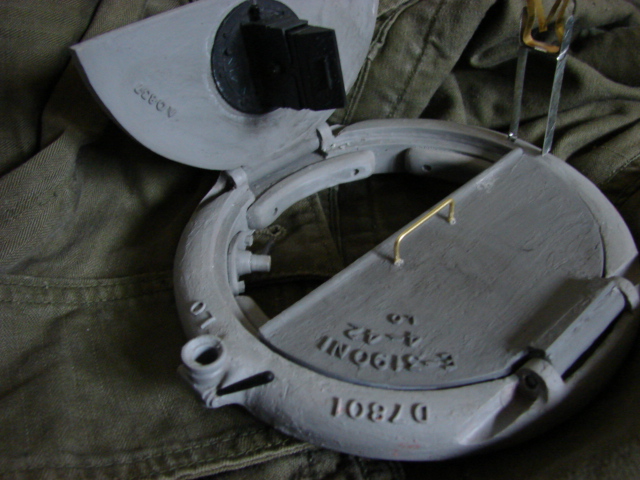
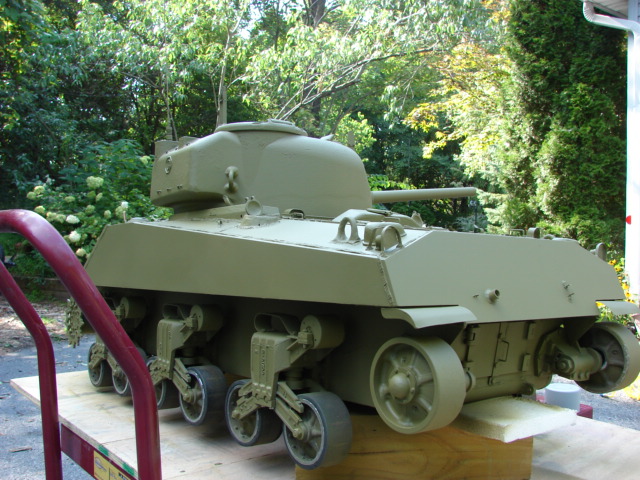
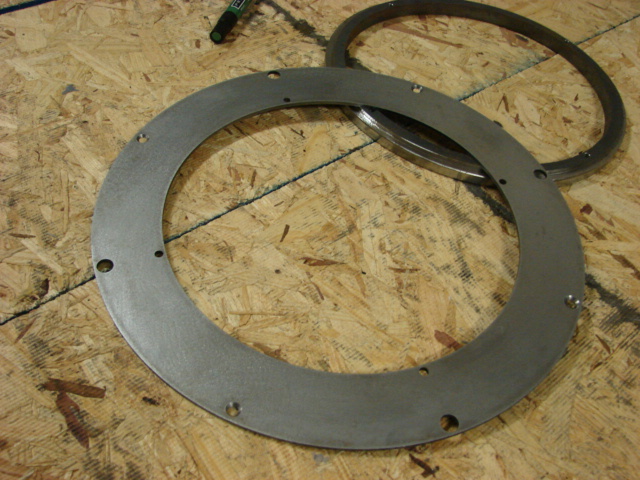
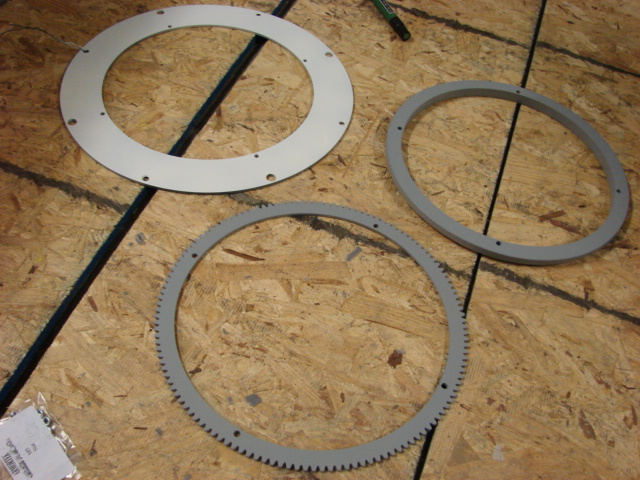
The turret's floor is made out of laser cut steel and is comprised of the floor, turret neck and the turret rotation gear ring. the parts are very nice and assemble easily. Before prime and paint I simply hit the surface with an Emory cloth to buff away any surface rust that was present.

Image

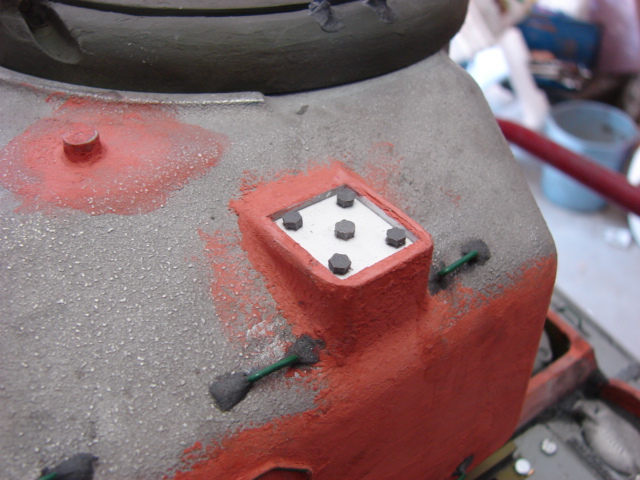
Once complete the parts were painted and installed. The only addition was adding lock washers to the fasteners

Image

Image

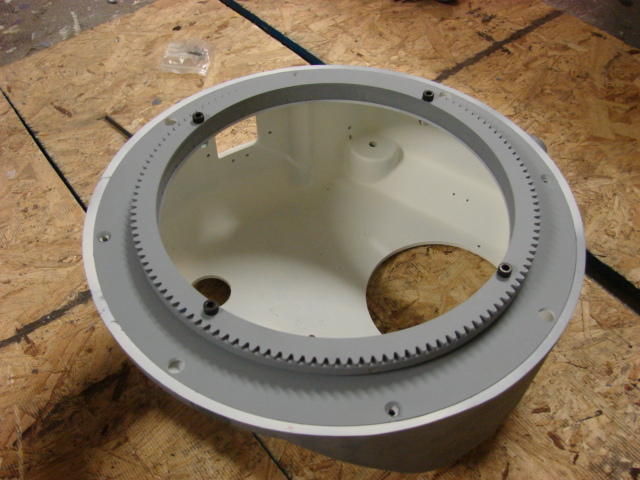
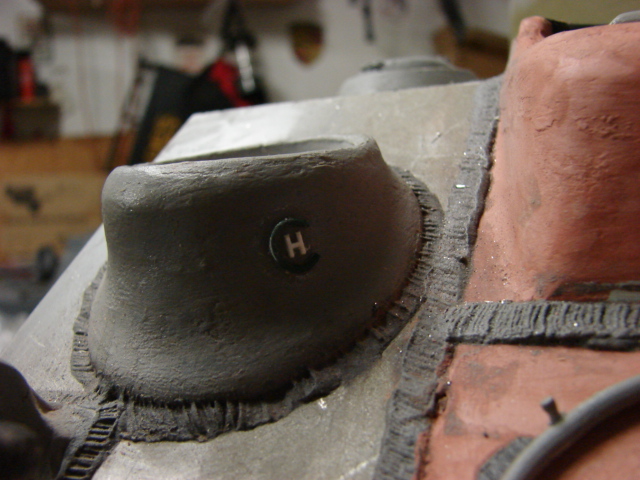
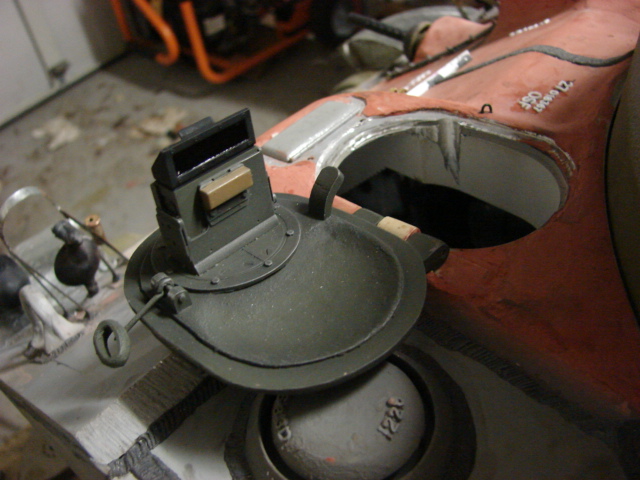
After a few small tweaks to the bullet splash rim the turret plops into place and rotates on control.

Image

a youtube video was made describing the updates in more detail,

http://youtu.be/9whWNO5Ic0E

More pics were also added to the facebook page,
http://www.facebook.com/EastCoastArmory

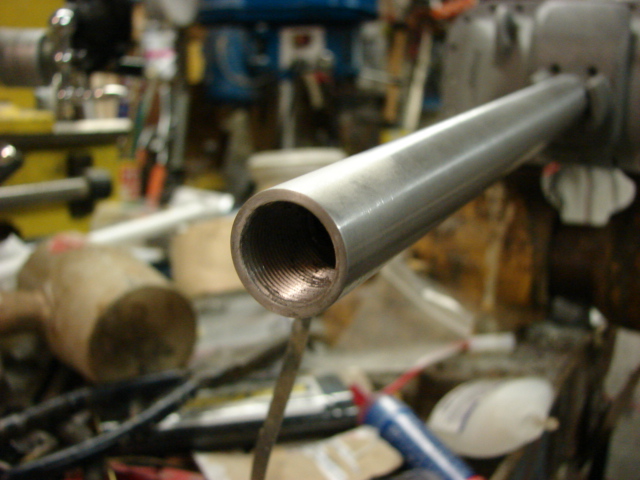
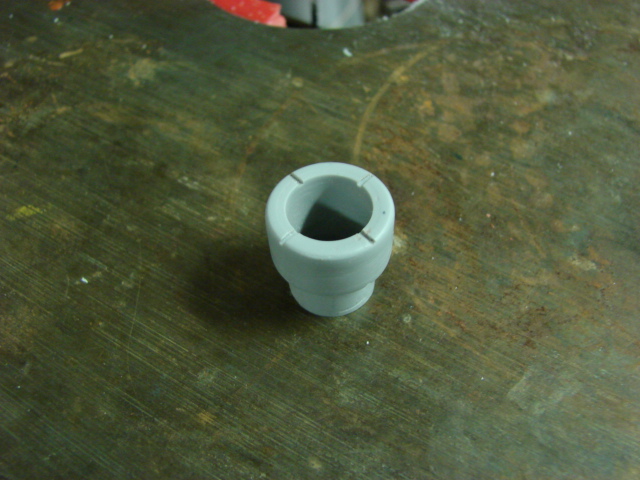
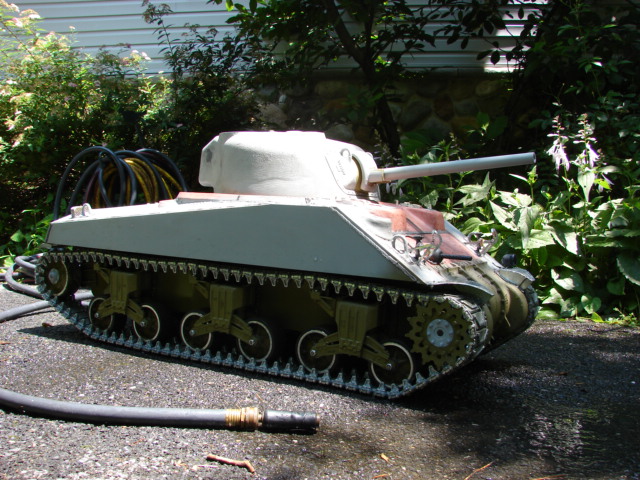
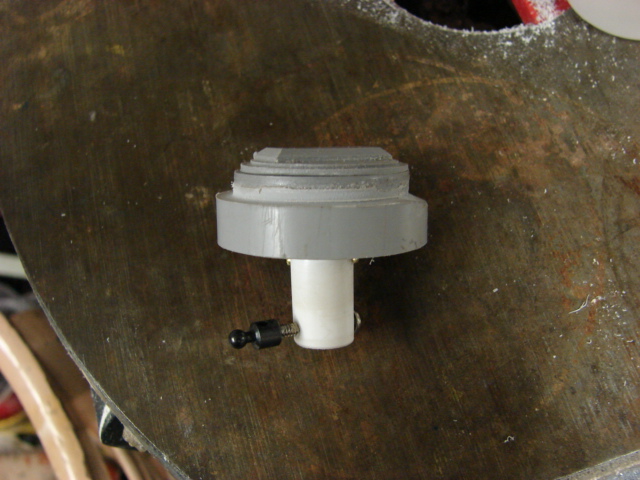
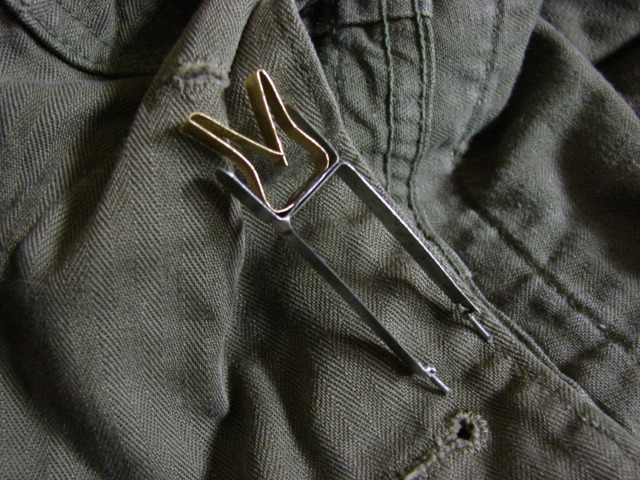
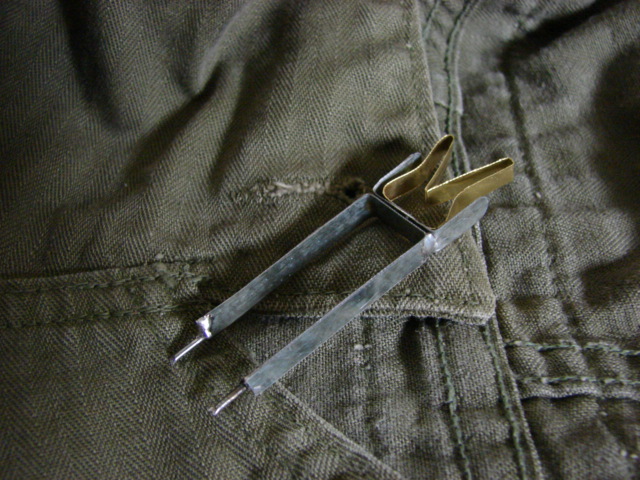
Currently I'm working on the gun and turret. I got lots of plans for this part of the build, and will also have some new early period sherman parts to add to the catalog, As for what they are, here is a sneek peek ;)

Image

More to come!

User avatar
Robert E Morey
Posts: 2286
Joined: Wed Jul 18, 2007 12:59 am
Location: Seattle, WA USA
Has liked: 111 times
Been liked: 741 times

Re: M4A4 Sherman tank project

Post by Robert E Morey »

John,
Really nice work on the Sherman. The modifications and attention to detail is amazing. I always enjoy seeing your updates.
Bob

John Grima
Posts: 250
Joined: Sun Jul 15, 2007 2:54 pm
Location: USA
Been liked: 48 times
Contact:

Re: M4A4 Sherman tank project

Post by John Grima »

Thanks Robert, of all the armortek kits I have built their shermans are the most fun to build and drive.

More progress was made on the model

Image

The 75mm conversion / gun work has been made and completed, It is at this point where my model is different from the other 24 other firefly kits produced, which are all 17 pounder equipped tanks.

Image

Image

When I received the kit it had a mixture of gun parts from the older 75mm kit and the current 17lber firefly

Image

There were not enough parts to build the complete elevation unit for either design, but with the parts supplied I was able to cobble together a Frankenstein design that utilizes parts from both kits

Image

Image

Like I mentioned earlier when purchasing the kit I specially requested to have the turret and equipment swapped with the 75mm version. This also included the kit's M34D mantlet and rotor drum. The kit original parts are very nice assemble easy and were one of my favorite parts from the first kit.

Image

Image

Unfortunately because of the time period that I'm building the tank for, the M34D mantlet was not developed yet, so I will not be using it on the model <:^( . In it's place I fabricated the early war period M34 mantlet and rotor drum.

Image

The earlier design of the M34 has the gun protected by a smaller thinner mantlet.

Image

Image

The gunner's scope is missing as that was developed later, and the coax M1919 barrel emerges from the rotor drum and is very exposed.

Image

Image

There were several different variations of this style of mantlet, of which these versions are currently in development. This set however has been added to the catalog. http://eastcoastarmory.com/m4.htm

Image

The set is designed to be compatible with the Armortek components / kits, but the parts can also be adapted for use on any other 1/6th scale sherman model... like for backdating a viper, vantex M4, or for backdating.. the new DML firefly to a composite hulled M4 ;)

Image

While on the 75mm barrel I smoothed out the barrel's small cnc marks with some Emory cloth. to speed up the process I placed the barrel into the lathe

Image

another part of the barrel that I tweaked was the barrel's front. Like with the German tanks the kit's barrel has muzzle break threads located on the barrel's front tip. but unlike the later 76mm gun the 75 never received a muzzle break so the threads are not needed.

Image

To improve the look I developed a resin plug tip that slips in the barrel and gives a more scaled thickness, and the detail of the emergency cross hair groves,

Image

Image

Once added and blended in the barrel was primed and mounted to the trunion along with the other elevation parts

Image

Image

Image

Image

For the elevation motor system the kit was supplied with the newer style.
Image

Because of the longer trunion on the older kit the motor needed to be mounted lower on the motor mount. To to this I simply drilled a new hole lower on the mount and fitted the motor upside down.

Image

Image

Image

Just prior to mounting to the tank, I added the coax M1919 MG. For the barrel itself I used the Panzerwerk resin one as I mentioned before are highly recommended

Image

To add more to the realism I was able to make the M1919 elevate with the main gun simultaneously. This was done by attaching the gun to the one pivot screw. The screw pivots with the mantlet, and since it's the pivot point the M1919 when attached will move true and seamlessly. It's a very simplistic feature that is low profile and passive. No extra servos or equipment is needed.

Image

Image

For installation of the unit, I replaced the kit recommended hex bolts for domed slot screws. Because it's not easy to find metric slot screws this size I swapped out the metric for standard. The screws themselves I find in Radio Shack.

Image

After the installation of the gun I decided it was time for a another road test. With the turret and hull weights now basically established I can set the track tension and chew up some lawn... which these VVSS have a knack on doing ;)

Image

Image

Image

Image

Image

Image

Then after a nice Sunday drive I hosed off the lower portion and got the tank back in the shop and on the lift to continue construction.

Image

More pics were put on the facebook page, http://www.facebook.com/EastCoastArmory

and update videos were added to youtube.

http://youtu.be/ZJNoKPROUiA

http://youtu.be/B4Xn4p5taac

http://youtu.be/G_ynSwahJ9w

Currently I'm adding some more functions to the turret. More to come!

Iacopo Di Giampietro
Posts: 226
Joined: Fri May 11, 2012 9:14 pm
Been liked: 48 times

Re: M4A4 Sherman tank project

Post by Iacopo Di Giampietro »

Dear John,
Every time I look at your work, I am speechless and do not know what to say. :shock:
Amazing job, clean and precise: my most sincere congratulations to these your works of art!

Ciao,
Iacopo

John Grima
Posts: 250
Joined: Sun Jul 15, 2007 2:54 pm
Location: USA
Been liked: 48 times
Contact:

Re: M4A4 Sherman tank project

Post by John Grima »

More progress on the model was made and the tank is another step closer to the finish line.

Image

All the functions have been completed, this includes the turret and the hull functions.

Image

With the functions now out of the way, the project's back has been broken and it is all down hill external detailing from here.

Image

Like on my last RC sherman build I added the function of the pivoting loader's periscope. The kit has a nice milled recess for the periscope. To make the unit pivot I modded one of my resin periscopes to rotate on a sleeve plug.

Image

The sleeve was then epoxied to the interior of the turret.

Image

The scope is hooked up with the turret rotation function and pivots when the turret is activated. This function gives a little more animation to the model.

Image

The last function that I added to the turret was the functional gunner's scope.

Image

The gunner's scope on the sherman like with most tanks is connected to the tank's main gun... and elevates and depresses with the gun in unison. I wanted to add this feature to my build as it helps with the accuracy of the tank, and is something that I haven't seen done before.

Image

The top plate was retained as it was the correct size and shape, only mods made were the addition of more fasteners and the split line detailing. The turret already has a nice divot in the casting and a securing plate for the scope.

Image

Image

The scope notch was drilled out, and pivot mounts were also added. For the scope itself I modded a spare panzerwerk periscope and fitted it to a rotor drum, finally for the top hatch door I used one of my resin periscope covers. To pivot with the scope the molded in hinge was removed and in it's place micro hinges were used.

Image

As for the hookup I simply used a connecting rod to hook the system to the gun. this way like the real tank it moves in sequence and because it's passive no extra electronics are needed and saves interior space.

Image

The last function that was added to the hull was the addition of the taillights. For the taillights I used one of my own sets, along with a set of my tail light brush guards

Image

Image

Like on my other builds I modded the LED to fit snugly into the tight recess of the taillight.

Image

Image

Image

The lights were patched into the headlight circuit and works along with the other lights

Image

Image

After the last of the functions were added I started to comb through and add the remaining exterior detailing. So far the front portion of the vehicle.

Image

Starting with the sprocket, since the test drives showed that the sprocket needed no adjustments I fabricated a cover cap for the center fastener.

Image

the cover cap was fabricated out of a thin sheet of brass. By being so thin it covers up the fastener and keeps the recess that is found on the center of the Sherman sprocket.

Image

On the front plate the cast numbers, foot rest, welds, foul weather driving hood clips and the bow hatches were all added.

Image

Image

Image

Image

Image

I used my early sherman hatches for the model, like with my other builds I used the panzerwerk periscopes. The interior portion of the hatches were painted and weathered

Image

Image

Image

One mod that I made to the hatches though was the removal of the counter weight assist spring and mounts. Because this tank is being built as such an early vehicle these springs were not developed at this time. It is also because of this reason why I didn't add the brush guards to the periscopes on this tank... as they would be anachronistic.

Image

On the tank's rear deck I added the fuel cover caps. The caps on this tank were supplied with the kit and they are from armorpax. They are very nice, easy to build and are fully functional. They were assembled out of the box.

Image

Image

I also fabricated the tank's grill work. The M4A4 had a unique rear deck setup compared to the other variants of the sherman. The A4 had a small intake grill just aft of the turret which was placed right in front of the engine's radiator.

Image

The grill itself was the typical US design, where it used welded slats. The kit comes with a laser cut sheet metal grill. The kit grill is a decent piece, but rather than using the kit supplied one I went and scratch built a new one.

Image

The new grill is all fabricated out of soldered brass strip, and sits in a box frame like the real one. Also like the real grill the mounting straps, and lift handles were also fitted.

Image

Image

The only plastic part is the bullet splash guard, which was made out of styrene. As I mentioned before the rear bullet splash rim was making contact with the turret and was deleted... What's interesting is that this same issue happened in real life with the real M4A4, and the designers redesigned the grill to have the bullet guard connected to it.

Image

Image

Image

After the grill was completed the grill was primmed/ painted in it's base coat, and a weld was sculpted on for the bullet shield. The grill will be fastened to the tank after the radiator cover is fabricated/ mounted... more on that to follow!!

Image

Image

The fire extinguisher box was also fitted at this time, As of note you can also see that the guard has a notch cut out for clearance. The extinguisher itself is one of my resin units.

Image

The top deck engine hatch was also fitted. The kit supplied hatch was a nice made component, but after I made some mods to the upper deck it was no longer going to be compatible. I obtained an aluminium plate of the same thickness and fabricated the new hatch for the dimensions of my rear deck.

Image

The A4's hatch was very simple, was noting more than a steel plate with some handles and lock fasteners fitted. These simple details were added.

Image

For the hinges the kit hinges were used OOB, only mods made was the weld detail, and some cast texture that also covers up the mounting fasteners

Image

The underside of the hatch was painted. With the hatch done I also mounted the control panel to the tank permanently, as no more RC functions will be added at this point.

Image

Image

Some turret details were also added. This would include the notch for the turret ring slot screws, and the cheek blister.

Image

Image

The shell ejection hatch was also fitted. The kit supplies you with a basic functional hatch along with the collar blister. The kit one could have been modded, but instead I swapped it out for one of my own resin ones. The collar blister was bolted to the turret, and body work was done to blend in all add on's to the turret cast surface.

Image

Image

Image

more images were posted on the ECA facebook page
http://www.facebook.com/EastCoastArmory

and a video update was posted on youtube,
https://www.facebook.com/EastCoastArmory

I'm now finishing up the molding for the A57 multibank radiator cover. Once added I can finish off the tool post effectively completing the tank's hull! Once complete I can finish off the turret and get this bad boy into paint!! More to come!

martin pitcairn
Posts: 172
Joined: Thu Jul 12, 2007 5:53 pm
Has liked: 765 times
Been liked: 8 times

Re: M4A4 Sherman tank project

Post by martin pitcairn »

John, what a great build, it is really nice to effort and care that you are taking on this tank. Well done, a great step by step master class!

Cheers
Martin

John Grima
Posts: 250
Joined: Sun Jul 15, 2007 2:54 pm
Location: USA
Been liked: 48 times
Contact:

Re: M4A4 Sherman tank project

Post by John Grima »

For the build I added the last of the model's details and the model is now ready for painting!!

Image

Image

After the rear hatch work was completed turned my attention to the tool posts. The tool posts are fabricated with my usual method. As for the tool layout the A4 used the same tool layout of the other sherman family. the posts and footman loops are all metal fabrication and have sculpted welds.

Image

Image

Image

The tow cable mounts were also added, unlike the later shermans the early war period ones only had one cable lock, as the cable would connect to the U hook on the front transmission cover, this was changed later on in the war to feature another cable lock on the front cover.

Image

Image

Image

The Fluid ID tags were also added,

Image

While adding these parts I tooled up the ID plate for the Little joe generator. Because the generator was a two stroke engine the unit needed Premix fuel. The ID plate stated the info as "GASOIL". The new plate was added to the current ID tag set and is now available on the product line.

Image

The last component to be fabricated / installed to the rear deck was the radiator armored cover blister.

Image

The Blister is one of the key distinguishing features of the A4 over other shermans, The purpose of the blister was because of the large radiator on the multibank engine. The engine was so large that even with the hull extended the engine still didn't fit. In addition to the large blister was added to the lower hull a top blister was also needed.

Image

Image

the top blister also has a large round hatch for access to the radiator filler cap.

Image

The blister was tooled up and is added to the catalog.

Image

Once the hull was complete I turned my attention to the turret.

Image

The details that were added were the turret lift hooks, shark fin vane sight, and MP48 spring antenna base... All parts were stock ECA. For the antenna all that was needed to prep the location was to drill a small drainage hole in the lower center of the antenna well.

Image

Image

Image

Unlike my other builds where I run the radio antenna into the MP48 antenna base on this build that was not needed. This was because of the 2ghz radio used, the antenna extension of the antenna was not needed so a static one was used instead. One good factor is that it leaves one less umbilical cord to deal with when removing the turret.

Image

Image

Also what was added was the nubs for the the lift eyelets to the turret's top deck. The sherman was originally intended to have the turret removed via threaded eyelets, this design was a carry over from the M3 Lee. The design was dropped and the larger cast in lift rings were developed in stead. Even though the design was dropped the eyelet locations were still present in the turret casting. These three nubs were added to the model.

Image

On the rear bustle and top deck of the turret I added the casting and foundry marks. Also added were the 6 footman loop tie downs found on the rear bustle. These tie downs were very common on the low bustle turret shermans of the era.

Image

Image

From what I have noticed on most M4A4s the low bustle turrets were mostly casted in east Chicago by the American Steel Foundries Cast Armor Plant. These castings have a prominent "C" inside a Octagon. This logo was scratch built amd blended in the turret's bodywork.

Image

Work was also done to the auxiliary antenna base mount. The armortek turret has the blister casted in and has a simple cover plate that get bolted to the location. The parts are correct and look good once mounted, but I wanted to mod the part to have the recess plate well that was common on early period tanks. The mod was simple and was done with strips of plastic and body work. the unit was then blended together into the turret with the body work

Image

A new plate was fabricated out of styrene and detail bolt heads were mounted.

Image

Like I always mention in these build logs, this part is for the spare antenna base ONLY! Many people miss ID this for the location of the MG pintle mount (because of the four bolts), and if added here is WRONG and KILLS the look of the tank... Don't do it!!!!


The last part of the build that was needed prior to paint was the commander's copula. The kit supplies you with a basic commander's split ring copula. The kit copula is a good starting point, however I always wanted to tool up this part as I already have the late single hatch version, and wanted this style as well.

Image

This is the first sherman I have built in 10 years to have the split ring so for me building a tank with this part is very overdue, The new copula is fully functional and has been added to the catalog.

Image

Image

The copula features full interior detailing on both the ring and hatches, minus the internal periscope... in which case I recommend the rein one from Panzerwerk (which is what I used) or the white metal one from Armorpax.

Image

Image

This version of the copula represents the first style witch doesn't have the spring assist which was found on later units. The hatch comes in two styles, One with the early style fixed M2 travel lock, and the other with the later retracting style travel lock.

Image

This style was more commonly found on early low bustle turret tanks, this kit will work for the Viper, New DML firefly / composite hull M4, Armortek early production M4A3 and armortek M4A4. This version may not be 100% accurate for the DML mid / late production M4A3, but I have that version in the works.

Image

Even though, this replacement copula is already superior the the stock DML one in that it has the integral pintle mount, interior detailing, and is the correct scale unlike the DML one which is severely under scaled, more on the new copula to come ;)

Also added to the catalog is the early style copula M2 fixed travel lock. This travel lock was common on early period tanks, and is all fabricated out of metal

Image

Image

Before installation the copula was painted in it's OD base, the details like the pads and heads rests will be painted after the rest of the tank is painted.

Image

Image

The final feature that I added was the ability to have the copula rotate. Unlike the single hatch version the split ring was able to rotate 360 degrees. This feature was built into my model, giving the tank a unique feature.

Image

Image

Image

This was done by adding to locks to the bottom of the copula and notches to the turret, like a 1/35th scale tank model. Another reason for making the copula removable was so I can still get easy access to the airsoft gun without risk of damage to any copula details.

Image

Once the details were done it was time to get the tank into paint, the tracks were removed, lights / pre painted lower hull areas were masked, and the model got a good dusting / vacuuming. Once ready the tank got it's final prime

Image

Image

Image

Image

Image

After the prime the base coat of OD was added, Like I mentioned earlier for the color I'm going with the early shade of OD (like the one I used on my M3 Lee). With the base on the tank is all one shade and all the work begins to pay off

Image

Image

Image

Image

Image

Image

Image

Image

Image

More pics were posted on the facebook page, http://www.facebook.com/EastCoastArmory

and a video update was added to youtube


Now with the tank is in it's base coat I've started to add the markings... More to come!!!

Iacopo Di Giampietro
Posts: 226
Joined: Fri May 11, 2012 9:14 pm
Been liked: 48 times

Re: M4A4 Sherman tank project

Post by Iacopo Di Giampietro »

Hello John,
whenever it is a pleasure for the eyes to see your work.
I will renew here the compliments that I've already done via Facebook: a truly amazing job! And as always, the result is a masterpiece.
I can not wait to see the progress in painting.
Ciao,
Iacopo.

John Grima
Posts: 250
Joined: Sun Jul 15, 2007 2:54 pm
Location: USA
Been liked: 48 times
Contact:

Re: M4A4 Sherman tank project

Post by John Grima »

Thanks Martin, and Lacopo. The kind words are very much appreciated.

Since the last post the tank has progressed some more and is now about 95% complete

Image

Image

Image

After the base was completed I added the markings, Like on all my builds the markings are painted on via home made disposable stencils. This includes all the stars, stripe, and TO&E markings

Image

Image

For the tank's markings I went with a style that has not been done in 1/6, and that is of a stateside training vehicle. Vehicles like this would be in this configuration with the white stripe in Fort Knox, and in the Desert Training center in California.

Image

Many M4A1s, M3 Lees, and Stuarts went into North Africa with similar paint schemes, but the A4 was relegated to training in the US before being sent off as lend leases... or upgraded and sent to Burma and China.

Image

There were also other options for the stripe, Yellow and Blue were also done in this format... possibly an idea for future builds ;) . When I had the idea for the A4 project I wanted to build it for this scheme / era as once done these tanks look very sharp and distinctive in this format.

Image

Another early war feature that is found on the markings is the Blue ID "W" prefix lettering.

Image

The lettering at the early part of the war was in blue, and had the "W" in the code which stood for "War Department". This was changed and dropped by around 1943 where the numbers where in white, and had only a USA prefix

Image

After the markings were added the tank got it's weathering.

Image

Image

Image

Image

After the weathering was complete the tank's tracks were painted and fitted

Image

Image

The tracks themselves were painted and were left unweathered. Because the tank is RC and the tracks are made out of metal, they would weather themselves after drived a (very) short distance. Which was subsequently done after the tracks were mounted... for testing and weathering purposes of coarse ;) .

Image

Image

Image

Image

Image

After the tracks were taken care of, I then moved to the remainder if the fittings, this includes the red painted zerk fittings, red fire extinguisher handles, MP48 Insulator, Copula interior

Image

Image

Image

Image

Image

The two M1919 gun barrels were painted/ weathered and installed at this time

Image

Image

The tank's head / tail light lenses were also fitted.

Image

Image

Image

The last bit that was added was the tank's fuel filler caps. Like with all my sherman builds the main filer caps are fabricated out of Aluminum. The radiator filler was also mounted, this is resin and comes with the radiator cover set. The caps were all weathered and like on all my US AFV builds the cap pins are chain retained.

Image

Image

Image

Image

Image

More pics were posted on the facebook page:
http://www.facebook.com/EastCoastArmory

With these parts now out of the way, all the remains now to be added are the pioneer tools and the M2HB AA machine gun. As a final surprise for this build, I have something I have something special planned for the AA gun ;) ... More to come!

Image

Iacopo Di Giampietro
Posts: 226
Joined: Fri May 11, 2012 9:14 pm
Been liked: 48 times

Re: M4A4 Sherman tank project

Post by Iacopo Di Giampietro »

Hello John,
I repeat what I have already said on Facebook: for me it is a masterpiece!
Congratulations for your work, full of detail and incredible quality.
I really do not know what else to add!
Indeed .... there is a question: what will be the next masterpiece? :D

Joking aside: I'd like to know what color you use to paint your tanks. You always say to use the OD, and every time I've seen the bottles of Tamiya color .... you use normal bottles of Tamiya acrylic paint? Which color, in particular, if I may ask?
Thank you and ...
Until next time!

Ciao,
Iacopo

John Grima
Posts: 250
Joined: Sun Jul 15, 2007 2:54 pm
Location: USA
Been liked: 48 times
Contact:

Re: M4A4 Sherman tank project

Post by John Grima »

For the base / camouflage colors on my builds I mix my own color and have it made into paint for me at a home improvement store.

Depending on the build I use the Tamiya paints for the shading, markings / insignia, and other fittings.

I just Posted a video update of the model where I give it a test drive all painted
youtu.be/_M8CschoqIU

Post Reply