Hi guys, After building a series of german tanks I decided to go back and build some more allied. With just about everyone cranking out DML M4A3s these days I decided to spice things up a bit by building a lesser appreciated Sherman variant, the M4A4.
I've been slow with updates recently, with all of the orders and commission builds going on I have had little time for my own projects :S
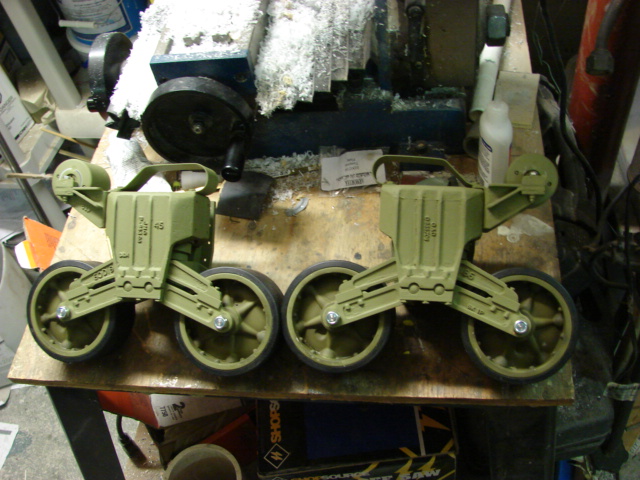
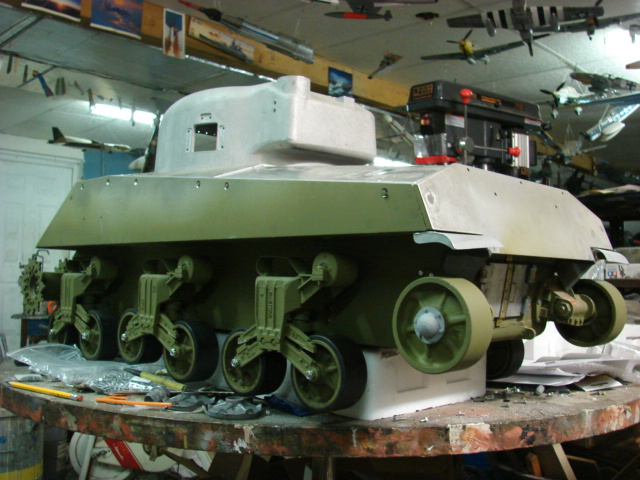
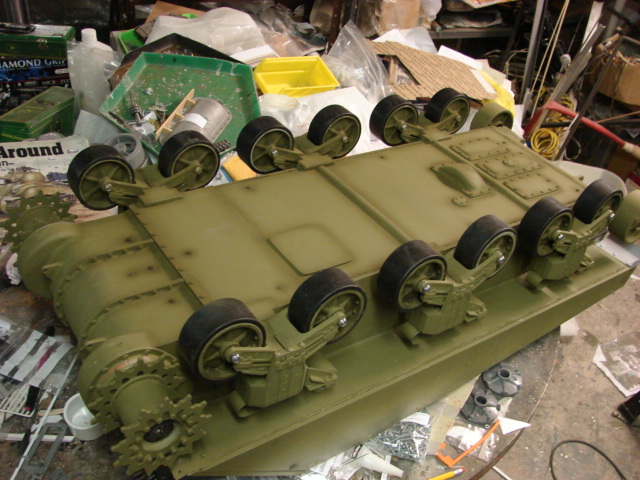
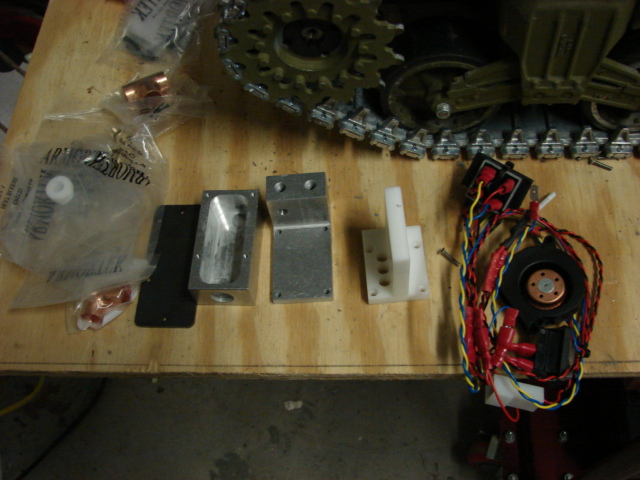
I was able to complete and install the tank's suspension.
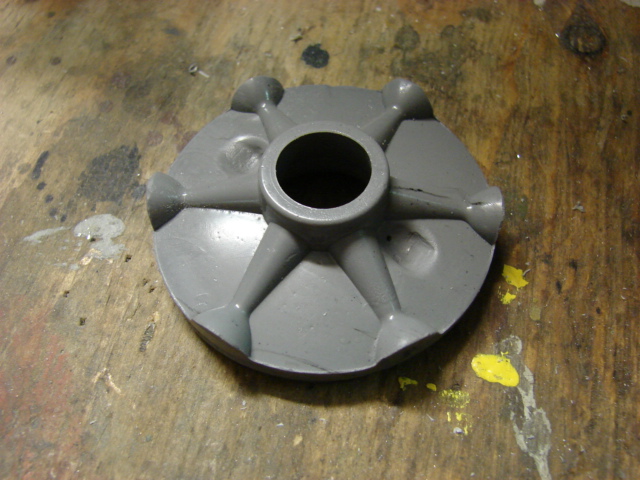
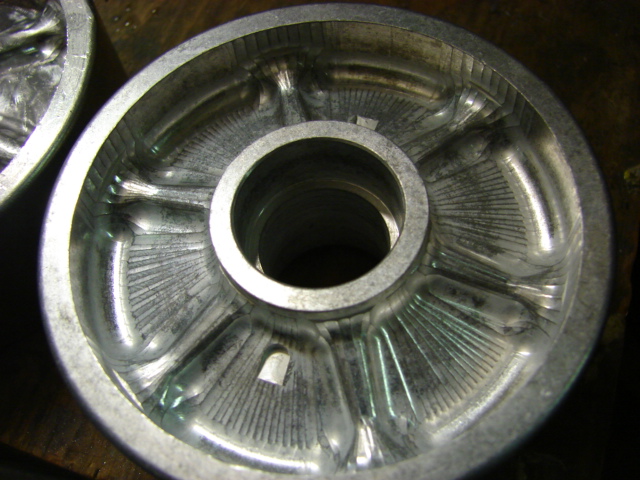
I also tooled up a resin wheel insert for the road wheels.
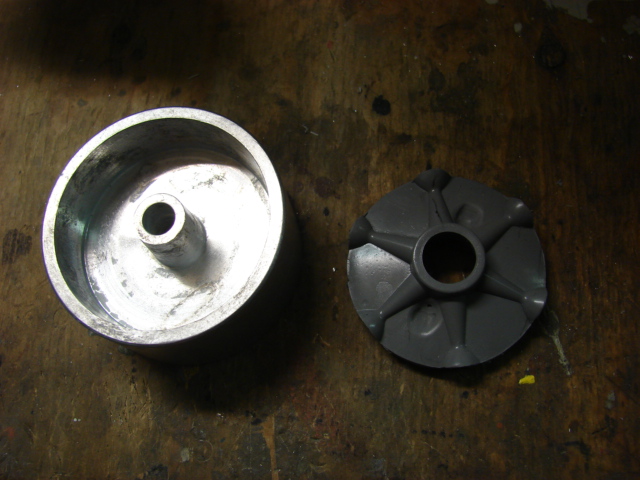
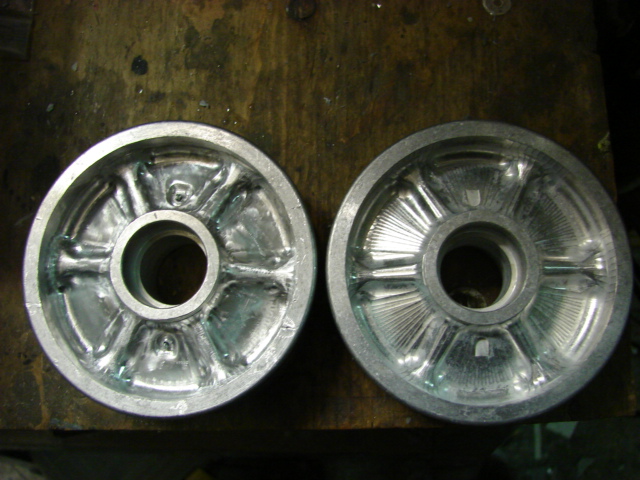
The pre sized insert simply drops into the wheel well filling up the space that was left in the kit. The wheel also has it's zerk fitting wells added.
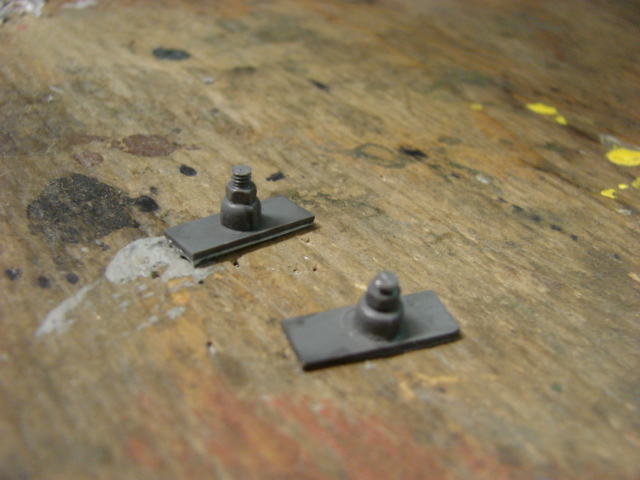
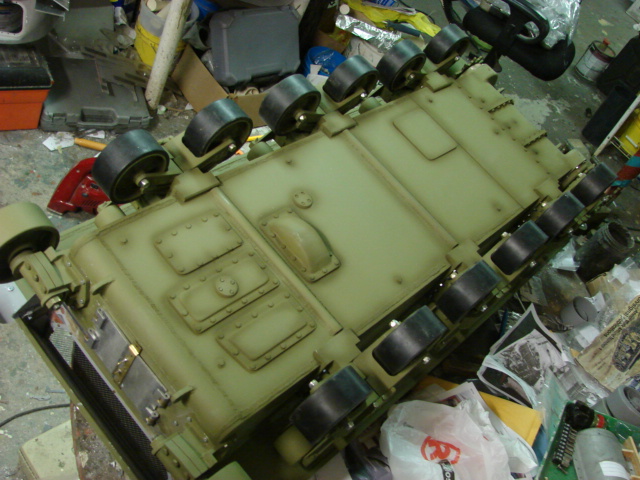
Also included in the set are covers for the return roller fasteners, The set has been added to the sherman parts catalog, http://eastcoastarmory.com/m4.htm
Also added to the product line was the early war style mini rear fenders. The fenders are fabricated out of sheet metal, and are all soldered together. They will also work on other early war ear shermans such as the Viper.
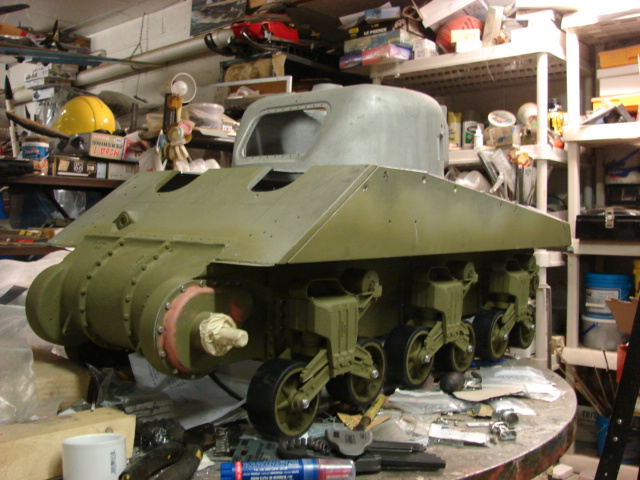
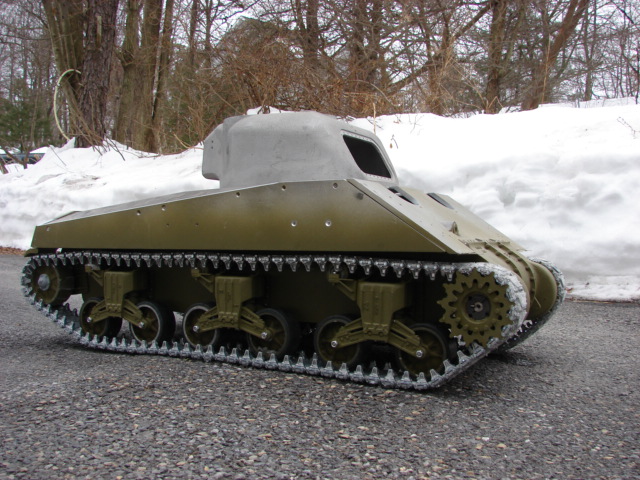
It seems like ages since I had an update on this one, but I was able to make a significant amount of headway on this project. The tracks, motors, and electronics have been installed... and the tank is now running!
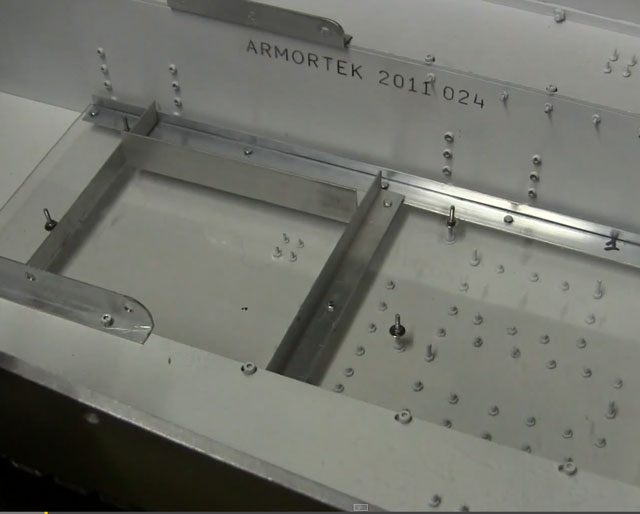
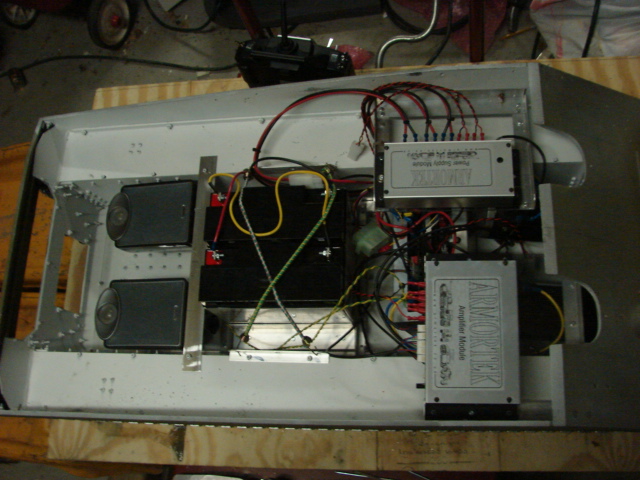
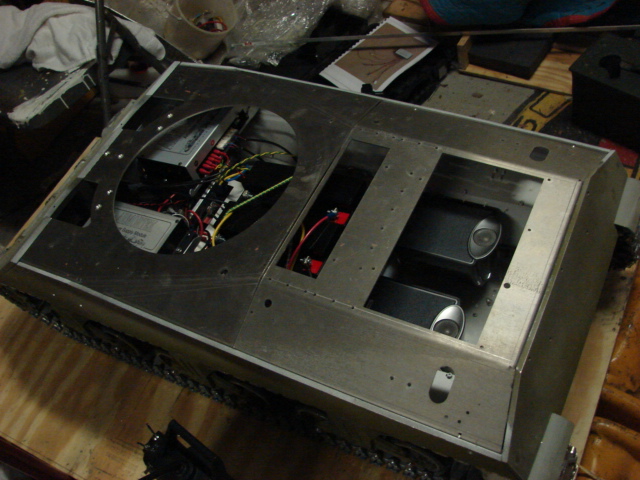
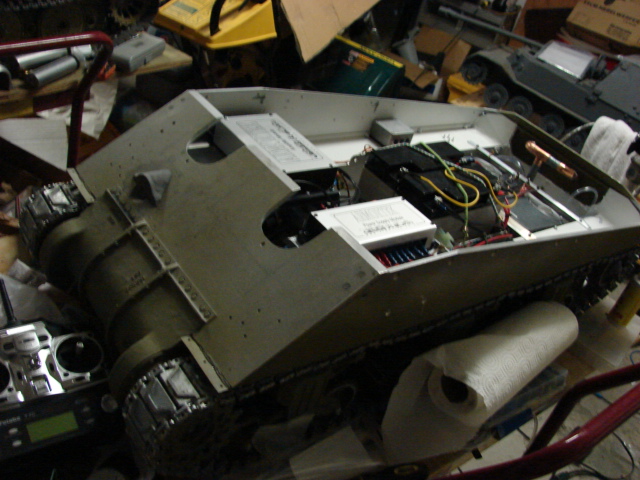
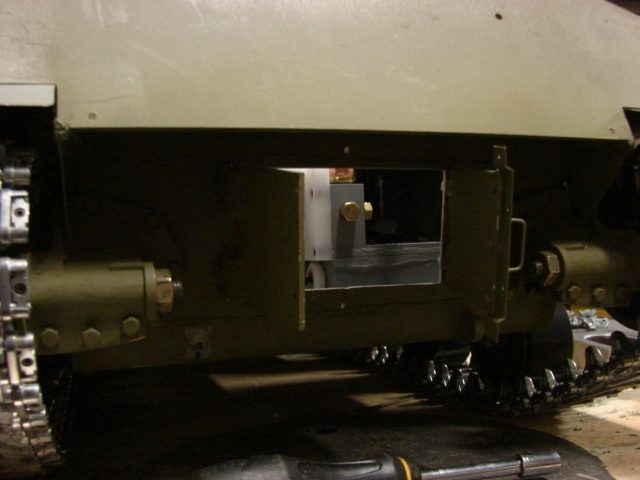
Unlike my older RC sherman builds where I mounted the electronics to the bottom floor plate, because of the added under hull detailing this was not a viable option. So instead I designed a subfloor which is elevated off the floor plate and uses the fasteners from the under hull details to suspend and firmly mount the unit.
The subfloor is fabricated out of Lexan plastic and for strength Aluminum angle.
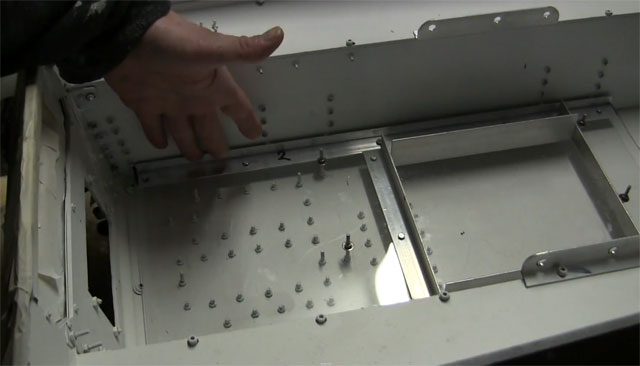
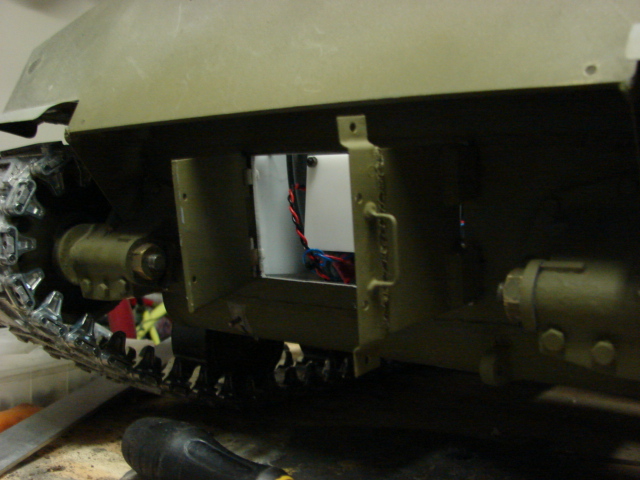
For mounting the other electronic equipment I fabricated aluminum angle mounts. The Speed Controller and the aux. component controller are mounted to one of these frames, which is then bolted to the model's sponsons. For the fasteners I simply utilized the armortek kit fastener and fastener locations for mounting the new braces like an erector set. This system saves space, and doesn't touch the bottom floor pan.
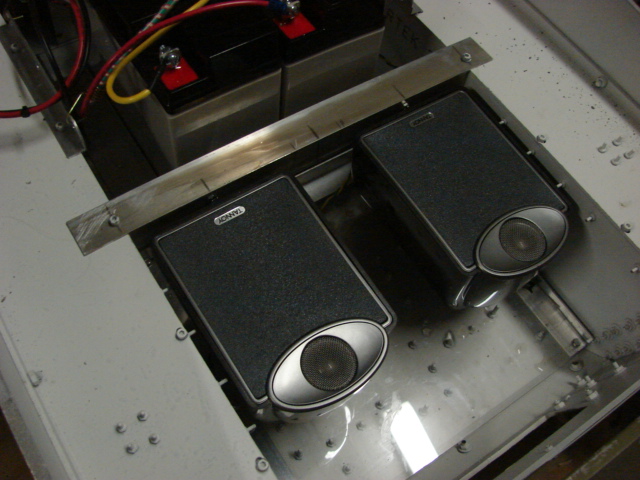
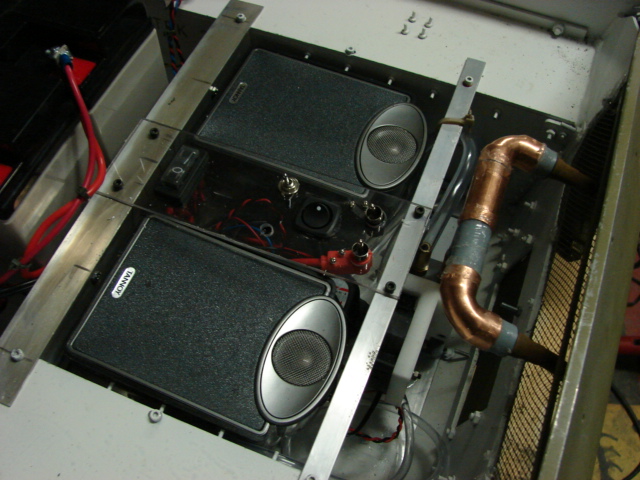
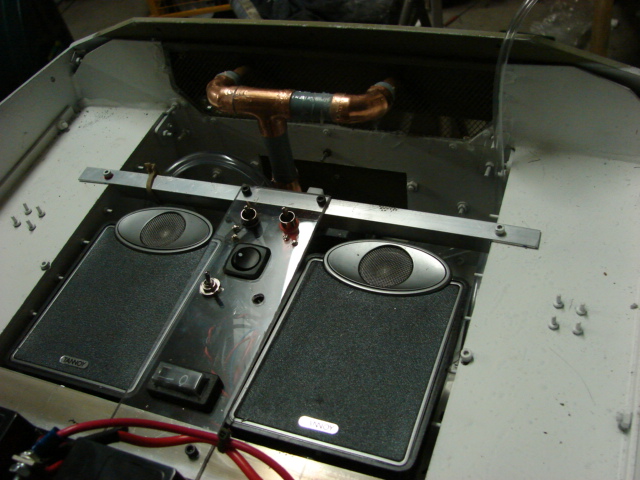
This same system was utilized for mounting on the speaker system.
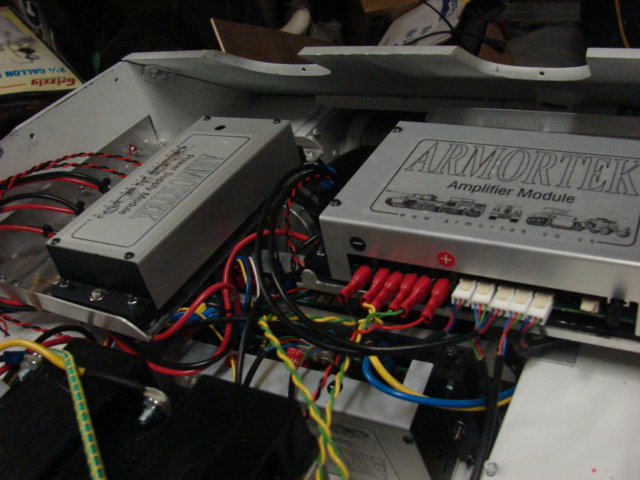
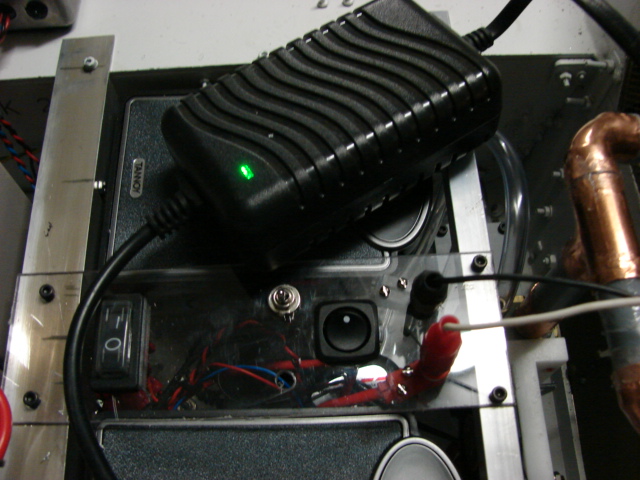
Because the speed controllers were mounted low in the hull in a cluster that freed up room towards the upper hull, I took advantage of this real estate by mounting the power supply box and sound system amp box on two elevated shelves.
These shelves allow me to mount the power supply to where the main power switch is located directly beneath the driver's hatch. To mount these shelves I simply adapted the holes that were pre drilled into the side plates by armortek. These holes are originally designed for the mounting of the kit supplied side armor plate slabs. Because this model will not be using these parts these holes were to be deleted anyway, so they were a perfect location for these two parts.
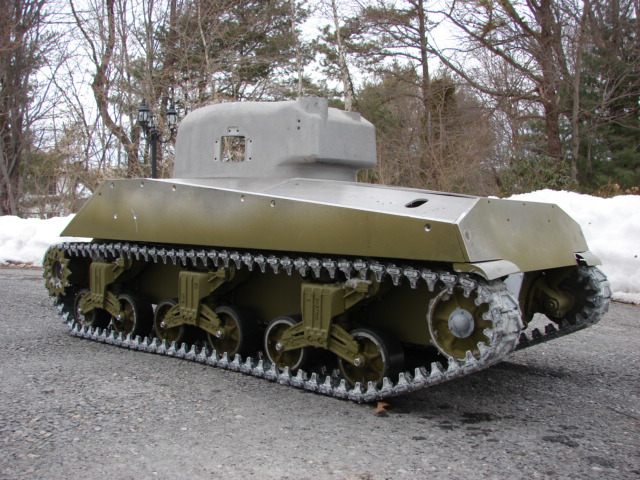
After the track was assembled it was time to take the tank out for it's maiden test run. I temporarily pinned the top deck in place and off I went.
The tank made it's paces in the snow and performed well on the ice.
Two youtube videos were made showing the unboxing of the electronics
With the tank running and with the sound system working properly I can now focus on the recharge system, smoke, and other added functions... More to come!
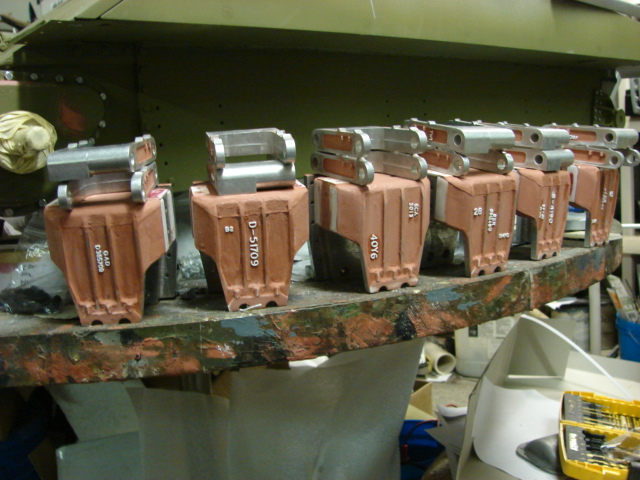
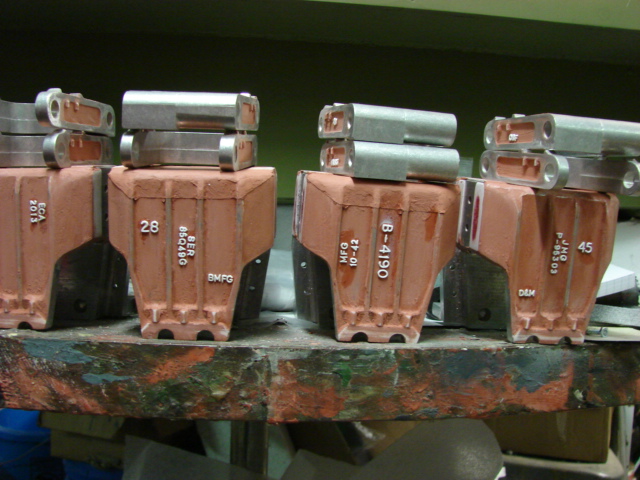
The models smoke system has been assembled and mounted.
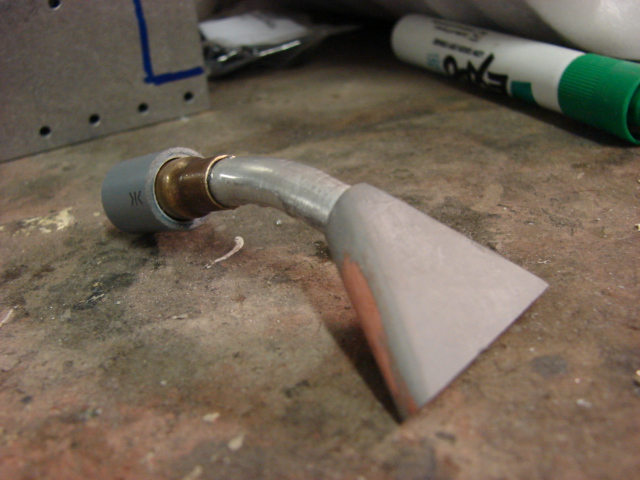
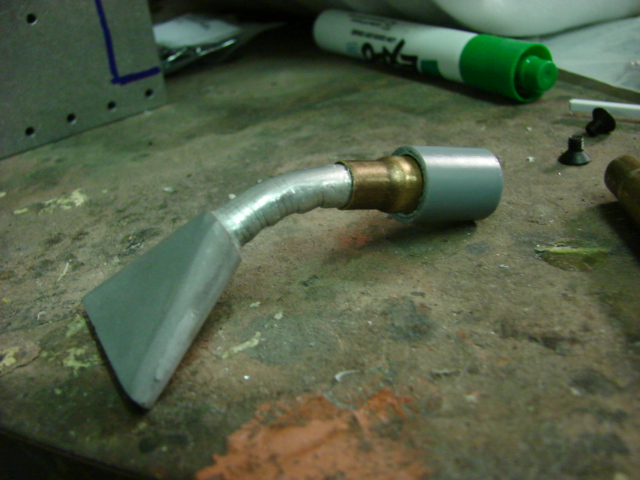
The kit includes all the plumbing for arranging the smoke system. The kit doesn't not come with the actual detail exhaust manifolds. For the manifolds themselves I fabricated them out of my resin M4 sherman exhaust manifolds.
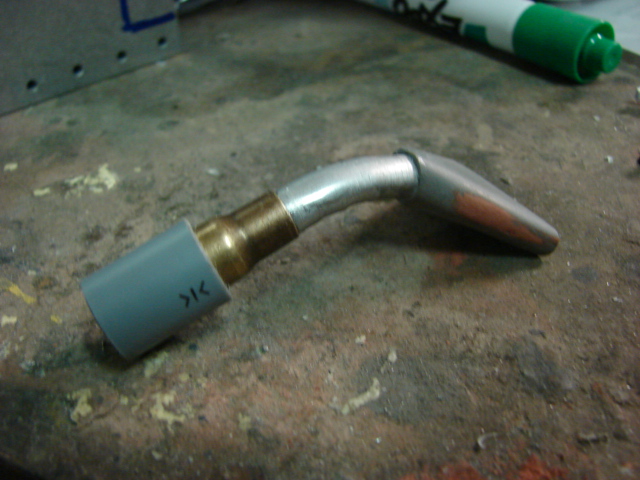
The resin exhaust tips were hollowed out on the mill, and a press bent aluminium tube.
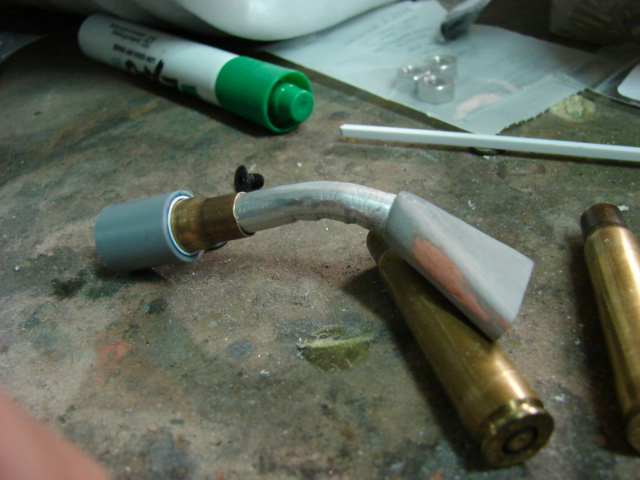
For connecting the thinner tube to the larger PVC adapter tube I recycled a spent 8mm mauser shell casing. The shell casing was a perfect fit for connecting the two tubes together.
To modify the casing I simply cut off the bottom portion of the shell and assembled the rest of the unit together.
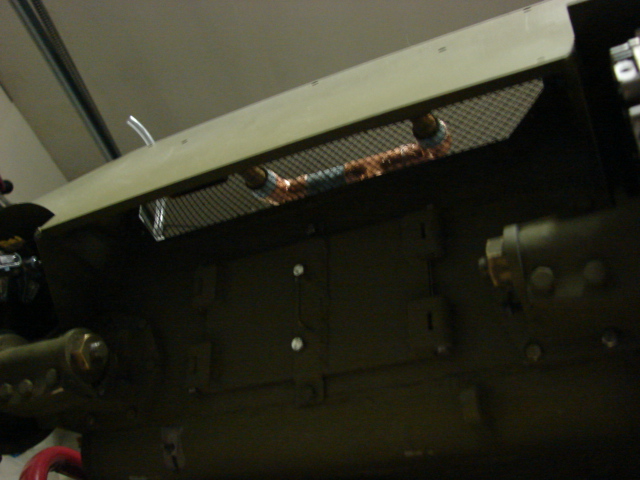
the manifolds were painted / weathered and were mounted to the tank. After they were mounted I also mounted the rear screen work. All plumbing and screen work was mounted to the model via silicone. The reason why I went with this medium was because in case I need to get access to the system for maintenance I can remove and disassemble everything without causing damage.
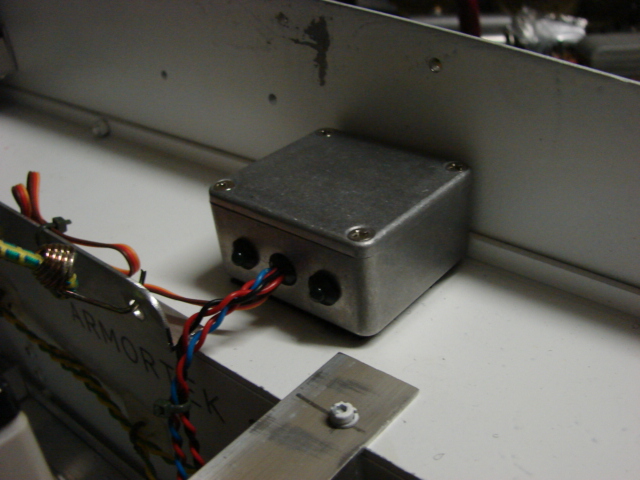
Another addition I made to the tank was the addition of the smoke system throttle control box. This unit is a drop in addition from Adrian ( sales@armortekaddict.co.uk ),
It was at this point I mounted the rear engine hatch doors.
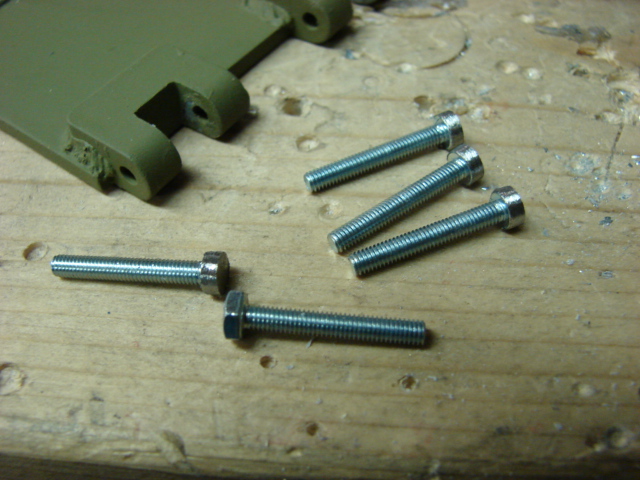
For the door pins I fabricated a set of pins from Hex bolts. The hex heads were rounded off giving them a pin appearance.
Like all of my RC tanks I built i a refueling system into the model. The system uses a RC fuel pump, and the pump was patched into the armortek power supply. The pump is only used to refill the system and uses a long tube. The purpose of the system and the long hose is because of the smoke fluid I want to minimize the chance of the fluid making contact with the model's surface, and possibly ruing the finish.
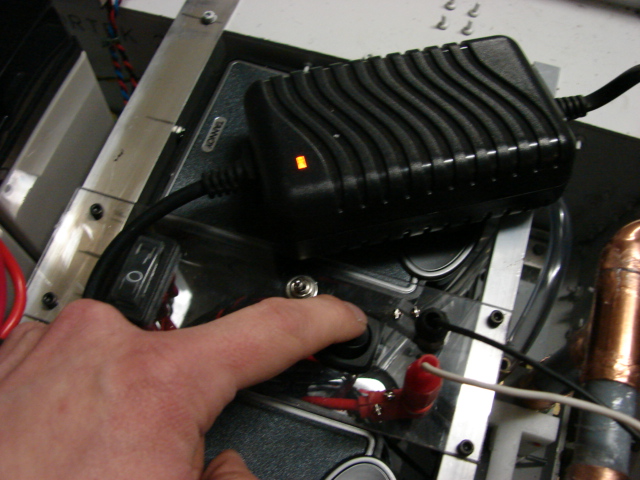
In addition to the pump I was also able to make the rear control panel. Because of the rear engine deck engine hatch, I have ample access to this location. This location is where I mounted the smoke system controls, (refueling, filament power cut off) and the tank's recharge jack system.
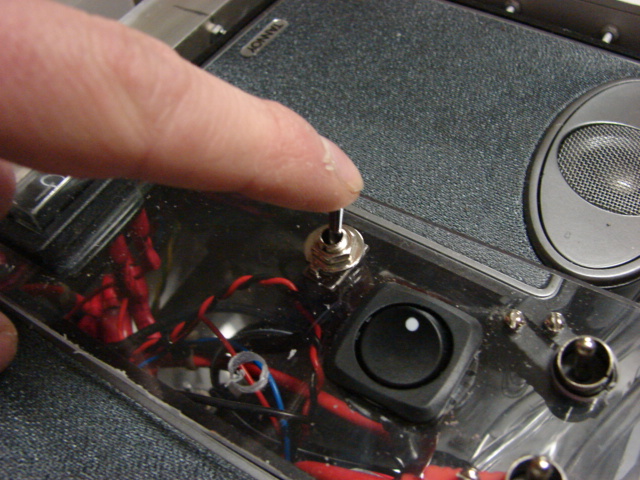
For the recharge jack I utilized a switch set up where I plug in the jacks to the tank, and hit the switch to charge. When charging is complete I hit the switch and pull out the jacks and I'm ready to go.
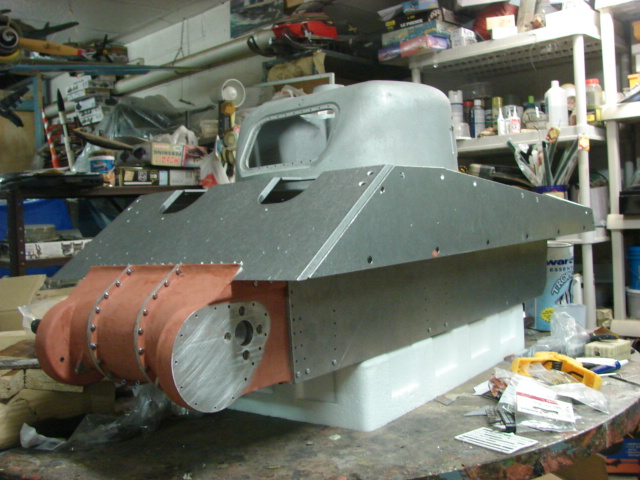
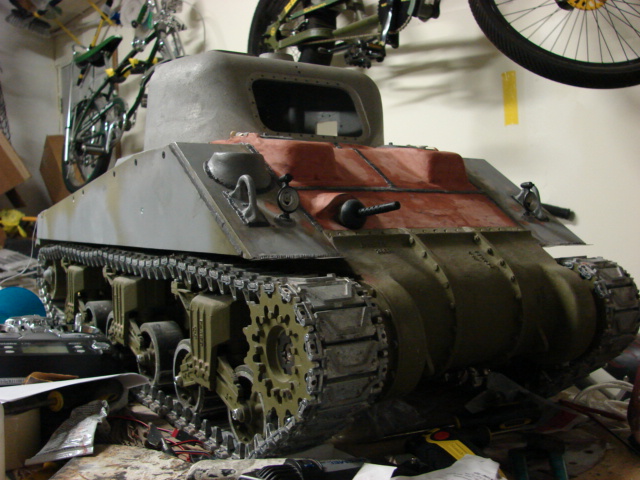
It's been awhile since I posted any updates, but I made a lot of progress on the model completing most of the front portion of the vehicle.
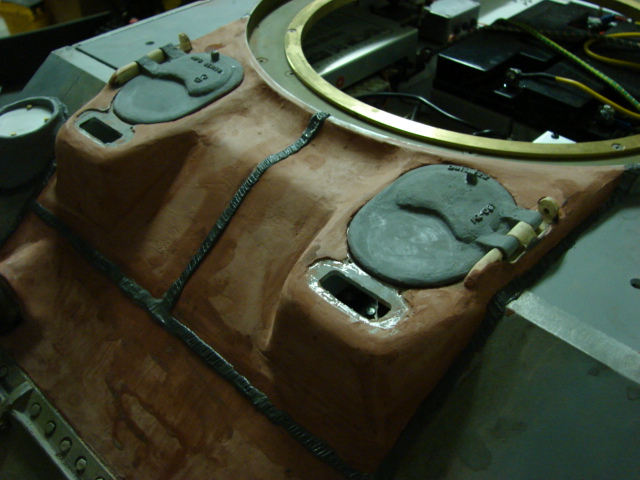
Once all the work was completed in the last update it was time to start buttoning up the tank. For this I started with the front half of the tank due to the work needed for the bow hatches.
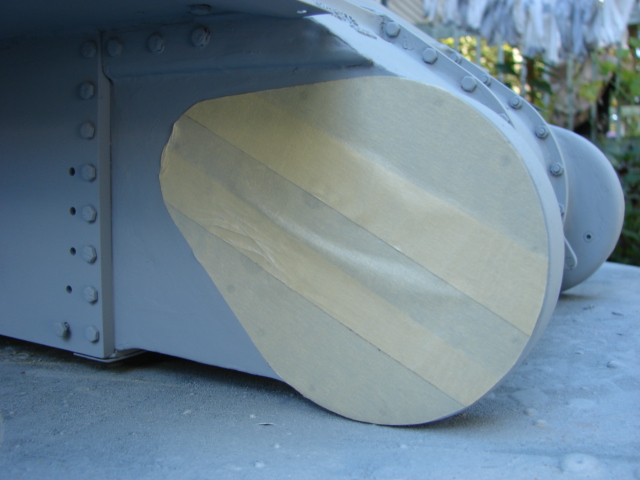
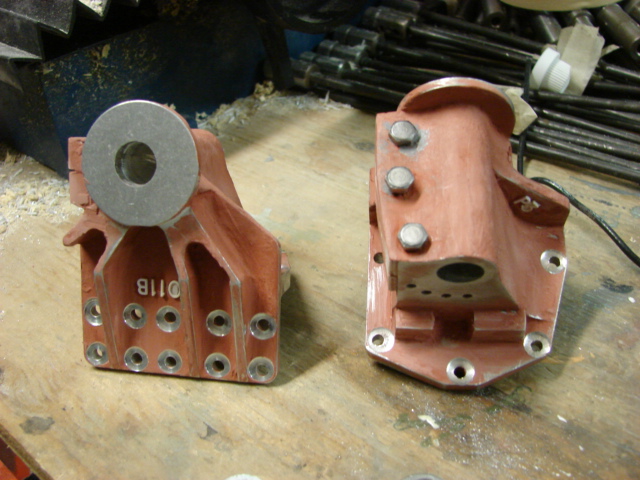
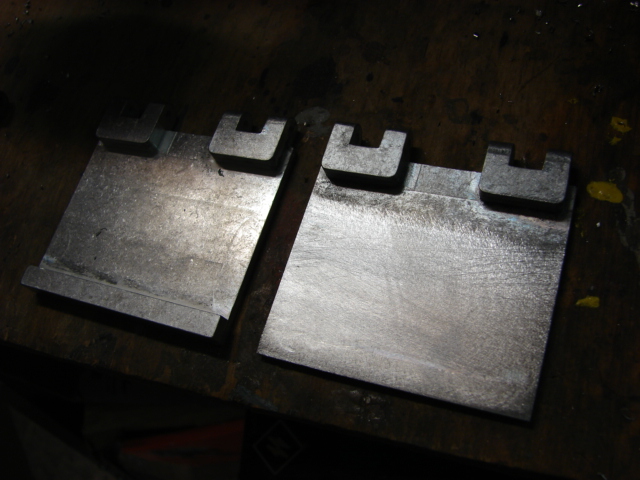
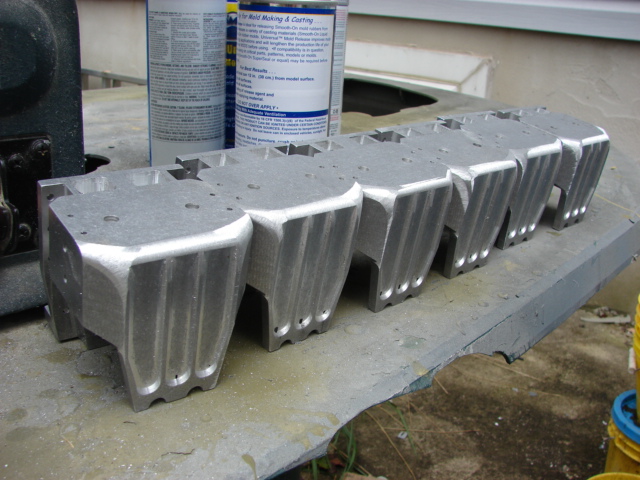
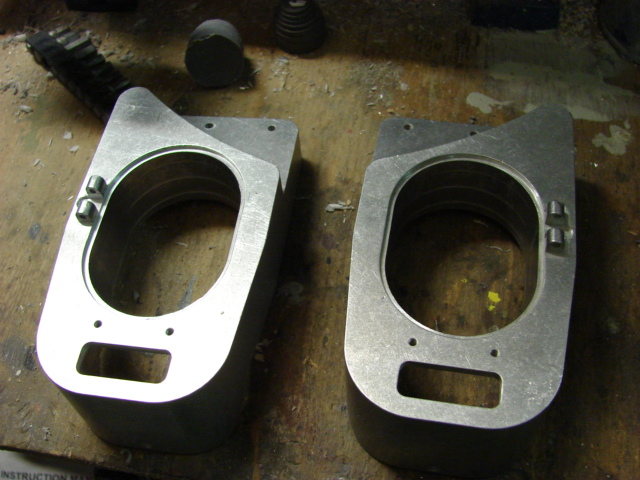
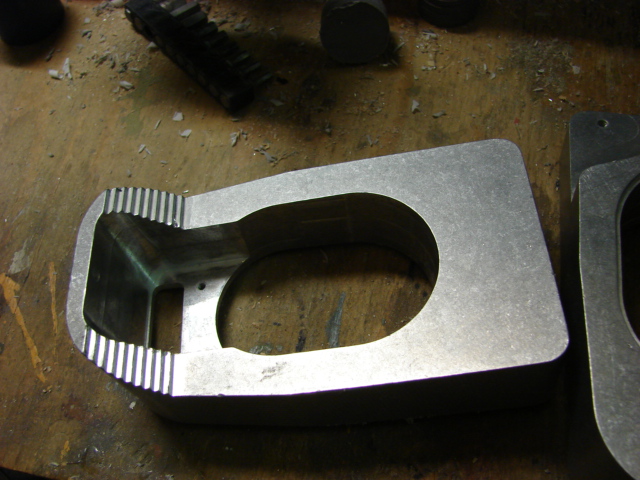
For the bow hatches the kit supplies you with two CNCed aluminum billets that have roughly the right shape and size of the wide welled early hatch blister. The kit also supplied you with a basic set of hatches
The blisters are a similar design from their first sherman release, only the units on the first model were made out of a hollow cast white metal alloy. Since these are solid billet they are much easier to rework and alter.
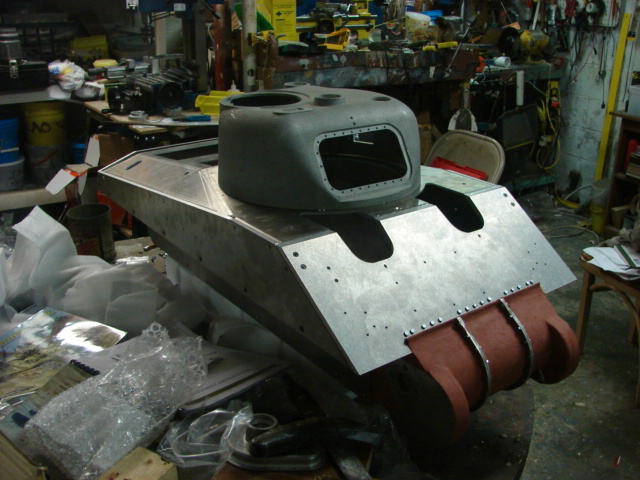
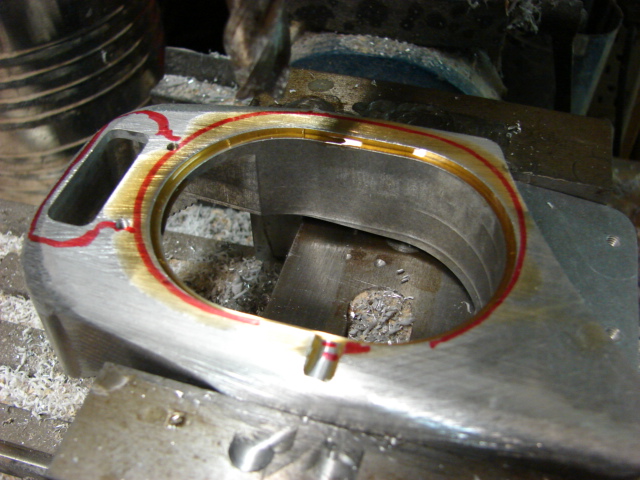
For the bow hatches I will be using one of my own early sherman hatch sets. to make my hatches fit better on the stock wells I enlarged the hatch well recess via the mill, also milled into the billet was the recess for the backup periscope. The Stock machined hinges were deleted as they will not be needed as I will be using the resin ones instead.
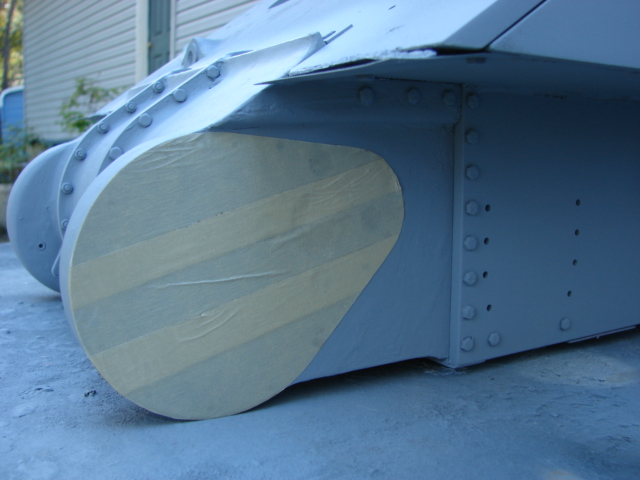
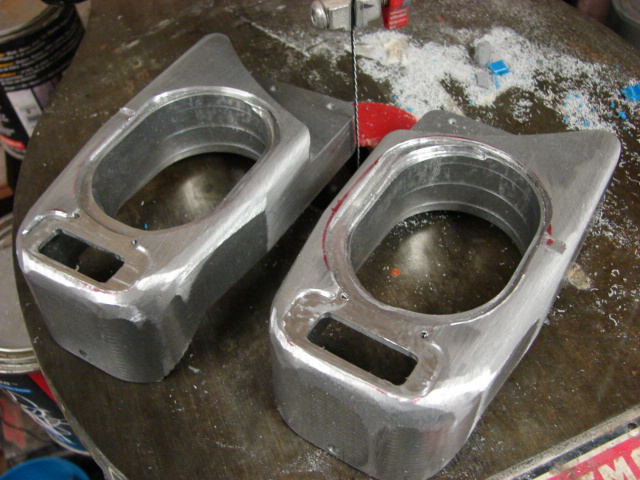
The squared off shape of the wells were rounded off with a few passes of the belt sander.
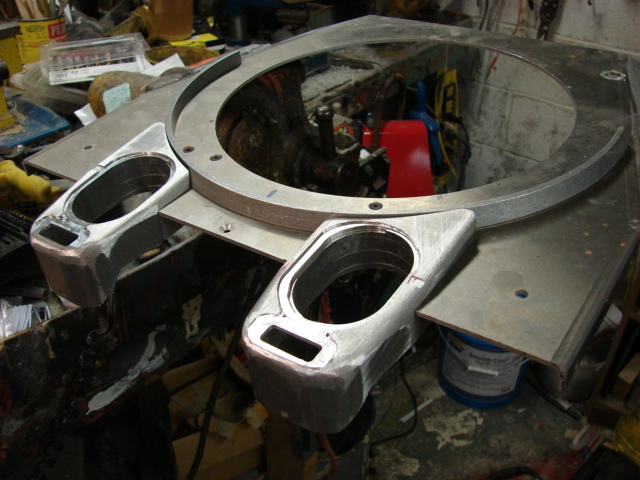
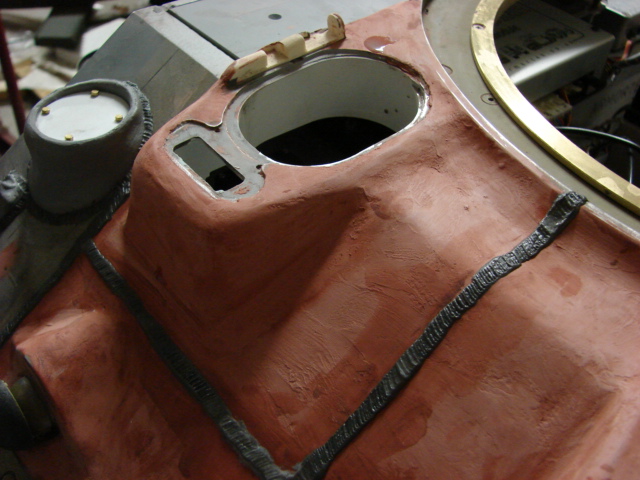
once the wells were revised it was time to mount them to the upper deck. The pieces themselves mounted perfectly with the stock fasteners and no fitting required.After the wells were added I also added on the bullet splash rim. these parts were also OOB. The only mod that I made was adding the water drain hole to the rear bullet splash rim corner (Pics to follow)
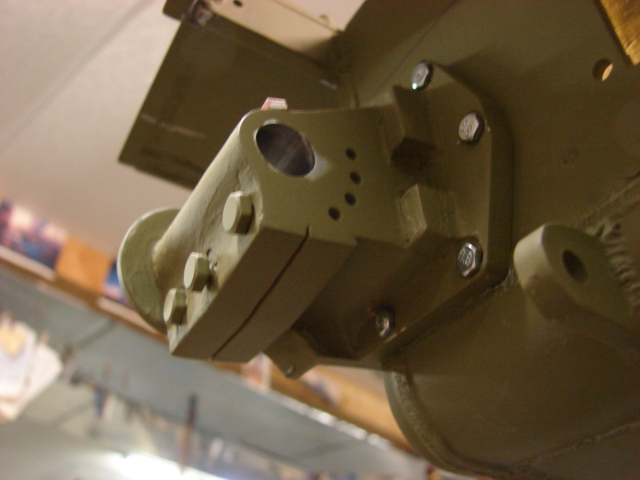
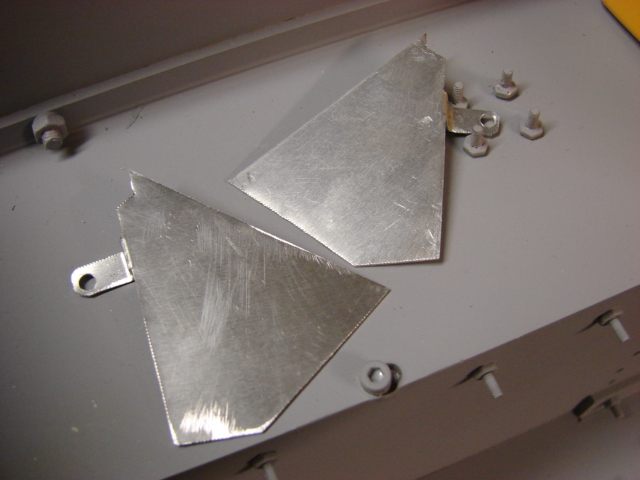
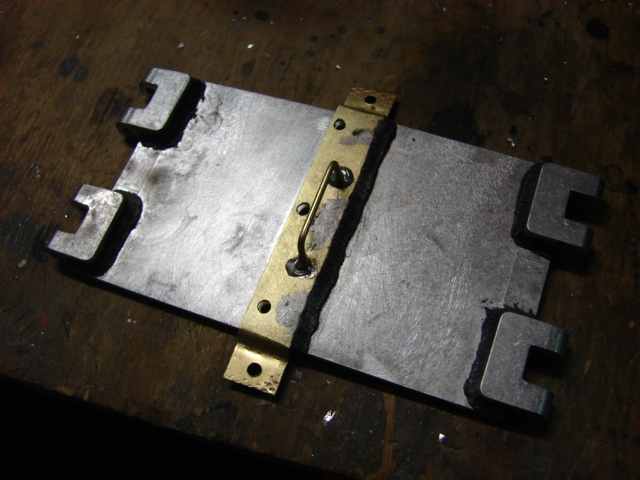
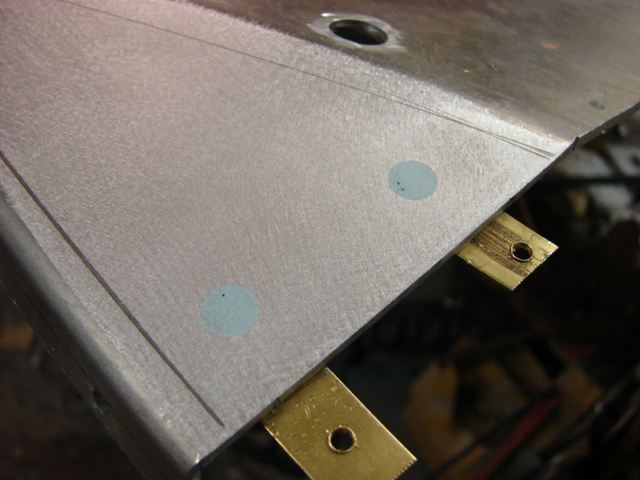
On this version of the sherman Armortek revised the upper deck design from their first release. On the first release M4A3 the deck was one plate of Sheet steel, this deck had two small triangular sections which needed to be affixed the the deck (either with straps and fasteners or welding). On this version of the kit the deck is aluminum and comes in two complete sections which makes it a lot easier to install. For extra support I fabricated two brass straps that will connect the two halves via countersunk fasteners.
these straps were added before the splash guards were added. The strap fasteners were blended in with the bodywork and are no longer visible. they will be connected with corresponding mounting holes on the rear plate. This will be done after the rear deck is mounted.
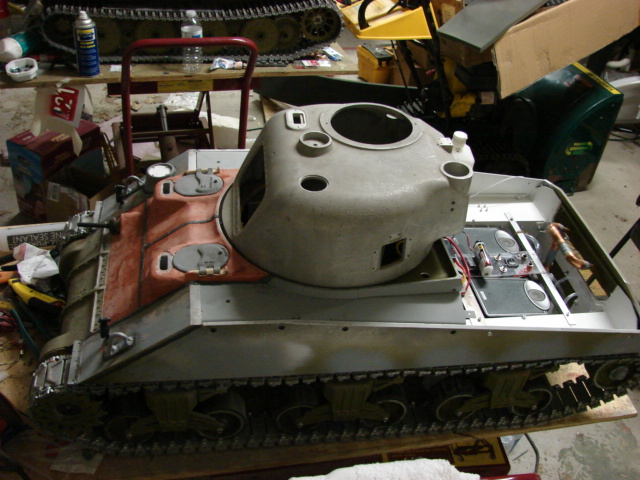
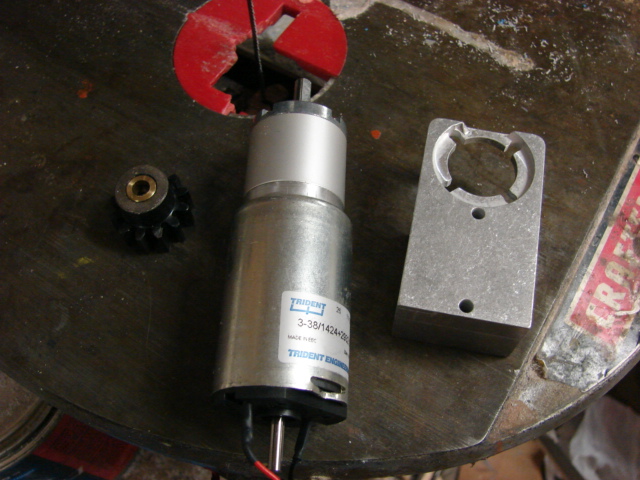
After the straps were fabricated I turned my attention to the turret rotation system. The kit supplied system was built OOB and assembles very easily.
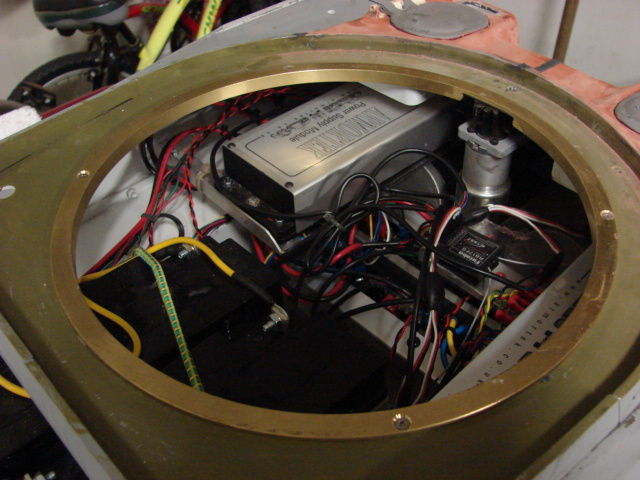
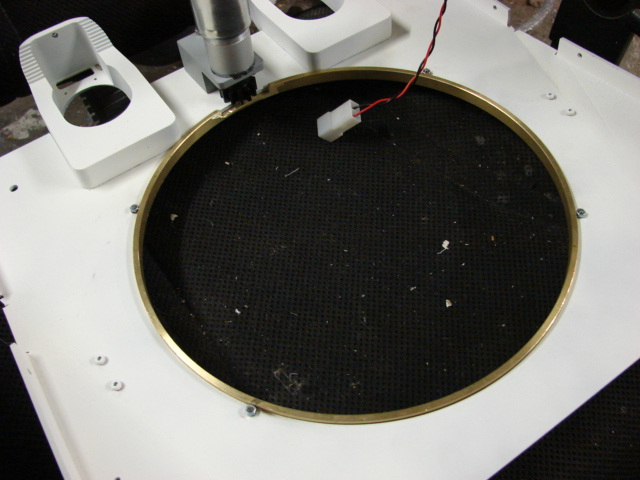
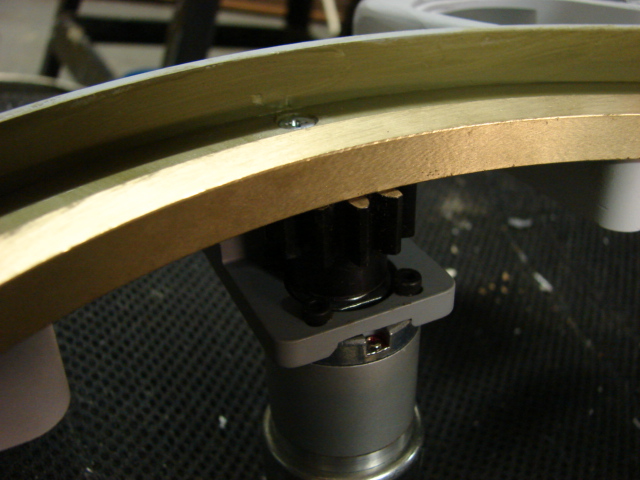
After the rotation motor was mounted I turned my attention to the brass turret bushing. The bushing is a common feature found on the armortek kits and is very effective at ensuring smooth operation of the turret.
On all my builds I like to mount the ring to the upper deck via counter sunk fasteners. By doing this that ensures the bearing to stay in it's place allowing the turret to glide over it during operation.
One these armortek shermans I encountered that the ring will make contact with the turret turning gear, which will not allow the ring to seat fully.
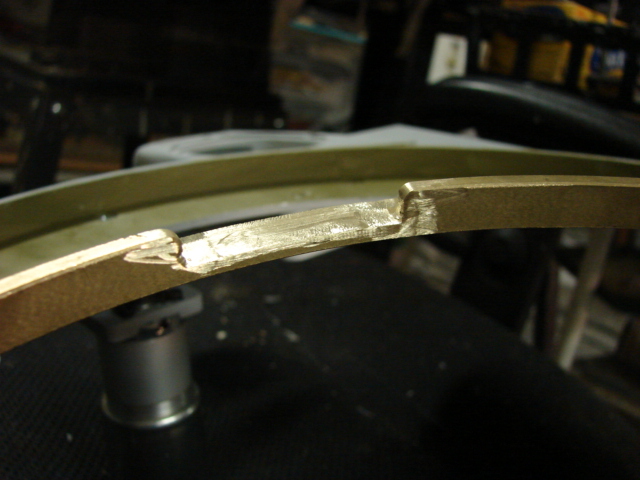
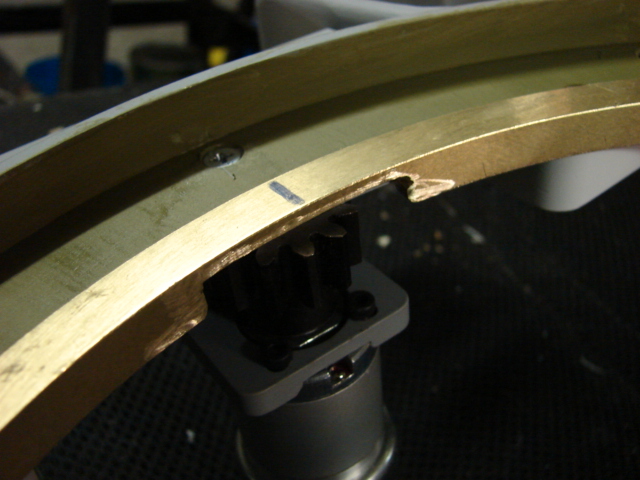
A simple fix was to remove a small section of the ring allowing clearance with the gear. All burrs and corners were removed and buffed smooth.
Once removed the ring slipped on like clockwork
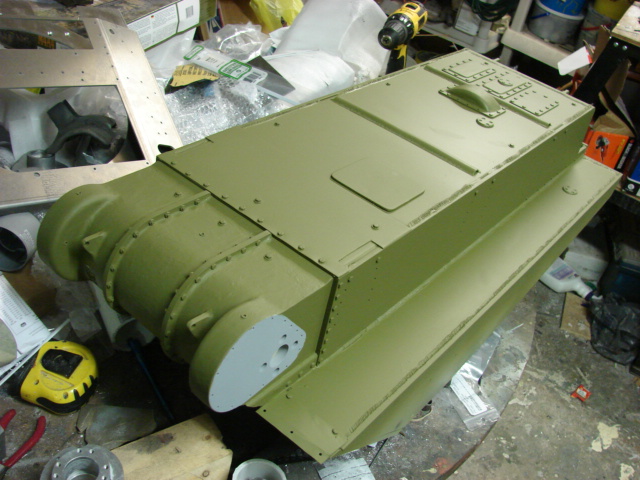
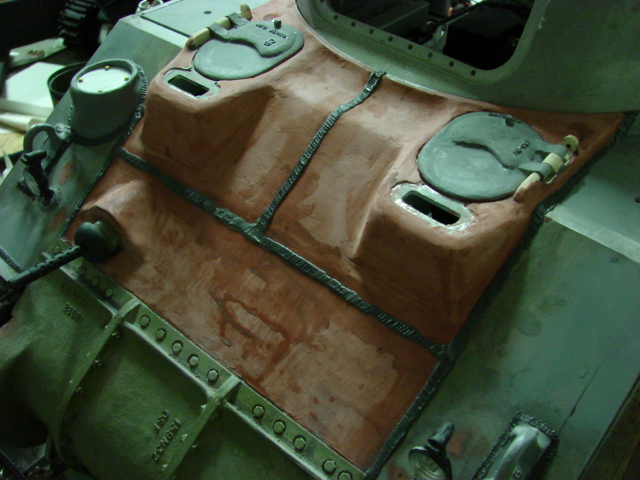
Once the top deck was installed I then completed the front hatch area with the bodywork.
On these early sloped shermans the front plate was constructed out of 5 parts, two rolled steel sides and three cast units. The bodywork completes the illusion of the hatch wells blending everything together making it resemble the real unit. Once everything was blended smooth cast texture was added to all the appropriate cast plate units.
The resin hatch hinge was thoroughly blended into the cast surface.
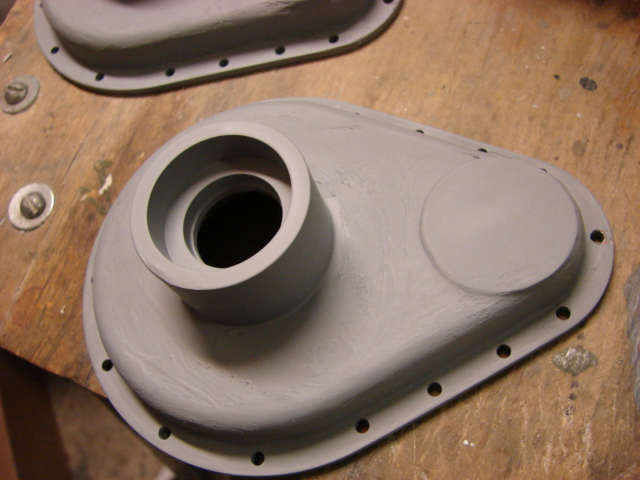
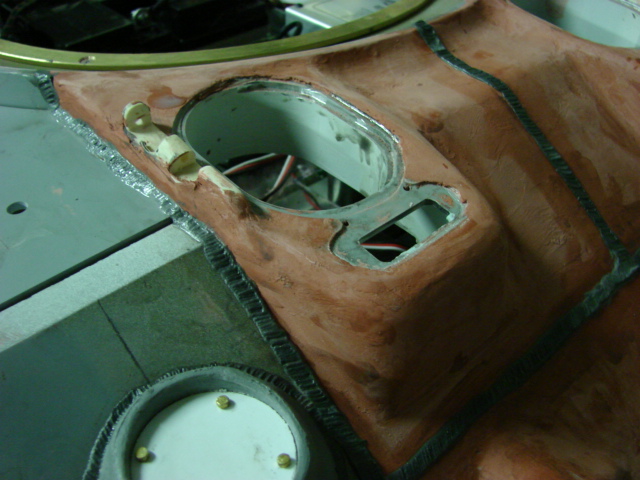
In addition to the hatch wells I also built up and completed the Bow M1919 section. Like the hatch wells on these early style shermans the entire plate containing the M1919 ball equipment was casted on a long rectangular plate.
Because this kit was a firefly the kit was not designed to have the M1919. On the firefly they removed the assistant driver location for use of more ammo for the 17 pounder gun. In it's place a large steel rectangular plug was placed on the hole. As I mentioned earlier in the build the well was all fabricated out of resin, PVC and epoxy bodywork.
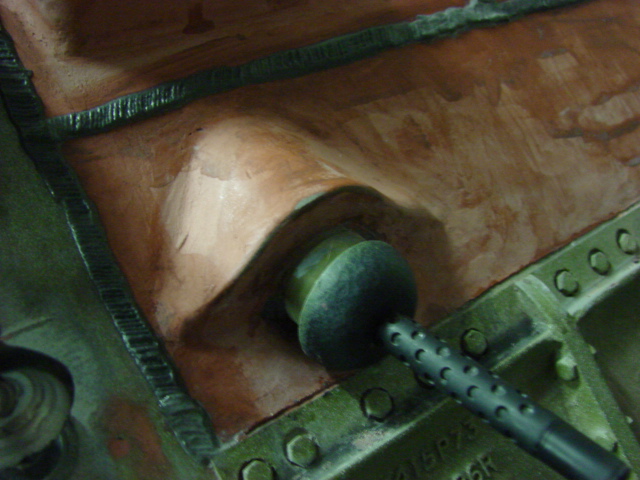
For the M1919 ball unit I used the resin set from panzerwerks, I've used these sets in the past and they are highly recommended. The MG ball was hooked up the a servo and pivots on demand.
As a side note, because I ordered the kit as an M4A4 Armortek did throw in an Armorpax white metal M1919 ball set (special thanks to Armortek). The armorpax version is also very nice and would have been used, but by the time I noticed that they supplied the parts I already had the Panzerwerk version fitted. The armorpax set will be put in storage and will be used on my next sherman build...which shouldn't be too far off lol.
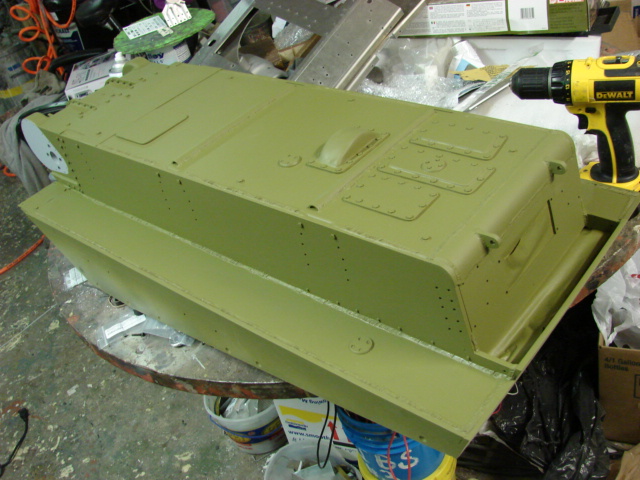
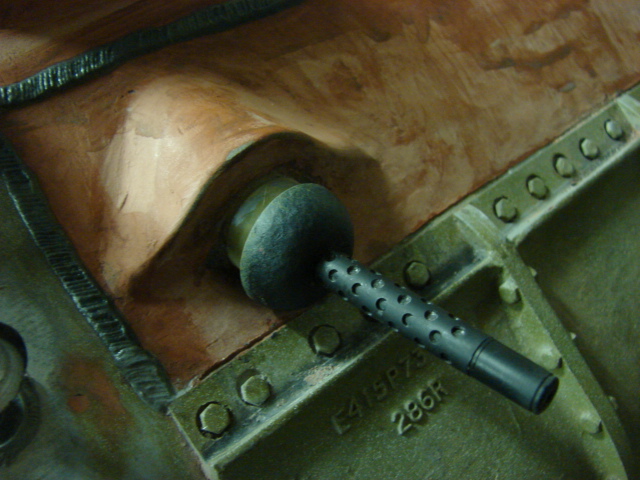
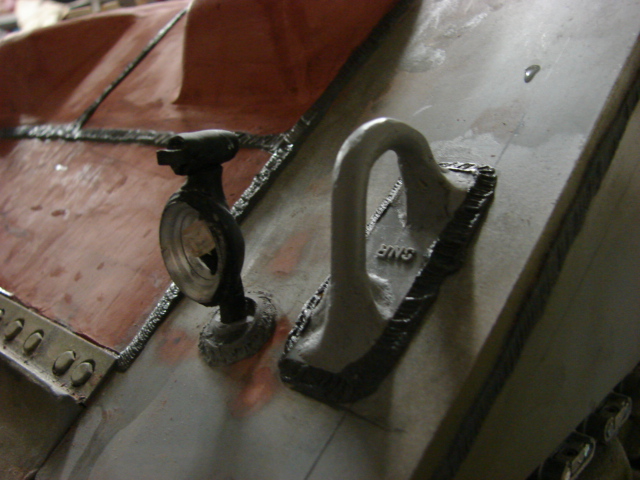
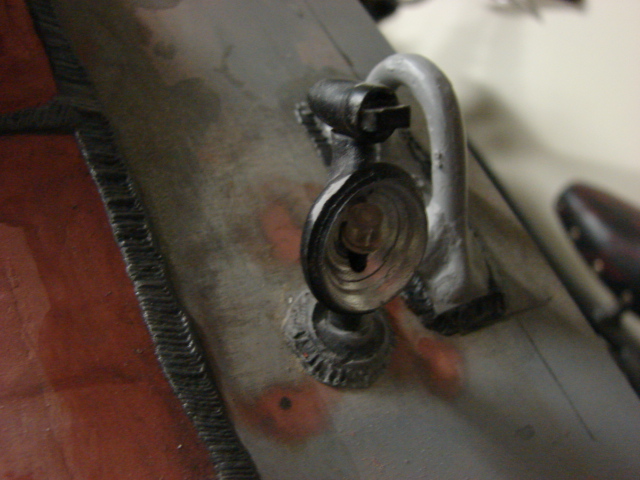
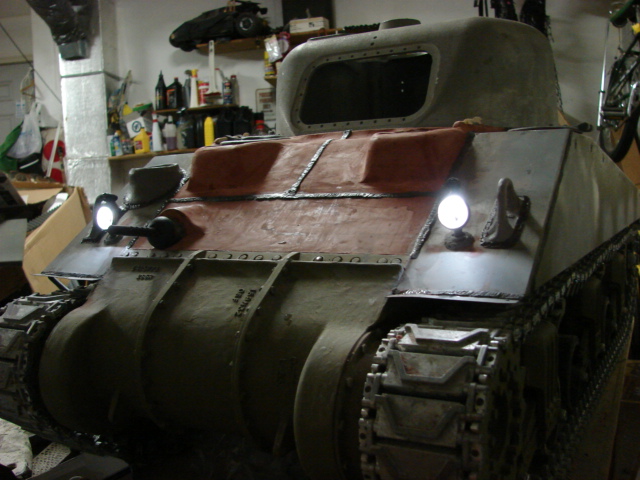
After the front hull rework I then added most of the front hull details. These details are off the shelf ECA and include the head lights, lift hooks.
One new addition to the ECA catalog is the addition of the early sherman hull front antenna base mount.
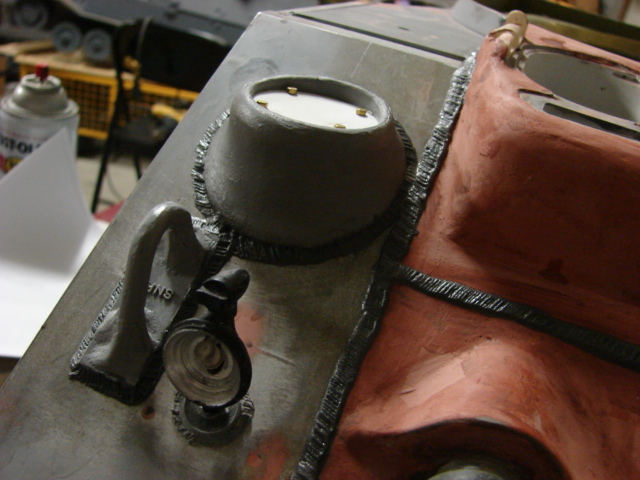
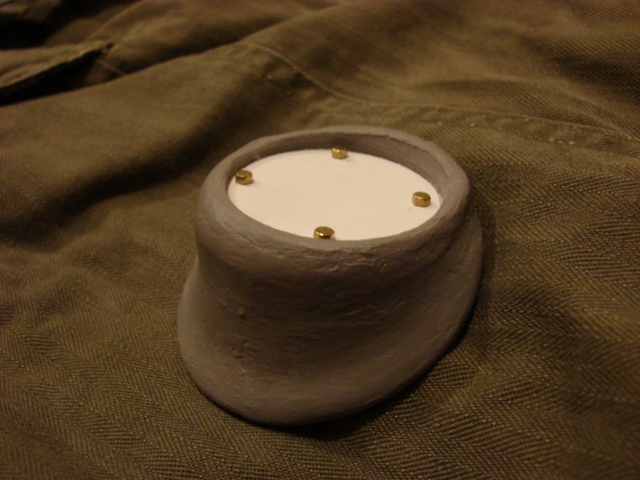
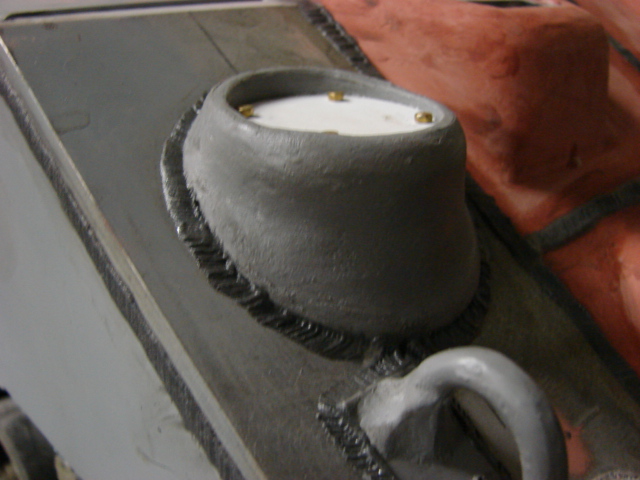
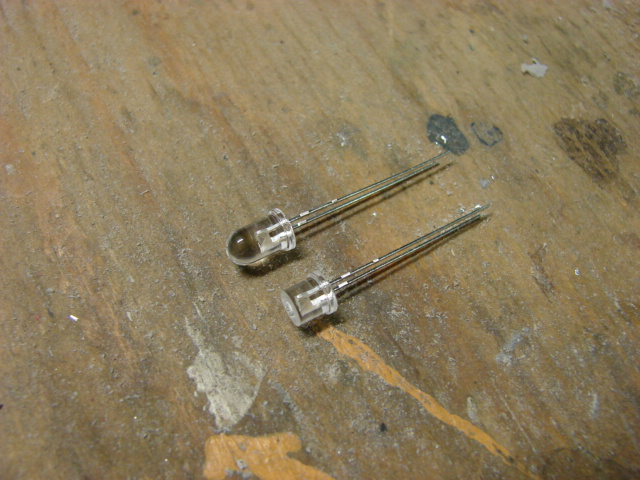
As for the headlights themselves they have been rigged to light via an LED. To better make the LED fit in the resin headlight housing I turned down the front portion of the led on the lathe.
Before I fitted the LEDs to the resin housing I first painted the entire searchlight silver, then Black on the exterior. The purpose of this is to insulate the resin casting and to remove the chance of the resin part "glowing" after the bright light is activated. Once all paint is dry the LED was fitted and mounted to the vehicle.
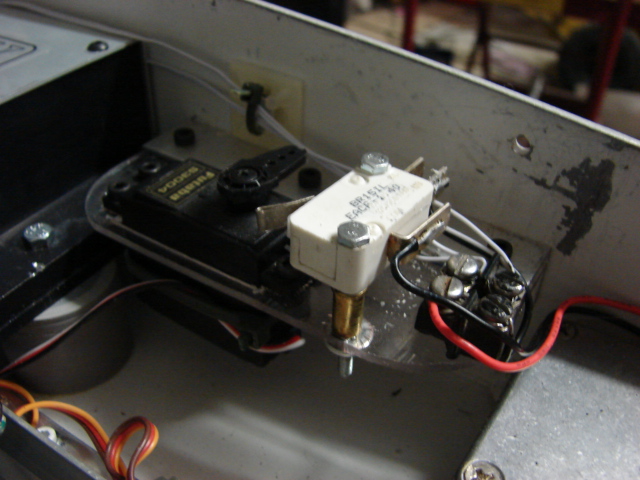
The lights on this model I configured to operate remotely. a remote activation switch was fabricated, along with a cut off so I can use the same channel for more than one operation... more on that to follow
Hello John.
As already mentioned on Facebook, your work is truly outstanding and the level of detail is amazing, as always in your work.
My most sincere congratulations!