Roy's StuG III (no. 2020/10)
Posted: Sun Oct 25, 2020 5:01 pm
Hi everyone,
Last week I took delivery of my StuG kit and already spent quit some time with it
Checked the inventory list, took a close look on how all the parts were made and packaged.
A sublime job, packed very sturdy, everything labeled very nice, good illustrations on the manual.
This is my first Armortek project and must say I'm very impressed with the machining quality, the way everything was packed and how everything was handled and communicated by Armortek, a big thumbs up!
To get myself familiar with the kit and to see how things go together, I started a dry fitting assembly. It won't go until the last part but far enough to figure out in which way or order I should paint parts, and assemble them afterwards, some perhaps as a painted subassembly and others as individual painted parts.
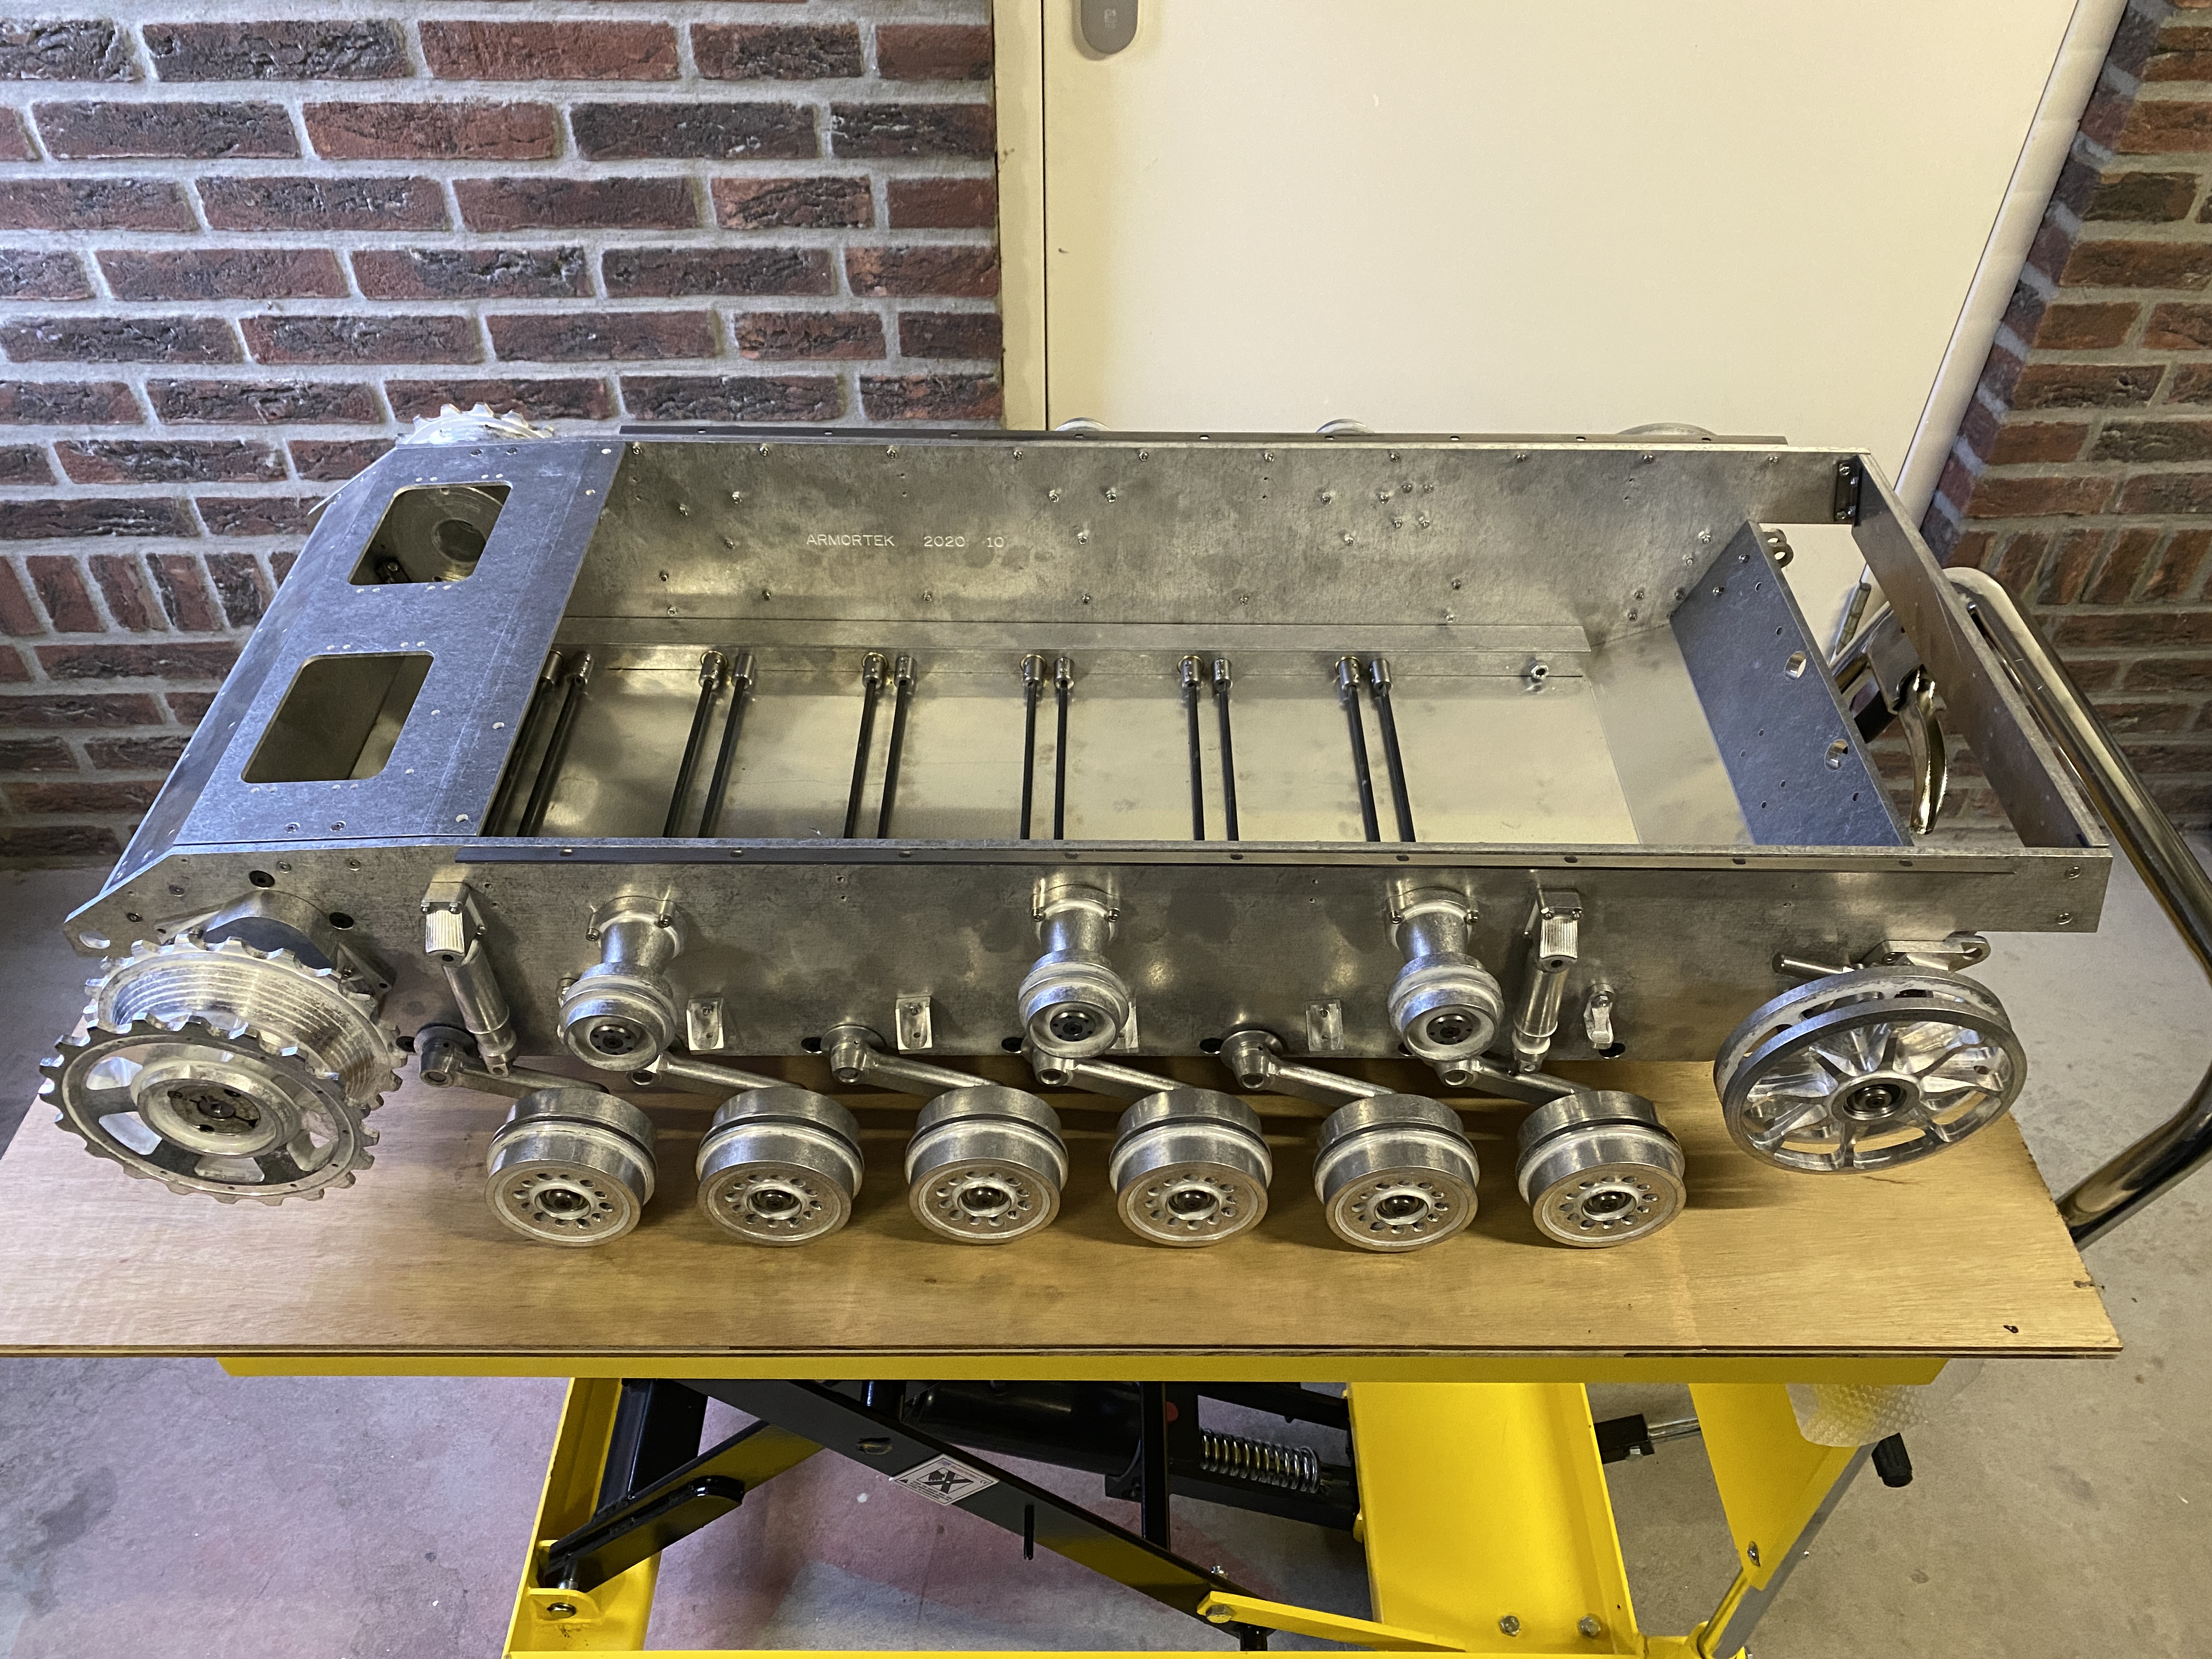
That all the parts are machined so well is proven by the fact that the photo below is the result of the past few days, just assembling, it all came together flawlessly
On this point none of the fasteners are tightened, glued, painted or lubricated, so I can take it apart easily.

On one point I did come across something that got me wondering. But maybe I'm misinterpreting it.
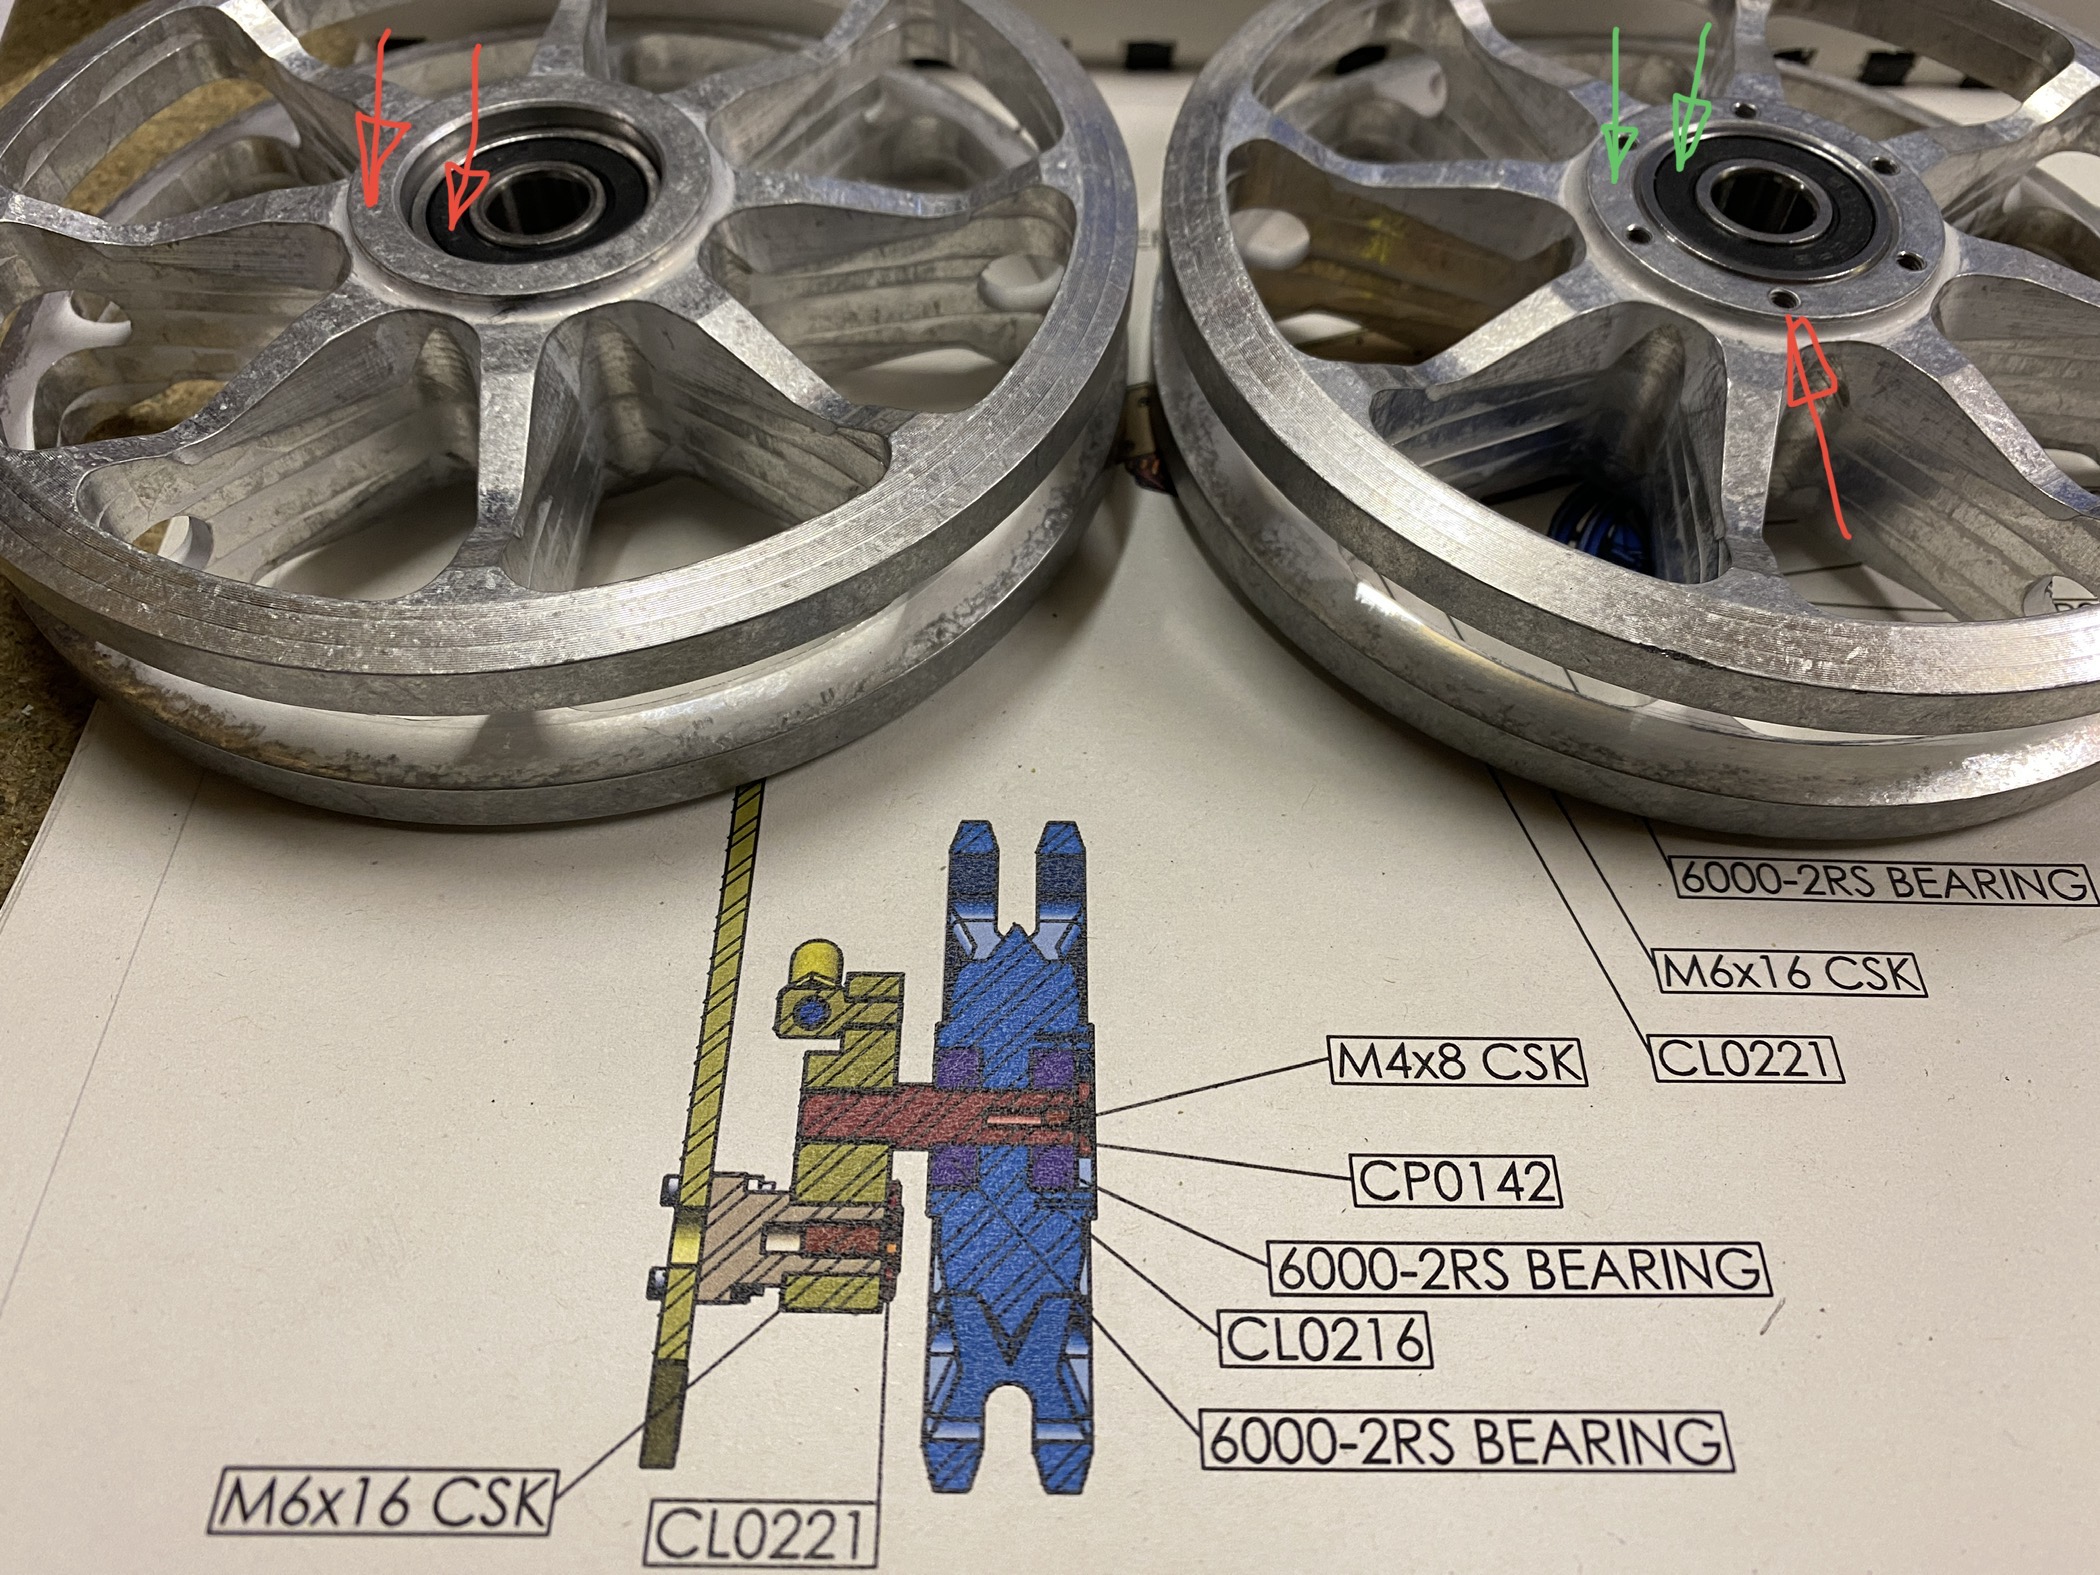
The idler wheels have two bearings in them. On one side the bearing is flush with the rim, on the other side it is sunken a few millimeters.
On that same side the manual states there are threaded holes in a circular pattern. But the actual idler wheel has these holes on the other side.
Anybody have a idea?

Last week I took delivery of my StuG kit and already spent quit some time with it
Checked the inventory list, took a close look on how all the parts were made and packaged.
A sublime job, packed very sturdy, everything labeled very nice, good illustrations on the manual.
This is my first Armortek project and must say I'm very impressed with the machining quality, the way everything was packed and how everything was handled and communicated by Armortek, a big thumbs up!
To get myself familiar with the kit and to see how things go together, I started a dry fitting assembly. It won't go until the last part but far enough to figure out in which way or order I should paint parts, and assemble them afterwards, some perhaps as a painted subassembly and others as individual painted parts.
That all the parts are machined so well is proven by the fact that the photo below is the result of the past few days, just assembling, it all came together flawlessly
On this point none of the fasteners are tightened, glued, painted or lubricated, so I can take it apart easily.
On one point I did come across something that got me wondering. But maybe I'm misinterpreting it.
The idler wheels have two bearings in them. On one side the bearing is flush with the rim, on the other side it is sunken a few millimeters.
On that same side the manual states there are threaded holes in a circular pattern. But the actual idler wheel has these holes on the other side.
Anybody have a idea?
