Roy's StuG III (no. 2020/10)

Forum for discussion relating to the Panzer III/StuG III
Post Reply
User avatar
Roy Beukeveld
Posts: 191
Joined: Fri Feb 14, 2020 7:23 pm
Location: The Netherlands
Has liked: 171 times
Been liked: 118 times
Contact:

Roy's StuG III (no. 2020/10)

Post by Roy Beukeveld »

Hi everyone,

Last week I took delivery of my StuG kit and already spent quit some time with it :-)
Checked the inventory list, took a close look on how all the parts were made and packaged.
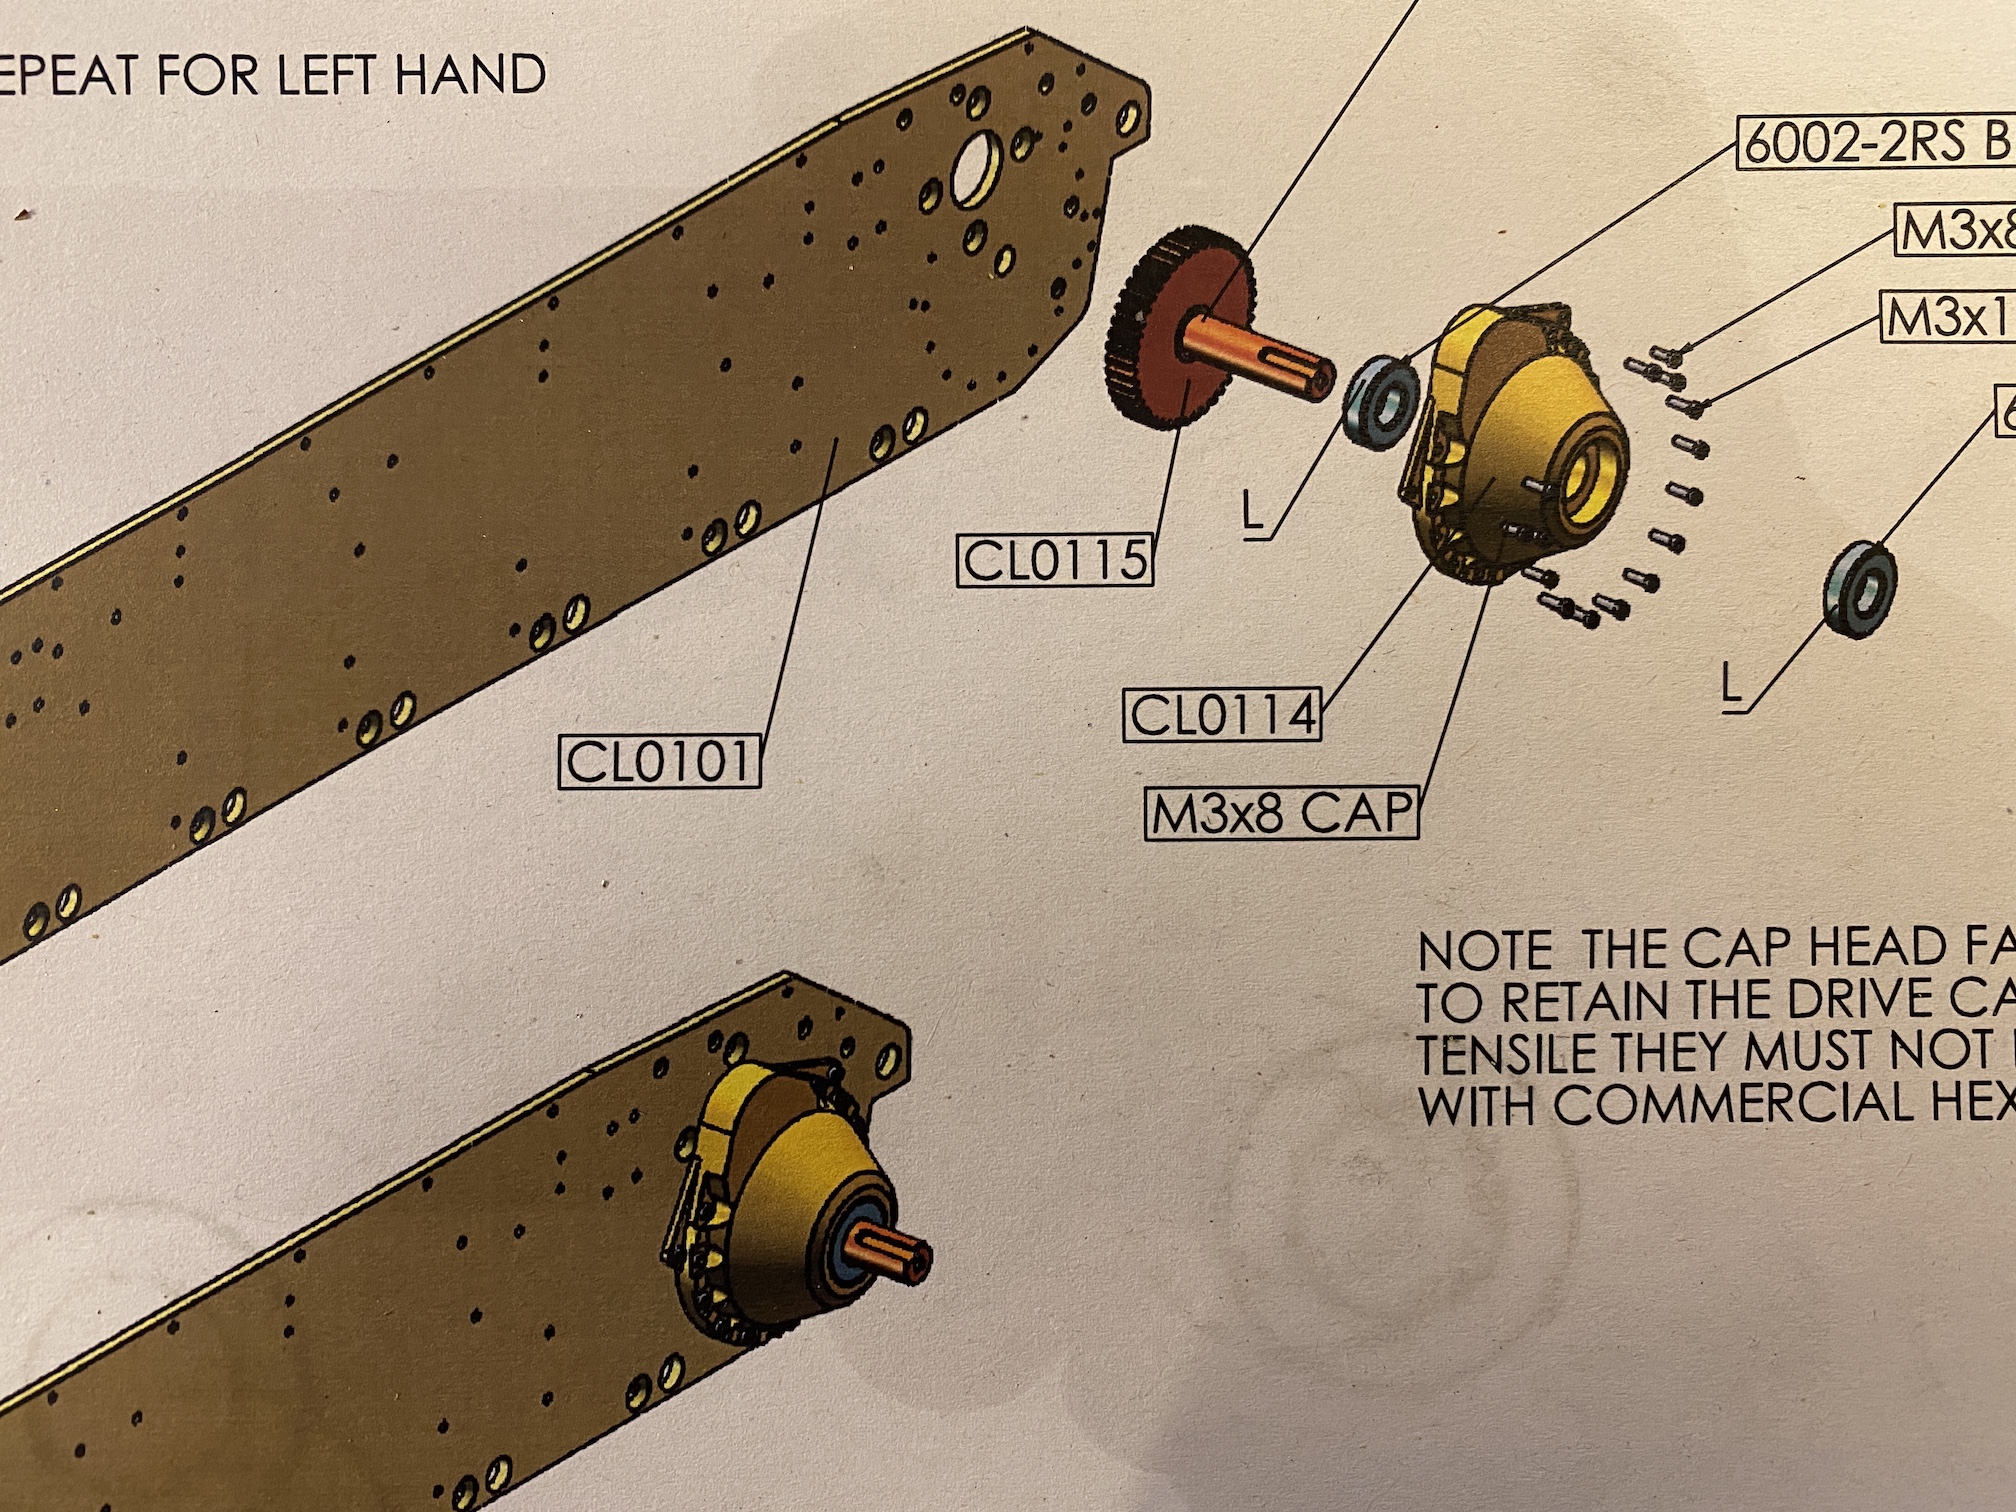
A sublime job, packed very sturdy, everything labeled very nice, good illustrations on the manual.

This is my first Armortek project and must say I'm very impressed with the machining quality, the way everything was packed and how everything was handled and communicated by Armortek, a big thumbs up!

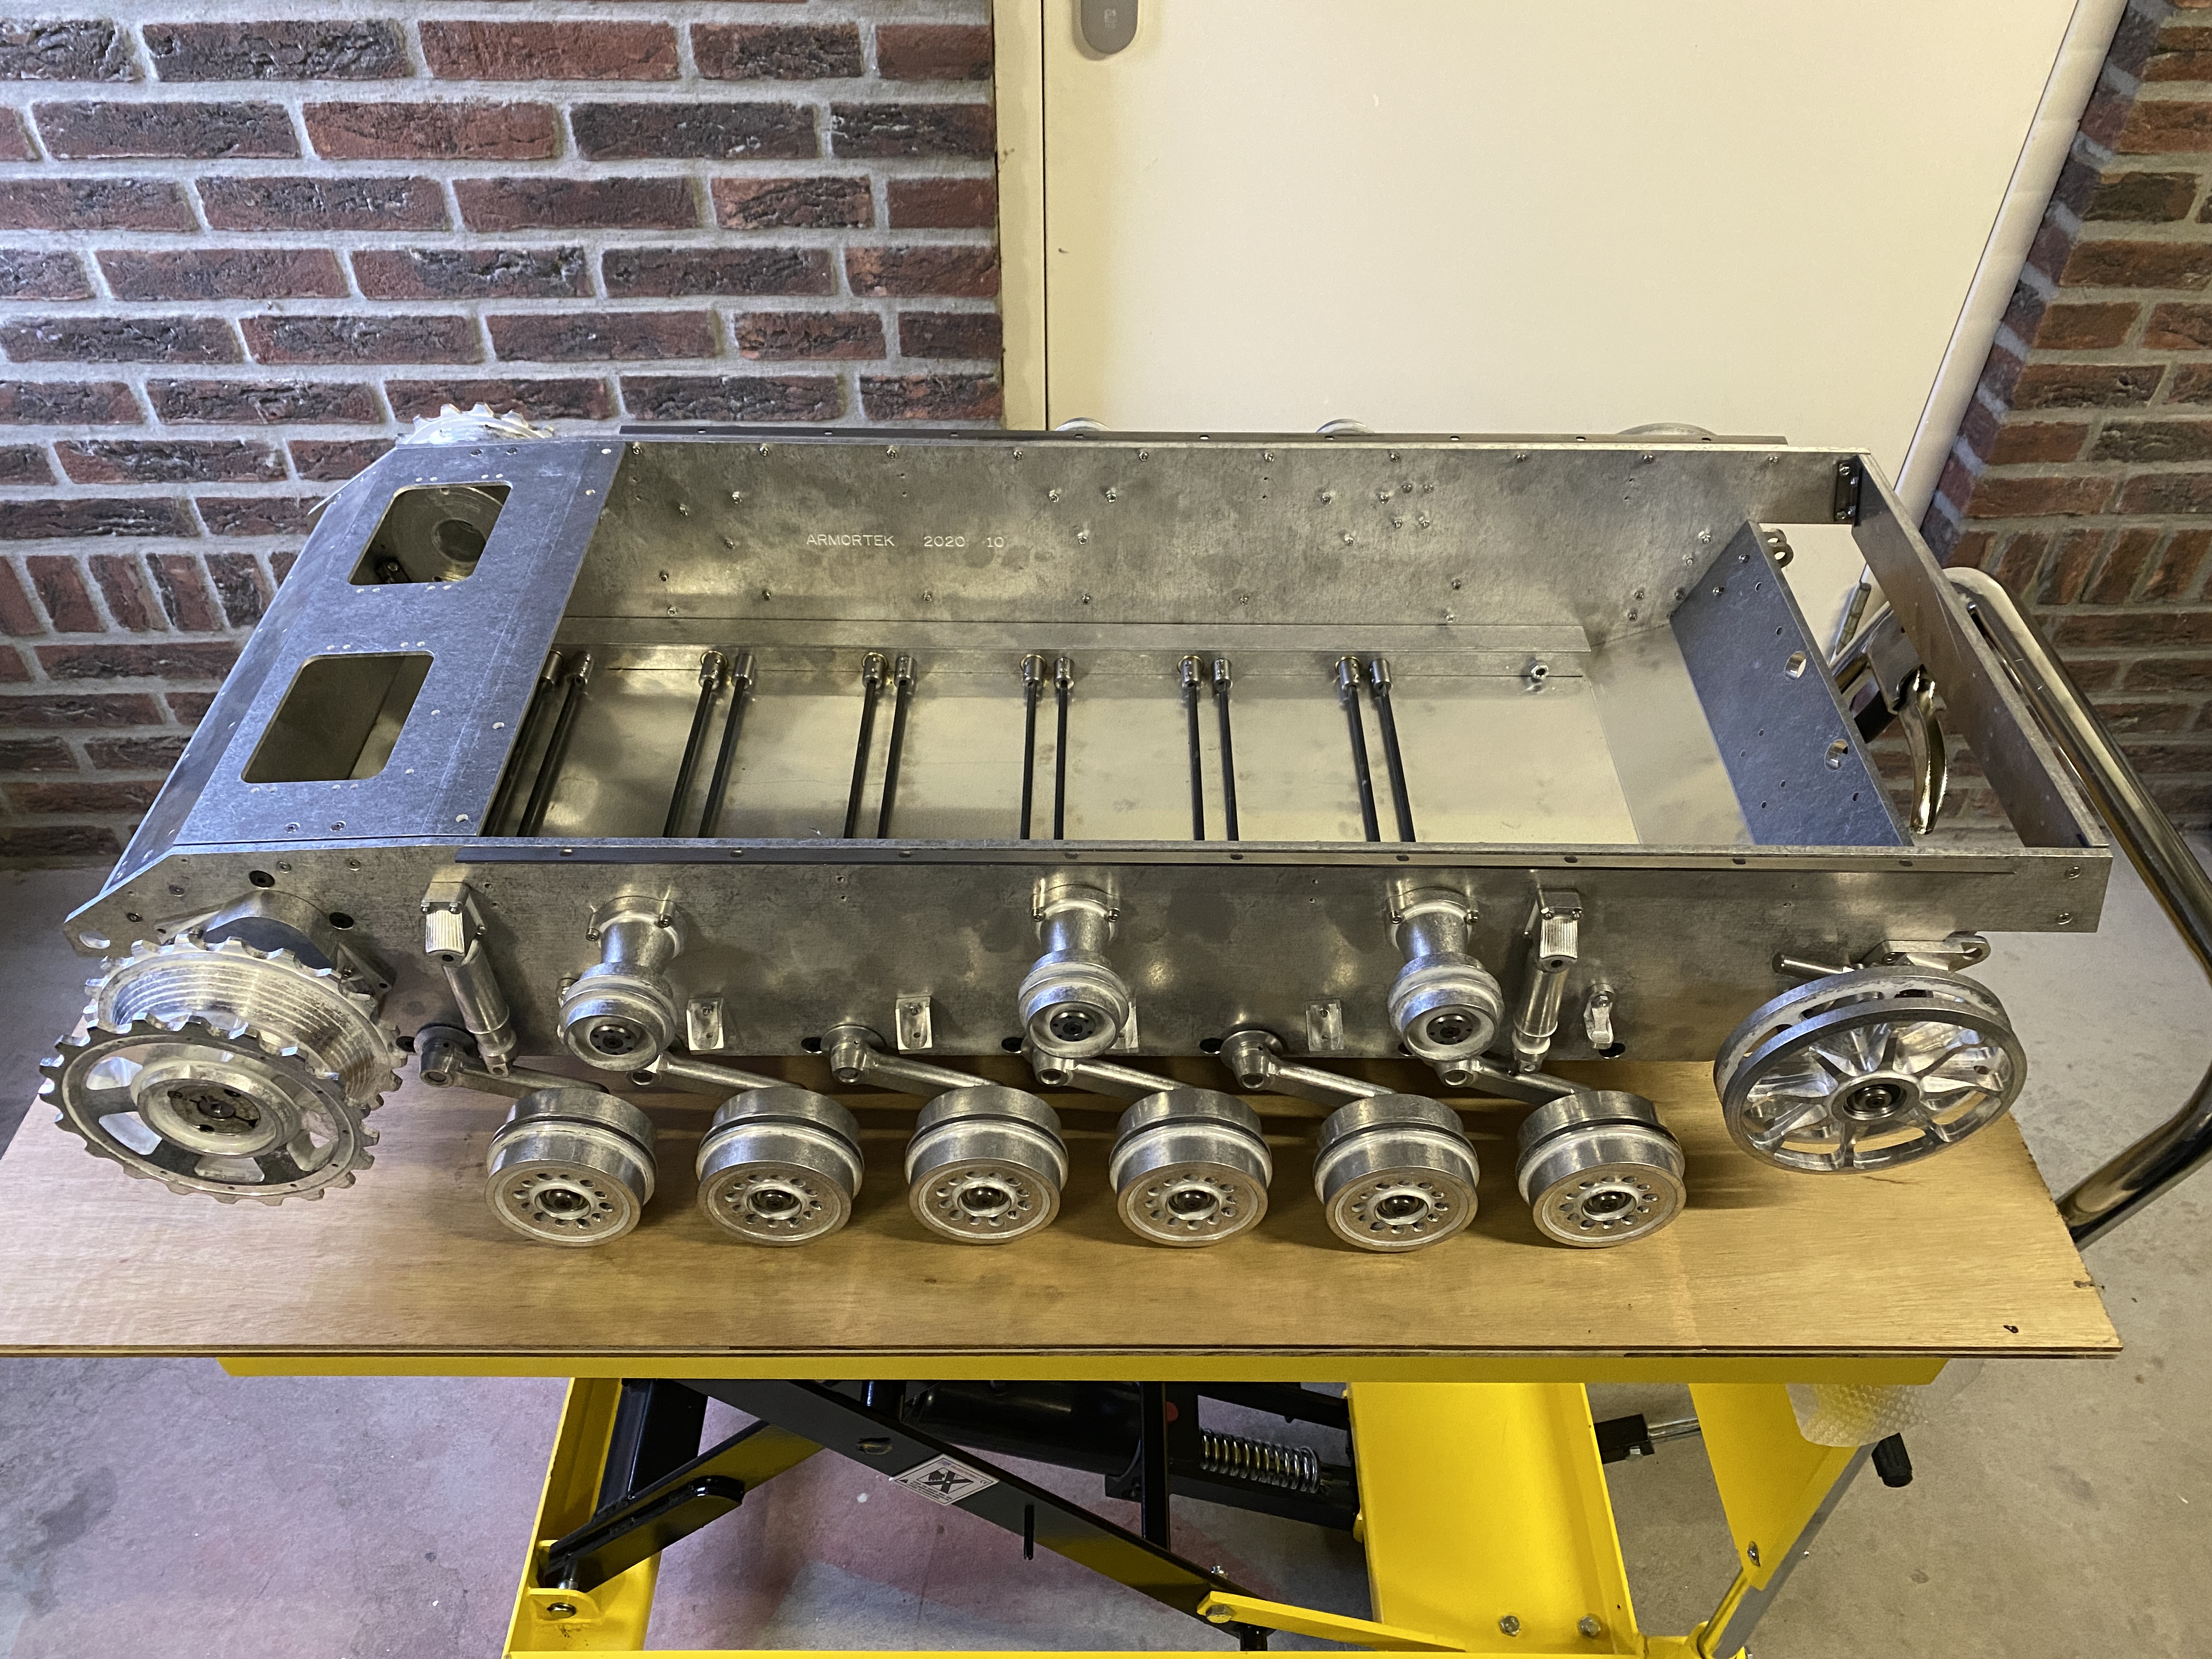
To get myself familiar with the kit and to see how things go together, I started a dry fitting assembly. It won't go until the last part but far enough to figure out in which way or order I should paint parts, and assemble them afterwards, some perhaps as a painted subassembly and others as individual painted parts.

That all the parts are machined so well is proven by the fact that the photo below is the result of the past few days, just assembling, it all came together flawlessly :-)
On this point none of the fasteners are tightened, glued, painted or lubricated, so I can take it apart easily.

Image

On one point I did come across something that got me wondering. But maybe I'm misinterpreting it.
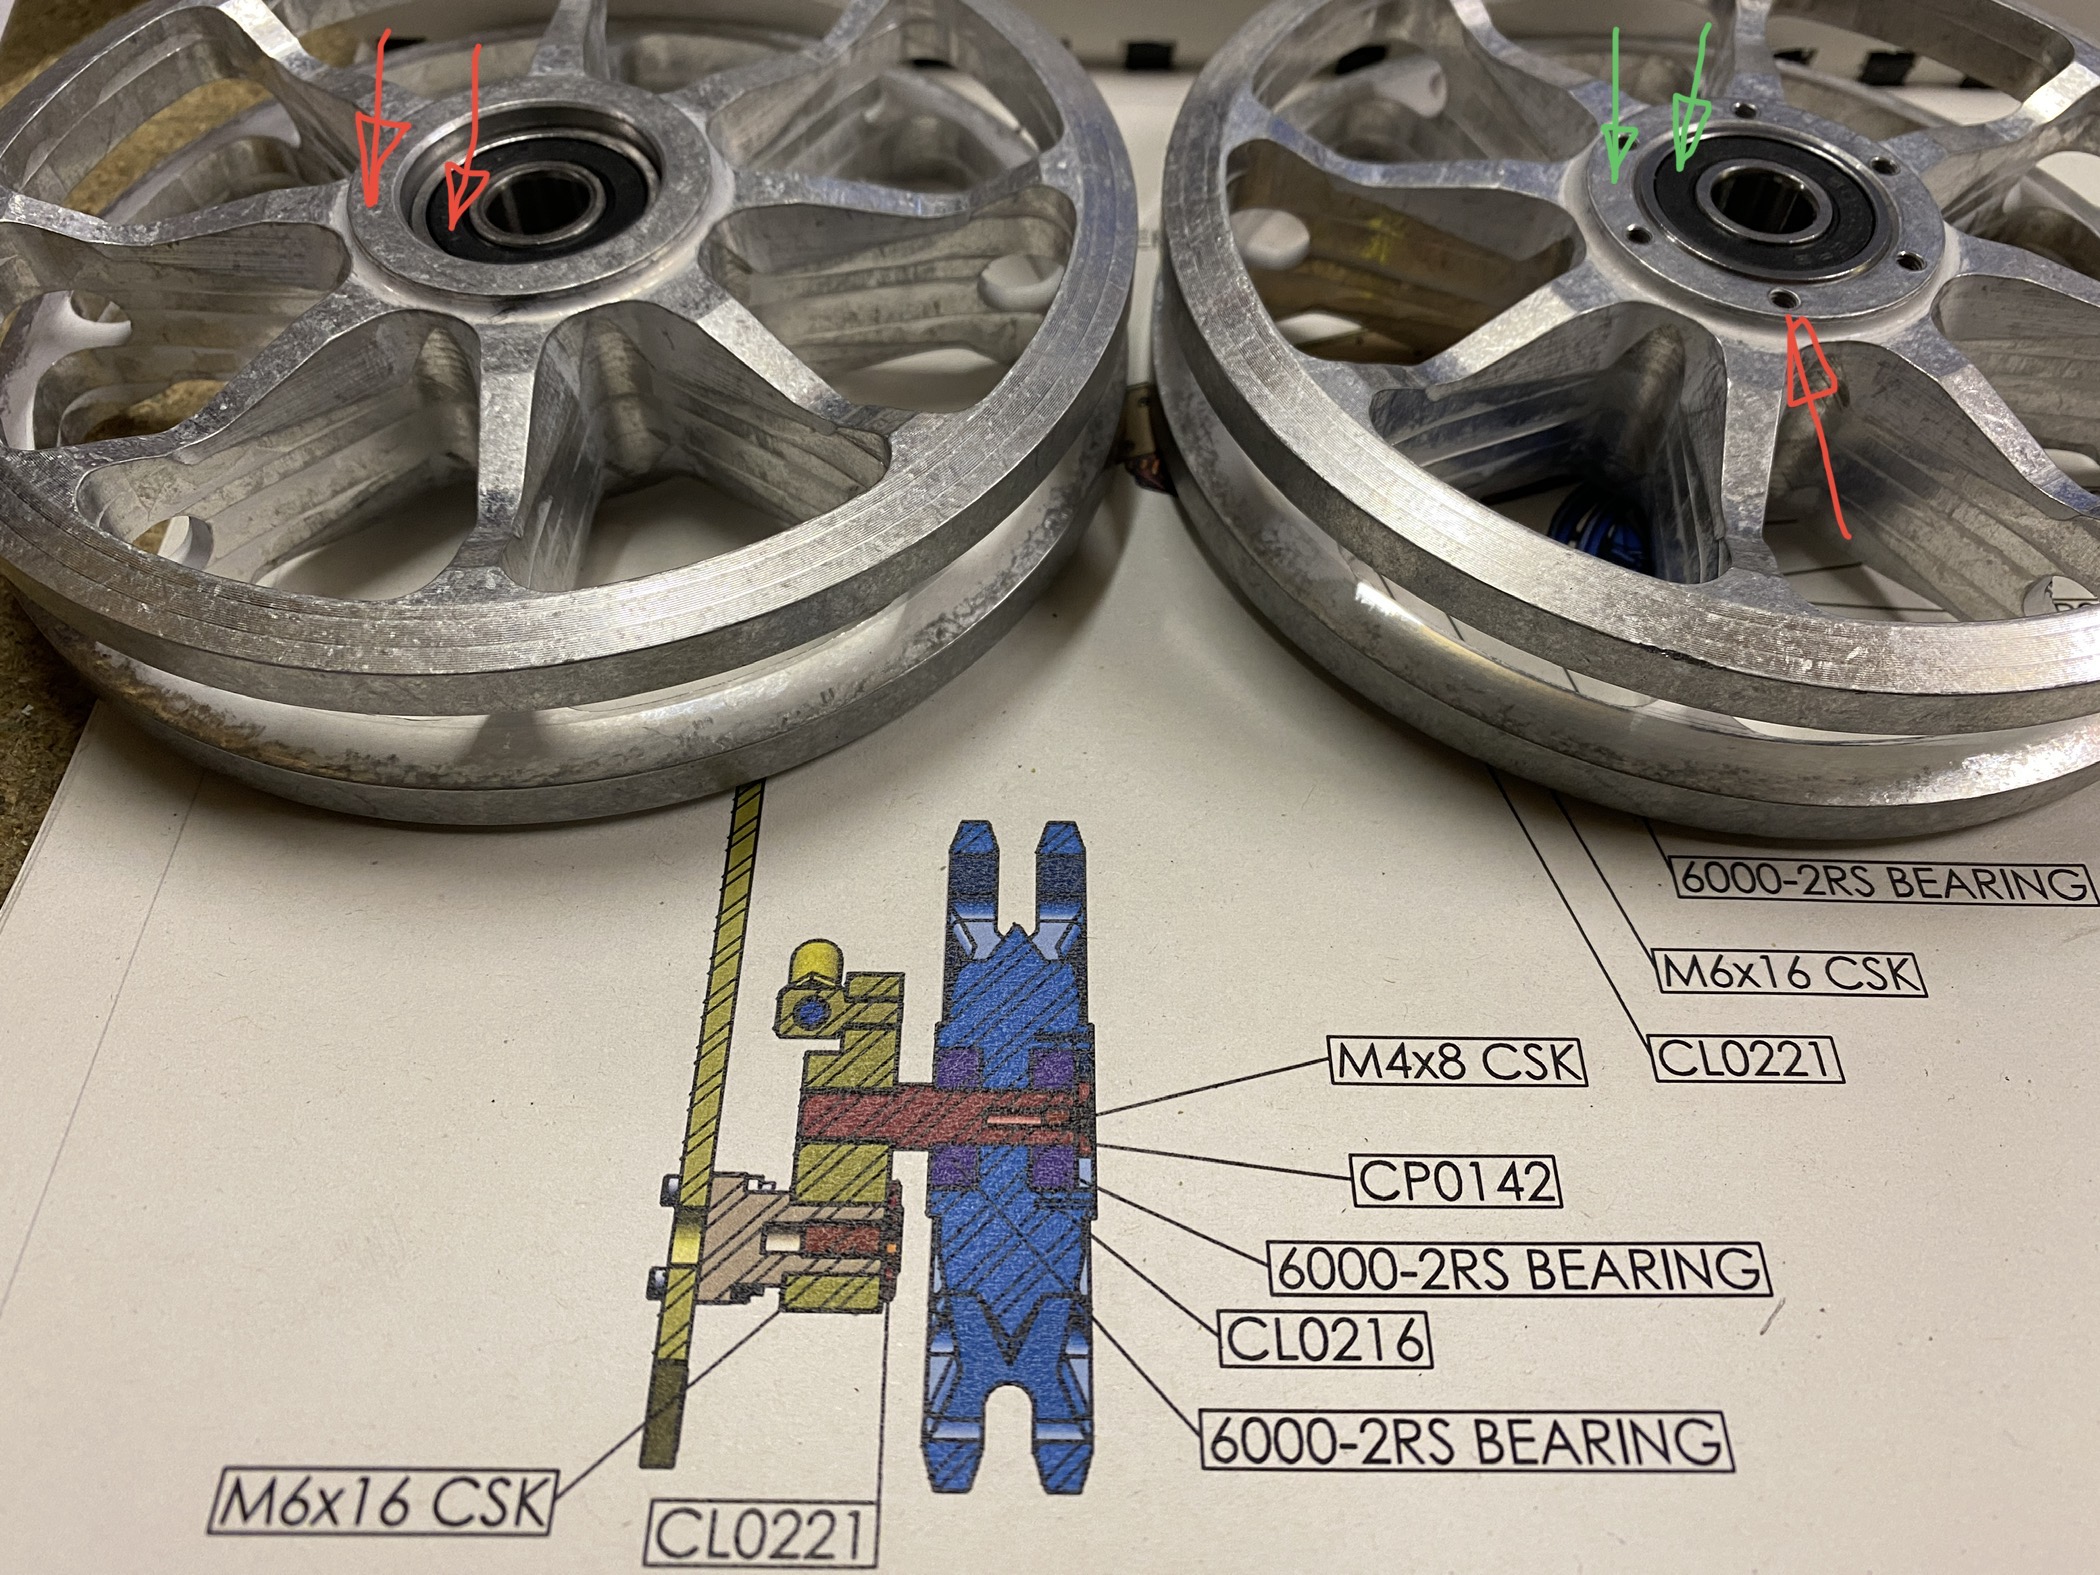
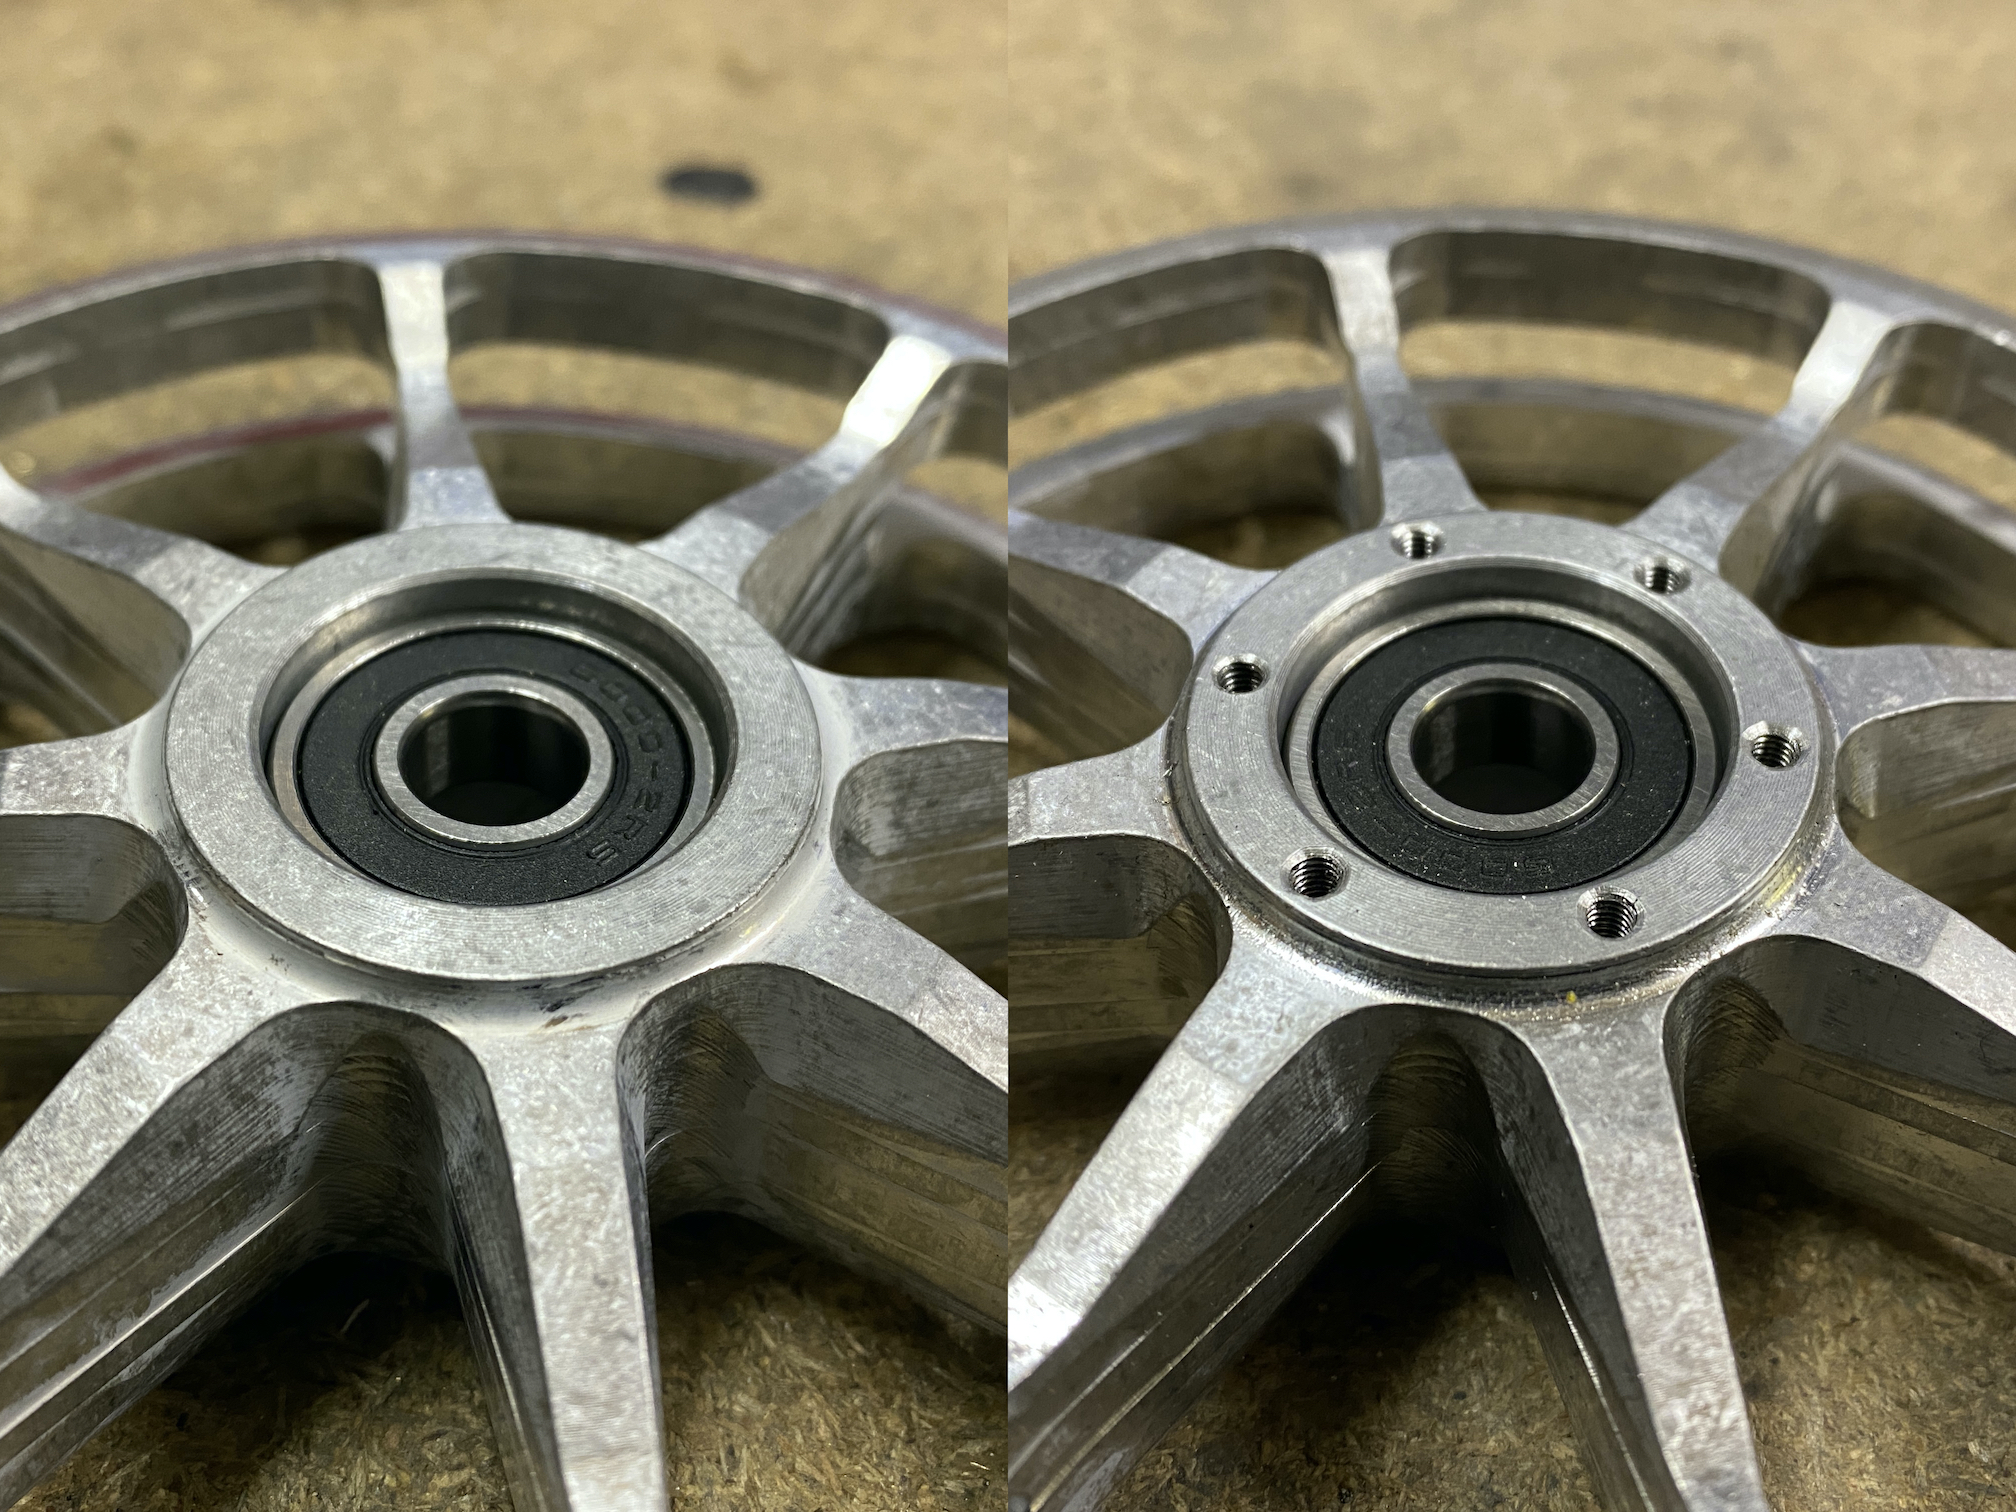
The idler wheels have two bearings in them. On one side the bearing is flush with the rim, on the other side it is sunken a few millimeters.
On that same side the manual states there are threaded holes in a circular pattern. But the actual idler wheel has these holes on the other side.

Anybody have a idea?

Image
Kind regards,
Roy

User avatar
Adrian Harris
Posts: 5035
Joined: Thu Jul 12, 2007 10:46 pm
Location: Berkshire (UK)
Has liked: 1341 times
Been liked: 1538 times

Re: Roy's StuG III (no. 2020/10)

Post by Adrian Harris »

I think the sunken one should have the six holes as the bearing that side is recessed to make room for the end cap which holds the idler on the shaft.

Idler.jpg
Idler.jpg (83.63 KiB) Viewed 7195 times

Adrian.
Contact me at sales@armortekaddict.uk for details of my smoker fan control module

User avatar
Robert E Morey
Posts: 2291
Joined: Wed Jul 18, 2007 12:59 am
Location: Seattle, WA USA
Has liked: 118 times
Been liked: 752 times

Re: Roy's StuG III (no. 2020/10)

Post by Robert E Morey »

The bearing on the idler on right (in your picture) should be pressed in further. It will interfere with hub cap if not lower. I agree also with Adrian - the one on left is missing the 6 threaded holes. Bob

LesBernell
Posts: 34
Joined: Sat Aug 22, 2020 10:17 pm
Location: Westlake Village, Calif
Has liked: 2 times
Been liked: 34 times

Re: Roy's StuG III (no. 2020/10)

Post by LesBernell »

If you flip the one on the right, and the bearing is recessed but no holes, and if you flip the one on the left, and the bearing is almost flush and there are holes, then it appears that the drilled/tapped holes for the hubcaps are on the wrong side of both idler wheels.
Mine are correct and have the recess and bolt holes on the same side.
Attachments
Hull 10-22-2020.jpg

User avatar
Roy Beukeveld
Posts: 191
Joined: Fri Feb 14, 2020 7:23 pm
Location: The Netherlands
Has liked: 171 times
Been liked: 118 times
Contact:

Re: Roy's StuG III (no. 2020/10)

Post by Roy Beukeveld »

Hi guys,

Seems we all came to the same conclusion, just wanted to check before altering the part.
Solution is an easy fix so no problem :)

Thanks for the replies!
Kind regards,
Roy

User avatar
Roy Beukeveld
Posts: 191
Joined: Fri Feb 14, 2020 7:23 pm
Location: The Netherlands
Has liked: 171 times
Been liked: 118 times
Contact:

Re: Roy's StuG III (no. 2020/10)

Post by Roy Beukeveld »

Drilled new holes in the idler wheels, and cut thread in them, all fixed now :D

Image

Continued exploring the kit by dry fitting the rear deck, and also started on the fighting compartment :D

Image
Kind regards,
Roy

simon_manning
Posts: 2018
Joined: Fri Nov 02, 2007 8:51 pm
Location: new forest,hampshire,u.k.
Been liked: 1627 times

Re: Roy's StuG III (no. 2020/10)

Post by simon_manning »

Nice to see some more stug's coming together, a great vehicle with lot's of option's, keep the build thread coming Roy, regards simon manning.

User avatar
Roy Beukeveld
Posts: 191
Joined: Fri Feb 14, 2020 7:23 pm
Location: The Netherlands
Has liked: 171 times
Been liked: 118 times
Contact:

Re: Roy's StuG III (no. 2020/10)

Post by Roy Beukeveld »

Hi Simon,

I agree, a great vehicle indeed and lots of options and details can put onto it.
Currently working on the fighting compartment and barrel, there are some heavy pieces of aluminium in there, impressive...! :shock:
Kind regards,
Roy

florian rudolf
Posts: 667
Joined: Mon Feb 29, 2016 10:53 am
Has liked: 288 times
Been liked: 637 times
Contact:

Re: Roy's StuG III (no. 2020/10)

Post by florian rudolf »

It's pne of the best tanks indeed.
I've build allready one from AT before. - It was nice.
The StuG is not too big and heavy so good for transport, but impressive enough for a nice time to drive.

I'm happy to see lots of StuG's soon somewhere at a meeting :D

User avatar
Roy Beukeveld
Posts: 191
Joined: Fri Feb 14, 2020 7:23 pm
Location: The Netherlands
Has liked: 171 times
Been liked: 118 times
Contact:

Re: Roy's StuG III (no. 2020/10)

Post by Roy Beukeveld »

Hi Florian,

Yes i think so too, scale and weight wise i really like it.
I don’t know how many Armortek produced in this batch but a few sturmbatterien are definitely in the making :D
Kind regards,
Roy

florian rudolf
Posts: 667
Joined: Mon Feb 29, 2016 10:53 am
Has liked: 288 times
Been liked: 637 times
Contact:

Re: Roy's StuG III (no. 2020/10)

Post by florian rudolf »

Hello Roy,
I think about 50 kits
Yes that would be a nice meeting with so many StuG's

User avatar
Roy Beukeveld
Posts: 191
Joined: Fri Feb 14, 2020 7:23 pm
Location: The Netherlands
Has liked: 171 times
Been liked: 118 times
Contact:

Re: Roy's StuG III (no. 2020/10)

Post by Roy Beukeveld »

Hi guys,

The gear drive casing is mounted to the hull side plate.
What would be wise to do regarding spray painting the hull plate?

The gear runs alongside the hull plate, what if it could get in touch with it on some point? It runs free for now but will it also run free under load? Some scraping could occur?

Would it be good to spray paint the entire side plate and then mount the casing to it, or mount the casing first and spray both parts as an assembly simultaneously?

Any advice on how to do this?

Image
Kind regards,
Roy

User avatar
Adrian Harris
Posts: 5035
Joined: Thu Jul 12, 2007 10:46 pm
Location: Berkshire (UK)
Has liked: 1341 times
Been liked: 1538 times

Re: Roy's StuG III (no. 2020/10)

Post by Adrian Harris »

I would use etch primer on both parts before assembly.

Does the line going to the inner end of the drive shaft indicate adding Loctite ? If so, this will hold the gear in place inside the housing, so it shouldn't be able to contact the hull.

A lot of the models I have bought secondhand have witness marks on the hull sides from the gear as it wasn't fixed in place.

Adrian.
Contact me at sales@armortekaddict.uk for details of my smoker fan control module

User avatar
Steen Vøler
Posts: 770
Joined: Mon Nov 19, 2012 2:45 pm
Location: Denmark
Has liked: 62 times
Been liked: 498 times

Re: Roy's StuG III (no. 2020/10)

Post by Steen Vøler »

Hi Adrian
Yes the manual says loctite on the shaft for the bearing
cheers
Steen

User avatar
Roy Beukeveld
Posts: 191
Joined: Fri Feb 14, 2020 7:23 pm
Location: The Netherlands
Has liked: 171 times
Been liked: 118 times
Contact:

Re: Roy's StuG III (no. 2020/10)

Post by Roy Beukeveld »

Hi Adrian and Steen,

Yes it indicates the use of loctite on that place and on the outer surface of the bearing.
If that does the trick than my question is answered indeed, thanks Adrian! :D
Kind regards,
Roy

Post Reply