Yves Stug III update
-
Roy Beukeveld

- Posts: 191
- Joined: Fri Feb 14, 2020 7:23 pm
- Location: The Netherlands
- Has liked: 171 times
- Been liked: 118 times
- Contact:
Re: Yves Stug III update
Nice work Yves, the packs look really good, I think your first testdrive isn't far away 
Kind regards,
Roy
Roy
-
yves mouton
- Posts: 971
- Joined: Fri Nov 06, 2009 7:55 pm
- Location: Belgium
- Has liked: 1 time
- Been liked: 514 times
Re: Yves Stug III update
Hello Roy,
There is still a lot to do before i can drive, i will need a little help from a friend
Sven Strobbe to program my Graupner MX 24 and bind the receiver with the transmitter.
The battery tray is primed, so tomorrow i am gonna place the tray,
and gonna work on the gun compartment and try to fix all the modules in place.
Later on i will put the wheels on and look how the suspension angle sets by the full weight.
When my tanks not running, they all have a little lift under them to raise the tank from the tracks,
so the suspension is not under load.
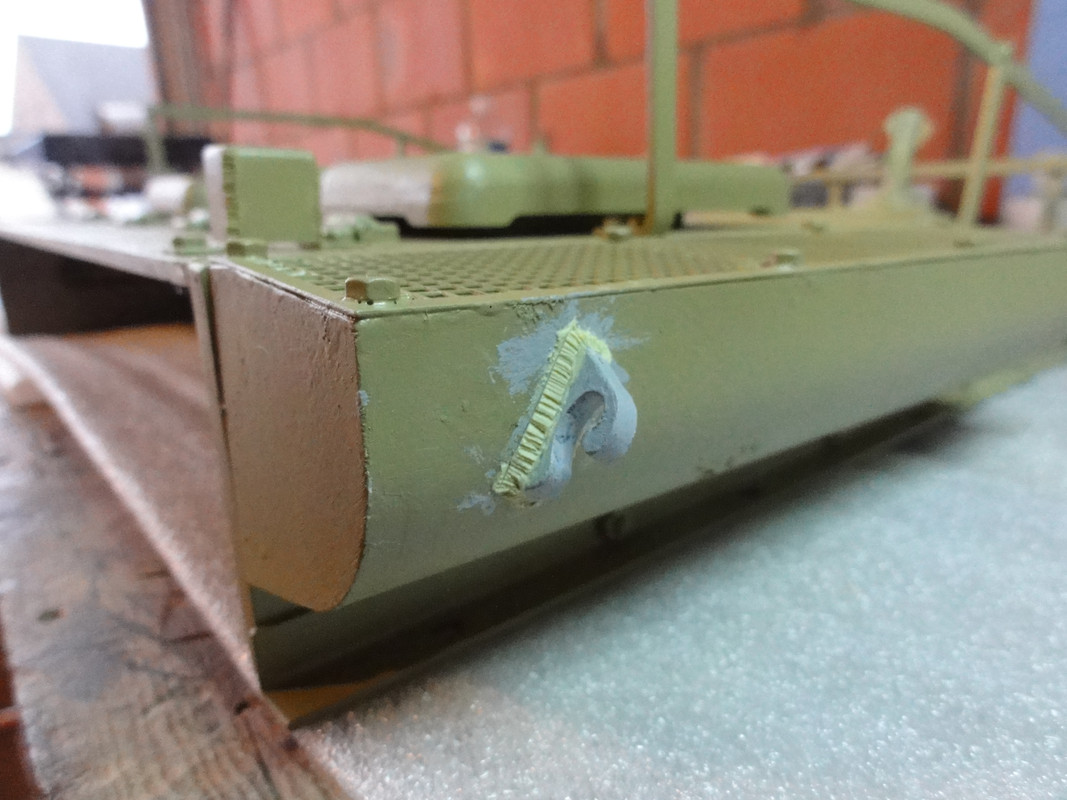
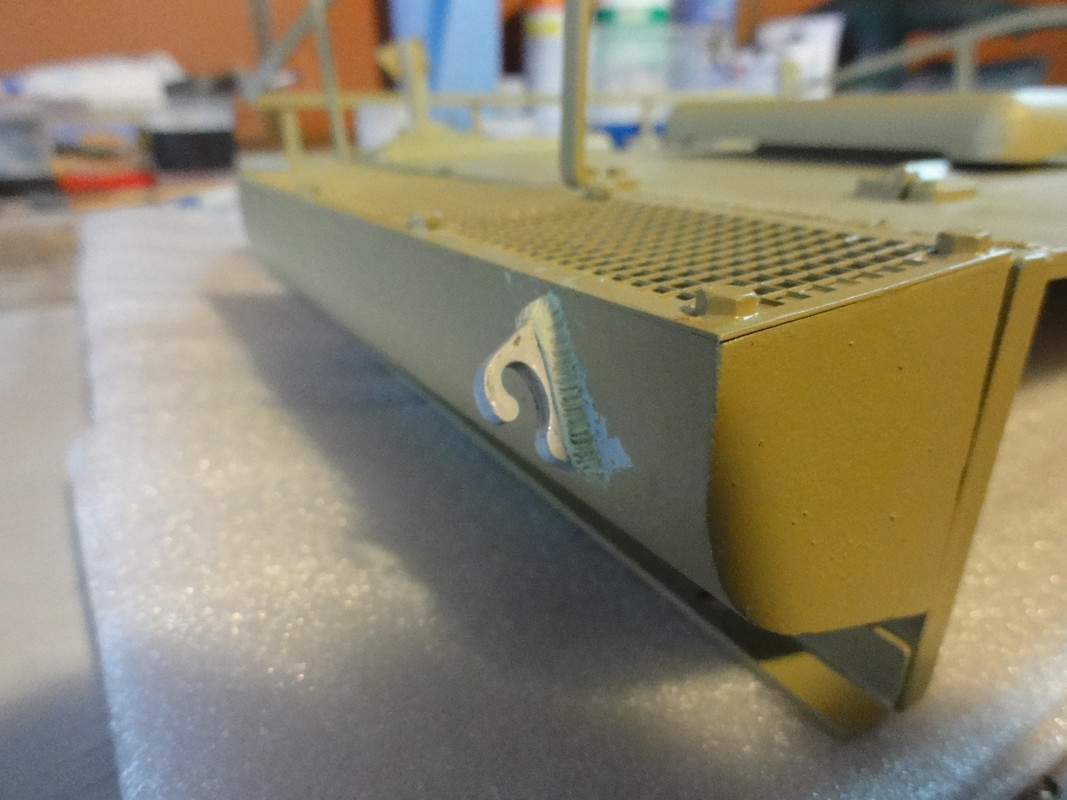
Also put some extra details on 2 lift hooks on the side of the stug ( sides where the grills are )
Best regards Yves
There is still a lot to do before i can drive, i will need a little help from a friend
Sven Strobbe to program my Graupner MX 24 and bind the receiver with the transmitter.
The battery tray is primed, so tomorrow i am gonna place the tray,
and gonna work on the gun compartment and try to fix all the modules in place.
Later on i will put the wheels on and look how the suspension angle sets by the full weight.
When my tanks not running, they all have a little lift under them to raise the tank from the tracks,
so the suspension is not under load.
Also put some extra details on 2 lift hooks on the side of the stug ( sides where the grills are )
Best regards Yves
-
Roy Beukeveld
- Posts: 191
- Joined: Fri Feb 14, 2020 7:23 pm
- Location: The Netherlands
- Has liked: 171 times
- Been liked: 118 times
- Contact:
Re: Yves Stug III update
Do you use this lift as well for settings the the right angle?yves mouton wrote: ↑Fri Dec 18, 2020 7:34 pm...Later on i will put the wheels on and look how the suspension angle sets by the full weight.
When my tanks not running, they all have a little lift under them to raise the tank from the tracks,
so the suspension is not under load...
I'm thinking of putting the model up to such a height that the wheel arms touch the floor and have the right angle.
Then tighten the fixed ends. Would this work? How do you adjust the arms?
Kind regards,
Roy
Roy
-
yves mouton
- Posts: 971
- Joined: Fri Nov 06, 2009 7:55 pm
- Location: Belgium
- Has liked: 1 time
- Been liked: 514 times
Re: Yves Stug III update
Hello Roy,
About use the lift to set the suspension angle is a very good idea i never tought about that.
Normaly i use a adjustable square to determine the angle of the suspension and set the arms one at the time.
Now i am gonna use the lift as extra help to set the height of the arms.
Best regards Yves
About use the lift to set the suspension angle is a very good idea i never tought about that.
Normaly i use a adjustable square to determine the angle of the suspension and set the arms one at the time.
Now i am gonna use the lift as extra help to set the height of the arms.
Best regards Yves
-
Roy Beukeveld
- Posts: 191
- Joined: Fri Feb 14, 2020 7:23 pm
- Location: The Netherlands
- Has liked: 171 times
- Been liked: 118 times
- Contact:
Re: Yves Stug III update
Hi Yves, nice to hear that my idea will be useful
Some say that it is wise to set the front arms slightly higher because of the motor weight.
I thought that if you lift the front a bit higher then the rear, you can set al arms accordingly when they are touching the table.
You smooth out the higher front angle that way...
Some say that it is wise to set the front arms slightly higher because of the motor weight.
I thought that if you lift the front a bit higher then the rear, you can set al arms accordingly when they are touching the table.
You smooth out the higher front angle that way...
Kind regards,
Roy
Roy
-
yves mouton
- Posts: 971
- Joined: Fri Nov 06, 2009 7:55 pm
- Location: Belgium
- Has liked: 1 time
- Been liked: 514 times
Re: Yves Stug III update
Hello Roy,
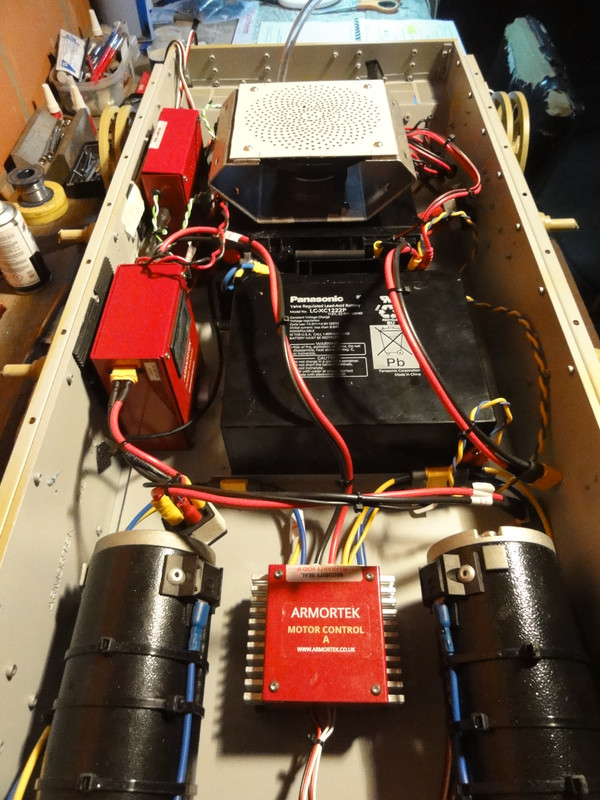
About the weight, the motors aint that heavy, the batteries have a lot of more weight. ( weight of both batteries is 13,2 kg )
I dont know how mutch everything weight but i think the weight will be equally over the stug.
I will check this out with a scale.
regards Yves
About the weight, the motors aint that heavy, the batteries have a lot of more weight. ( weight of both batteries is 13,2 kg )
I dont know how mutch everything weight but i think the weight will be equally over the stug.
I will check this out with a scale.
regards Yves
-
yves mouton
- Posts: 971
- Joined: Fri Nov 06, 2009 7:55 pm
- Location: Belgium
- Has liked: 1 time
- Been liked: 514 times
Re: Yves Stug III update
Hello
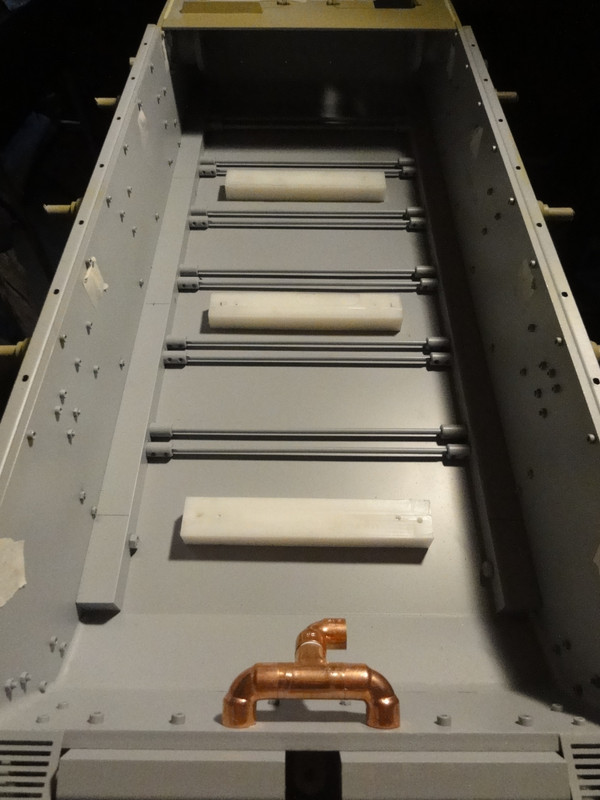
Made 3 extra battery trey supports, place the velcro pads for all the modules,
and put the motors in.
Sanding and primed all the fighting compartment parts
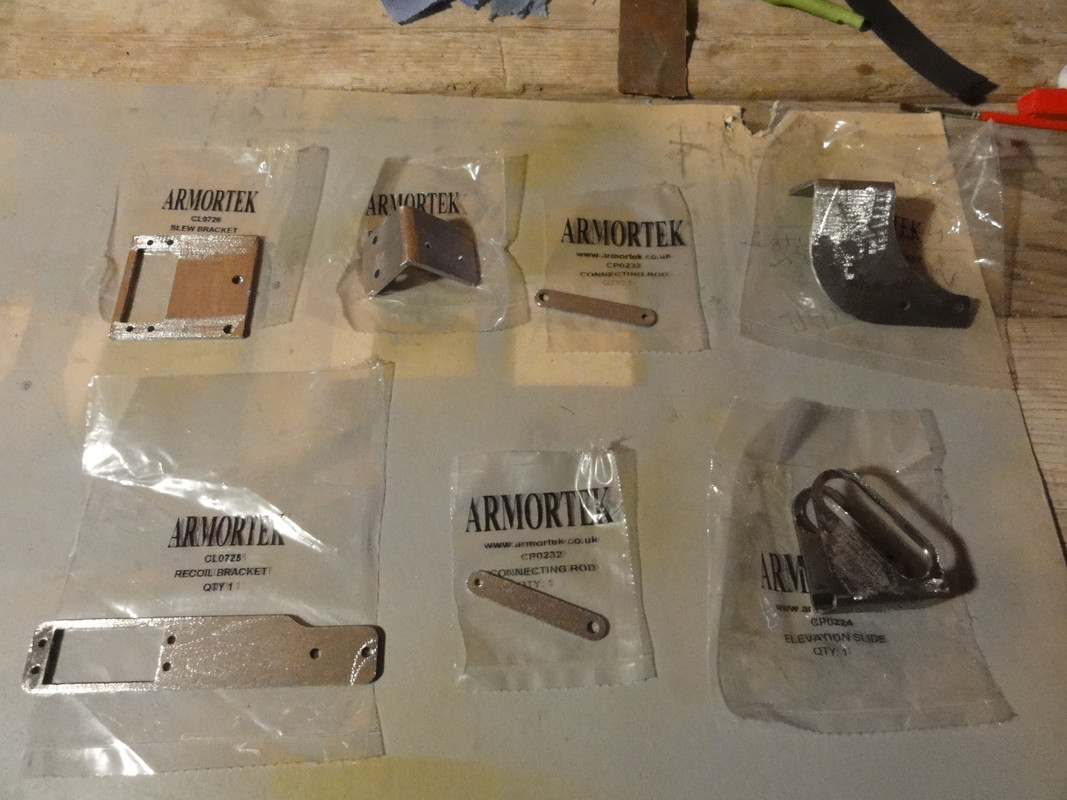
Put all the parts in the compartment with servo's and the recoil and module b

Best regards Yves
Made 3 extra battery trey supports, place the velcro pads for all the modules,
and put the motors in.
Sanding and primed all the fighting compartment parts
Put all the parts in the compartment with servo's and the recoil and module b
Best regards Yves
-
Roy Beukeveld
- Posts: 191
- Joined: Fri Feb 14, 2020 7:23 pm
- Location: The Netherlands
- Has liked: 171 times
- Been liked: 118 times
- Contact:
Re: Yves Stug III update
Hi Yves, nice work, you are making good progress
(My first idea would have been to put them in line of each other).
Why did you put the two batteries staggered in relation to each other?
(My first idea would have been to put them in line of each other).
Kind regards,
Roy
Roy
-
yves mouton
- Posts: 971
- Joined: Fri Nov 06, 2009 7:55 pm
- Location: Belgium
- Has liked: 1 time
- Been liked: 514 times
Re: Yves Stug III update
Hello Roy,
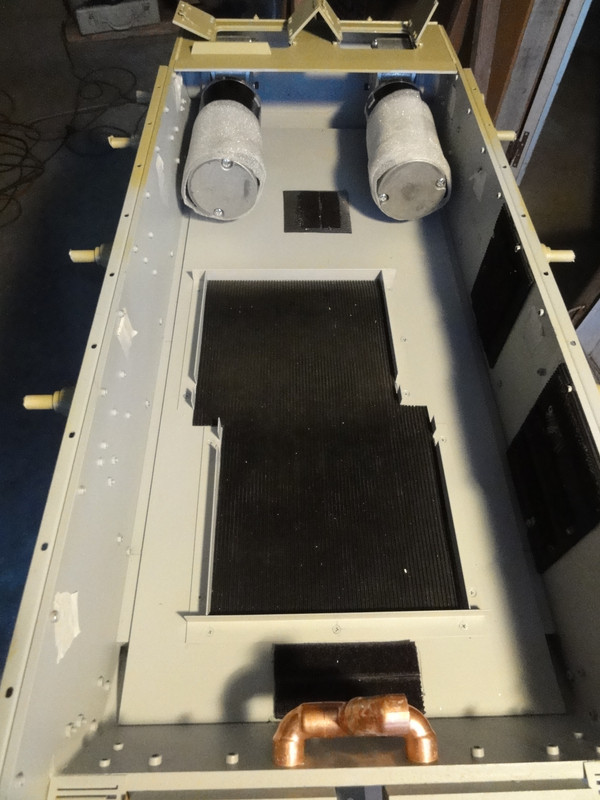
I put them out of line to distribute the weight evenly and also you can see later that my sound module comes on the back
of the stug next to one of the batteries. The power module comes next to the batterie on the front ( module is thicker than the sound module )
That's also one of the reasons that the batteries out of line.
I will post later a picture of my mudule and speaker setup.
Regards Yves
-
yves mouton
- Posts: 971
- Joined: Fri Nov 06, 2009 7:55 pm
- Location: Belgium
- Has liked: 1 time
- Been liked: 514 times
Re: Yves Stug III update
Hello,
Today i put everything in the stug to test the suspension angle,
first i set every arm on 30° but that was for the 2 front arms ( on each side ) a little to low.
So i put the 2 front arms on 36° ( on each side ) so when the stug is on his wheels ( full load )
all the arm angle is on 20°
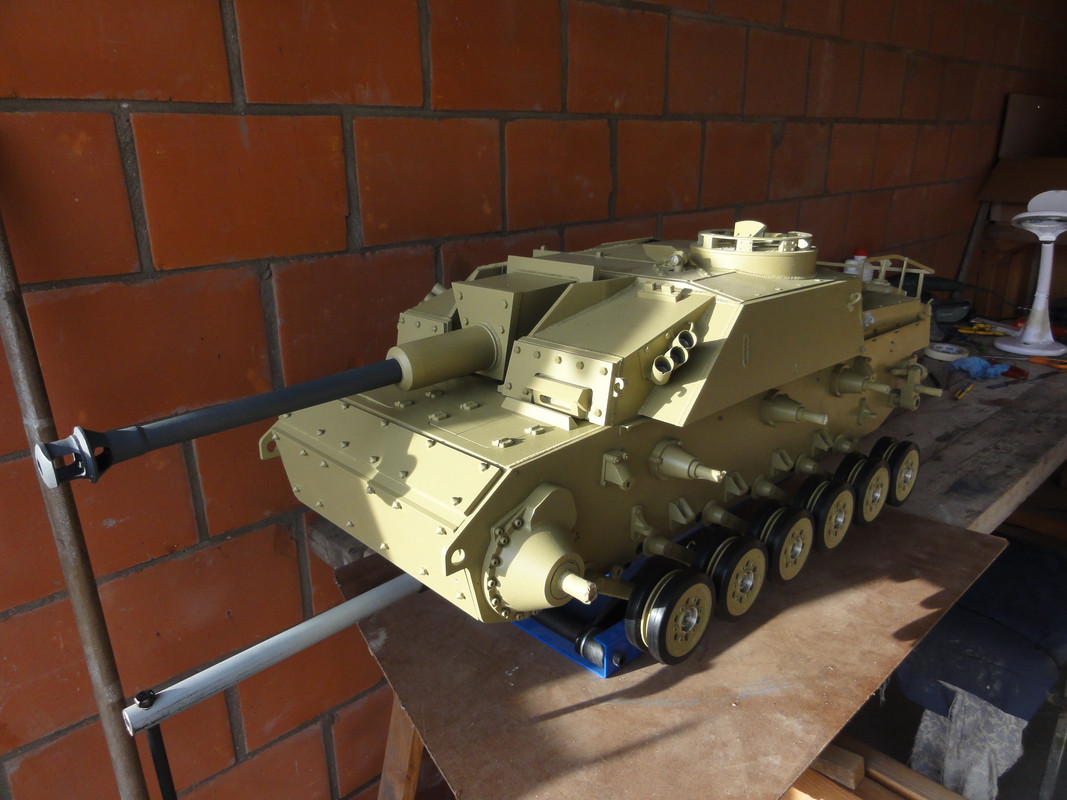
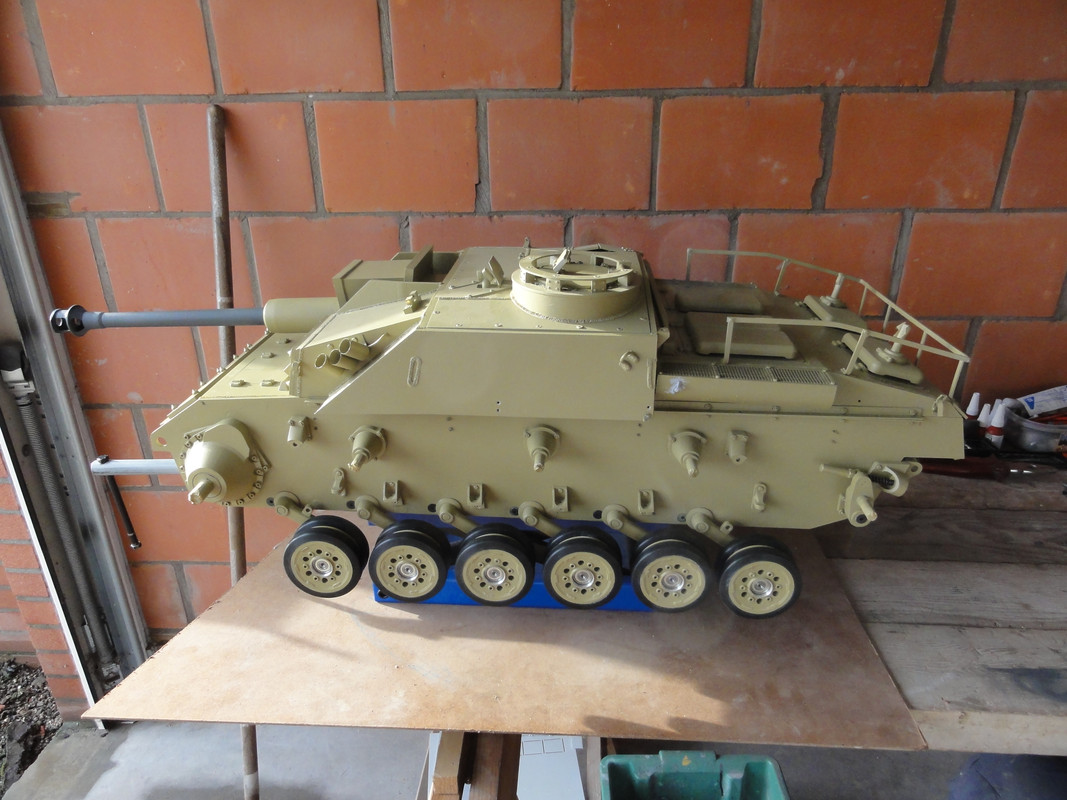
Fix and weld the lift hooks on the stug
Best regards Yves
Today i put everything in the stug to test the suspension angle,
first i set every arm on 30° but that was for the 2 front arms ( on each side ) a little to low.
So i put the 2 front arms on 36° ( on each side ) so when the stug is on his wheels ( full load )
all the arm angle is on 20°
Fix and weld the lift hooks on the stug
Best regards Yves
-
Roy Beukeveld
- Posts: 191
- Joined: Fri Feb 14, 2020 7:23 pm
- Location: The Netherlands
- Has liked: 171 times
- Been liked: 118 times
- Contact:
Re: Yves Stug III update
Hi Yves,
Your StuG is coming together very nicely! It sure looks good, nice to see the extra detailing you put into it.
Your reference data on the arm angles is very interesting too, although not every interior setup will be the same for everyone I do think that the overall COG will turn out quite similar for the StuG's.
One thing that got me thinking is that when you set the front arms higher than the other ones, the front and rear arms/torsion bars take the highest load. The torsion bars in between carry less weight.
If you smooth out the angle over all axles the load is distributed more even (lets say 36 degrees on the front, than 35, 34, 33, 32, 31 degrees on the rear).
Would you agree or do you have different experiences on this?
Kind regards,
Roy
Roy
-
yves mouton
- Posts: 971
- Joined: Fri Nov 06, 2009 7:55 pm
- Location: Belgium
- Has liked: 1 time
- Been liked: 514 times
Re: Yves Stug III update
Hello Roy,
I am not sure if 1 degree per arm make that difference , it is my first tank
where the arms need a different angle so i have no experience on that.
I just read on the forum from panzer 3 builders that you have to set the front arms a little higher than the rest of
the arms.
Now is the stug upside down and i give it already 3 layers of mattvarnish ( bottomplate only ) so tomorrow i turn it around
and put all the electronics in. About the camo i am not sure what i gonna do.
Best regards Yves
-
Roy Beukeveld
- Posts: 191
- Joined: Fri Feb 14, 2020 7:23 pm
- Location: The Netherlands
- Has liked: 171 times
- Been liked: 118 times
- Contact:
Re: Yves Stug III update
Hi Yves, you do have a point there, and the overall experiences count the most. Maybe my approach is a bit too theoretical 
Kind regards,
Roy
Roy
-
yves mouton
- Posts: 971
- Joined: Fri Nov 06, 2009 7:55 pm
- Location: Belgium
- Has liked: 1 time
- Been liked: 514 times

-
yves mouton
- Posts: 971
- Joined: Fri Nov 06, 2009 7:55 pm
- Location: Belgium
- Has liked: 1 time
- Been liked: 514 times
Re: Yves Stug III update
Hello,
Finaly i got the stug elevation working,
I change the gearbox of the elevation motor from 18:1 to 60:1 motor gearbox from the KT.
Next i made a counter weight in metal from around 1,688 kg now its working fine.
Counter weight is ready to paint.
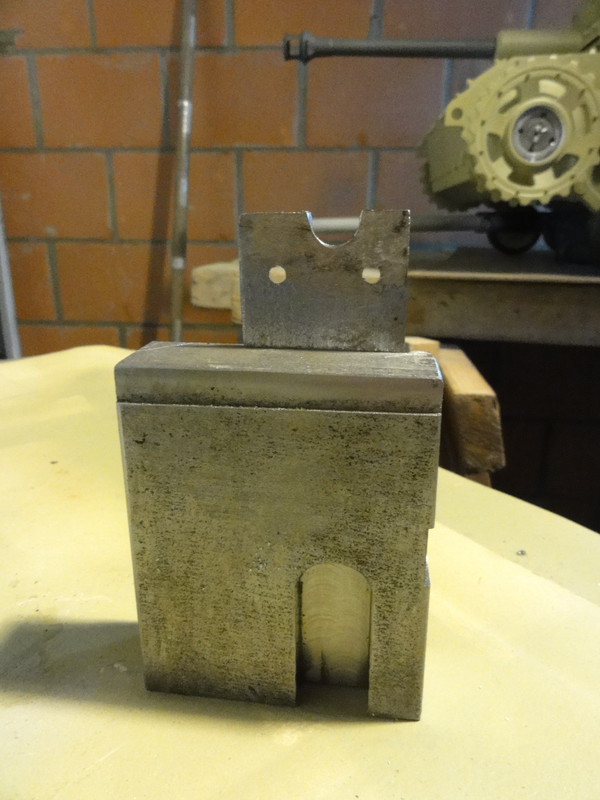
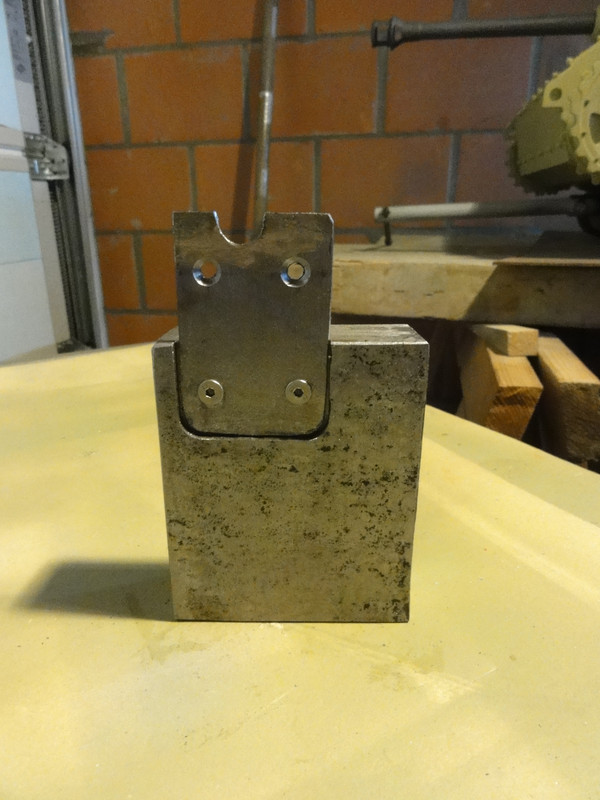
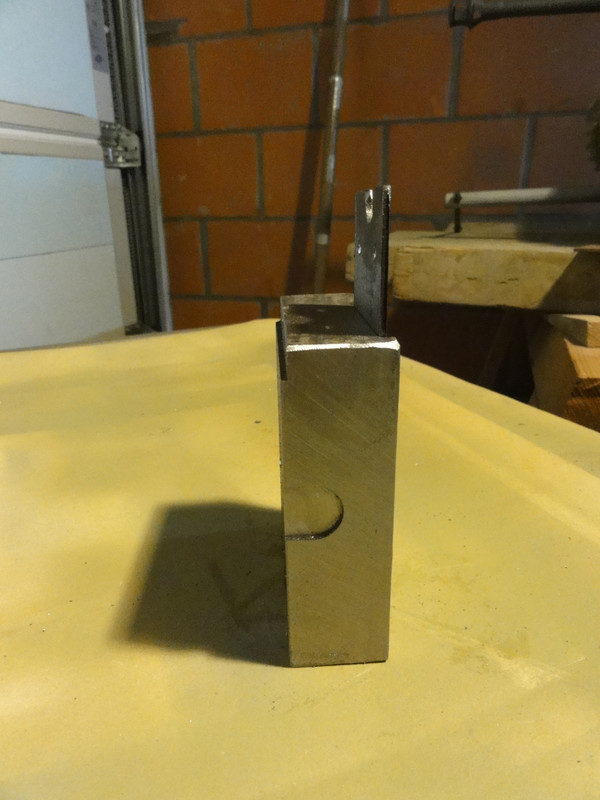
The counter weight is 10 cm/8cm/3cm
Later i will post a picture if the weight is in the stug.
Best regards Yves
Finaly i got the stug elevation working,
I change the gearbox of the elevation motor from 18:1 to 60:1 motor gearbox from the KT.
Next i made a counter weight in metal from around 1,688 kg now its working fine.
Counter weight is ready to paint.
The counter weight is 10 cm/8cm/3cm
Later i will post a picture if the weight is in the stug.
Best regards Yves