Page 1 of 3
Comet No 34
Posted: Sun Apr 24, 2016 10:10 pm
by Steve Stuart
It starts with a few small steps..... Comet No 34 is now organised for building.
Following Stephen White's prompt with regard to the Front Tow Hooks I have remade them with the upper eyes!
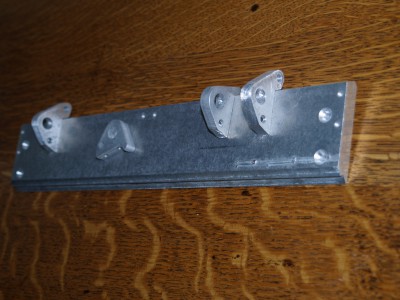
- Forward Tow Hooks
The Rear Deck is the next step, but somewhat bigger!
Steve
Re: Comet No 34
Posted: Sun Apr 24, 2016 10:31 pm
by Stephen White
Good to see you starting, Steve, this will be one to watch. Do shout if I can help with reference material, not that there is that much published and I know you've got a comprehensive photo coverage.
All the best. Stephen
Re: Comet No 34
Posted: Mon Apr 25, 2016 11:09 am
by Dennis Jones
Glad to see you have made a start Steve.
Dennis.
Re: Comet No 34
Posted: Mon Apr 25, 2016 1:15 pm
by Derek Attree
Hi Steve
Nice to see someone else on the long silent Comet thread.
Looking forward to seeing the pictures.
Derek
Re: Comet No 34
Posted: Wed Apr 27, 2016 11:16 pm
by Steve Stuart
The Rear Deck is an area which needs a bit of attention. The side plates need a sharp top edge, which is found on the Cromwell where they are bolted on, the Comets Plates are welded which makes things simpler. The Hatches on the Forward End of the Deck need to be larger, so it is easier to remake with a new sheet of aluminium the whole top.
This photo is a close up which roughly indicates the area, as I write this I realise I will need to find a better one!
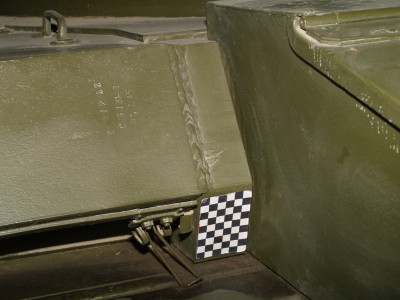
- Rear Deck
To remake the deck I have milled some angled fillets to join the parts together, I have bolted these to the under side of the original deck and drilled the bolt holes necessary for securing the new deck together once the counter sunk bolts I have ordered arrive.
These photos show this initial stage.
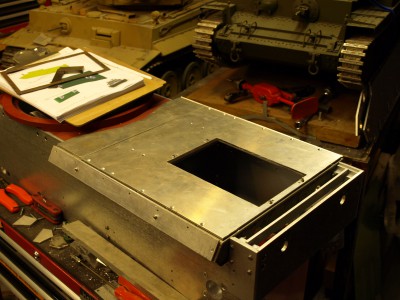
- New Rear Deck
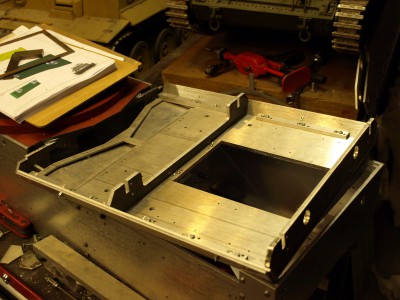
- New Rear Deck
This is just a progress report, once I have the bolts fitted I can produce some photos to show what I am trying to achieve with this work.
Steve
Re: Comet No 34
Posted: Thu Apr 28, 2016 2:42 am
by Steve Norris
Hi Steve
Good to see you have made a start. Your rear deck build has come at just the right time for me as this is the area I will be tackling myself soon, I will be watching closely.
Regards
Steve
Re: Comet No 34
Posted: Thu Apr 28, 2016 6:34 pm
by Steve Stuart
I have followed up this link;
https://nl-nl.facebook.com/pages/BAIV-B ... 7456456403 This from the Comet wanted posting placed by Armortek.
Very interesting to see the interior of the hull. Some photos have relevance to the rear deck. I feel that I will have to compromise so as to achieve strength in the model, plus serviceability in the model and this helps in my planning.
Steve
Re: Comet No 34
Posted: Tue May 03, 2016 9:53 pm
by Steve Stuart
Slow progress on the deck, it is going round in circles to get everything in place to get to the details. My aim is to have a strong structure for the deck and the hull as the deck is not going to be bolted down.
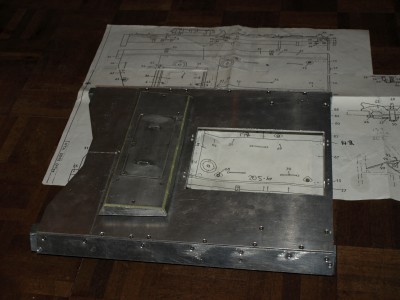
- Top View
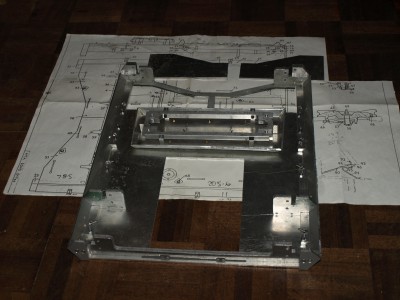
- Under View
I am now going to move back on to the suspension.
Steve
Re: Comet No 34
Posted: Wed May 04, 2016 11:15 am
by Dennis Jones
Hi Steve,
I bolted a piece of angle to one of the bearers and then a bolt with a wing nut under the vent which can be accessed from the rear hatches, easy to remove rear deck and just fixed with one bolt.
Dennis.
Re: Comet No 34
Posted: Wed May 04, 2016 2:23 pm
by Sam Hough
Very tidy! I'm struggling with gizmo layout at the morning.
Re: Comet No 34
Posted: Wed May 04, 2016 10:07 pm
by Steve Stuart
My sentiments as well, the installation of the modules is very neat and makes my Tiger Tank look like a complete disaster area.
This reminds me that when I had Comet No 45 (whilst my Tiger was not really mobile) the Tank was attacked by Panzer Mice over the winter and they chewed off the insulation on the wires. I was really lucky not to have switched the Tank on as it could well have caught fire with bare wires and shredded paper that had been brought in....
Steve
Re: Comet No 34
Posted: Thu May 19, 2016 7:55 pm
by Steve Stuart
This may be slightly off topic but these rare earth magnets could be dead useful inthat they can be bolted in place.
http://www.ebay.co.uk/itm/20pcs-N50-Str ... OSwWTRWzr8~
I am thinking that they may be useful if I wish to make the tension spring adjustor nuts accessible by not having the covers bolted down, but just held in place with magnets.An idea at the moment
Steve
Re: Comet No 34
Posted: Fri Jul 08, 2016 10:36 pm
by Steve Stuart
Progress has been slowed down by life's circumstances plus the nature of the job taken on.
I have cracked and decided to add the bolt detailing for the side plates, enough of them can be seen to make it some thing I have to do

Anyway, I have the example of my predecessors to follow!
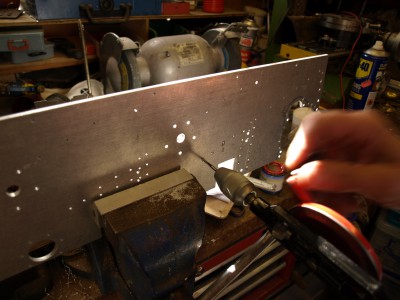
- Tapping Side Plates
To tap all the holes I am using a hand drill which I find works well in providing the correct pressure, torque and speed for the tap to cut smoothly. Following Stephen White's recommendation of WD40, after each hole I am dipping the tap in WD40 to wash off swarf, and then on the new hole it prevents clogging of the tap. (I normally use TF2, but a Son had borrowed it.) A standard Tap Holder would be painfully slow.

I hope next week to have the side plates fully bolted up....
Steve
Re: Comet No 34
Posted: Sat Jul 09, 2016 8:12 am
by Derek Attree
Hi Steve
Wow that brings back memories

Derek
Re: Comet No 34
Posted: Mon Jul 11, 2016 10:08 pm
by Steve Stuart
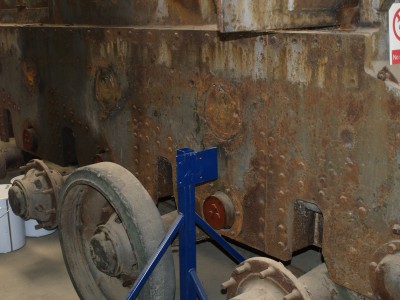
- The real Comet
This is what I am trying to achieve with a couple of hundred or so bolts, nearly there:

- The model
What I always find fascinating is how each builder interprets the task and comes up with a subtly different solution, so do have a look at Stephen's, Derek's, Steve's and others postings to how each has done the same thing.

I appreciate the insight gained from previous postings, thank you!
Steve