Muzzle Break

Forum for discussion relating to the Panther
Post Reply
Tim Bowman
Posts: 1762
Joined: Fri Jul 13, 2007 4:53 am
Location: Northern California
Been liked: 177 times
Contact:

Muzzle Break

Post by Tim Bowman »

Hi Everyone

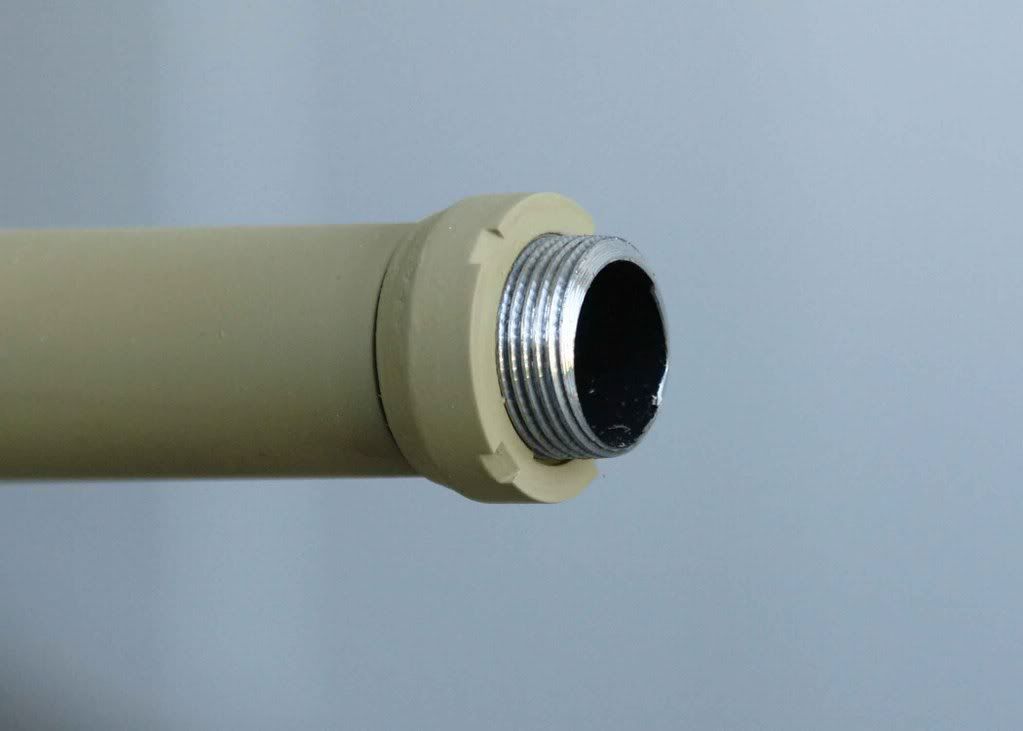
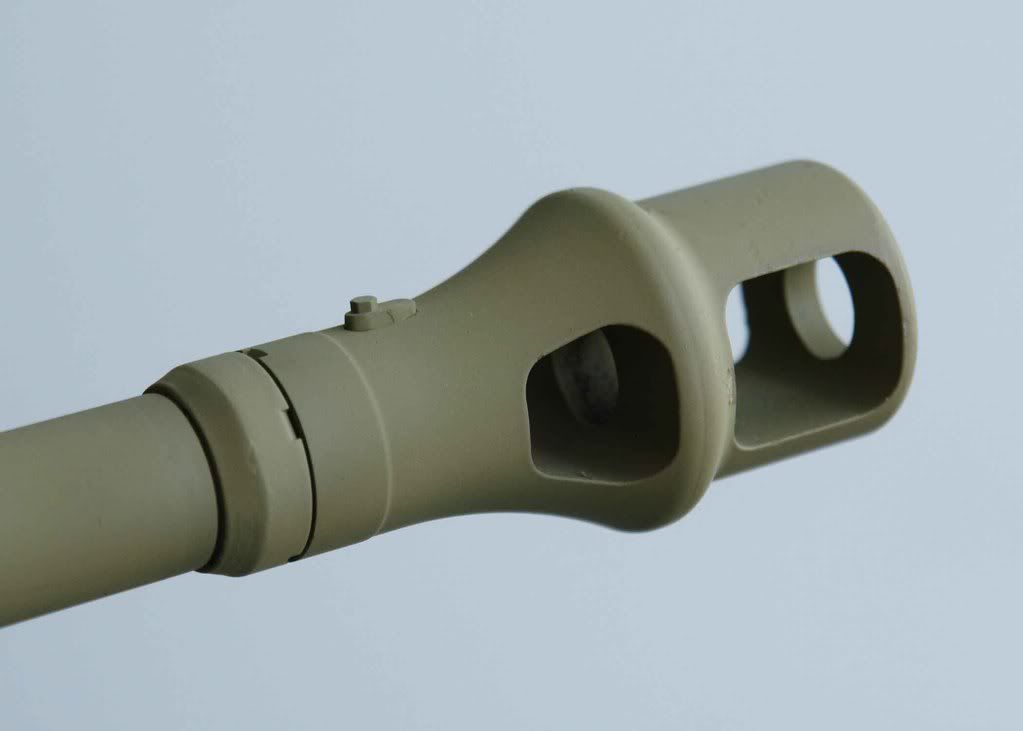
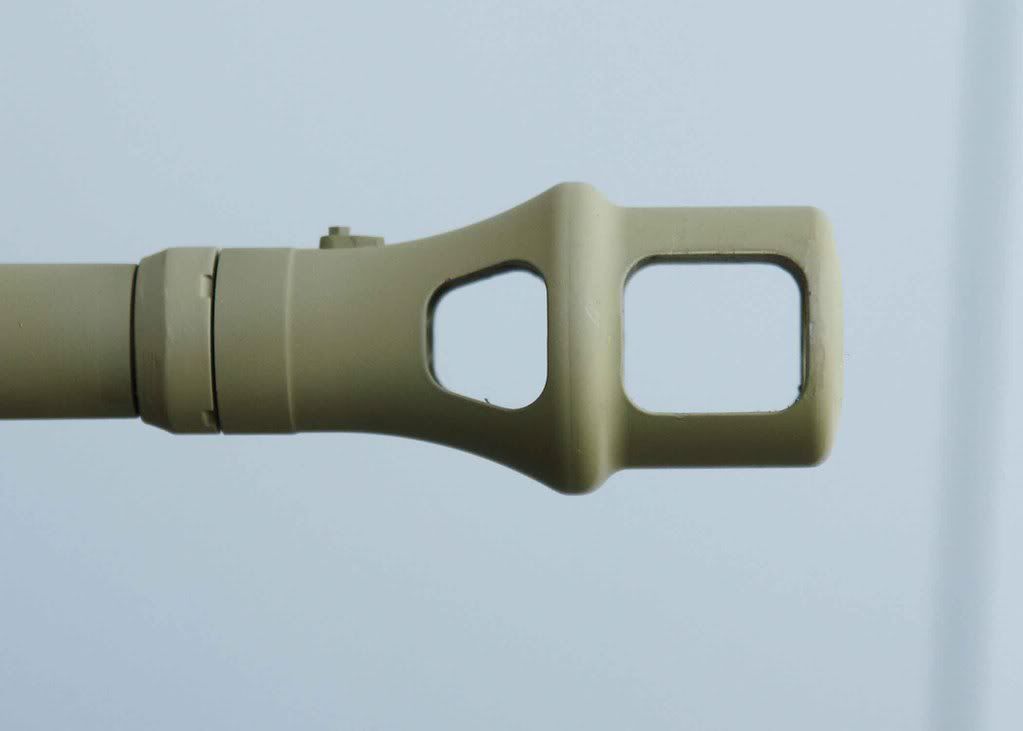
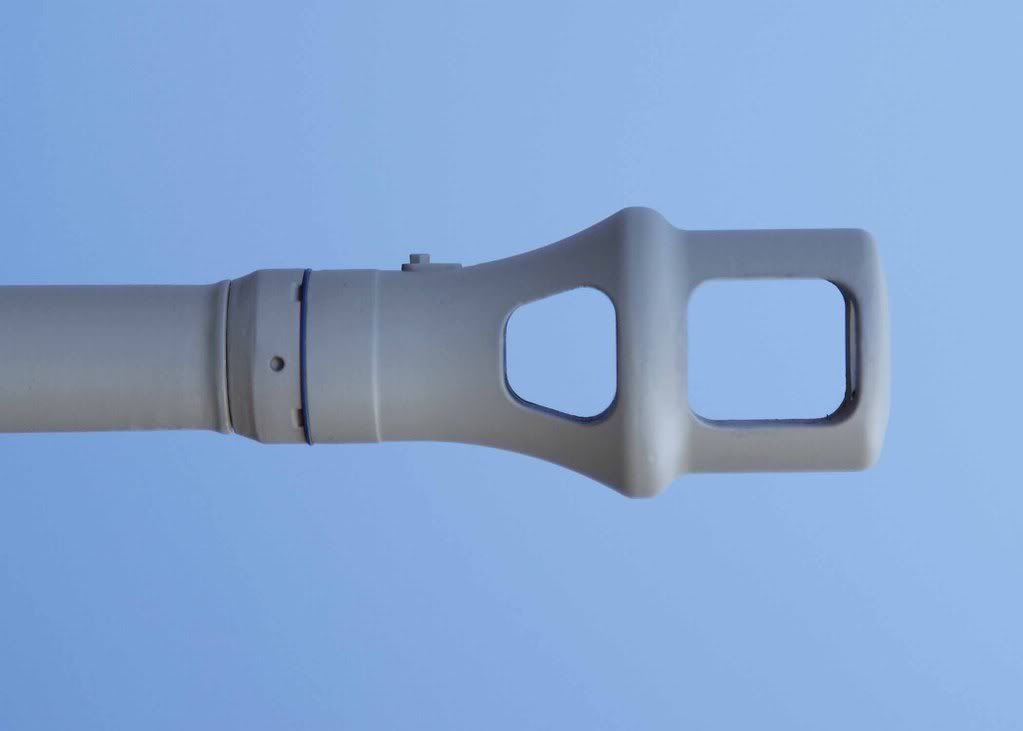
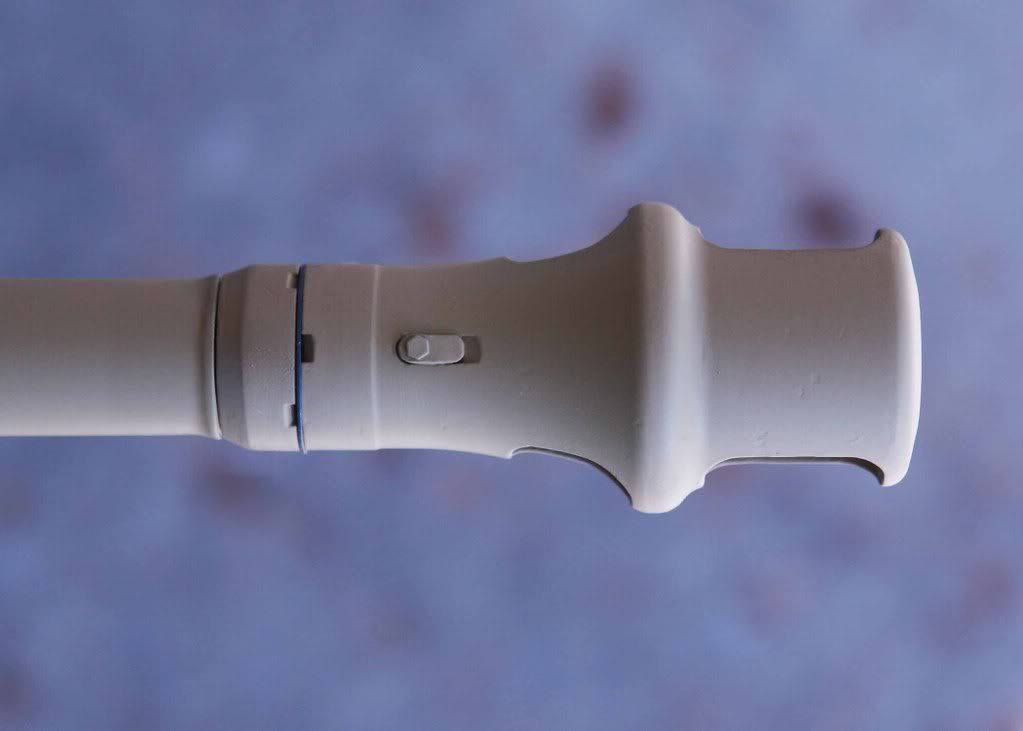
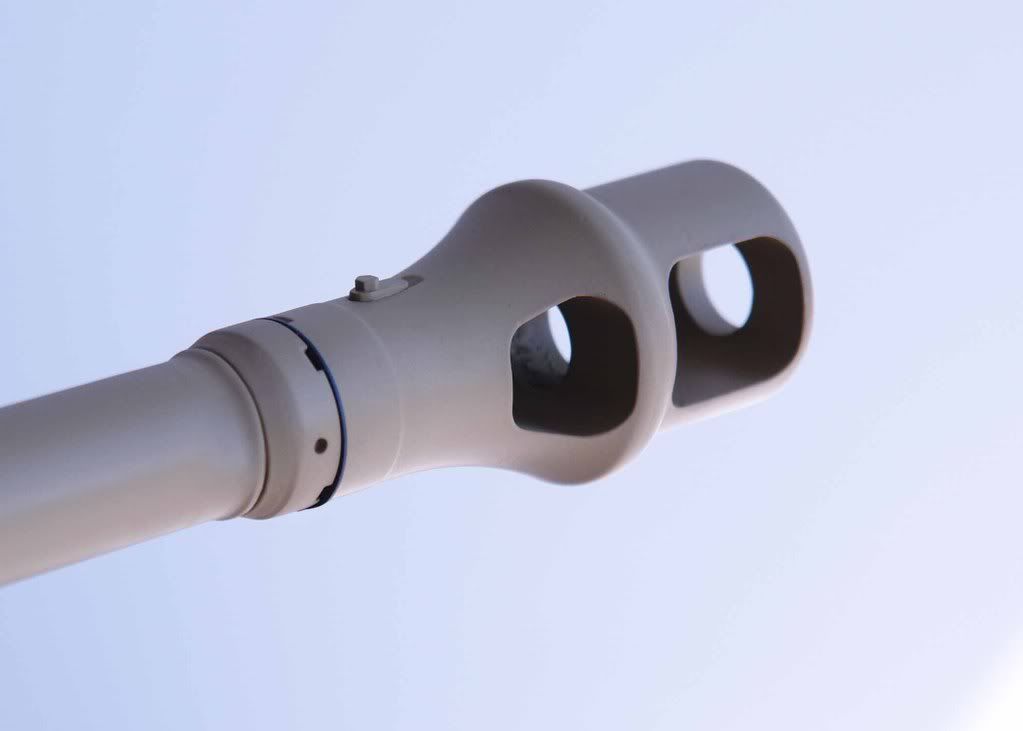
Finally took care of this. Still contemplating whether or not to do the interior of the muzzle as well. I have yet to make the washer that goes between the collar and the break.

Image

Image

Image
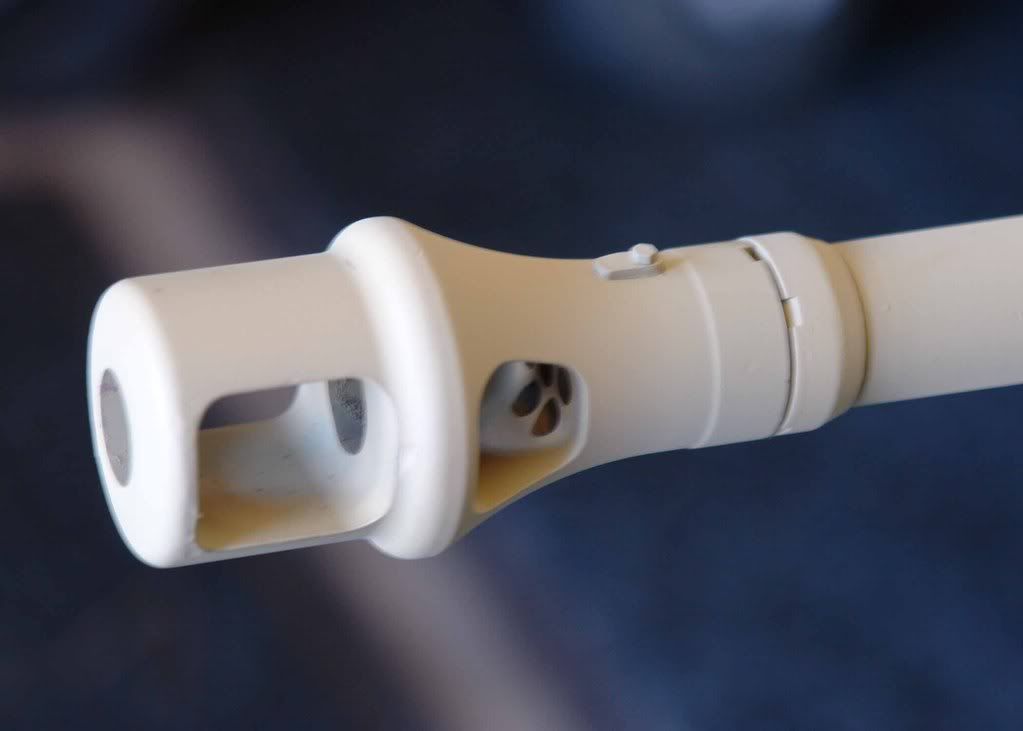
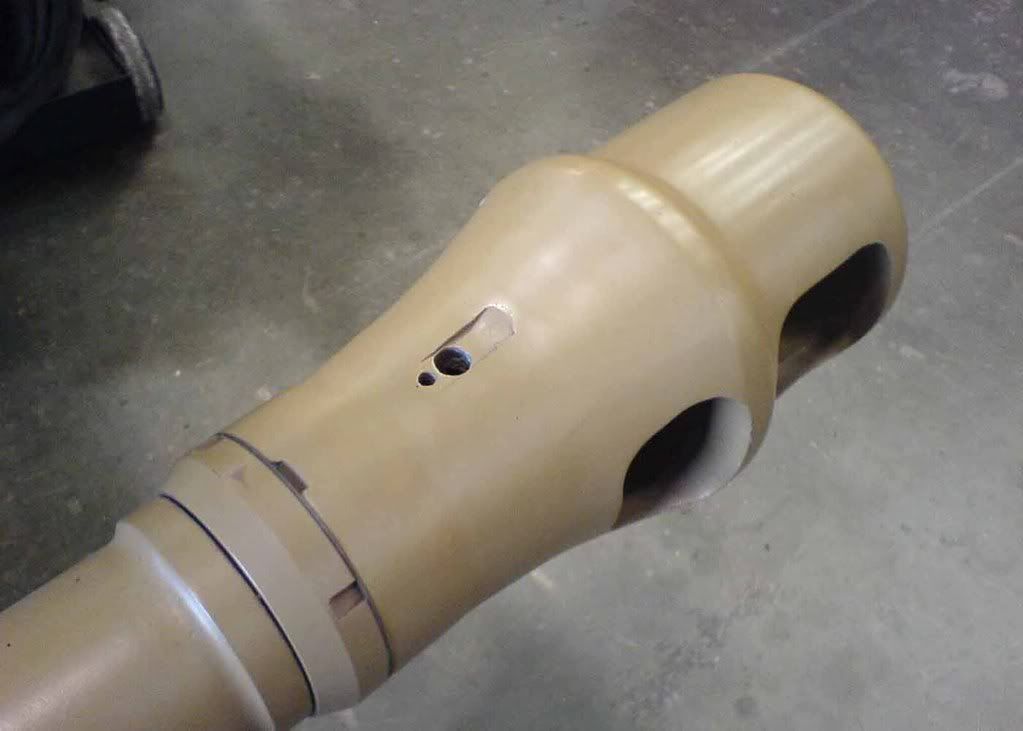
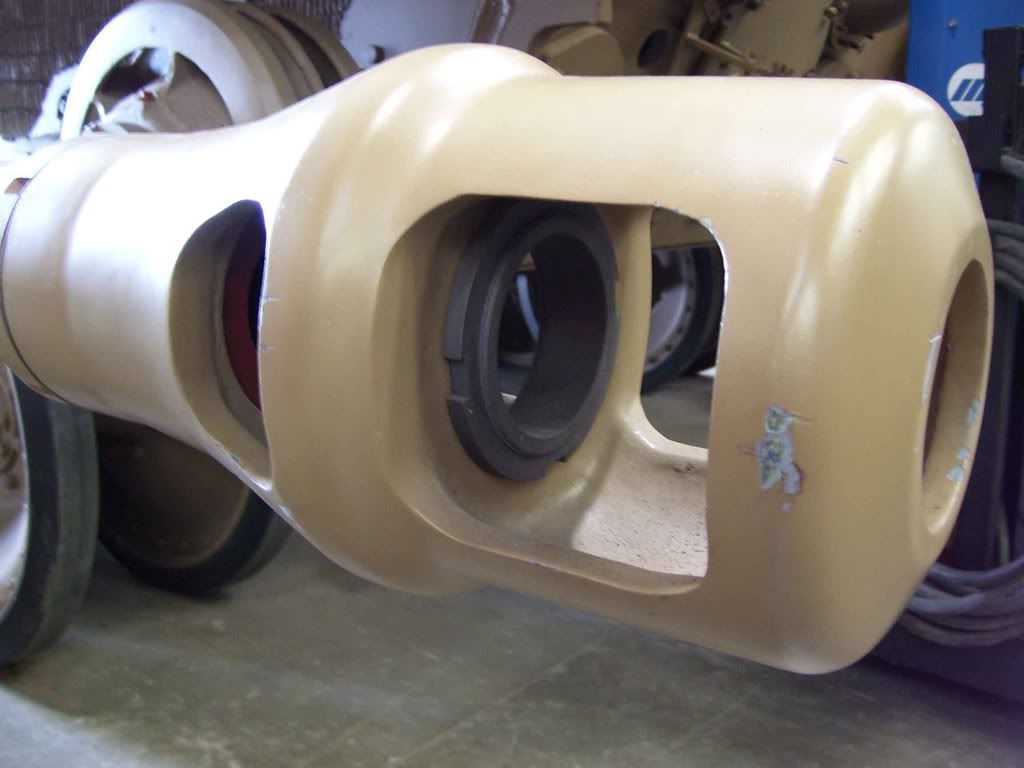
The real thing off of Littlefield,s Panther Ausf A (missing the center-lock tab). From what I could tell, the ausf G did not have the flange on the barrel before the muzzle break and the collar is thicker on the G. This photo courtesy of Bob Morey

Regards

Tim
Last edited by Tim Bowman on Sun Apr 20, 2008 11:33 pm, edited 1 time in total.
"So long as one isn't carrying one's head under one's arm, things aren't too bad." – Erwin Rommel

Derek Attree
Posts: 1242
Joined: Thu Jul 12, 2007 12:44 pm
Location: london
Has liked: 213 times
Been liked: 151 times

Post by Derek Attree »

Hi Tim
That looks very good did you part the end off completly or is it a deep groove with the spanner notches milled in?

I was going to part the end off. I also noticed on photos of the real thing
there is a grub screw that looks the short end peice (Ryton panther in detail page 41 - Culver & Feist )

The only word of warning would be to those using the blank fire mechinisim I am not sure if this mod is ok with that !.

All the best

Derek
we must stop making stupid predictions

Tim Bowman
Posts: 1762
Joined: Fri Jul 13, 2007 4:53 am
Location: Northern California
Been liked: 177 times
Contact:

Post by Tim Bowman »

Hello Derek

Yes, I parted it completely like the real thing. You are correct, there is a set screw on the collar. I was going to add it when I completed the spacer/washer thing that goes between the two pieces.

I agree. I would strongly advise against this modification if you plan on firing blanks as the muzzle break ends up with only half the original threads.

I was thinking a spare, factory muzzle for that purpose would be the way to go to prevent any unwanted or unexpected projectiles. :shock:

some clearer pictures

Image

Image

Image

Regards

Tim
"So long as one isn't carrying one's head under one's arm, things aren't too bad." – Erwin Rommel

Derek Attree
Posts: 1242
Joined: Thu Jul 12, 2007 12:44 pm
Location: london
Has liked: 213 times
Been liked: 151 times

Post by Derek Attree »

Hi Tim
I have another question please.
How many notches are in the muzzle for the spanner ?
I can see 4 in the short bit.
This is such a good detail .Your Panther is fantastic.
I hope to post some pics of mine soon.

Regards

Derek
we must stop making stupid predictions

Tim Bowman
Posts: 1762
Joined: Fri Jul 13, 2007 4:53 am
Location: Northern California
Been liked: 177 times
Contact:

Post by Tim Bowman »

HI Derek

Yes, there are four in the collar. I cut them at a 45 degree angle and approx. 1.1 mm deep(distance from edge to the back edge of the cut) The Ausf A pictured above is different then the G but it was a nice photo of a real one none the less.

The muzzle also has the same cut (only one) inline with the locking tab/thing. I need to go back and check the location of the set screw on the collar as I have seen them in various orientations in real pictures but it's centered on the flat area of collar between two of the spanner-type cuts.

Look forward to seeing your pictures.

Another great picture of the interior part I'm making.
Image

kind regards

Tim
"So long as one isn't carrying one's head under one's arm, things aren't too bad." – Erwin Rommel

Kent Wiik

Post by Kent Wiik »

Awesome work Tim (as always!)

As a matter of fact I think it was 2 cuts in the muzzle.
The photos below indicate that.
And don´t forget the washer for the muzzle locking bolt.
Also please note the 2 holes in the collar - probably used to grip in a tool to get the collar in place.

Image
Bovington Ausf G

Image
Patton Ausf G underside

Image
Patton Ausf G side

Image
Overloon Ausf G

It is all in the details! :wink:


Cheers
Kent

Derek Attree
Posts: 1242
Joined: Thu Jul 12, 2007 12:44 pm
Location: london
Has liked: 213 times
Been liked: 151 times

Post by Derek Attree »

Hi Tim
Thanks for the answer I think the set screw is shown in different places depending on where the collar came to a stop when it was tightened.
Your work is first class.

Regards

Derek :shock:
we must stop making stupid predictions

Tim Bowman
Posts: 1762
Joined: Fri Jul 13, 2007 4:53 am
Location: Northern California
Been liked: 177 times
Contact:

Post by Tim Bowman »

Kent Wiik wrote: As a matter of fact I think it was 2 cuts in the muzzle.
The photos below indicate that.
And don´t forget the washer for the muzzle locking bolt.
Also please note the 2 holes in the collar - probably used to grip in a tool to get the collar in place.

Cheers
Kent
Excellent info and pictures Kent. Thanks. Will make appropriate corrections. I need to figure out how to make a lock-washer that size for the bolt still. that's why it's missing. :)

So they are just holes on the collar and not set screws? That's easier.

This will teach me to post things before they are completed. :lol: :lol:

Thanks Derek :)

Tim
"So long as one isn't carrying one's head under one's arm, things aren't too bad." – Erwin Rommel

Derek Attree
Posts: 1242
Joined: Thu Jul 12, 2007 12:44 pm
Location: london
Has liked: 213 times
Been liked: 151 times

Post by Derek Attree »

Hi Tim
I have just finnished my spacer washer thing and I made two the
first was 0.62 mm thick which looked good but put out the alinement of the notches so I then made one 0.85mm thick which gave good alinement of the notches but looks a bit thick.

Do you know how thick this washer/spacer should be?

Also did you have to take a bit off the end of the barrel thread to make the
muzzle screw down fully after the parting off?

regards

Derek :?
we must stop making stupid predictions

Tim Bowman
Posts: 1762
Joined: Fri Jul 13, 2007 4:53 am
Location: Northern California
Been liked: 177 times
Contact:

Post by Tim Bowman »

Hello Derek

Instead of removing from the barrel, I added material to the back end of the collar 1.5 mm which also ended up giving the chamfer a look closer to the real thing. This will depend on how thick your cutter was and how much material it removed. The space I have left for the washer is no more then .5mm. I had some scrap of really thin styrene I'll be using that measures .45mm thick. Luckily, it looks perfect!

By the way, the muzzle on mine bottoms out on the threads right on center so if it was able to be threaded on further, it would be crooked.

I'll finish it this weekend and post pictures.

Tim
"So long as one isn't carrying one's head under one's arm, things aren't too bad." – Erwin Rommel

Derek Attree
Posts: 1242
Joined: Thu Jul 12, 2007 12:44 pm
Location: london
Has liked: 213 times
Been liked: 151 times

Post by Derek Attree »

Hi Tim
I have parted my washer from Brass rod I have now sorted the
alignement out I have undercut the inside of the muzzel thread
so it screws on all the way.
I did find the thread is a bit offset but I can get the 2 parts to line up
with the washer in place.

Thanks

Derek
we must stop making stupid predictions

Tim Bowman
Posts: 1762
Joined: Fri Jul 13, 2007 4:53 am
Location: Northern California
Been liked: 177 times
Contact:

Post by Tim Bowman »

Latest pictures. I didn't have the material to fabricate the inner details yet so they'll have to wait. But I added a flange to the barrel, increased the top slot, added key-holes on collar and added a slot on the bottom of the muzzle break. Also reduced my locking tab height. Sorry Kent, no lock washer yet.:oops:

I will add the kinks(or dings like above photos from Kent) in the large, collar lock washer when I do final weathering etc.


Image

Image

Image

Derek,

Look forward to seeing yours.
"So long as one isn't carrying one's head under one's arm, things aren't too bad." – Erwin Rommel

Kent Wiik

Post by Kent Wiik »

Hats off - Super job!

Cheers
Kent

Post Reply