StuG III 014 - A Team Effort
-
Lawrence Godson
- Posts: 165
- Joined: Thu Jul 12, 2007 7:06 pm
- Location: Westchester, suburb of Chicago, USA
Re: StuG III 014 - A Team Effort
Good to see your build coming along. I've been away from the forum for a bit so just saw your post on the spring. Yes, I used a slightly stiffer spring than you did but "whatever works" is the rule. I guess you don't want to make it too stiff so as to make the suspension movement too limited and unrealistic but then you also need one strong enough so that it actually alters the stance upward in the front when all the weight is on it. Good luck! Looking forward to following your further progress.
Lawrence Godson
-
Dennis Jones
- Posts: 883
- Joined: Wed Feb 04, 2009 11:19 am
- Location: Poole, Dorset
- Has liked: 10 times
- Been liked: 218 times
Re: StuG III 014 - A Team Effort
Hi Darren,
When I built my Panzer 3 I put the split pins on the inside, next to the hull. Main reason being that if a split pin gets broken the track pin moves outwards and not inwards where it would jam plus you can see when a split pin has come off as the track pin will be poking out.
I bolted the 3 modules to the sides of the hull as there is not much room in the hull by the time you have put batteries, speakers and smoke unit in.
If there is a barrel elevation motor in the turret make sure you have clearance beneath it in the hull, that's why on my Panzer the speaker is in the middle.
Dennis.
- Attachments
-
-
Darren_Hagarty
- Posts: 57
- Joined: Mon Jun 17, 2013 9:31 am
- Location: Toowoomba Queensland Australia
- Been liked: 26 times
Re: StuG III 014 - A Team Effort
Thanks Dennis.
Progressing with tracks now decided to prime pins.
Will put together what Amorpax accessories we have and prime them.
Just discovered Derek's forum about his own Stug111 design.
He has some great photos which have helped us.
Your photo has also helped us visualise placement of the electrics and motors.
Did you mount your modules to the side using double sided Velcro?
That's what we were planning to use for mounting the components to the false floor and sides.
Amortek also had some good photos of the electrics and motor mounting for the prototype Stug111G
On their blog but the blog's disabled at the moment so I'm going to see if they can send us a copy.
Expect some more questions soon on the electrics and motors.
Have to get Futaba RC next.
-
Dennis Jones
- Posts: 883
- Joined: Wed Feb 04, 2009 11:19 am
- Location: Poole, Dorset
- Has liked: 10 times
- Been liked: 218 times
Re: StuG III 014 - A Team Effort
Hi Darren,
I used nuts and bolts to fix the modules, used a nut and bolt through the side and then another nut to fix the module. You can use velcro I used bolts as it was my first Armortek model. I now use Spektrum radio gear as it has more facilities than Futaba. Whichever you choose go for 7 or 8 channel not 6.
I have set up quite a few systems so any help you want I will be here.
Dennis.
-
Adrian Harris

- Posts: 4906
- Joined: Thu Jul 12, 2007 10:46 pm
- Location: Berkshire (UK)
- Has liked: 1181 times
- Been liked: 1378 times
Re: StuG III 014 - A Team Effort
Contact me at sales@armortekaddict.uk for details of my smoker fan control module
-
Darren_Hagarty
- Posts: 57
- Joined: Mon Jun 17, 2013 9:31 am
- Location: Toowoomba Queensland Australia
- Been liked: 26 times
Re: StuG III 014 - A Team Effort
Tracks
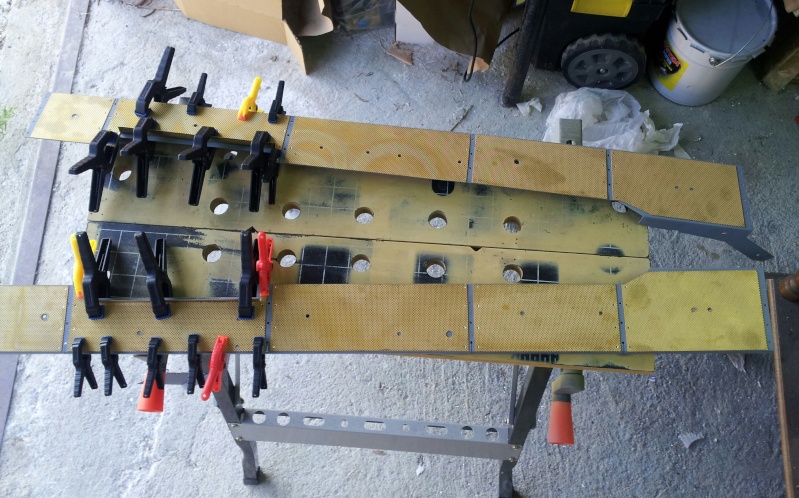
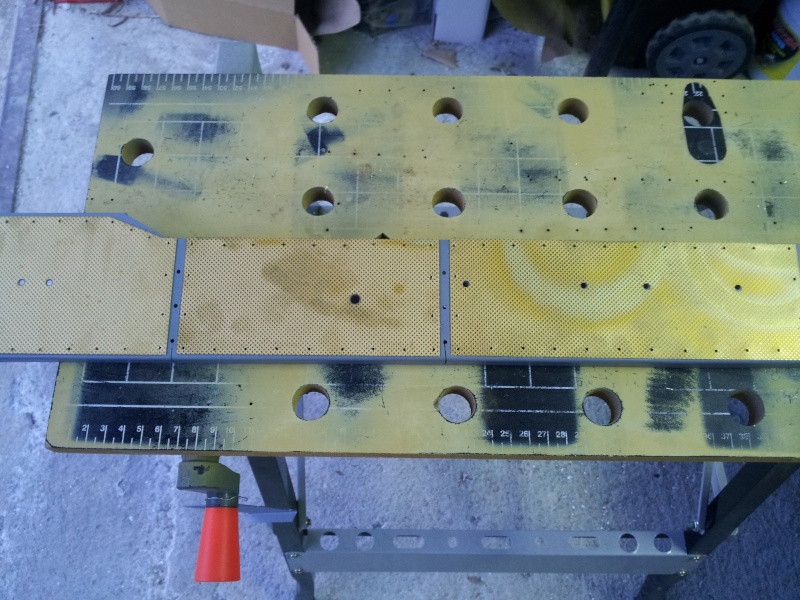
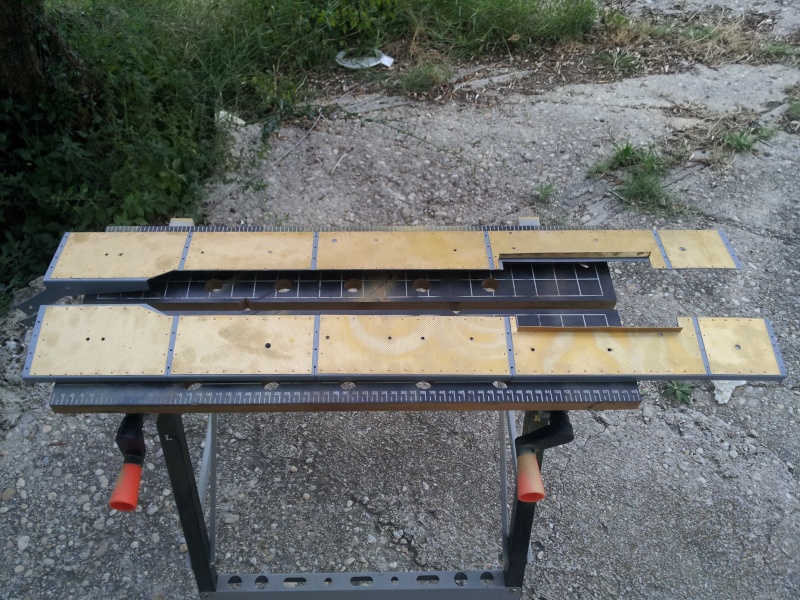
At last a job where you can put your mind in neutral. it was quite meditating building the tracks. The guide mentions about 97 links per track loop. We did 93 with the suspension unloaded and no weight on top.As mentioned in the guide that did loosen up over a couple of days of the kids spinning the tracks around. We then put the fighting compartment and rear deck on and managed to take out one link making it 92 links. The track is certainly tighter but eventually with drive motors and batteries etc we expect the suspension to sit a little lower. Let us know if you think the track looks to tight in the photo. (92 links). We just put primer on the track pins.
At last a job where you can put your mind in neutral. it was quite meditating building the tracks. The guide mentions about 97 links per track loop. We did 93 with the suspension unloaded and no weight on top.As mentioned in the guide that did loosen up over a couple of days of the kids spinning the tracks around. We then put the fighting compartment and rear deck on and managed to take out one link making it 92 links. The track is certainly tighter but eventually with drive motors and batteries etc we expect the suspension to sit a little lower. Let us know if you think the track looks to tight in the photo. (92 links). We just put primer on the track pins.
- Attachments
-
- Stug III G - Track Profile
-
Darren_Hagarty
- Posts: 57
- Joined: Mon Jun 17, 2013 9:31 am
- Location: Toowoomba Queensland Australia
- Been liked: 26 times
Re: StuG III 014 - A Team Effort
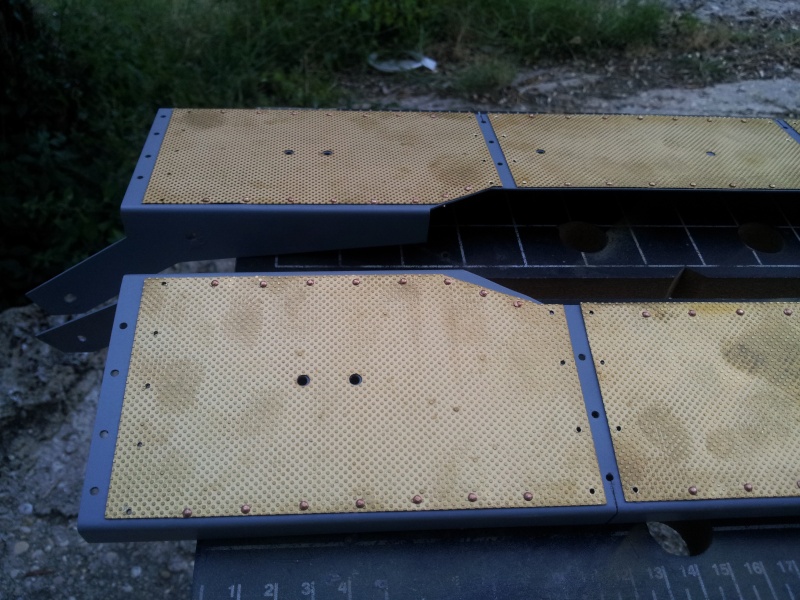
Rear Deck Accessories
We applied the engine vent mesh, spare road wheels and barrel cleaner. The barrel cleaner actually has three parts but we couldn't fit the third rod in, but you'd have to be expert to notice it missing. Also with some of our spare tracks we loaded them into the purpose build rack on the back of the fighting compartment. This was common in the historical photos and looks good we think.
We are also pondering getting another one of these guards from Gil and Mark and mounting on the front loaded with some extra track links. We think we'd be able to tap the extra holes needed.
We've also considered mounting the spare wheels on the side of the fighting compartment held on by the tow chain, however haven't got detailed enough photos to see how it was actually done in practise.
On that front quite a few crews hung track links on the slopped upper surfaces however again we can't see from the photos we have how they were mounted.
- Attachments
-
- Stug 111 G - Rear Deck Accessories
-
Darren_Hagarty
- Posts: 57
- Joined: Mon Jun 17, 2013 9:31 am
- Location: Toowoomba Queensland Australia
- Been liked: 26 times
Re: StuG III 014 - A Team Effort
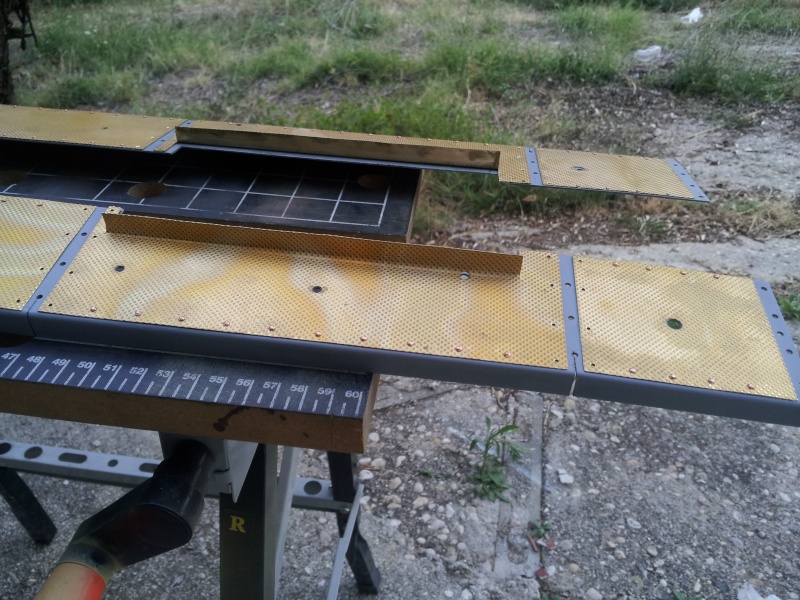
Rear Deck Overhang
We'd like some advise on the Rear Deck Fit. With the fastener holes lined up the Rear Deck doesn't sit flat on the hull top due to a small amount of overhang on the rear of the upper surface. If we slide the Rear Deck back a few mm it will sit flat but the fasteners don't line up and also you end up with a few mm gap to the fighting compartment.
We plan just to shave a bit off the rear of the upper surface but wanted to check in case we were missing something. A 1:35 model we have appears to show some overhang.
- Attachments
-
- Stug 111 G - Rear Deck Overhang 2
-
- Stug 111 G - Rear Deck Overhang 1
-
Iacopo Di Giampietro
- Posts: 226
- Joined: Fri May 11, 2012 9:14 pm
- Been liked: 48 times
Re: StuG III 014 - A Team Effort
I hope to be keen to help, at least I try to tell you how I dealt with the problem on my Panzer III.
As you can see, in real tank, below the plate is chamfered on the top edge, so as to allow the top plate to advance slightly, creating a small step.

To obtain this result, I've backward slightly the bottom plate, and then I added a thickness at the top.


And so I finally resolved. This is the final result.

I hope that you can be of help.
Hello and good luck!
As you can see, in real tank, below the plate is chamfered on the top edge, so as to allow the top plate to advance slightly, creating a small step.
To obtain this result, I've backward slightly the bottom plate, and then I added a thickness at the top.
And so I finally resolved. This is the final result.
I hope that you can be of help.
Hello and good luck!
-
Darren_Hagarty
- Posts: 57
- Joined: Mon Jun 17, 2013 9:31 am
- Location: Toowoomba Queensland Australia
- Been liked: 26 times
Re: StuG III 014 - A Team Effort
Rear overhang options
Thanks Lacopo your explanation was very thorough. We are not machinists and have only basic tools so we thought from your explanation we have two options.
1) Grind a chamfer at the top of the rear plate like your photo of the full size panzer.
2) Trim the excess off the rear overhang, which is not true to the original design.
We'll try option 2) as the easier option since the rear plate is 8 mm thick and grinding a chamfer on that is a bigger job.
Only expert eyes like yourself would notice that it's not quite right.
Also we found your photos of your panzer 111 mudguards useful as we are about to do our mudguards. The pegs were a good idea.
-
Iacopo Di Giampietro
- Posts: 226
- Joined: Fri May 11, 2012 9:14 pm
- Been liked: 48 times
Re: StuG III 014 - A Team Effort
I am happy to have been of help to you.
You may also consider that I do not have specific equipment and I manage with what I have.
For this work it is sufficient a cutter a flexible disc.
Good work!
You may also consider that I do not have specific equipment and I manage with what I have.
For this work it is sufficient a cutter a flexible disc.
Good work!
-
Darren_Hagarty
- Posts: 57
- Joined: Mon Jun 17, 2013 9:31 am
- Location: Toowoomba Queensland Australia
- Been liked: 26 times
Re: StuG III 014 - A Team Effort
Mudguards
These had brass etched tread plates. They needed to be glued on. We used a type of super glue after a failure with Araldite, you need a quick drying glue. We needed to fiddle about to align the brackets to the fighting compartment sides. These brackets also needed to be drilled out with a 3 mm drill to allow the fasteners to go through.
We have some tools to assemble and mount however won't mount then till our final spray job. Current colour is just a rattle can used for colorbond roofing. After a chat with the secretary of the local modellers club who I've joined recently I've decided to go for a simple paint job. He said on large models you get natural shadows so simple colour schemes work well. Just the correct dark yellow factory finish with Balkan cross, vehicle number and Stug battalion logo.
Could always try a winter coat down the track.
Have picked vehicle number as 114 to honour the Amortek serial number. Still to decide battalion number.
Tank is now on floor as the table was starting to look shaky. We need to look for one of those scissor lifts. Will start on phase two the mechanicals now we have a clean table. I'm sure that will be a challenge.
We managed to customise a pin for the shocks to cover the broken one. Have glued with Araldite and will try to get some spares just in case.
Out of interest do the Armortek builders have a preferred source for figures. We were looking at getting a commander and loader with the correct artillery uniforms if that's possible.
- Attachments
-
- Stug III G - Mudguards Top
-
- Stug III G - Mudguards Front
-
Iacopo Di Giampietro
- Posts: 226
- Joined: Fri May 11, 2012 9:14 pm
- Been liked: 48 times
Re: StuG III 014 - A Team Effort
Theoretically along the edges of the plates photoetched, should put the various rivets that will help to keep the plates in place.
This is the (long) work I've done on my fenders: I hope that this will be of help to you!
I used copper rivets, soft enough to be clinched with ease.
Ciao and good luck!
This is the (long) work I've done on my fenders: I hope that this will be of help to you!
I used copper rivets, soft enough to be clinched with ease.
Ciao and good luck!
-
Darren_Hagarty
- Posts: 57
- Joined: Mon Jun 17, 2013 9:31 am
- Location: Toowoomba Queensland Australia
- Been liked: 26 times
Re: StuG III 014 - A Team Effort
Thanks Lacopo your detail is amazing, keep us updated with your build.
We might bypass the extra rivets it's probably beyond us to get that detail right.
We have to learn spray painting from scratch for our final coat and work on the
Motion kit which should be interesting.
We might bypass the extra rivets it's probably beyond us to get that detail right.
We have to learn spray painting from scratch for our final coat and work on the
Motion kit which should be interesting.
-
Steven Snel
- Posts: 25
- Joined: Mon Jan 07, 2013 9:38 am
- Location: Belgium
- Been liked: 1 time
Re: StuG III 014 - A Team Effort
Wonderfull to see another StuG come to its own.
great work so far and i look forward to seeing more! as well as hoping to find the time to continue the work on mine.
great work so far and i look forward to seeing more! as well as hoping to find the time to continue the work on mine.