2012 Late tiger comission build

Forum for discussion relating to Tiger 1, Mid, Early, Late Production and Sturmtiger
John Grima
Posts: 250
Joined: Sun Jul 15, 2007 2:54 pm
Location: USA
Been liked: 48 times
Contact:

2012 Late tiger comission build

Post by John Grima »

Hi guys, After the Panther was completed I was contacted by another collector to build for him an RC Late production Armortek Tiger I.

Image

Because of load times I posted the rest of the post on another forum. The full post can be found on the following link.

http://www.sixtharmygroup.com/forums/ar ... oject.html

A project start video was made and posted on youtube.

Armortek Late Tiger I Project video #1 (introduction and project start) - YouTube

more pics were also posted on the ECA facebook page.
http://www.facebook.com/EastCoastArmory

More to come

John Grima
Posts: 250
Joined: Sun Jul 15, 2007 2:54 pm
Location: USA
Been liked: 48 times
Contact:

Re: 2012 Late tiger comission build

Post by John Grima »

More progress was made to the model's suspension.

Image

After the last post I focused on the swing arms.

Image

The swing arm design is the same, the swing arm is comprised of three parts. An aluminum swing arm base, and two Steel axles. The axles thread into the aluminum swing arm. Because of the way they mount to the swing arm the axles can unscrew from the swing arms causing serious suspension issues.

The solution to the problem is to pin the suspension. The pinning technique is simple. What is required is to drill a hole through the swing arm and the axle, and to expand a pin to lock everything together.

Image

Image

a pinning tutorial video was made and posted on youtube.

The rest of the post and all the suspension upgrades can be found on the following link:
http://www.sixtharmygroup.com/forums/ar ... oject.html

More info is described on the video update that was posted to youtube

Armortek Late Tiger I Project video #2 (Torsion Bar assembly and installation) - YouTube

and more pics were posted to the facebook page:
https://www.facebook.com/EastCoastArmory

With the swing arms now out of the way I can focus on the lower hull details and running gear. More progress to come!

John Grima
Posts: 250
Joined: Sun Jul 15, 2007 2:54 pm
Location: USA
Been liked: 48 times
Contact:

Re: 2012 Late tiger comission build

Post by John Grima »

I just completed the work and mods to the road wheels,

Image

Image

Image

Image

The rest of the post can be found on the following link,
http://www.sixtharmygroup.com/forums/ar ... oject.html

A youtube video was made describing these mods in more detail,
http://youtu.be/08ZU4jsdT-g

Also more pics were posted on the facebook page,
http://www.facebook.com/EastCoastArmory

With the wheels complete I can now focus on the lower hull details, once ready they will be installed and the tank will be on her feet again. More to come!

John Grima
Posts: 250
Joined: Sun Jul 15, 2007 2:54 pm
Location: USA
Been liked: 48 times
Contact:

Re: 2012 Late tiger comission build

Post by John Grima »

Thanks Nate,

After some more work was made to the model I complete the suspension.

Image

Before mounting the wheels I added some more details to the tank's under hull to get the hull ready for painting.

Image

Image

As for the shock absorber plug details, I designed a resin detail insert. The set was added to the tiger parts catalog, East Coast Armory -- 1/6th Scale Tiger I Detail Upgrades

Image

The detail insert is sized for the armortek kit and will protrude from the armortek side hull. To install the set you drill a hole through the hull plate, and glue or epoxy the plug in place from the interior. The set can also be used on any 1/6th scale tiger on the Market.

Image

Image

Image

The rest of the post can be found here:
http://www.sixtharmygroup.com/forums/ar ... oject.html

More images were posted on the facebook page, http://www.facebook.com/EastCoastArmory

and a video update was added to youtube:
Armortek Late Tiger I Project video #4 (Road wheel installation, and lower hull details) - YouTube

Since the wheels have been mounted I have been working on the model's sprockets and idlers. Once added I will have a new update...Stay tuned!

John Grima
Posts: 250
Joined: Sun Jul 15, 2007 2:54 pm
Location: USA
Been liked: 48 times
Contact:

Re: 2012 Late tiger comission build

Post by John Grima »

Before I go into the update I would like to wish everyone a Merry Christmas.

More headway has been made to the vehicle. The model's sprockets and idlers have been mounted and the tank is now getting it's machinery.

Image

Image

Image

Image

Image

Image

Image

A youtube video was made describing the install / assembly in more detail


Also more pics were posted on the facebook page.
http://www.facebook.com/EastCoastArmory

The rest of the post can be found on the following link, http://www.sixtharmygroup.com/forums/ar ... oject.html

John Grima
Posts: 250
Joined: Sun Jul 15, 2007 2:54 pm
Location: USA
Been liked: 48 times
Contact:

Re: 2012 Late tiger comission build

Post by John Grima »

I have mounted some of the RC equipment, and the tank is now running!

Image

Image

Image

A youtube video update was created, which goes more into detail on what was made to the model

Armortek Late Tiger I Project video #6 (motors, electronics, and test drive) - YouTube

Also more pics were posted on the facebook page.

https://www.facebook.com/EastCoastArmory?ref=hl

The rest of the post can be found on the following link, http://www.sixtharmygroup.com/forums/ar ... oject.html

Now that the model is up and running I will now be focusing on the cleaning up the tank's interior, calibrating the tank's sound system with it's radio, and starting on the engine compartment. More to come!

John Grima
Posts: 250
Joined: Sun Jul 15, 2007 2:54 pm
Location: USA
Been liked: 48 times
Contact:

Re: 2012 Late tiger comission build

Post by John Grima »

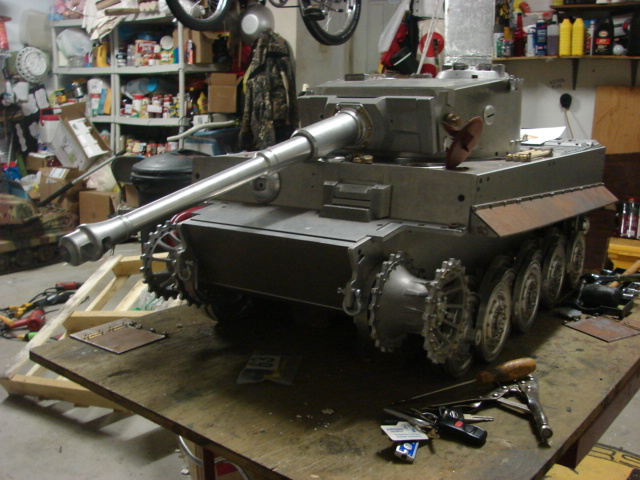
This project has moved some more since I posted last.

Before I was able to complete the engine compartment and start on the engine itself I had to first finish off the tank's rear hull / exhaust detailing.

Image

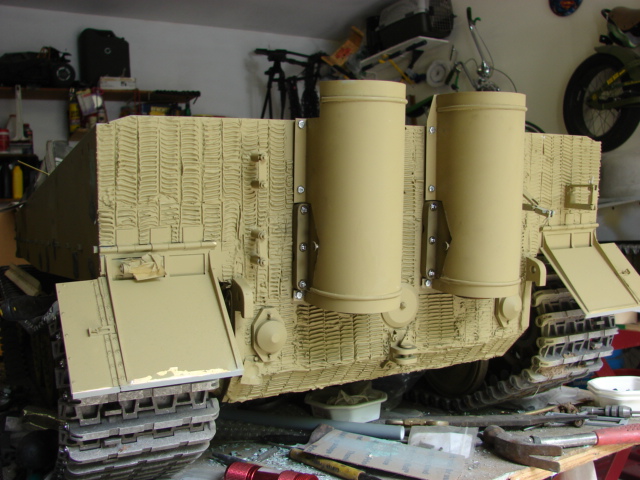
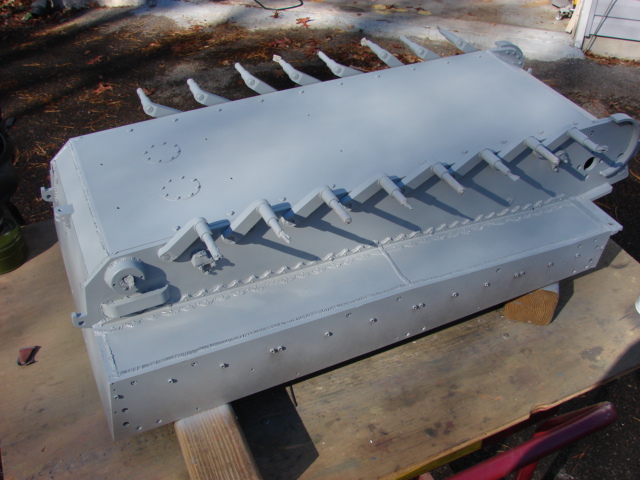
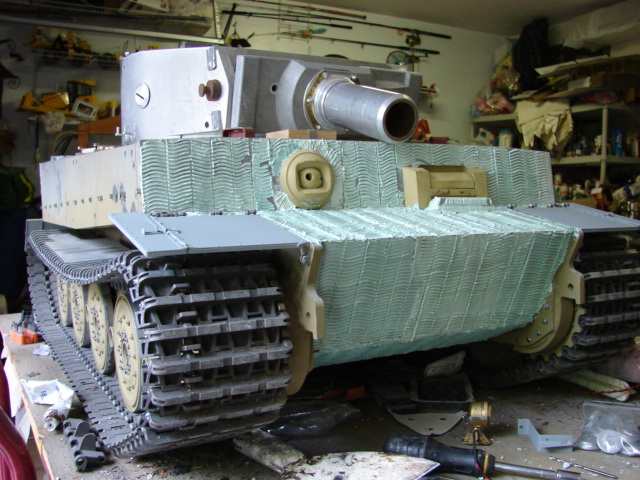
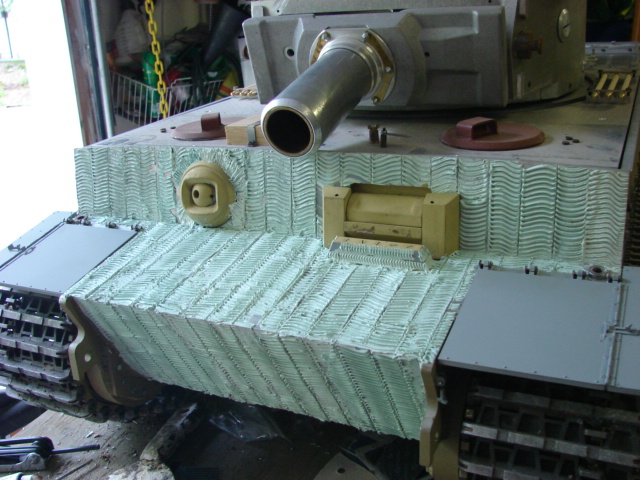
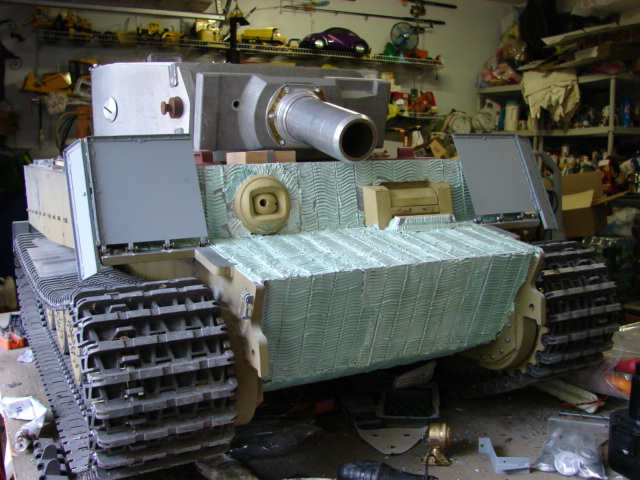
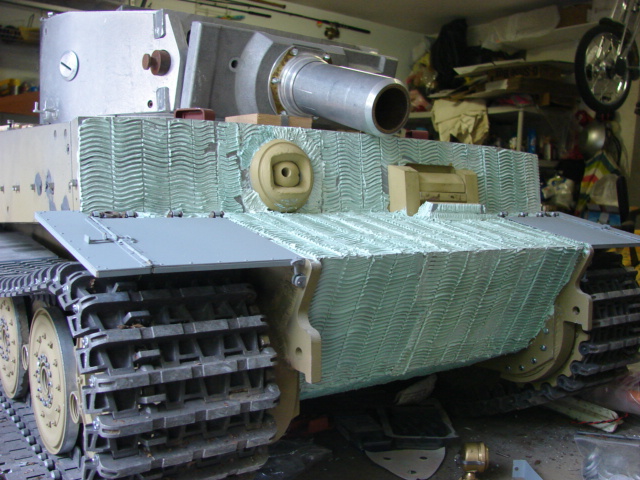
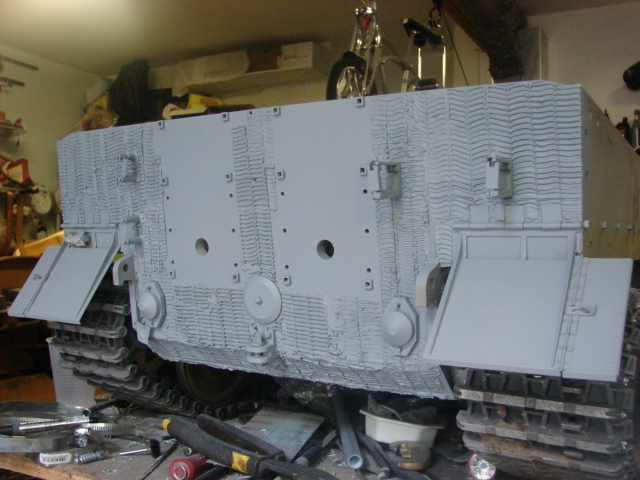
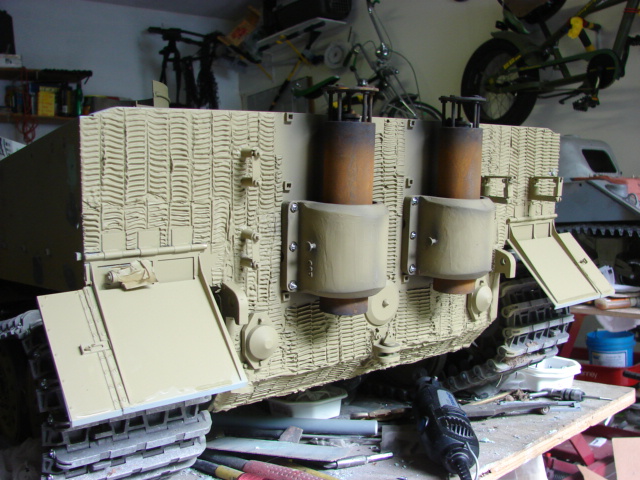
To start with the client requested that he wanted his tank to be zemmerited, so before I was able to move along with the detailing I needed to sculpt the zemm on the rear hull.

Image

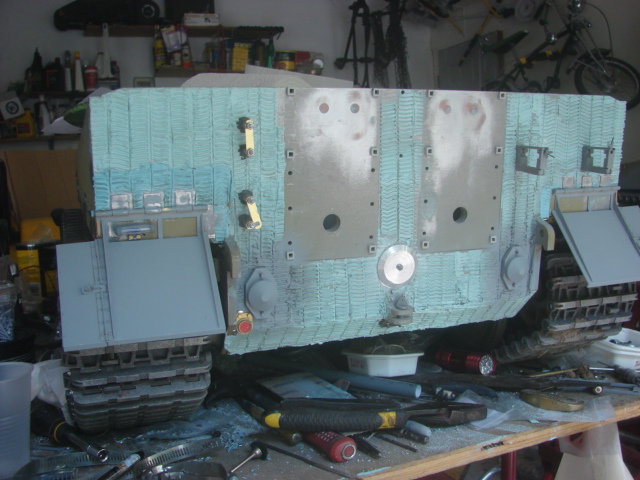
Portions of the hull that were not going to be coated with the zemmierite were masked off allowing for a nice clean cut sections of areas not coated.

Image

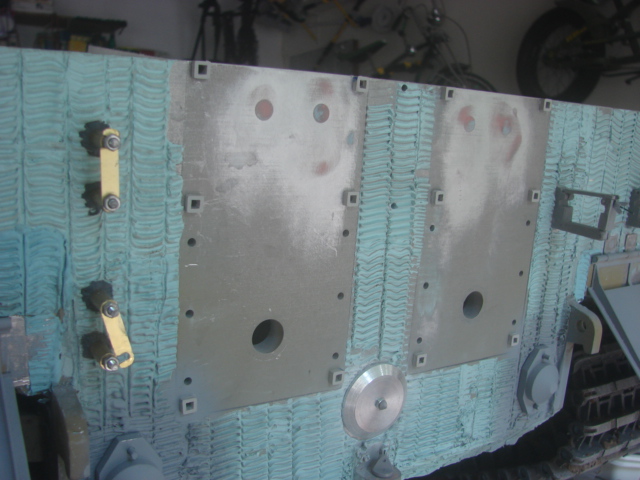
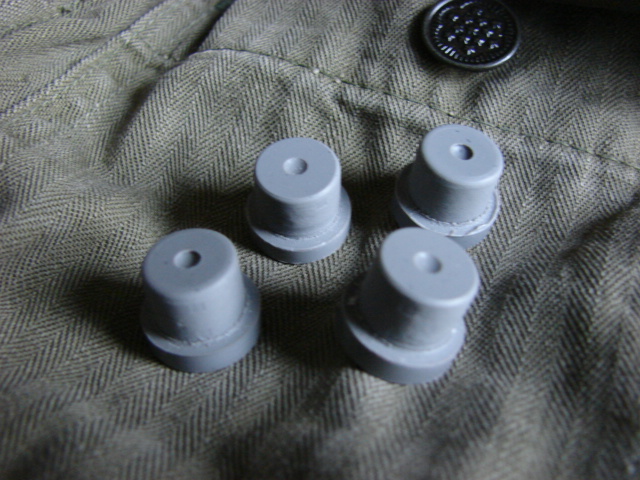
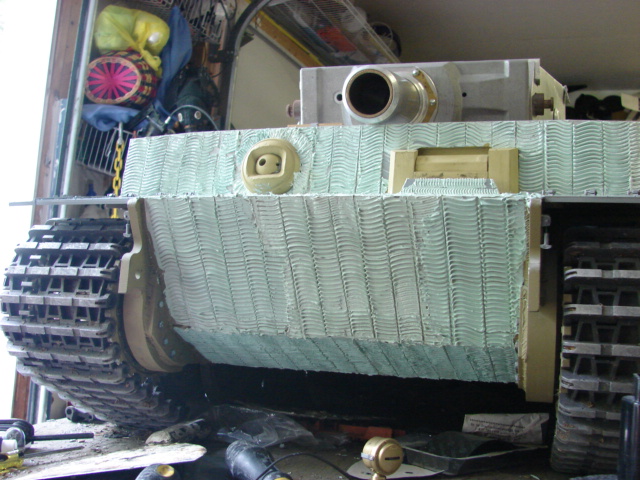
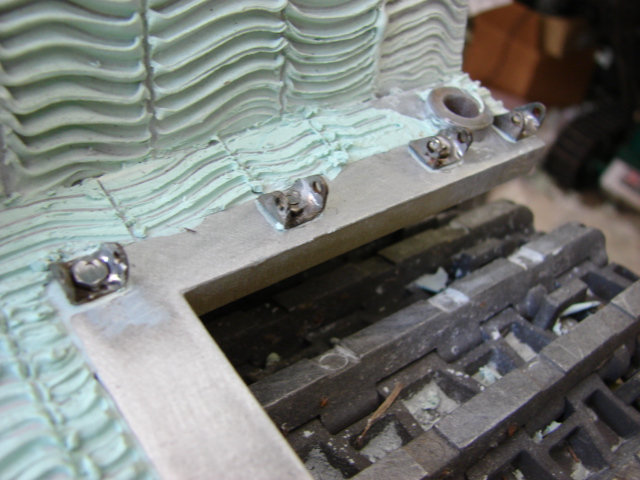
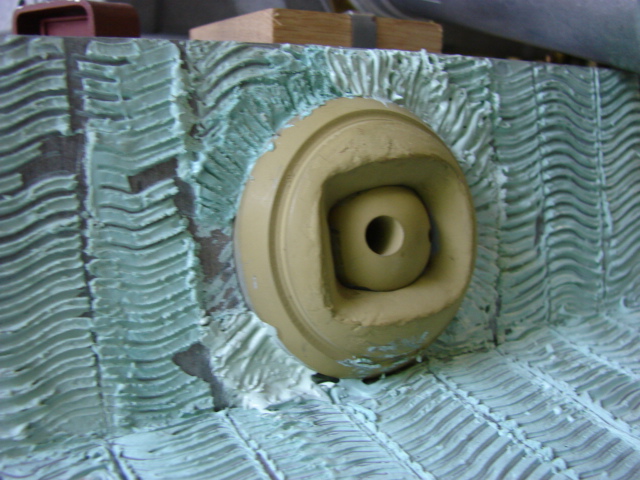
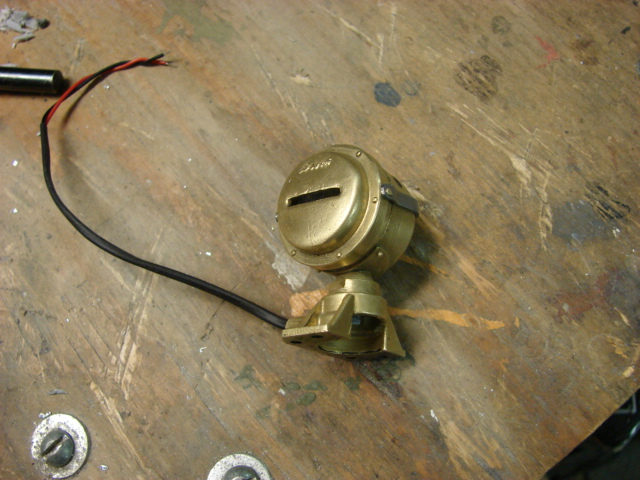
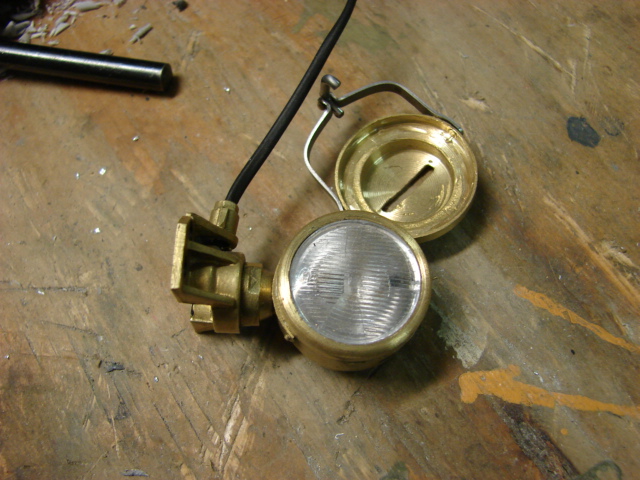
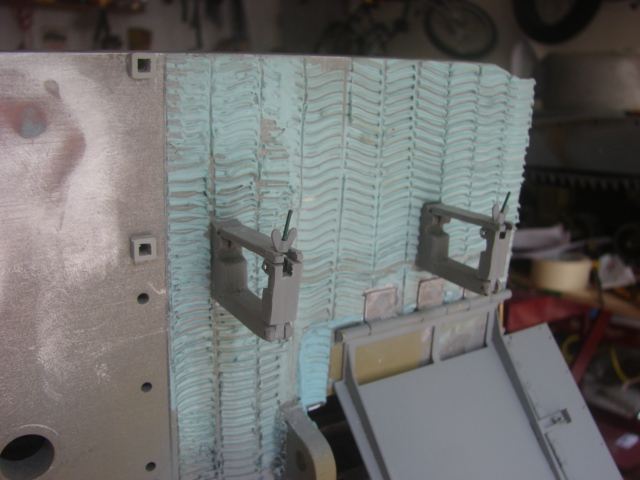
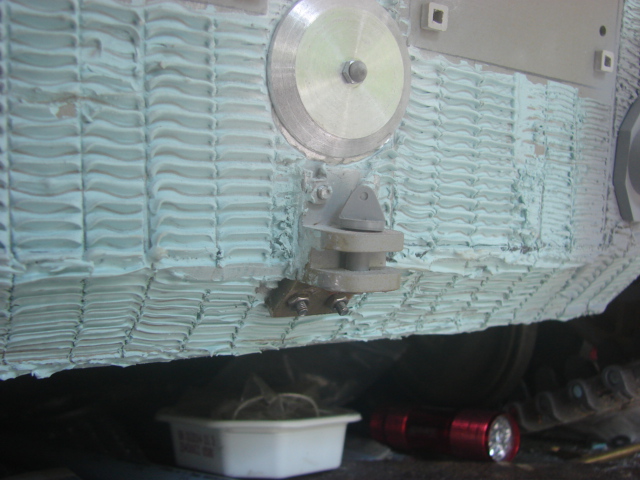
After the zemm, I added the remainder of the rear detailing, This would include the ECA Jack mounts, tubular convoy / tail light, reflector, idler tension cover caps, and starter cover cap.

Image

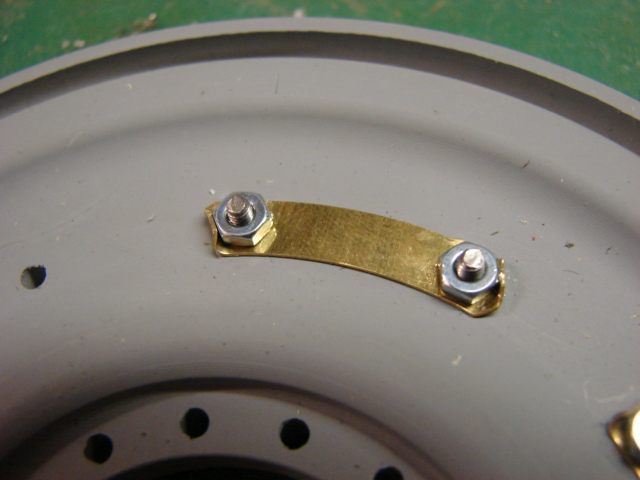
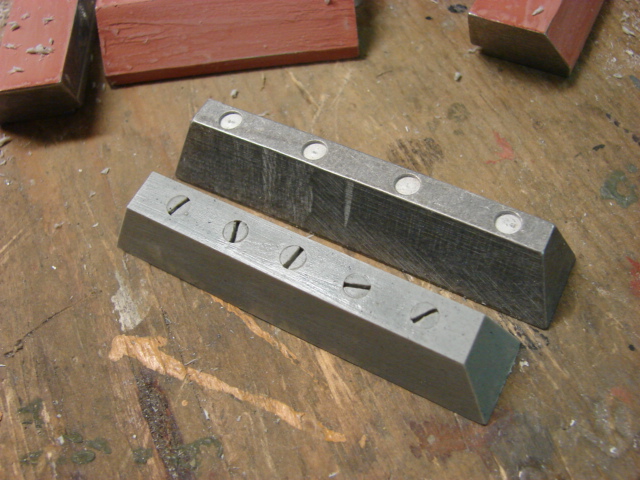
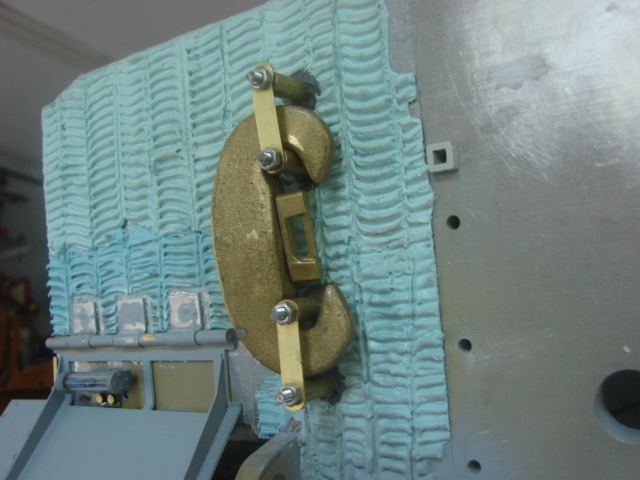
On these Armortek tigers the kit supplied tow hitch is a nice sturdy unit, one improvement that I made to the kit mount was the addition of a resin ECA tow pin, and the addition of the bottom portion. The bottom portion of the hitch is missing on the stock kit, but is a very easy addition to make out of plastic and two fasteners.

Image

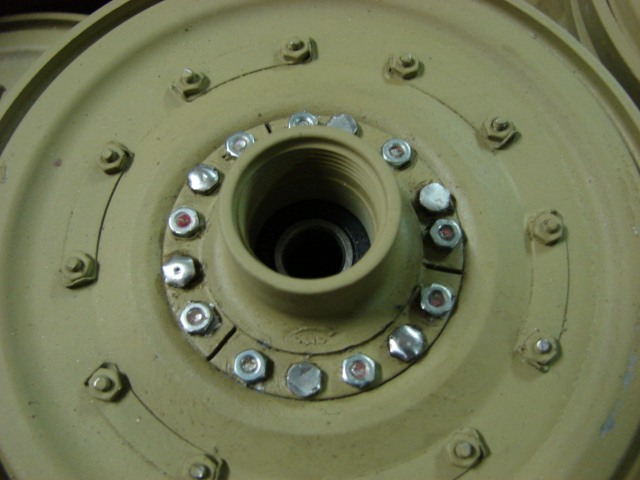
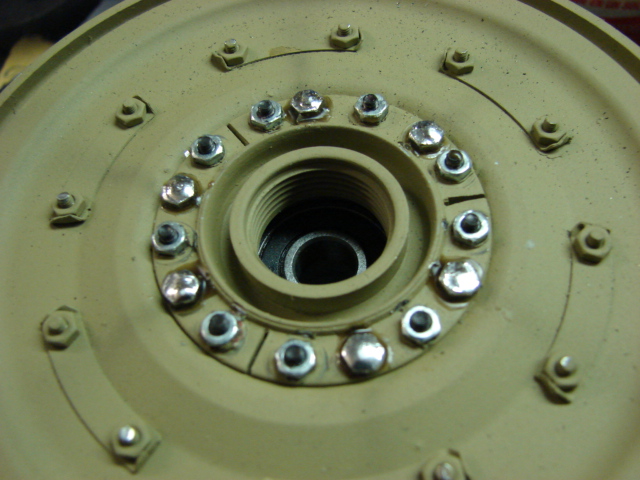
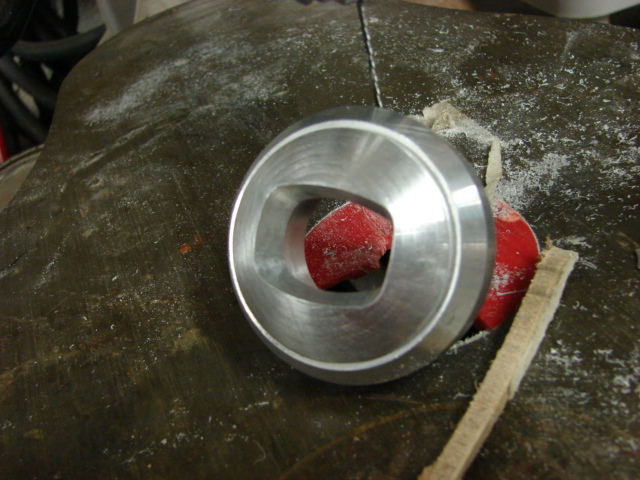
A small resin cone was also added to the starter cover cap. These quick additions also help improve the look of the tank.

Image

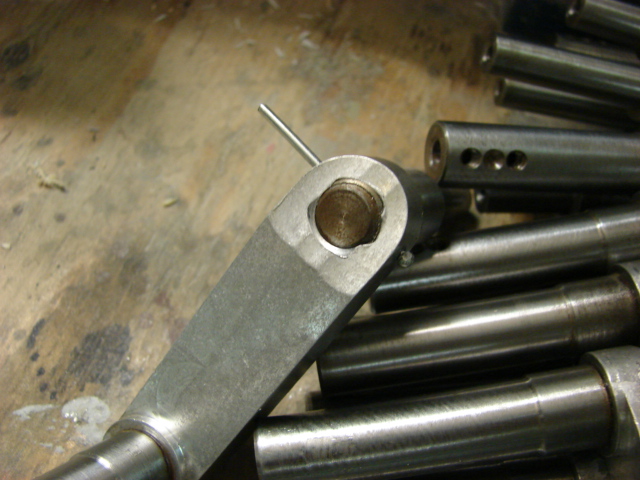
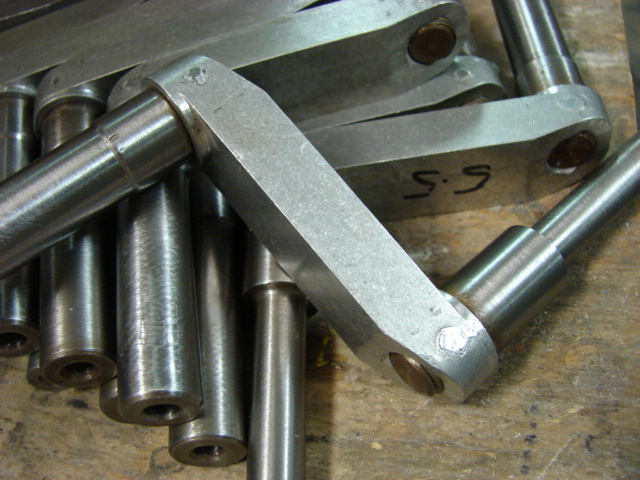
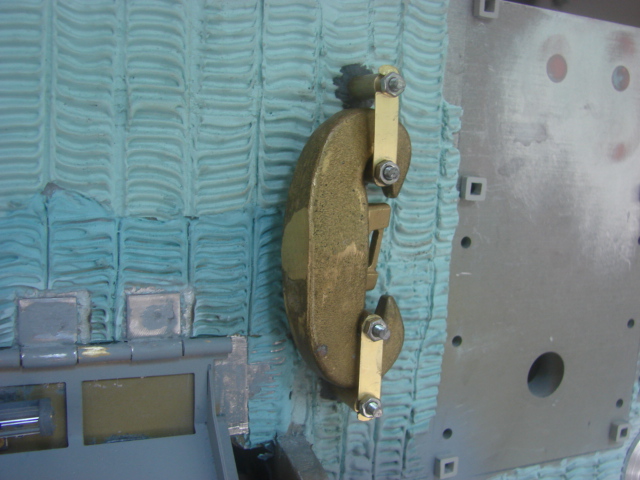
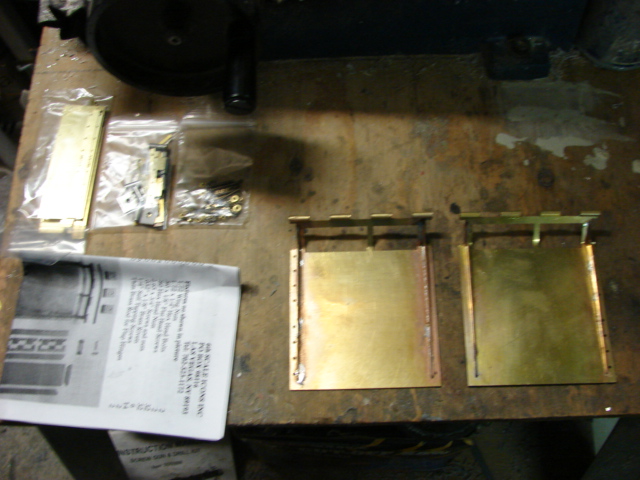
The tank's tow shackles were also added. The kit supplies you with a very nice set of aftermarket cast bronze tow shackles and all the functional mounting hardware required for the build.

Image

The kit supplied parts are very good and are very effective at their job, but because of the new thickness of the zemmerite they were too tight to mount on the shackles, so rather then redoing the zemm coating in that spot I simply

Image

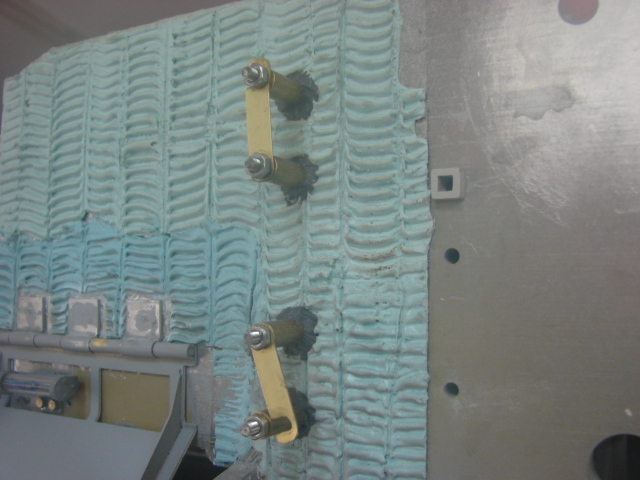
fabricated new mounting hardware of the same design, only slightly longer to compensate for the zemm thickness.

Image

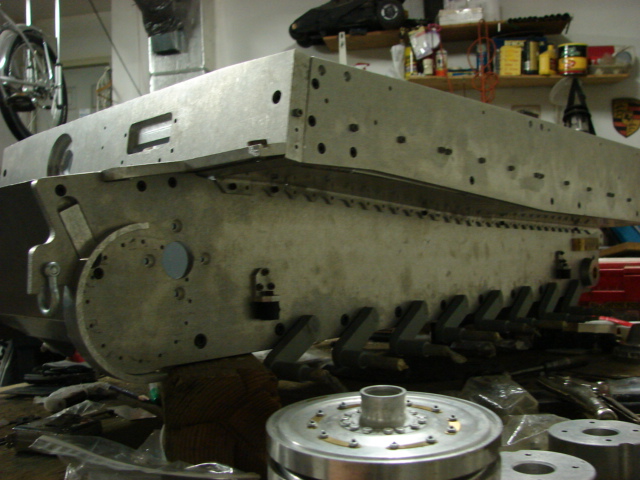
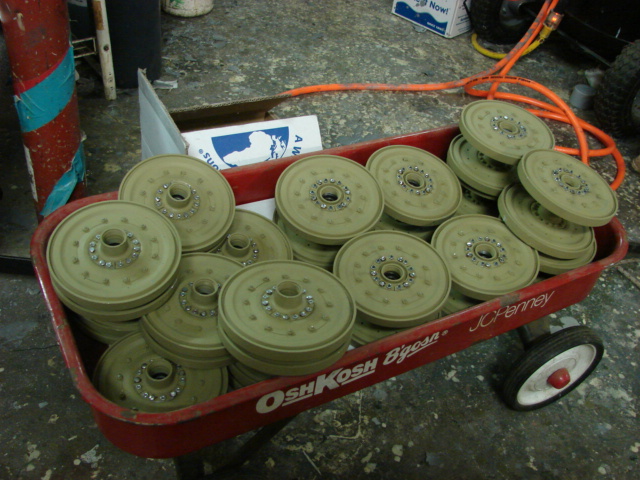
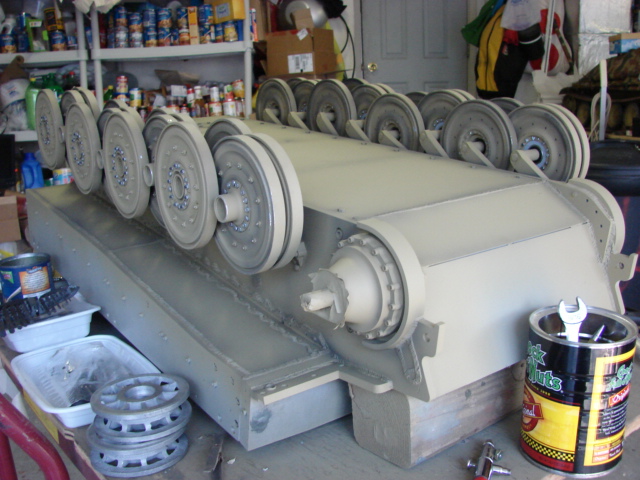
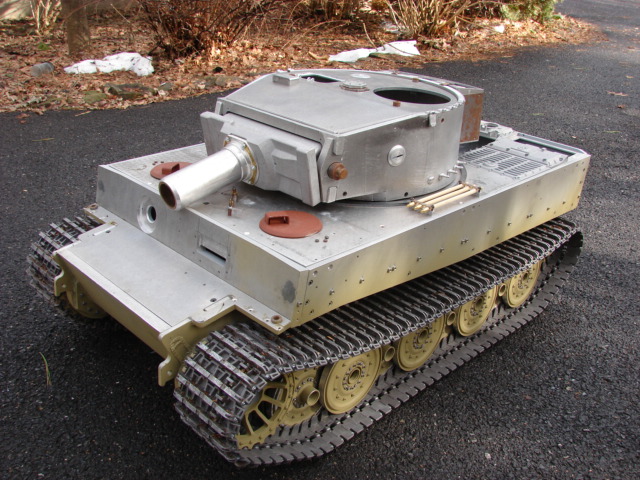
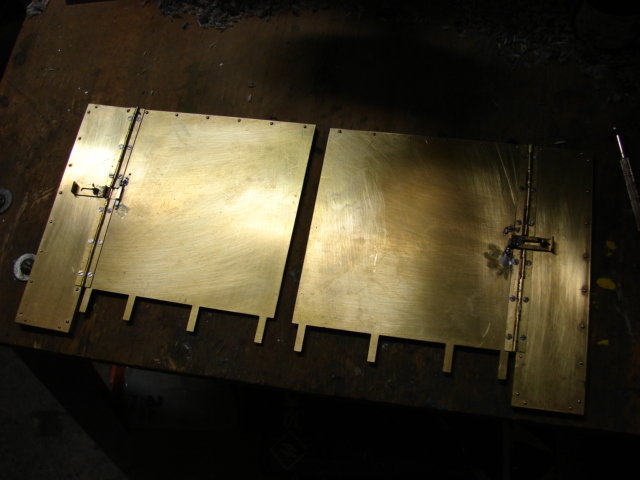
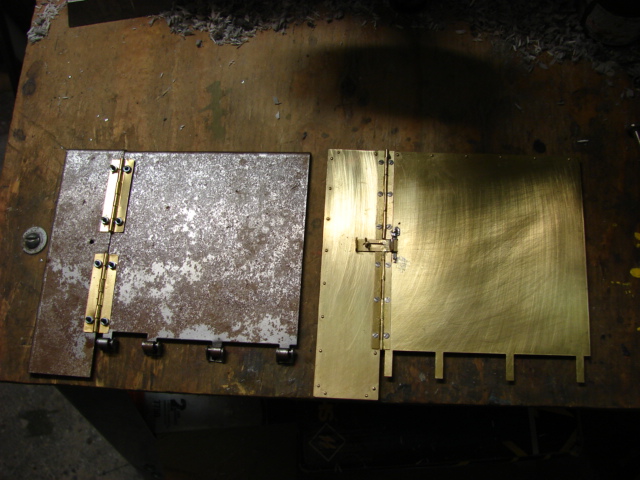
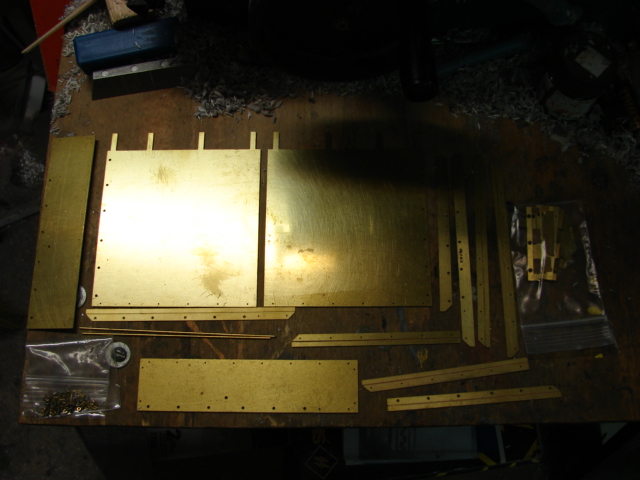
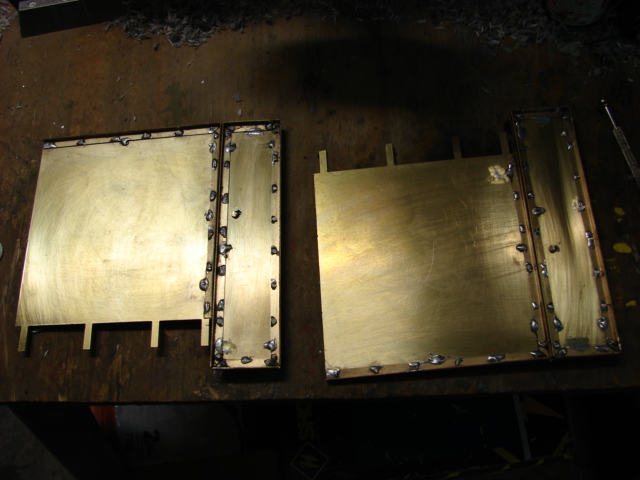
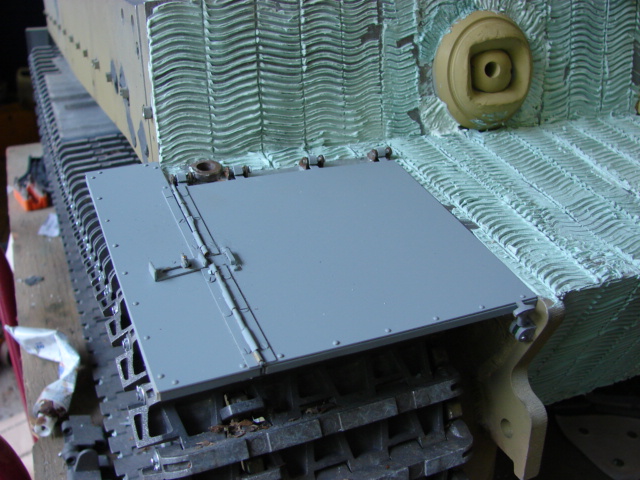
I then moved onto the tank's rear fenders. For the fenders the kit supplies you with a very basic set of early style fenders, which are all sheet metal, hinged and have the rear hull mounting frame. Because this is a late tank I switched out the early style kit fenders with a set of aftermarket ones from Sixth Scale icons.

Image

The set was the unassembled versions and with a few hand tools they went together very quickly.

Image

Image

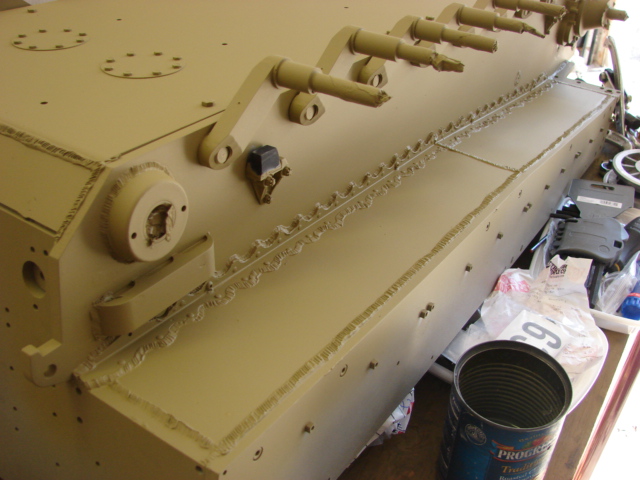
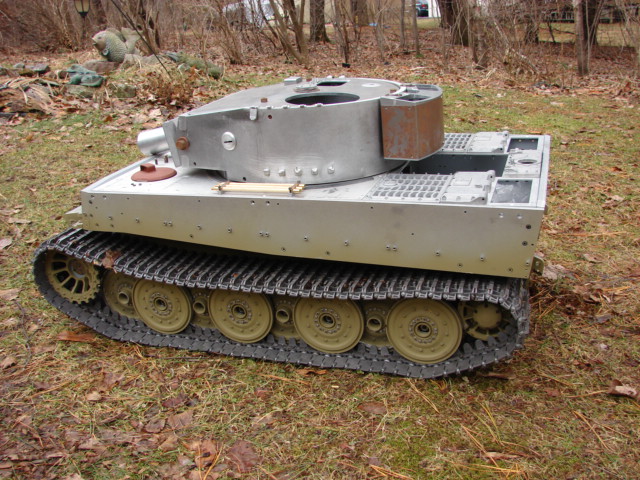
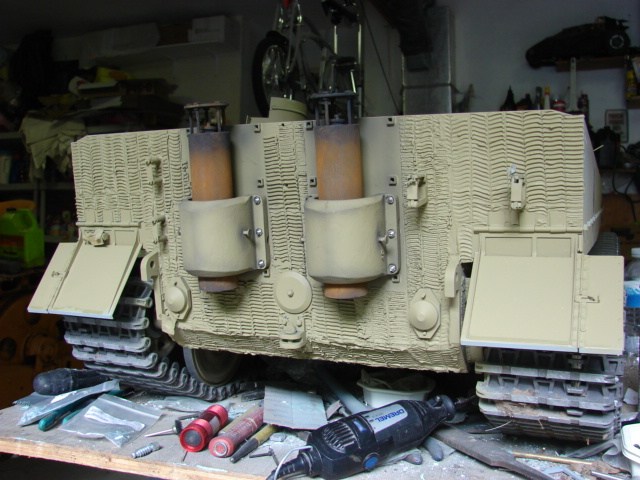
After they were installed it was time to start on the exhaust system, but before I could I wanted to fully prime and paint the rear hull to get it prepped for installation.

Image

Image

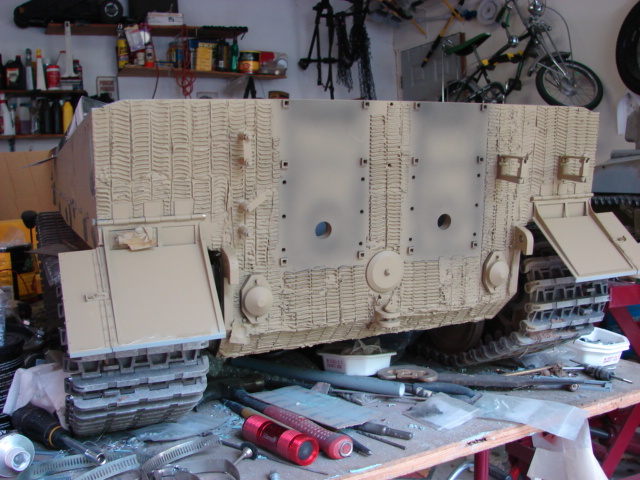
exhaust sut was also airbrushed on at this point, as once the manifolds and guards are added these areas will become very difficult to get to.

Image

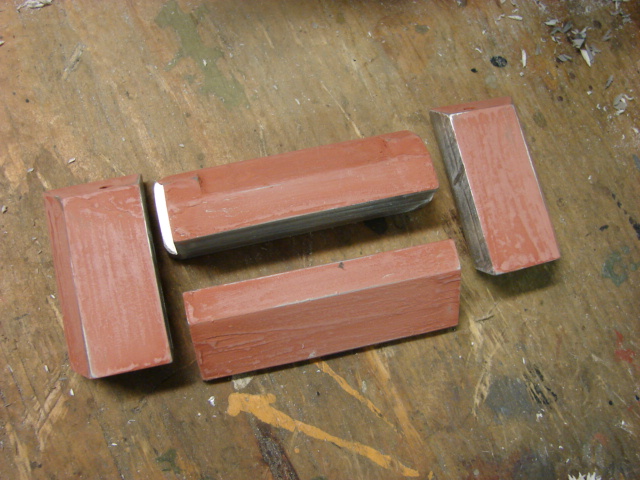
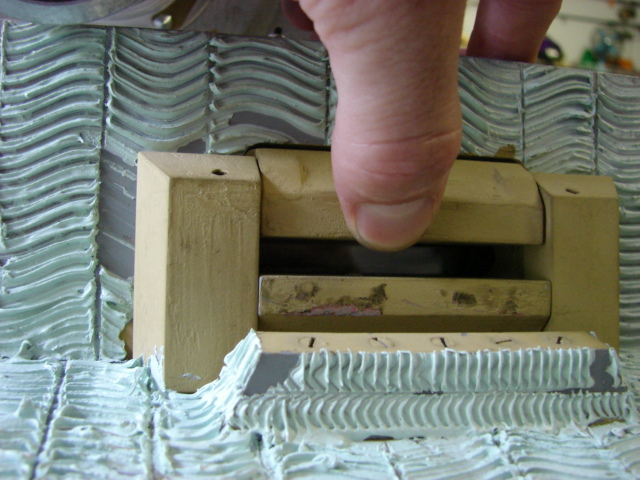
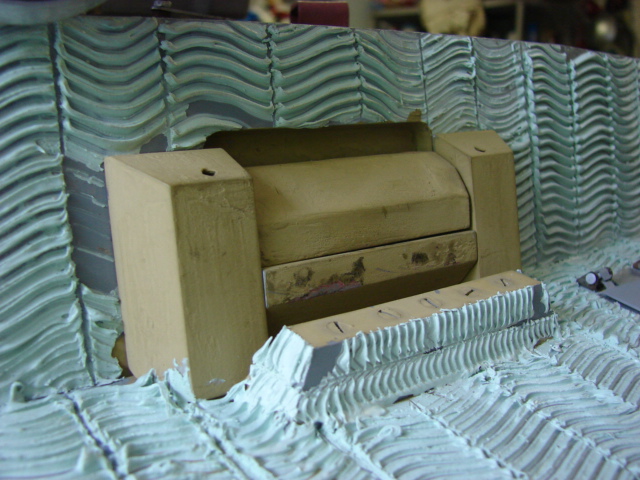
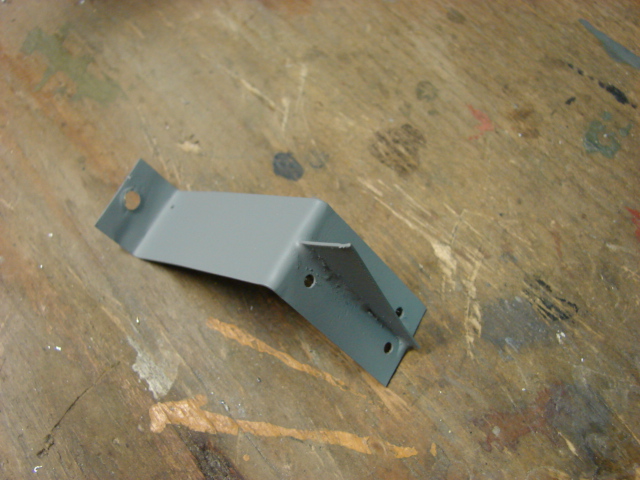
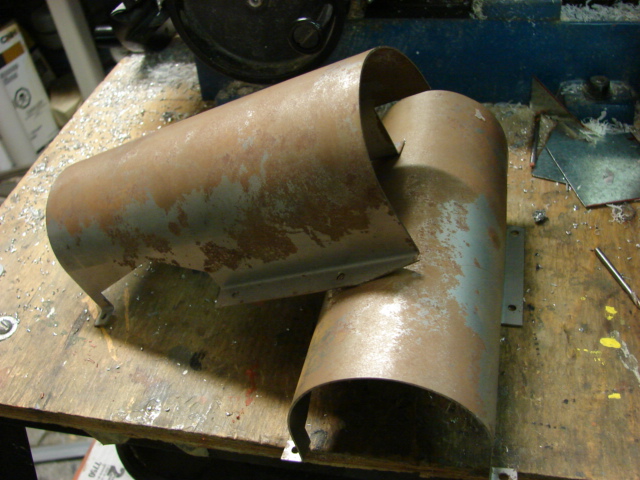
Once the rear was all ready it was then time to focus on the exhausts. For the manifold system the kit supplies you with the exhaust stacks, armored covers, and sheet metal heat shields. All of these parts are nicely made and were used on the model after a few small tweaks were made.

The stacks themselves were basically assembled OOB, with the only mod being made was the addition of the puffer cap detailing. After the cap was added they were weathered with their rust, and sut effects

Image

Image

Image

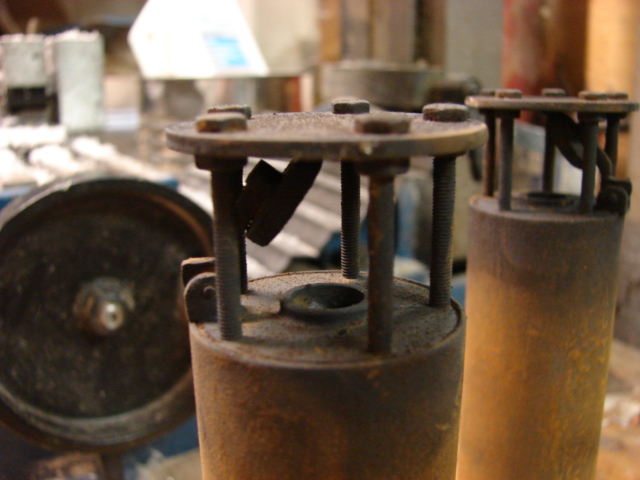
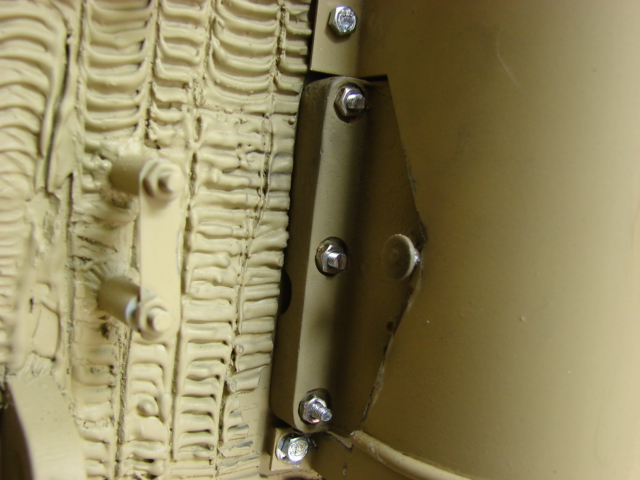
As for the armored covers, they had a few small shape tweaks that were added via the mill, ECA lift bolts,

Image

Image

cast texture / numbers, and also had the rust / sutt effects added.

Image

Image

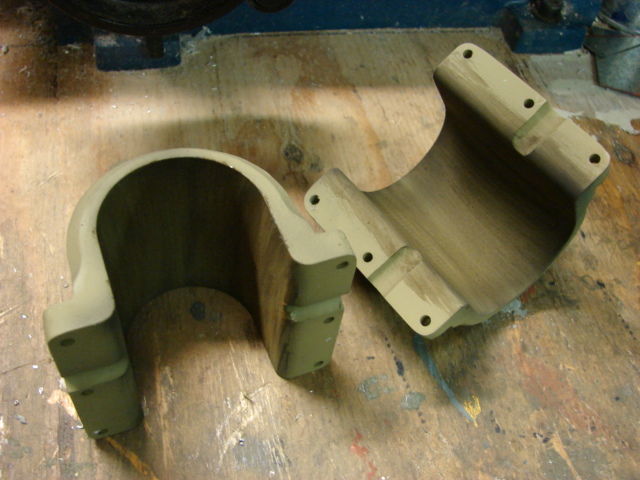
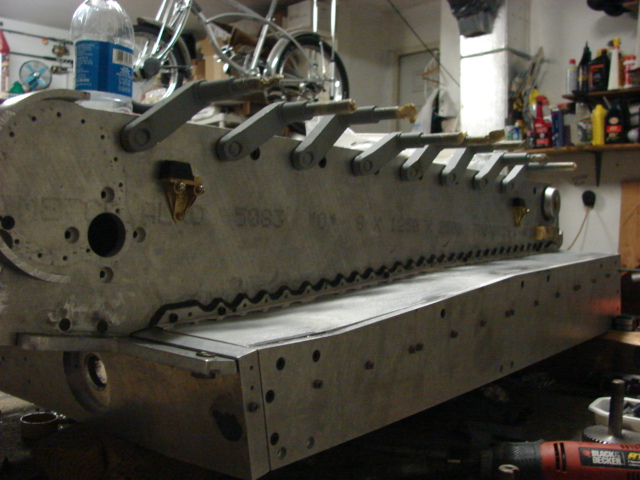
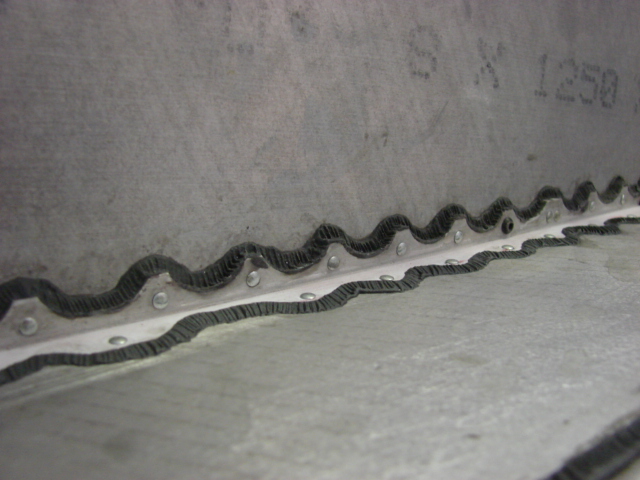
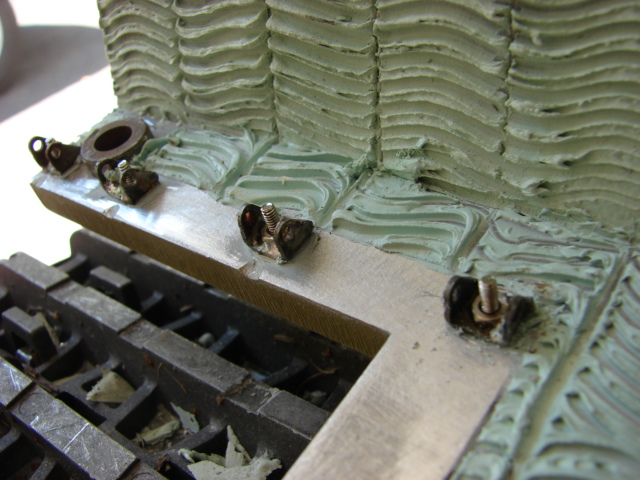
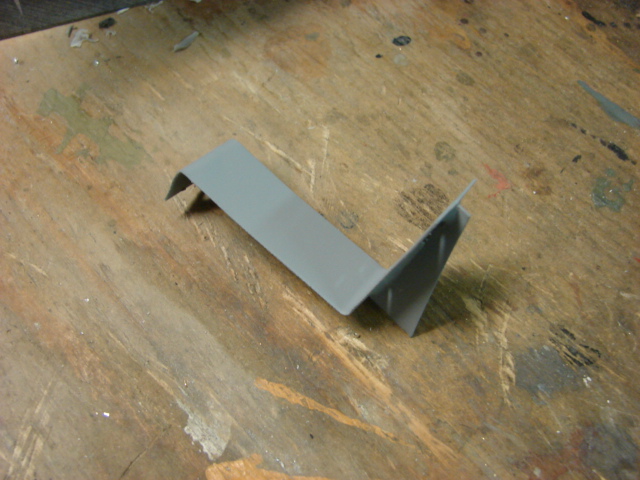
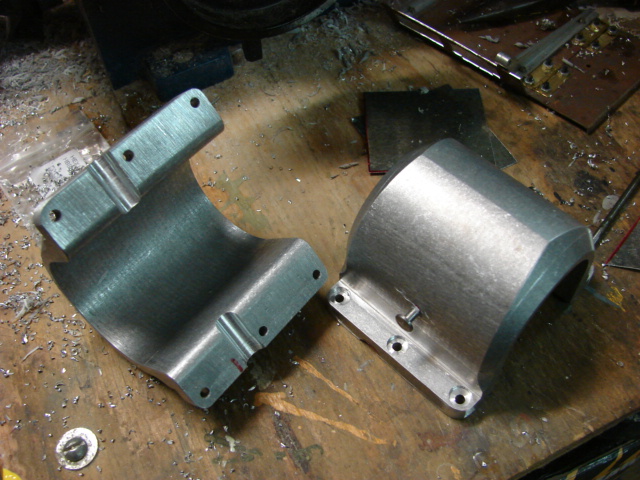
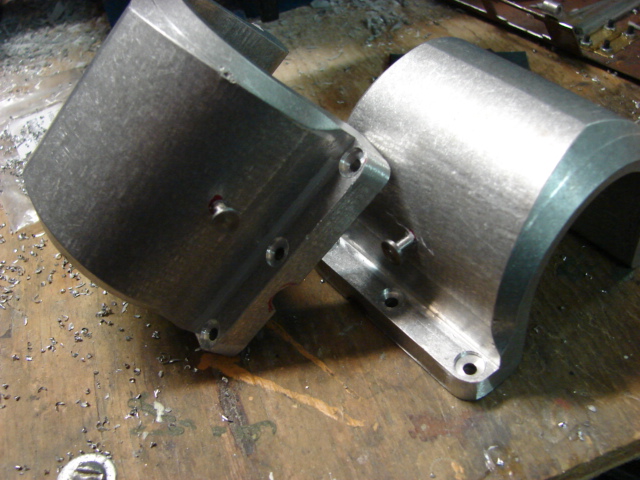
The exhaust heat shields that are included with the kits are mostly ready to go OOB, they are laser cut sheet steel and come pre bent and drilled.

Image

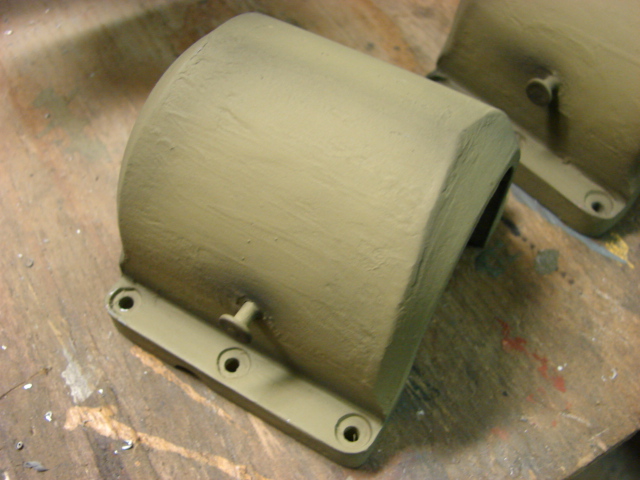
what was added to them were the rigidity bulges. Because of their thickness these were added via plastruct half round stock. Like the other parts these too were weathered. The exteriors will be completed along with the rest of the tank.

Image

Image

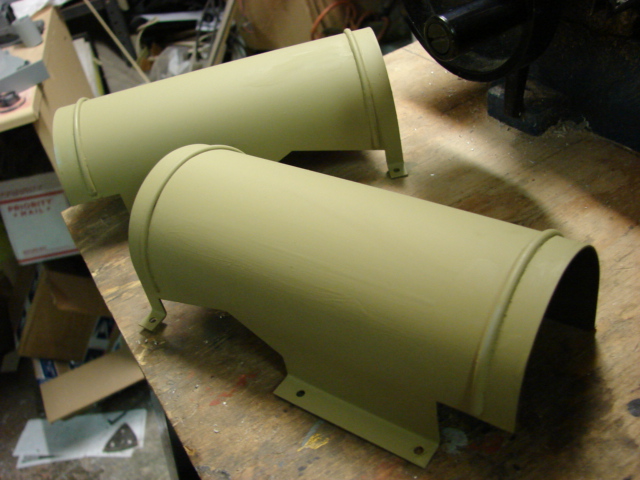
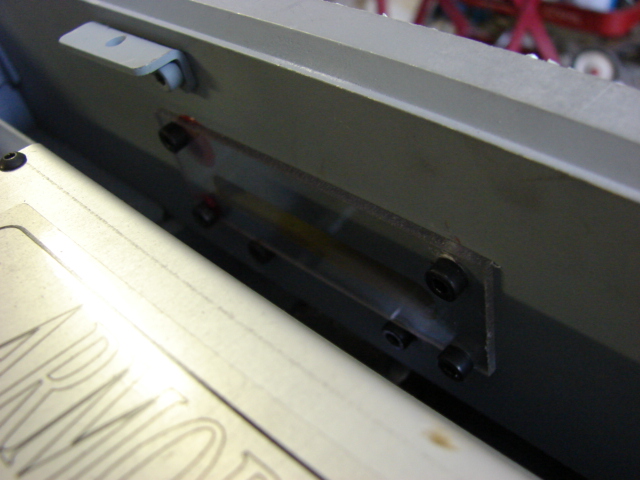
Once all the parts were ready they were all installed. Installation is all done with fasteners, and install in layers like the real one.

Image

Image

Image

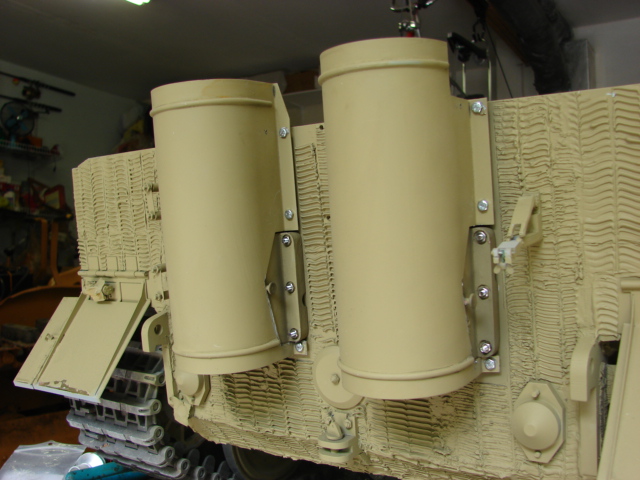
On the heat shields I fabricated the mounting bosses. These were simply cut from plastic square tubing. Once added they give the shields the nice stand off appearance which is found on the real tank and helps the look.

Image

Image

More pics were posted on the facebook page http://www.facebook.com/EastCoastArmory

and a youtube video was made describing more of the progress.

http://youtu.be/qAAaZD7x0ug

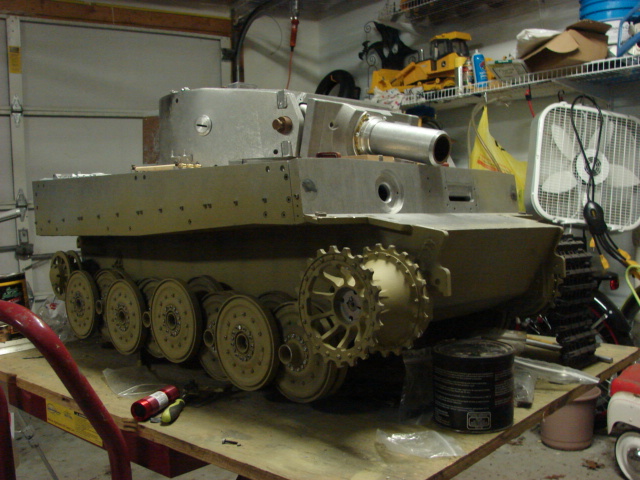
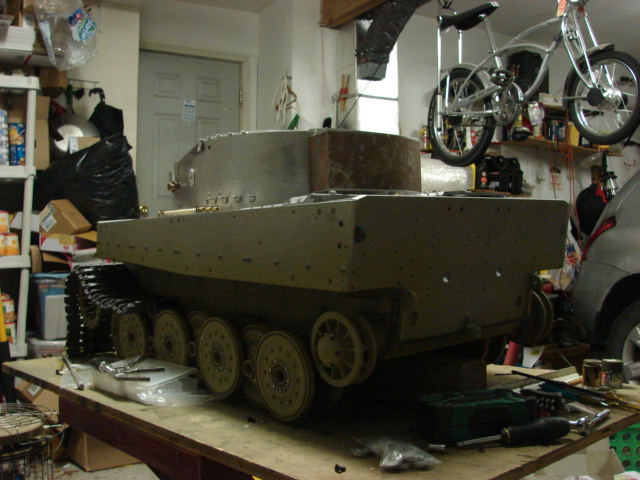
Now with this major part of the build out of the way I can now focus on the engine and all the animations... More to come!

Iacopo Di Giampietro
Posts: 226
Joined: Fri May 11, 2012 9:14 pm
Been liked: 48 times

Re: 2012 Late tiger comission build

Post by Iacopo Di Giampietro »

Ciao John,
it is always a pleasure to watch your work.
Cleaning and precision, attention to detail ..... a really great job! Congratulations!

John Grima
Posts: 250
Joined: Sun Jul 15, 2007 2:54 pm
Location: USA
Been liked: 48 times
Contact:

Re: 2012 Late tiger comission build

Post by John Grima »

Thanks Iacopo.

Progress was made to the tank's front hull portion.

Image

Just like with the rear I added the zemmirite coat at this time. The zemm was added with the same material and technique as was used on the rear.

Image

Image

Once the zemm was out of the way I turned my attention to the front fenders. Like with the rear fenders I replaced the kit original ones with a set from Sixth Scale Icons.

Image

The Kit fenders were not terminal, and will be stored and redetailed for another future build.

Image

Like the rear fenders the front fender set comes as an unassembled kit made from brass components. I was able to assemble them smoothly with no issues. all the parts are soldered on for strength.

Image

Image

For mounting on the fender I need to recycle the stock kit metal ones, for the installation I soldered a nut to their interior. I was then able to bolt the hinge to the top deck with fasteners that were flush.

Image

To finish them off I cut off the extra material with the dremel, once removed the hinges were ready for the fender install.

Image

The fenders mount on and are very realistic in their function. I did add the fender retention latch for added detail.

Image

Image

Image

Image

Image

I was also able to install the other front plate detail like the MG ball and the front visor. For the MG ball I improved the kit original by enlarging the MG well, and adding cast texture

Image

Image

After the revisions I mounted the part to the tank, I also hooked up a servo to the MG ball creating the pivoting function.

Image

Image

On the front visor the kit supplied one is very good out of the box, it is designed to have the visor open and close like the real tank. The only improvements that I made to the part was the addition of the cast texturing

Image

The kit supplied bullet guard is also nicely detailed, but I used the resin ECA one instead because it already had the slot screw details molded in and saved time in having to add them to the kit version.

Image

Another quick easy mod to make that helps the detail of the model was the visor panzerglass.

Image

To add the glass I simply cut a strip of clear lexan and sandwiched it with the fasteners that are used to mount on the kit part.

Image

Once installed the part is fully functional

Image

I also was able to work on the front headlight. The kit supplied front headlight bracket was missing in the parts bag, but I was able to fabricate one out of sheet metal in it's place, The part will be bolted to the tank and to the light after the micro fasteners arrive.

Image

Image

Image

as for the light itself the kit comes with an excellent Aftermarket cast brass one that is fully detailed and functional. Outside of fabrication of the power cable conduit, No mods are needed for this part, and will be added as is.

Image

Image

With this work now complete I have focusing on the tank's engine and engine compartment.

More pics were posted on the Facebook page, http://www.facebook.com/EastCoastArmory

and a video update was added to youtube
http://youtu.be/XmWiDedVYu8?list=UUdlM7 ... -Goo_LACsg

More progress to follow.

John Grima
Posts: 250
Joined: Sun Jul 15, 2007 2:54 pm
Location: USA
Been liked: 48 times
Contact:

Re: 2012 Late tiger comission build

Post by John Grima »

Been working on the tank for a little while, and the other day I completed the tank's functional HL230 engine.

Image

Image

The customer requested to have his tank fitted with not only a detailed engine, but one that is also fully functional, like my last initial production tiger I model. For the engine on this model though the build required a few alterations than what was done on my last build.

Image

For the engine itself I used my full HL320 kit as the base.
Image

Unlike the animated HL210 where the motor and gearbox was mounted behind the engine on the interior portion of the tank, this engine had to have all of it's mechanical equipment fitted to the interior of the crank case. This was because of all the electronics that are present in this model, the luxury of having lots of empty space was not present.

Image

To do this I had to mill away sections of the crank case interior. This was all done on the mill, and with having the crank case being a single solid casting made this procedure viable.

Image

Image
adding to the viability of the procedure was the fact that the the bottom detail engine plate is a separate casting, and after the mechanical parts are fitted makes a perfect access plate via fasteners

Image

Image

A similar procedure was done with the magneto tower. Unlike the HL210 where the fans are powered by a single output shaft that goes into a differential gearbox, the HL230 has the differential gearbox mounted to the engine on the magneto tower.
Image

Because the drive shafts emerge from both sides of the magneto tower I had to hollow out the tower's interior portion to allow the mounting of the machinery. Essentially the tower was turned into a miniature 90 degree gearbox differential.

Image

Since both animations (flywheel and cooling fan drives) are electrically powered the power cables exit from the front part of the engine, where it will be out of visible view as this portion of the engine is connected to the firewall.

Image

Both systems are powered by the same power source and are controlled via the same circuit which simplifies the electrical work. As for the smoke the exhaust manifolds are casted hollow so that they can be connected to the armrotek smoke system which will be mounted behind the firewall.

Image

Image

Once the conversion was complete the modification was completely seamless. other than the removal of the kit output shaft for the wires the engine is identical with it's static detail counterpart.

Image

For the paint on this build I went with the Auto Union style paint scheme, as this supplier of engines was common. Unlike the other engines I have seen the Auto Union built ones were black in color and featured the rocker arm covers in their natural aluminum color.

Image

Image

Image

Image

Image

More pics were added to the facebook page, https://www.facebook.com/media/set/?set ... 642&type=3

and a video of the engine in operation
http://youtu.be/DPCbWpZg8Cw

After these pics were taken the engine was weathered, I'm now working on the working fans / radiators clusters. Once done the compartment will get it's final details and everything will be installed!! More info to follow!

Iacopo Di Giampietro
Posts: 226
Joined: Fri May 11, 2012 9:14 pm
Been liked: 48 times

Re: 2012 Late tiger comission build

Post by Iacopo Di Giampietro »

Simply spectacular! :shock:
I do not know what else to add to your work: spectacular!
Congratulations, John. A truly amazing creation. :wink:

Ciao,
Iacopo

simon_manning
Posts: 2062
Joined: Fri Nov 02, 2007 8:51 pm
Location: new forest,hampshire,u.k.
Been liked: 1767 times

Re: 2012 Late tiger comission build

Post by simon_manning »

very nice john, these engines are a must have extra in the model, regards simon manning.

Derek Attree
Posts: 1307
Joined: Thu Jul 12, 2007 12:44 pm
Location: london
Has liked: 219 times
Been liked: 200 times

Re: 2012 Late tiger comission build

Post by Derek Attree »

Hi John
A true master piece :D

Derek
we must stop making stupid predictions

chris quick
Posts: 61
Joined: Thu Jul 12, 2007 2:58 pm
Location: Netherlands

Re: 2012 Late tiger comission build

Post by chris quick »

Great work John 8)


Best regards,
Chris
groetjes uit Holland

John Grima
Posts: 250
Joined: Sun Jul 15, 2007 2:54 pm
Location: USA
Been liked: 48 times
Contact:

Re: 2012 Late tiger comission build

Post by John Grima »

Thanks guys, Like with the other commission build I got going more time is now available due to the completion of the M4A4. Since the completion I was able to wrap up the assembly / paint of the tanks functional cooling fan clusters.

Image

Like the engine, the fans themselves are built from my cooling fan set. The sets are built / painted / and weathered the exact same way as I did on the initial tiger I built a little while ago.

Image

Image

Image

Image

And just like that earlier project these fans are fully functional and will give the tank a nice detail element along with the animated engine.

Image

Image

In addition to completion of the fan clusters I also completed the weathering on the HL 230.

Image

Image

Image

Image

Image

With the engine and fans now done I can focus on the engine compartment details and getting it completed, Once complete the project will pick up steam.

Image

Image

More pics were posted on the ECA facebook page, http://www.facebook.com/EastCoastArmory

and a video update was posted on youtube,
http://youtu.be/NfHsii2jRrI

More to come!

Post Reply