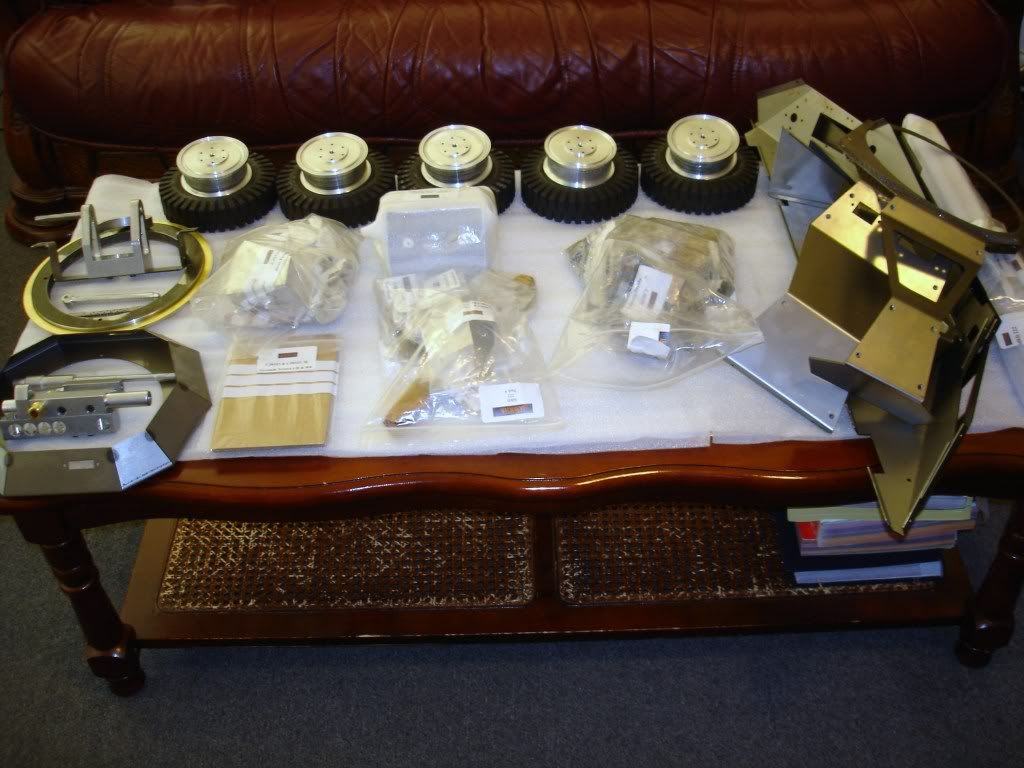
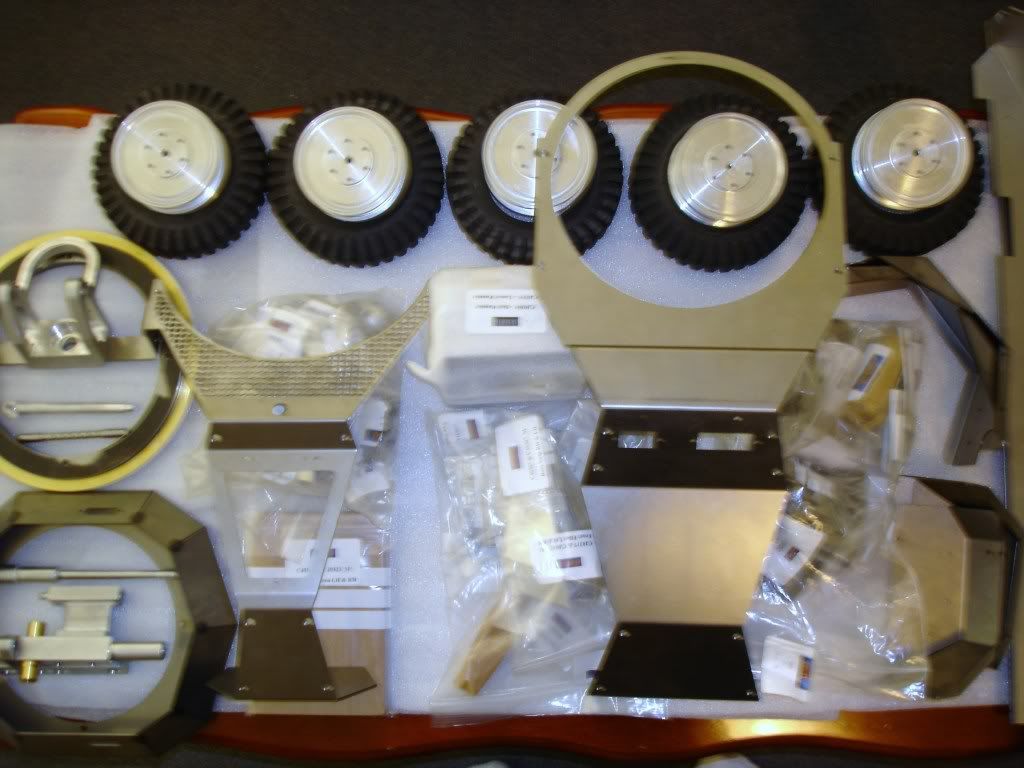
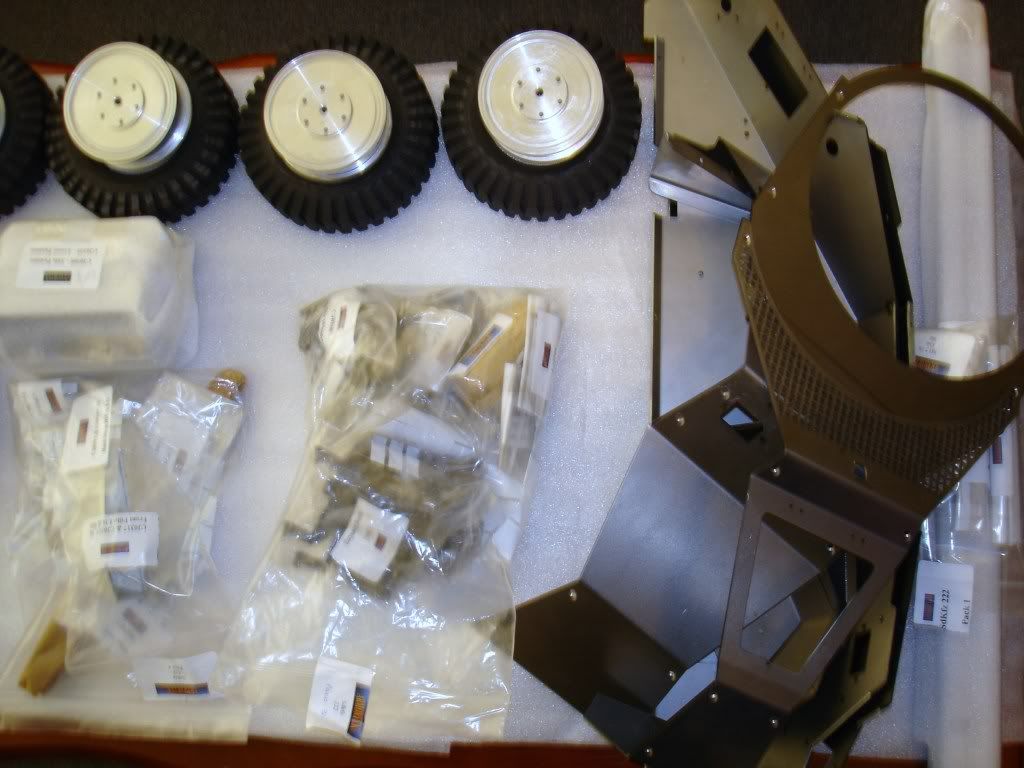
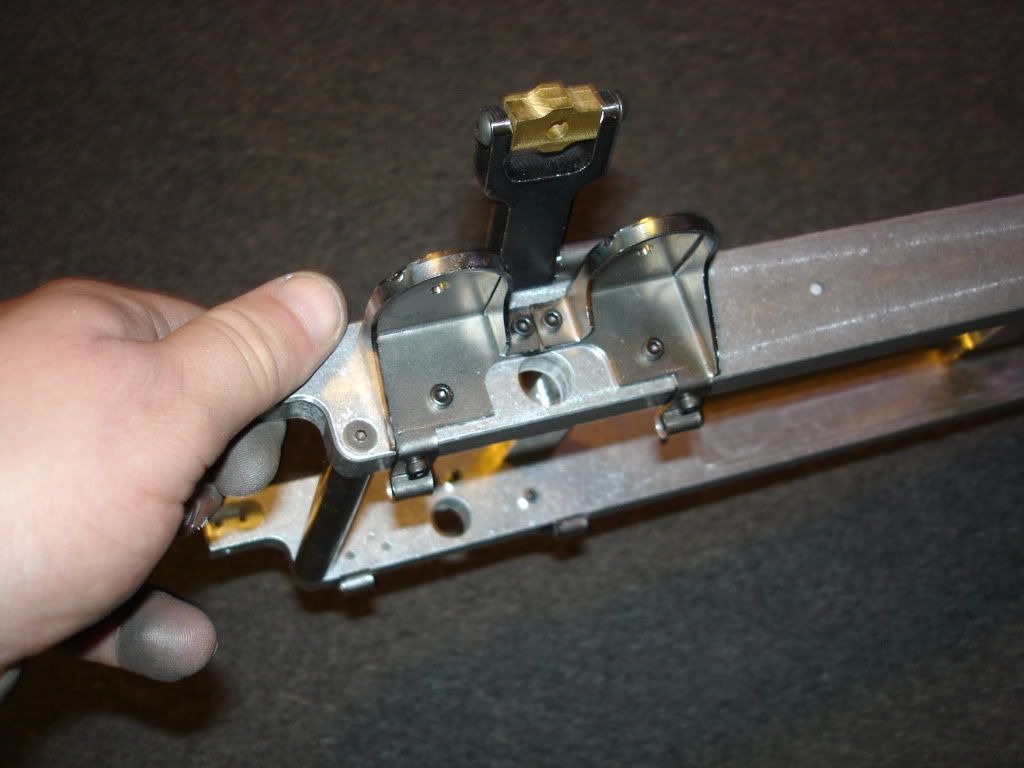
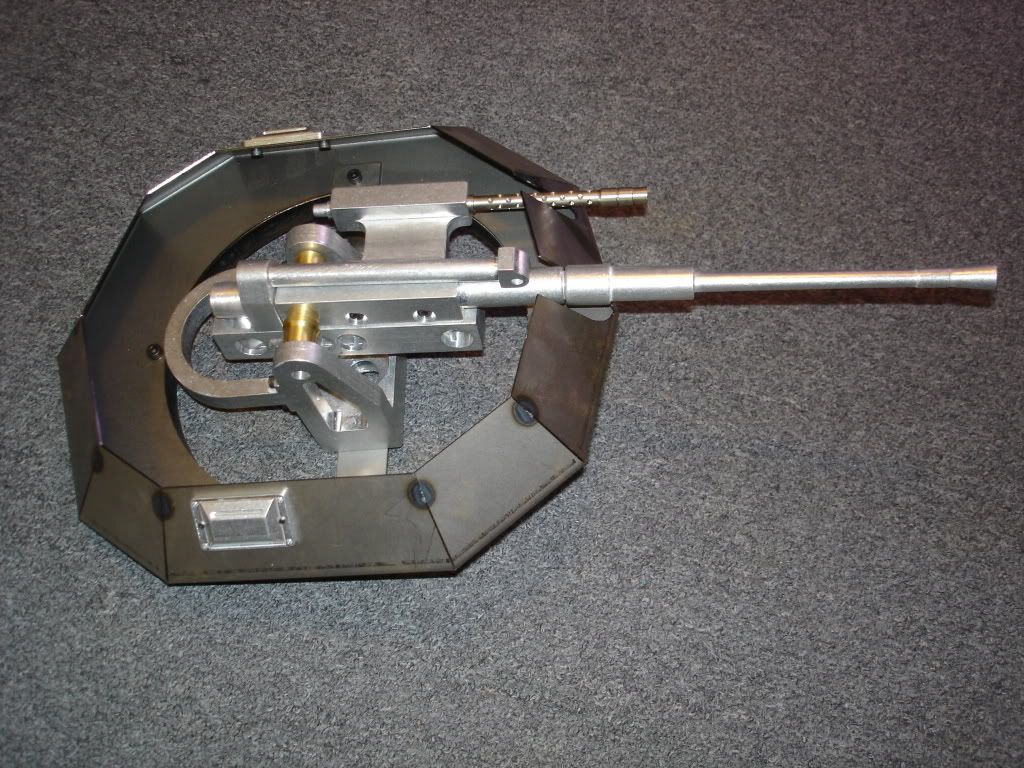
my sdkfz-222 build

Forum for discussion relating to the Sdkfz 222
Post Reply
Sean Noonan
Posts: 119
Joined: Fri Aug 20, 2010 2:12 pm
Location: bournemouth

my sdkfz-222 build

Post by Sean Noonan »

hi all
this is my first armortek model, and wanted to share my 222 build. this may take me some time to build ,what with work etc (and my lack of building skills :lol: ).
i only have the 222 kit for now, motion pack to folow soon :wink:
cheers sean


Image
Image
Image

Sean Noonan
Posts: 119
Joined: Fri Aug 20, 2010 2:12 pm
Location: bournemouth

Post by Sean Noonan »

hi all
well frances went out for the night, so i mamaged to get started on the 222. just dry fitting everything first to make sure all the important parts fit ok before i etch prime the parts.
cheers sean
Image
Image
Image
Image
Image
Last edited by Sean Noonan on Wed Sep 29, 2010 3:54 pm, edited 1 time in total.

Paul Morris
Posts: 1559
Joined: Thu Jul 12, 2007 4:44 pm
Location: North Lancs
Been liked: 68 times

Post by Paul Morris »

Hi Sean.

Looks like not many problems there mate...see said you would be fine :)
Cheers Paul :wink:
Paul's Tank Workshop. Complete Tank builds and re builds zimmerit and paint to museum quality standard. pjtigerman@aol.com
01524 720977
https://www.facebook.com/PaulsTankWorkshop

Sean Noonan
Posts: 119
Joined: Fri Aug 20, 2010 2:12 pm
Location: bournemouth

Post by Sean Noonan »

thanks paul
i must say so far i have enjoyed the build, a little sanding here and there cleaning out thread holes etc.
will post my progress as and when i get a chance to tinker
cheers sean

Sean Noonan
Posts: 119
Joined: Fri Aug 20, 2010 2:12 pm
Location: bournemouth

Post by Sean Noonan »

motion pack ordered today :D

User avatar
Adrian Harris
Posts: 5016
Joined: Thu Jul 12, 2007 10:46 pm
Location: Berkshire (UK)
Has liked: 1296 times
Been liked: 1511 times

Post by Adrian Harris »

Just wait till you see how many bits there are in it !!

Adrian

PS - I think your visors are on upsidedown :wink:

Sean Noonan
Posts: 119
Joined: Fri Aug 20, 2010 2:12 pm
Location: bournemouth

Post by Sean Noonan »

im glad someone noticed at last :lol: i did notice my mistake and have already changed them :D
cheers sean

Tim Bowman
Posts: 1762
Joined: Fri Jul 13, 2007 4:53 am
Location: Northern California
Been liked: 177 times
Contact:

Post by Tim Bowman »

Hi Sean

Congratulations on the 222. Keep the photos coming please.

Best regards
Tim
"So long as one isn't carrying one's head under one's arm, things aren't too bad." – Erwin Rommel

martin pitcairn
Posts: 172
Joined: Thu Jul 12, 2007 5:53 pm
Has liked: 765 times
Been liked: 8 times

Post by martin pitcairn »

i am also enjoying your build, so keep the photos coming

Sean Noonan
Posts: 119
Joined: Fri Aug 20, 2010 2:12 pm
Location: bournemouth

Post by Sean Noonan »

thanks for the kind words guys, i will post some more pics soon
but im in need of some advice, the brass pivot block on the wishbone (you can see it on my photo above) is this ment to be fitted slightly loose to allow for movement?? so to allow the suspension to move up/down.
sounds a silly question but best to ask for advice.
cheers sean

martin pitcairn
Posts: 172
Joined: Thu Jul 12, 2007 5:53 pm
Has liked: 765 times
Been liked: 8 times

Post by martin pitcairn »

you are correct, slighly loose, well mine are anyway!

Sean Noonan
Posts: 119
Joined: Fri Aug 20, 2010 2:12 pm
Location: bournemouth

Post by Sean Noonan »

hi all
not much happend since my last update (to much work :cry: )
just managed to etch prime most of the parts, still more to do.
waiting on mike.s hinges for the doors etc.
waiting on motion pack
Image
Image
cheers sean

Sean Noonan
Posts: 119
Joined: Fri Aug 20, 2010 2:12 pm
Location: bournemouth

Post by Sean Noonan »

hi all
well still waiting for parts etc :( 
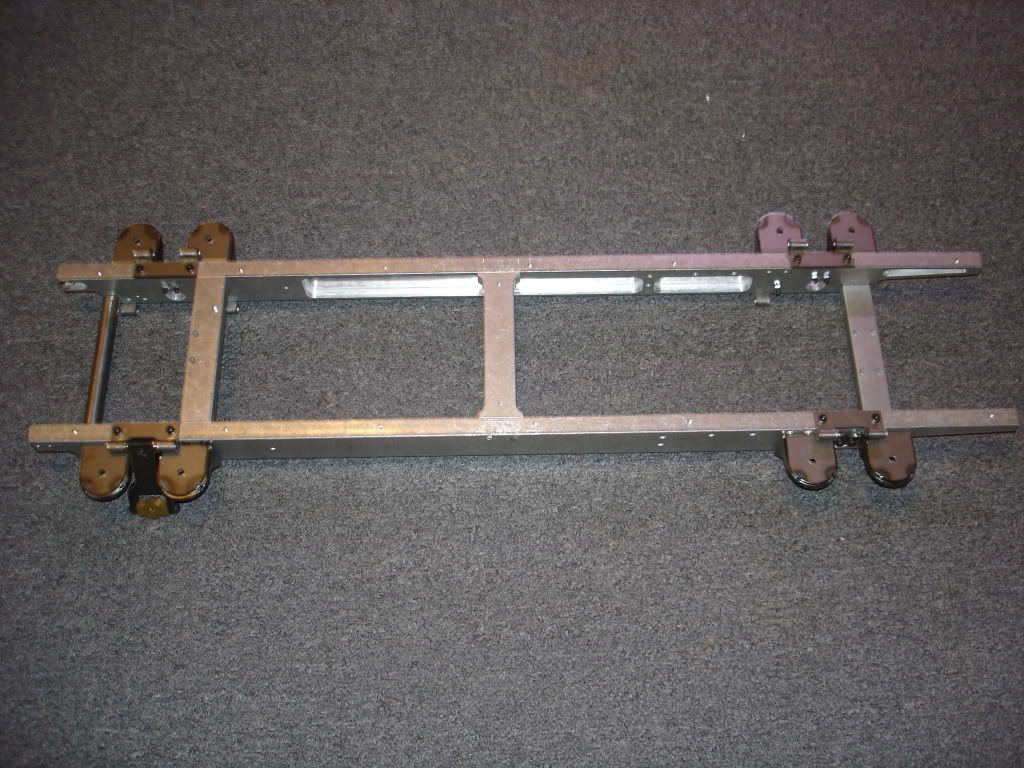
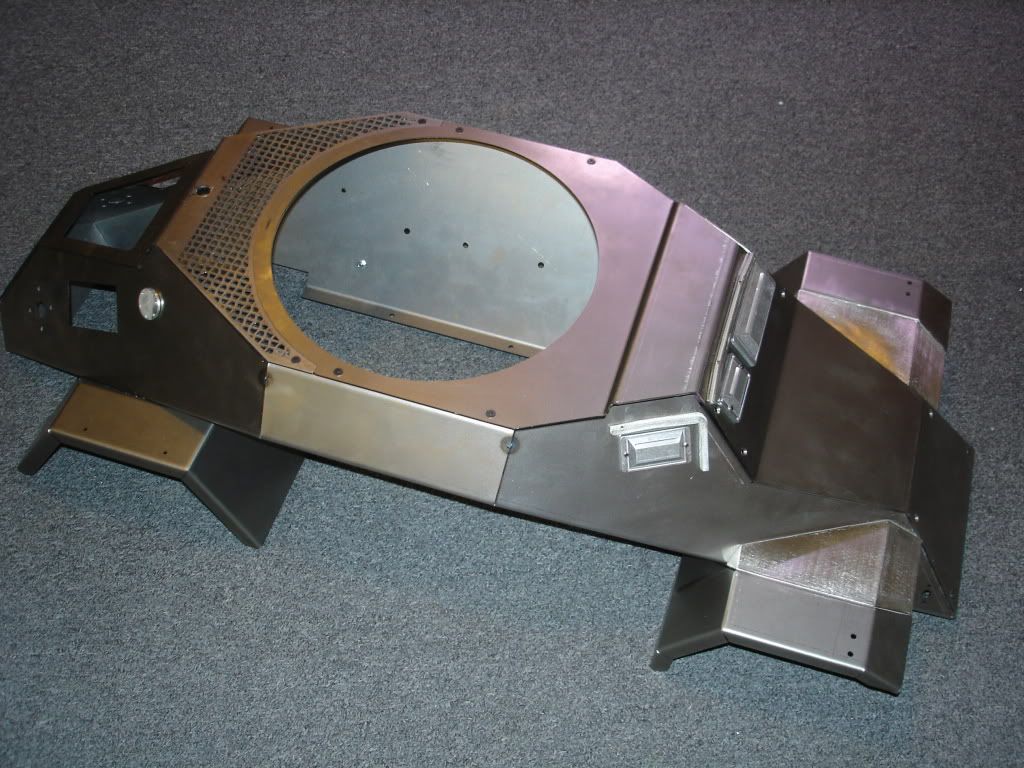
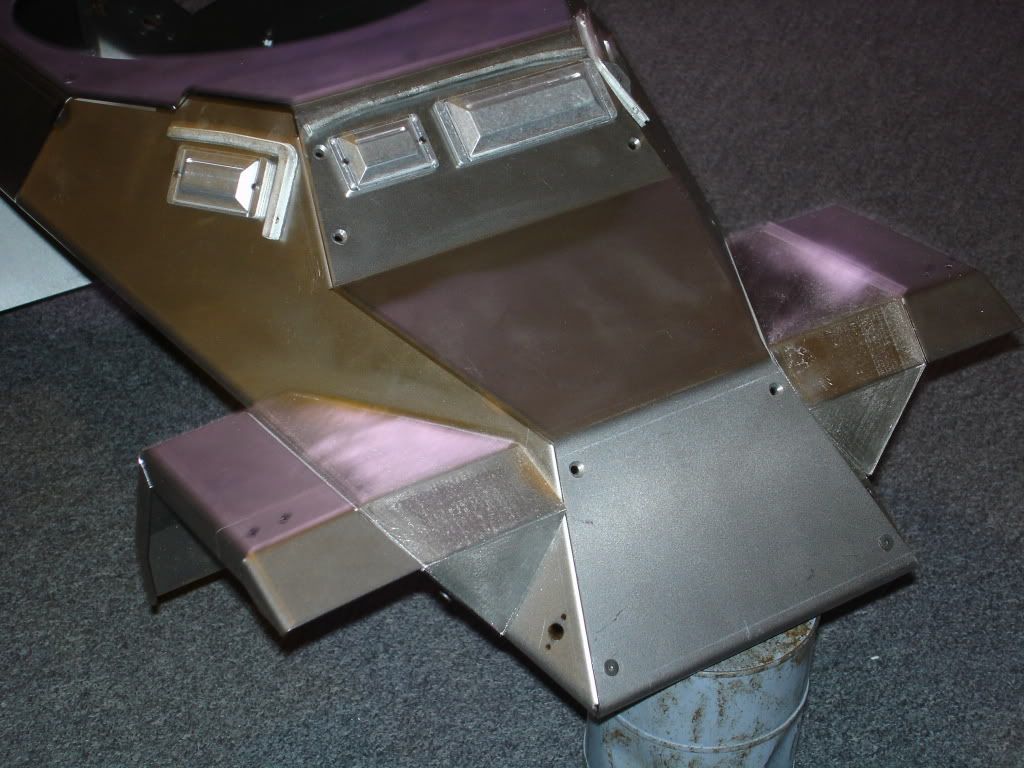
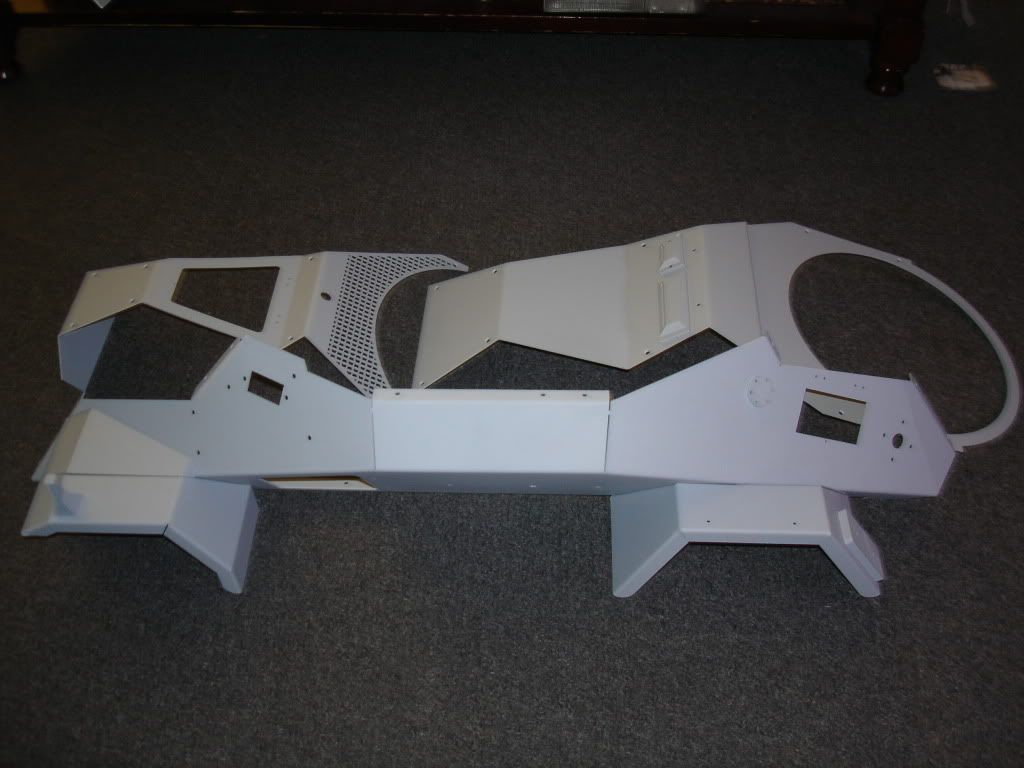
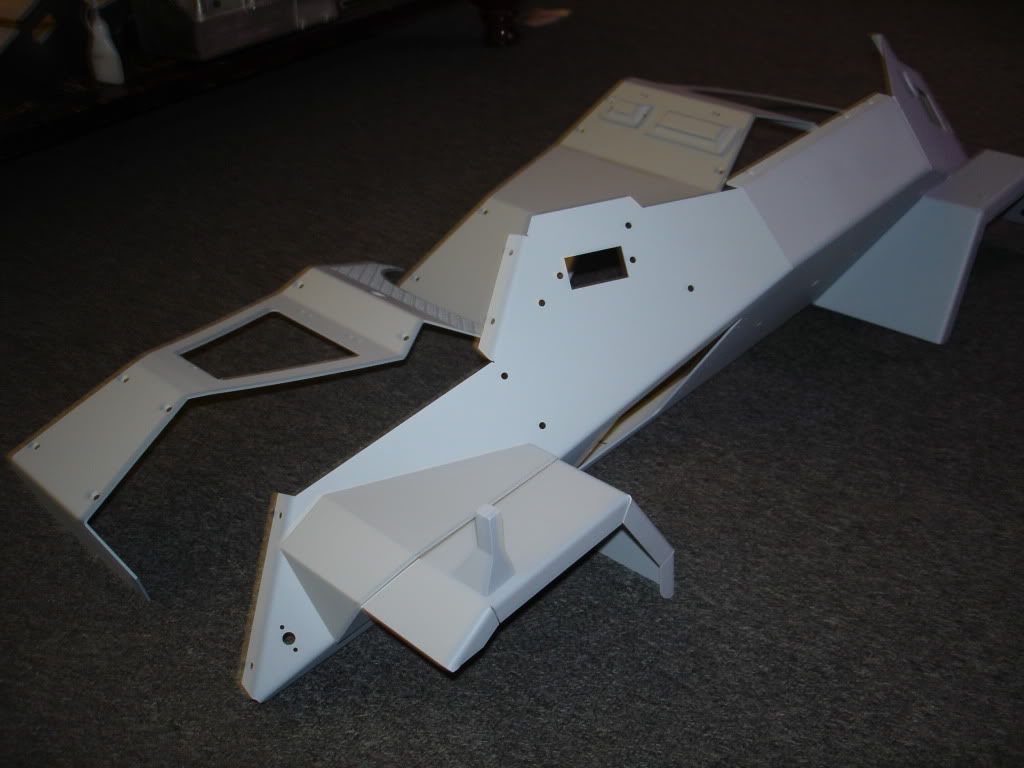
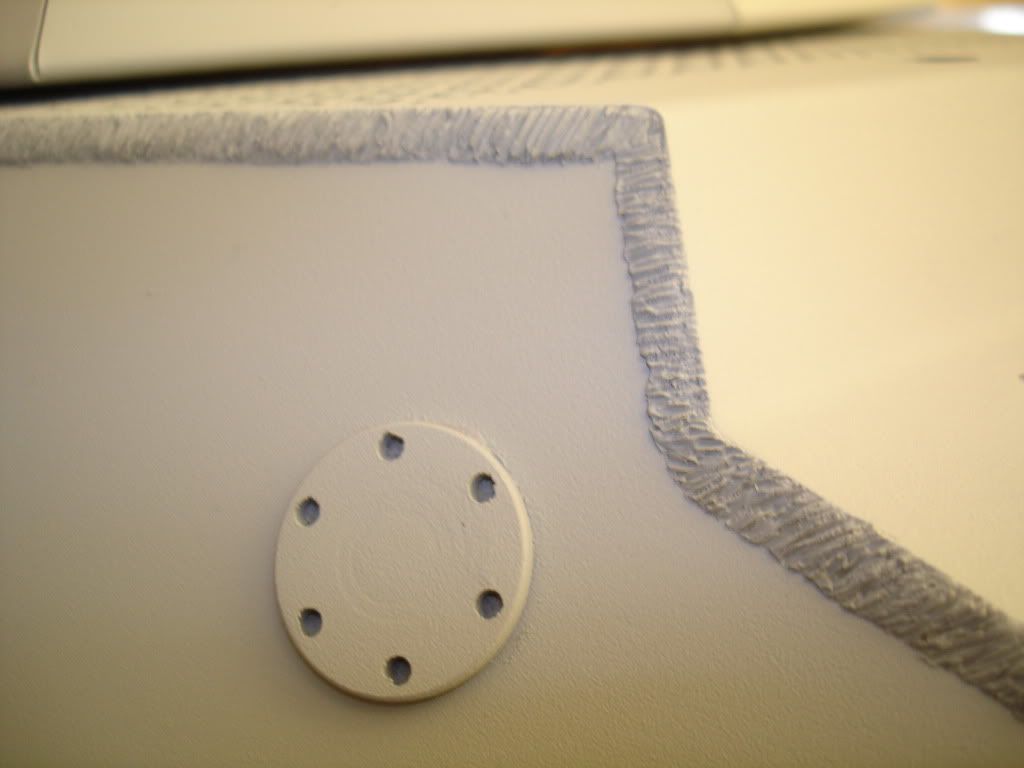
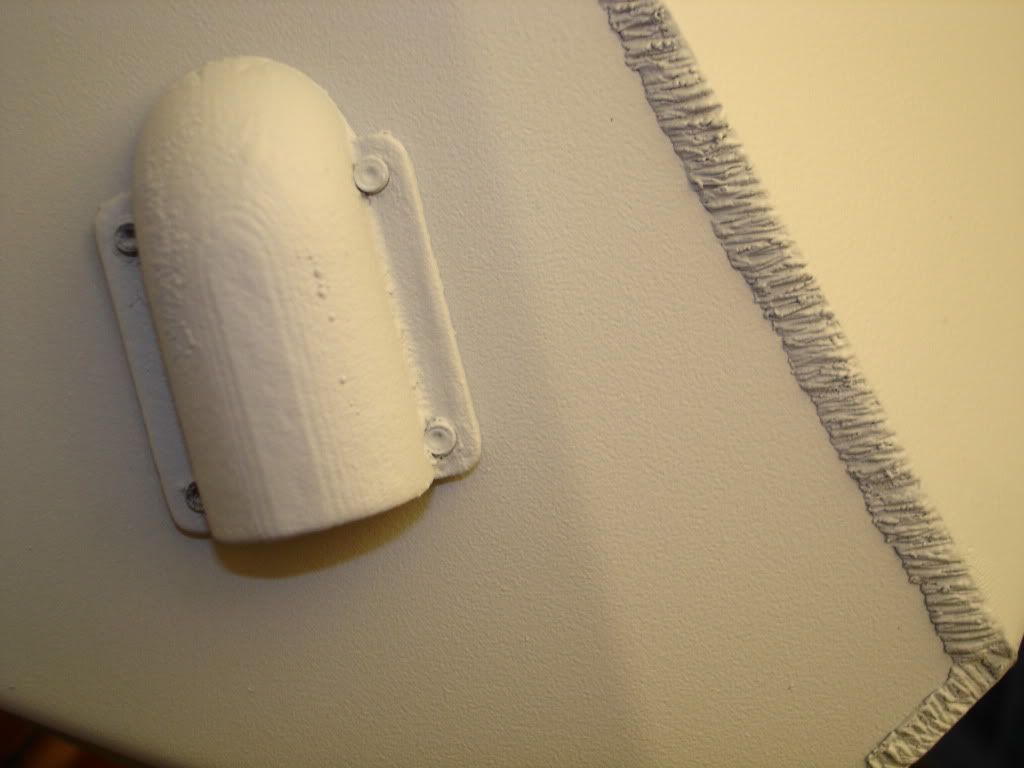
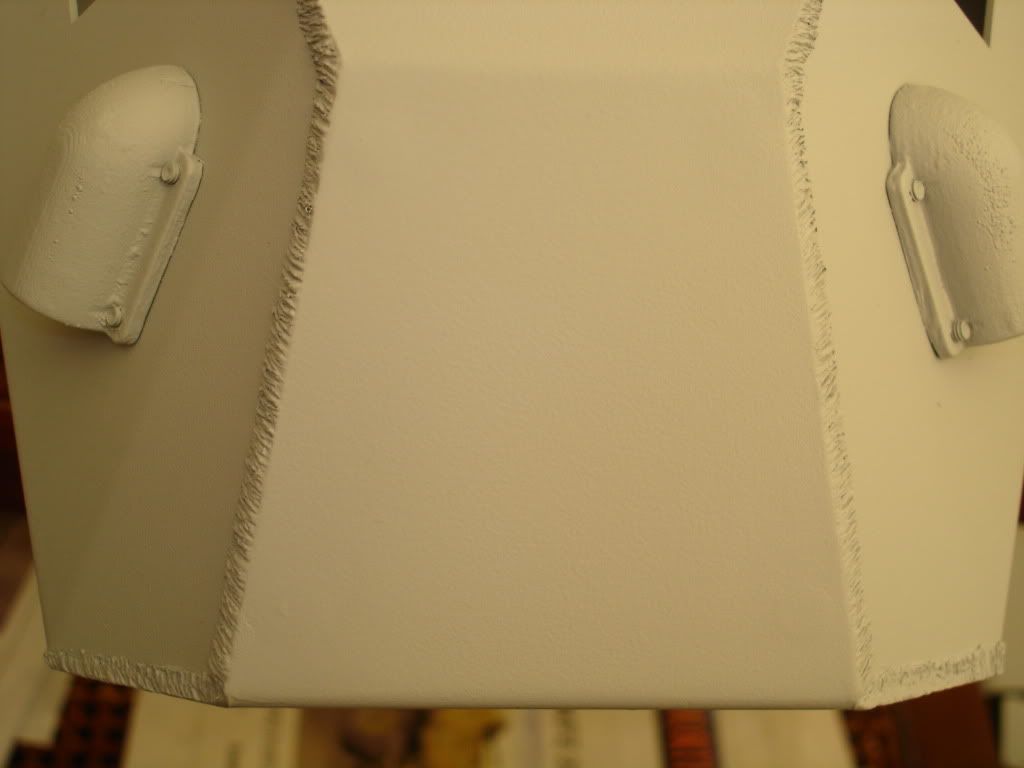
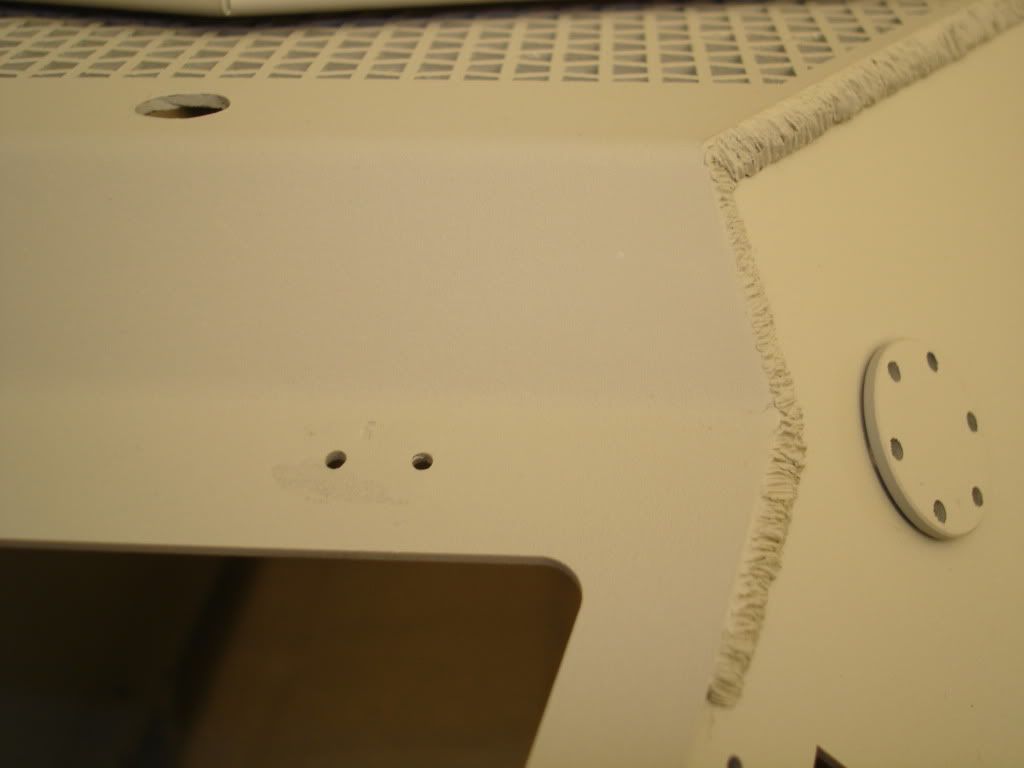
, so i thought i would start on the body. started by counter sinking some of the main body srews, then had the bright idea of adding weld marks. trust me when i say O.C.D and weld marks dont go together.
i know the welds dont have to look perfect, but my brain tells me otherwise.
took me over an hour to do about 8inches of weld marks :cry:
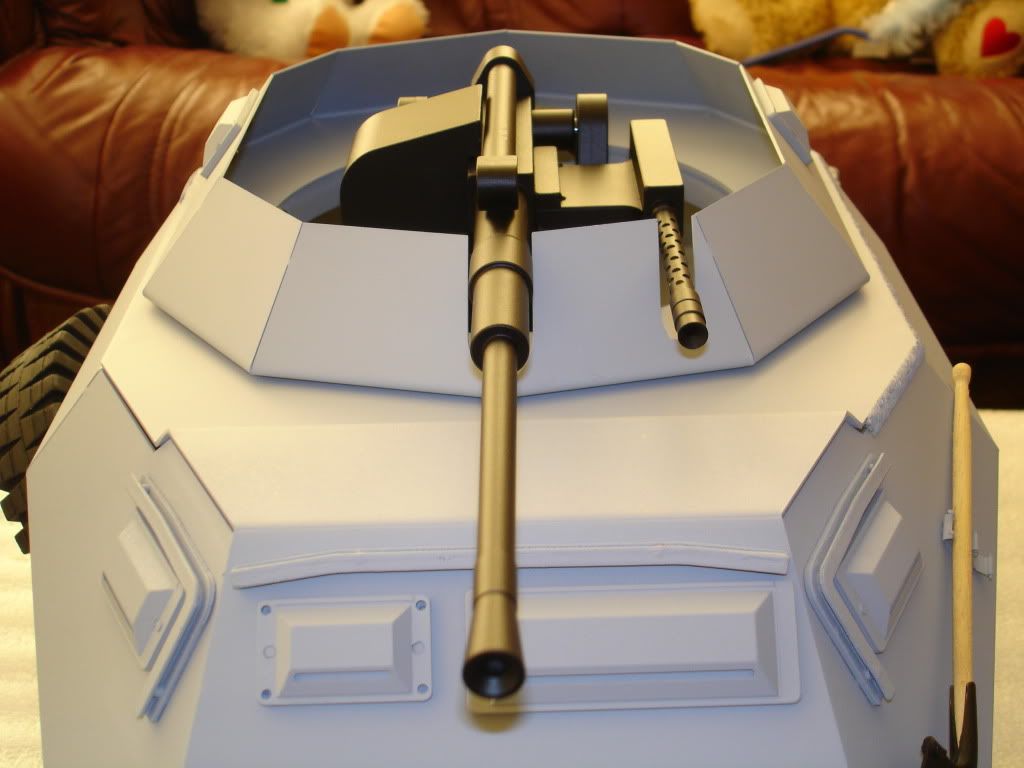
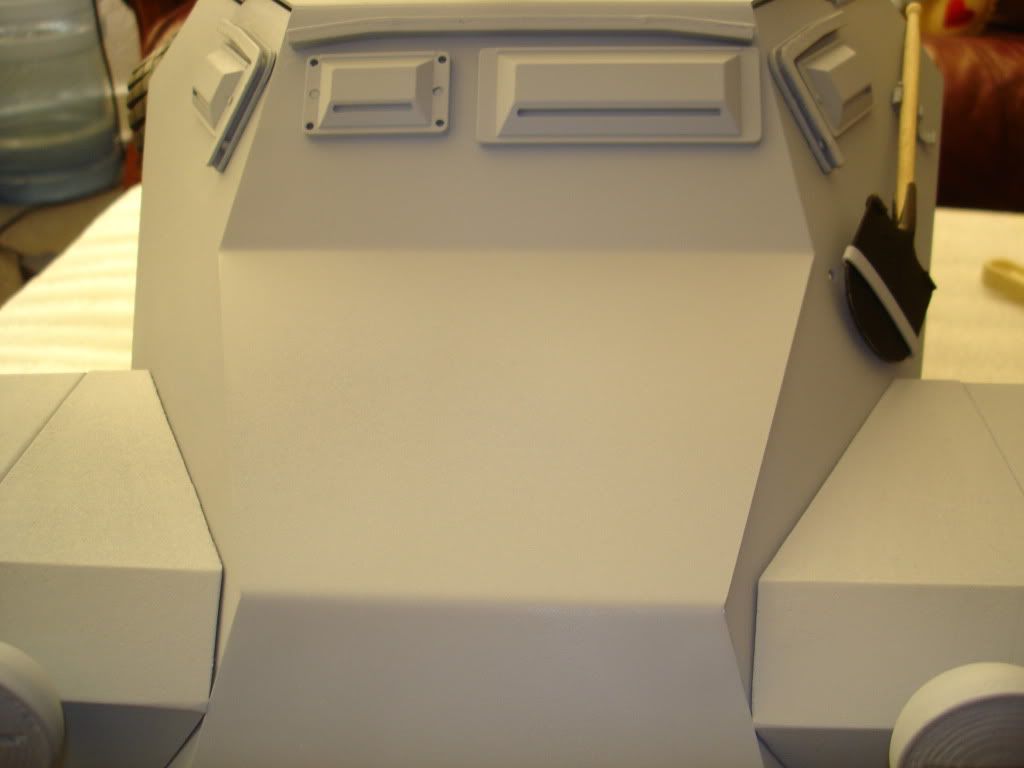
will post some pics when i have a bit more done this may take a while :lol:
cheers sean

Sean Noonan
Posts: 119
Joined: Fri Aug 20, 2010 2:12 pm
Location: bournemouth

Post by Sean Noonan »

hi all
here are some progress pics
Image
here ive added some weld marks
Image
more weld marks
Image
this shows more weld marks + all four holes countersunk and coverd
Image
more holes coverd
Image
Image
gun painted
Image
more holes coverd
hope you enjoyed the pics will update when ive done some more
cheers sean

User avatar
Robert E Morey
Posts: 2286
Joined: Wed Jul 18, 2007 12:59 am
Location: Seattle, WA USA
Has liked: 111 times
Been liked: 741 times

Post by Robert E Morey »

Sean,
Weld marks are time consuming to add. But worth the effort. I think yours look good! :)

Post Reply