Steve
Late Tiger wheel hub type Y
-
Steve Norris
- Posts: 1231
- Joined: Thu Jul 12, 2007 11:42 am
- Location: Manchester
- Has liked: 8 times
- Been liked: 701 times
Late Tiger wheel hub type Y
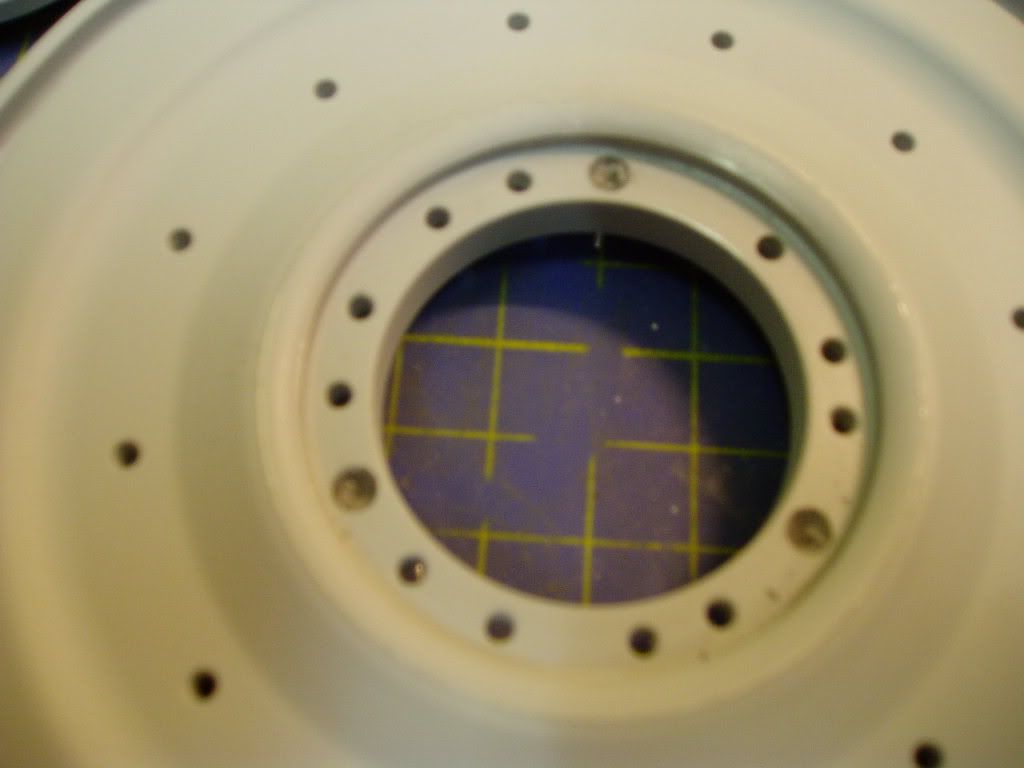
I have just had a dry run of the assembly of the type Y wheels on my late tiger and found that the supplied M2.5x30 screws are about 3mm to short (cant even get a nut to start  ), has enyone else had this problem ?
Steve
Steve
-
Armortek

- Site Admin
- Posts: 2937
- Joined: Tue Jul 10, 2007 10:30 am
- Location: Winchester, England
- Been liked: 3713 times
Steve
This is a question that has been asked a couple of times. The bolts are in fact just long enough. The holes are quite tight and it is essential that each bolt is tapped fully through. Once this is done the nuts go fully onto the thread. Ideally I would have preferred at bit more thread sticking through the nut, but 30mm is the longest available bolt. I have built many sets of these these wheels, including some returned by a customer stating that the bolts were too short. In all cases the assembly was fine.
Mark
Armortek
-
StevenFlint
- Posts: 26
- Joined: Tue Nov 06, 2007 12:10 pm
- Location: Oxfordshire
M2.5x30 screws
Hi Steve,
I also had this problem but was able to source a longer screw in Cheltenham, they were a special order and only a few pounds. It meant you had to cut the screw down after fitting but it was worth it as it was less of a struggle. Can't give you the company details though as they are at work 30 miles away but if you wish I can get them to you next week. Regards
Steve
'Big Boys and their Toys'
-
Steve Norris
- Posts: 1231
- Joined: Thu Jul 12, 2007 11:42 am
- Location: Manchester
- Has liked: 8 times
- Been liked: 701 times
Hi Steve.
Thanks for the offer, After a bit of thought i have decided that i would like to make the hub caps more easily removable to aid servicing, therfore i think i have come up with a workable solution that does not require longer screws. When complete i will post some photos of this mod.
Many thanks again
Steve
-
Steve Norris
- Posts: 1231
- Joined: Thu Jul 12, 2007 11:42 am
- Location: Manchester
- Has liked: 8 times
- Been liked: 701 times
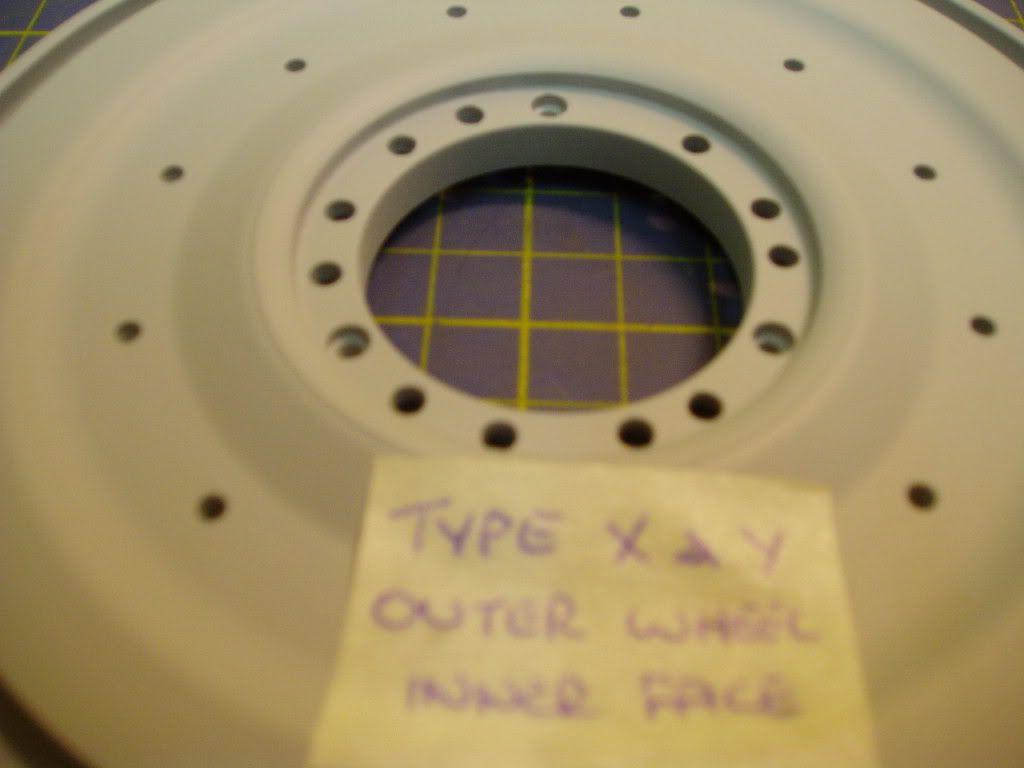
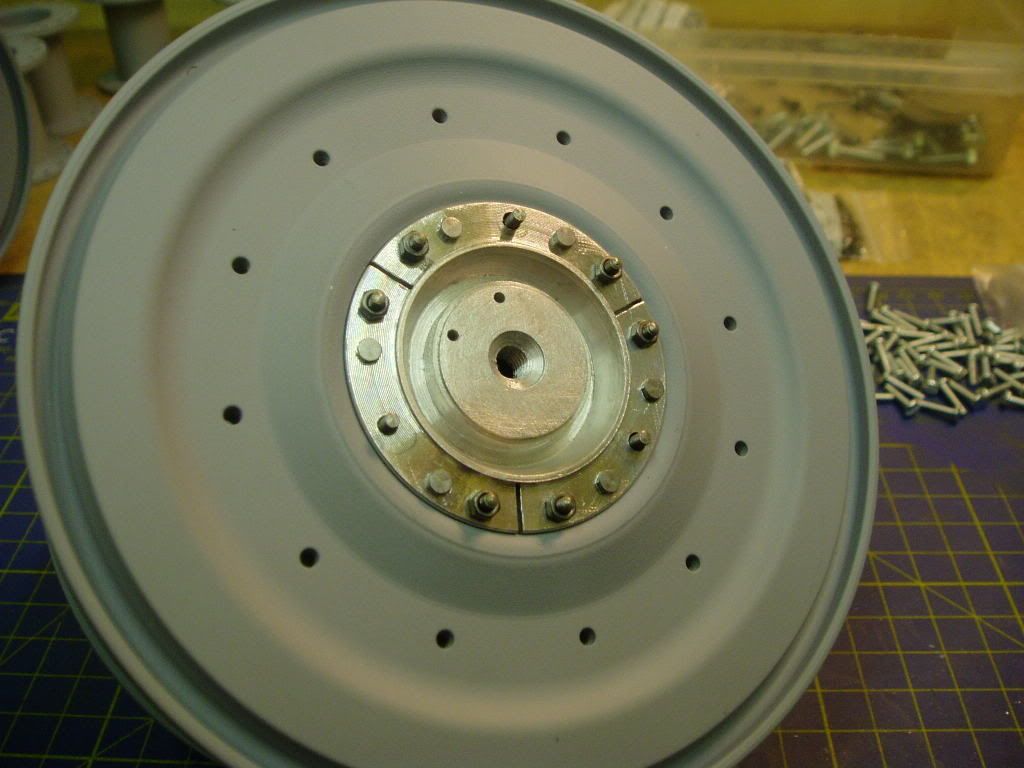
As mentioned above i have devised a way of modifying the assembly of the type X and Y wheels, this mod allows the wheels to be more easily assembled and more importantly disassembled for servicing.
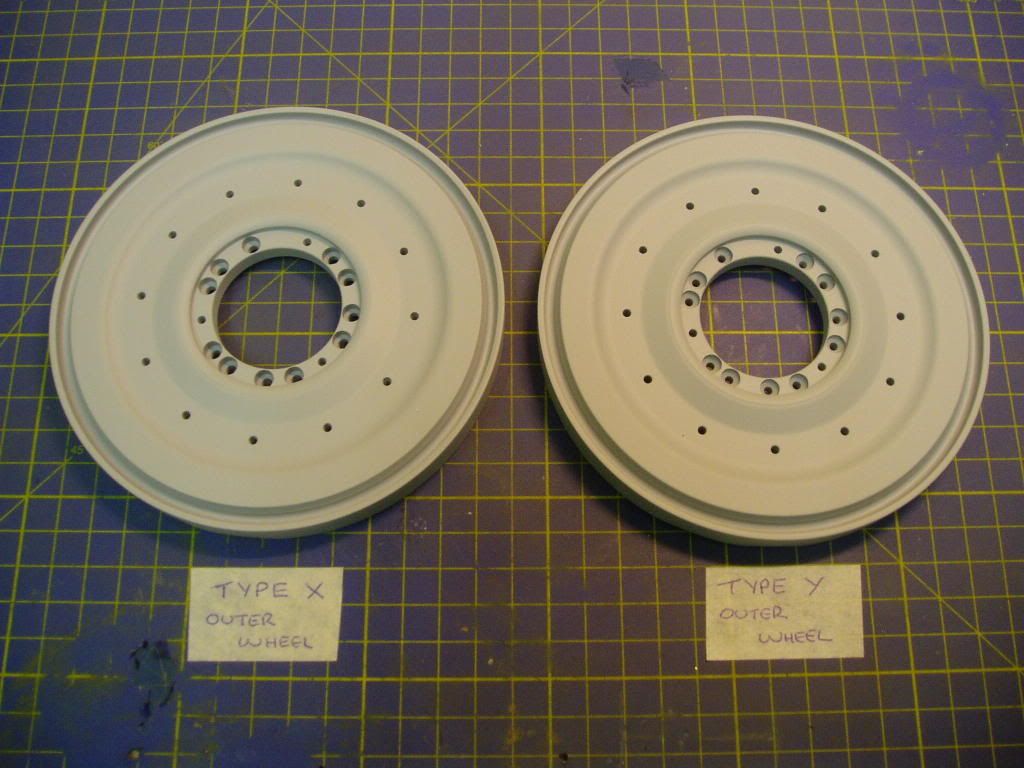
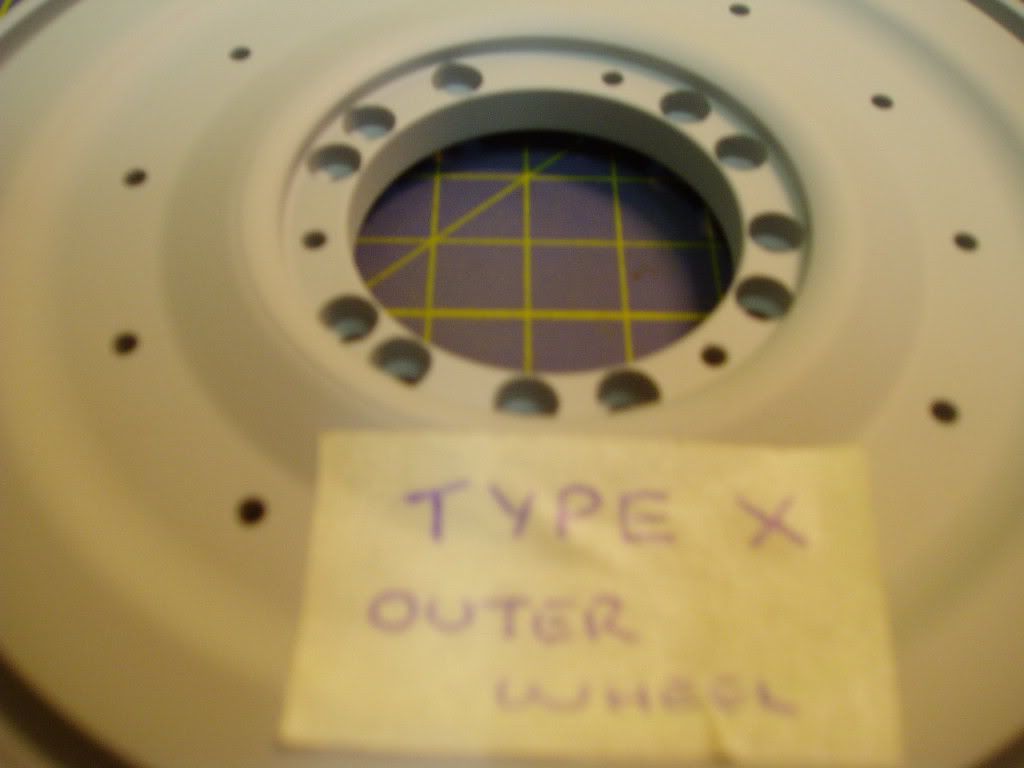
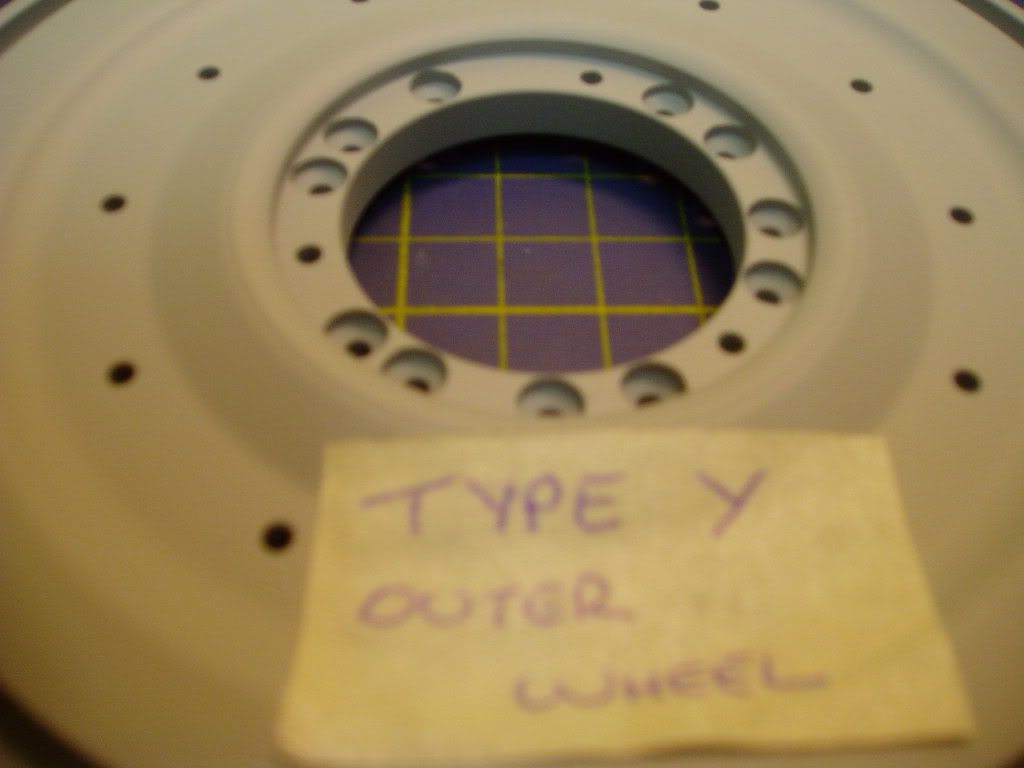
Stage 1 , Open up 11 holes in the sequence shown in the outer face of 8 type X and 8 type Y wheels. The holes should be a clearance fit for the head of a M3 cap head bolt in the type X wheel and a clearance fit for the head of a M2.5 slotted scew in the type Y wheel. The holes should be deep enough so that the fastener heads will be just below the surface of the wheel hub mounting face.
Next flip the 16 modified wheels over and drill 3 holes in each in the positions shown, each hole should be deep enough for the head of a 6BA bolt.
Each of the 16 wheels should have 3 6BA x 3/8 bolts glued in as shown.
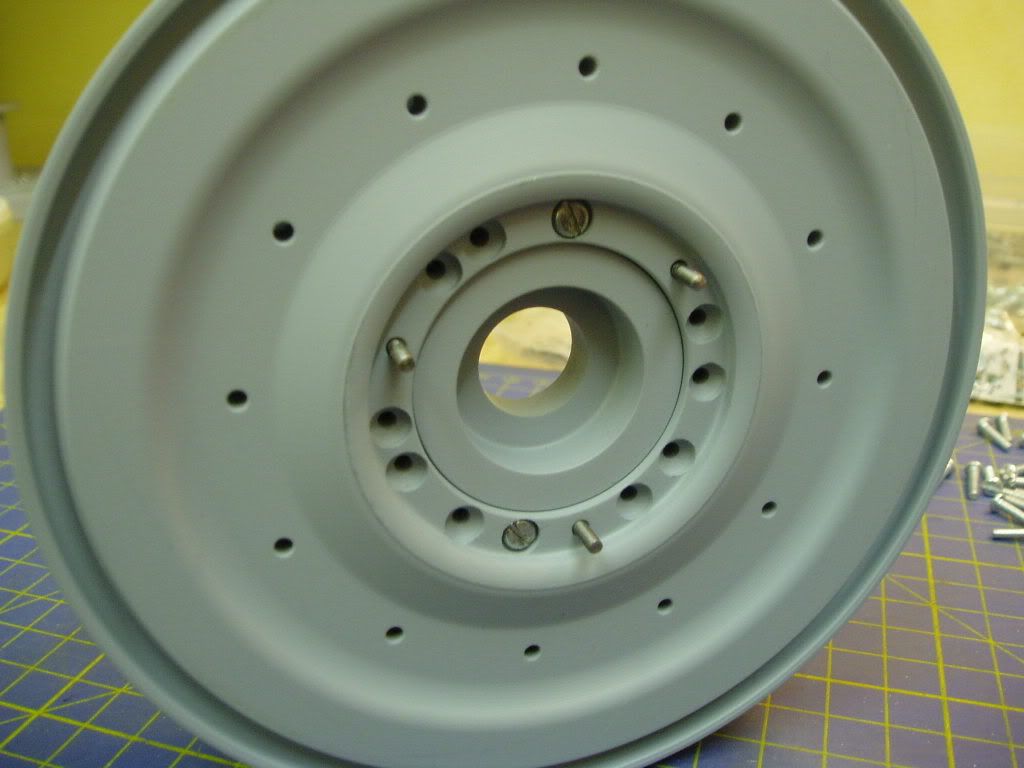
This shot shows the outside of a wheel after the 6BA bolts have been fitted.
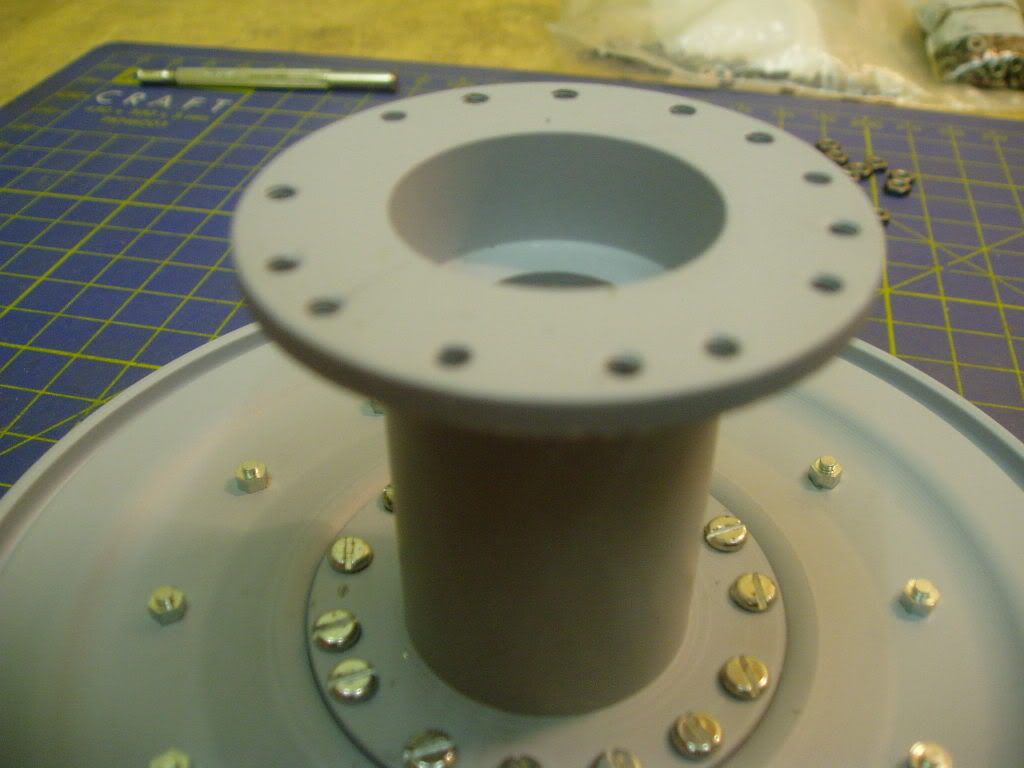
Fit 8 inner type X wheels to the hubs with the supplied fasteners and tap 11 holes M3 at the outer end, these holes should allign with the remaining holes in the outer wheel.
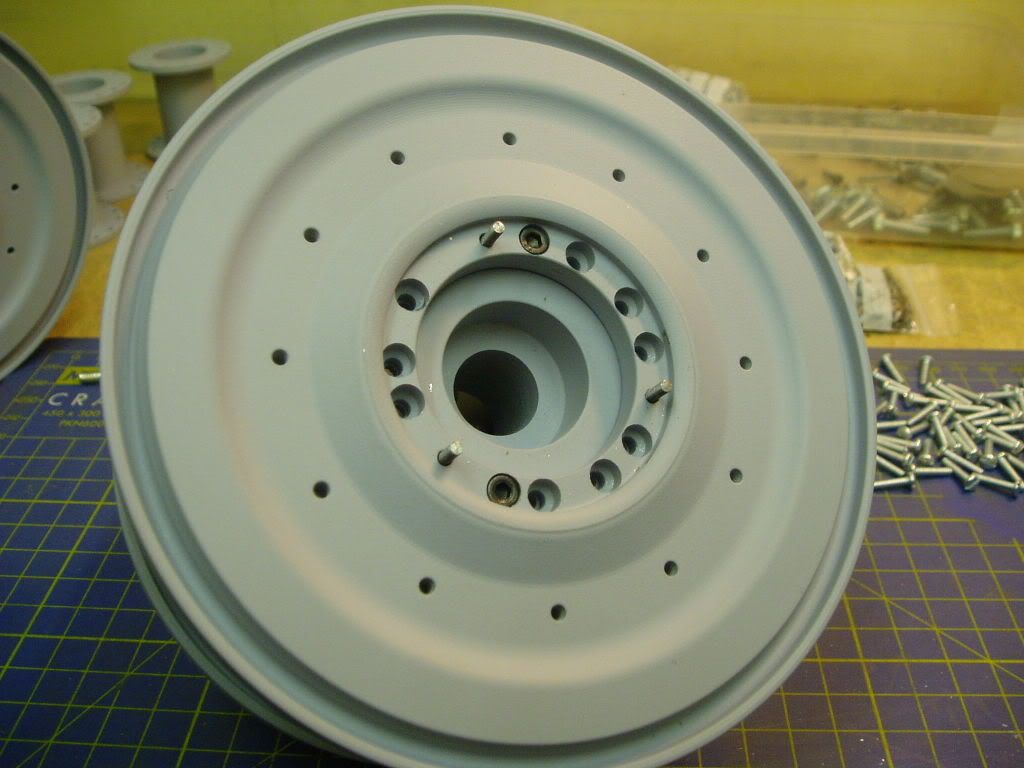
The outer type X wheel can now be fitted using 11 M3 fasteners. 2 are shown fitted here.
The hub cap can now be fitted using the 3 6BA bolts and nuts.
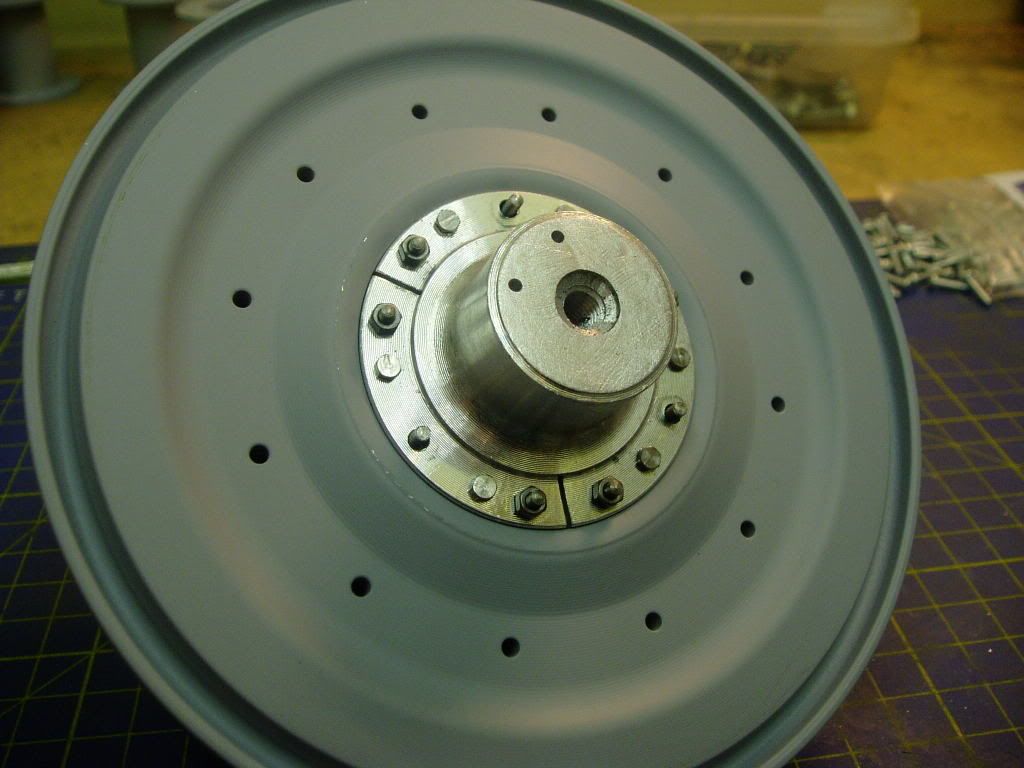
The type Y wheel build up uses the same principle as the type X the only difference is that the inner ,outer and hub are bolted together as a assembly prior to fitting the hub cap.
Hope all this is clear
Steve
Stage 1 , Open up 11 holes in the sequence shown in the outer face of 8 type X and 8 type Y wheels. The holes should be a clearance fit for the head of a M3 cap head bolt in the type X wheel and a clearance fit for the head of a M2.5 slotted scew in the type Y wheel. The holes should be deep enough so that the fastener heads will be just below the surface of the wheel hub mounting face.
Next flip the 16 modified wheels over and drill 3 holes in each in the positions shown, each hole should be deep enough for the head of a 6BA bolt.
Each of the 16 wheels should have 3 6BA x 3/8 bolts glued in as shown.
This shot shows the outside of a wheel after the 6BA bolts have been fitted.
Fit 8 inner type X wheels to the hubs with the supplied fasteners and tap 11 holes M3 at the outer end, these holes should allign with the remaining holes in the outer wheel.
The outer type X wheel can now be fitted using 11 M3 fasteners. 2 are shown fitted here.
The hub cap can now be fitted using the 3 6BA bolts and nuts.
The type Y wheel build up uses the same principle as the type X the only difference is that the inner ,outer and hub are bolted together as a assembly prior to fitting the hub cap.
Hope all this is clear
Steve
-
Tim Bowman
- Posts: 1762
- Joined: Fri Jul 13, 2007 4:53 am
- Location: Northern California
- Been liked: 177 times
- Contact:
Nice work Steve. Great solution and your hub modification looks great too!  beautiful!
Keep up the good work. It's nice reference for when the time comes to tackle the wheels. Thank you for the nice photos and explanation.
regards
Tim
Keep up the good work. It's nice reference for when the time comes to tackle the wheels. Thank you for the nice photos and explanation.
regards
Tim
"So long as one isn't carrying one's head under one's arm, things aren't too bad." – Erwin Rommel
-
Dale jordan
- Posts: 1460
- Joined: Fri Jul 13, 2007 1:10 am
- Location: Port Macquarie Australia
- Been liked: 525 times
- Contact:
Hello Steve. Thanks for the great heads up on this topic . I have not built a late tiger with this wheel set up .. When my King tiger arrives it will be the same . With my early tiger it was really easy to remove all the road wheels , I just hat to remove eight hex screws and they came off.. How are the wheels removed on the stannard set up ?? Are there lots of nut or bolts to be undone before one set is off . I found out when building my tiger that I had the wheels on and off my tiger lots and lots of times during construction and painting ... Dale
-
Steve Norris
- Posts: 1231
- Joined: Thu Jul 12, 2007 11:42 am
- Location: Manchester
- Has liked: 8 times
- Been liked: 701 times
Hi Dale,
The standard method of assembly has 14 M2.5 bolts passing from the inner wheel through the hub and outer wheel then hub cap, all held with M2.5 nuts on the type Y wheels, On the type X wheels the build up has 14 bolts holding the inner wheel to the hub and 14 bolts holding the outer wheel to the hub (these bolts also secure the hub caps on which cover the axle bolts).
As you can see from the above it would be quite a undertaking to remove any wheels once fitted.
One other thing i did not mention was that the hub caps should have 15 bolts in them and not 14, this is easily rectified as there is a blank space where the missing bolt should be. I guess this was done to aid alignment during assembly as it is very easy to get the inside and outside faces of the wheels mixed up.
I would guess the build up of the wheels on the KT would be almost the same (another post says that the same wheels are used) and therefore a similar mod may be feasable on the KT.
Tim
Thanks for the comments, I think that now you have completed your wonderful Panther you should turn your skills on a KT and produce another masterpiece, it was a pleasure watching your build progress and i am sure everyone wants to see more in the future.
Regards
Steve
-
Dale jordan
- Posts: 1460
- Joined: Fri Jul 13, 2007 1:10 am
- Location: Port Macquarie Australia
- Been liked: 525 times
- Contact:
Lots of bolts there Steve ... Looking at the king tiger road wheel photos Maybe Mark has made the hud caps threaded and removable . The hub caps do look different then the late tiger ones plus they look longer .. The dish part of the wheels look the same . This would be nice as then you would only have one bolt to undo... Dale
Last edited by Dale jordan on Mon Jan 26, 2009 3:06 am, edited 1 time in total.
-
Tim Bowman
- Posts: 1762
- Joined: Fri Jul 13, 2007 4:53 am
- Location: Northern California
- Been liked: 177 times
- Contact:
Thanks Steve. As much as I'd like to build and have a King Tiger, I'm afraid my budget won't allow it at the moment.Steve Norris wrote: Tim
Thanks for the comments, I think that now you have completed your wonderful Panther you should turn your skills on a KT and produce another masterpiece, it was a pleasure watching your build progress and i am sure everyone wants to see more in the future.
Regards
Steve
best regards
Tim
"So long as one isn't carrying one's head under one's arm, things aren't too bad." – Erwin Rommel
-
Steve Norris
- Posts: 1231
- Joined: Thu Jul 12, 2007 11:42 am
- Location: Manchester
- Has liked: 8 times
- Been liked: 701 times
-
David Gray
- Posts: 289
- Joined: Tue Jul 24, 2007 7:22 pm
- Location: chesterfield derbyshire
- Been liked: 1 time
Hi Steve, the mod looks great, now you have drilled and tapped the centre
of the hub you do not need to disassemble the wheel ,as you can pass the alankey through the hole to unscrew the keeper plate.
i used a standard m6x10 with the head machined down to half its depth,
with the lathe tool slightly off set so it left a small tip inthe centre to look
like a grease nipple, the small locking tab bolts were 9BA.
i also used 6BA nuts and bolts for the fifteen locking ring bolts but i used
one size smaller head. i.e[ 6BA thread with 7BA head], this seems to
look a bit more to scale. with 6BA you can tap the hubs as the tapping
size is around 2.7mm for 6BA.
the nuts on the wheels are larger on the real ones and i replaced the 2.5mm
ones with m3x12 hex head sets and plain nuts
Dave
-
Steve Norris
- Posts: 1231
- Joined: Thu Jul 12, 2007 11:42 am
- Location: Manchester
- Has liked: 8 times
- Been liked: 701 times