Sherman gun travel lock

Forum for discussion relating to the Sherman.
User avatar
Robert E Morey
Posts: 2356
Joined: Wed Jul 18, 2007 12:59 am
Location: Seattle, WA USA
Has liked: 165 times
Been liked: 849 times

Sherman gun travel lock

Post by Robert E Morey »

I can't let Dale get all the glory with his Sherman, so I thought I'd post some pix of the Sherman gun travel lock prototype I'm working on. Not too slight Dale's superb work, but to prove I do actually work on my Sherman (although only occasionally). :evil:

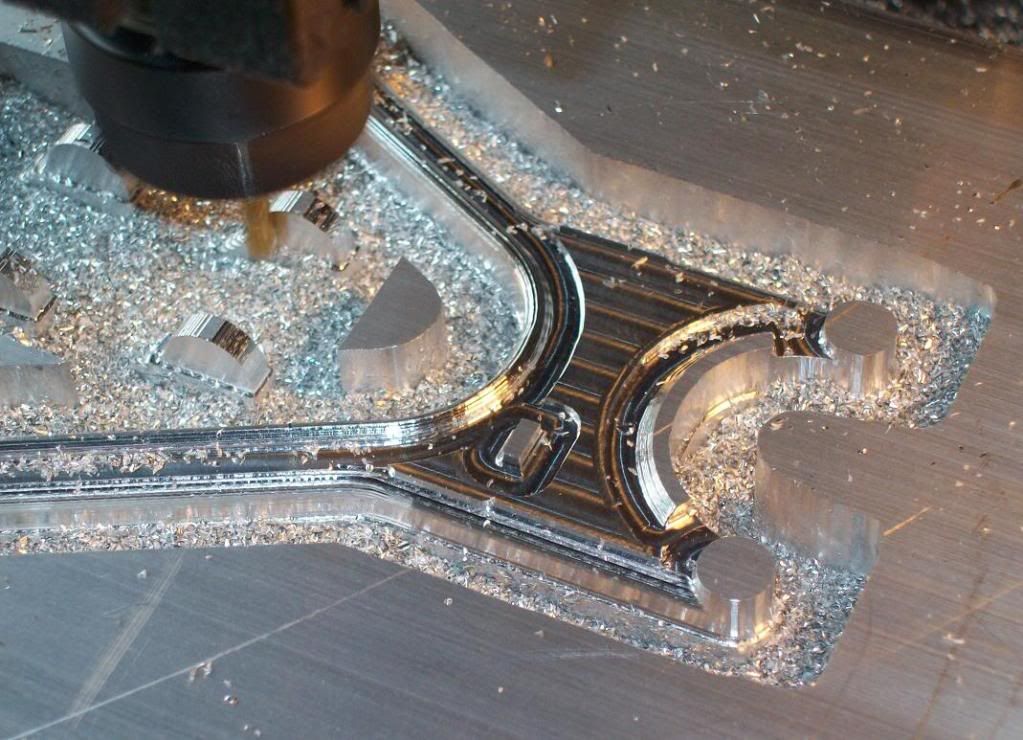
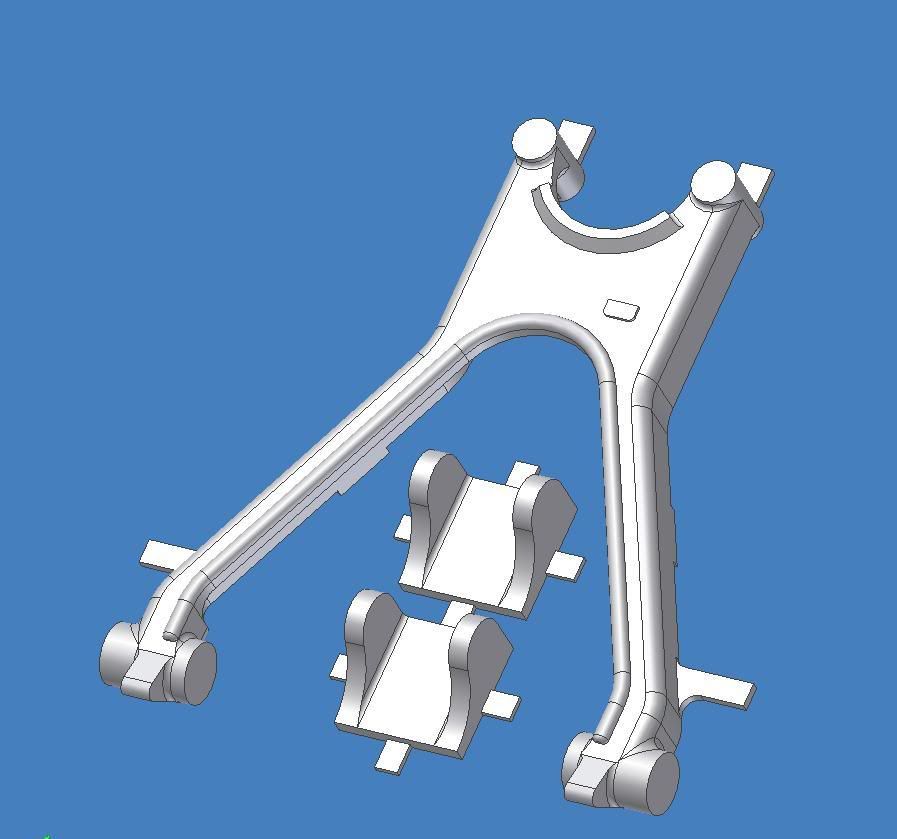
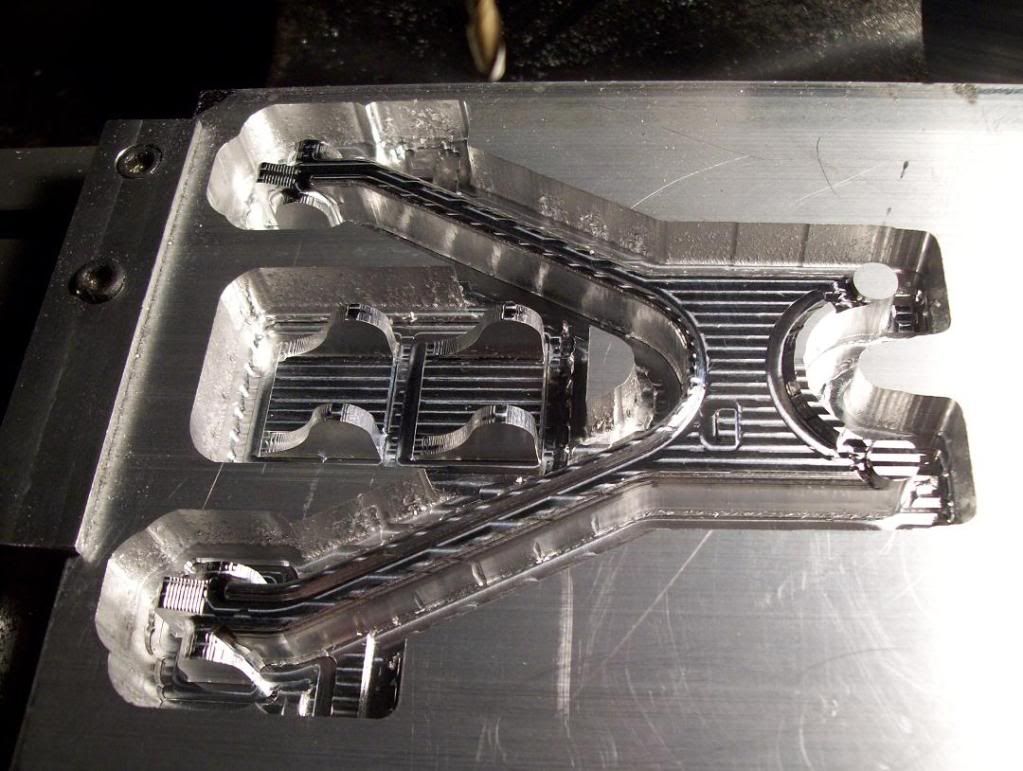
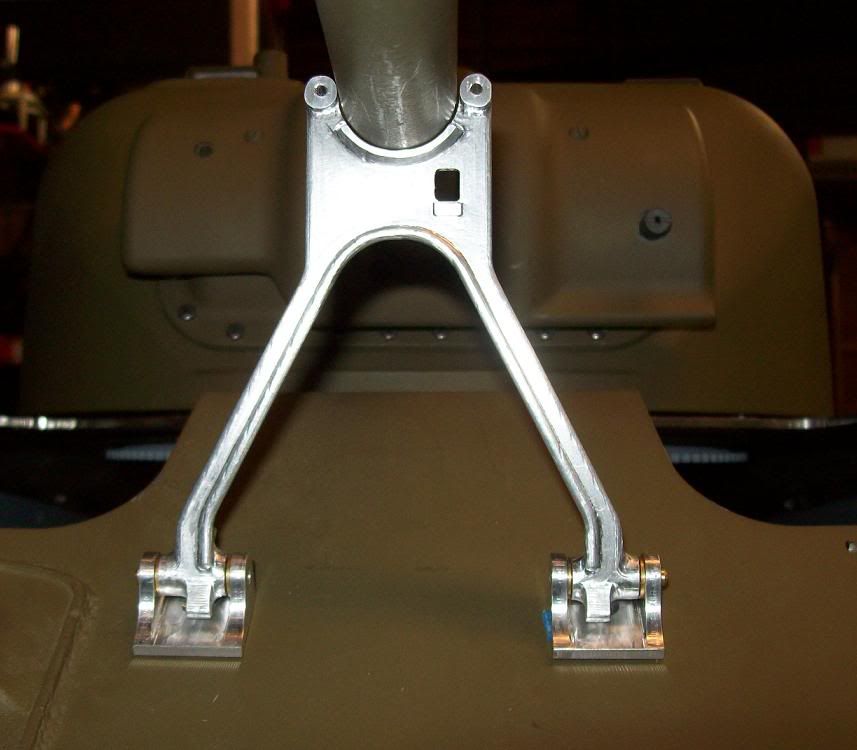
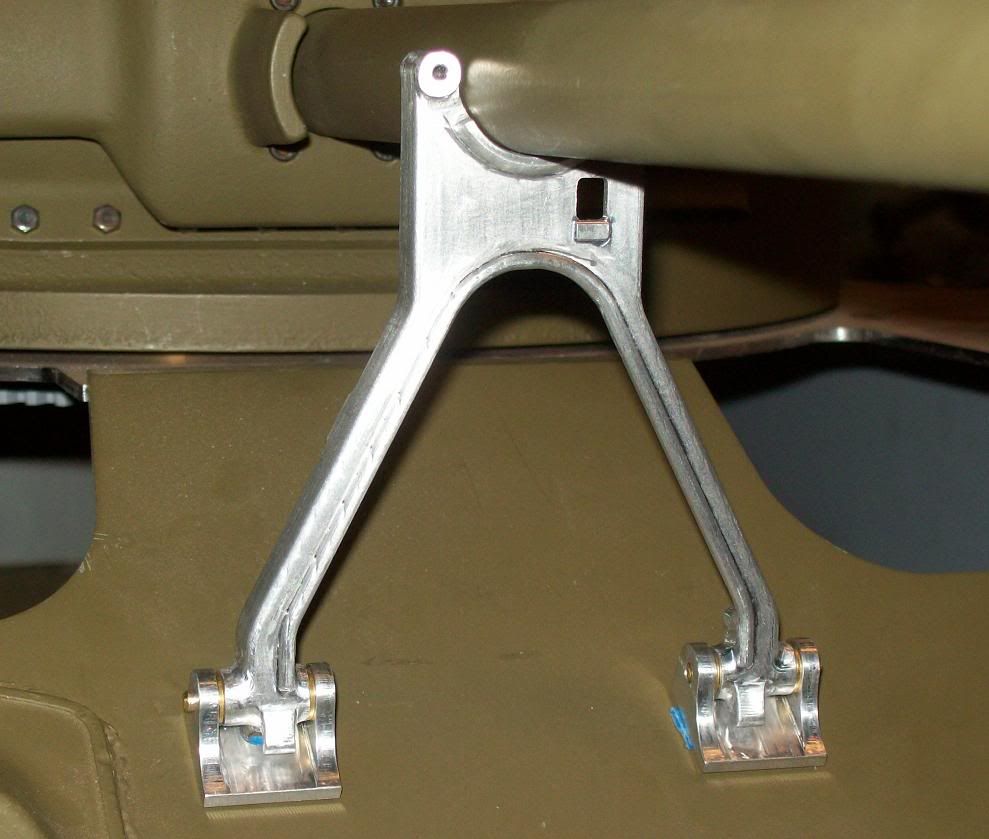
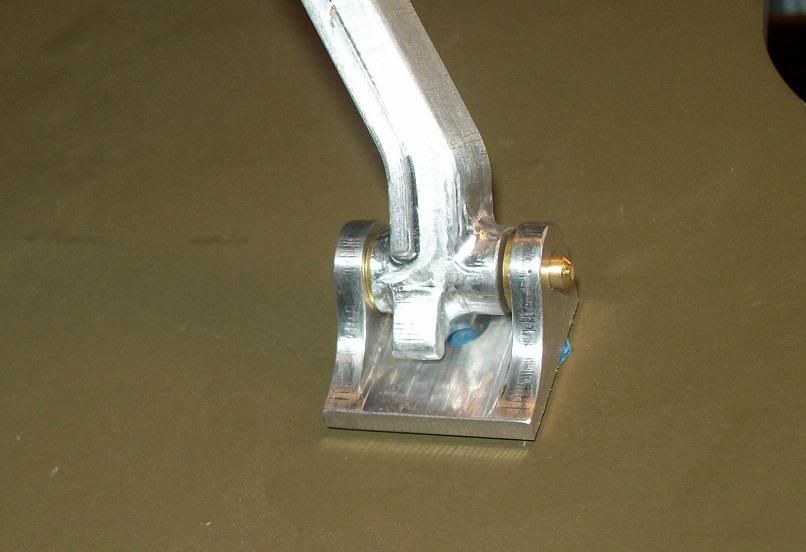
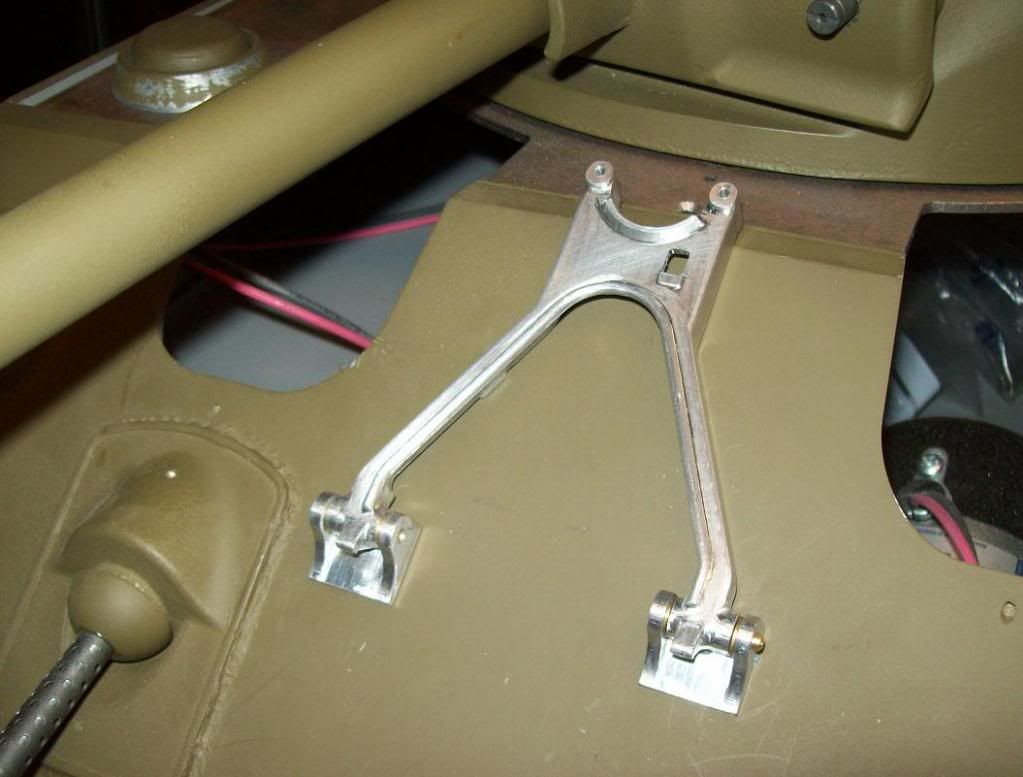
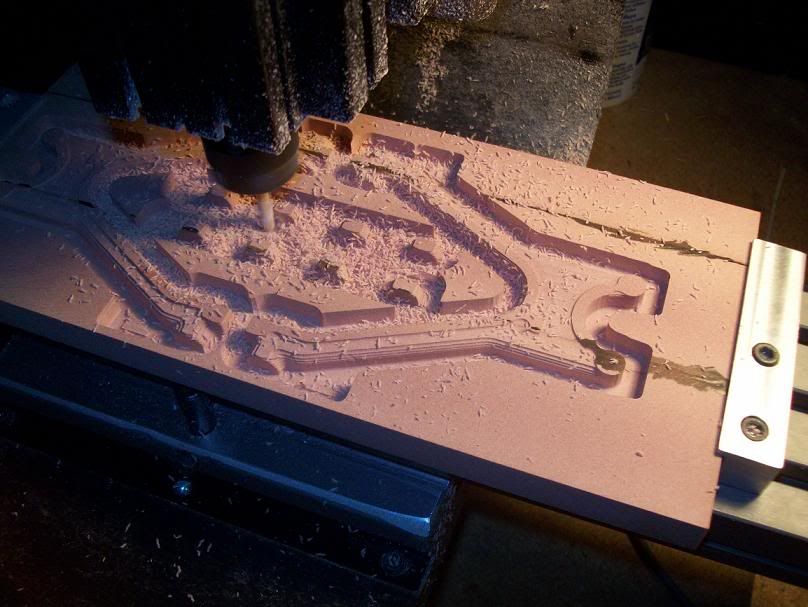
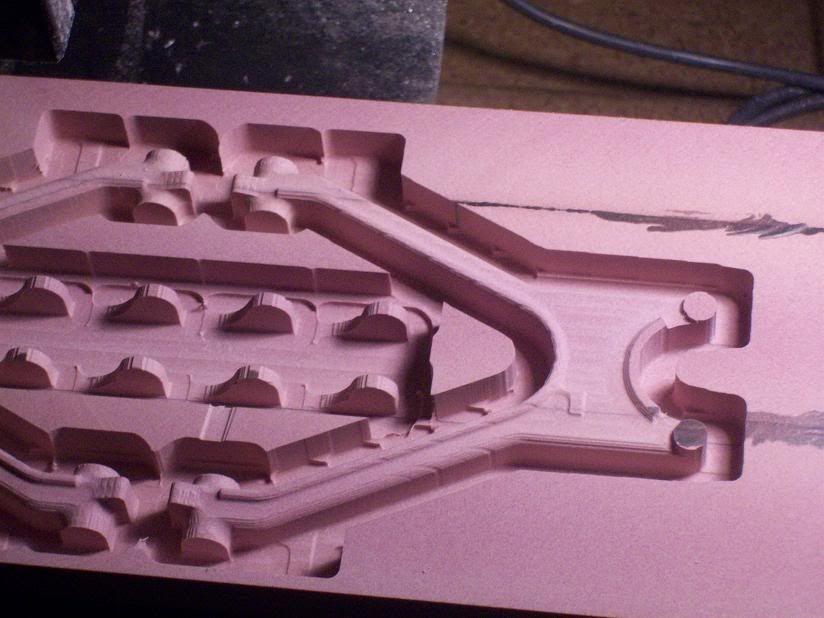
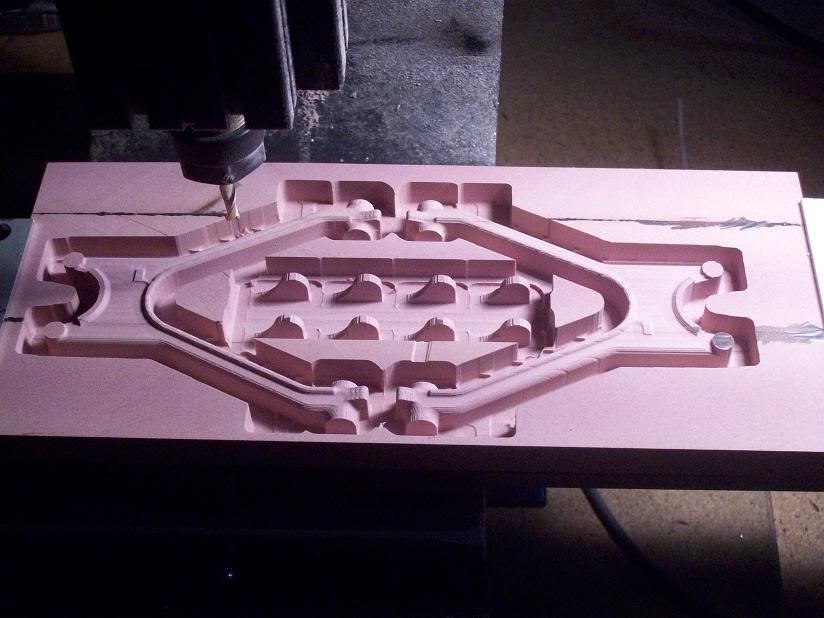
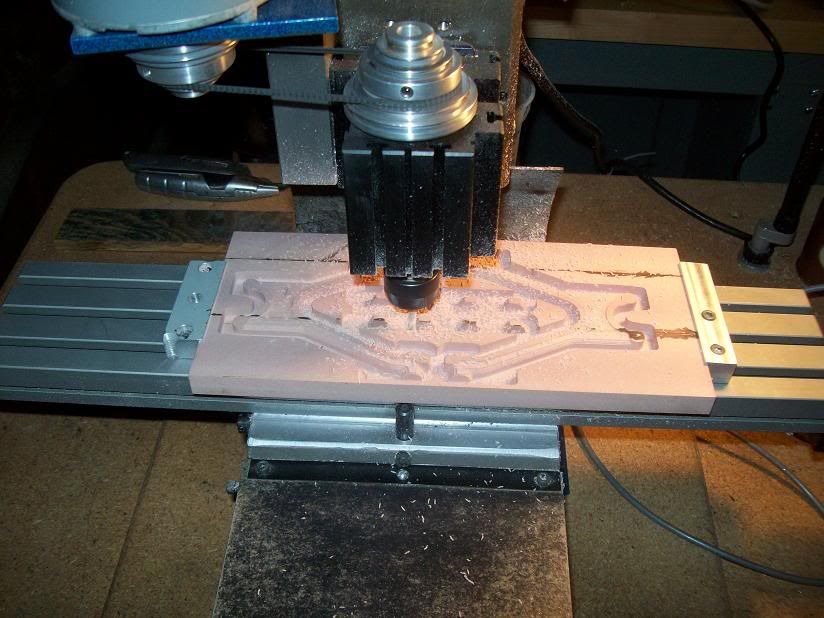
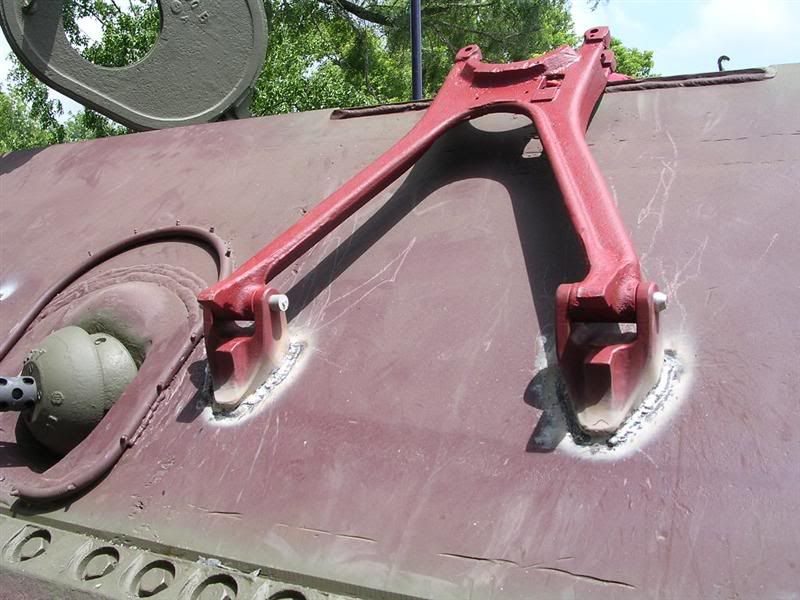
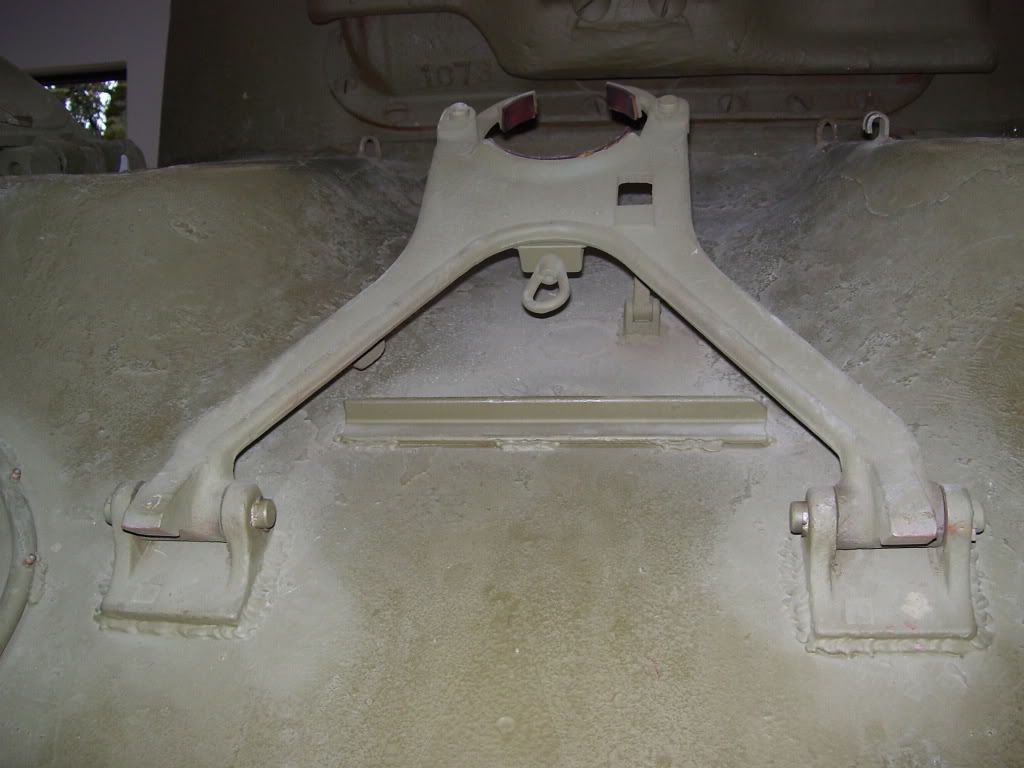
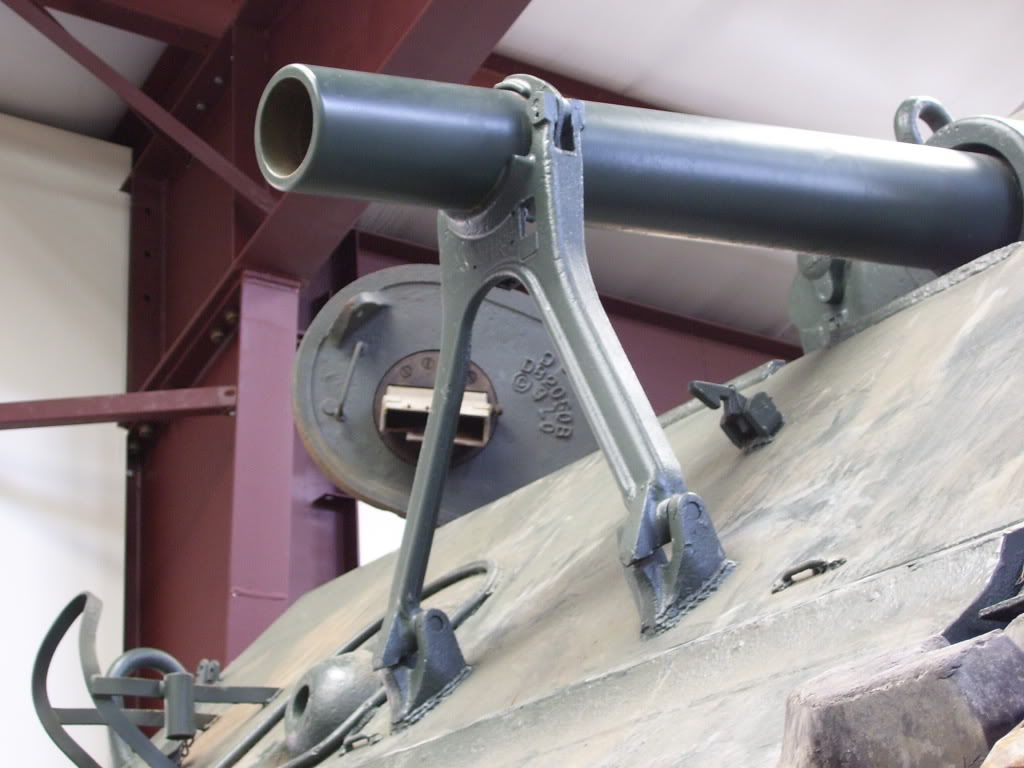
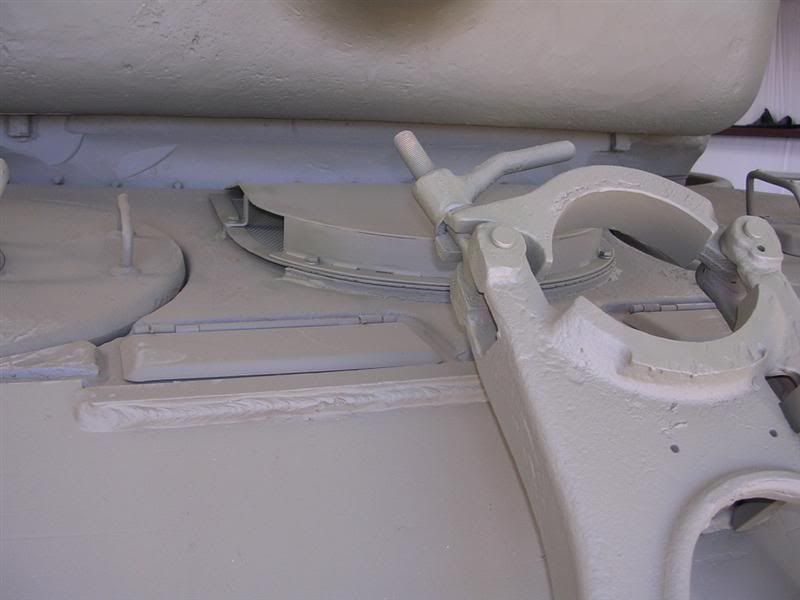
The material is Urethane foam board to test the CNC program. This is the top side program. Now to flip the material over and machine the back side details. Once the programs are proven out, I will machine the parts in Aluminum. I will put one on my Sherman and use the other as a casting master to eventually make a spin cast mold. Stay tuned for a white metal kit possibly later next year (09)?? The "bumps" in the center are the hinge pieces which mount the gun travel lock to the glassis plate. The black lines are epoxy which bonds the three pieces of foam board together.

Image

Image

Image

Image

Image

Image

Image

Image

Happy holidays everyone! Bob

Brian Leach
Posts: 363
Joined: Tue Nov 18, 2008 4:15 pm
Location: Auburn, Wa USA
Been liked: 3 times

Post by Brian Leach »

Wow, nice job. I like that you did a test run with the foam.

What kind of milling machine is that we are seeing?

I expect to buy one fr myself and would appreciate any suggestions.

Great work!

-B

Allan Richards
Posts: 743
Joined: Thu Jul 12, 2007 10:34 am
Location: Kent
Been liked: 10 times

Post by Allan Richards »

Very impressive Bob and a great addition for the Sherman. I've almost compleated the Firefly one which was a lot of work to scratch build.
Allan Richards

User avatar
Robert E Morey
Posts: 2356
Joined: Wed Jul 18, 2007 12:59 am
Location: Seattle, WA USA
Has liked: 165 times
Been liked: 849 times

Post by Robert E Morey »

Thanks for the comments guys.

Brian, its a Taig, made near you in Chandler Az. Great little machine, it is very capable if used within its limitations. In my opionion it is way better than Sherline or MaxNC machines. I recommend it over all others. I've made a lot of nice parts with it.

Its always a good itea to prove out and test long programs in foam, wax or other soft matl. This particular program is 180,000 lines of code - just for the top side alone! Better to find a bug in foam than after 12 hours of machining metal. I also run a comuter simulation of the program before machining anything just be sure there are no serious glitches.

Allan, looking forward to seeing your firefly travel lock details, you've done a great job so far. It will be really impressive when painted up.
Bob

Brian Leach
Posts: 363
Joined: Tue Nov 18, 2008 4:15 pm
Location: Auburn, Wa USA
Been liked: 3 times

Post by Brian Leach »

Robert,

Thanks for the recomendation. Actually I am going out there this week to take a look at their machines.

I am also looking to get a lathe. Any thoughts?

Thanks again, and of course-Great work!

-B

Dale jordan
Posts: 1460
Joined: Fri Jul 13, 2007 1:10 am
Location: Port Macquarie Australia
Been liked: 525 times
Contact:

Post by Dale jordan »

Very Very nice Bob . This is one part , I have been waiting for someone to build as I need one 'soon as' . This will fill up the front plate on my Sherman nicely ... Dale

User avatar
Robert E Morey
Posts: 2356
Joined: Wed Jul 18, 2007 12:59 am
Location: Seattle, WA USA
Has liked: 165 times
Been liked: 849 times

Post by Robert E Morey »

Brian,
I'd like a CNC lathe someday myself. The choices in a benchtop model are limited. MaxNC does make a pretty nice looking lathe, but I have not used it and its pretty spendy. Sherline also has one but it is small. I don't believe Taig makes a CNC lathe, but they do a manual one. If I was really wanting a lathe I would shop evilbay for a used EMCO Maier Compact 5 with tool changer if I was in the market for a lathe. You might check Evilbay for a Taig mill, I got mine brand new with stepper motors and control box for around $1680. There's always buy a 7x12 or 7x14 mini-lathe and convert it to CNC as another option.

Dale I agree the gun travel lock is really needed, and I'll keep you posted on the progress. I can't wait to see how the machined alum version turns out.
All for now...
Bob

simon_manning
Posts: 2062
Joined: Fri Nov 02, 2007 8:51 pm
Location: new forest,hampshire,u.k.
Been liked: 1767 times

Post by simon_manning »

very nice and very skillfull,keep us posted if you make any you want to sell i would like one.


simon manning

User avatar
Robert E Morey
Posts: 2356
Joined: Wed Jul 18, 2007 12:59 am
Location: Seattle, WA USA
Has liked: 165 times
Been liked: 849 times

Post by Robert E Morey »

Finally got around to machining the Sherman gun travel lock in Alum. Here are a few shots. Now that the Panther is nearly done, I hope to make a few goodies for the Sherman and get it finished up. These are photos of the top side machining. Time to machine is about 5 hours roughing, and 8 1/2 hours finishing. Not exactly what you call "rapid prototyping".

Next steps will be to machine the back side features. The round things in the middle of the piece are the two mounting brackets.

Image

Image

Image

Image

Image

User avatar
Adrian Harris
Posts: 5134
Joined: Thu Jul 12, 2007 10:46 pm
Location: Berkshire (UK)
Has liked: 1495 times
Been liked: 1699 times

Post by Adrian Harris »

Simply stunning Bob :D :D

Do you have to change the tool between the roughing and finishing :?:

Adrian

Graham Ord
Posts: 249
Joined: Mon Jul 16, 2007 11:15 am
Location: BRIXHAM
Has liked: 4 times
Been liked: 16 times

CNC

Post by Graham Ord »

Bob
A beautiful piece of work and as an ex CNC machinist I can appreciate the time, effort and skill required to produce it.
Graham

User avatar
Robert E Morey
Posts: 2356
Joined: Wed Jul 18, 2007 12:59 am
Location: Seattle, WA USA
Has liked: 165 times
Been liked: 849 times

Post by Robert E Morey »

Adrian,
On the top side machining I did use 2 tools, a 3/16" dia for roughing and a 1/8" dia for finishing. Its actually separate programs for roughing and finishing, so having different tools is relatively easy. One just has the machine return to X0,Y0 after the rough program and then you only have to re-zero the Z axis with the second smaller dia tool. X and Y will use the same zero pt for both programs (rough and finish).

On the bottom side I elected to use the same tool for both rough and finish - the 3/16 dia.

Graham thanks for the compliment! I'm very honored to hear you say that. Your P4 is a marvel of the machining trade, Esp doing most of it on a lathe. Not many people can really appreciate how difficult that truely is. Did you use CNC for any part of that project? I see from the video's it drives superbly.
Bob

Graham Ord
Posts: 249
Joined: Mon Jul 16, 2007 11:15 am
Location: BRIXHAM
Has liked: 4 times
Been liked: 16 times

CNC

Post by Graham Ord »

Bob
All of my PIV was done manually on my lathe. The only part I did not make was the turret ring gear which I had laser cut.
Graham

User avatar
Robert E Morey
Posts: 2356
Joined: Wed Jul 18, 2007 12:59 am
Location: Seattle, WA USA
Has liked: 165 times
Been liked: 849 times

Post by Robert E Morey »

Some recent photos of the gun travel lock finished up and test fitted. I nearly had a distaster on the back side machining. CNC is very unforgiving! In the previous thread I mention that I would use the same tool for the backside machining. Well I program two different tools by mistake (.1875 rough, .125 finish) and nearly ruined the part. :oops: The entire backside was machined .031 undersize on all sides! Image

But the good news is the part was salvageable, I had to add the washers to the base pivots, but other than that you cannot really tell anything went wrong. It came out ok for the prototype - 1st one in aluminum.

Next will be the barrel hold down piece and hull latch (to hold it to the glassis when not in use).

Image

Image

Image

Image

Jeffrey Goff
Posts: 805
Joined: Thu Jul 12, 2007 12:52 pm
Location: NORTHAMPTON
Has liked: 20 times
Been liked: 737 times

Post by Jeffrey Goff »

Hi Bob, that looks fantastic, I am envious of your skill and technology, I tried to remove some alloy using a small mini mill with electronic speed control the cut was to deep, it jammed and it blew its brains out literally, the PC board is on its way back to the manufacture, so I shaped the PZIII mantel ends with a hacksaw and file, at least human manual errors are slight
keep up the good work
regards
Jeff

Post Reply