Page 4 of 20
Re: Churchill Mk3 number 67
Posted: Fri Mar 17, 2023 9:22 pm
by Steve Stuart
Please would give the source of the inserts? They look as though they could be very useful problem solvers!
Steve
Re: Churchill Mk3 number 67
Posted: Sat Mar 18, 2023 7:07 pm
by Gary Richardson
Steve Stuart wrote: ↑Fri Mar 17, 2023 9:22 pm
Please would give the source of the inserts? They look as though they could be very useful problem solvers!
Steve
Hi Steve
The inserts are available from The Insert Company. The ones I used are meant for use in plastic but have worked in the aluminium plates.
https://www.theinsertcompany.com/brass_ ... lastic.php
They do lots of other types but these were the best match for what I required on the Churchill. One thing to watch for is the postage which seemed excessive at £12.50 but I suspect they have a minimum p&p. The 35 fasteners I bought cost £69 but the saving in the time and effort to make them is worth it.
Regards
Gary
Re: Churchill Mk3 number 67
Posted: Sat Mar 18, 2023 10:46 pm
by Steve Stuart
Thank you Gary, this is very useful for both Tanks and work! Steve
Re: Churchill Mk3 number 67
Posted: Sun Mar 19, 2023 11:01 pm
by Gary Richardson
Hi all
I managed to progress the pannier door applique armour today, I also decided to reprofile the door hinges and reduce their height. I am still debating whether to deepen all the door frame rebates and use cap head bolts instead of the button heads. The left hand side of the frame nearest the hinge will be reprofiled.
I used half head bolts on the hinges which allowed them to be just proud of the hinge recesses as per full size. I drilled a couple of holes through the applique armour and door and countersunk the armour holes. The door holes were then tapped for M2.5 and both parts bolted together, car filler will hide the countersunk screw heads.
I also continued the detailing on the drivers visor, this time it's the internal fittings. I made the latching system that keeps the viewing glass in place using photos I have taken of the Churchill at Bovington. The bottom rail has a rebate that allows the lower rear edge of glass casing to drop in and the latch then secures the top. Next job is to mill out a rectangle in the centre of the visor for the viewing slot, make the left hand locking mechanism and fabricate the glass block and casing. I will use UV resin to make the glass block and thin brass sheet for the casing.
Regards
Gary
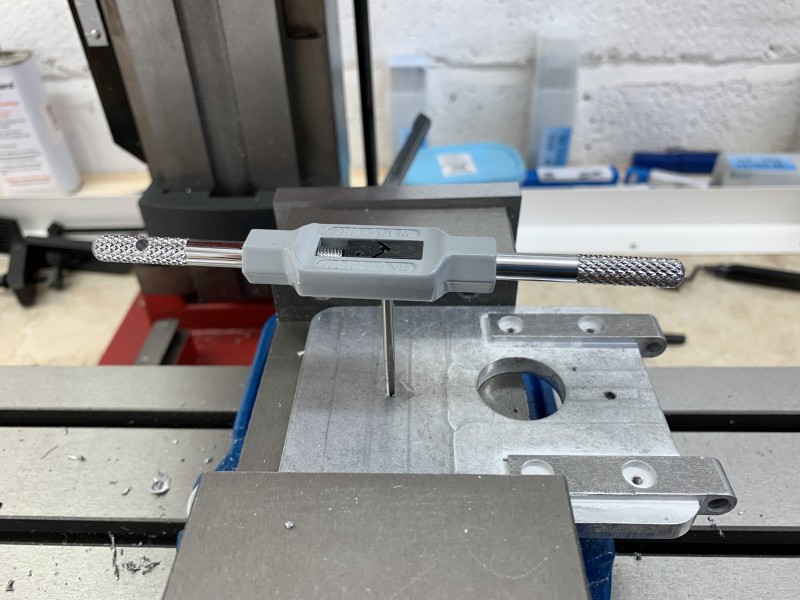
- M2.5 holes being tapped
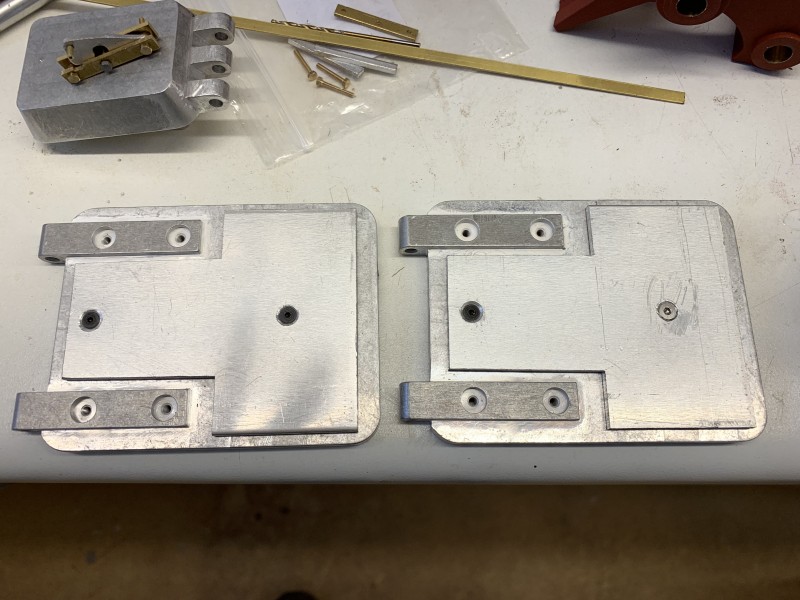
- Screw the armour in place
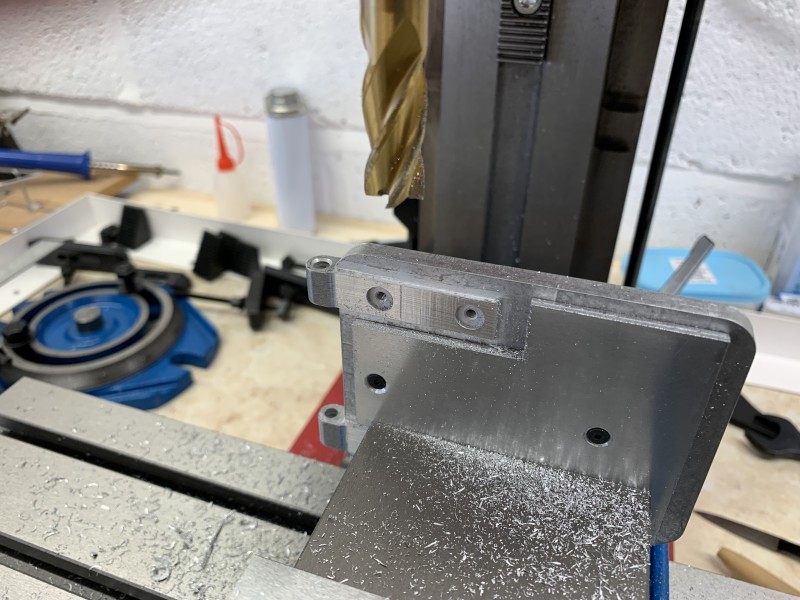
- Reprofiling the hinges
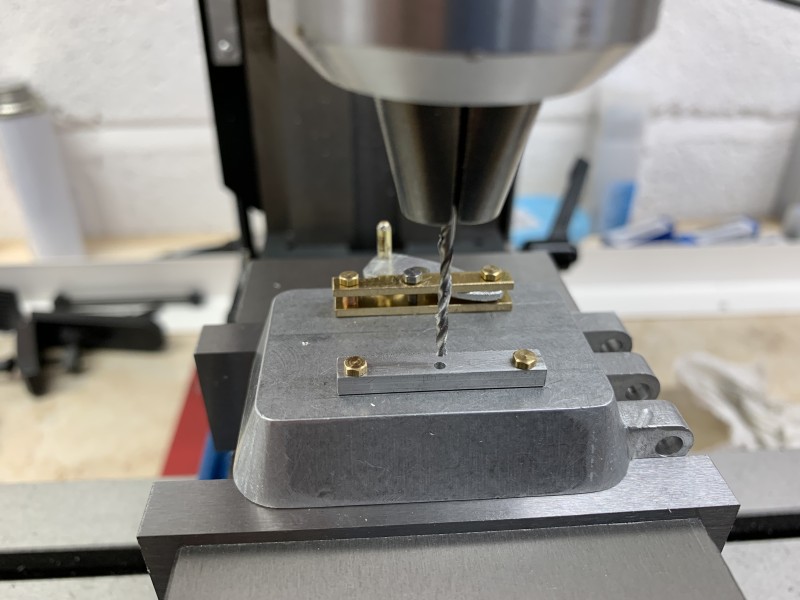
- Fitting the rebated lower bar
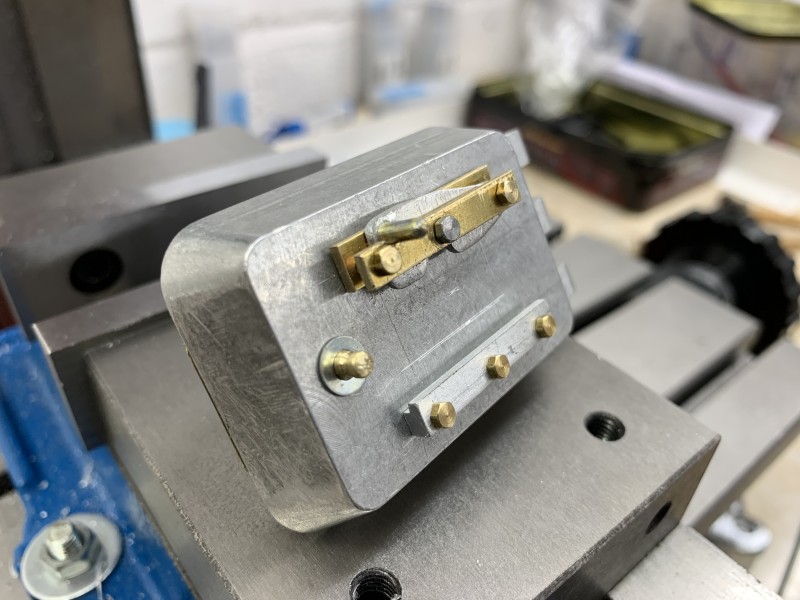
- Latch in closed position
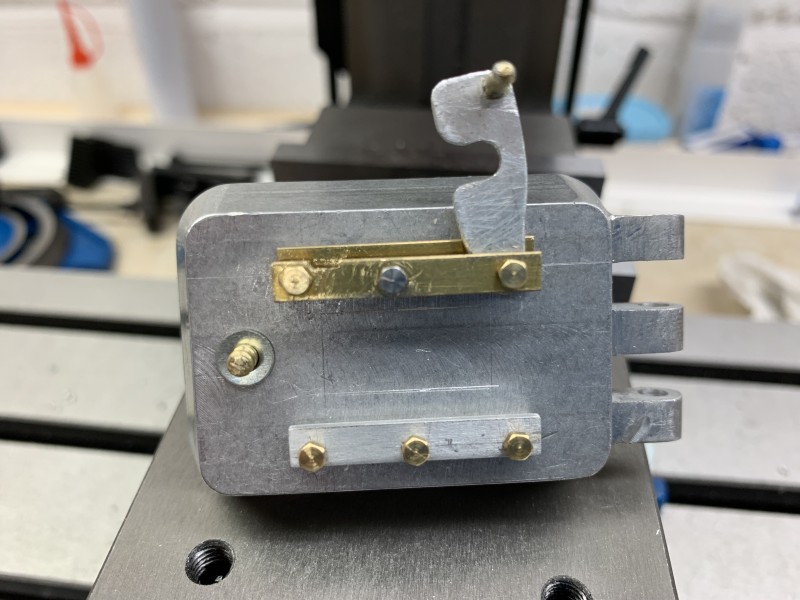
- Latch in open position
Re: Churchill Mk3 number 67
Posted: Thu Mar 23, 2023 7:54 pm
by Gary Richardson
Hi all
The saga of the applique armour continues. Today I made the front pannier sections of applique armour plus the two fillets that act as a spacer. I altered the top profile slightly to better match the pannier shape. All the guide holes have been drilled and the panniers marked up ready for new cone head positions and bracket stud holes which I will use to attach the armour. I will use the same M4 brass inserts I used on the rear plates. Hopefully all the pannier armour will be completed and etch primed in the next couple of days and I can start on the brackets.
There may be some delays as I am helping train a new guide dog puppy called Rosy, although only ten weeks old she is under the impression that she is an attack dog in training as my fingers will attest

I have obtained various thicknesses of aluminium plate to try out on the brackets and will be comparing photos to try and get it right.
Now it is getting milder I will also start spaying the top coat mix on the bogie parts and get those assembled. This will also free up some bench space and allow me to get the panniers completed and sprayed.
Regards
Gary
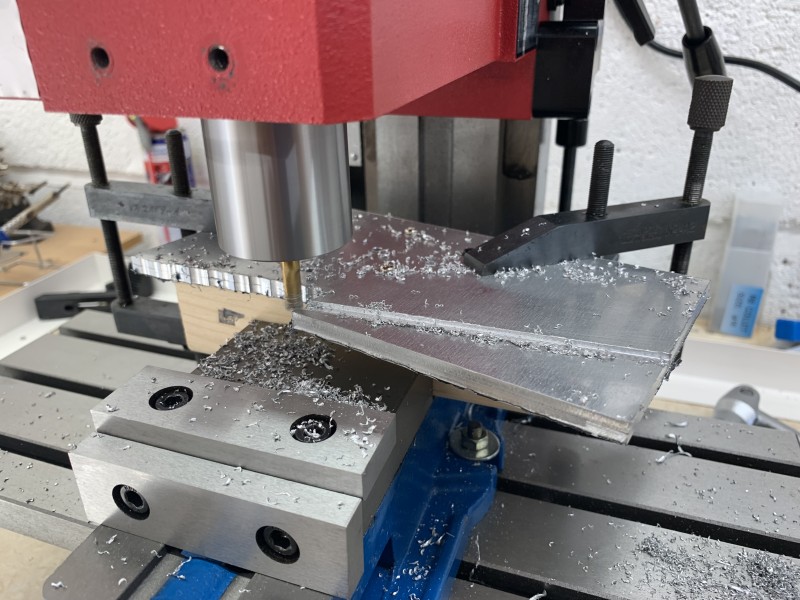
- Shaping the front armour.
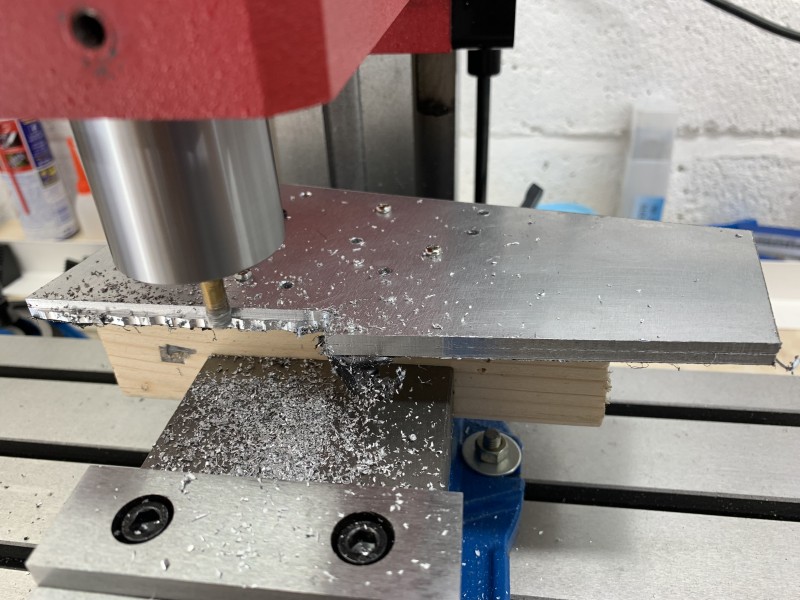
- Getting the Z profile cut.
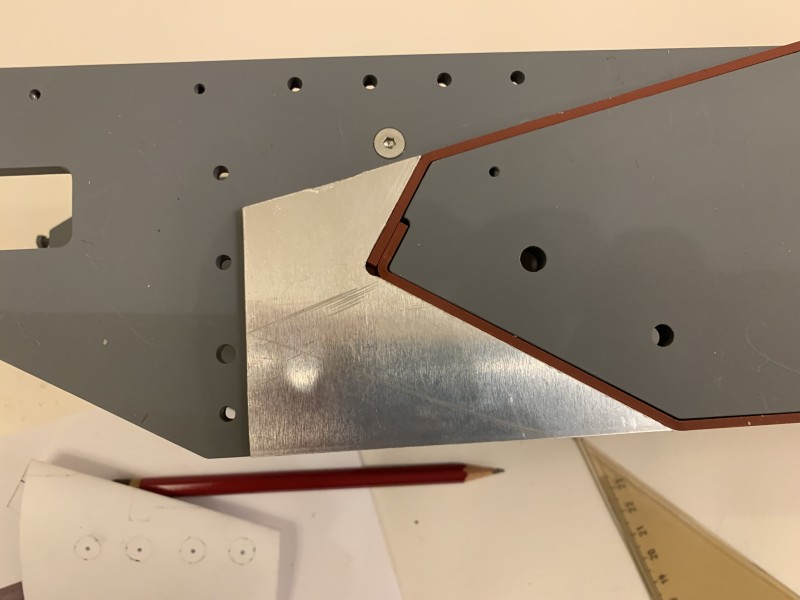
- The applique spacer required to get the correct height.
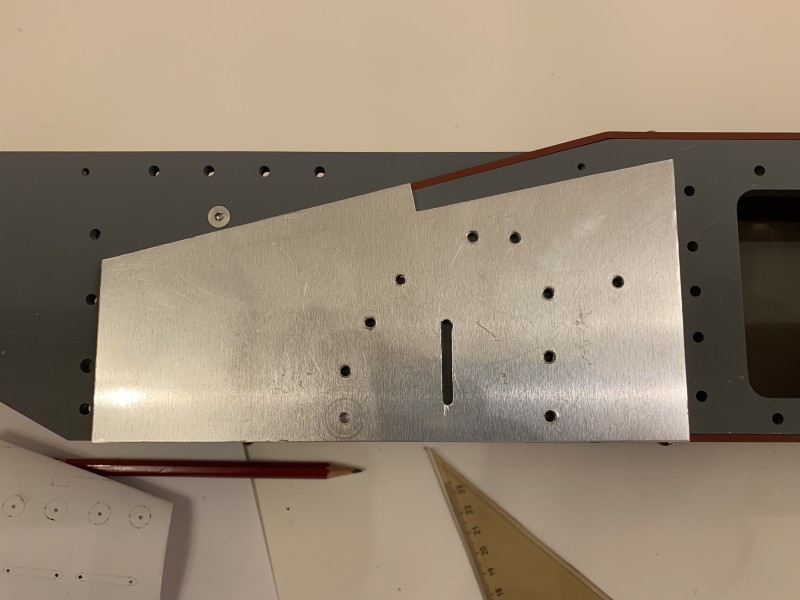
- Pilot holes drilled ready for marking out on the pannier.
Re: Churchill Mk3 number 67
Posted: Sat Mar 25, 2023 10:45 am
by Andy Cameron
Hi Gary
Good to see your new toy being put to great use.
Regards
Andy
Re: Churchill Mk3 number 67
Posted: Sun Mar 26, 2023 9:04 am
by Gary Richardson
Andy Cameron wrote: ↑Sat Mar 25, 2023 10:45 am
Hi Gary
Good to see your new toy being put to great use.
Regards
Andy
Hi Andy
I am enjoying learning how to use the mill and it has saved me a lot of time and made the applique armour easier to fabricate. I am also learning you can never have too many mill bits !. The Churchill is a fascinating subject and I really like the kit. Well done to Armortek.
I just love adding the details along with all the research. My next workshop addition will probably be a small lathe as I want to have a go at making the Petard mortar and I also need one to make the wheels and axle for my 8 ton derrick. Before that I need to get the Churchill motors, modules, etc.
It's nice to see your build coming along and I look forward to following its progress.
Regards
Gary
Re: Churchill Mk3 number 67
Posted: Sun Mar 26, 2023 9:20 am
by Gary Richardson
Hi all
A quick update on the applique armour, I have temporarily fixed the bracket aligners onto the armour. I drilled and tapped M2 holes and will fill the hole recesses using car filler once everything is ready for priming. I will probably use the mill to reduce the depth of the retaining brackets to around 2mm to match the bracket thickness. The brass inserts will also be reduced slightly.
Regards
Gary
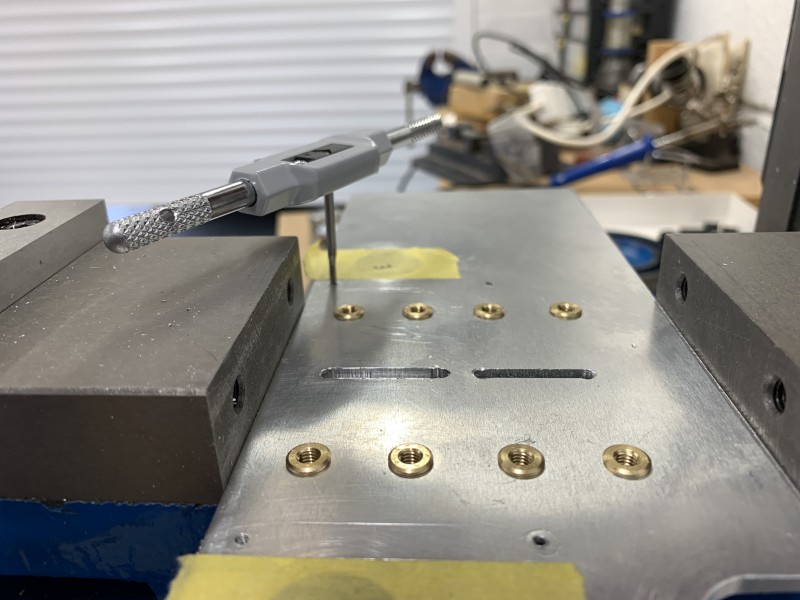
- M2 holes tapped.
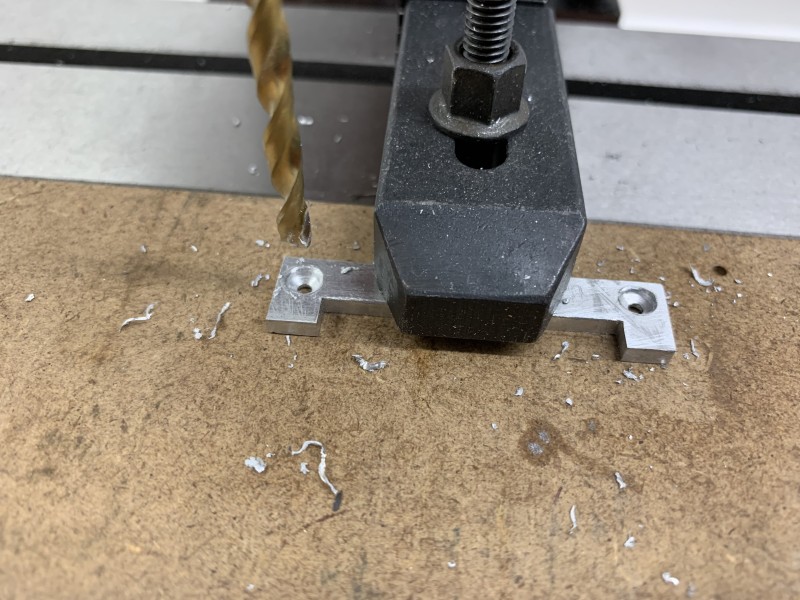
- holes in retainers recessed and countersunk.
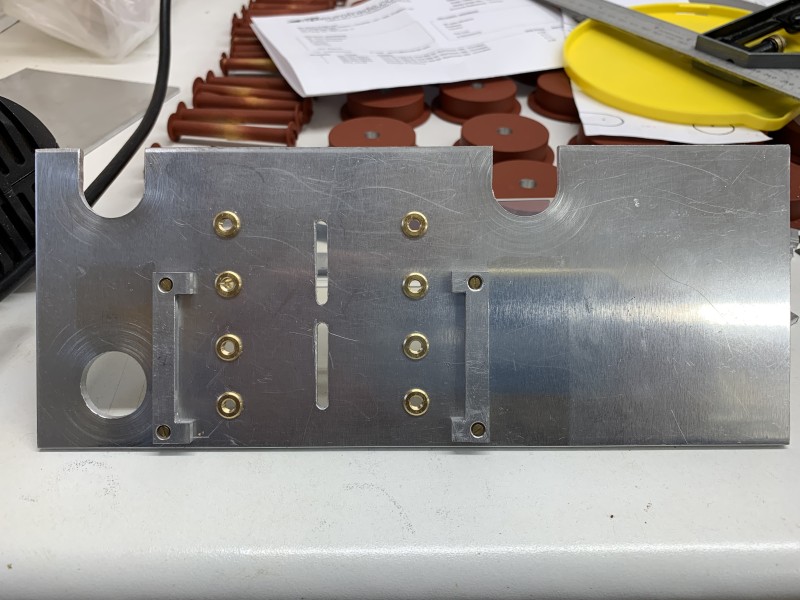
- Retainers in position.
Re: Churchill Mk3 number 67
Posted: Sun Mar 26, 2023 12:18 pm
by Shayne Sutton
Gary,
If you want a better finish on the aluminum and stop the build up on the taps and milling cutters, apply a small amount of kero as a lubricant, it has worked for me as a machinist for over 50 years.
Re: Churchill Mk3 number 67
Posted: Mon Mar 27, 2023 8:55 am
by Gary Richardson
Shayne Sutton wrote: ↑Sun Mar 26, 2023 12:18 pm
Gary,
If you want a better finish on the aluminum and stop the build up on the taps and milling cutters, apply a small amount of kero as a lubricant, it has worked for me as a machinist for over 50 years.
Hi Shane
Thanks for the tip, I have been using WD40 while I await cutting fluid and lubricants plus various mill bits that I ordered, unfortunately Royal Mail seemed to have 'lost' the package

. Arc Eurotrade are going to resend it by courier so I will see how good they are and keep the kero in mind.
Regards
Gary
Re: Churchill Mk3 number 67
Posted: Mon Mar 27, 2023 9:09 am
by Gary Richardson
Good morning
Just a quick update, I have made some cable brackets to go on the applique armour. There is also a longer bracket that needs to be made which goes along the top of the door frame. The small bracket at the top left is held in place using 1.2mm brass rod through holes in the bracket and the edge of the armour. I then soldered the rods with everything in place using a small propane torch, the solder runs down the rods into the holes and when it cools becomes a very solid fixing. The other bracket has 1.6mm countersunk screws going through the armour to a recess at the back which keeps the nuts flush with the armour surface.
Regards
Gary
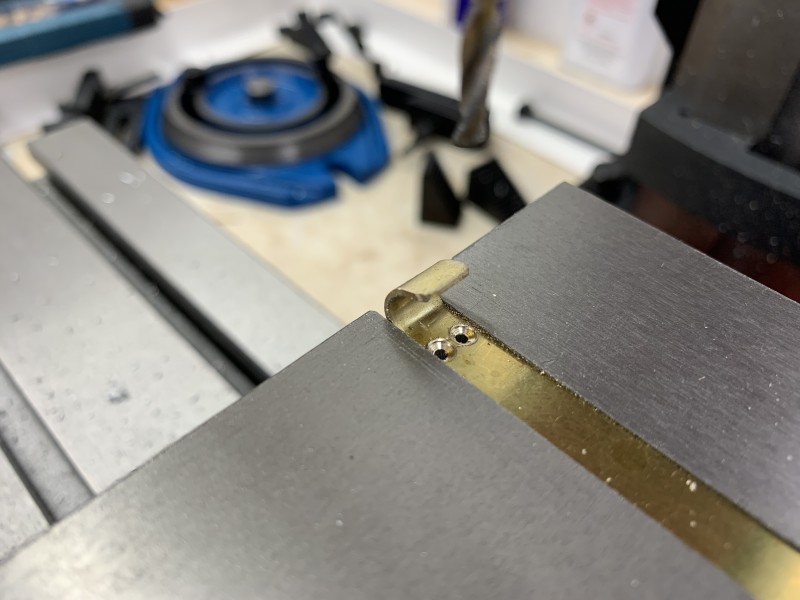
- Making the cable brackets out of 1mm brass strip
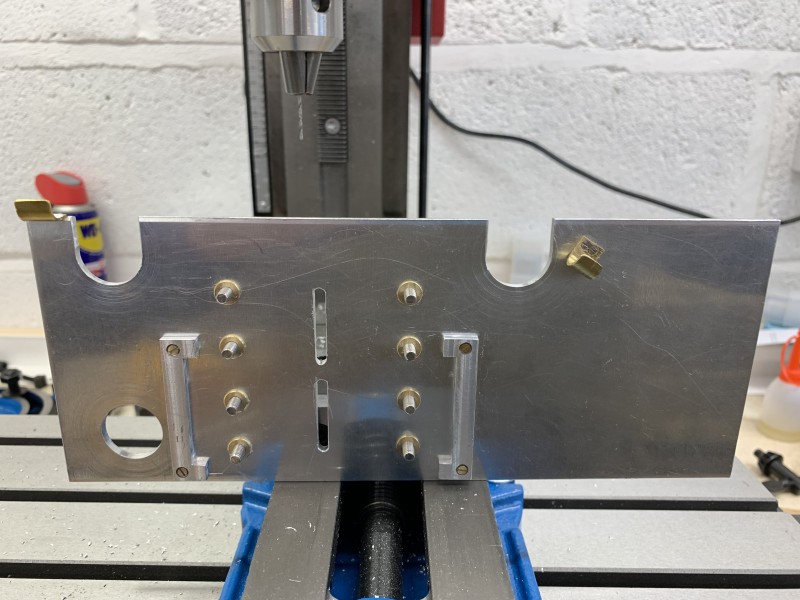
- Both brackets in place for the mid armour section
Re: Churchill Mk3 number 67
Posted: Mon Mar 27, 2023 11:53 am
by Vince Cutajar
You seem you have gotten used to your mini mill.
Vince
Re: Churchill Mk3 number 67
Posted: Thu Mar 30, 2023 7:07 pm
by Gary Richardson
Good evening
Todays little project was to make the drivers visor interior locking system and mill the hole that exists behind the glass block.
The locking lever and associated parts were quite small and fiddly. The hand operated lever/latch started off as a bar of aluminium and I decided to use the mill to make it. I am happy how it came out and it looks like the one in the photos I have from the Mk 3 in the Tank Museum. I wanted it to work, so I used different gauges of brass tube and 2.5mm brass and steel threaded screws to fabricate it. It took far longer than I expected, around 9 hours, but that was mainly due to the complexity of the aluminium hand lever which has unequal sides and an angled cut on the top face to allow clearance when the visor is closed.
Tomorrow I will continue working on the front pannier applique armour as well as thinking about how I am going to make the brass box for the glass vision block. I think UV resin is the way to go to simulate the glass and that way I can incorporate the cross hairs when I pour it.
Regards
Gary
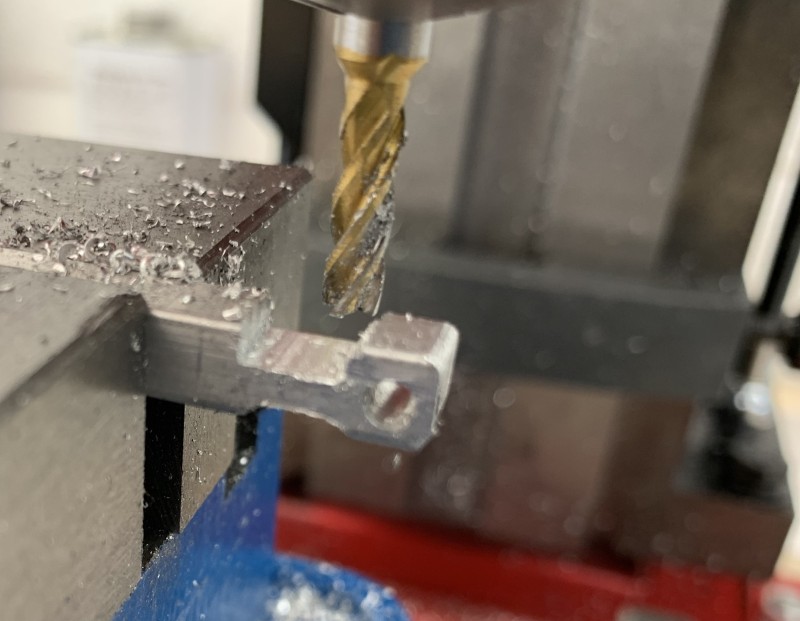
- Starting the lever with an aluminium square section
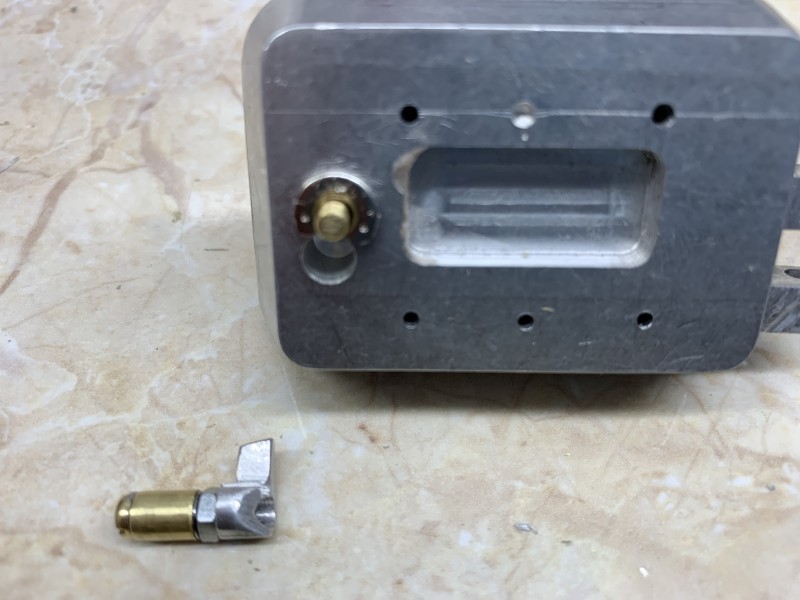
- The locking lever assembly
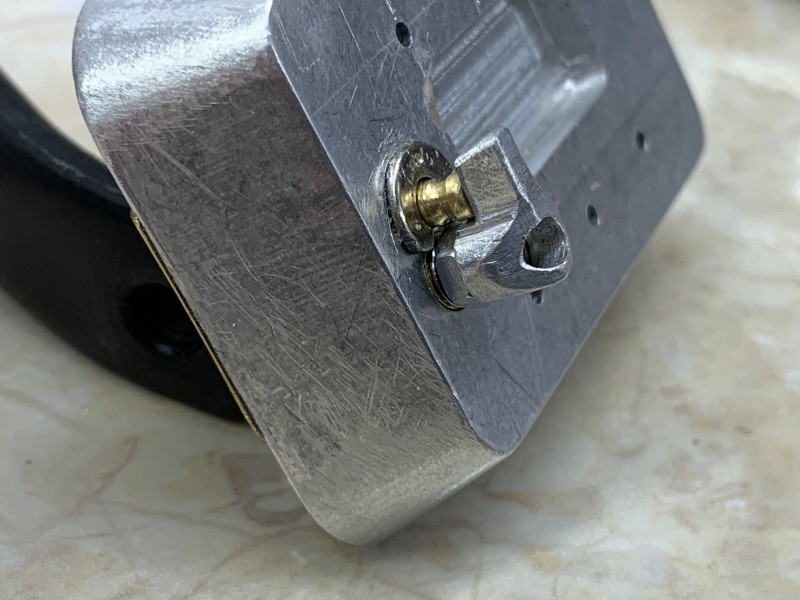
- Lever dry fit
Re: Churchill Mk3 number 67
Posted: Sat Apr 01, 2023 6:08 pm
by Gary Richardson
Hi all
I made a bit more progress with the front applique armour and the drivers visor today. The armour has had the brass inserts fitted and the two large cone head holes drilled. There are a few more holes required for the fillet armour to attach and brackets etc but I need to check all the parts are going to align and double check the hole positions required in the panner sides and horns.
The drivers visor glass block is coming along nicely and I just need to acquire some 1/16" brass angle to complete the top edges before I add the UV resin. I have added the lower and top rails that allow the brass case to clip into position and be held by the catch and it works very well.
Regards
Gary
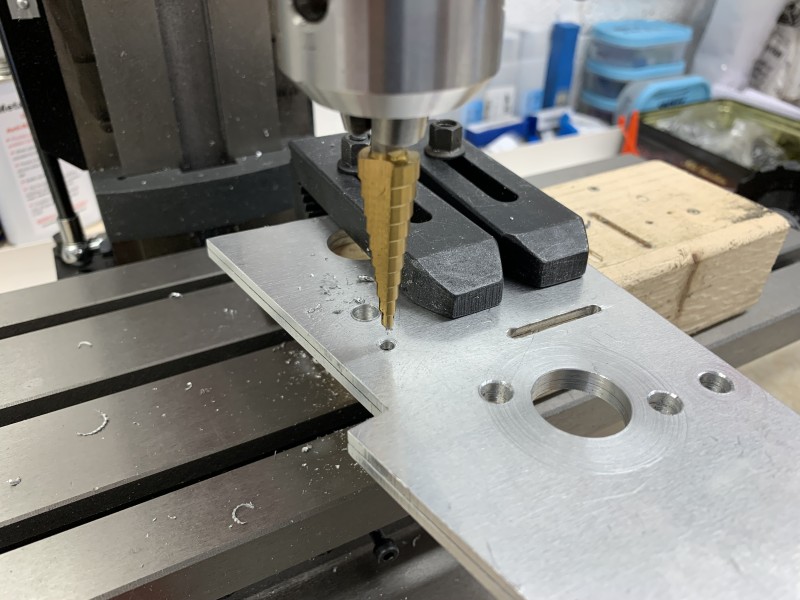
- Drilling the front armour bracket holes
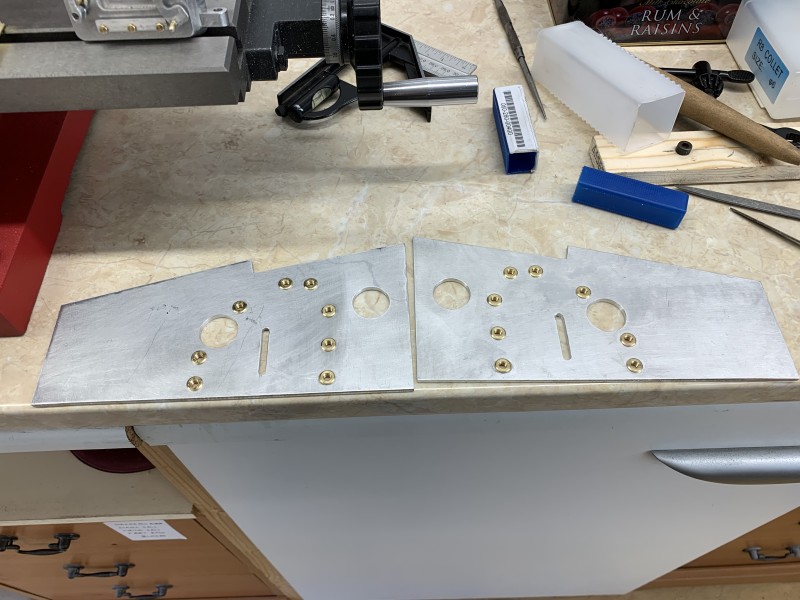
- Ready for fixing, brackets holders, etc
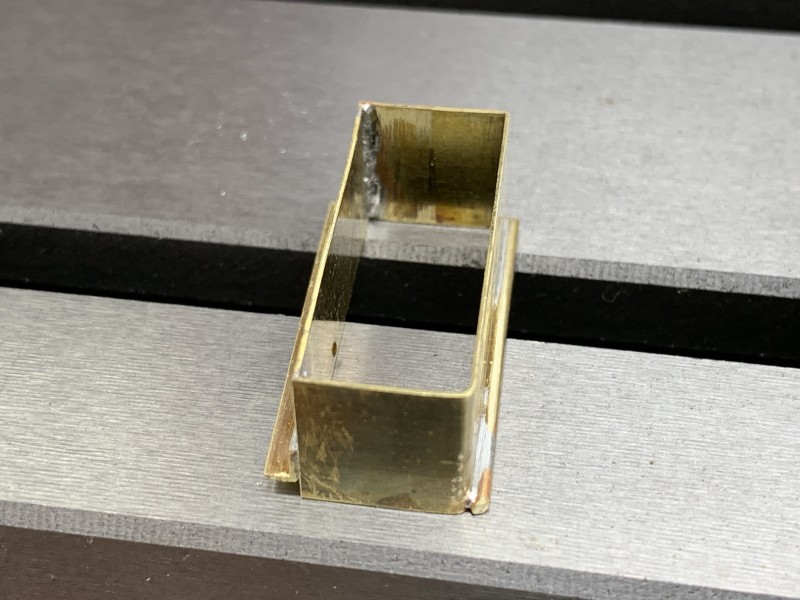
- Adding the locating rails to the vision block case
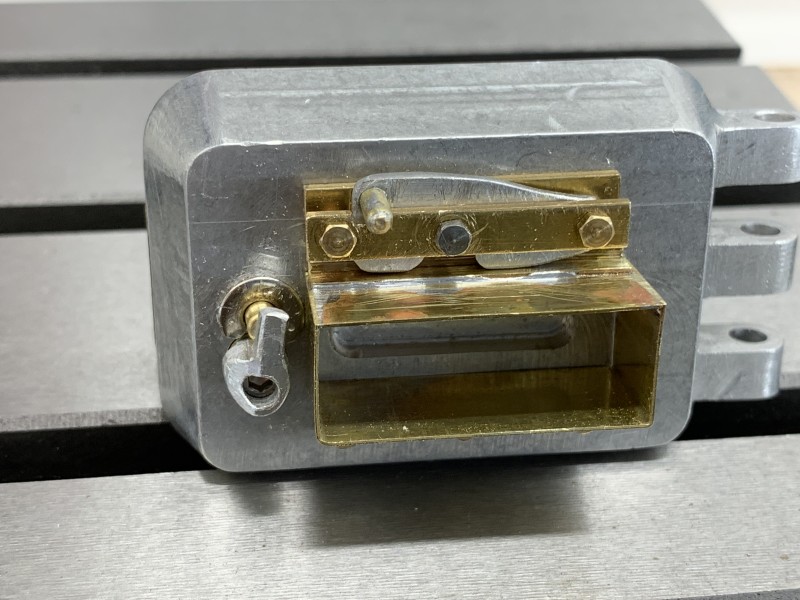
- Nearly ready for the UV resin
Re: Churchill Mk3 number 67
Posted: Fri Apr 07, 2023 1:46 pm
by Gary Richardson
Hi all
Well what a beautiful sunny day. I have started spraying the top coat as its now warm enough. The paints are Tamiya and I have mixed them according to Mike Starmer's new SCC15 formula. XF81 Dark Green 5 parts, XF71 Cockpit Green 1 part and XF58 Olive Green 1 part.
I am very pleased with the resulting colour and it sprays very well with 50% thinners added.
Hopefully I can get all the bogie components sprayed today as the rest of the Easter weekend is taken up with Guide dog puppy sitting

.
I have also used UV resin to add the 'glass' to the vision block casing, there was one minor hiccup when an air bubble formed while it was being UV hardened. I think this may have been caused by a pinprick hole in the solder joint where the brass sides joined. The resin seems to contract slightly as it starts to harden which I think drew air into the resin. I will find a way to make it less obvious.
Anyway my coffee break is over so back to the spraying.
Regards
Gary
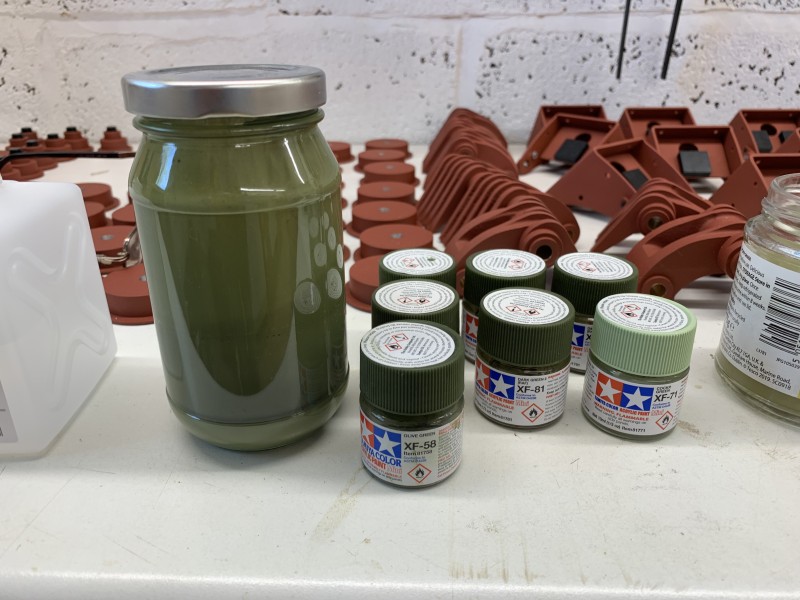
- XF81 X 5, XF71 X 1, XF58 X 1
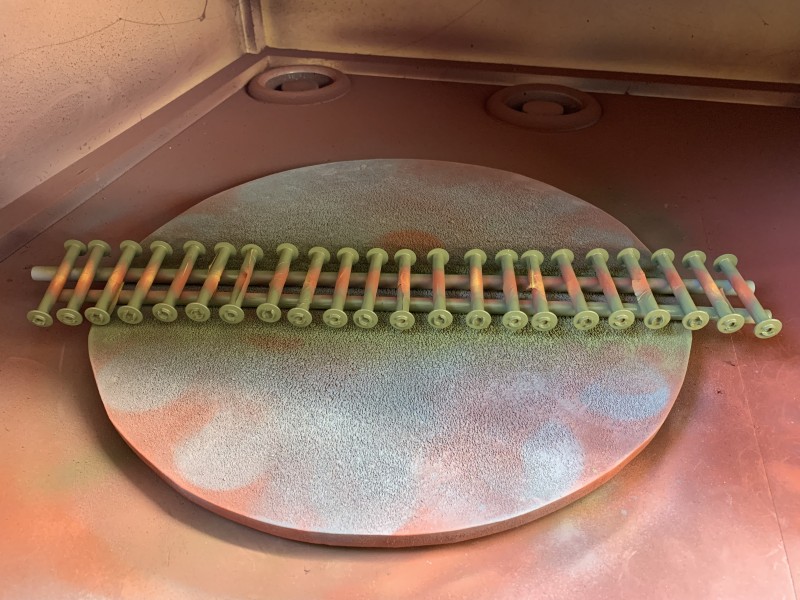
- Axles ready to fit.
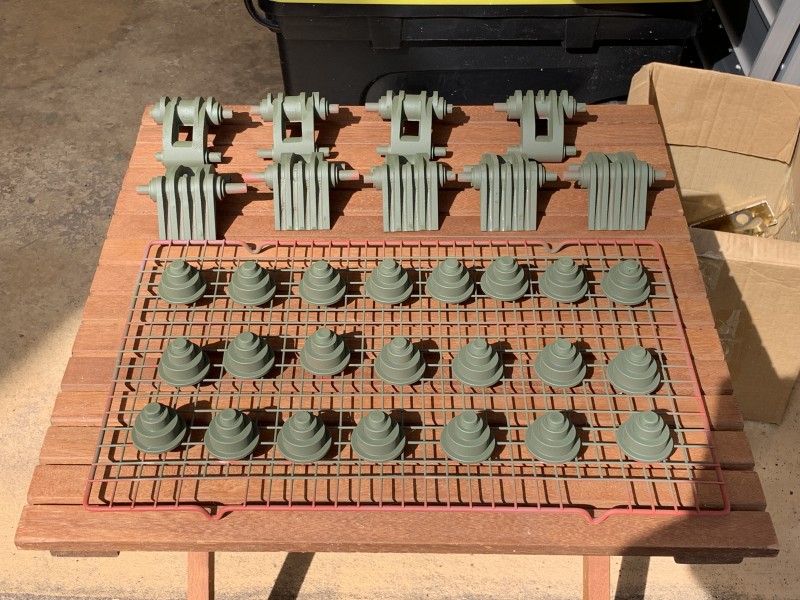
- Bogies under way
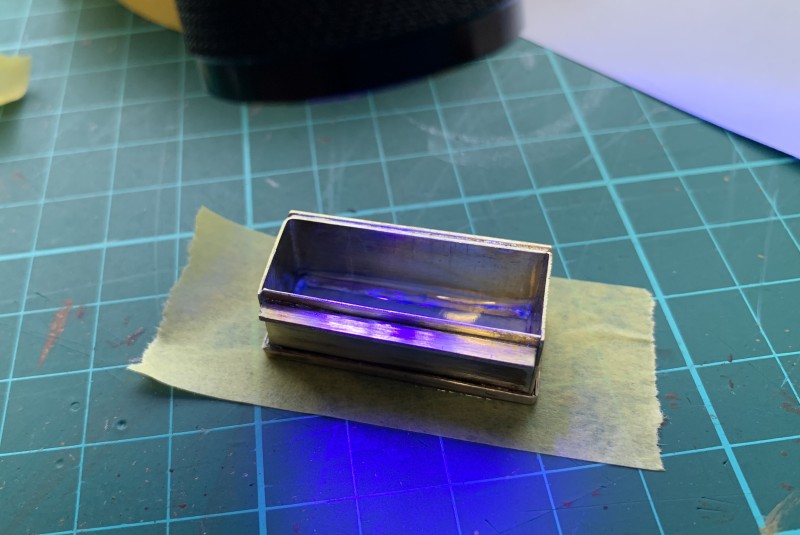
- UV resin being activated
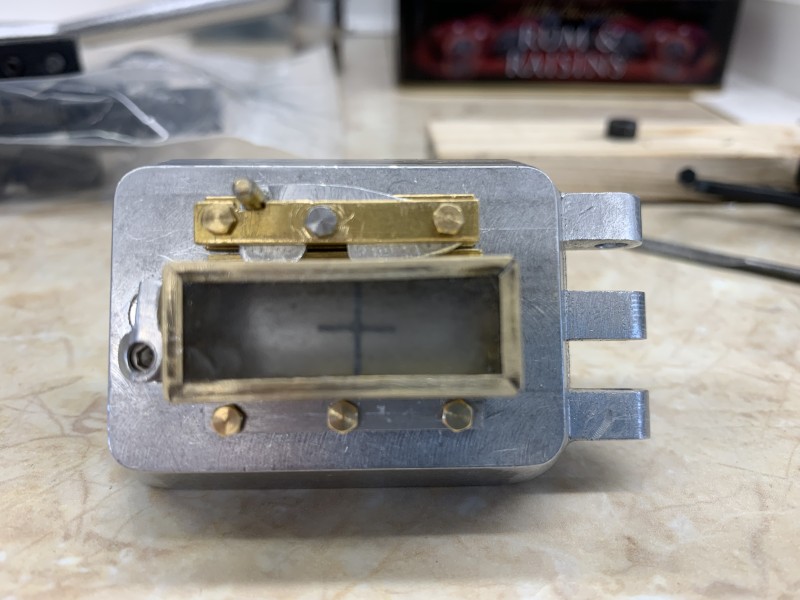
- resin added in layers with the cross embeded.