Page 4 of 4
Re: Panther 18
Posted: Wed Jul 31, 2024 9:02 pm
by Charles A Stewart
Hi Folks.
The last post is still ongoing, I'm no sculptor, but not to far off now.
Blacking Aluminium tracks:-

- I don't think they look too bad, they're on the right.
Outdoor temperature was 20C today as required in the instructions , so had a go. Before I do more I would be interested in the pros and cons of this process.
Regards
Charles
Re: Panther 18
Posted: Wed Jul 31, 2024 9:05 pm
by Malcolm.Plumb
Turned out very good Charles.
Re: Panther 18
Posted: Sat Aug 03, 2024 9:28 pm
by Charles A Stewart
Hi again.
Another of those super detail jobs, they take time, I know. However:-

- What a difference from the original kit part.
Some Mr Surfacer to cover up/texture and we will get there.
Cheers
Charles
Re: Panther 18
Posted: Sun Aug 04, 2024 12:25 pm
by Robert Tanzer
Charles A Stewart wrote: ↑Wed Jul 31, 2024 9:02 pm
Hi Folks.
The last post is still ongoing, I'm no sculptor, but not to far off now.
Blacking Aluminium tracks:-
Etched track.jpg
Outdoor temperature was 20C today as required in the instructions , so had a go. Before I do more I would be interested in the pros and cons of this process.
Regards
Charles
Please tell us what you use to Blacking the Aluminium tracks.
Re: Panther 18
Posted: Sun Aug 04, 2024 1:00 pm
by Charles A Stewart
Hi all.
Robert, in answer to your query I use the products from here:-
www.metalblak.co.uk
The web site includes instruction and the chemicals required. I bought the 500ml kit to experiment with..
I fancied the idea as a way of avoiding painting the tracks. The track links seen here were done as separate items, the next step will be to see if I can do them built up sections of 10 or so.
Hope that helps.
Charles
Re: Panther 18
Posted: Sun Aug 04, 2024 3:40 pm
by Charles A Stewart
Back again, and so soon.
Finished re sculpting the hull machine gun mount:-

- Original kit item.
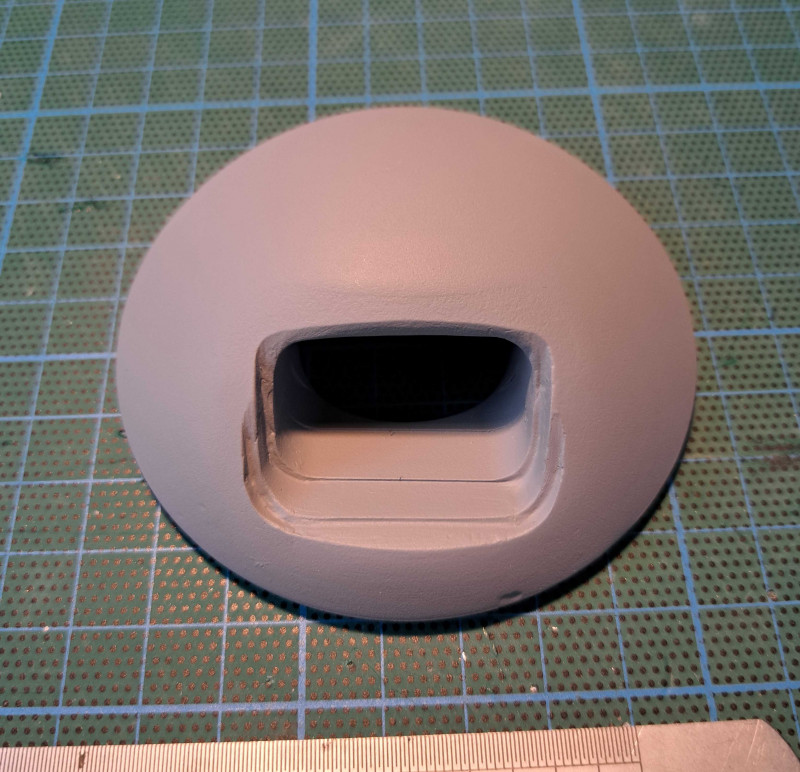
- A bit more Mr Surfacer and a coat of paint or two, and stand 6' back, should look good.
I'll let that last coat of paint dry out thoroughly before any tweeking.
Cheers
Charles
Re: Panther 18
Posted: Sun May 11, 2025 7:07 pm
by Charles A Stewart
Hi Folks.
I didn't intend to do this today, but as the rear deck plate happened to be on the work bench. Well I am sure I am not the only one who has a plan but is diverted/distracted/challenged, so here we are.
I have not liked(my opinion) the kits intake covers, too frumpy, bit of a lump if you get my drift.
After a recent visit to the Tank Museum and some photos:-
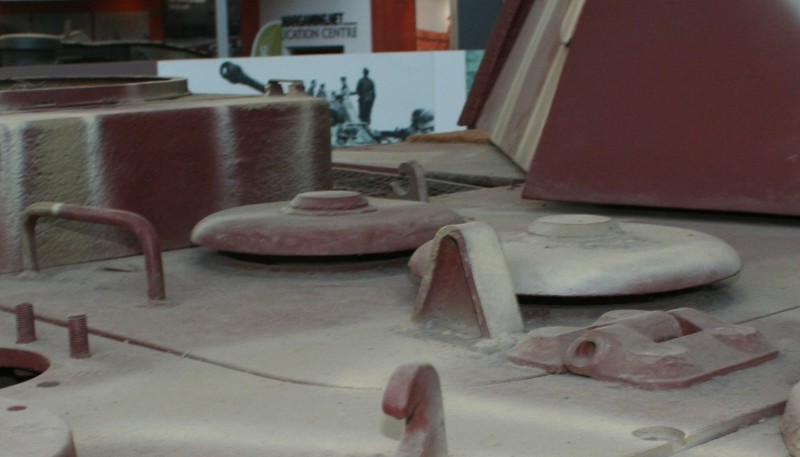
- Real intake cover, Tank Museum.
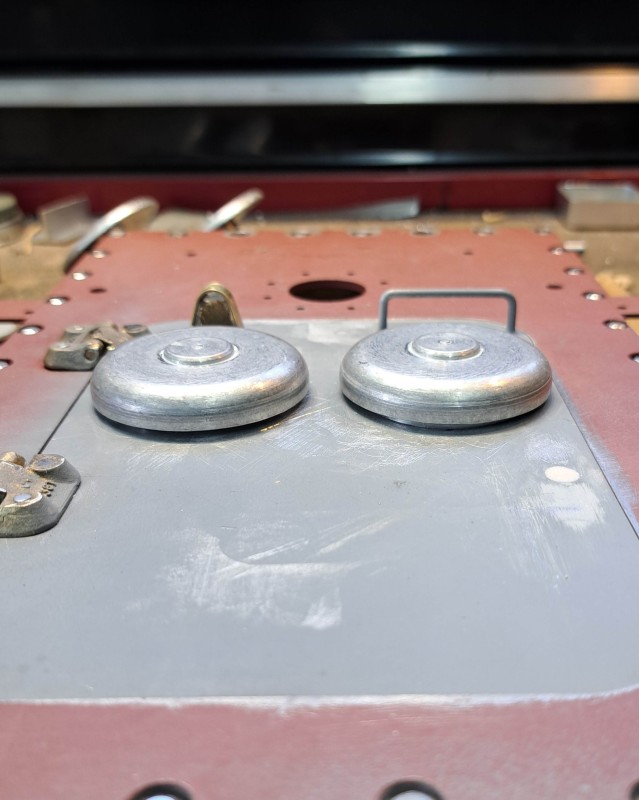
- Kit covers, just that little bit, dumpy, just not.... there.
As I had gone to the effort of opening the intake holes, redoing the covers had been on my mind. I know, if that's all he has to worry about

Therefore:-
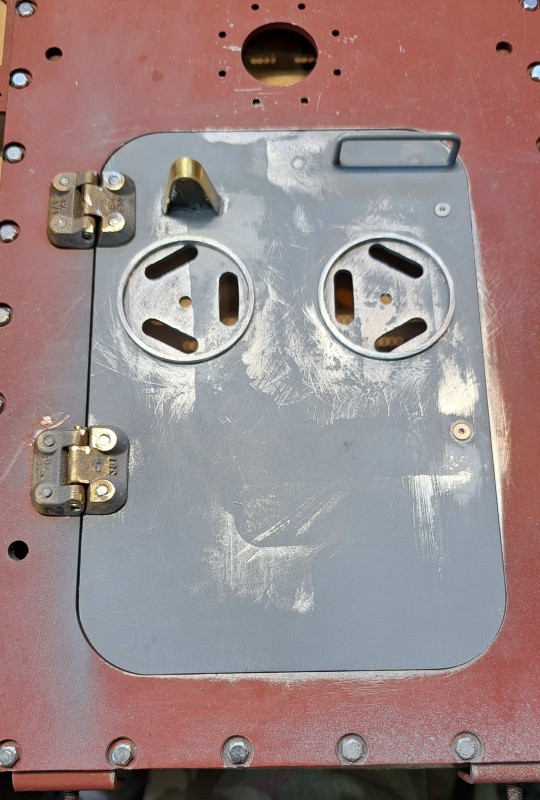
- The ring thing, shh, its only glued on.
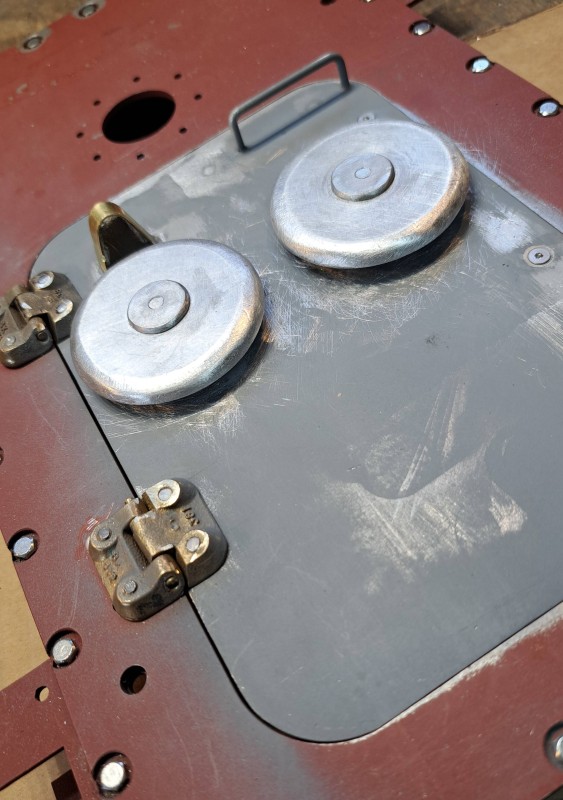
- Let the glue dry, a coat of paint.
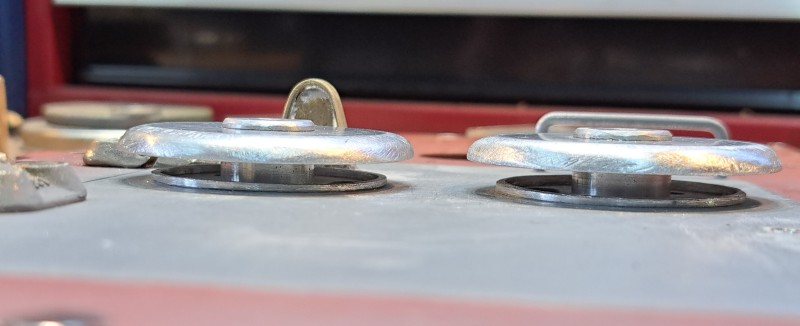
- Now, that's got to look better surely.
Time for a beer, OK another one.
Take care all.
Charles
Re: Panther 18
Posted: Sun May 11, 2025 7:11 pm
by David Brady
Lovely work.
DB
Re: Panther 18
Posted: Sun May 11, 2025 7:14 pm
by Robert E Morey
Nice detail Charles - looks great.
Bob