2025 ARMORTEK KIT SURVEY

Over the last few years we have brought out a whole series of kits as a direct result of your feedback - kits like the Pershing, JagdPanther, Hetzer, Leopard 2A4, and more recently the Sd Kfz 7, 88mm Flak 36 and the upcoming Challenger 2.

So, in keeping with what has become and annual tradition, here is your opportunity to once again influence our future production plans.

We have added in some "guide pricing" next to the names of the models. This is a rough estimate of the price at the current rates.

Thanks in advance for your input and we look forward to the results.

Panther deck detailing

Forum for discussion relating to the Panther
Tim Bowman
Posts: 1762
Joined: Fri Jul 13, 2007 4:53 am
Location: Northern California
Been liked: 177 times
Contact:

Post by Tim Bowman »

Since I'm waiting on my deck parts, I decided to tackle the side fenders. I drilled the brackets, made sectioned fenders and new fasteners that match the ones I used in my front fenders.

I haven't made the center bracket yet so the parts are just sitting in position in these photos. The fenders are made out of a thinner brass so I can bend them up a bit later on. I will add the welds between the sections next and get them in primer.

Image

Image

Image

Image

Image

Tim
"So long as one isn't carrying one's head under one's arm, things aren't too bad." – Erwin Rommel

Allan Richards
Posts: 743
Joined: Thu Jul 12, 2007 10:34 am
Location: Kent
Been liked: 10 times

Post by Allan Richards »

Tim,

This is one very nice looking Panther with lots of eye catching detail. Keep the photos coming.
Allan Richards

User avatar
Robert E Morey
Posts: 2348
Joined: Wed Jul 18, 2007 12:59 am
Location: Seattle, WA USA
Has liked: 158 times
Been liked: 830 times

Post by Robert E Morey »

Very nice addition Tim. A couble bashes here and there would be great! Looking awesome!
Bob

Tim Bowman
Posts: 1762
Joined: Fri Jul 13, 2007 4:53 am
Location: Northern California
Been liked: 177 times
Contact:

Post by Tim Bowman »

Thanks Bob and Allan

Bob, I'm stalling as long as possible so I can use your camo as an example to look at when I attempt mine. :D

I painted the base coat on the left fender and finished most of the work on the right one. I also thought it'd be a good time to show Steve Winstone's AWESOME lights. Not great pictures in broad daylight, but boy they look good in the evening.

I'm starting to feel like I'm on the home stretch!

Image

Image

Image

Image

Image

Tim
Last edited by Tim Bowman on Wed Aug 06, 2008 12:05 am, edited 1 time in total.
"So long as one isn't carrying one's head under one's arm, things aren't too bad." – Erwin Rommel

Derek Attree
Posts: 1305
Joined: Thu Jul 12, 2007 12:44 pm
Location: london
Has liked: 219 times
Been liked: 199 times

Post by Derek Attree »

Hi Tim
Serriously COOOOOL 8)

Derek
we must stop making stupid predictions

Dale jordan
Posts: 1449
Joined: Fri Jul 13, 2007 1:10 am
Location: Port Macquarie Australia
Been liked: 483 times
Contact:

Post by Dale jordan »

Best Panther by far Tim . Bring on the camo !!! Dale

User avatar
Robert E Morey
Posts: 2348
Joined: Wed Jul 18, 2007 12:59 am
Location: Seattle, WA USA
Has liked: 158 times
Been liked: 830 times

Post by Robert E Morey »

Tim,
Absolutely stunning job! The details are amazing. You even drilled the holes in the side fender mounts! I really do think you should stop now though - its going to take me three more years to catch up! :oops:

You're kinda freekin me out with the wire stand though! I'm going to have to get you a hydraulic table for Christmas??? :roll: I can't bear the thought of that thing falling off again!

I would love for you to model your camo off mine! What a compliment! Stay tuned I'm getting real close to air brushing er! As soon as the zimmerit is done...
Bob

simon_manning
Posts: 2061
Joined: Fri Nov 02, 2007 8:51 pm
Location: new forest,hampshire,u.k.
Been liked: 1767 times

Post by simon_manning »

very nice work great to see some quality photos aswell,keep them coming simon manning

Tim Bowman
Posts: 1762
Joined: Fri Jul 13, 2007 4:53 am
Location: Northern California
Been liked: 177 times
Contact:

Post by Tim Bowman »

Thank you all for the nice words.

Still waiting for deck castings. Real work has gotten in the way. :x In the mean time, I did some small things. I still need to add welds around the several items but mostly there. Still need to make the hatch hinges too.

Image

Image

Image

Image

Regards

Tim
"So long as one isn't carrying one's head under one's arm, things aren't too bad." – Erwin Rommel

Pierluigi Patri
Posts: 142
Joined: Fri Jan 11, 2008 7:36 pm
Location: Genoa
Been liked: 1 time
Contact:

Post by Pierluigi Patri »

These are truly beautiful macro-pictures, they give a perfect idea about the detail's accuracy.
My compliments for the pictures ... and for your work :wink:
Pierluigi

simon_manning
Posts: 2061
Joined: Fri Nov 02, 2007 8:51 pm
Location: new forest,hampshire,u.k.
Been liked: 1767 times

Post by simon_manning »

very nice workmanship,a treat to look at

User avatar
Robert E Morey
Posts: 2348
Joined: Wed Jul 18, 2007 12:59 am
Location: Seattle, WA USA
Has liked: 158 times
Been liked: 830 times

Post by Robert E Morey »

I have to echo Simon and Pierluigi's comment about the close ups! They are great Tim. What camera do you use? I have a new 8 Mega-pixel Kodak that I'm really dissapointed with - as far as close ups go. :x

Great work on the rear deck. Keep the details coming.
Bob

Kent Wiik

Post by Kent Wiik »

Here comes another echo... :D
Awesome, truly awesome and something to get inspired from.
As I said before - The finest 1:6th Panther in the world!

Keep the photos coming
Cheers
Kent

Tim Bowman
Posts: 1762
Joined: Fri Jul 13, 2007 4:53 am
Location: Northern California
Been liked: 177 times
Contact:

Post by Tim Bowman »

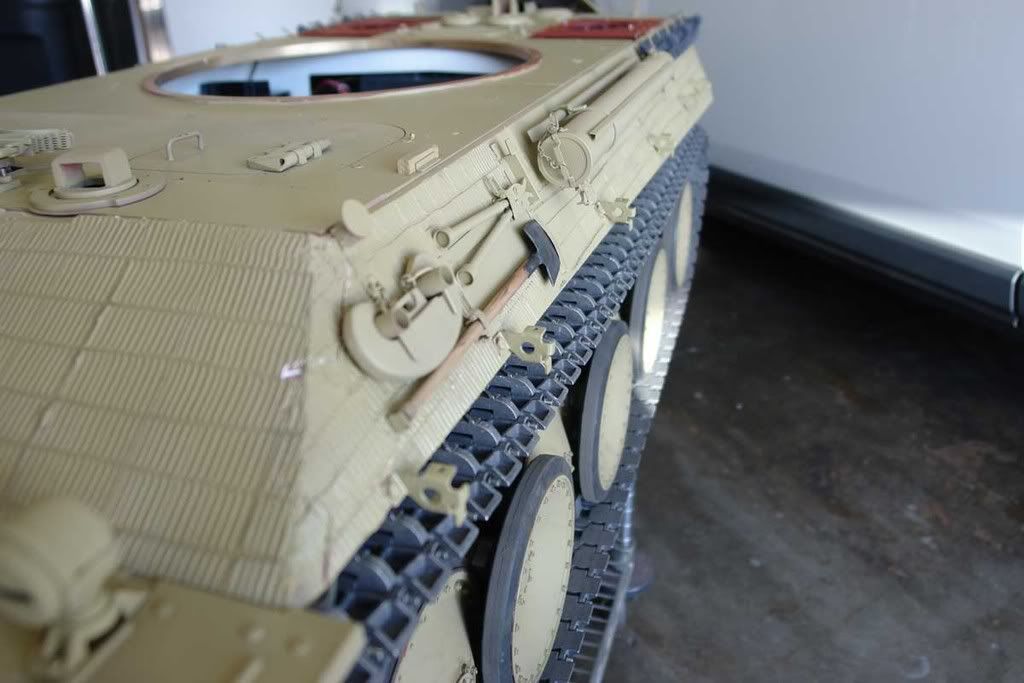
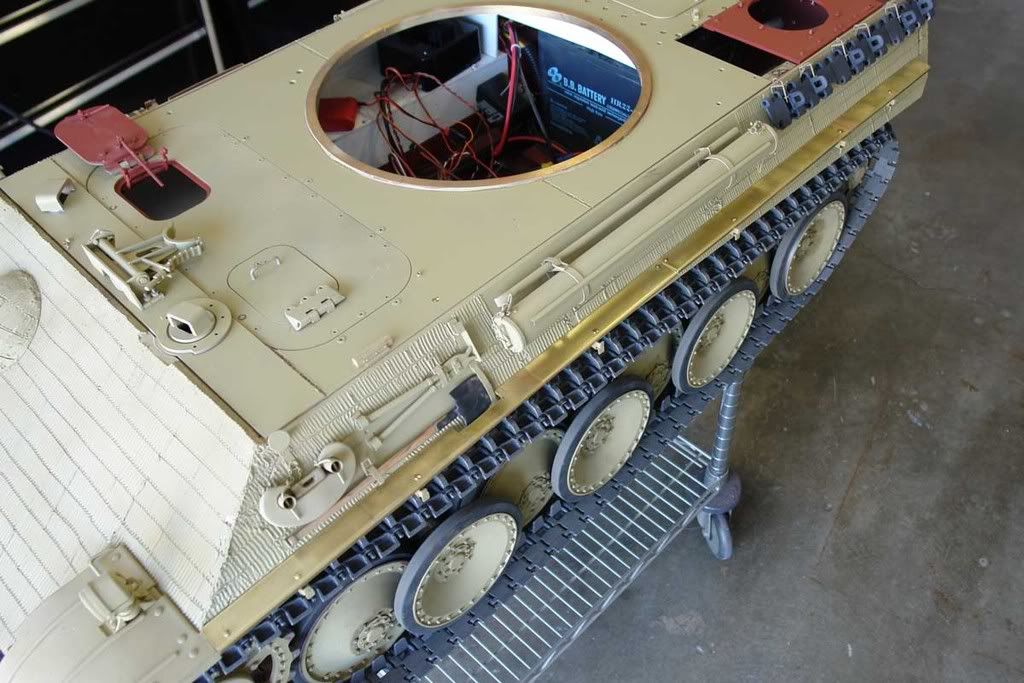
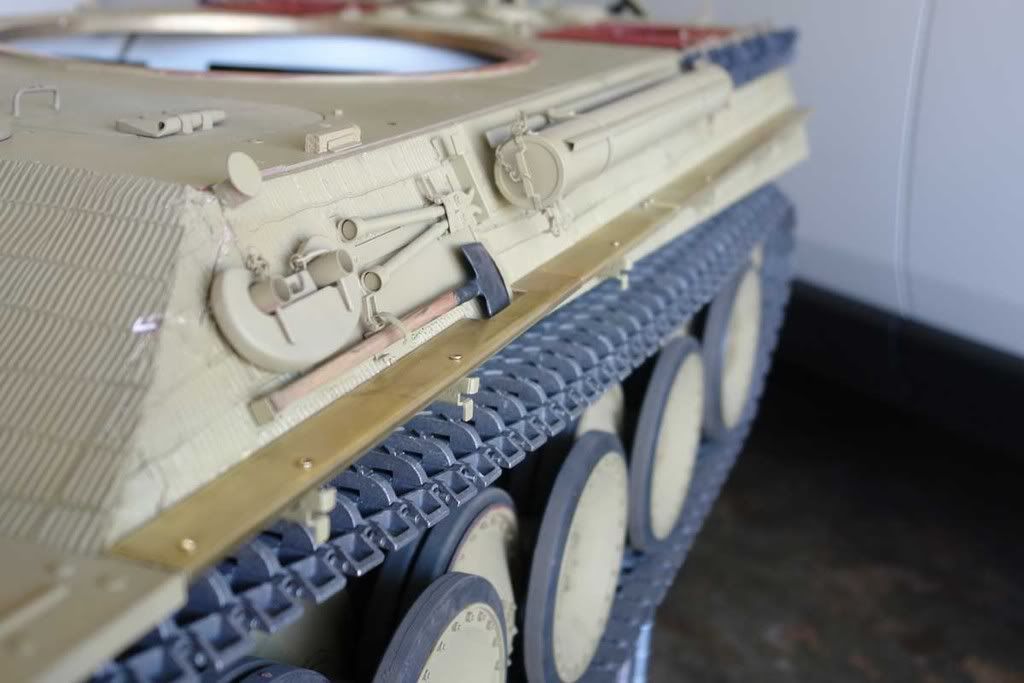
Thank you all for the words of encouragement.

Bob, I think your pictures are equal to mine. It's all about good lighting.

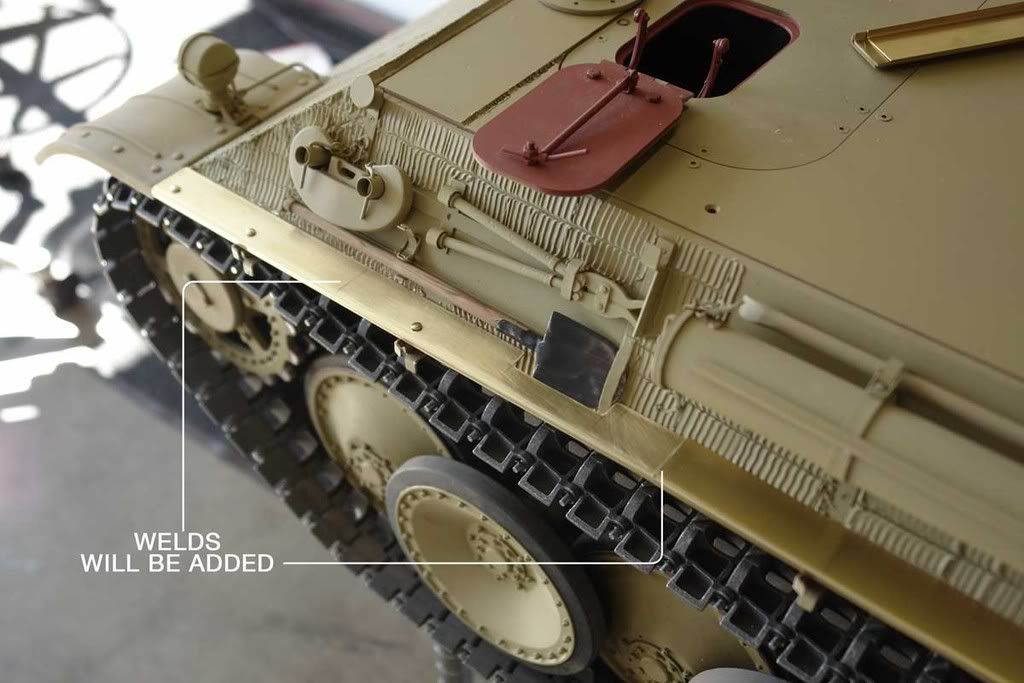
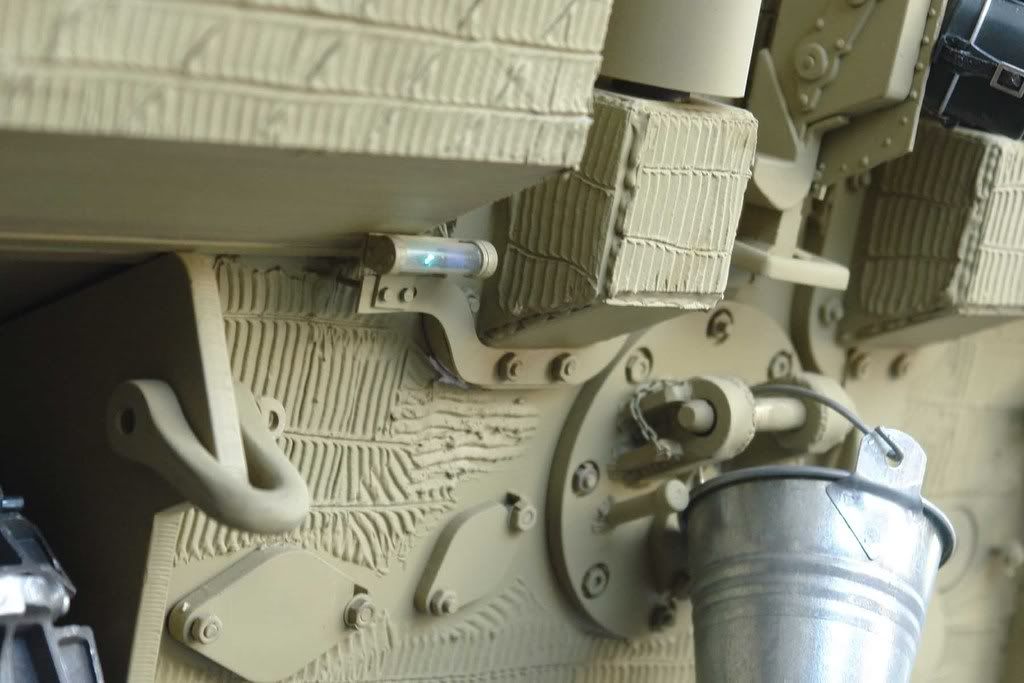
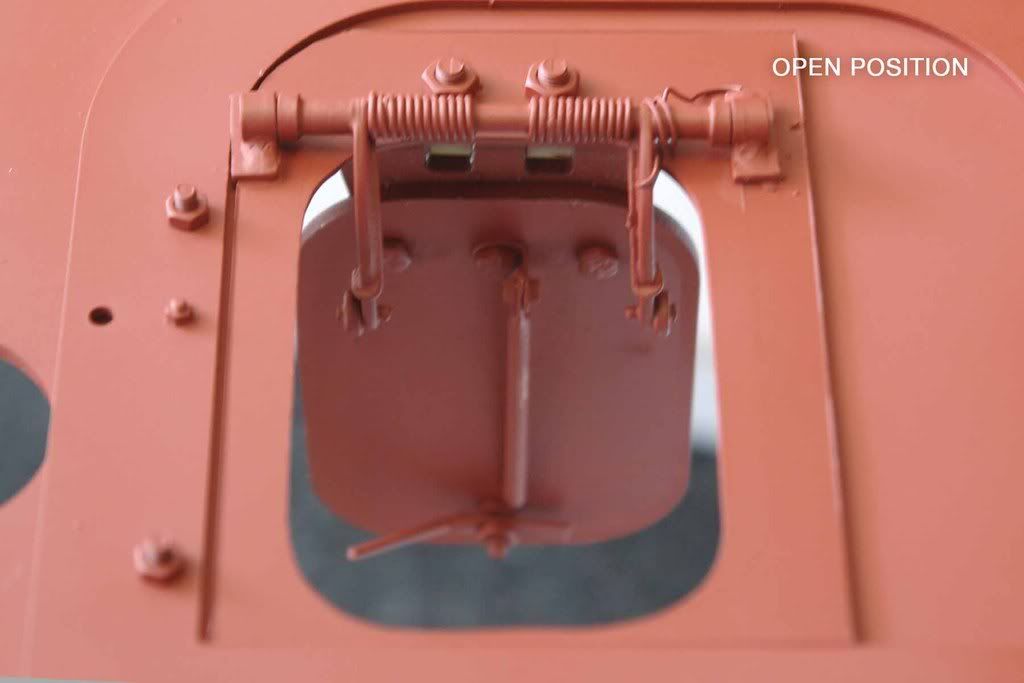
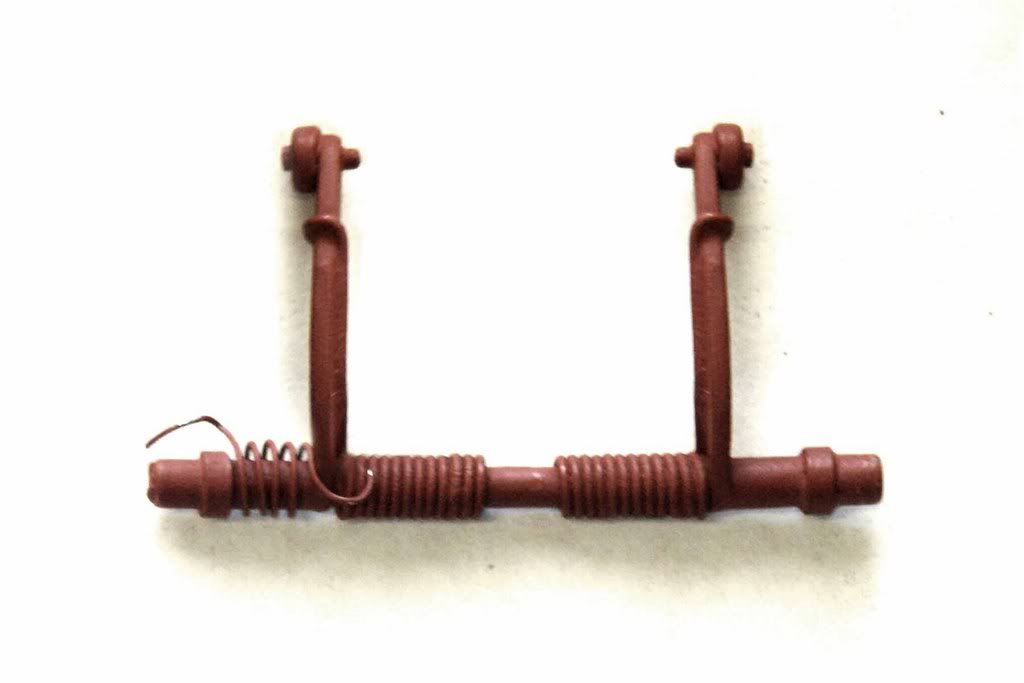
For those who are interested, here is the underside of my Driver's hatch showing the spring I made to simulate the hatch assist spring action. Not the prettiest thing but again, you do not see it from the exterior.

It's just a small piece of existing spring cut down to a few coils. One end is bent to wrap around the arm and the other is bent to sit against the ceiling.
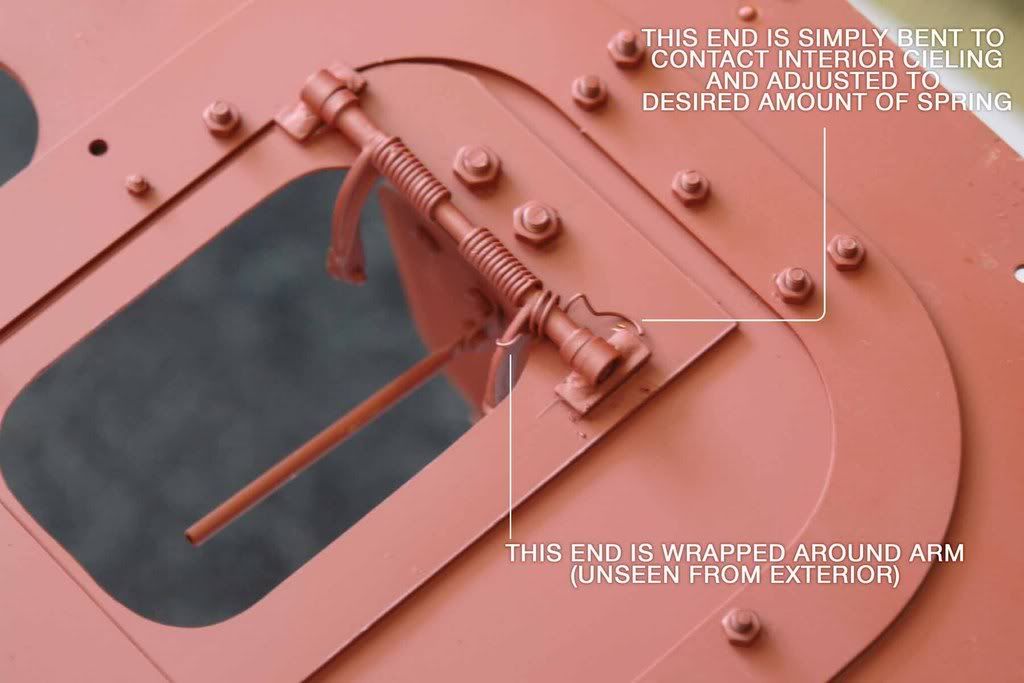
Image

Image

Image

Image

Hope that helps

Tim
"So long as one isn't carrying one's head under one's arm, things aren't too bad." – Erwin Rommel

Tim Bowman
Posts: 1762
Joined: Fri Jul 13, 2007 4:53 am
Location: Northern California
Been liked: 177 times
Contact:

Post by Tim Bowman »

Hi Everyone

Some progress finally made. The intake and exhaust guard parts are molded and several sets have been cast. Here they are mounted. Grills are not yet mounted(obviously) A few minor touches/welds and handles on the engine hatch vents still to do but I couldn't wait to get these parts on.

Image

Image

Image

Image

Tim
Last edited by Tim Bowman on Sat Aug 30, 2008 9:33 pm, edited 1 time in total.
"So long as one isn't carrying one's head under one's arm, things aren't too bad." – Erwin Rommel

Post Reply