Page 3 of 9
Re: Iacopo's Panzer III, a new and first adventure for me.
Posted: Thu Mar 27, 2014 11:11 am
by Stephen White
Iacopo, a joy to watch the fine detail you're applying to your outstanding Pz III. Great craftsmanship and thanks for sharing with the Forum. The Pz III is a great kit for detail, there's so much going on with the outside of the vehicle compared with some of the bigger tanks.
Have you decided on a final paint scheme? I was attracted to the 10 Pz Div Ausf Ls, there are some well known photos of them moving through Marseillles on their way to Tunisia in 1943. They had a very distinctive divisional sign (a bison) and extra stowage boxes on the right hand track guards. There is also a well known sequence taken by a Kriegsberichter of them in convoy in Tunisia. They were sent over to reinforce Panzer Korps Afrika, far too late to have any effect and were lost. They had been recuperating in France after a tour on the Eastern Front and must have had very mixed feelings about leaving.
Keep the posts coming.
Regards.
Stephen
Re: Iacopo's Panzer III, a new and first adventure for me.
Posted: Thu Mar 27, 2014 11:31 pm
by Andrea Daviero
Iacopo is hiding few other details on his building...

Stephen, he will probably do a pz3 ausf L ready to be sent to Afrika but never landed there, it was used in Italy. About the unit, Iacopo will give some more details.

Re: Iacopo's Panzer III, a new and first adventure for me.
Posted: Fri Mar 28, 2014 9:27 am
by John Fitzsimons
Great work Lacopo. Love the details. Amazing work on the wheels and suspension. Lots of little details on the panzer III and IV.
Re: Iacopo's Panzer III, a new and first adventure for me.
Posted: Tue Apr 01, 2014 6:15 am
by Iacopo Di Giampietro
Good morning everyone.
Thanks for your kind comments : there is still a long road to go, but I hope to do a good job .
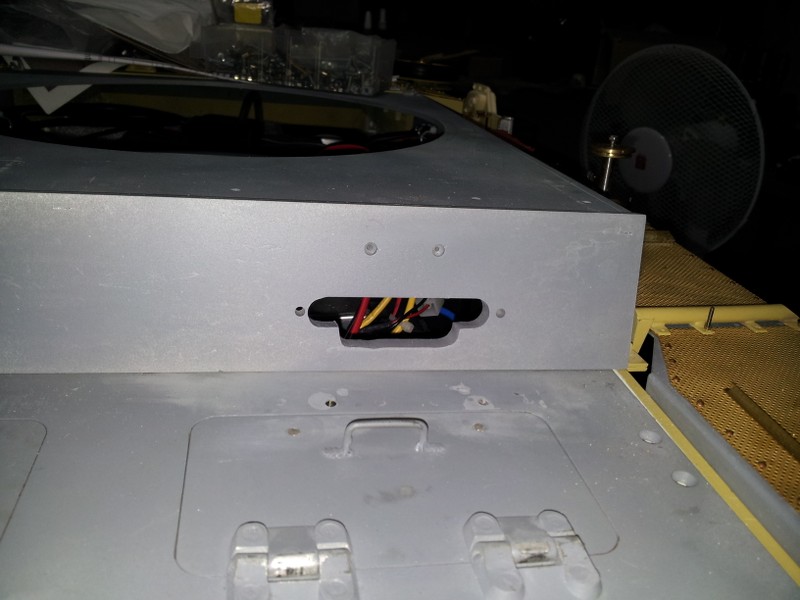
We start from the front plate , sove has been expanded viewer pilot (too small ) and above which were made the two " armored monocles do not know how to call them ".

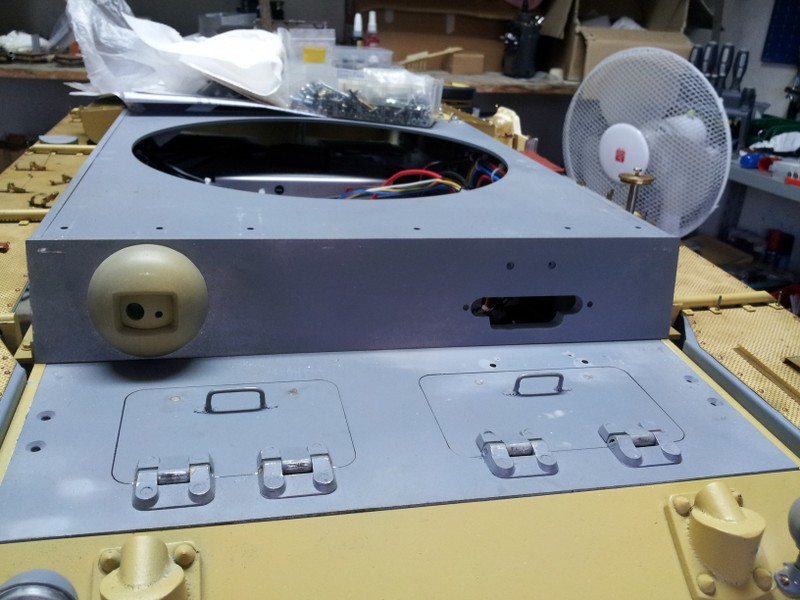
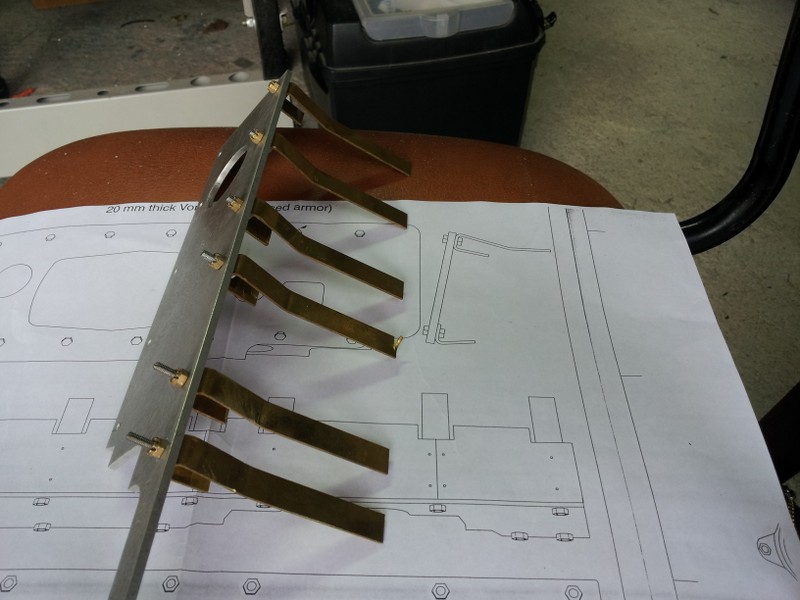
Then we moved to the front plate of additional protection , which was realized by an aluminum plate 3mm thick, and CNC machined !
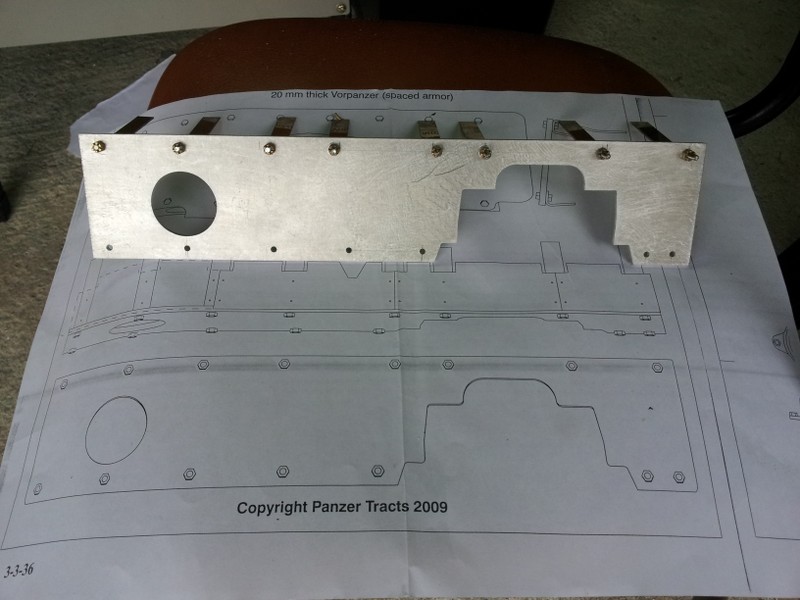
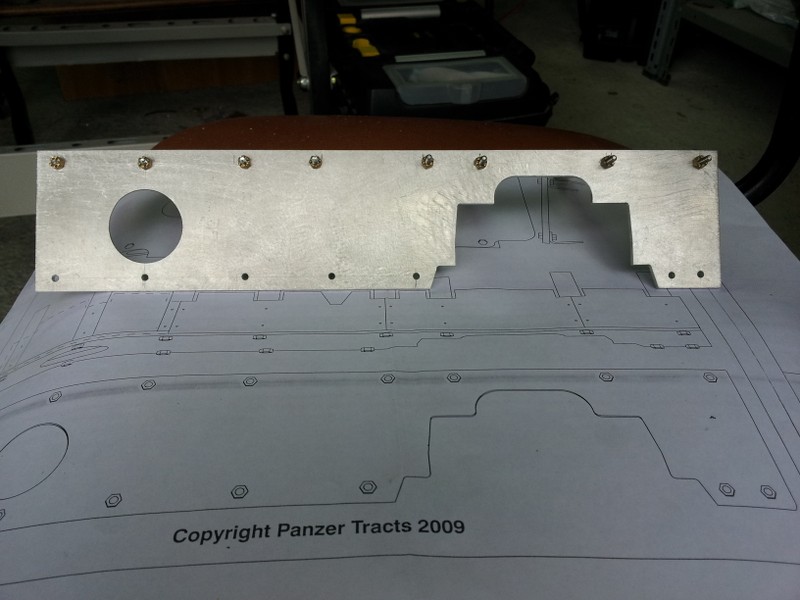
Naturally the plate were added support structures , also these scratch built from brass sheet 1mm thick . All that remains is to cut them to size :
Once I enlarged the hole on the front plate and the additional plate redone , all that remains is to insert the viewer 's tank crewman , artwork of Juan Carlos: I thank you very much !

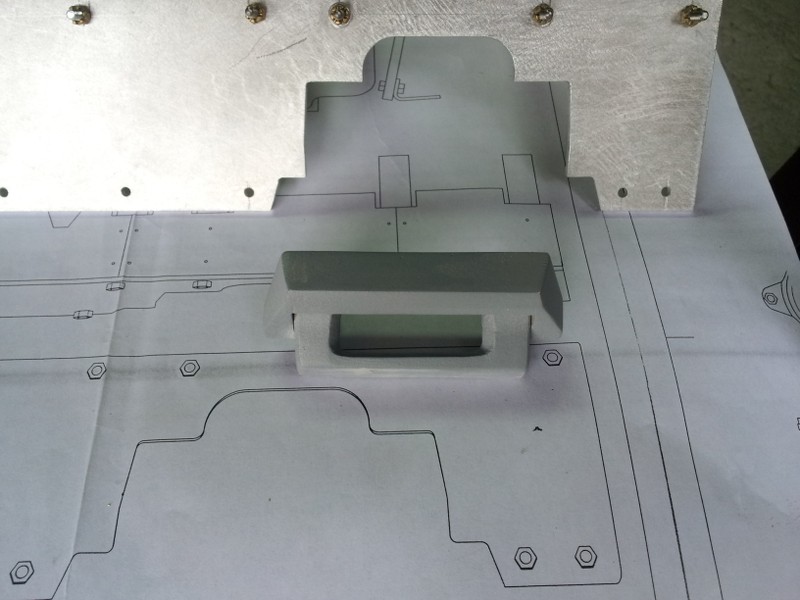
equipped with his fume slide bulletproof !

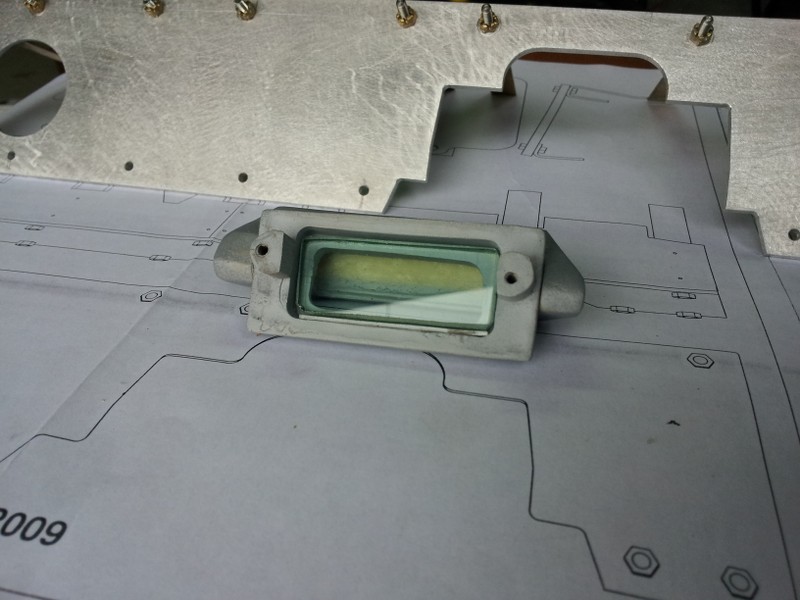
Once rebuilt the front armored plate ( in the right measures ), I also redid the bar to protect the viewer tank crewman , since the original one was short .
Here is an overall view of the assembly after provisional , to see how he does !
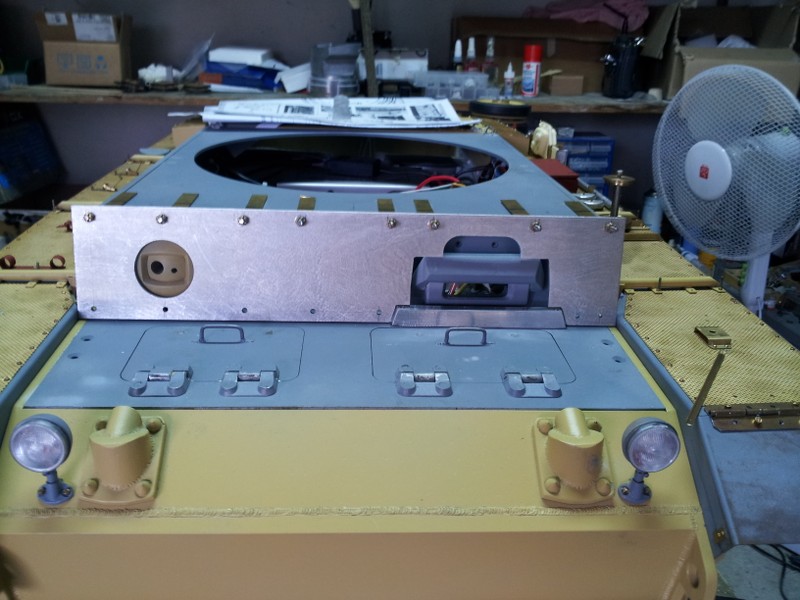
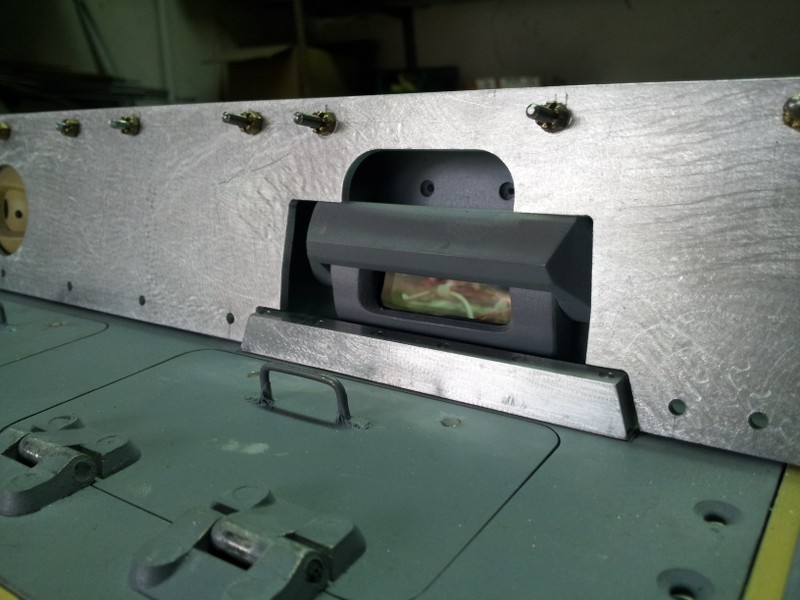
Of course the screws are to be trimmed !
Pictured in the foreground you can see the support of this Notek also redone from scratch .....
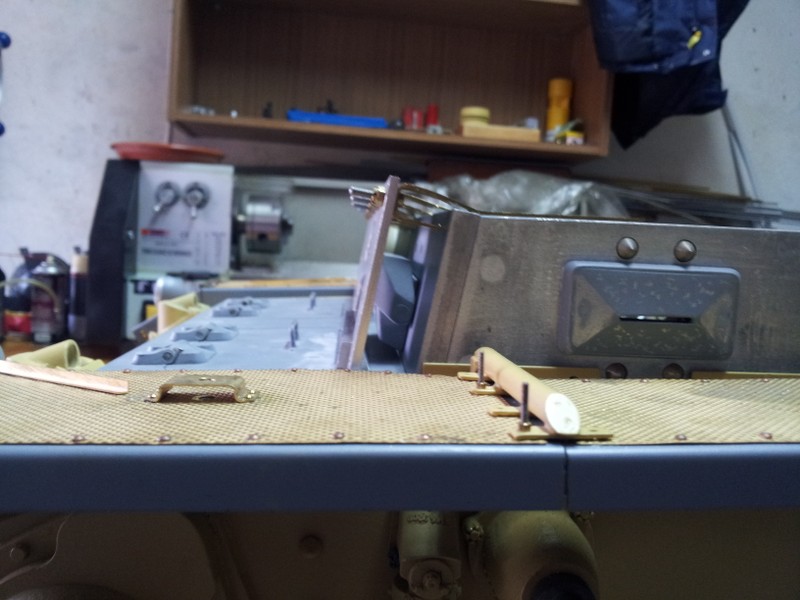
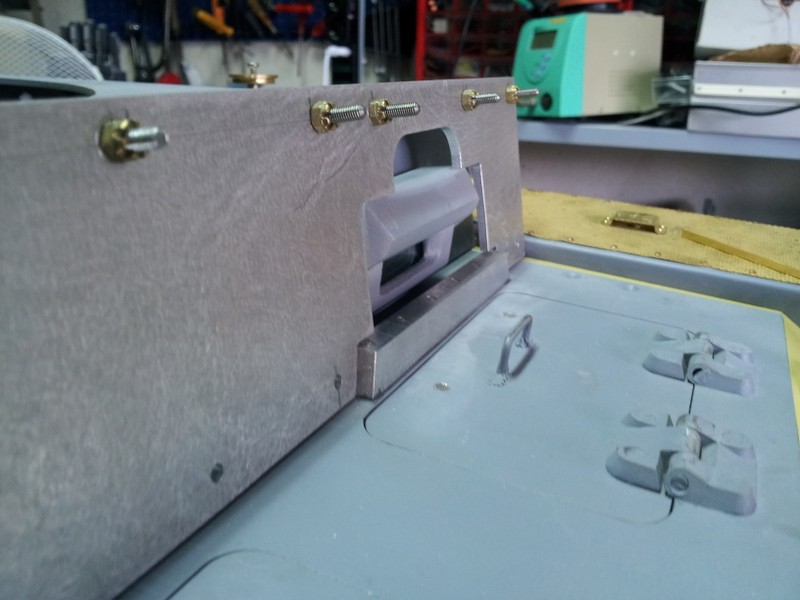
I hope that the work done will appeal to you ....
Re: Iacopo's Panzer III, a new and first adventure for me.
Posted: Thu Apr 03, 2014 6:20 pm
by Iacopo Di Giampietro
Good afternoon, everyone .
Slowly work on the Panzer III continue .
Surely you remember this photo (the first of last post): you could see many cables behind the viewer;

I tried not to think about it, but I did not like the idea of seeing those cables behind the viewer ....
I then decided to put a head back to the viewer (the head of the hypothetical tank crewman ) in order to cover the cables.
So we had to build a stand to put a head . At this point I said, " I put forward some servos ! Let's take one and let's get over a head ! "

Maybe it 'll connect to the receiver and turn the head of tank crewman with the " steering" of the tank, even though no one will see it .... look at the case , I had a nice chubby Futaba servo on which the head came almost perfectly. A shot of the lathe to the base and you're done !

Support will be bound by the bolts that hold the armor of the viewer.
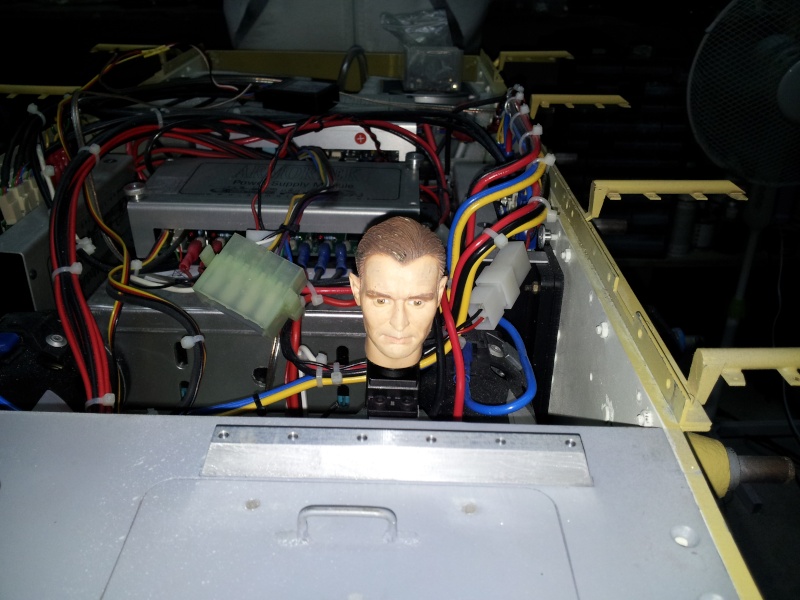
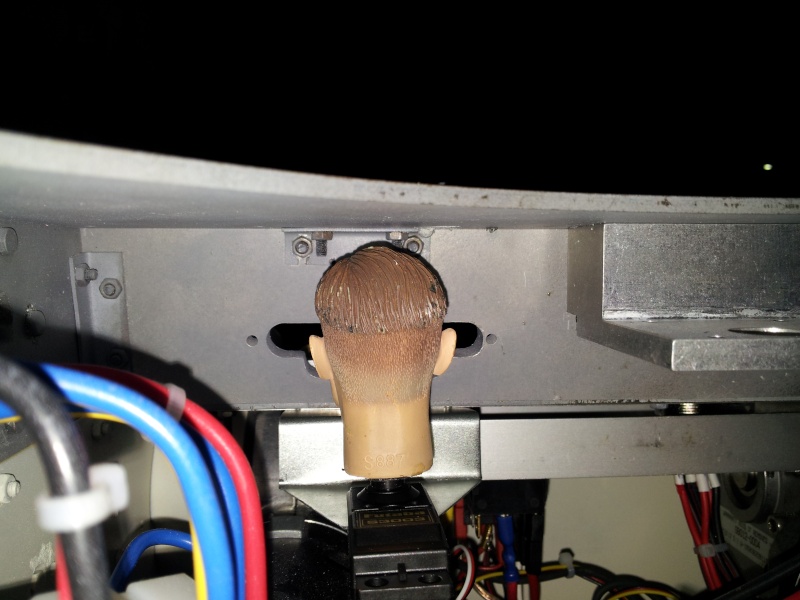
And here's the final result:

Now , all that remains is to find a shirt to cover the servant at the base of the neck.
Finally, it was also completed the command and control panel, with switches and multi-polar charging socket .
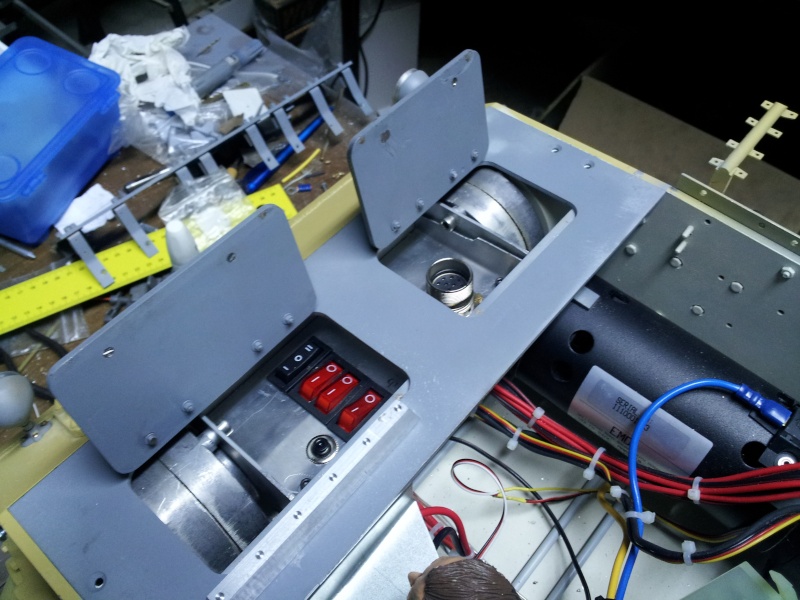

The last switch toward the front of the tank (the black one) is a three-position switch for the lights, so that I can choose between:
0) Lights Out,
I) normal lights,
II) convoy lights .
Well, all for now!
Ciao,
IACOPO.
Re: Iacopo's Panzer III, a new and first adventure for me.
Posted: Thu Apr 03, 2014 11:07 pm
by Andrea Daviero
Iacopo, you must also tell that the recharge connector is used for recharging 2 LiFePO batteries, so there is a +, a - plus the balancing wires.

The button and the LED on the main panel comes from the armortek power supply module, the box is over the battery in a convenient position for Fuse replacing and the cover is hold by 2 "screws" that can be removed by hands.
I know you will ask for gun elevation motor, as it is impossible to install it (and the turret)in the original way, but we have done some works also on that...

Re: Iacopo's Panzer III, a new and first adventure for me.
Posted: Fri Apr 04, 2014 6:05 am
by Iacopo Di Giampietro
Thank you , Andrew.
You know that with the English (especially with electronics ) I have little familiarity !


I forgot to mention that my Panzer III is powered by two batteries LiFePO 12V and the capacity of 22Ah , small size and low weight at only 7 kg for the pair.
To avoid having two connectors ( one connector for charging and one for the balance of the cells ) we have adopted a multipolar connector : two pins have been used for the power ( + and -) and nine pins have been used for cables balancing of the individual cells .
You will then simply plug the only multi-pin connector and recharge the battery pack !

I take this opportunity to publicly thank my great friend Andrea Daviero that always helps me with passion in the construction of my little Panzer , and that has made an electric truly amazing .
Maybe next time we do a separate post and you'll do the description : what do you say ?
Thank you again, my friend!

Re: Iacopo's Panzer III, a new and first adventure for me.
Posted: Sun Apr 06, 2014 7:46 am
by Iacopo Di Giampietro
Good morning everyone.
Last week 's progress .
Before mounting the additional frontal armor , you must do the fake welds then that would be uncomfortable once fixed the plate.
Then go to dremmel to do all the channels of the case :

Is then spread the liquid steel , and when it is starting to dry I work with a thin brass tube to simulate the welds :


Also finished the ball MG :

I have to re now I like it much more.

In the meantime I finished the first fender.
Put all the clamps for the tools , I had to fix the various details on the front, and use rivets , so the fender was removed and completed:


Missing the " cap " of light right back , because I have to make other changes ....


Well, all for now !

Made a fender , all that remains is the other!
The next update!
Ciao,
IACOPO
Re: Iacopo's Panzer III, a new and first adventure for me.
Posted: Tue Apr 15, 2014 9:50 pm
by Iacopo Di Giampietro
Welcome back !
I am happy that the Forum has begun to function at full capacity : they were long days !
The fenders have been completed : place all the clamps and various accessories :
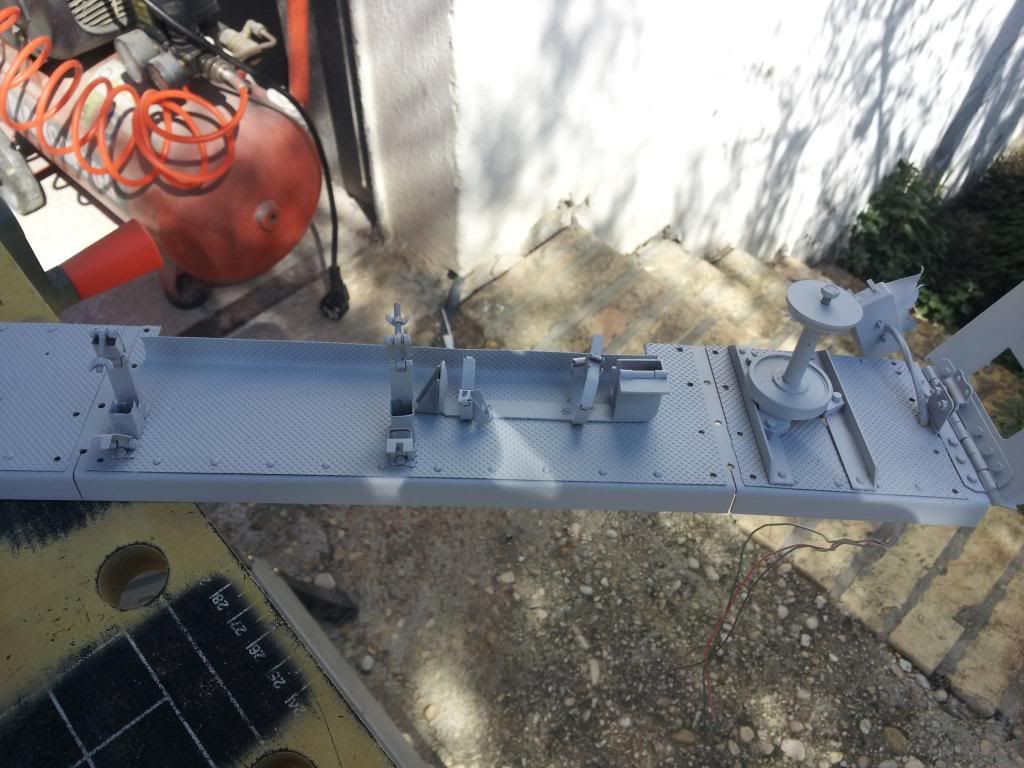


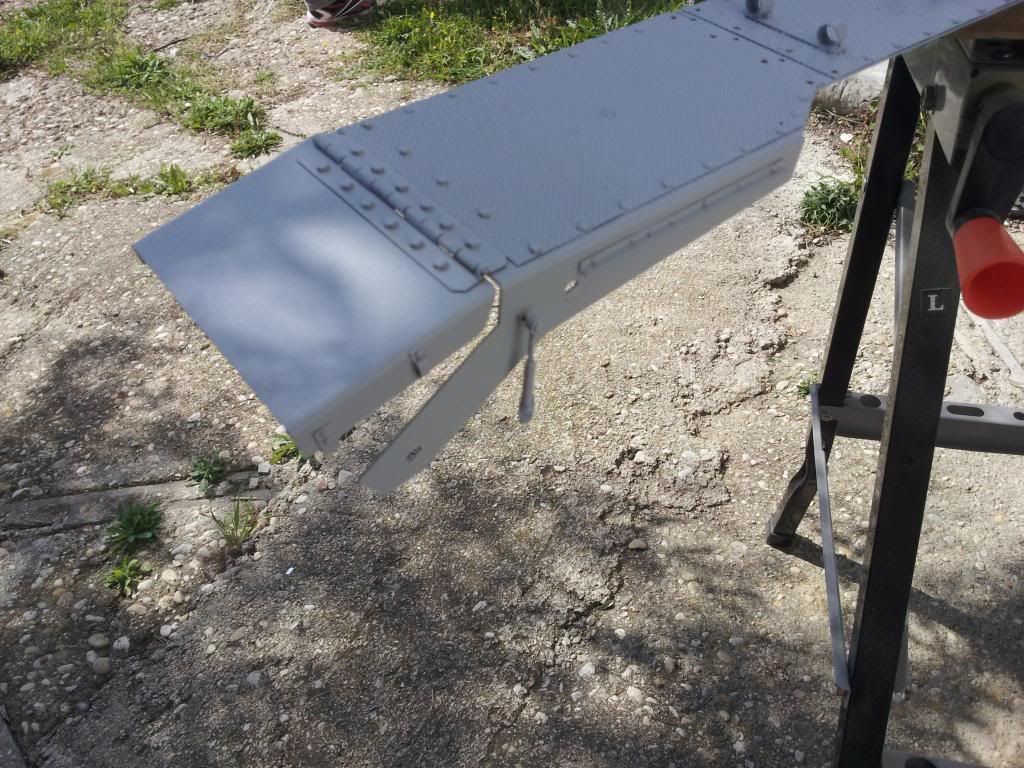
The electronics was pretty much over. Missing only to connect the lights that are placed on the fenders and machine guns :
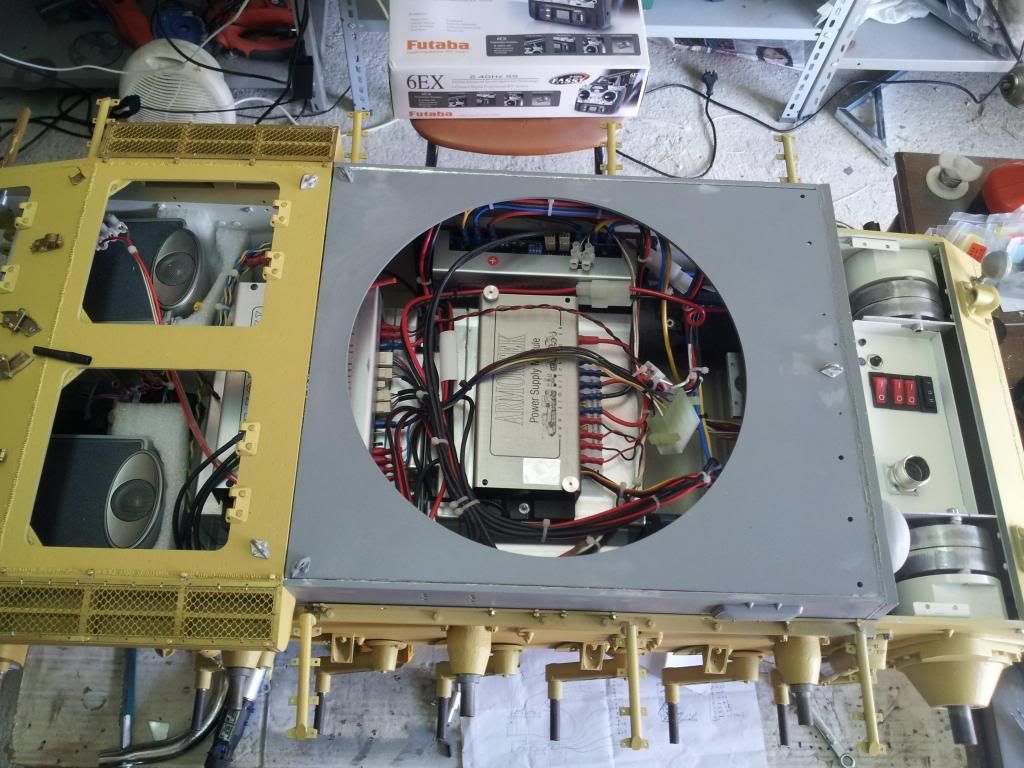
Since the control panel is almost finished and electronics arranged, we could finally proceed with fixing the plate with doors .
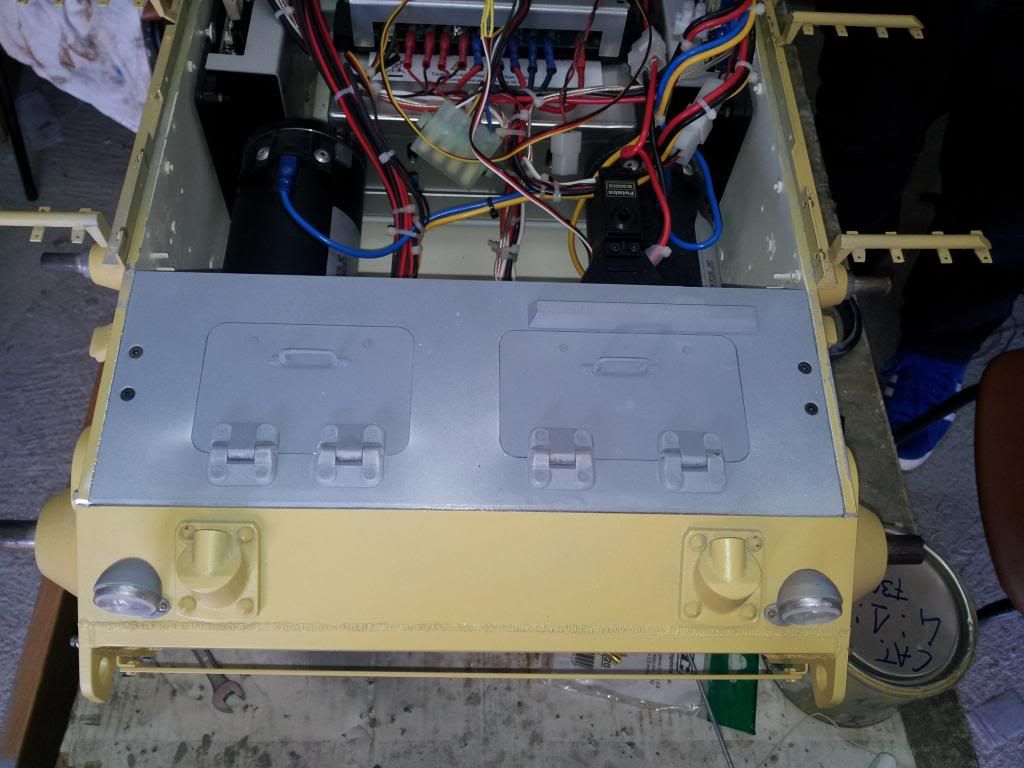
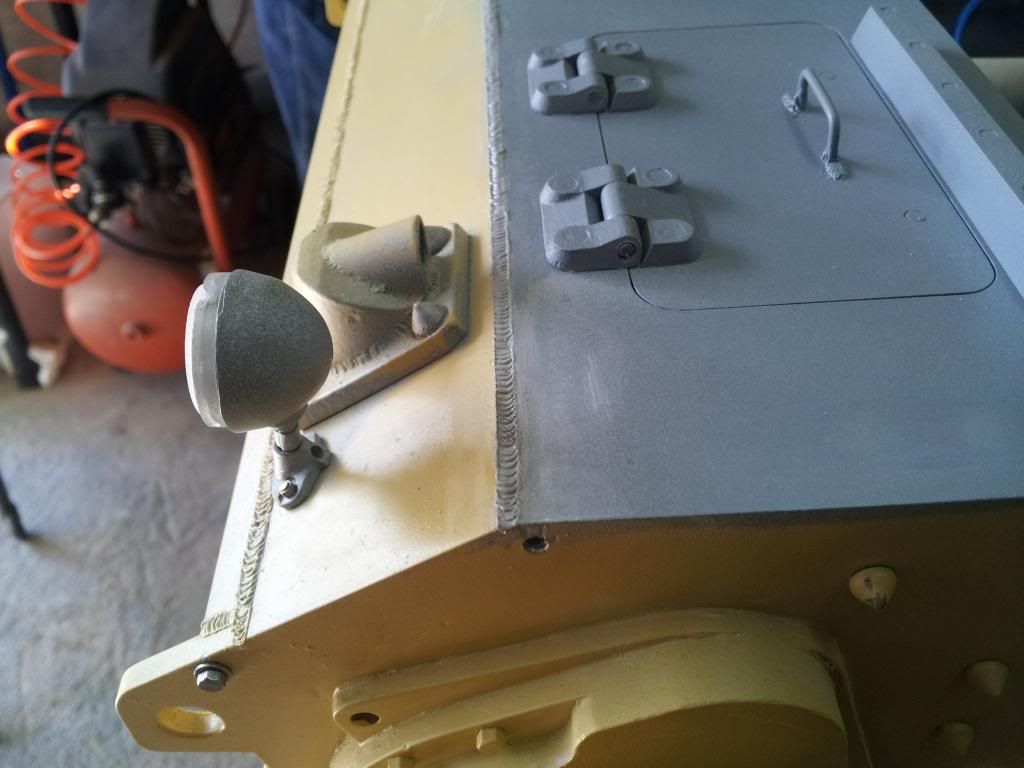
This plate in reality was as wide as the tank and it was welded across the front panel . So after that I have set , I had to first extend the cut for the weld on the side plates using dremmel , and then I had to do all the plastering of the case.

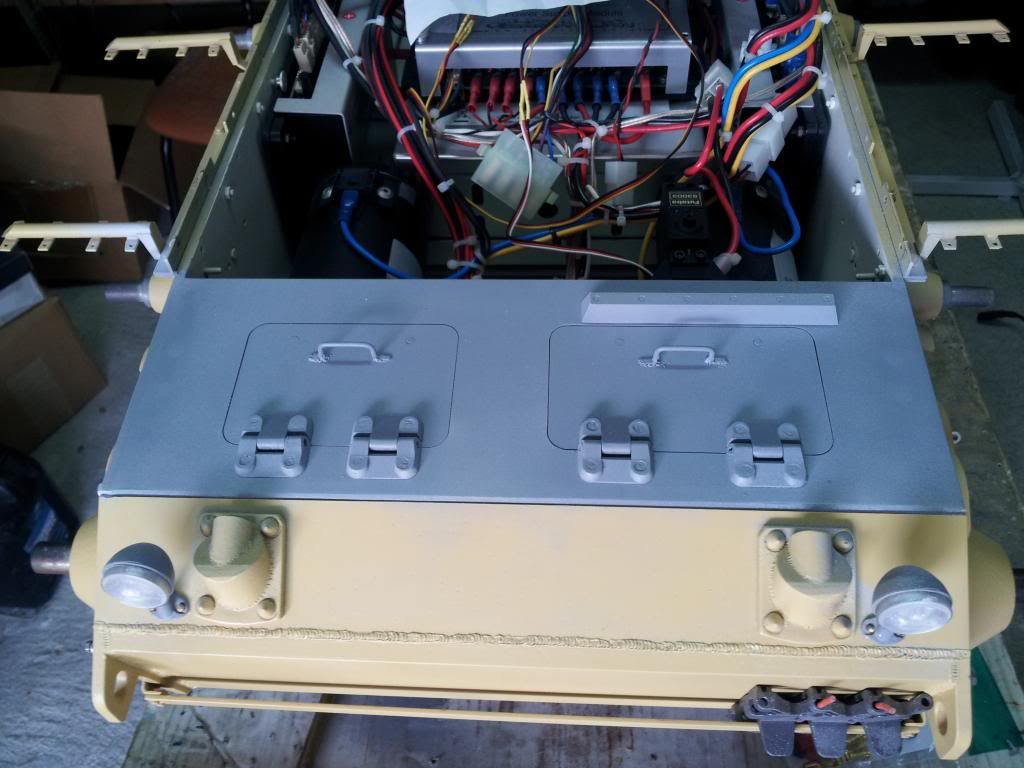

Now all that remains is to fill the slot with the fake welding :
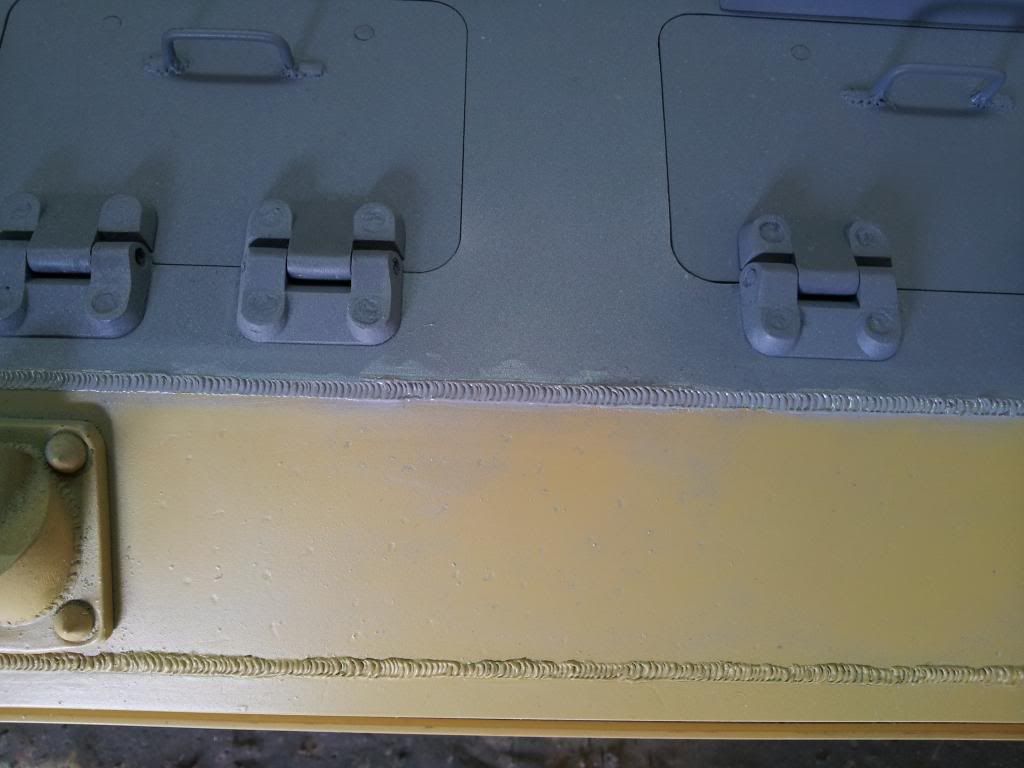
I hope you enjoy the work , and as always I hope you will forgive my bad English !
Until next time!
Ciao,
IACOPO.
Re: Iacopo's Panzer III, a new and first adventure for me.
Posted: Wed Apr 16, 2014 1:23 am
by John Fitzsimons
Excellent, did you manage to get s
Pri gš into the mudguard clase?
Partner than rivets I used Rotunda head screws to secure the trend plate. Much easter. This will be a master piece.
Re: Iacopo's Panzer III, a new and first adventure for me.
Posted: Wed Apr 16, 2014 2:45 pm
by Iacopo Di Giampietro
Hello John,
I'm not very familiar with English and I could not understand what you are referring to: I beg you to forgive me.

In relation to the rivet, I've used two types:
1) To fix the plates of brass almond on the fenders, I first used the glue, then I drilled plates coupled and I finally used real copper rivets, by crushing them under with a punch and a hammer.
2) instead to fix the various clamps and some accessories, I used the threaded rivets, fastening from below with washer and nut.
The most difficult parts are to be fixed on the front fenders and folding parts: they were fixed with rivets really small. I used the rivets from 1 mm to ensure that could not be seen from below.
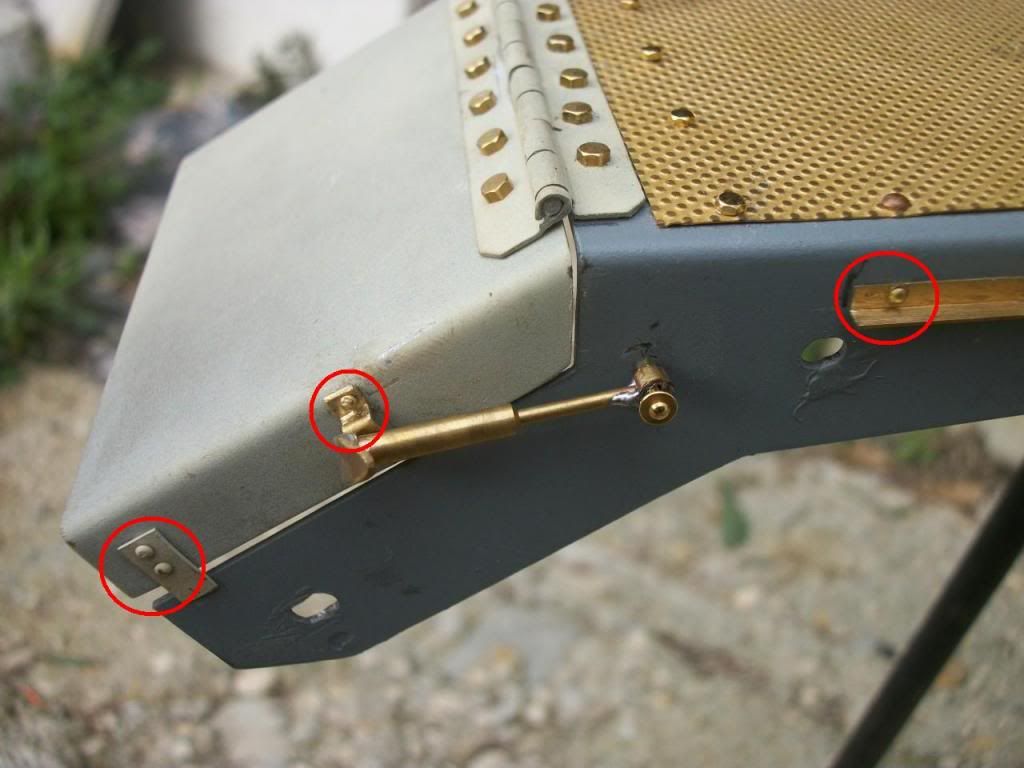
I hope to be able to answer your question.
Thank you and see you soon.
Ciao!
IACOPO
Re: Iacopo's Panzer III, a new and first adventure for me.
Posted: Wed Apr 16, 2014 3:25 pm
by Adrian Harris
It's not you Iacopo - I'm English and I couldn't understand that post


Adrian.
Re: Iacopo's Panzer III, a new and first adventure for me.
Posted: Wed Apr 16, 2014 10:19 pm
by John Fitzsimons
Sorry Lacopo for the poor english in my post. MY partner is Montinegrin and using her laptop my english was translated into a type of Serbian

I was asking about the mudguard clasps. Did you manage to get working spring mechanisms.
Re: Iacopo's Panzer III, a new and first adventure for me.
Posted: Thu Apr 17, 2014 9:04 am
by Iacopo Di Giampietro
Hello John, now everything is clear.
Sorry if I have not understood yesterday.
The latch of the front wing is fully functional:
was constructed with two tubular brass and a tab that has been fixed with a screw M2.
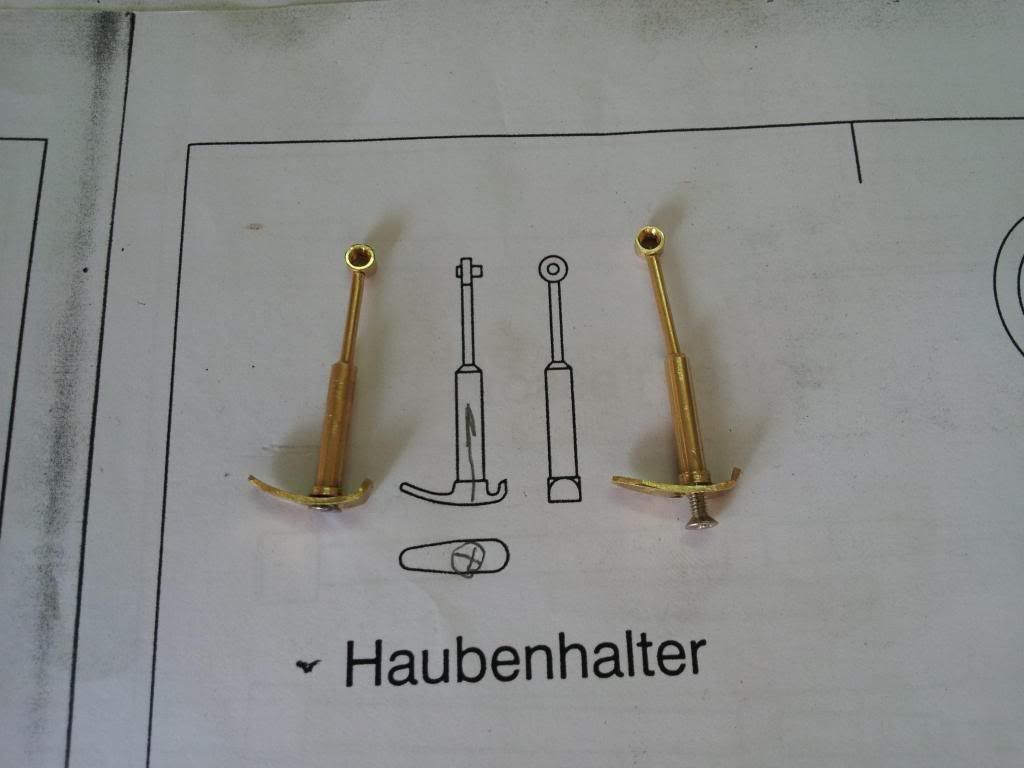
Works within a small traction spring fixed on the screw.
The whole was then sealed and filed.
For these small works of art I have to thank my good friend Andrea Daviero.

Small clarification for all the friends of Armortek: my name is IACOPO, with the "I" and not Lacopo.
Thanks for your attention and see you soon.
Ciao!
Re: Iacopo's Panzer III, a new and first adventure for me.
Posted: Thu Apr 17, 2014 9:52 am
by John Fitzsimons
Thanks Iacopo. Must be a very small spring. Would like to get some of those. They would be perfect for my Tiger 1 mudguards.


