My Mid Production Tiger

Forum for discussion relating to Tiger 1, Mid, Early, Late Production and Sturmtiger
Kent Wiik

Post by Kent Wiik »

Yes this is fun :D but what am I doing here? I am supposed to build a Panther... :shock:

Tim, the turret roof is indeed in line with the top of the bar as seen in your drawing.
Image
Image
It is at the ends the bar looks higher as the roof stops a bit from the ends.

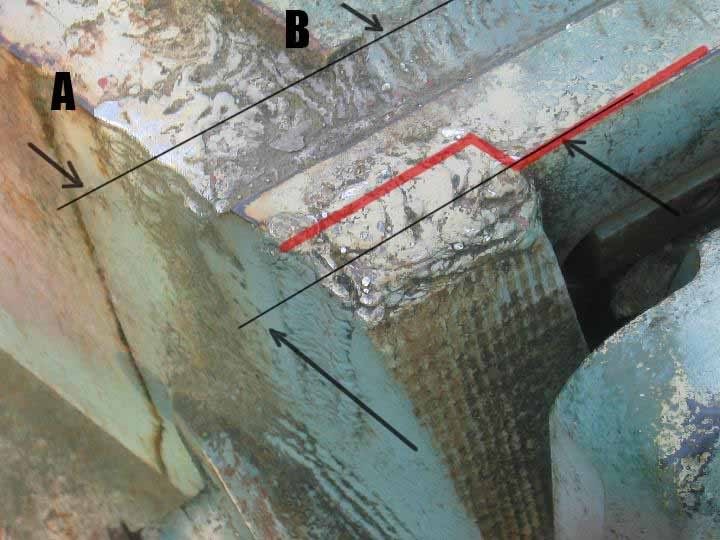
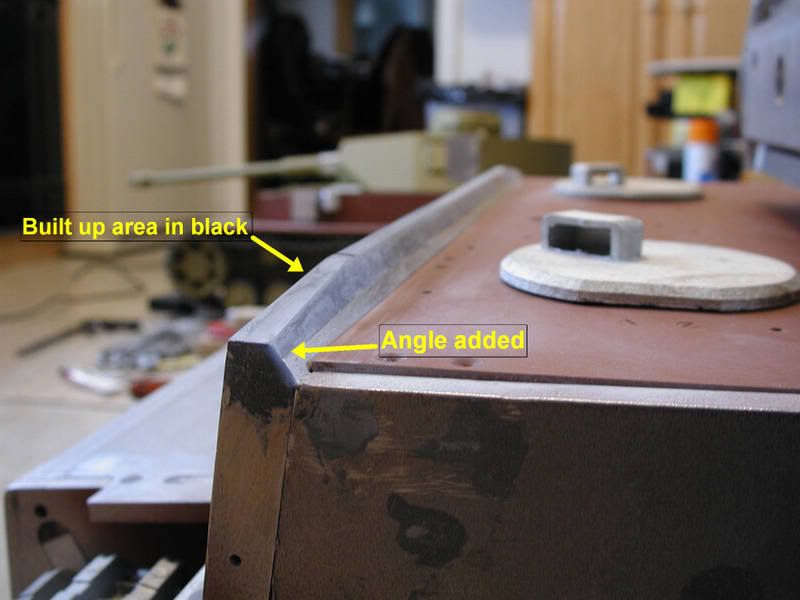
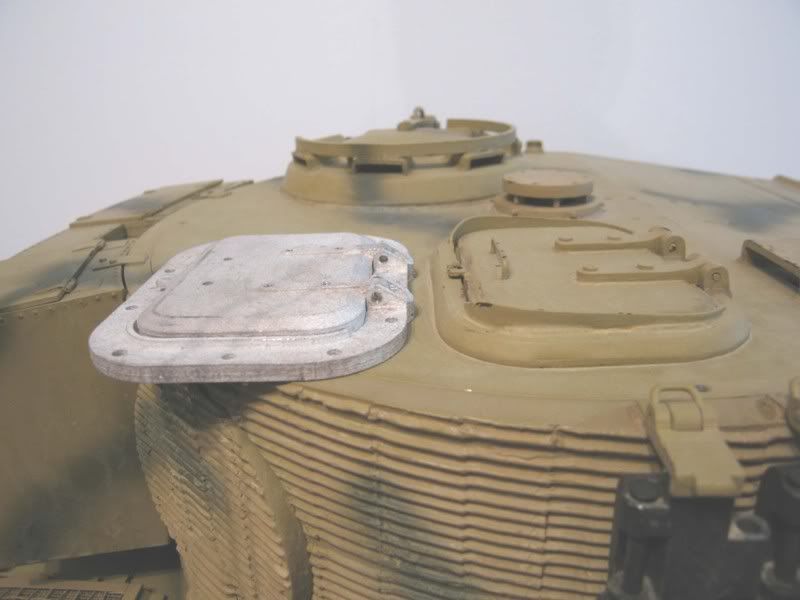
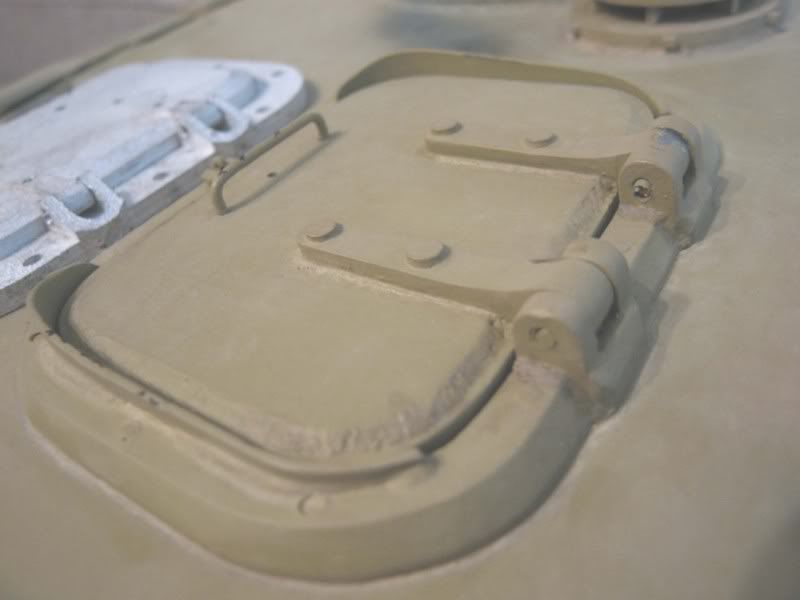
Here is another good photo of the Vimoutier Tiger showing the angles Roland pointed out:
Image
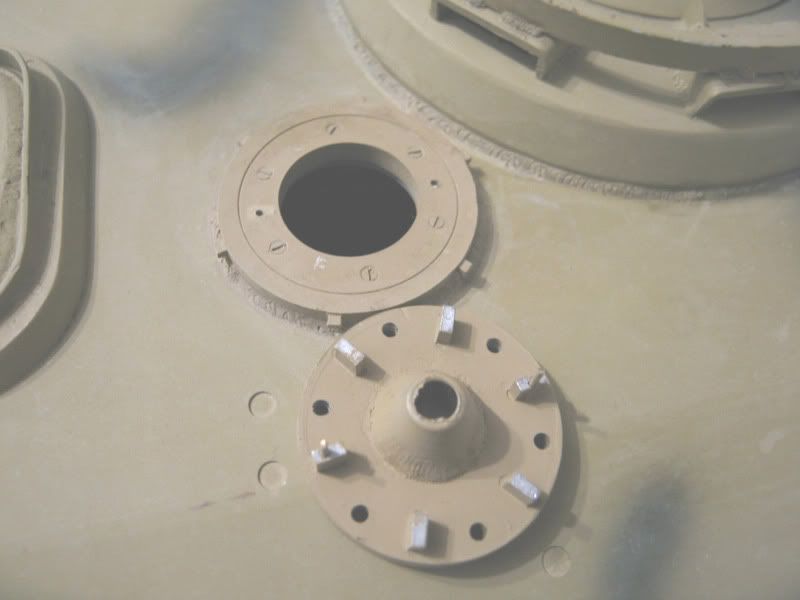
Please note how the lower part looks - I guess us rivetcounter has something to add to our list...

Must leave you Tiger guys now or my Panther will suffer - or maybe not as this is fun :D

Kent

Tim Bowman
Posts: 1762
Joined: Fri Jul 13, 2007 4:53 am
Location: Northern California
Been liked: 177 times
Contact:

Post by Tim Bowman »

Hi Adrian. this will probably add to the confusion but I was talking about these thicknesses and if they are the same. A and B

Image

Which apparently they are. You are correct, it appears that on a late model Tiger with the thicker roof, the weld fills the entire groove.

Awesome reference photos Kent.

NOW, back to the hull. :D

tim
Last edited by Tim Bowman on Mon Feb 09, 2009 9:35 pm, edited 1 time in total.
"So long as one isn't carrying one's head under one's arm, things aren't too bad." – Erwin Rommel

Mike Kasputis
Posts: 104
Joined: Thu Jul 26, 2007 2:17 am
Location: Maryland, USA
Been liked: 54 times

Post by Mike Kasputis »

Kent
Great pictures, you can see the cut out in the side view that I removed from my mantlet.
I had to do alot of sanding on my mantlet to get rid of the gap between the turret and mantlet. You can see the gap I had in the picture below.

Image

Tim
Now back to the hull.
A simple little mod I did to the exhaust.

Image

I also made my own side fenders out of brass. I did not like the fenders it came with, a little too rounded. Here you can see the front side fender I made compared to the original ones.

Image

Here is a side by side shot.

[/img]Image

I also used smaller bolts

Image

I raised them up in the rear to be even with the bottom of the hull. All the pictures of the real ones look like this. You can see in the picture below how much I raised them.

[/img]Image

And here are the dimensions of the fenders.

Image

[/img]
Last edited by Mike Kasputis on Sun Oct 16, 2011 1:55 am, edited 1 time in total.

Tim Bowman
Posts: 1762
Joined: Fri Jul 13, 2007 4:53 am
Location: Northern California
Been liked: 177 times
Contact:

Post by Tim Bowman »

Outstanding Mike! Your side fenders look great! Just amazing. I am well stocked on micro fasteners after the Panther that will come in handy on the Tiger.

When I said "now back to the hull", I meant me and my build, not necessarily the posts on this thread. :) I'm saving every photo for when I get to those parts. you'd laugh if you saw where I was on the project.

regards
Tim
"So long as one isn't carrying one's head under one's arm, things aren't too bad." – Erwin Rommel

simon_manning
Posts: 2061
Joined: Fri Nov 02, 2007 8:51 pm
Location: new forest,hampshire,u.k.
Been liked: 1767 times

Post by simon_manning »

very interesting,top class building skills some great posts,i,ve learnt more about the tiger 1 in two days than in the last 6 months,keep it up.simon manning.p.s.any detailed photos of the tiger 1 muzzle brake,mine is still untouched.

Mike Kasputis
Posts: 104
Joined: Thu Jul 26, 2007 2:17 am
Location: Maryland, USA
Been liked: 54 times

Post by Mike Kasputis »

Simon
I have not done anything to the muzzle brake, I would like to have one that Pete Fertl made.

Here is another mod I made.
I did not like the look of the glacis plate, I thought it was too low and did not have the proper angle on the back. Here is what it looked like originally.

Image

Here is my fix. The black area was built up with JB weld and I added the angle to the back of it.

Image[/img]
Last edited by Mike Kasputis on Sun Oct 16, 2011 1:56 am, edited 1 time in total.

User avatar
Robert E Morey
Posts: 2349
Joined: Wed Jul 18, 2007 12:59 am
Location: Seattle, WA USA
Has liked: 161 times
Been liked: 830 times

Post by Robert E Morey »

Mike,
Great modifications and insite on the Tiger! I like your brass side fenders as well. Excellent work! Thanks for sharing your modification details!
Bob

Mike Kasputis
Posts: 104
Joined: Thu Jul 26, 2007 2:17 am
Location: Maryland, USA
Been liked: 54 times

Post by Mike Kasputis »

Another mod I did was to the wheels. First I had the wheels machined so the hub would be recessed and not sticking out. I then added the weld bead around it and made my own bolt retainers out of .005" brass.

Image

[/img]Image

The next thing was to have my wheels modified by Pete Fertl (you can see this on Rich Stinchcomb"s site http://www.stinch.com/one6armor/detailroadwheelpf.html).

And now for something a little different.
Just a quick little dio I did a while back.

[/img]Image

Image

[/img]Image

Image

[/img]Image
Last edited by Mike Kasputis on Sun Oct 16, 2011 1:58 am, edited 1 time in total.

User avatar
Robert E Morey
Posts: 2349
Joined: Wed Jul 18, 2007 12:59 am
Location: Seattle, WA USA
Has liked: 161 times
Been liked: 830 times

Post by Robert E Morey »

Mike,
Your tank commander is without his Luger...just when he needs it most :evil: Tsk Tsk.

Note: No real pigeons were harmed making this thread.

:P Bob

Brian Leach
Posts: 363
Joined: Tue Nov 18, 2008 4:15 pm
Location: Auburn, Wa USA
Been liked: 3 times

Post by Brian Leach »

I must admit that I really am not into the figures, but this was GREAT! Thanks for the chuckle, -Brian

Per Sonnervik
Posts: 153
Joined: Sat Jul 12, 2008 12:01 pm
Location: Stockholm, Sweden
Been liked: 2 times

Post by Per Sonnervik »

Hi Mike,

Impressive work and very informative as well, very good for us who´s not started with the Tiger I yet.

I have one question regarding your application of zimmerit; why no zimmerit on the plate in front of the drivers visor and MG? This plate was also zimmeritted, there are quite a lot of photos showing this. When one put zimmerit here one should not forget to do two parallel lines in the zimmerit, always in the same place in front of the front lamp, see arrows in photo (sorry about the poor scanning) below;


Image


The same type of lines can be found on the Tiger II front , probably from sort of ladder contraption used when applying the zimmerit.

Also note the two cut outs in the commanders hatch for his scissors periscope, not uncommen either in some units.

Keep up the good work,

Per

Kent Wiik

Post by Kent Wiik »

Mike - Stunning work on the wheels, looks 1:1.

Per - That was news to me about the 2 lines. Good eyes my friend.
From now on a must have on all zimmerit coated Tigers :D

Good photo, please note the absence of the Bosch headlight.
Generally stored inside the tank before battle.
Please also note how the headlight bracket had zimmerit coating as well.

Also note the quite commonly seen grey color heat resisted primer painted barrel.

Kent

Per Sonnervik
Posts: 153
Joined: Sat Jul 12, 2008 12:01 pm
Location: Stockholm, Sweden
Been liked: 2 times

Post by Per Sonnervik »

Kent,

I´ve just had new glasses, a whole new world has opened up :D

Here´s another one, with zimmerit and parallel lines (the tank is on it´s side):


Image


Per

simon_manning
Posts: 2061
Joined: Fri Nov 02, 2007 8:51 pm
Location: new forest,hampshire,u.k.
Been liked: 1767 times

Post by simon_manning »

nice to see you posting on the tiger thread per,any chance of some photos of your 1/8 king tiger to wet the appetite for the armortek k.t.builders.the tiger forum is very good at the moment,many thanks to you all.

simon manning

Mike Kasputis
Posts: 104
Joined: Thu Jul 26, 2007 2:17 am
Location: Maryland, USA
Been liked: 54 times

Post by Mike Kasputis »

Per,
Great photo and a good catch on the lines (never noticed them before) and the cut outs on the hatch, thats the first time I have seen that.
I did not put zimmerit on the front plate because it was not always applied there. I modeled my Tiger after the 507 and from all the pictures I have seen it looked like none of them had the zimmerit there.

Here are a few more mods.
I modified the vent from Mike Stannard (made top thicker, added the funnel thing and added screws to inside) and I redid the loaders periscope guard.

Image

[/img]Image

Image

I also made my own loaders hatch. Here it is compared to the original.

[/img]Image

Image

[/img]Image

Image[/img]

Also bought the commanders hatch from Vince.
Did some mods to the cupola - added welds, hatch stop, lock tabs and the post's for the rain guard.

Image[/img]
Last edited by Mike Kasputis on Sun Oct 16, 2011 2:00 am, edited 1 time in total.

Post Reply