Page 14 of 20
Re: Churchill Mk3 number 67
Posted: Thu Mar 21, 2024 7:30 am
by Gary Richardson
Hi all
Quick update on the applique armour. I used 1.5mm brass rod to make the hand rails which were fixed in place using Araldite. I wanted them strong enough not to deform but still scale in appearance. They will be useful for adding stowage later.
Todays job is to study the photos of the three rear turret panels to see what detailing can be added then decide on how I want to attach the roof so its easily removable.
Regards
Gary
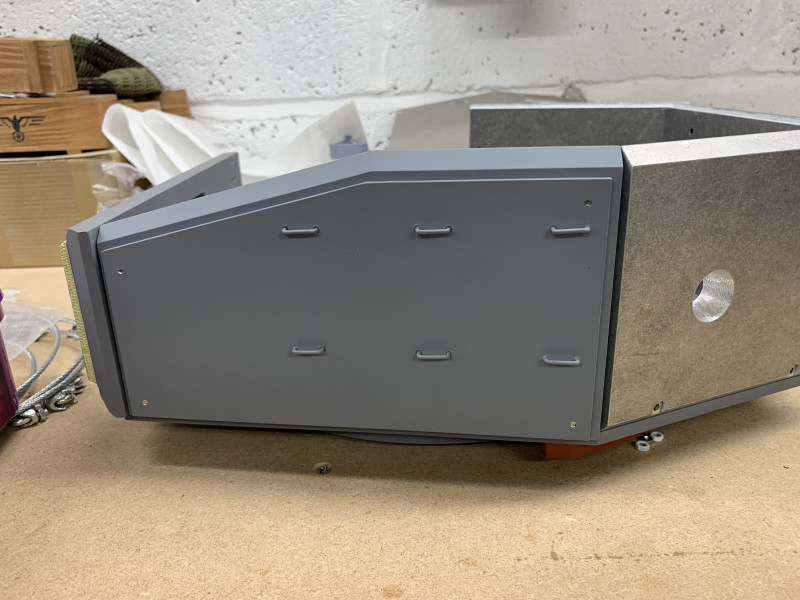
- Hand rail/ tie downs added using 1.5mm brass rod.
Re: Churchill Mk3 number 67
Posted: Sun Mar 24, 2024 11:04 am
by Gary Richardson
Good morning all
I have started assembling the turret and adding the applique armour plates. There is a definite need to leave all the fixings loose until you get the roof correctly aligned. I spent some time doing this due to the unusual turret shape and ended up shaving one the the angles on the rear plate to get an even gap all around the roof. I am still working on how I will hold the roof in place, at present it uses the countersunk screws as per the manual which are not too obtrusive. I am leaning towards tongues at the front of the roof going into slots in the front plate. I will probably retain one screw at the rear just for security or devise a spring loaded bolt system.
I modified the two side plates with applique armour and tie downs, the second plate on the left has had nuts and bolts added as per the full size in the Tank Museum although I am not sure what they were used for

. I have added a bevel to the port cover on the rear plate again as per the AVRE in the Tank Museum, although that has eight bolts holding the cover in place where as the kit only has six. Something else for me to think about.
All the parts look too smooth so I will add some detail using Mr Surfacer and high build primer dragged with a rag. Welds will be added using Milliput and I will make some weld detail tools as the welds are applied differently to the ones on the Tiger 1.
Regards
Gary
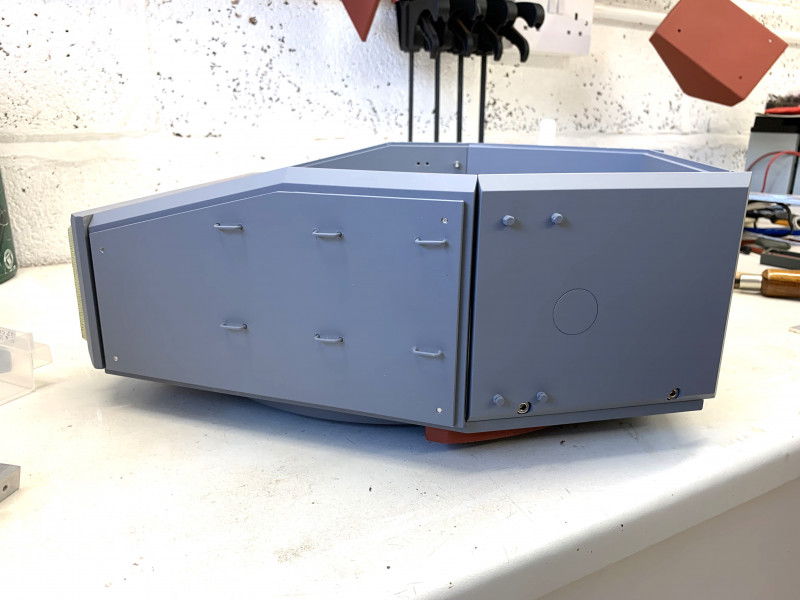
- Left aspect
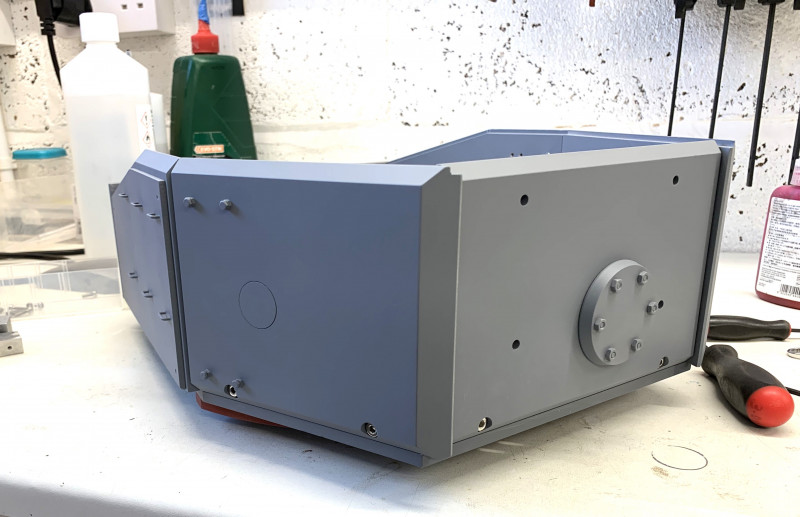
- Left rear aspect
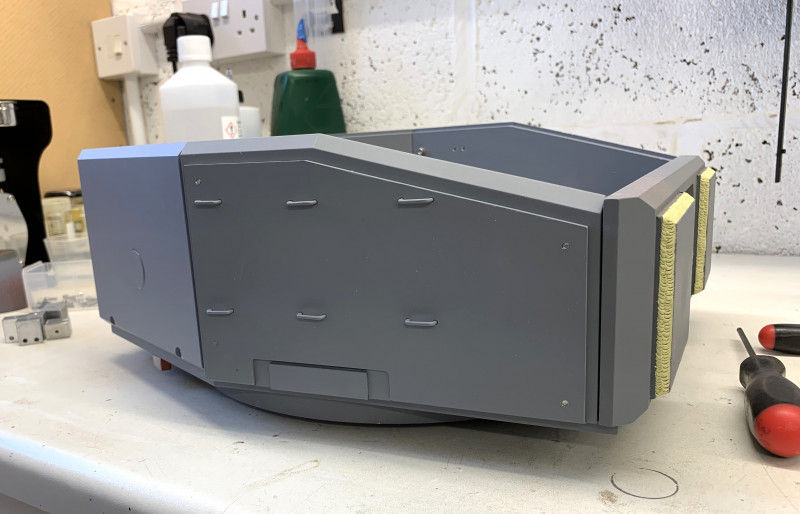
- Right aspect
Re: Churchill Mk3 number 67
Posted: Mon Mar 25, 2024 5:33 pm
by Gary Richardson
Hi all
Just a quick update regarding the roof detail on the Mk3 AVRE.
Interestingly there were three bolt holes with bolts fitted that could be removed to attach lifting pins on the turret roof. Two at the front and one at the rear which means it would be correct to replace the kit countersunk screws and use bolts instead to hold the roof on. This would mean filling the existing recess or adding a suitable spacer but that is an easy fix. I have added a photo (courtesy of the Tank Museum) of the front aspect of the Churchill Mk3 AVRE which shows the two front bolts and also the profiles of the periscope housings and close defence port. I will be reprofiling them to match.
Regards
Gary

- Note: bolts, defence port and periscope profiles
Re: Churchill Mk3 number 67
Posted: Mon Mar 25, 2024 5:59 pm
by Steve McEvoy
Some great detailing going on there Gary.
Re: Churchill Mk3 number 67
Posted: Tue Mar 26, 2024 8:14 am
by Gary Richardson
Steve McEvoy wrote: ↑Mon Mar 25, 2024 5:59 pm
Some great detailing going on there Gary.
Hi Steve
Thanks, the only downside is it is time consuming. Luckily I now have hundreds of photos of the Mk3, Mk4 and Mk7 taken at the Tank Museum and Cobberton Collection which help me decide the level of detailing to add. Some amendments use a bit of poetic licence to ease making the parts but I try to keep the appearance close to the original.
I am still hoping to have the AVRE running for my Village Day although I doubt the Petard Mortar will be ready for the turret as I haven't started that yet. If I can get the electronics fitted and tested I might bring the unfinished AVRE to the Armortek open day.
Regards
Gary
Re: Churchill Mk3 number 67
Posted: Tue Mar 26, 2024 3:03 pm
by Steve McEvoy
Would be great to see it mate.
Re: Churchill Mk3 number 67
Posted: Tue Mar 26, 2024 3:20 pm
by Vince Cutajar
Keep at it Gary.
the only downside is it is time consuming.
I know the feeling when going into the minor details. It feels that a lot of work was done but hardly any progress to show for it.
Vince
Re: Churchill Mk3 number 67
Posted: Wed Mar 27, 2024 11:17 am
by Gary Richardson
Hi all
Todays job is to make progress on the turret. I have filled the fixing bolt holes and applique armour holes and given the turret a coat of acid etch primer after thoroughly cleaning and de oxidising each part.
I have reprofiled the defence port but decided against reprofiling the periscope bases as the countersunk holes are already very close to the outer edges. I may add some Milliput instead and slope that. I have used three M3 bolts with washers silver soldered against the heads for the lifting points which will also hold the roof in place, when I checked the scale positions it was close to the existing kit holes so I will fill in the recess and use those with the fixing blocks underneath.
I am now trawling though my books and photos to see what detail I can add the the cupola area. I have some white metal latches and catches thanks to Dave Dibbs of Armorpax which I will be using.
I have now moved in doors as it has started sleeting and is getting cold in the workshop and the rest of the day will be spend adding welds to the turret plates, tie downs etc.
Regards
Gary
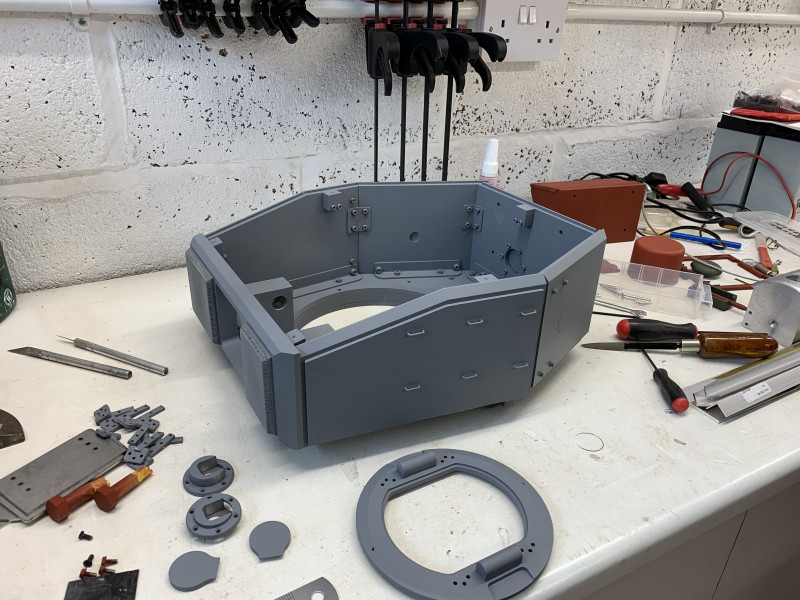
- Etch primed ready for welds
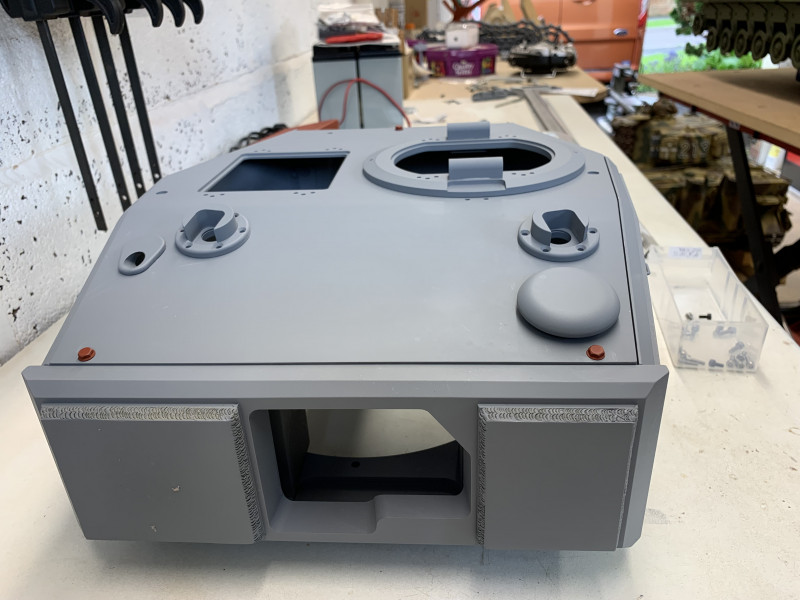
- Still need more detailing
Re: Churchill Mk3 number 67
Posted: Wed Mar 27, 2024 2:50 pm
by Gary Richardson
Hi
Just a quick update on the weld progress. I am using Milliput as usual to do the welds and made a small brass tool to apply the longitudinal welds on the applique armour. I also removed the original horizontal welds on the front armour as I had made the mistake of doing them the same as on my Tiger. The welds on the Churchill are very different and tend to form lines of weld material. I copied mine using photos of the AVRE at the Tank Museum, the applique armour welds also differ from the original tank welds, hence the tool I made to apply them.
Regards
Gary
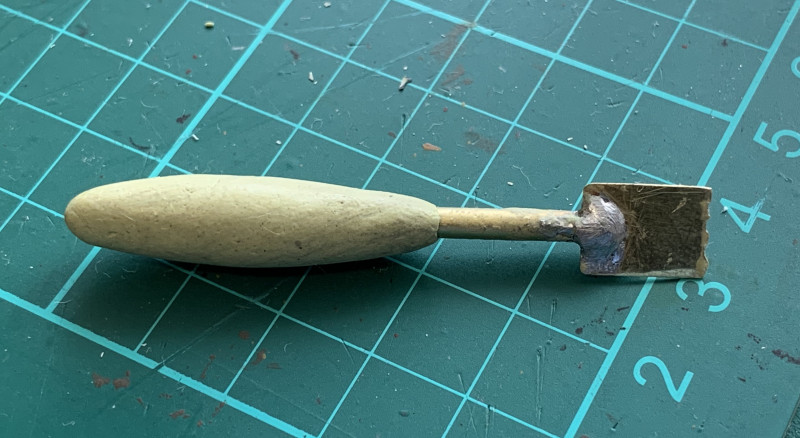
- Simple straight weld tool with unevenly filed end
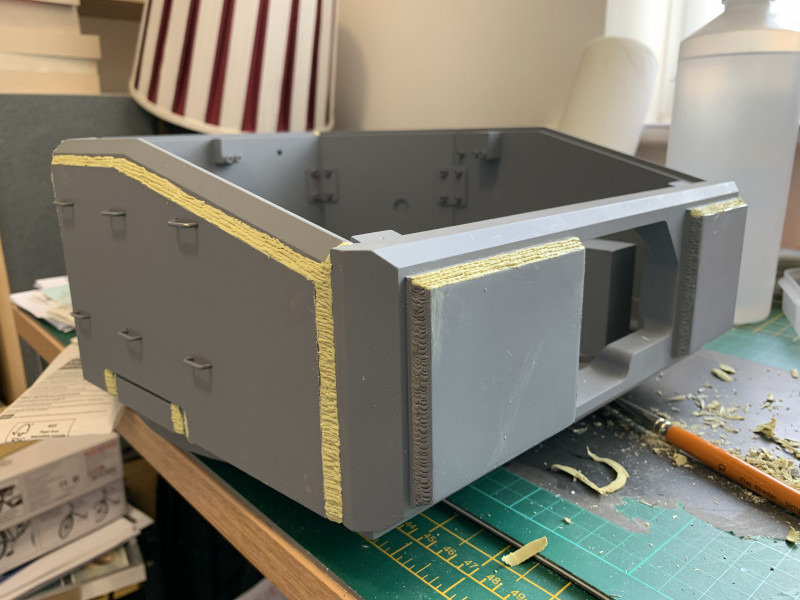
- Should look ok when painted
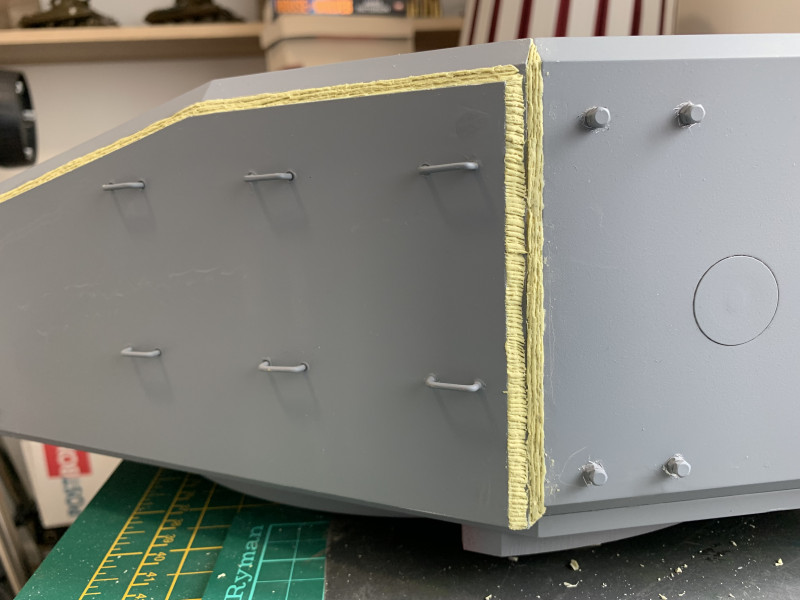
- Two different weld methods
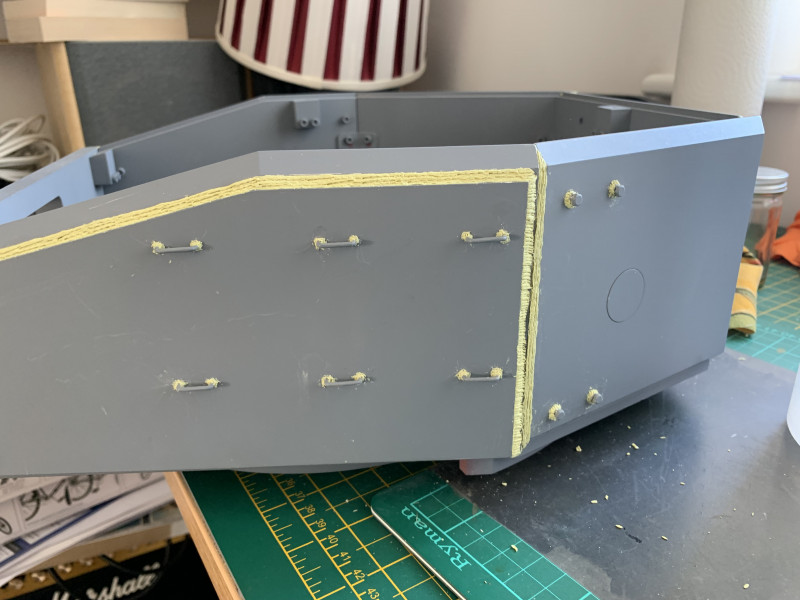
- This is the tricky part, tiny welds.
Re: Churchill Mk3 number 67
Posted: Fri Mar 29, 2024 7:37 am
by Gary Richardson
Good morning and a Happy Easter weekend to you all.
Now that the turret base is more or less ready I have moved on to the turret roof and the hatch and cupola. I managed to find some photos online which showed some of the detail I was after.
I have modified the hinges by countersinking them to take M2.5 countersunk slotted machine screws and also drilled and countersunk the hatch lids to take the four M1.6 countersunk slotted screws adjacent to the hinge lines. On the cupola lids there is also a bolt head on the centre line of each lid which I have pre drilled ready for a M1.6 hex head bolt. ( The centre holes on the loaders lids was an error and will be filled

). There is also the locking mechanisms to add which will need a bit more research and further addition to the top of the lids. The screws and bolts are on order and I will add photos once I have them installed.
I have also found a photo of an AVRE showing a spotlight on the left hand side of the cupola ring which would be a nice addition so I will make and add the bracket for that. If anyone has a decent photo or drawing of a British spotlight suitable for the later war years I would appreciate your assistance.
Regards
Gary
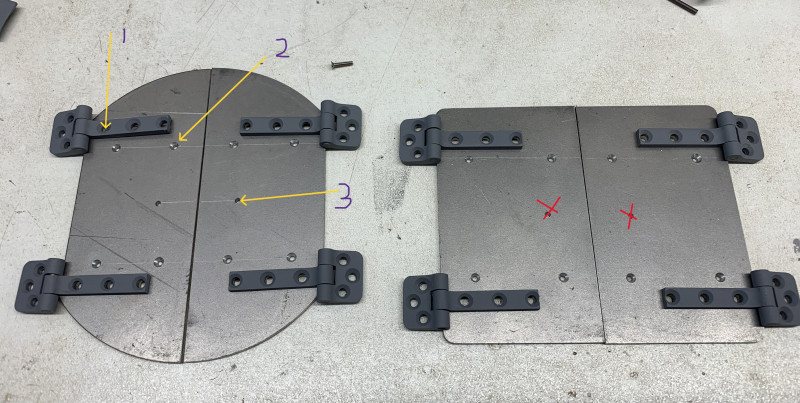
- 1 M2.5 countersunk slotted, 2 M1.6 countersunk slotted, 3 M1.6 hex head bolt.
Re: Churchill Mk3 number 67
Posted: Sun Mar 31, 2024 8:52 am
by Gary Richardson
Hi all
I managed to start the cupola modifications yesterday morning before going off to do six hours collecting for the Guide Dogs. The cupola blocks need a lot of reprofiling and new parts adding. Some of it is being done with Milliput, the rest I am making using the mill and good old Swiss files.
I am basing the design on a close up photo of a MK3 walkaround I found on the web. Although I have photos of the Mk4 at Bovington I couldn't get any decent photos of the Mk3 cupola as I don't think they like people climbing on the tanks

.
The blocks needed to be reduced in height and the curve reduced, then Milliput was added to the inside edges which will be drilled where the three small raised bumps are. I had originally glued the blocks in place prior to deciding to do the mods but it ended up helping as it was easier to hold the cupola in the vices when doing the milling and filing.
Regards
Gary
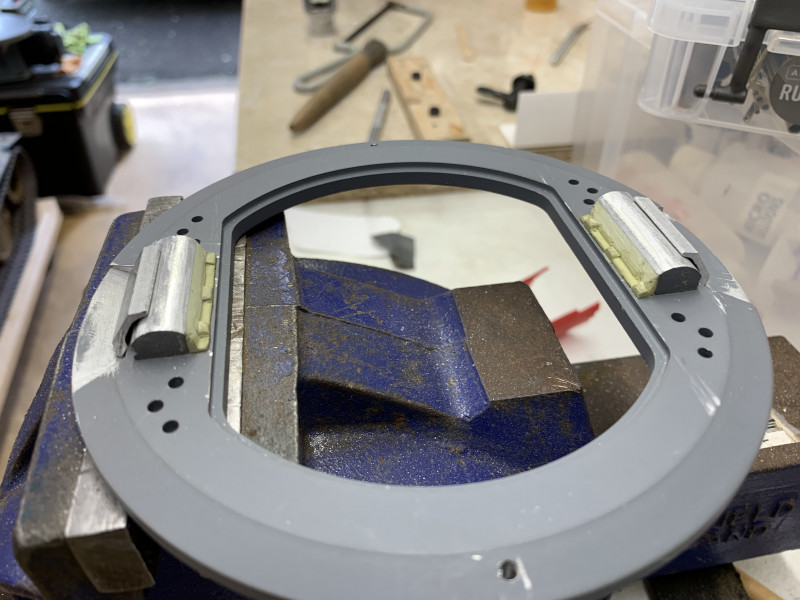
- Lots of small fiddly parts left to make and attach
Re: Churchill Mk3 number 67
Posted: Sun Apr 14, 2024 4:15 pm
by Gary Richardson
Good afternoon
I made some more progress with the hatches and cupola. I added some small items I made using the mill to improve the detailing on the cupola. The hatches now have the correct screws and bolts fitted and where necessary I have used countersunk allen key screws and filled the head to give a smooth slightly raised fitting. The searchlight fixing point has also been added.
Regards
Gary
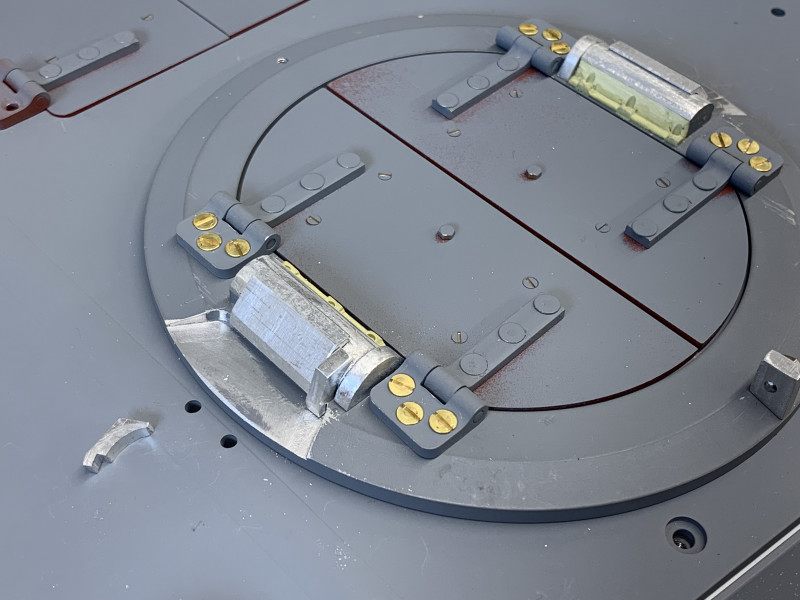
- Fiddly parts to make.
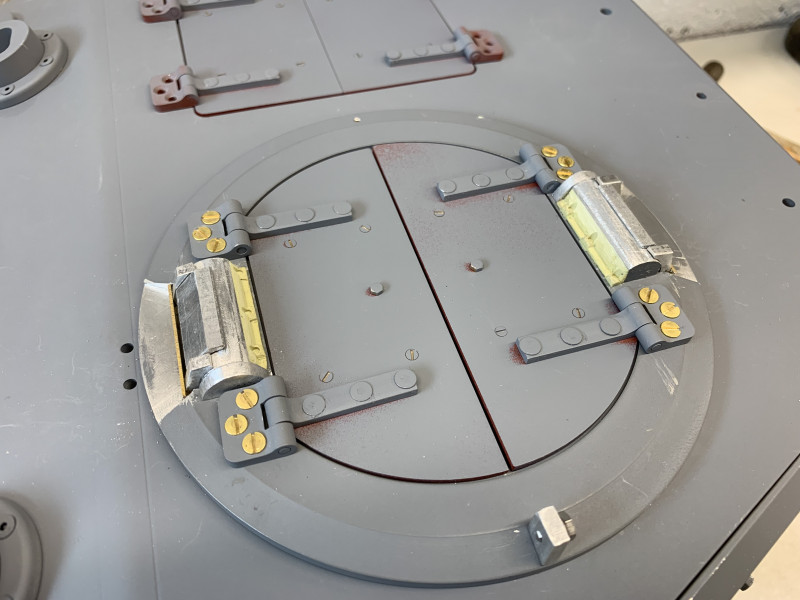
- Starting to look more interesting
Re: Churchill Mk3 number 67
Posted: Sun Apr 14, 2024 4:38 pm
by David Skeldon
I changed my hatch shape as I do not believe the one in the kit is correct.
David
Re: Churchill Mk3 number 67
Posted: Mon Apr 15, 2024 8:53 am
by Gary Richardson
Hi David
You are correct about the shape of the hatches and cupola, I was talking about it yesterday with my friend Pat who 'critiques' my work. I will probably reshape the hatches and cupola as per the photo in the link below which is from a Churchill Mk3 walk around.
https://data3.primeportal.net/tanks/dmi ... _of_68.jpg
I haven't added the photo as not sure about the copyright status.
Regards
Gary
Re: Churchill Mk3 number 67
Posted: Thu Apr 18, 2024 10:00 am
by Gary Richardson
Good morning
I am making the locking mechanism for the drivers hatch using brass strip, a cut down spring and differing gauges of brass tube. I think it is going to look ok when completed and painted. There is also the curved hatch support which goes on the same edge as the lock. This will be made out of brass with a very small magnet at the end to hold the hatch open, a small washer will be glued to the underside of the deck for the magnet to hold on to.
I wanted to add some texture to the turret plating so I applied some random bursts of high build primer and dragged a piece of natural sponge across them. I used this method on the Tiger and was very pleased with the results.
As I was on a roll I sprayed the red oxide onto the turret so hopefully I can get the SCC15 top coat on it today.
Regards
Gary
P.S. I am looking forward to the open day and making new acquaintances. Thanks again to those who helped out recently.
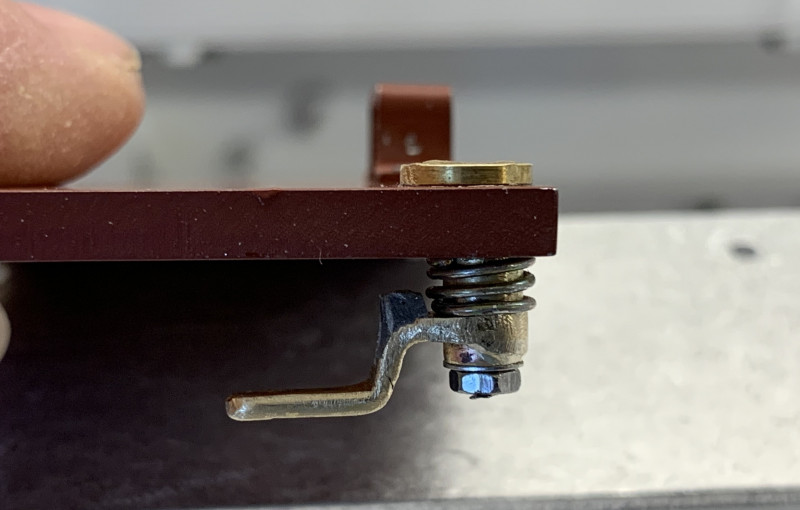
- Drivers hatch locking mechanism
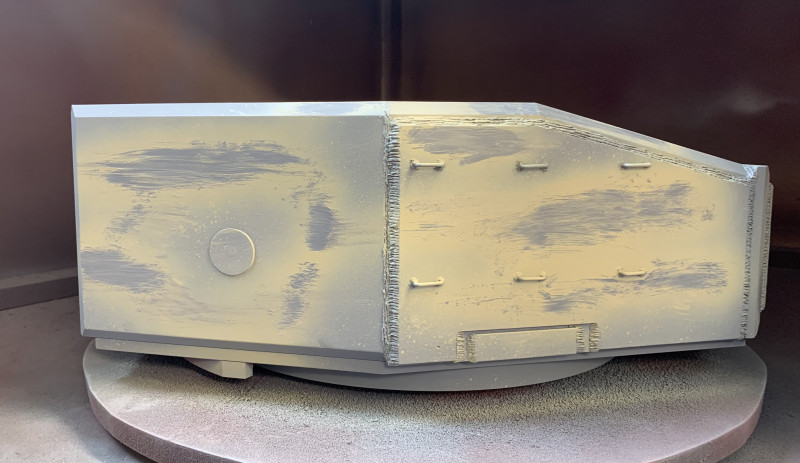
- Turret texturing using high build primer