Page 2 of 11
Re: KT 2019 #29
Posted: Sat Jan 28, 2023 7:39 am
by David Brady
Hi Mick
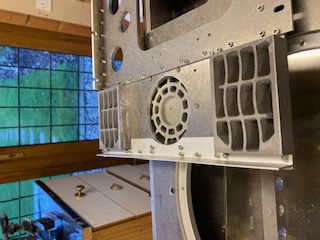
The rear should look like this once assembled correctly, your cast grills should be fitted as pictured, and a insert fills the gap, the rear plate would need adjustment to close the small gap - maybe file or clamp in position then fasten together
Cheers
Re: KT 2019 #29
Posted: Sat Jan 28, 2023 8:24 am
by Michael Allen
David
Many thanks for taking the time to assist
Re: KT 2019 #29
Posted: Sun Jan 29, 2023 9:18 pm
by Michael Allen
One - nil to KT29.

- 82023313-C427-4D6E-B08B-564858D4F5A5.jpeg (30.46 KiB) Viewed 2942 times
Not the last war wound to be suffered in this build I fear
Re: KT 2019 #29
Posted: Mon Jan 30, 2023 8:23 am
by Michael Allen
Having spent all weekend filing and fettling
Re: KT 2019 #29
Posted: Mon Jan 30, 2023 11:02 am
by David Brady
Hi Mick,
A way to fix this would be open up the brackets that fix the rear plate and move inwards - you may need to file/open up the interlocking slot... or you could just live with the Gap.
Cheers
Re: KT 2019 #29
Posted: Mon Jan 30, 2023 1:33 pm
by Michael Allen
David
Many thanks for your time.
Re: KT 2019 #29
Posted: Mon Jan 30, 2023 10:34 pm
by David Battson
Hi Mick,
Welcome to the world of Armortek tank building.
Re the apparent gap problem, as David says you could try easing a couple of the joints elsewhere to shuffle things along and help close the gap - the joint between engine deck and turret plate looks a good start. I find that with bolted plates such as on an engine deck it's worth exaggerating the gaps slightly anyhow where possible to accentuate the construction method and stop the joints being 'lost' and covered over when you paint it.
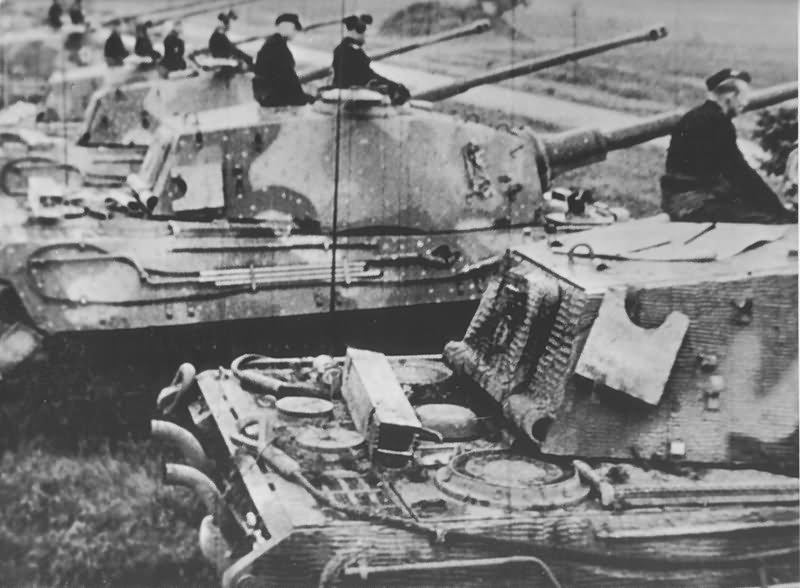
Also you need to consider the construction of the real thing and whether there should actually be a gap. It's clear that there were sizable gaps on real thing and the close up of the JT at Bovington shows why. The inner face of the rear plate is sloped, so the top edge of the deck will never butt up fully. Also the gap has been widened to allow for a decent build up of weld which wouldn't be possible if the plates were pushed closely together.
Looking at the real thing and your build, I'd say it's really the thickness of the rear plate upstand that could do with improving. My solution would be to add a strip of alloy or even plastic card say 2mm thick to the upstand to thicken it up and close the gap a little. Just a thought.
David
- Tiger_2_tank_.jpg (67.13 KiB) Viewed 2784 times
Re: KT 2019 #29
Posted: Tue Jan 31, 2023 6:55 am
by Michael Allen
David
Many thanks I am very grateful for your note.
Re: KT 2019 #29
Posted: Tue Jan 31, 2023 6:08 pm
by Michael Allen
Sascha
Many thanks for your kind post
Re: KT 2019 #29
Posted: Tue Jan 31, 2023 6:34 pm
by Michael Allen
I have just completed my first (intentional!) modification.
- 03B1D9CD-3DA0-496A-A3B4-4D3775CF03A4.jpeg (59.09 KiB) Viewed 2670 times
Re: KT 2019 #29
Posted: Sun Feb 05, 2023 12:47 pm
by Michael Allen
Can anyone offer advice as to how I can repair one of my exhaust pipes that has been damaged in transit
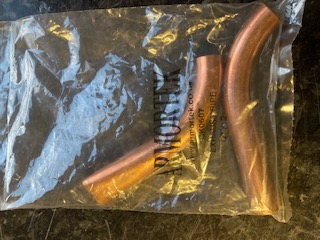
- 9B976EA1-985F-43AF-B766-82D4A0333A9A.jpeg (33.76 KiB) Viewed 2564 times
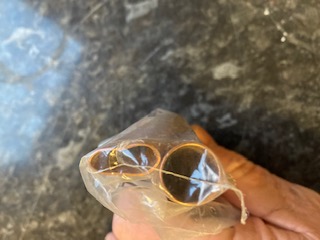
- E710F31D-5EB5-4542-8DE5-B5BF5D12A31B.jpeg (21.03 KiB) Viewed 2564 times
MANY THANKS
Re: KT 2019 #29
Posted: Sun Feb 05, 2023 10:03 pm
by John Clarke
If it cannot be sent back or get a replacement, then try to open the tube from the inside out. Its difficult to see the extent of the flatten area, But I'd heat the damaged area with a modelers butane torch to soften the copper metal. Allow to cool slowly, then with the use of a small thin pair of long nose pliers (closed) insert into opening and gently open the damaged area out from the inside. Reheat the copper to soften if needed. Once opened up you should be able to use a round Phillips screwdriver of the appropriate diameter to gently ease open up the hole in the pipe, again you may have to heat up to soften the copper. Be careful how you grip or hold the out side of the tube as deep marks may not polish out.
It will be difficult to get perfect but you should be able to get most of the crease out.
Battle damage and clumsy driving could also cause damage like this too on the real thing, not that that helps.

Re: KT 2019 #29
Posted: Sun Feb 05, 2023 10:55 pm
by Charles A Stewart
Hi Mike
I'd go for battle damage, as is shown in previous
photo.
Charles
Re: KT 2019 #29
Posted: Mon Feb 06, 2023 2:27 pm
by Michael Allen
Happy enough with this
[attachment=0]76D3A5DE-8666-431F-864E-4A20B7456D9E.jpeg[/attachment
Re: KT 2019 #29
Posted: Fri Feb 10, 2023 8:01 am
by Michael Allen
ARMORTEK have very generously agreed to replace the rear plate so I have dismantled the hull and started to etch spray
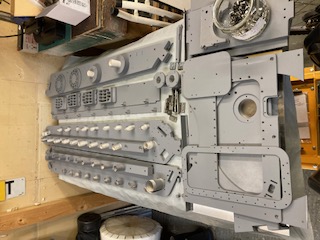
- FA540AD2-045C-4FAF-B44B-0445DC8D3591.jpeg (61.19 KiB) Viewed 3229 times
Many thanks to ARMORTEK