Page 2 of 3
Re: Comet No 34
Posted: Tue Jul 12, 2016 10:33 pm
by Steve Stuart
Stephen White spotted the cover plate lurking, nearly hidden, ready to cause angst. I have chosen this picture to be my prototype, it has a simpler profile to reproduce.
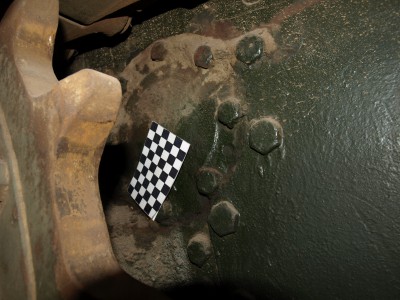
- Prototype
These are the finished items fitted in place, so the side plates are now nearly done, waiting to be installed.
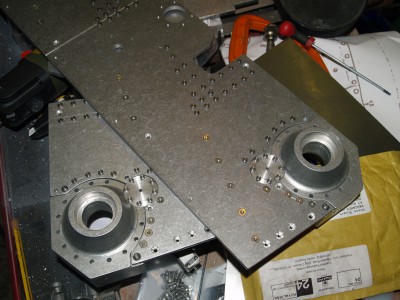
- Model
So time to clean up, tidy up, and get the Red Oxide out!
Steve
Re: Comet No 34
Posted: Wed Jul 13, 2016 12:17 am
by Peter Curran
Such awesome detail
Re: Comet No 34
Posted: Sat Jul 30, 2016 11:21 pm
by Steve Stuart
It is peculiar how a detail that you have never noticed before suddenly becomes apparent. The Comet at Tank Fest made it so obvious and I cannot avoid it.
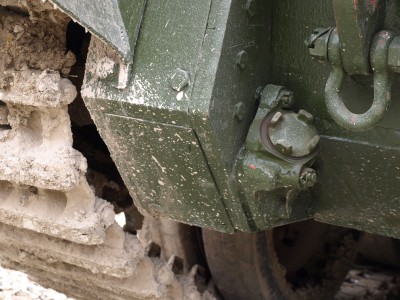
- Comet at Tank Fest
This is how I have replicated these plates with their counter sunk bolts
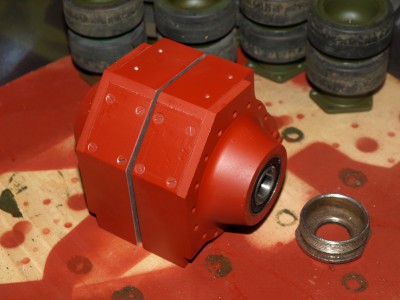
- Model Gear Cases
This was done by skimming the edges to replicate what I can see on the Tank
I am now waiting for a delivery of bolts from Knupfer so as to start bolting things together, hopefully early next week!
Steve
Re: Comet No 34
Posted: Sun Jul 31, 2016 7:13 pm
by Paul Wills
Highlighted by the mud I would say

Paul.
Re: Comet No 34
Posted: Sun Jul 31, 2016 10:35 pm
by Steve Stuart
Mud has its uses, the slotted bolts would otherwise have been hard to spot!
Steve
Re: Comet No 34
Posted: Tue Apr 18, 2017 9:40 pm
by Steve Stuart
Side plates on, with countersunk attachment bolts left clear so that they can be removed for servicing.
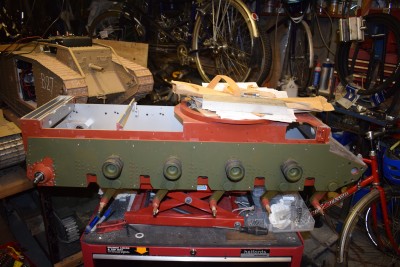
- Side plates
This now done the next thing to be done, the top plates look as though they need countersunk bolts as well....
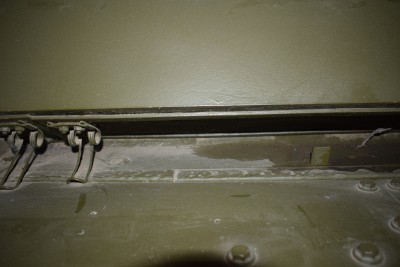
- Spot the countersunk bolt
I shall have to work out if these bolts are so visible.
Onwards!
Re: Comet No 34
Posted: Thu Apr 27, 2017 11:22 pm
by Steve Stuart
I have decided to turn the whole issue of securing the top plates around by using the bots that secure the Mudguards to secure them in place. Plus I have made them so that they can be relatively easily removed for adjusting the suspension, the aluminium angle is slotted for that purpose.
All great fun, that is why!
Re: Comet No 34
Posted: Thu May 25, 2017 9:25 pm
by Steve Stuart
Life has a habit of slowing things down, I have been tackling the rear plates. The major thing was to duplicate the Cromwell derived rear plate that has no exhaust holes, install the bolt heads for other details. The other issue was to replicate the angle iron that is welded to the top edge which has the retaining lugs for the Exhaust Cowls.
Job nearly done:
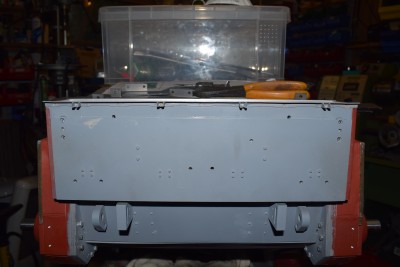
- Rear Plates
The question now is fabric paint or Milliput for the welds? The ancilliary is what make of fabric paint and where to find it?
Steve
Re: Comet No 34
Posted: Thu May 25, 2017 11:36 pm
by Tim Page
Fabric paint for weld lines?
Not heard of that before.
Would be interested to see an example of this method.
Tim
Re: Comet No 34
Posted: Fri May 26, 2017 4:27 pm
by Stephen White
Steve, Tim
I've posted about fabric paint a few times, including:
http://www.armortek.co.uk/Forum3b/viewt ... &start=360
http://www.armortek.co.uk/Forum3b/viewt ... &start=750
I then did an update with a new source of material to replace the one Fabrice le Roux originally recommended here:
http://www.armortek.co.uk/Forum3b/viewt ... 527#p55527
I'd recommend fabric paint over Milliput now having use it a lot on my Cent build. It's much quicker and easier to use and above all, it gives much more refined results in smaller areas. I'll still use Milliput for the bigger structural welds but for fine detail, i.e. the majority of welds, I'll use fabric paint.
Stephen
Re: Comet No 34
Posted: Fri May 26, 2017 11:00 pm
by Steve Stuart
Thank you for the information Stephen. I have walked around to Hobby Craft and bought there a tube of the Tulip 3D paint which I am seeing how it performs. I will also get some of the Jaquard 3D paint as the Tulip paint does seem a bit thin. However the weld I am trying simulate does need some thing les bulky than Milliput. Once it has dried I will spray it over and put the photo up on the Forum.
Steve
Re: Comet No 34
Posted: Fri Jun 08, 2018 11:26 pm
by Steve Stuart
Well one Comet post deserves another! Mudguards have been entertaining me for a while. I thought the side plates had enough bolts, but the mudguards have involved a whole load more.
The front had new full width hinges and then remodelled arms, now with two sides. The forward part had the 'angle iron' edge fitted to it.
The rear had the side plates added and then the steps on the rear of the mudguard remade and soldered in place, all fun and games, but worth the hassle as it now avoids the bolts! I will be forever grateful to Derek for telling me that steel can be soldered.
I hope to move on the wheels, and drive sprockets, necessary to do before fitting the mudguards for real.
Steve
Re: Comet No 34
Posted: Wed Nov 28, 2018 10:16 pm
by Steve Stuart
Mudguards nearly there, but the drive spocket centre cover needed tweaking to have the three securing bolts, but practicality means that the 5mm cap head bolt is replaced with a counter sunk bolt that is seated on a plug to ensure the head sits at the correct level. The shape is not quite convex enough on the top, but at a glance it ought not to worry too many people too much!
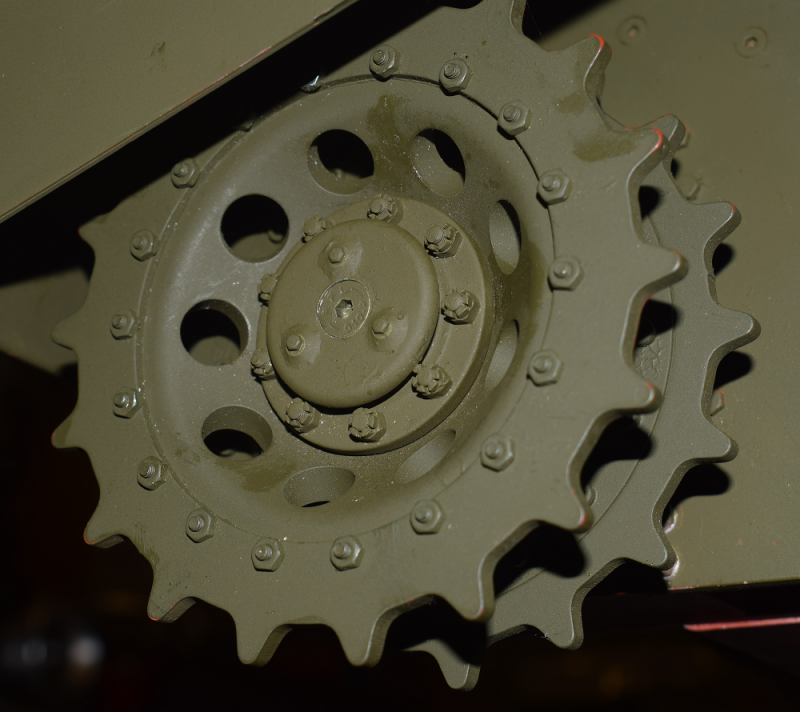
- Comet Drive Sprocket Centre Cover
Having done the Comet, the Cromwell demanded attention.

Re: Comet No 34
Posted: Thu Nov 29, 2018 9:33 am
by Marco Peter
You showed these to me - great to see the end result!
Re: Comet No 34
Posted: Thu Nov 29, 2018 9:41 am
by Stephen White
Real or fake? One for Phil, if non-Wehrmacht ist erlaubt darueber.
Stephen