Page 2 of 2
Posted: Sat May 24, 2008 11:03 am
by chris fry
hello dale,
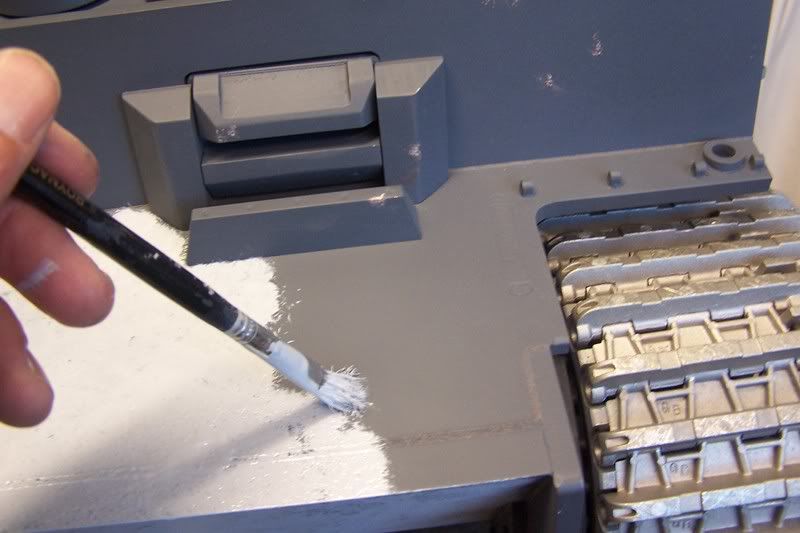
many thanks for the close ups, looks very releastic, did you just brush it on with a stiffish brush, and is that one coat or several.
thanks again, chris.
tiger weathering
Posted: Sat May 24, 2008 3:01 pm
by simon_manning
well done dale, i have started to realise how much detail on my tiger i have missed out.yours is coming togeather nicely. i think i will hold on and wait for you so i can pick up some more tips! keep posting please.
regards simon manning.
Posted: Sat May 24, 2008 7:18 pm
by Robert E Morey
Awesome work Dale,
Your Tiger is looking beautiful. Really enjoy your "how to" articles. Great reference for all. You guys keep coming up with more and more for me to do on my tanks just to keep up! But enjoying every minute of it.

Keep up the great work all! Dale love how organized you shop is, mine looks like a junk yard (full of cool toys though)

Bob


Posted: Sat May 24, 2008 11:27 pm
by Dale jordan
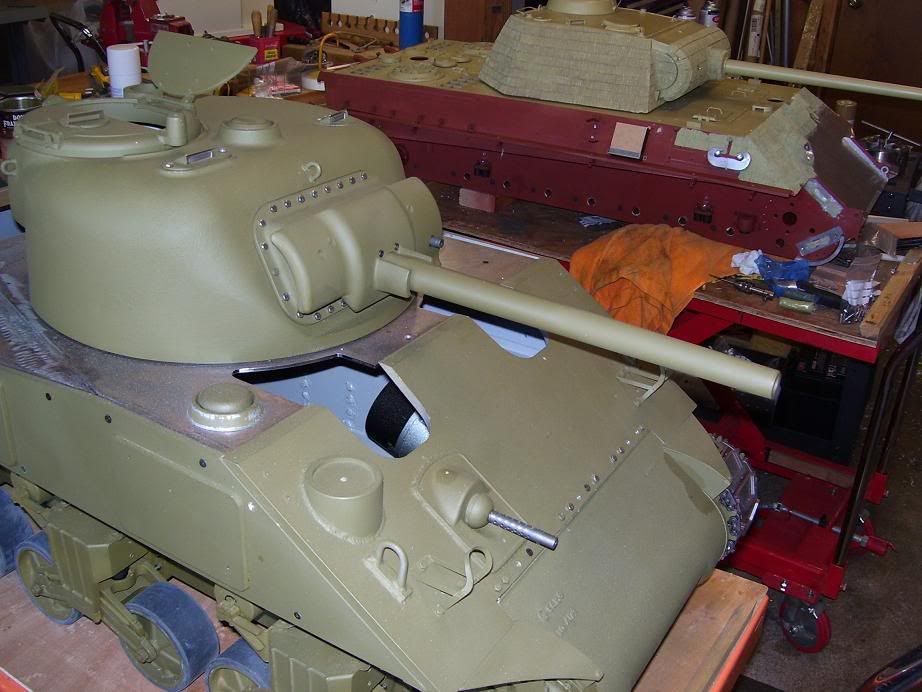
Robert thanks for your comments . I do spend to much time tidying up my workshop . I work realy hard to get through a stage of the build which does make a mess !! Then I have a big clean up . Most of the time that I take photos for the forum my shed is clean . After looking at your work area I would love to get in there and have a good look around . Do you find it hard working on the panther with the Sherman next door??? . Like you I started My sherman knowing that my tiger was still not finished . I've been strong for the last three months . Not to go near my sherman it's covered up , whilst I finish of my tiger . I' m very close now . Then I will dive into the Sherman . I'm saving up for a Panzer III . If I miss out .I hope that armortek do a stug III G . next . Dale
Posted: Sun May 25, 2008 6:29 pm
by Robert E Morey
Hi Dale,
Yes its hard working on two models. In fact little has been done on the Sherman while I try to finish the Panther. The Panther should be on its wheels in a few weeks. I find I have little time to tidy up - an occasional super clean does the job though.
For those curious, the Panther zimmerit is milliput. This isn't finished on the glassis as I do a little bit at a time. Its slow going but is authentic looking. There are a lot faster ways of putting on zimmerit though.
Posted: Wed May 28, 2008 12:26 pm
by Kent Wiik
Hi Bob,
You know I love your Panther and I think I (as a simple Dremel man

) love your tools even more...

Just one thing my friend:
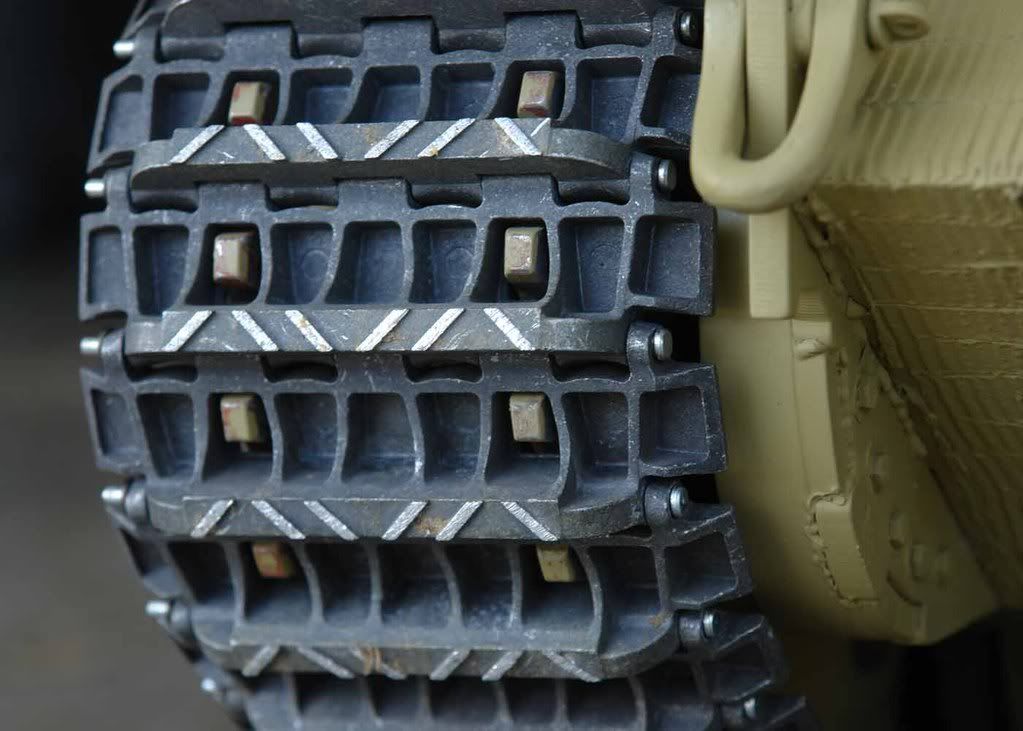
Inspired by Richard at Steeldragon and his building start on an Armortek Panther I have begun to look at my kit "big" parts to have the chassis built this summer. While looking at yours I see you have mixed sides for the Front Armour, parts #CH0628.
(after looking in the Galley I am sad to say you are not alone...

)
No wonder as there is no instruction in the manual how they shall be fitted but in the manual for the Option Pack 1 there is a hint at page 6.
Another thing is that the kit parts are to small compared to the real thing.
The real ones almost make a half circle.
This is how they looked:

And this is the kit one:

No big deal but I will rework my pair as they are well visible.
Cheers
Kent
Posted: Wed May 28, 2008 4:02 pm
by Tim Bowman
Hi Bob
the good news is it looks like yours are not permanently fastened yet.

When I first put mine on to see what they looked like I had them on wrong too. Fortunately I caught my mistake before fastening them permanently.
Kent is correct, even with the tracks and fenders installed, you can see the guards.
Your Panther and Sherman look GREAT! I love the Tank factory look of your shop.
Keep up the great work,
Tim
Posted: Thu May 29, 2008 12:15 am
by Stephen Mason
WOW!!! It does look good Dale. Nice to see it coming along so nicely.
Does anyone know if Mr surfacer 500 is available to buy in the UK as I would like to get a jar or two to add to my Tiger's surfaces?
Steve
Posted: Fri May 30, 2008 11:26 pm
by Dale jordan
Here is a photo of the Mr surfacer 500 being stippled on . When dry you must block sand it !!! Dale