Page 2 of 9
Re: Paul & Robin's Centurion
Posted: Mon Dec 10, 2012 1:34 pm
by paul&robinmargle
Hi Sean,
Thanks for the encouragement

Robin
Re: Paul & Robin's Centurion
Posted: Mon Dec 10, 2012 10:43 pm
by sean kerambrun
I need to decide which tank to do..
But headlights and IR light are things I need to make
Need to order 2 more wheels as OZ ones generally have 2 wheels on the front and we used different headlights
Cheers
Sean
Re: Paul & Robin's Centurion
Posted: Tue Dec 11, 2012 9:44 pm
by Kevin Hunter
Hi Robin - great work so far. I like the little extras re the bin handles. SImple solution yet effective result.
How are you doing with your catches and filler caps? Did you have a pattern, or have you made your own? Would love to hear how you do this in the absence so far of commercially available add ons.
Regards
Kevin
Re: Paul & Robin's Centurion
Posted: Wed Dec 12, 2012 1:31 pm
by paul&robinmargle
Hi Kevin,
I'm in the process of trying resin casting (not very successful yet

), the master catch was made from plastic strip and a paper-clip, I need to cast 20 (this includes 8 for the turret bins). I copied a picture I took at the Tank Museum and basically guessed the size

, only the paper-clip part will be workable
I've also built a filler cap again from plastic strip and ground it into a round domed shape, I came up with 2.33cm diameter in 1:6 from roughly measuring the AFV Club 1:35 model, may be too small?
Robin
Re: Paul & Robin's Centurion
Posted: Wed Dec 12, 2012 1:53 pm
by Kevin Hunter
All very interesting Robin - let me know how it goes.
I reckon I need a day at Bovvy or anywhere else I can fill an SD card with pics of these Centurion details. I'm in Guernsey so will have to wait until the New Year now. Meanwhile I continue to read books, glean what info I can from pictures on the web and of course in this forum.
Regards
Kevin
Re: Paul & Robin's Centurion
Posted: Sun Dec 16, 2012 11:53 am
by paul&robinmargle
Hello,
Much better weather this weekend, sunshine

Finally acid etched the main hull parts.
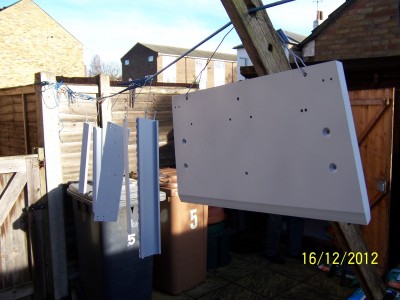
- Sunday laundry
Should get them together over Christmas.
Here is the master filler cap:
The mess is from all the grinding

I may be getting closer to success with the casting, it seems to take much longer for the rubber to set than the 24 hours stated. The latest attempt is solid but sticky, I'll leave it another week.
Robin
Re: Paul & Robin's Centurion
Posted: Mon Dec 17, 2012 4:22 am
by neil pudney
hi robin, not sure if these miniature toggle latches are ok for our purposes but i saw them for sale online at this web site, they are miniature and the sizes look ok, go to
http://uk.farnell.com/jsp/displayProduc ... price=true
please let me know what you think, there is a pdf file on their with all the dimensions
regards,neil
Re: Paul & Robin's Centurion
Posted: Mon Dec 17, 2012 11:04 am
by paul&robinmargle
Good find Neil, good price too, I spent ages looking for jewellery box catches.
The lower main body of the catch may not fit on the lower part of the box though? looks about 20mm?
Robin
Re: Paul & Robin's Centurion
Posted: Mon Dec 17, 2012 5:21 pm
by neil pudney
Hi robin, you may be right there but when i get to the stowage bins part of the build i might get a couple and see how they look,or try making some up of course !
regards,neil
Re: Paul & Robin's Centurion
Posted: Wed Dec 26, 2012 5:56 pm
by paul&robinmargle
I hope everyone had a good Xmas,
This is a halfway holiday report

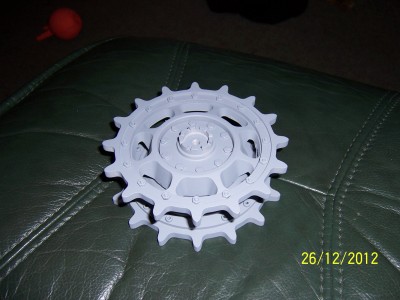
- Drive wheel
I created the missing bolt detail around the centre by glueing on spare nuts and filling the centres with Milliput.
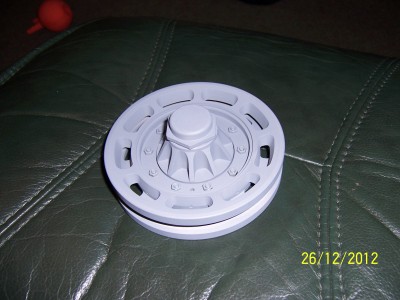
- Idler
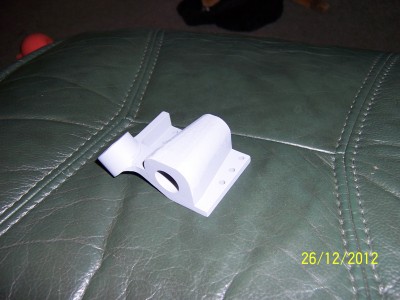
- Idler mounts
I'm not sure if it's that easy to see, but I created some cast texture with Tamiya putty on the idler mounts.
Here is the current state of the hull, roller houses attached and some rear parts fitted.
First welds added

Plenty more holiday left, hopefully a lot more progress before the return to work

Robin
Re: Paul & Robin's Centurion
Posted: Wed Dec 26, 2012 6:06 pm
by paul&robinmargle
I forgot to post about the casting success

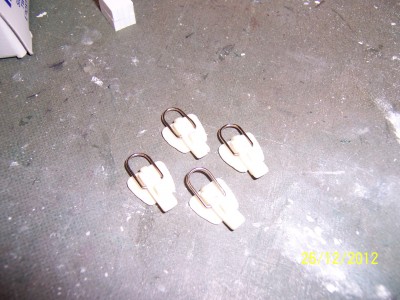
- Four catch castings
Done 4 just 16 more

I've only got one mould so it takes a while.
Robin
Re: Paul & Robin's Centurion
Posted: Wed Dec 26, 2012 11:45 pm
by sean kerambrun
Nice work.. Looks great.
You have made a lot of progress complied to me

Cheers
Sean
Re: Paul & Robin's Centurion
Posted: Thu Dec 27, 2012 11:09 am
by mick whittingham
Looking good so far guys.
I see you addressed the "missing" bolt detail from the drive sprocket. I used M3 bolts and nuts to achieve the same thing, the cap heads fitted inside the hub with no fouling the taper lock bush.
I am going to try and fabricate the locking bar set up for the castleated nut at some point so i will post pics when that is done.
Keep up the good work, Mick
Re: Paul & Robin's Centurion
Posted: Sat Dec 29, 2012 1:19 pm
by paul&robinmargle
Hi, I have a quick question about the idler assembly, in the instructions it says the axle should be screwed fully and firmly home but I end up with a gap at the swing arm face which translates through to the spigot eye only having half the shaft inserted:
I'm worried this may affect wheel alignment.
Thanks,
Robin
Re: Paul & Robin's Centurion
Posted: Sat Dec 29, 2012 4:53 pm
by mick whittingham
Hi Paul,
I had the same result in my first fit, the axle needs relieving a little where the threaded portion butts up to the arm.
I did this in my lathe but you could manage it with a small file. The lack of a relieved area stops the axle screwing
Right home. Hope this helps, Mick
