Early Panther Ausf G Idler Wheel

Forum for discussion relating to the Panther
Post Reply
Tim Bowman
Posts: 1762
Joined: Fri Jul 13, 2007 4:53 am
Location: Northern California
Been liked: 177 times
Contact:

Post by Tim Bowman »

Hi Kent,

Yes, yes I know..I almost put a "bolts are too big" disclaimer in my post :lol: I just put em on for pics to post using same size bolts as the kits original idlers. I'll use the ones that are on my road wheel hub caps in the pictures. It's hard to find much in that size here in the States. I'll update these pictures this coming weekend.

I'll get things squared away when I get back from my trip.

Tim
Last edited by Tim Bowman on Sat Aug 04, 2007 3:01 pm, edited 1 time in total.

Tim Bowman
Posts: 1762
Joined: Fri Jul 13, 2007 4:53 am
Location: Northern California
Been liked: 177 times
Contact:

Post by Tim Bowman »

Hi everyone

I quickly finished up my proto-type wheels and installed them. Everything runs good so far. Grease fitting detail still not completed but these photos show how the wheel looks installed. Depending on how I make the final version of the wheels, the grease fitting may be a separate, removable part like the real thing.

Unfortunately the washer-like locking tabs I had are too big for the 6 hub cap bolts I used so I'll have to figure something out there.

Panther also has my modified gun mantel(yet to be zimmerited along with turret)

Starting to look like an early G though!

Regards

Tim

Image

Image

Image

Image

Image

Image

Image

Image

Image
Last edited by Tim Bowman on Sat Aug 04, 2007 7:28 am, edited 1 time in total.

Dale jordan
Posts: 1456
Joined: Fri Jul 13, 2007 1:10 am
Location: Port Macquarie Australia
Been liked: 514 times
Contact:

Panther

Post by Dale jordan »

Great build so far Tim . Nice to see the turret comming together . I'm very impressed with the look of the new cast armortek tracks . keep the photos comming . Dale

Tim Bowman
Posts: 1762
Joined: Fri Jul 13, 2007 4:53 am
Location: Northern California
Been liked: 177 times
Contact:

Post by Tim Bowman »

Thank you Dale. I'm having a great time with this kit. I agree, when I pulled the first tracks out of the box I was amazed. I think they are still one of my favorite parts. Hearing them clack and squeak is just icing on the cake.

Hopefully this weekend I will be able to spend much needed time on my turret.

How's the Tiger coming? I'm hoping to save some money up for the late version and everytime I see pictures of the early ones like yours on the forum it makes me want one even more.

Tim

Roland Wallick
Posts: 146
Joined: Sun Jul 15, 2007 12:22 pm
Location: MD United States

Post by Roland Wallick »

Tim nice job on the idlers, I like them very nice. If your looking for small bolts here, try Maryland metrics or small parts.com or McmasterCarr.
If your not living on the edge, your taking up to much space.

Kent Wiik

Post by Kent Wiik »

Lovely photos Tim!

Your Panther looks awesome mate and those photos are a huge source of inspiration - thanks for posting them.
Adding your idler made a huge difference in having the early look.

Cheers
Kent

Tim Bowman
Posts: 1762
Joined: Fri Jul 13, 2007 4:53 am
Location: Northern California
Been liked: 177 times
Contact:

Post by Tim Bowman »

Roland, Thanks. I was wondering if McMaster might have bolts that small since they have everything under the sun there. I'll give your sources a try. Thanks again.

Kent, Thanks. I'll keep the photos coming.

Cheers
Tim

Roland Wallick
Posts: 146
Joined: Sun Jul 15, 2007 12:22 pm
Location: MD United States

Post by Roland Wallick »

Tim I just bought 100 ss m4x4 set screws, they were only about $4 from McMasters. I dont know what all they have but for conectors they are very reasonable on the price. Maryland metrics prices are a lot higher, but with them you can buy as many or as few as you want.
Small parts I think are some where in between. Small Parts will send you a free catolog that has all kinds of small stuff for building all sorts of contraptions.
If your not living on the edge, your taking up to much space.

User avatar
Robert E Morey
Posts: 2351
Joined: Wed Jul 18, 2007 12:59 am
Location: Seattle, WA USA
Has liked: 161 times
Been liked: 830 times

Post by Robert E Morey »

Tim,
Fantastic job! Like Kent said you are an inspiration to all early G builders. Excellent detail. You whipped those idlers out fast. Are they machined Alum? Beautiful work!
-Bob

User avatar
Robert E Morey
Posts: 2351
Joined: Wed Jul 18, 2007 12:59 am
Location: Seattle, WA USA
Has liked: 161 times
Been liked: 830 times

Post by Robert E Morey »

Tim,
Sorry in my haste to view your photos I missed the first page where you show the idlers as the raw stereolithography models. Still, super job designing and modelling the part. Are you planning to have them cast or machined?
-Bob

Tim Bowman
Posts: 1762
Joined: Fri Jul 13, 2007 4:53 am
Location: Northern California
Been liked: 177 times
Contact:

Post by Tim Bowman »

HI Roland. Sounds great. I'm making a list of fasteners for my deck details and will definately give those suppliers a try. The ones I've used so far are expensive and hard to get in bulk. Thanks again for the info.

Hi Bob,

Thanks. This stuff is so fun. I'm looking into three different ways to make the actual parts. Unfortunately, casting in metal would require more cost up front then I can absorb and I don't think I could sell enough to even cover my cost.
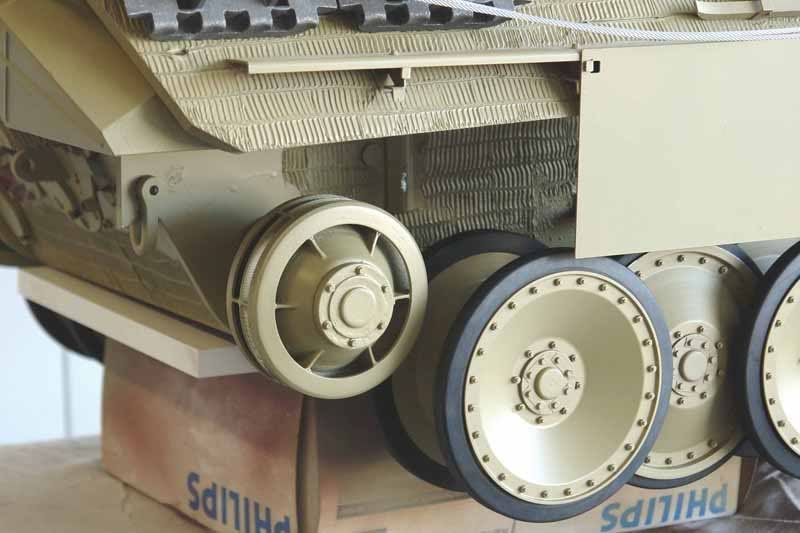
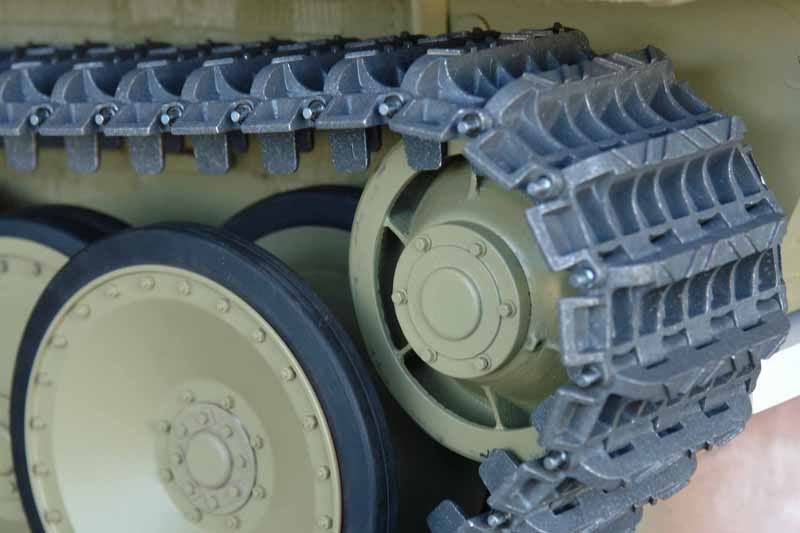
I also looked into 3D printed metal parts. They are done the same as SLA only in steel, at high resolution so super clean, functional, finished part with all the crazy, un-machinable undercuts this wheel has. This is the method I will probably use for my personal set.(also very expensive per wheel) If anyone is interested in spending the money I'll be happy to have more then my set run when I do them.
The last way is a very cost effective, do-able way that I will also be doing some prototypes in. It will sacrifice some accuracy but provide the look of the early wheels. These will be a combo of machined outer rings and hub(the functional structure) and an inner cast detail part which includes the spokes, grease fitting etc. I would supply them as kits so who ever wants to can detail them out to their personal standards when they assemble it.

So basically its a good, better, best plan with the best being beyond my budget. I do have to save something for that late Tiger I kit
:D

I think the last option will be the way to go. It won't have the undercuts like the one in my photos but will look good. Once I have parts and prices I will let everyone know. I'm not looking to do this as a business so prices will be pretty much cost+shipping.

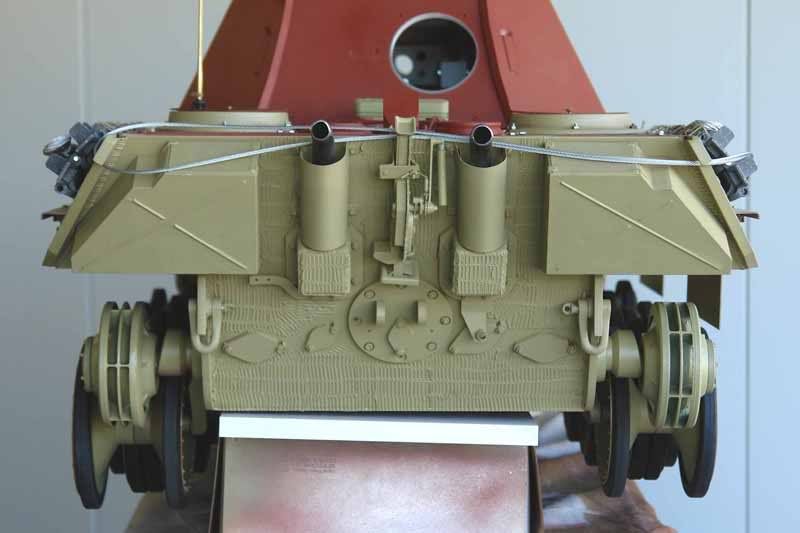
3D drawings are done for the exhaust guards and I am working on a VERY detailed, complete replacement deck, deck plates and deck components set as well.

PHEW..that was wordy. sorry about that.

Happy Panthering

Tim

Kent Wiik

Post by Kent Wiik »

Hi Tim,

All of this sounds thrilling.
Please put me up for a set of the 3D printed metal parts idlers.
(a rivet counter always goes for the best................ :wink: )

Cheers
Kent

User avatar
Robert E Morey
Posts: 2351
Joined: Wed Jul 18, 2007 12:59 am
Location: Seattle, WA USA
Has liked: 161 times
Been liked: 830 times

Post by Robert E Morey »

Tim,
Thanks for the excellent information. Being an Engineer and machinist I was curious as to how you would tackle the part in aluminum. The undercut area of the hub in particular. I would make the hub and rim separately too, as a good compromise. Then bolt the two together.

If you have access to CNC machining equipment you may just machine the hub and rim separately from solid stock rather than cast them then machine them. Seems like a lot more work to make a pattern, cast them, then machine and fit together? Depends on what processes you have access to.

How expensive are we talking about for the metal printed part?

Great stuff,
Bob

Tim Bowman
Posts: 1762
Joined: Fri Jul 13, 2007 4:53 am
Location: Northern California
Been liked: 177 times
Contact:

Post by Tim Bowman »

Bob,

The only reason I was thinking of a cast Urethane facade of the conicle center, grease fitting and spokes is it would be done out of the mold. Then it would simply be bonded around, and into the machined hub and rims on both sides. I did, and am still am looking into a multi piece cnc part but even there some accuracy will have to be sacrificed.

The cost of the wheel alone, no hub and no fasteners and no tapping is $450.00 per wheel. :shock: That's my cost just for the 3D part. There's no price break at quantities either due to the nature of the process. :( so I'm guessing somwhere just over $1,000/set with caps fasteners etc..again
:shock:

Thats why I was looking at the good, better best solution. I'll have prices on the other methods soon.

Tim

Roland Wallick
Posts: 146
Joined: Sun Jul 15, 2007 12:22 pm
Location: MD United States

Post by Roland Wallick »

Tim Bowman wrote:
The cost of the wheel alone, no hub and no fasteners and no tapping is $450.00 per wheel. :shock: That's my cost just for the 3D part. There's no price break at quantities either due to the nature of the process. :( so I'm guessing somwhere just over $1,000/set with caps fasteners etc..again
:shock:

Tim
:shock: WOW Tim lets just build full sized Panthers :?
If your not living on the edge, your taking up to much space.

Post Reply