Page 2 of 4
Re: 2024 Jagdpanther No43 build log.
Posted: Tue Jan 07, 2025 8:09 pm
by chris fry
Time for some paint, Temperature has warmed up a little so can start applying,
Will try and put in the pictures what paints and materials we use,
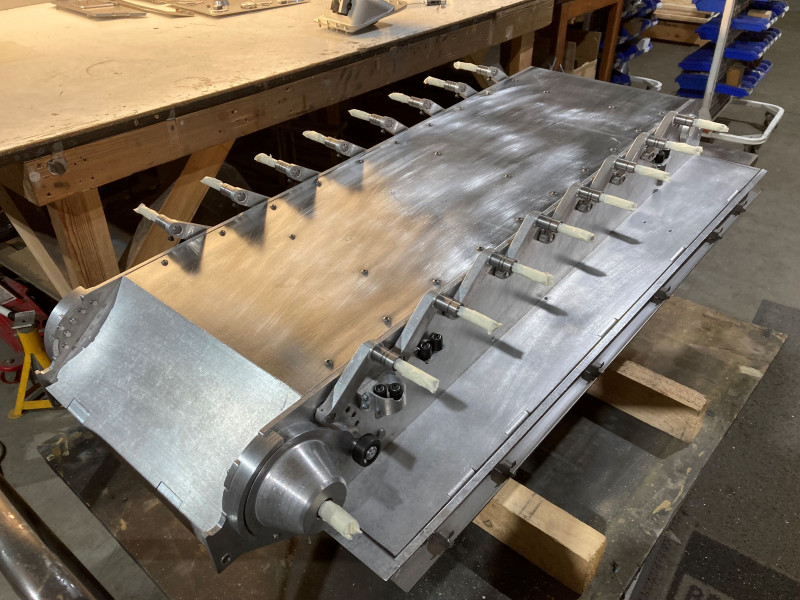
- underside first, keyed the surface using scotch brite, not necessary as the upol etch primmer will bond itself to the metal but it will help, then wipe clean with thinners or panel wipes, masked up all the axles/bearings etc.
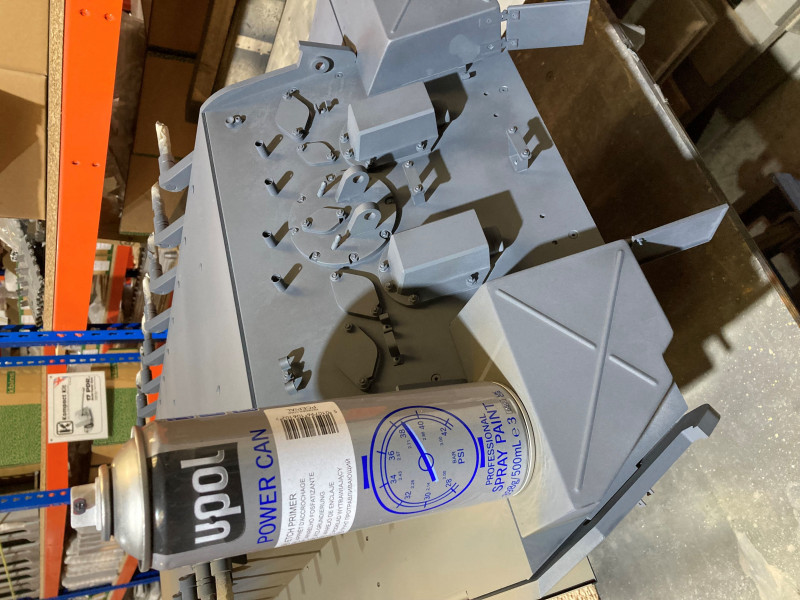
- upol etch primmer on, this primmer works out around £5/6 pound a can, will expect to use 4 to 6 cans on this model.
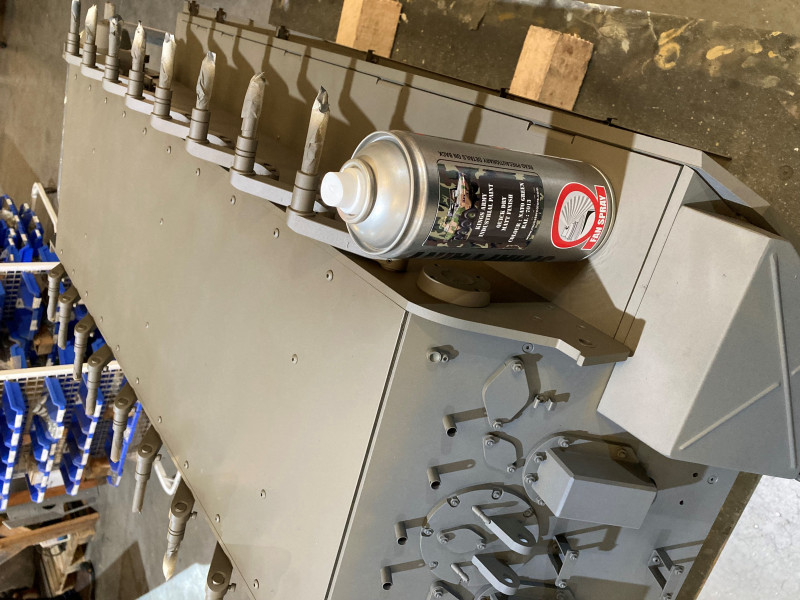
- for a base color on the underside, used a light green, as this color wont been seen and not much weathering color not critical, used half of this can,
Once the underside has dried will turn over and start primming the top side and color the inside,
Regards, Chris.
Re: 2024 Jagdpanther No43 build log.
Posted: Wed Jan 08, 2025 9:06 pm
by chris fry
More hull painting,
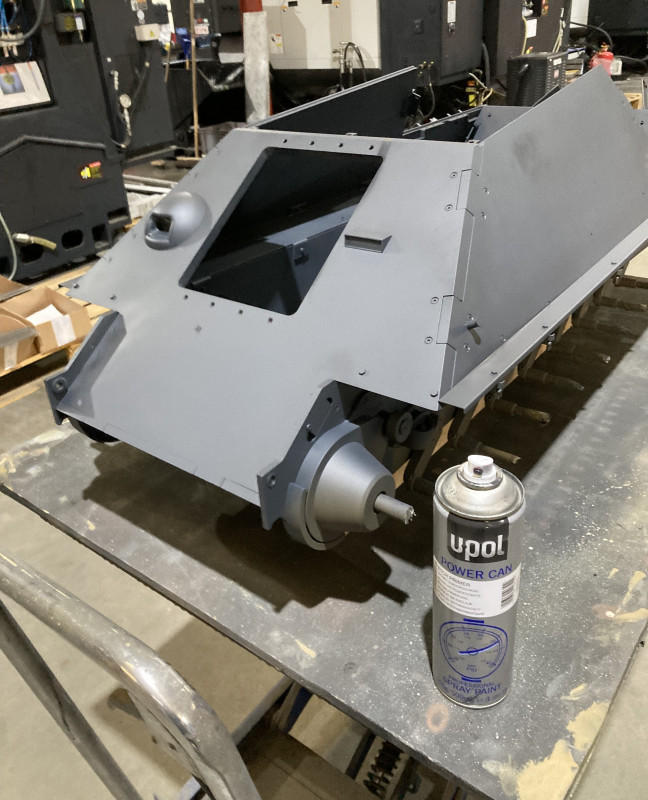
- Hull now in etch primer,
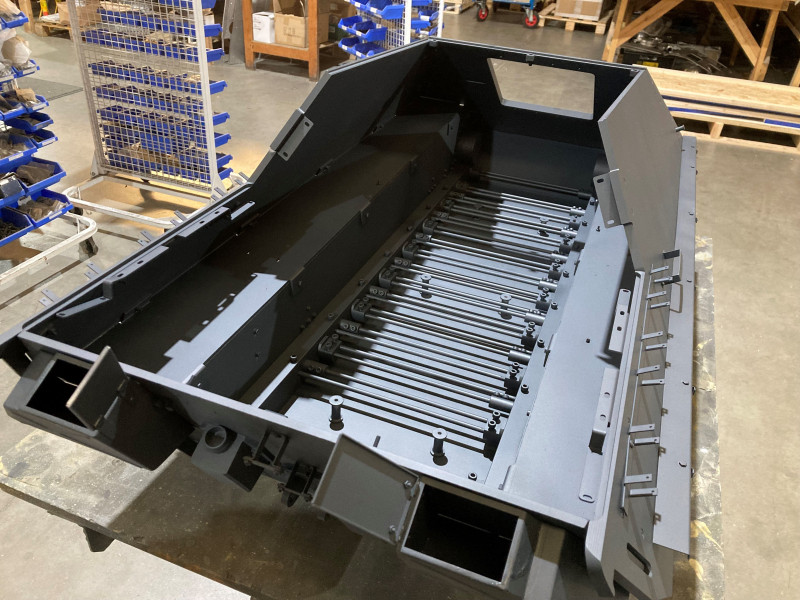
- Inside as well. with all the other panels/gun mount and wheels primed now, total used 6 500ml cans.
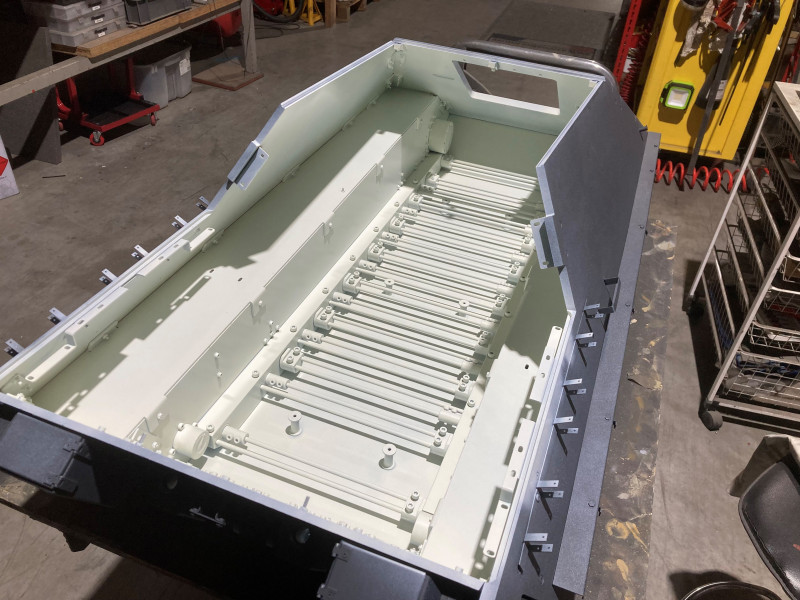
- Inside sprayed gloss white.
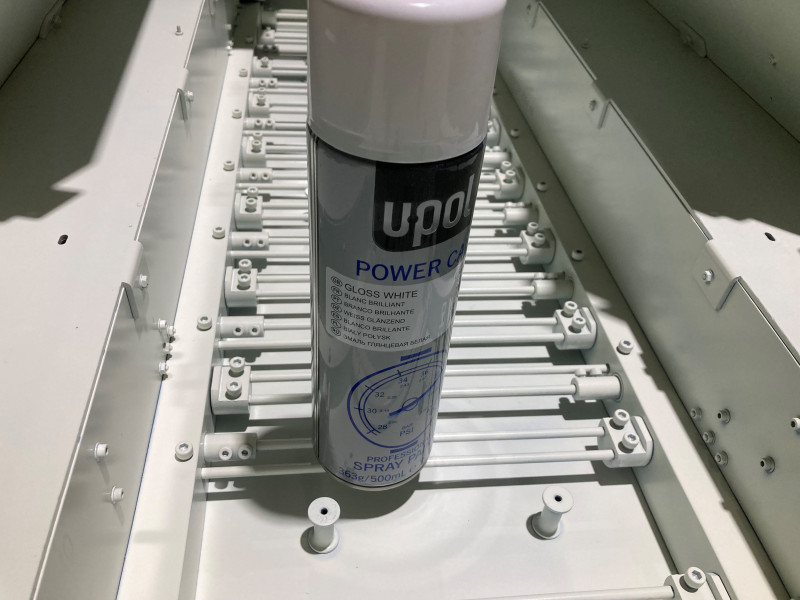
- Again used upol spray paint, Used 2 500ml cans, inside hull/underneath of roof and inside rear segment, also battery tray, around £6/7 pounds a can.
Once all dry will start on filling over fasteners not to be seen, Dummy welds added and texture surface applied, Again will show pictures as we go along on method and products used, Also can now start adding the motion pack,
Thanks chris.
Re: 2024 Jagdpanther No43 build log.
Posted: Sat Jan 11, 2025 7:22 pm
by chris fry
As the cold spell continues and not ideal for painting etc carried on with installing the motion pack,
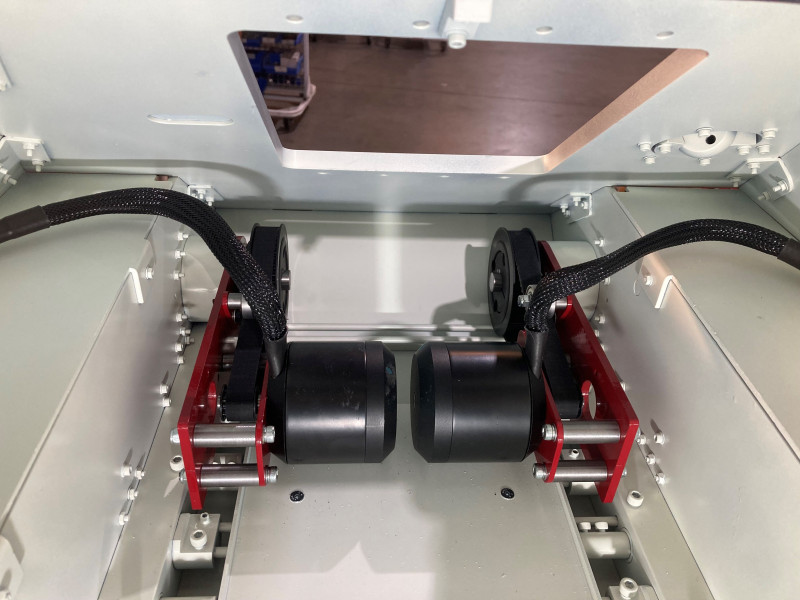
- Motors assembly fitted,
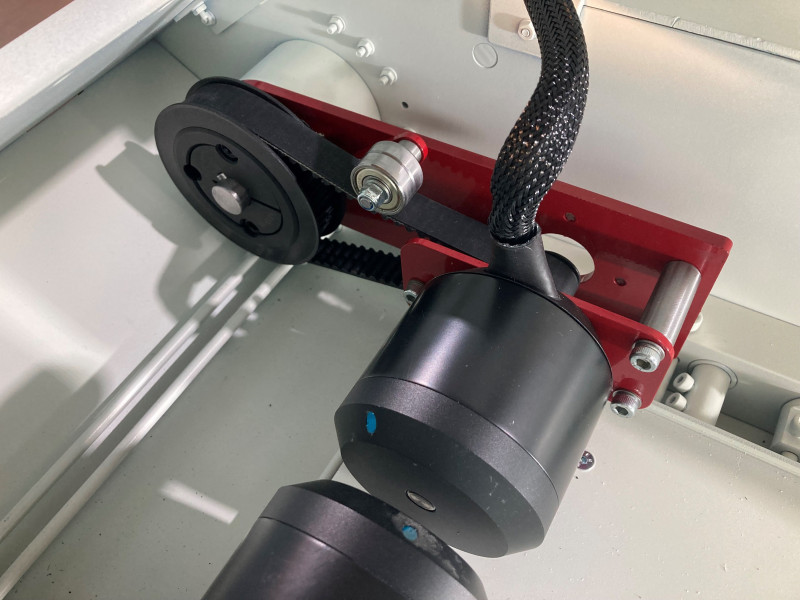
- R/H assembly fitted, Follow instructions with belt tension, They dont need to run very tight.
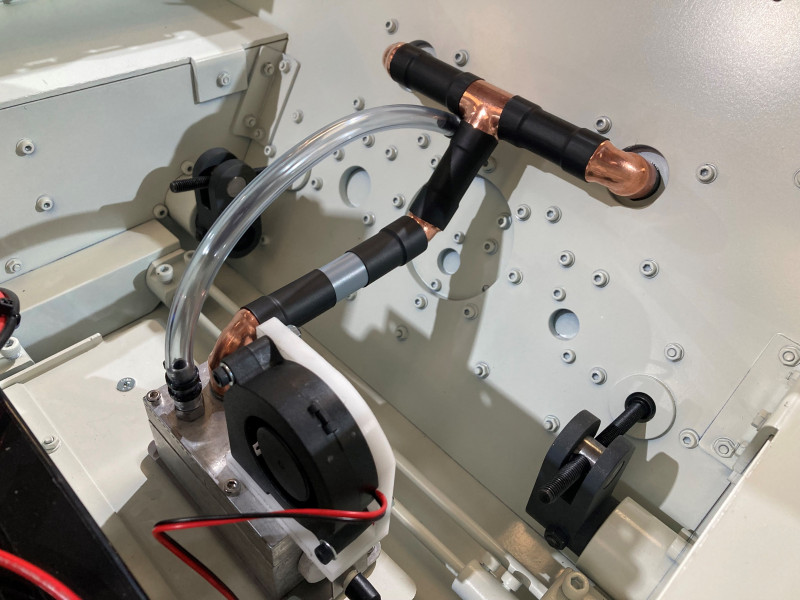
- Smoker all piped up, Some non kit parts used here, Used heat shrink on the joints to aid sealing but it still allows joints to twist if you need to disassemble at a later date.
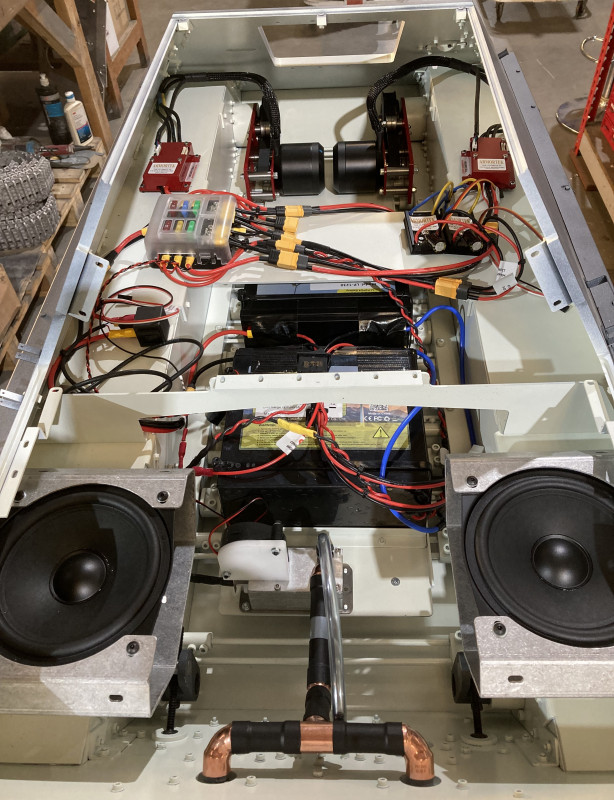
- General layout of electronics, None of the modules are fixed down yet, I use dual-lock to do this, this makes attaching/removal easy and acts as a cushion for the modules, A lot of tidying up once testing is finished, Just need to add receiver, Audio unit, Recoil and gun actuators etc/etc.
Hopefully warming up next week so we can continue with painting etc,
Re: 2024 Jagdpanther No43 build log.
Posted: Sat Jan 11, 2025 11:28 pm
by Derek Attree
Hi Chris
Nice neat layout and good to see the new motor set up.
Regards Derek
Re: 2024 Jagdpanther No43 build log.
Posted: Thu Jan 16, 2025 9:01 pm
by chris fry
Some more progress, Again anything you want to know or advice please feel free to ask,
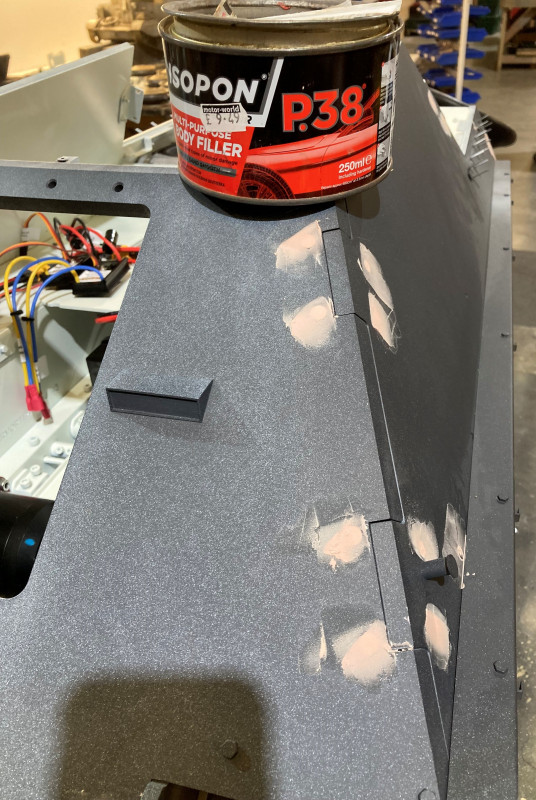
- Filling over the fasteners not to be shown, Using p38 body filler, Price is on the tin, Once it has set use emery paper to smooth down,
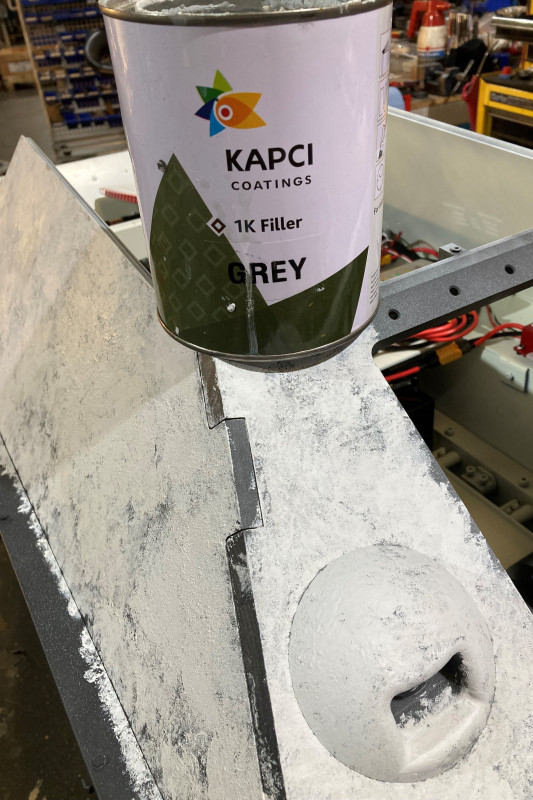
- Replicating the texture look, Use a high build filler, Apply with a brush by stipulating (dabbing), This filler is like a very thick paint, Use straight from can, Use in a ventilated area as it does stink, Cost around £20 a tin but this will do a dozen++ tanks.
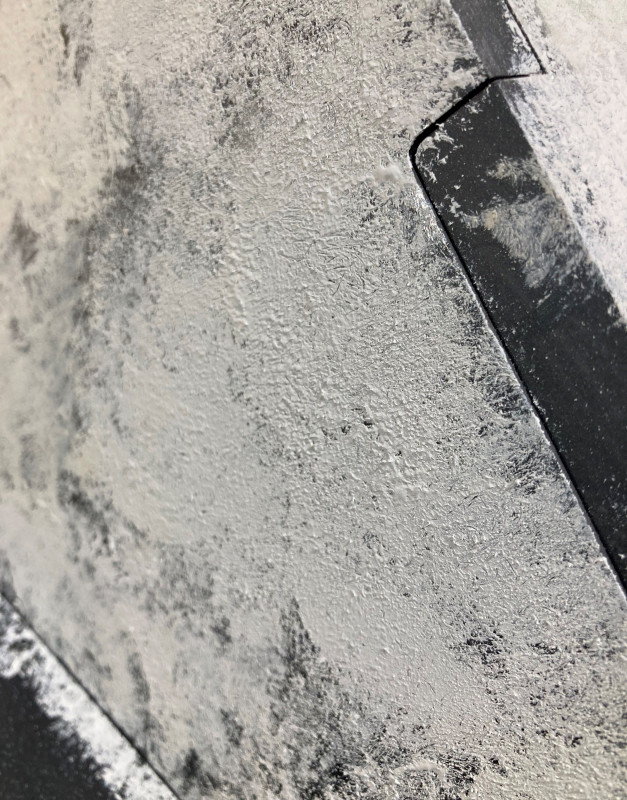
- Close up of texture result, The more you work the filler when applying will give a more texture look, Which will really show once the main color scheme is applied. Just trying to give a depth look to the paint rather than the flat new look metal finish.
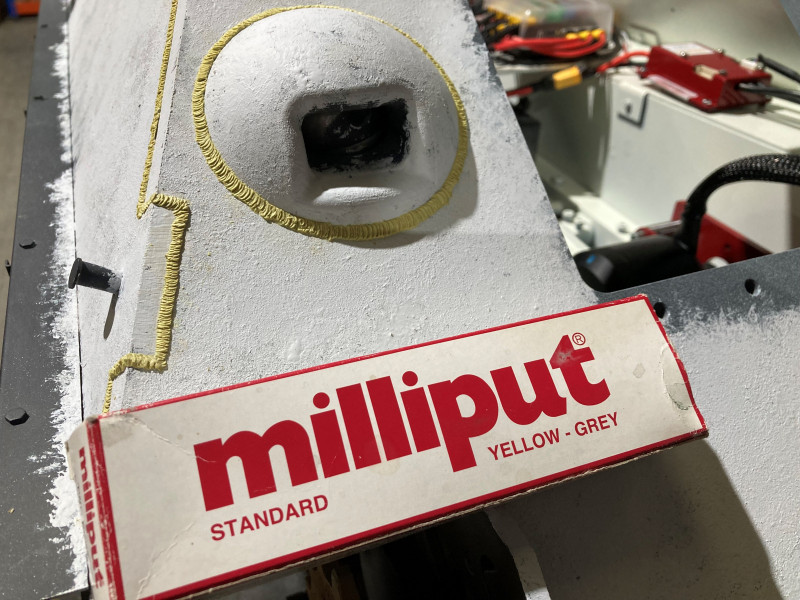
- Dummy welds, Used milliput putty, Around £5 a pack, It comes in a 2 part application, Roll the 2 parts together, Keep it moist as this helps it not sticking to your fingers, Then once mixed roll in to a thin bead then apply where you want the weld, Then with a small flat edge impress the weld lines,
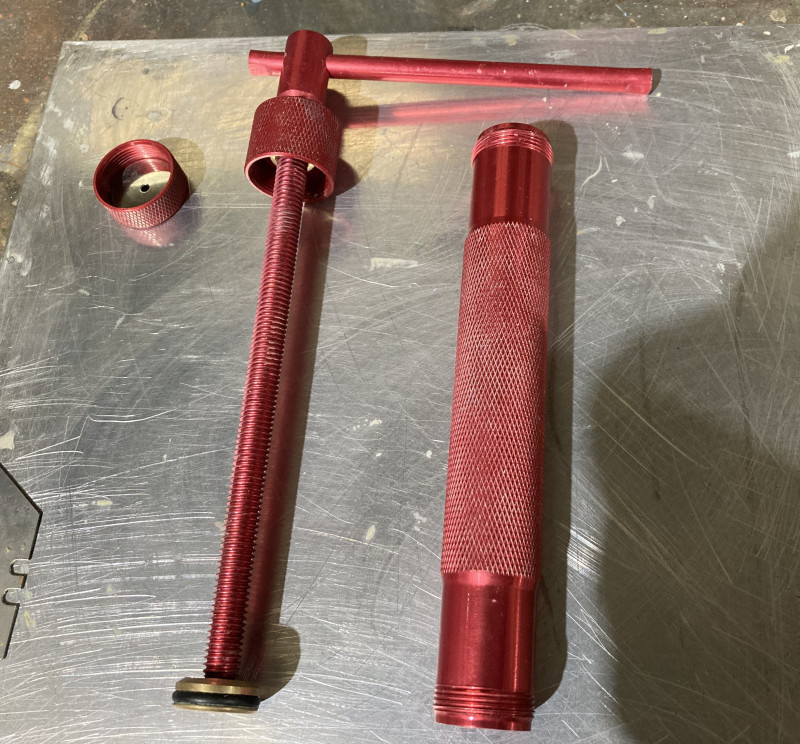
- Tool used for squeezing out a perfect bead of milliput, Saves rolling it by hand, Just fill the tube up with the mixed putty and wind the handle, Best £8 spent. Just make sure you clean well after use as milliput sets like concrete,
Next stage will be applying the base colors.
Re: 2024 Jagdpanther No43 build log.
Posted: Thu Jan 16, 2025 9:56 pm
by Steve Stuart
A useful device, who is the supplier and what is it's name so I search for it?
Thanks Steve
Re: 2024 Jagdpanther No43 build log.
Posted: Thu Jan 16, 2025 11:00 pm
by chris fry
Evening Steve,
Try searching for DIY craft extruder, eBay is your best bet,
Regards, Chris.
Re: 2024 Jagdpanther No43 build log.
Posted: Fri Jan 17, 2025 12:14 am
by Dan Fuhrman
Chris,
Thank you for posting! Best new modeling tool for 2025.
Dan
Re: 2024 Jagdpanther No43 build log.
Posted: Sat Jan 18, 2025 7:13 pm
by chris fry
fitting running gear today,
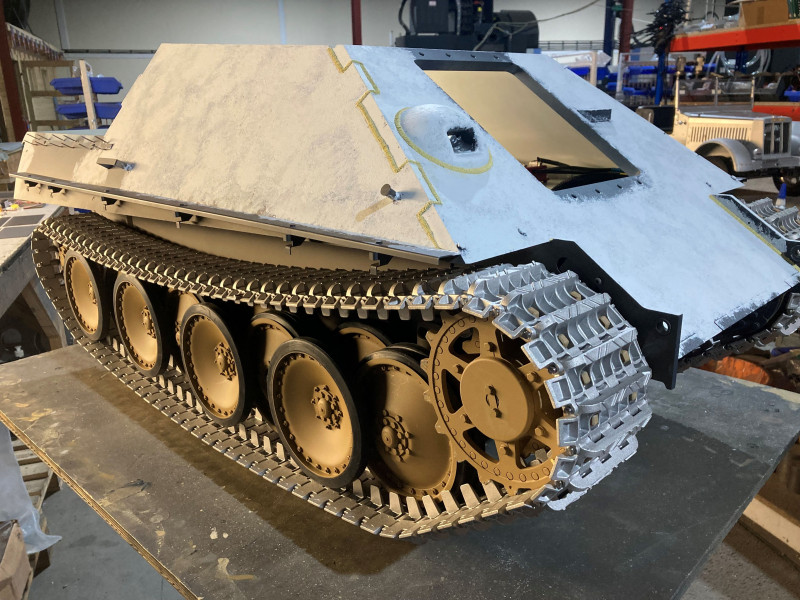
- All the running gear fitted, Tracks temporally fitted to make sure there's enough links before painting. 86 each side, And to set the sprocket alignment, Good point with these new motors you can spin the tracks around by hand and set the correct measurement to align the sprocket/tracks,
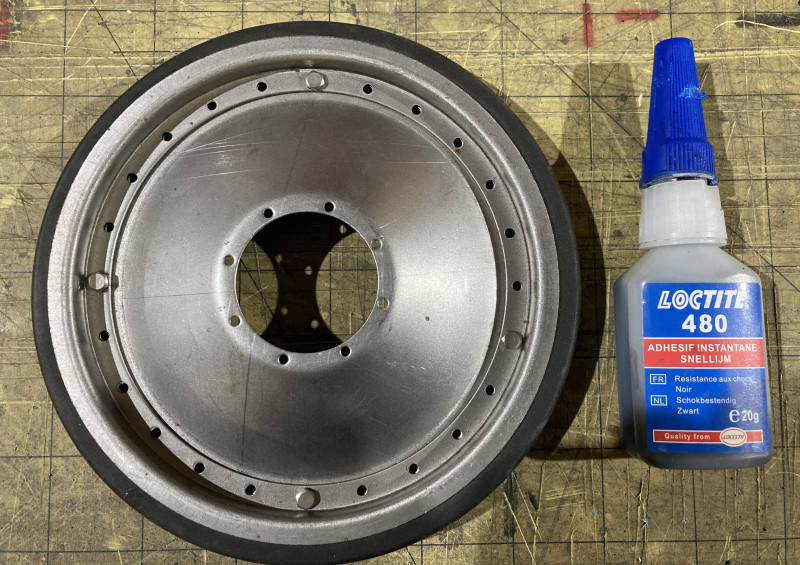
- Bonding the tires on used Loctite 480, Cost around £9 a bottle but will do whole tanks worth of tires, (Showing sample tire/rim).
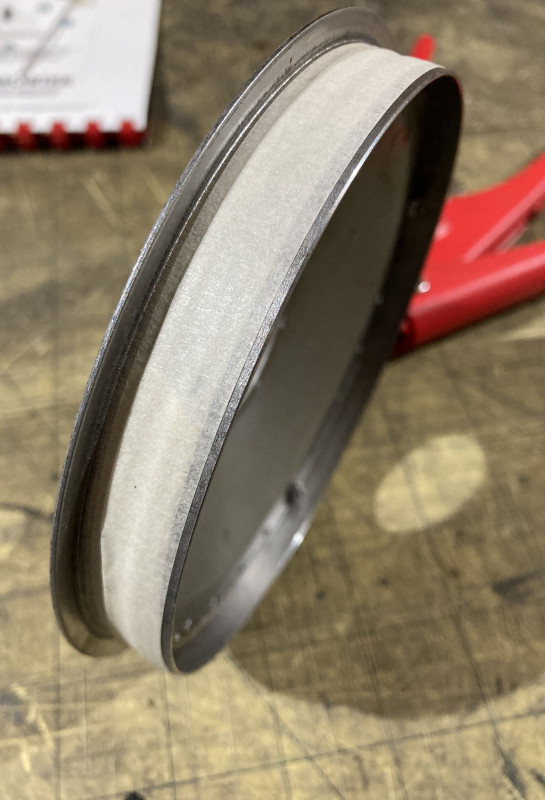
- Before painting rims i mask off area where the tire bonds to the rim, This will give a much stronger adhesin area, I have seen on the forum builders painting the whole rim then bonding the tires on, The glue is only adhering to the paint this way which is much less effective strength wise.
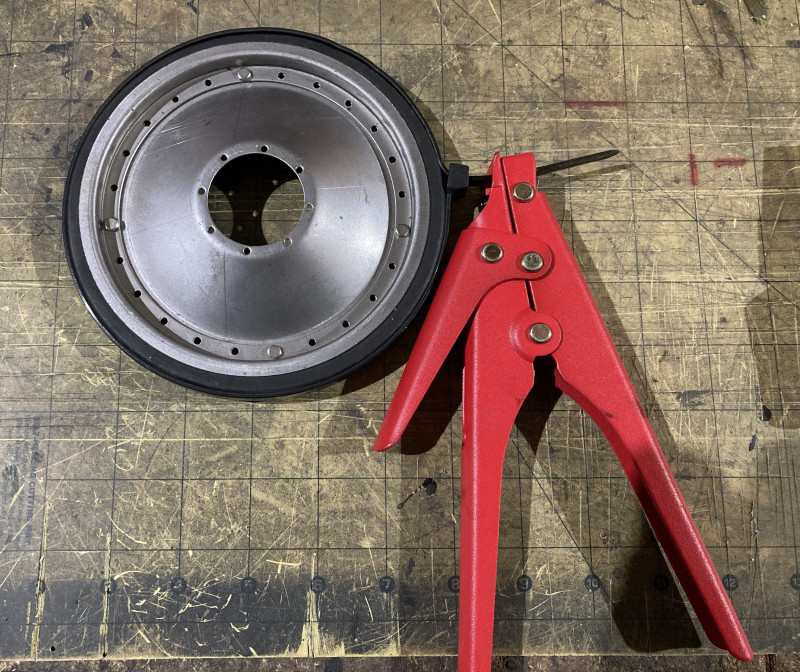
- When using 480 to attach tires you have only have a few seconds to fit the tire on so work fast, Once the tire is on i use cable ties to clamp the tire down, A useful tool here is this cable tie tensioner tool £20, Allows you to use one handed to tension the cable tie firmly, (showing sample tire/rim).
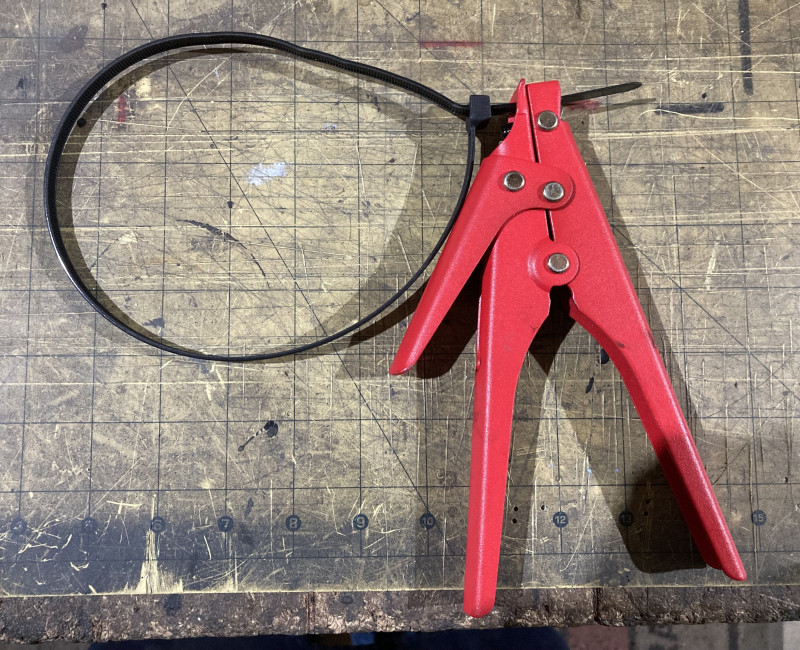
- Showing without tire/rim, The small handle on the left side is the cutter if you want to cut the tails off, But i re-use the cable ties as they are expensive to use once £15+ per 100 so don't use this.
Painting next week.
Re: 2024 Jagdpanther No43 build log.
Posted: Sat Jan 18, 2025 7:33 pm
by yves mouton
Hi Chris,
The extruder is a good idea, thanks for sharing,
i orderd one.

Best regards Yves
Re: 2024 Jagdpanther No43 build log.
Posted: Sun Jan 26, 2025 1:39 pm
by chris fry
Applying paint,
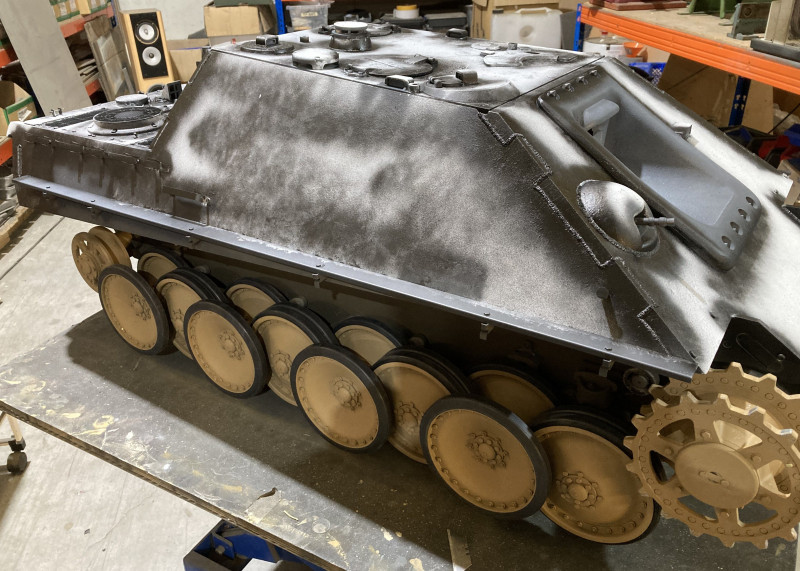
- Shading, Applying a matt black on top of the high build primmer to areas that would have a natural shaded area or edge,
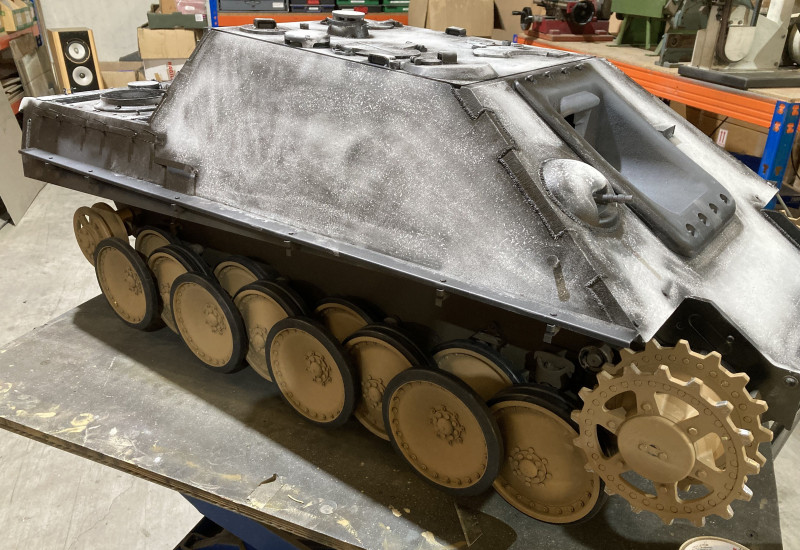
- Rubbing off most of the matt black!!! Using a fine sandpaper, You want the black to sink in to the textured areas that would naturally have a darker shading.
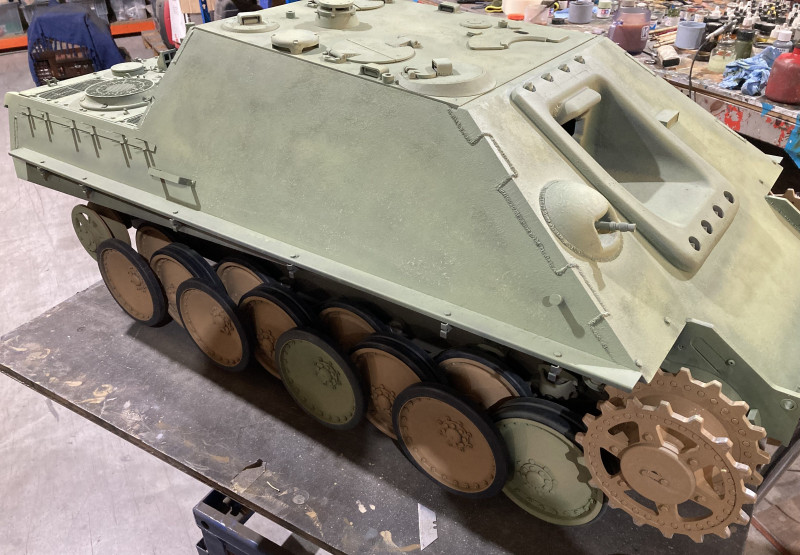
- Light green base color applied, (applied with airbrush), You want this to be as thin as you can apply it, As you don't want to cover over the dark shaded areas you have done already, (ignore the reflection areas from the overhead led lights)
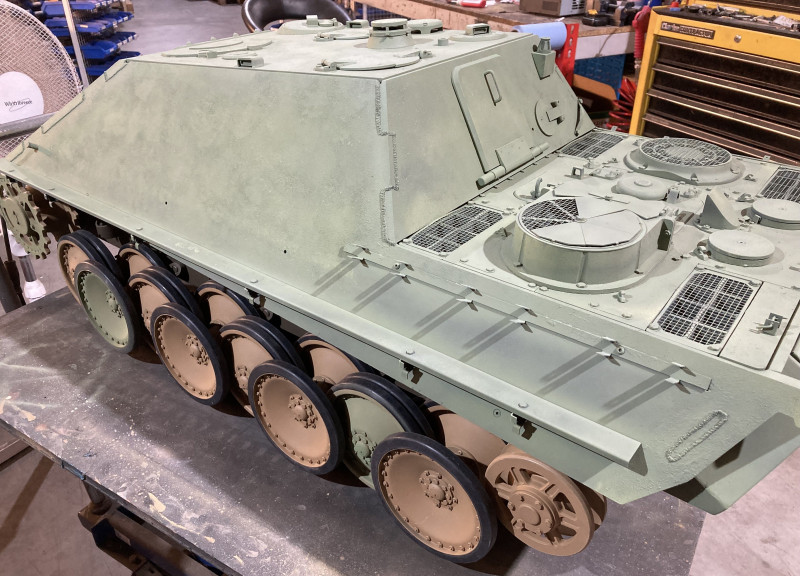
- You can see the darker patches coming through the light green, Again trying show different shade colors and to give the color some depth, If you look at anything painted in different light and angles there are loads of different colors and this is what we are trying to achieve, (ignore the reflection areas from the overhead led lights)
Difficult for me to explain but hope the pictures make sense, There are a lot more stages to go but this is the start of building up the weathering effect, Next will be the camouflage pattern,
Re: 2024 Jagdpanther No43 build log.
Posted: Sun Jan 26, 2025 4:18 pm
by Damon Resch
This is very helpful Chris, the photos and explanations are spot on. Thank you for sharing your work with us.
Re: 2024 Jagdpanther No43 build log.
Posted: Thu Jan 30, 2025 6:11 pm
by chris fry
Camouflage anyone,
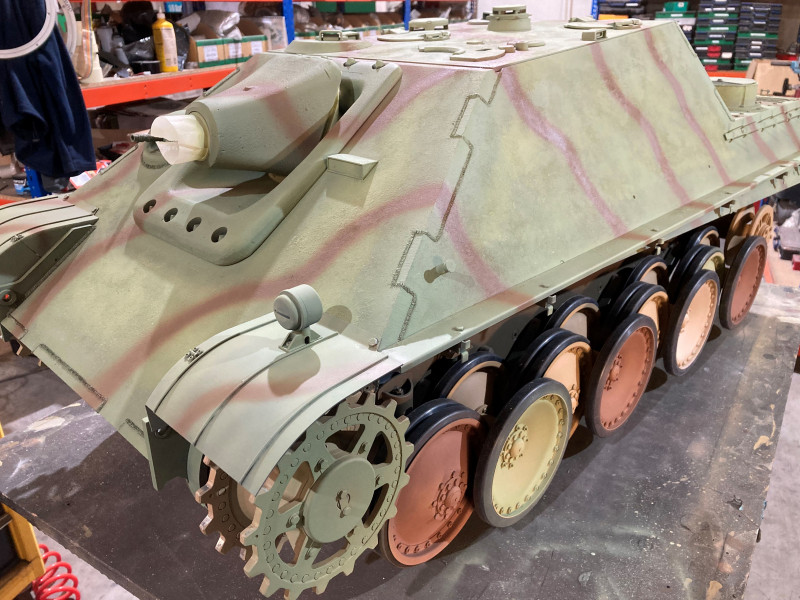
- Applying the first color stripes with airbrush, Used Tamiya flat brown.
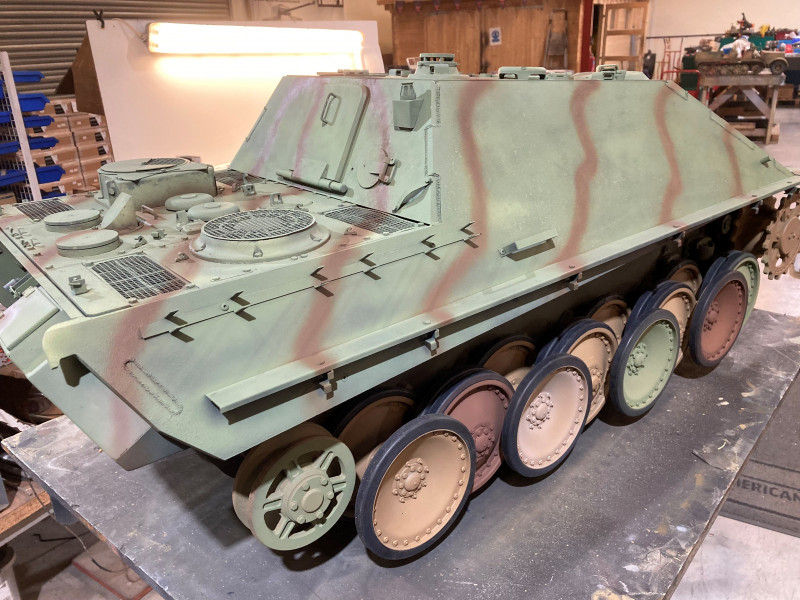
- No masking with this scheme just let your artistic license flow,
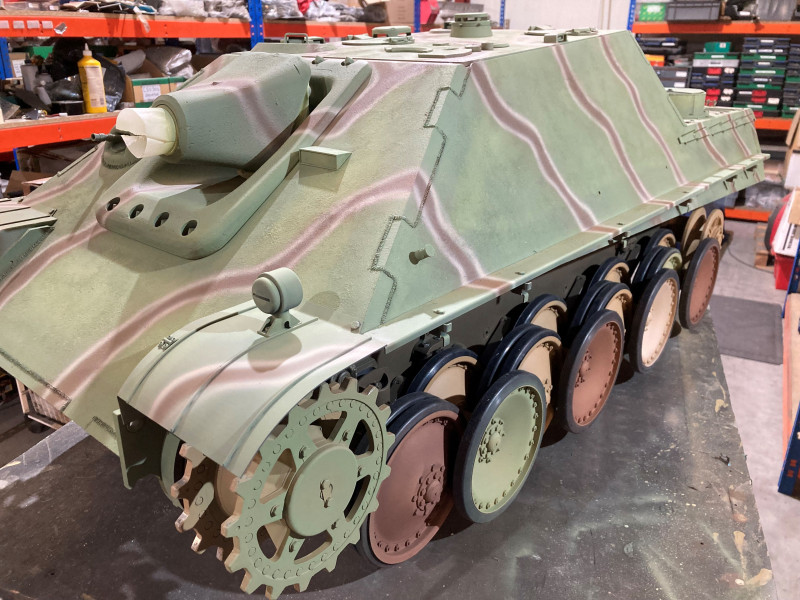
- Applying second color stripes, Used Tamiya light sand,
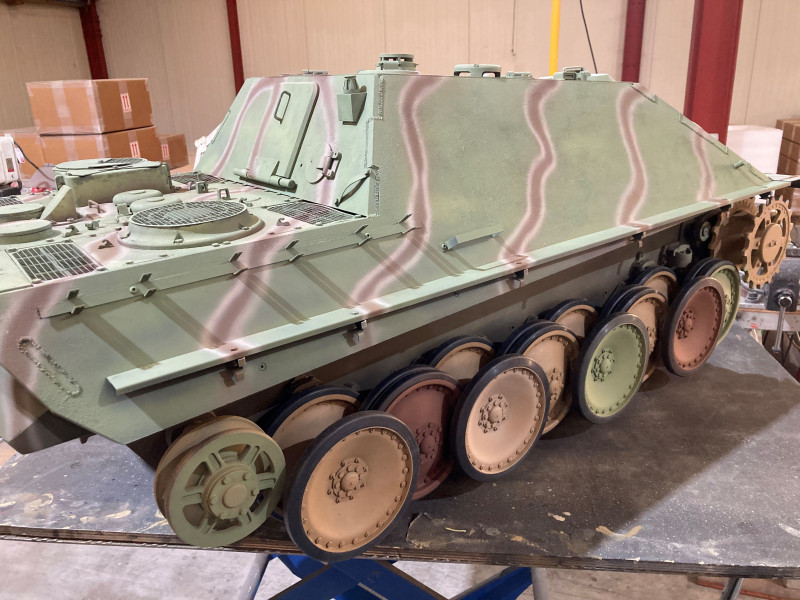
- If you slightly angle the airbrush in on itself it will avoid to much paint bleeding on to the green/brown gives a bit more on a defined line.
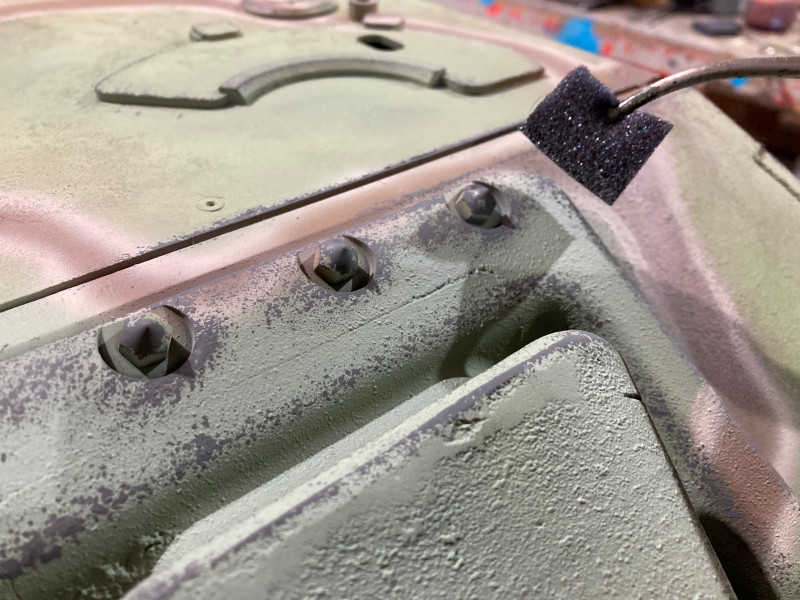
- Applying the paint chips, Simply use a small peace of foam dipped in matt black paint then VERY lightly stipulate on areas of heavy wear, Time consuming but very rewarding oddly. Starts to bring some age to the model.
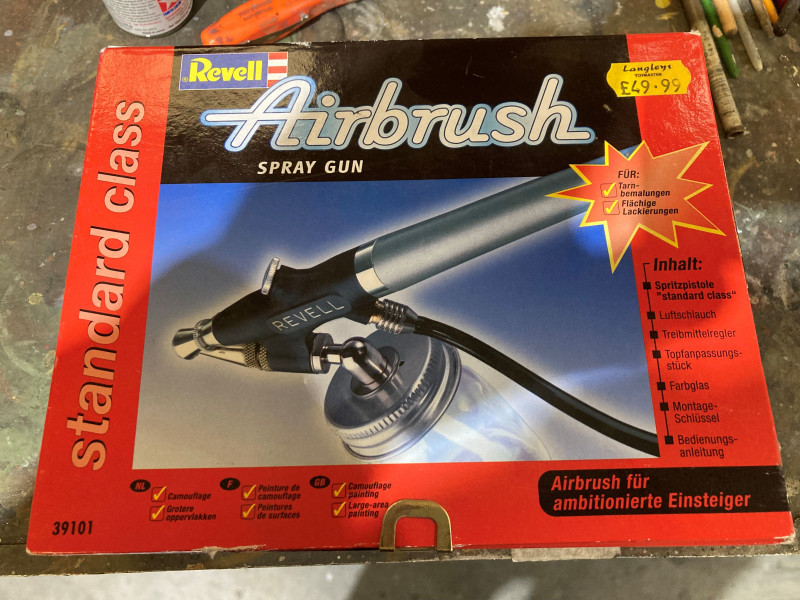
- This is the airbrush make used, Really simple to use and clean, Priced around £50,
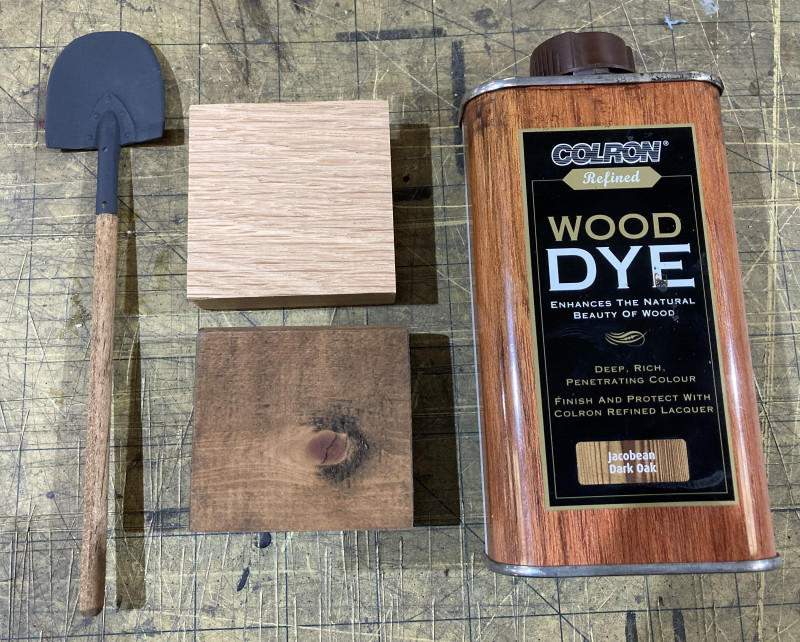
- Wood dye used to stain any wooden parts on the model, Just apply with a cloth, Several coats will give more age depth to the item,
A lot more ageing to be done, side skirts to be fitted and stripes applied,
Re: 2024 Jagdpanther No43 build log.
Posted: Sat Feb 01, 2025 6:41 pm
by chris fry
More progress with the weathering,
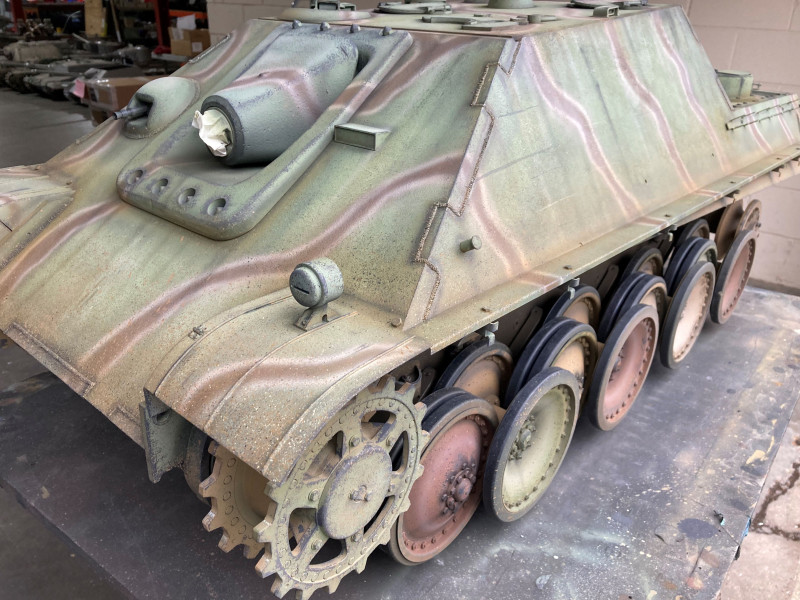
- Overall effect coming along,
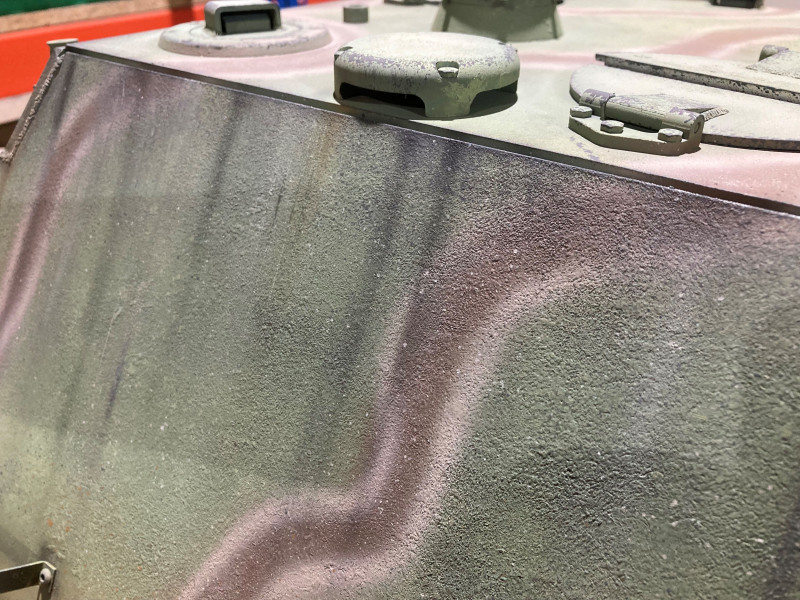
- Streaking effect, Replicating dirt being washed down the sides. Applied with airbrush,
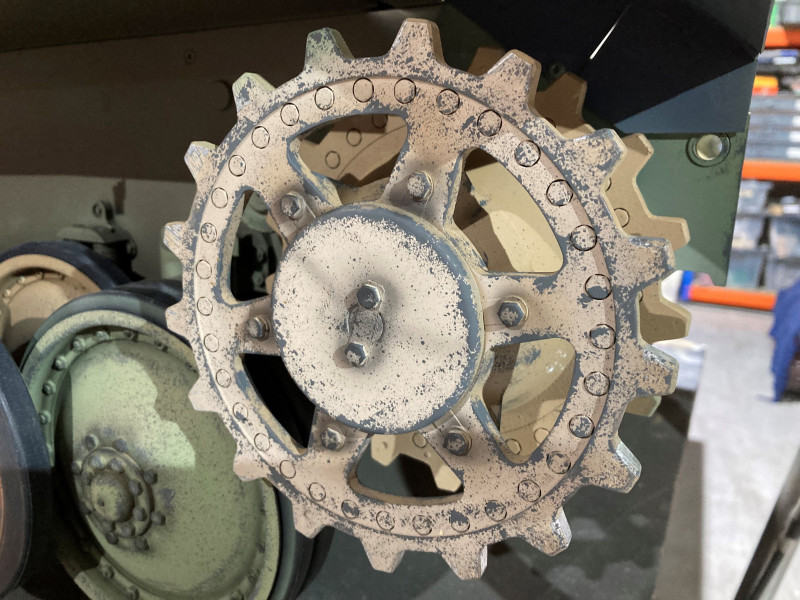
- Sprocket after chipping effect, Again using sponge,
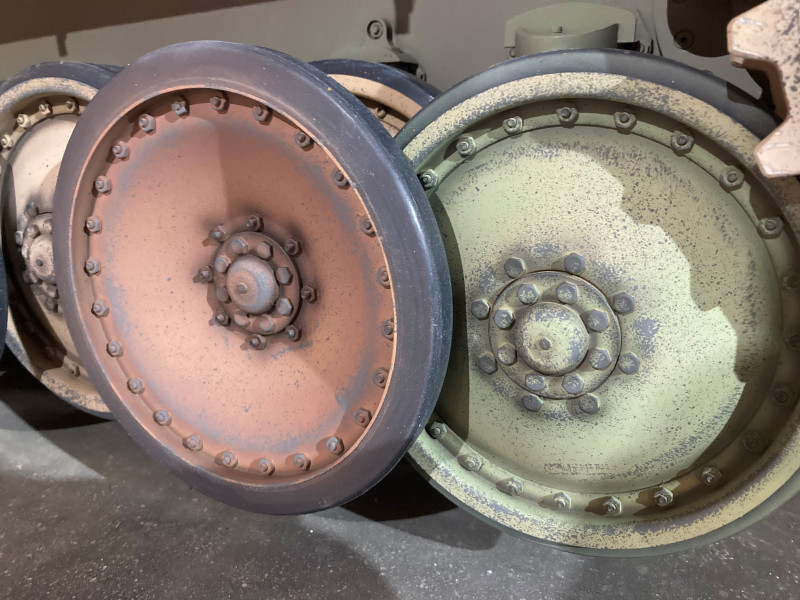
- Roadwheels after chipping effect,
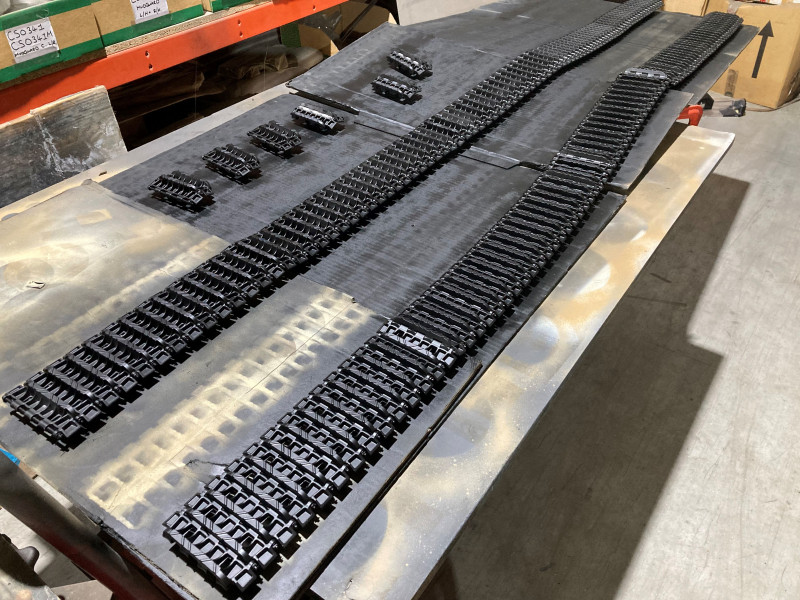
- Track painting, First a light coat of etch primmer then a coat of matt black paint, A lot more work here to do.
Hope this is being of some help to other builders,
Re: 2024 Jagdpanther No43 build log.
Posted: Sat Feb 01, 2025 7:53 pm
by Derek Attree
Hi Chris
Looking good .
Regards Derek