Page 10 of 20
Re: Tiger 1 2021 no. 13
Posted: Wed Jun 08, 2022 6:07 pm
by Gary Richardson
Hi all
Today I decided to modify the turret protection ring, I used the information from the Tiger site Vince kindly pointed me and also some advice David had given to me, I started by drawing the positions of the holes on a piece of wallpaper. It was quite easy once I had the degree lines sorted out with a protractor. The Armortek part was cut into three sections and the first section was drilled and used as a template for the other two. I drilled 2.5mm holes tapped out to 3mm to take the M3 x 6mm bolts that were inserted beneath the deck. The bolt holes that were not used on the full size were drilled out to 3mm and will be left as open.
The bolt holes that were used have had the top of the hole filled with Milliput which was depressed a fraction to represent the tapered bolt heads.
I used Milliput to get the angled outer edge of the Turmfugenschutz using a narrow chisel scalpel blade held at the correct and as I turned the deck round on the turret bearing. A wet finger was used to smooth out any irregularities.
Regards
Gary
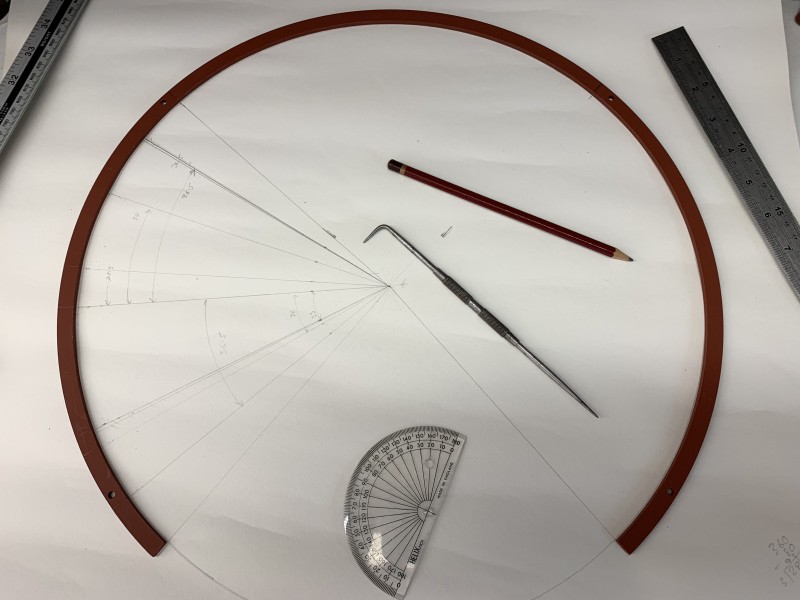
- Preparing to cut and drill the ring
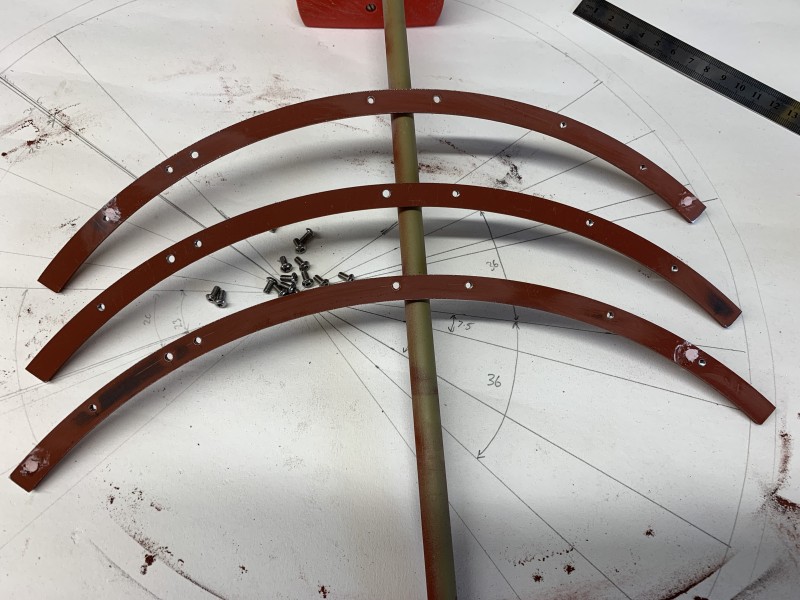
- Drilled and tapped to M3
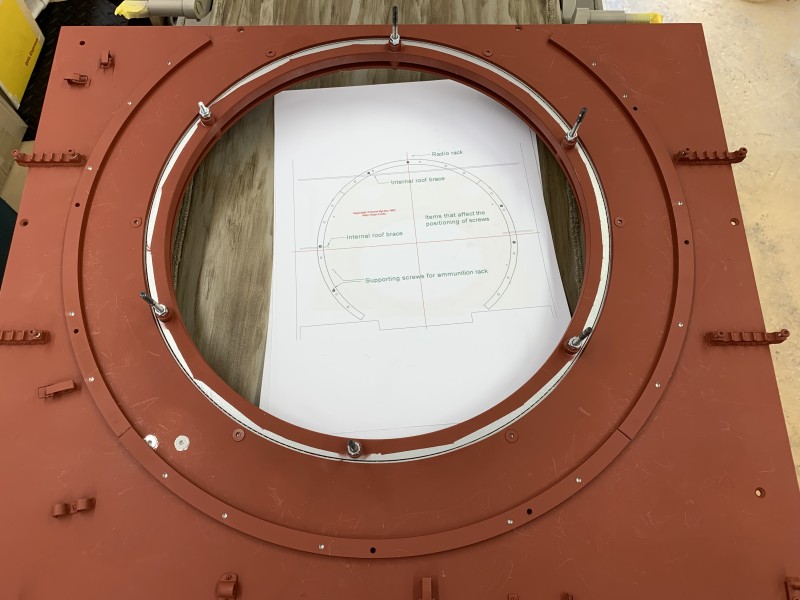
- Bolted in position from the underside of the deck
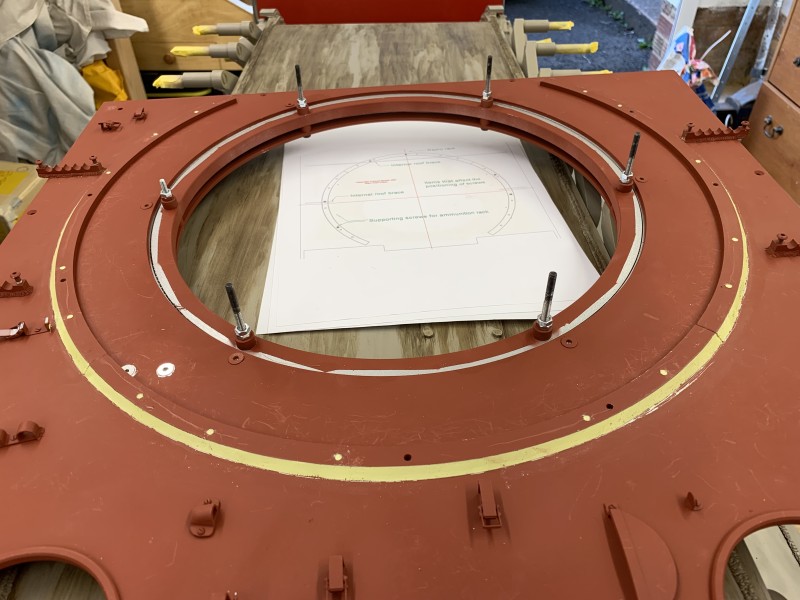
- Good old Milliput, outside edge angle added.
Re: Tiger 1 2021 no. 13
Posted: Sat Jun 11, 2022 6:13 pm
by Gary Richardson
Good afternoon
I made a bit more progress with the deck after finishing the turret protection ring. Most of the day has been spent airbrushing the front and rear decks, fittings and hatches as well as doing some work on the cupola. I also popped out to get some Citadel satin matt varnish which will act as a barrier between the acrylic and the oil paints and pigments I am going to use for the weathering and make it easier to correct any mistakes.
The hull is still upside down on the trolley at the moment as I want to experiment with weathering on the underside of the panniers while I have easy access, after that the hull will be righted and the motors and batteries will be installed and it will be too heavy for me to move it.
The Zimmerit is another thing I have started to think about and am leaning towards using tile adhesive with some PVA added to it to aid adhesion.
If anyone has a zimmerit tool handy could you let me know how many teeth there are per inch ( or centimetre ) and what depth they are and I will have a go at making one out of brass or convert a screw thread gauge.
Also does the acrylic paint adhere ok to the tile adhesive ?
I have set the electronics up in the garage while I get used to using the transmitter and how the motors react etc . I also received the Mosfet switch I ordered for the lights, it's very small and neat and can handle up to 30v and 21A. It plugs into the receiver and has terminals for power and load.
Regards
Gary
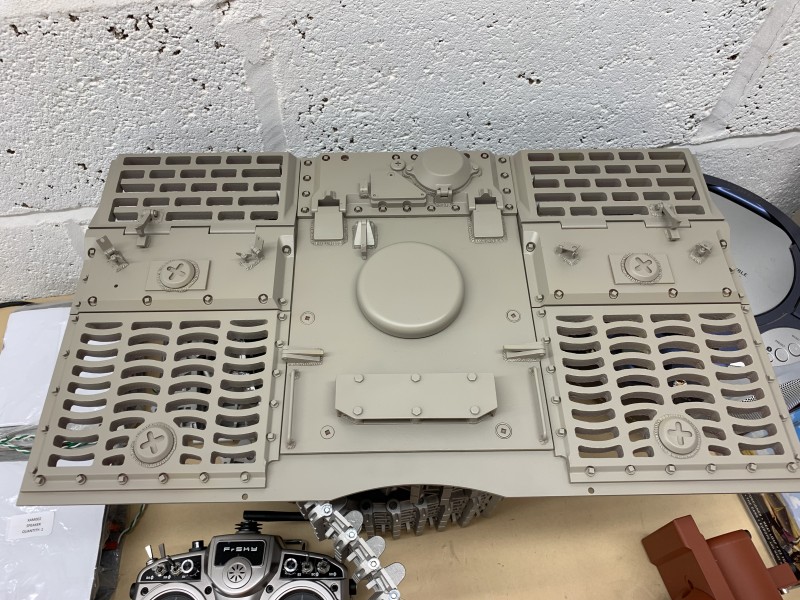
- Rear deck
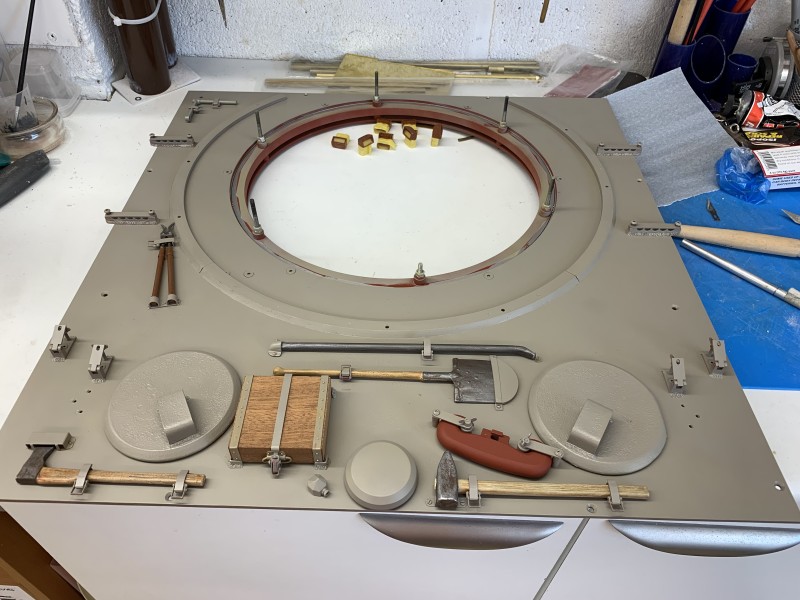
- Its all very clean at the moment
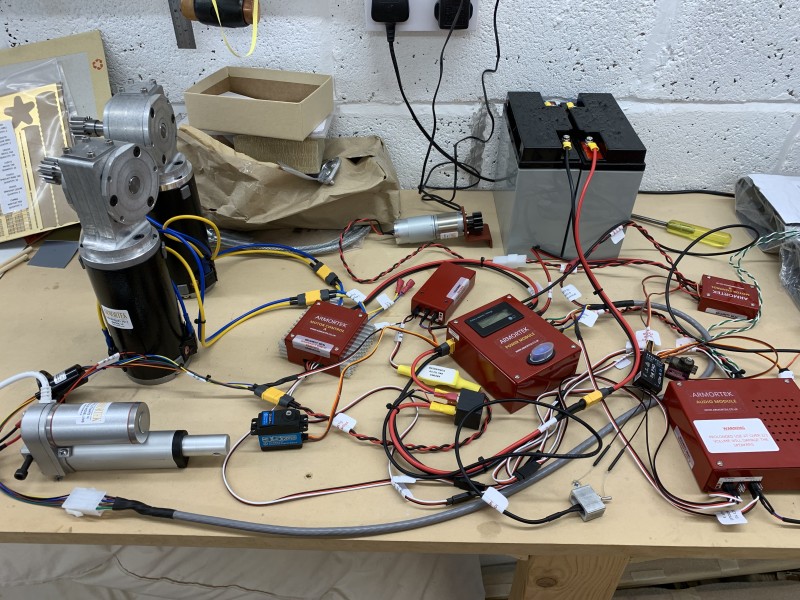
- Will it all fit in the hull ......
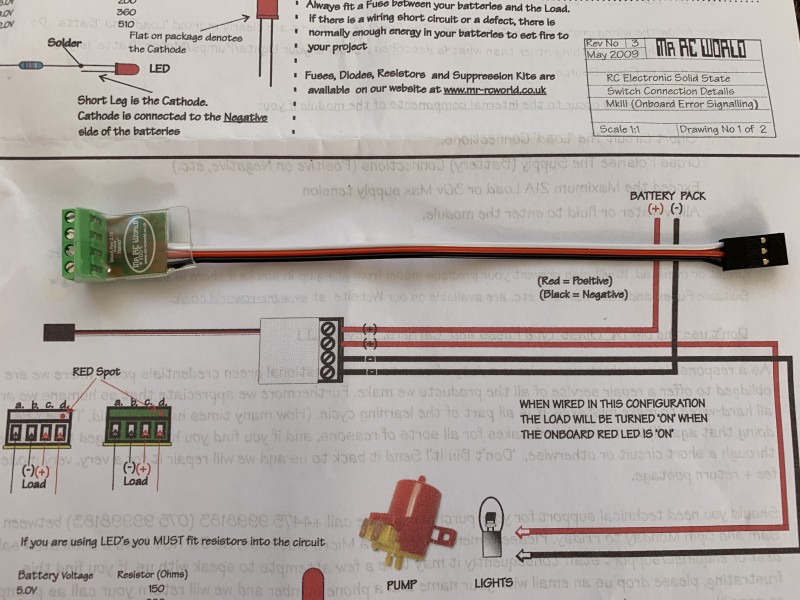
- Mosfet power switch for lights
Re: Tiger 1 2021 no. 13
Posted: Sat Jun 11, 2022 9:08 pm
by Vince Cutajar
Gary, I used pre-mixed tile adhesive for the zim. My first attempt was horrible and after 24hrs decided to remove it and try again. Had to use a hammer and wood chisel to take it off!
Be careful if you want to add PVA to pre-mixed tile adhesive as it may become too "watery" to apply to the tank. Experiment first.
I seem to have misplaced my zim tools but sending you an email which you might find interesting.
Vince
Re: Tiger 1 2021 no. 13
Posted: Wed Jun 22, 2022 10:33 pm
by Gary Richardson
Hi all
While I work out how to make the zimmerit tools I decided to progress the turret cupola and roof. I have painted the periscopes and tinted the lenses using a green oil paint wash that still allows the clear 'glass' to show through. The lenses are covered in masking tape in the 2nd photo while I wait to see how the camouflage pattern is going to be applied.
I have had a bit of luck as my uncle was a tool maker and when I was discussing how to make the zimmerit tools and the need for a very thin angled file he told me he had a collection of swiss files which he is going to donate to me

Thanks to Vince I now have the information about the size and shape of the tools and will have a go at making them out of reinforced brass strip with a brass tube soldered on for the handle.
Regards
Gary
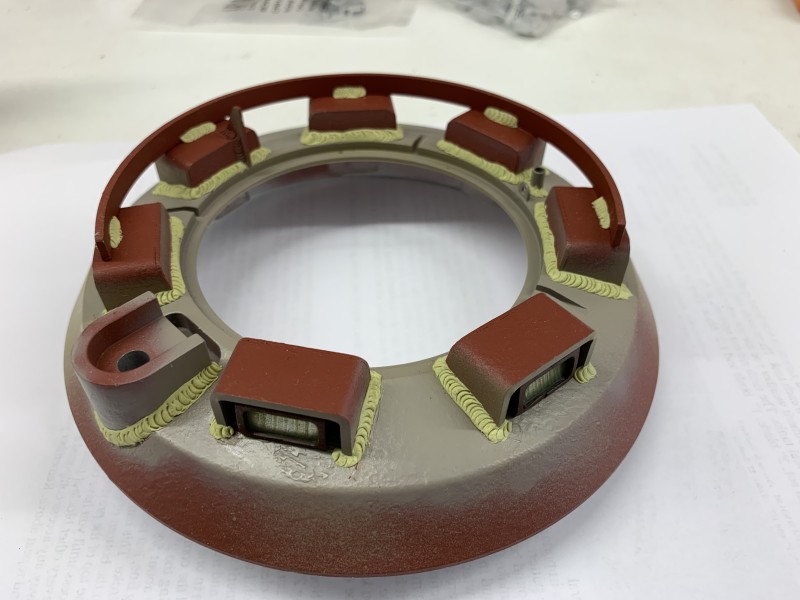
- Detailing the cupola
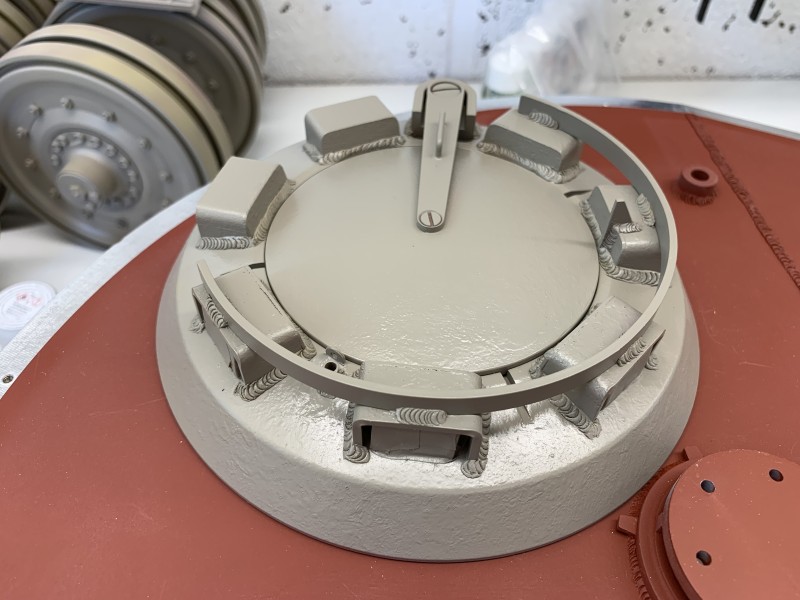
- Top coat added, ready to attach to the roof.
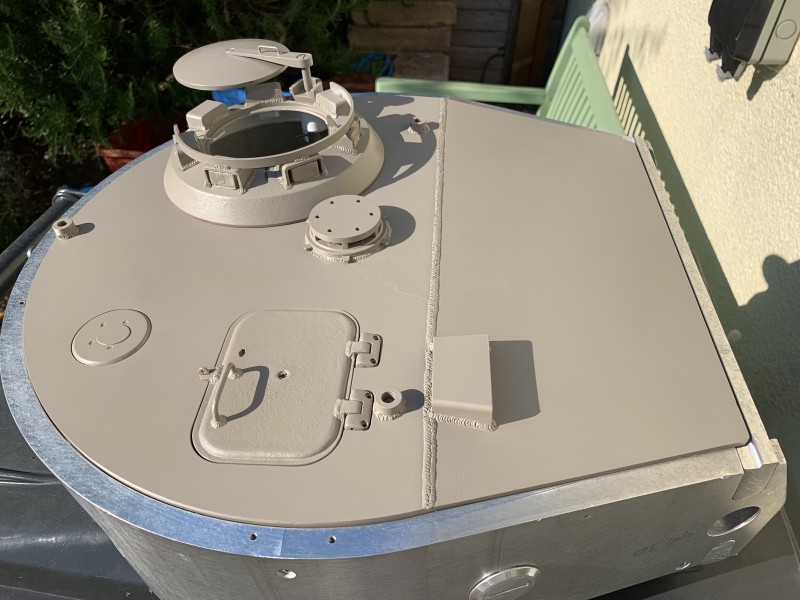
- Turret roof top coat, next step add the cuploa to turret weld.
Re: Tiger 1 2021 no. 13
Posted: Thu Jun 23, 2022 1:54 am
by Vince Cutajar
Gary
Cupula came out great. I am not sure if it's hidden in the photos, but there should be two cupola umbrella support tubes.
https://tiger1.info/EN/Umbrella.html
Vince
Re: Tiger 1 2021 no. 13
Posted: Thu Jun 23, 2022 10:24 pm
by Gary Richardson
Thanks Vince, well spotted, glad you are keeping me on my toes

. I will add the second one.
Regards
Gary
Re: Tiger 1 2021 no. 13
Posted: Fri Jun 24, 2022 5:56 pm
by Gary Richardson
Hi all
I have added the missing umbrella post to the cupola and attached the cupola to the turret complete with the obligatory Milliput weld.
Next job was to have a go at making some Zimmerit tools, not quite as easy as I thought it would be. Even with the swiss files set I received today from my uncle I found only one file out of twelve had the correct profile to do the teeth on the zim tool. First couple of attempts went wrong due to rushing to do the teeth so I went for a coffee and decided to have a go at the 1/2" tool . Slow and steady is definitely the way to go and I am reasonably happy with the result.
I am at Tankfest tomorrow so the 1" and 2" tools will have to wait until next week. I am looking forward to seeing the Churchill at the Amortek stand and getting some more info on Tiger mods.
Regards
Gary
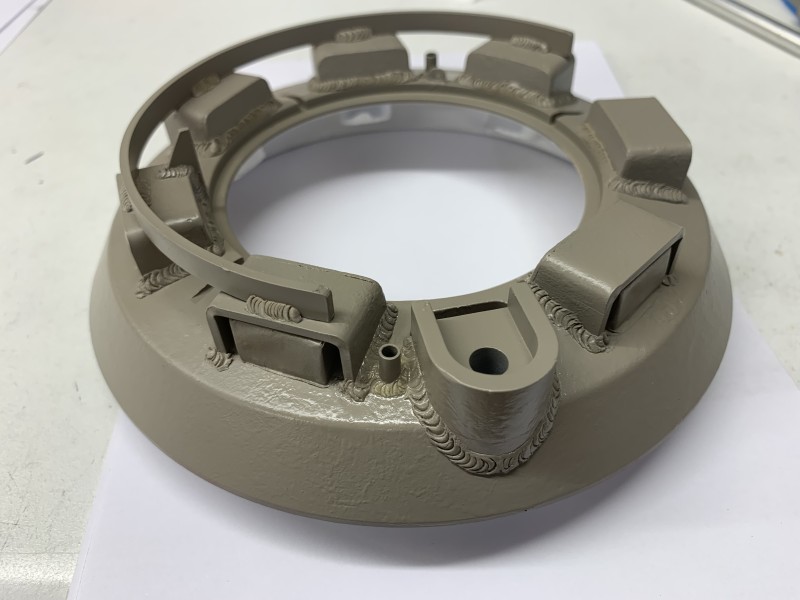
- Second umbrella post added
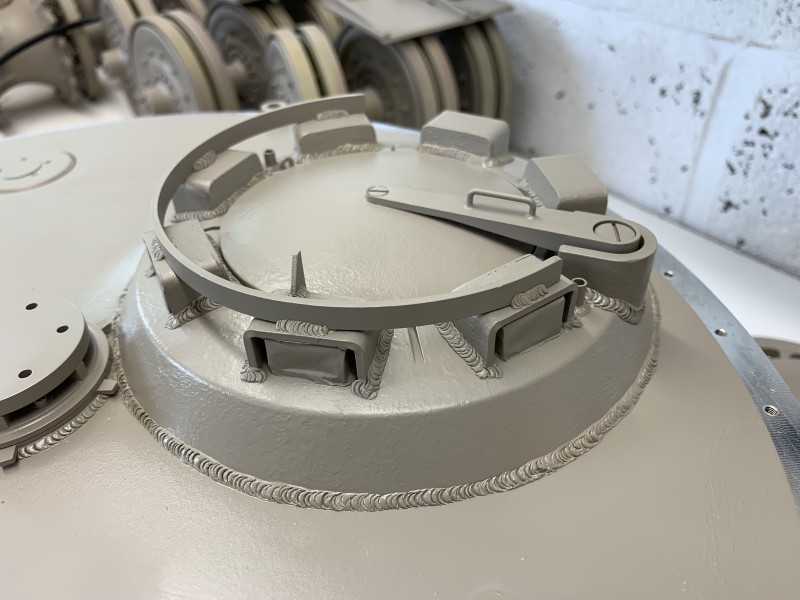
- Cupola to roof weld
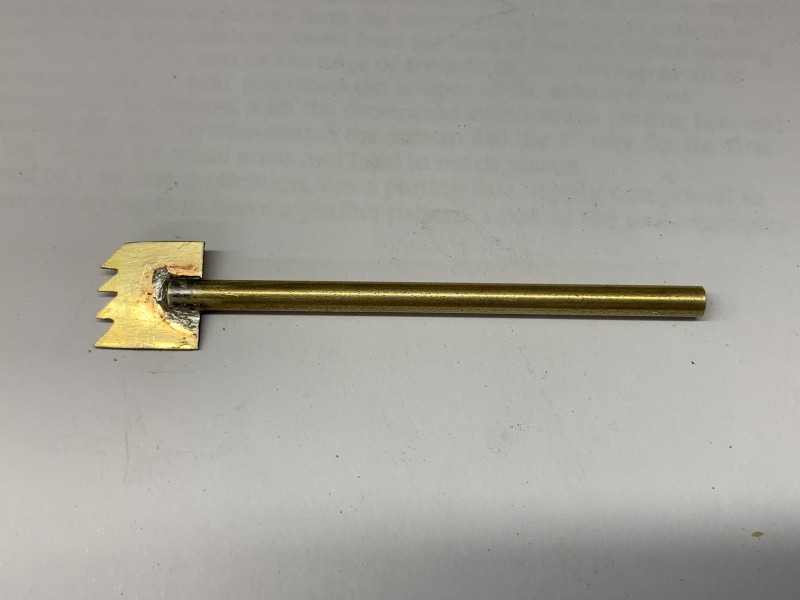
- Just the 1" and 2" tools to make.
Re: Tiger 1 2021 no. 13
Posted: Fri Jun 24, 2022 6:14 pm
by Robert Tanzer
Please show us how you made the zim tools
Robert
Re: Tiger 1 2021 no. 13
Posted: Fri Jun 24, 2022 10:27 pm
by Gary Richardson
Robert Tanzer wrote: ↑Fri Jun 24, 2022 6:14 pm
Please show us how you made the zim tools
Robert
Hi Robert
Bob Grey has kindly offered to lend me his set of Zimmerit tools but I will make a 25mm tool next week once I know the tooth count on his set. It would be good to have different TPI tools for the mantlet area and I will upload the photos and description once completed.
The small tool I made today was quite simple, 0.5mm brass strip with the teeth set at 1.9mm depth. I have varied the tooth depth slightly to avoid the zimmerit looking too neat. I am working on 9TPI hence only 4 teeth on the 12mm tool. The handle is just brass tube with a slot cut in the end and the brass strip is soldered into the slot. The important thing is finding the correct file to cut the teeth, the one I used is a diamond shape and very narrow so keeping once face vertical gives the correct tooth angle.
Regards
Gary
Re: Tiger 1 2021 no. 13
Posted: Wed Jun 29, 2022 10:03 am
by Gary Richardson
Hi all
Firstly many thanks to Bob for lending me his sets of Zimmerit tools which arrived today. His generosity is one on the reasons I like this forum so much, every one is willing to help each other.
I have not made much progress over the last couple of days although I have done the welds for the mudguard stand offs which was time consuming but enjoyable. I am not sure if these will be seen once the Zimmerit is applied but hopefully just enough to add realism.
I was starting to air brush some shadowing under the sponsons when the air brush decided to start playing up and despite stripping it down to component parts and thoroughly cleaning them and adjusting the needle it refuses to spray correctly. It was a cheap set I inherited so I suspect the thinners and cleaners have damaged the jet area but visually it all looks correct. I will invest in a new compressor and a Harder and Steenbeck dual cup and nozzle airbrush set I have seen on line.
Tankfest was great and I enjoyed speaking to Monique and Kian about the Churchill and Hetzer, I must say a big thankyou to Simon who took the time to explain how he painted the Sdkfz 9 (FAMO) and the mods he had made to it, it was great to see it close up and I am in awe of your skills

I picked up an armoured MG34 barrel from Dave Dibbs and ordered a Dragon MG34 to add to the cupola mg mount so that's another little project for an evening. Now, where did I leave the tile adhesive....
Regards
Gary
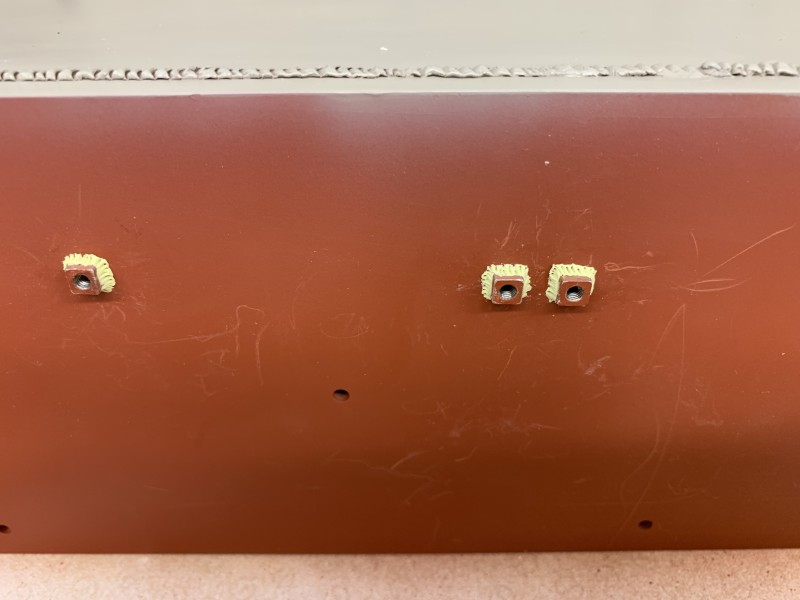
- Fiddly job but hopefully worthwhile.
Re: Tiger 1 2021 no. 13
Posted: Wed Jun 29, 2022 7:52 pm
by Donald Suttie
Garry
I think you may find the Harder and Steenbeck needles a bit fine for a tank of this scale,the kit comes with 2 needles so you can interchange them as well as the cups (i own one myself) i have found my Iwata airbrush is much more suited to this size of model,i use a Iwata Eclipse HP-CS,which has not let me down so far
i have started painting/weathering the tracks and touched up the wheels after final assembling them and its worked well
the steenbeck is for really detailed work,or Graphic design where ink is airbrushed,while i still have mine its not my go to airbrush
i also use the Sparmax AC-501X Compressor ,which is just a rebranded Iwata,and is of good quality,i had a cheap Chinese tank type compressor which lasted 10 years,but it did have moisture issues from time to time,but nothing a filter trap didnt fix
thought i would give my thoughts as as the Steenbeck can be expensive these days
Donald
Re: Tiger 1 2021 no. 13
Posted: Wed Jun 29, 2022 9:07 pm
by simon_manning
Hi Gary, A good Airbrush to use on this scale is the Revell intermediate level Airbrush, cannot remember the type number, but it;s metal with glass jar for the paint, usually cost's around £30 pounds, you can spray anything through it, Thinner's, water based paint, model washes, There's only one rubber seal in it and is Resistant to chemicals, just keep it clean, Most Airbrush fail due to using Thinner base paints, the seals melt or go soft even after one use, i have tried them, all the best simon.
Re: Tiger 1 2021 no. 13
Posted: Sat Jul 02, 2022 9:09 am
by Gary Richardson
Robert Tanzer wrote: ↑Fri Jun 24, 2022 6:14 pm
Please show us how you made the zim tools
Robert
Hi Robert
As promised some photos of how I made the Zimmerit tools. I will still be using Bob's stainless steel set as they will be easier to clean but will use mine for the mantlet areas to see how they work.
Brass strip is 0.5mm thick and 5mm brass tube used for the handles. The only file I found that worked was the diamond shaped one in the photos. Tooth depth is 1.9mm but you need to make them irregular.
Regards
Gary
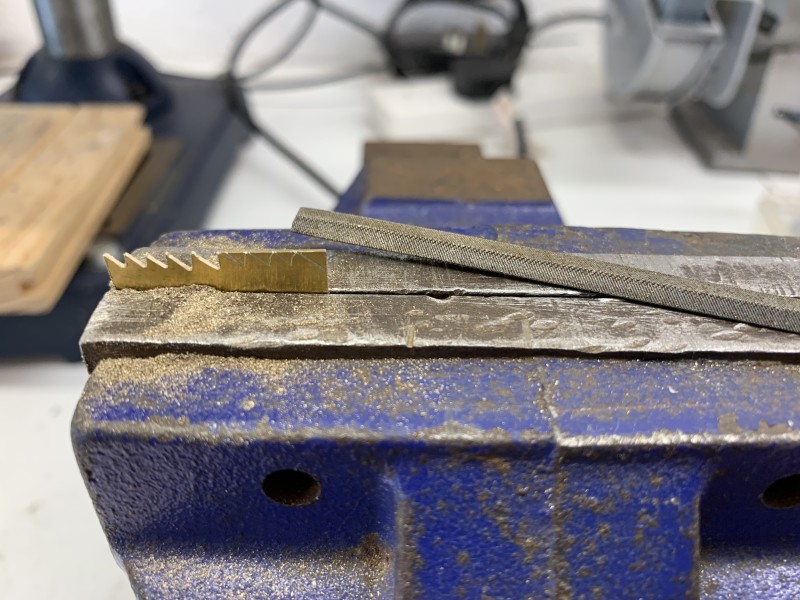
- take your time with the teeth , it is very easy to over file them.
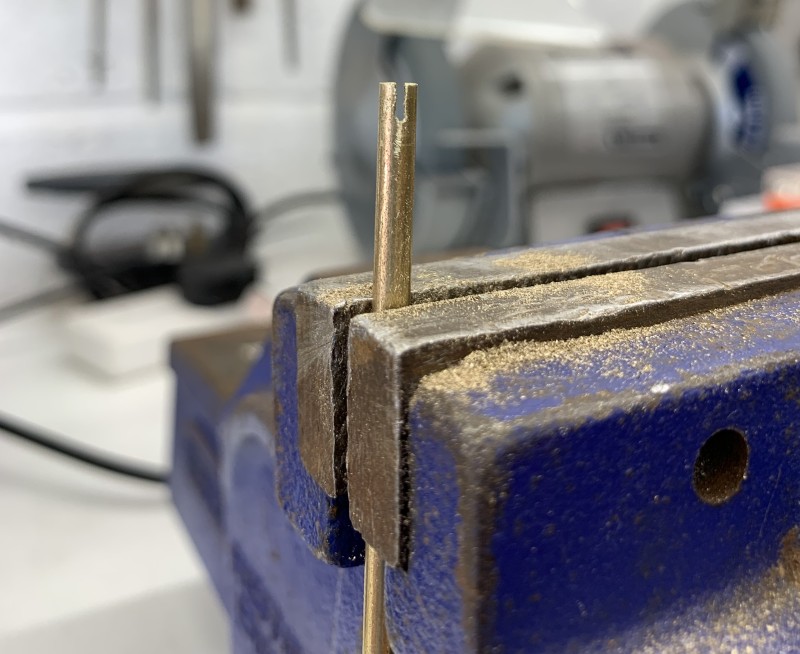
- A simple hacksaw cut for the blade to fit in.
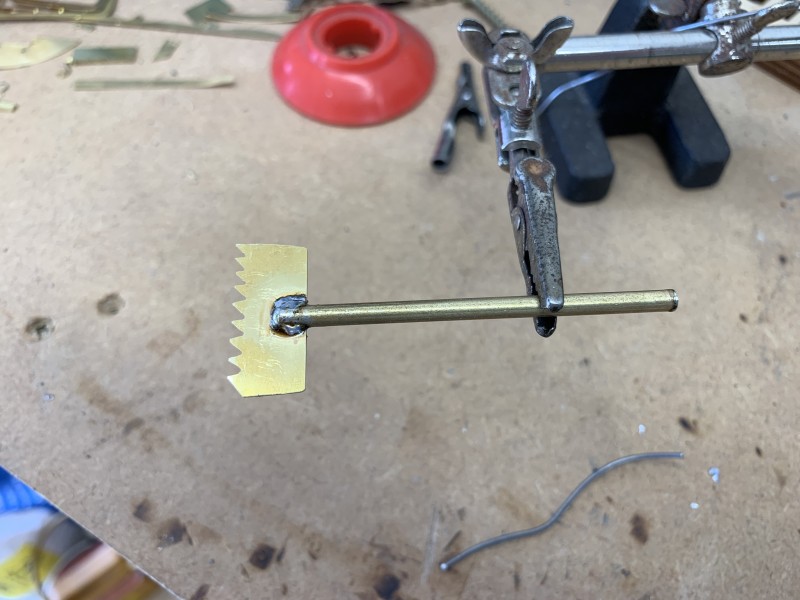
- solder them together ensuring the handle is in line with the blade.
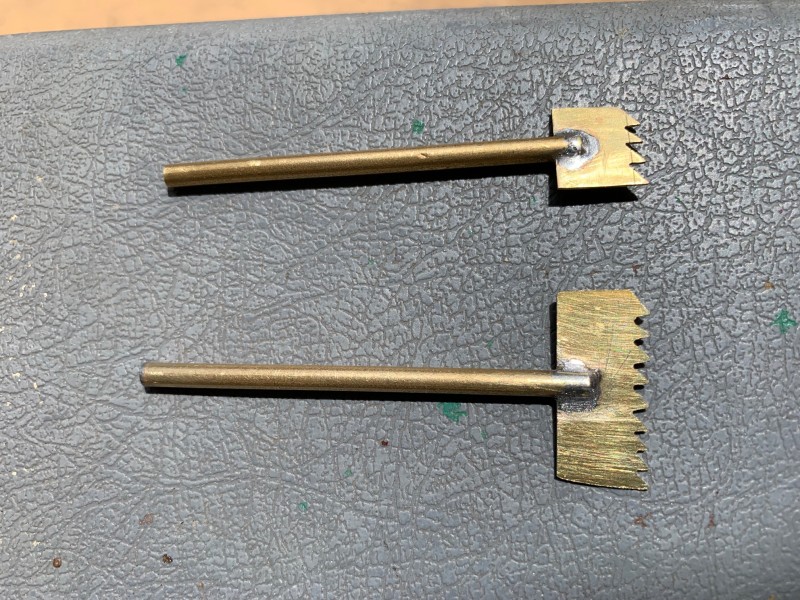
- The result so far.
Re: Tiger 1 2021 no. 13
Posted: Sat Jul 02, 2022 9:25 am
by Gary Richardson
Hi all
While I wait for the new compressor and airbrush to arrive I felt the need to turn the hull the right way up and see how it looked with the decks and turret assembled. I think I have spent so much time doing the small detailing I need to get my mojo back. It also means I can mark up areas that have to be left clear of Zimmerit, especially on the rear hull plate.
Having spent days scouring the web for airbrush and compressor reviews plus the very helpful advice from other tankees I decided on a Sparmax AC50x
compressor and an Iwata Eclipse CS airbrush, the airbrush has a 0.35 nozzle and needle which does very fine line to a 50mm broad spray, I can also get a 0.5mm needle/nozzle set for even larger spray areas.
Regards
Gary
Photo should read Unlucky for some..
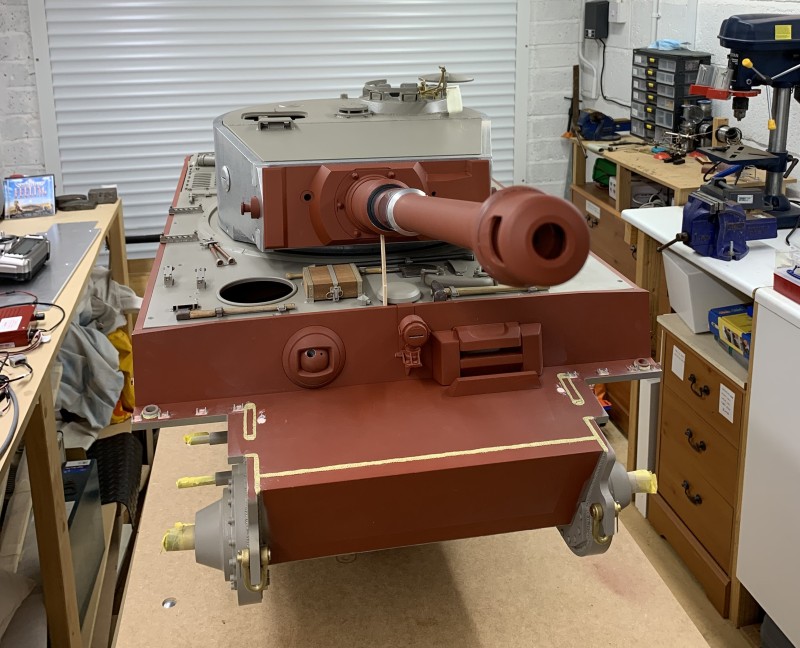
- Tiger 13. Unlikely for some.....
Re: Tiger 1 2021 no. 13
Posted: Sat Jul 02, 2022 9:31 am
by Robert Tanzer
Thank you for showing how you did your zim tools.
Robert