For more complicated markings, involving irregular shapes, multiple colours and which may need to be repeated, decals are ideal. Decal paper is widely available and cheap. "Experts Choice" is a leading brand. It comes in ink jet and laser ready versions and with transparent and white background. There are a couple of pitfalls to note.
Bear in mind the obvious, that printers don't print white. If your marking has areas of white, it might seem logical to use the white background. The decal paper is very thin indeed and the colour under the decal will show through and compromise the white. It's much better to stick to the trans parent sheets and take precautions to provide a painted white background. I'll show this below.
The second issue is also related to the thin carrier film. If you print and attempt to set the decal, the chances are that it will disintegrate. The solution is simple. Once the ink is dry, spray the decal twice with an acrylic varnish, such as Citadel Purity Seal. That will both protect the decal and give it sufficient body to be robust.
Final tip is to use decal softening and setting fluids to ensure that it adopts the shape of the underlying surface. This is really important if you're trying to apply it to cast texture or zimmerit.
I've selected three examples, a simple text registration plate,a complex label on a fire extinguisher and finally a more complicated shield shaped badge.
As ever, start with reference photos.
The artwork is created in Powerpoint. There is no need to fear Powerpoint. Its drawing tools are simple to learn and powerful enough for our purpose. There are more powerful programmes like Adobe Illustrator which have bitmap to vector tracing which in theory make it easier to get an exact likeness but they're expensive and complicated. I do use Photoshop Elements to refine artwork and I'll give an example below. Again, it's not hard to learn.
In this case the artwork is a simple text box, white on black. Open a new blank presentation, cut and paste the original markings onto the slide and then create a copy of the marking. In this case, the registration number plate is a simple text box. The only challenge here was to find a true type text (font) which matches.
Now you can play around with the size to match the model. To use the decal sheets efficiently, I cut them into 10 x 15 cm pieces and I layout the decals in Powerpoint selecting the standard 10 x 15cm photo paper size. That way, you can get an exact fit for the decals by adjusting the size of the images on your Powerpoint blank slide.
Once you're happy, go ahead and print onto the decal sheet, apply the varnish and when thoroughly dry, cut out the decals.
This registration plate has white text. To provide a solid background, mask an appropriate area and spray several thin coats of white. The decal will then sit on the white, which will show through the transparent carrier film.
Soak the decal in lukewarm water, slide off onto the model, using setting and softening fluid to help it conform to the contours of the model. Finally, give it another overspray of varnish to seal.
That's the process, very simple and straightforward and totally repeatable. The remaining examples show how to create some more complex markings. I'll show the creation of the artwork but not the rest of the process, which doesn't change.
The second example is a fire extinguisher label. It's largely text, which is easy to create in Powerpoint, using text boxes. It also contains a graphic to show how to operate it, which would be very difficult to draw. The secret here is to use part of the reference photo to fill in the graphic.
The reference photo:
Text boxes drawn in Powerpoint:
Graphic imported into Powerpoint, cropped to size and inserted into decal:
It's worth mentioning that if you want to match an original colour in Powerpoint, there is an Eyedropper function in the Shape Fill Menu, which allows you to sample an original colour from a reference photo (here British Army Deep Bronze Green) and apply it to your decal. Very useful.
The decal is now complete, although you can see the join between the bit created in Powerpoint and the imported graphic:
It's beyond the scope of this topic but you can use programs such as Photoshop Elements to blend images like this (and here to apply some "distressing" ie scratches and damage):
The final example shows how to create a design from scratch using the Powerpoint drawing tools. The decal is an Australian Task Force marking from Vietnam, for which a reference was available:
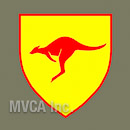
- 1ATFVietnam.jpg (10.29 KiB) Viewed 3362 times
The decal was drawn using the Powerpoint Freeform drawing tool, very roughly to shape. It was then magnified and, using the Edit Points feature, the shape was pulled, pushed and adjusted until it was correct. I won't go into any more detals here, except to say that it takes a bit of practice but will produce great results. If you superimpose your drawing over the original, you can quickly adjust it to the correct shape.
Final result:
This example of a German 15 Pz Div marking was drawn using the same technique:
That's it. Start simple and learn on the job!
