Hi mike. i did follow part of your build on the rich stinchcombe website.
superb attention to detail. i have used this for a reference several times but missed the turret difference. thanks very much. keep posting.
simon manning
re-building mid tiger
-
simon_manning
- Posts: 2061
- Joined: Fri Nov 02, 2007 8:51 pm
- Location: new forest,hampshire,u.k.
- Been liked: 1767 times
-
Allan Richards
- Posts: 743
- Joined: Thu Jul 12, 2007 10:34 am
- Location: Kent
- Been liked: 10 times
Simon,
Here are details on the grub screws
http://www.rctek.com/fixings/info_fixin ... crews.html
You could use the plain cup hd or knurled cup hd screw.
Here are details on the grub screws
http://www.rctek.com/fixings/info_fixin ... crews.html
You could use the plain cup hd or knurled cup hd screw.
Allan Richards
-
Stephen Mason
- Posts: 72
- Joined: Mon May 26, 2008 11:06 pm
- Location: Romsey. Hampshire
- Has liked: 1 time
- Been liked: 4 times
Hi Simon,
It was great to meet you today and see your tanks. Thanks also for the advice that you gave me about the best way to go about certain things with regard to the build of my Tiger and suppliers of parts.
It was a shame about the weather though as we did get wet "wading" through the newly formed river that was making its way down into your back garden. Can I claim for a new pair of shoes on your insurance please?
Anyway what can I say, ABSOLUTELY AMAZING work.
I certainly have come away with the I wants after seeing what you have done to your Armortek Tigers especially your mid Tiger 1 that you are building at the moment. I only hope I can get my Early Tiger to a similar standard as yours, which might take quite some time if at all.
Keep up the good work.
From a new fan of yours.
Steve
-
simon_manning
- Posts: 2061
- Joined: Fri Nov 02, 2007 8:51 pm
- Location: new forest,hampshire,u.k.
- Been liked: 1767 times

-
Adrian Harris

- Posts: 5131
- Joined: Thu Jul 12, 2007 10:46 pm
- Location: Berkshire (UK)
- Has liked: 1484 times
- Been liked: 1693 times
-
Jim Slothower
- Posts: 138
- Joined: Wed Apr 02, 2008 7:39 pm
- Location: (Afghanistan)-Camas, Wa. USA
-
Allan Richards
- Posts: 743
- Joined: Thu Jul 12, 2007 10:34 am
- Location: Kent
- Been liked: 10 times
Adrian,
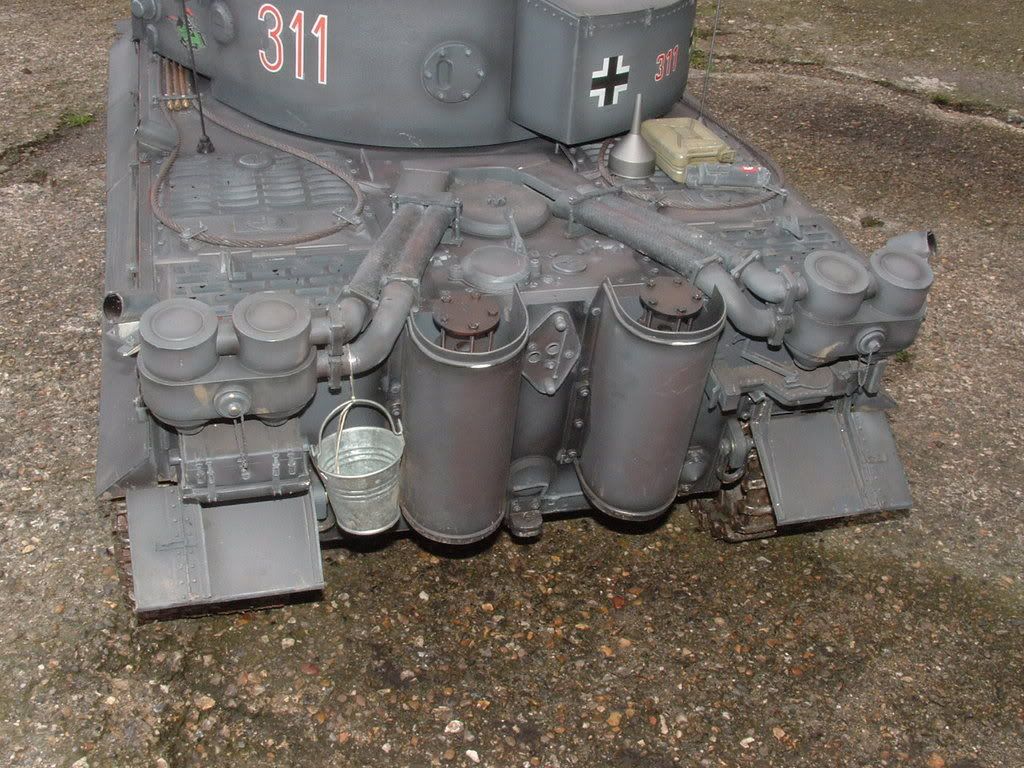
If you look at the pictures of my Tiger I've used a similar technique to Simon. I painted the panels the basic colour then shaded the edges with thinned out black paint and then used a very light shading of rust brown on the grey to shade out the middle of the panels. This breaks up the "flatness" of the panel and adds depth to the model. With olive green on the Sherman I've used black around the edges of the panels and yellow in the centre to get the depth. I would think that a cream might work to highlight the dunkelgelb panels.
The shading that Simon has created using quite contrasting colours is very skilfully done and takes quite a bit of practice to do well and create the effect he has. A top model.
Allan Richards
-
Adrian Harris
- Posts: 5131
- Joined: Thu Jul 12, 2007 10:46 pm
- Location: Berkshire (UK)
- Has liked: 1484 times
- Been liked: 1693 times
Thanks for the explanation and photos Allan, another excellent Tiger, and Sherman too 
The annoying thing is that I've had a Badger airbrush for a couple of years and never really run any paint through it.
I'm a great one for "I just need ... before I can start", which tends to lead to the situation I'm in presently with three dismantled tanks and nothing to run.
The idea of spraying these kits (and I suppose making a hash of it) after all the effort that goes into building them brings me out in a cold sweat. At least with these you can just spray them with Nitromors and start again..
Adrian.
The annoying thing is that I've had a Badger airbrush for a couple of years and never really run any paint through it.
I'm a great
The idea of spraying these kits (and I suppose making a hash of it) after all the effort that goes into building them brings me out in a cold sweat. At least with these you can just spray them with Nitromors and start again..
Adrian.
-
Tim Bowman
- Posts: 1762
- Joined: Fri Jul 13, 2007 4:53 am
- Location: Northern California
- Been liked: 177 times
- Contact:
-
Allan Richards
- Posts: 743
- Joined: Thu Jul 12, 2007 10:34 am
- Location: Kent
- Been liked: 10 times
Adrian,
There is no need to be afraid, infact I found the larger models a little easier to tackle than the small ones. An airbrush on its own is a little small for spraying the base colour on these 1/6th tanks, you either need to get your base coat put into aerosols or buy the next size up spray gun with the small jar on it. The most important thing to do is practice on some scrap sheet, an old washing machine or fridge are great to test spray. I have the dual action Badger 150 airbrush for shading, push for air and pull back for paint. I get on with this fine and have stuck with it, although there are better ones made now. Another thing is don't bother with the propellant cans they go cold and loose pressure when spraying for any length of time, ok on small models but not for an hour session. Get a compressor from B&Q or somewhere, you won't regret the expense. Mine came with the airbrush fittings, big spray gun oil gun for rustproofing the car tyre inflator and all oter bits got about £150.
Tim,
Thanks for the reply.
Allan Richards
-
simon_manning
- Posts: 2061
- Joined: Fri Nov 02, 2007 8:51 pm
- Location: new forest,hampshire,u.k.
- Been liked: 1767 times
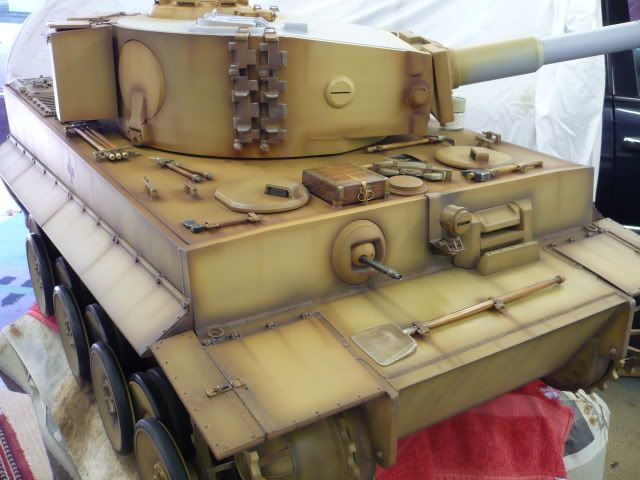
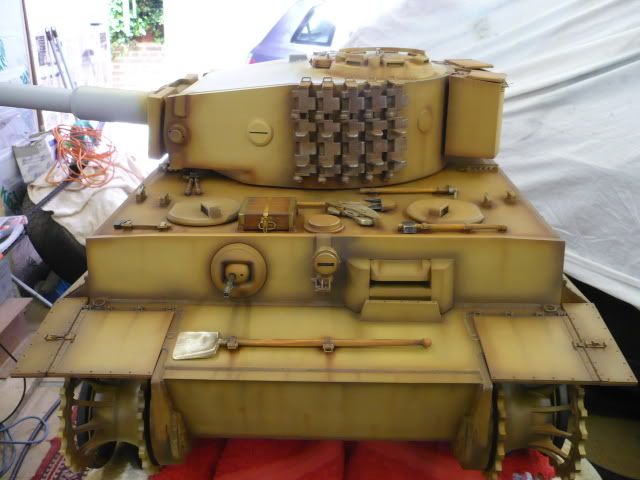
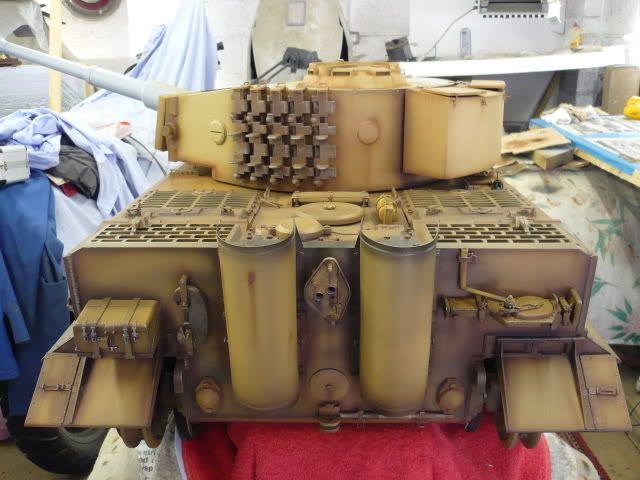
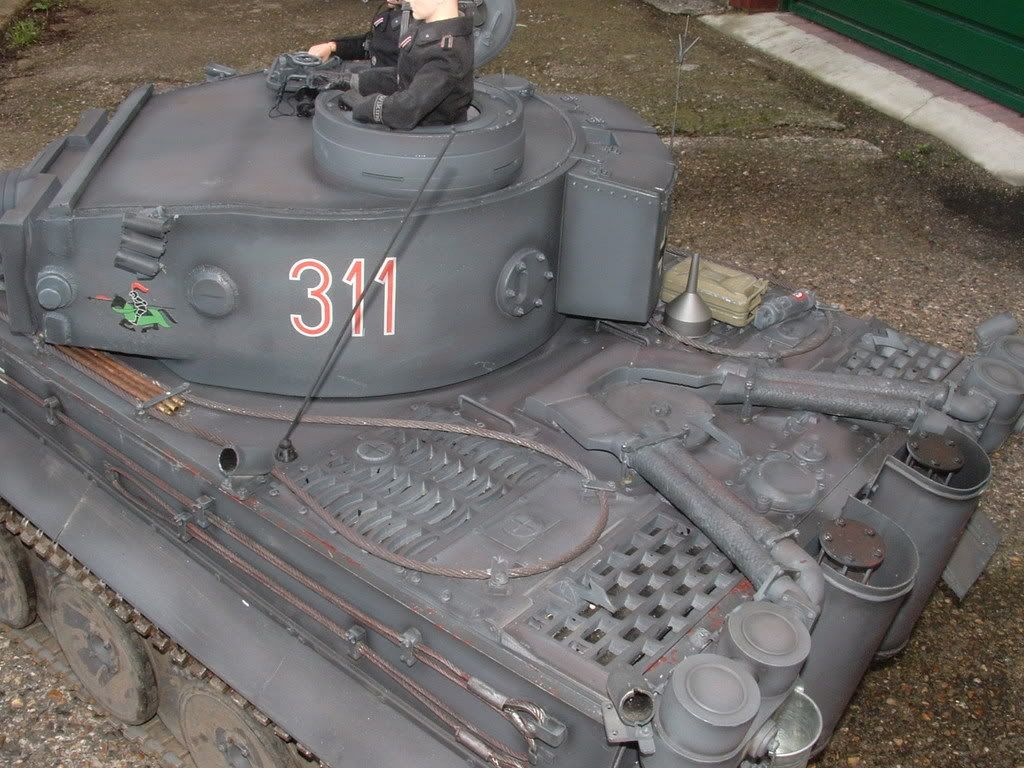
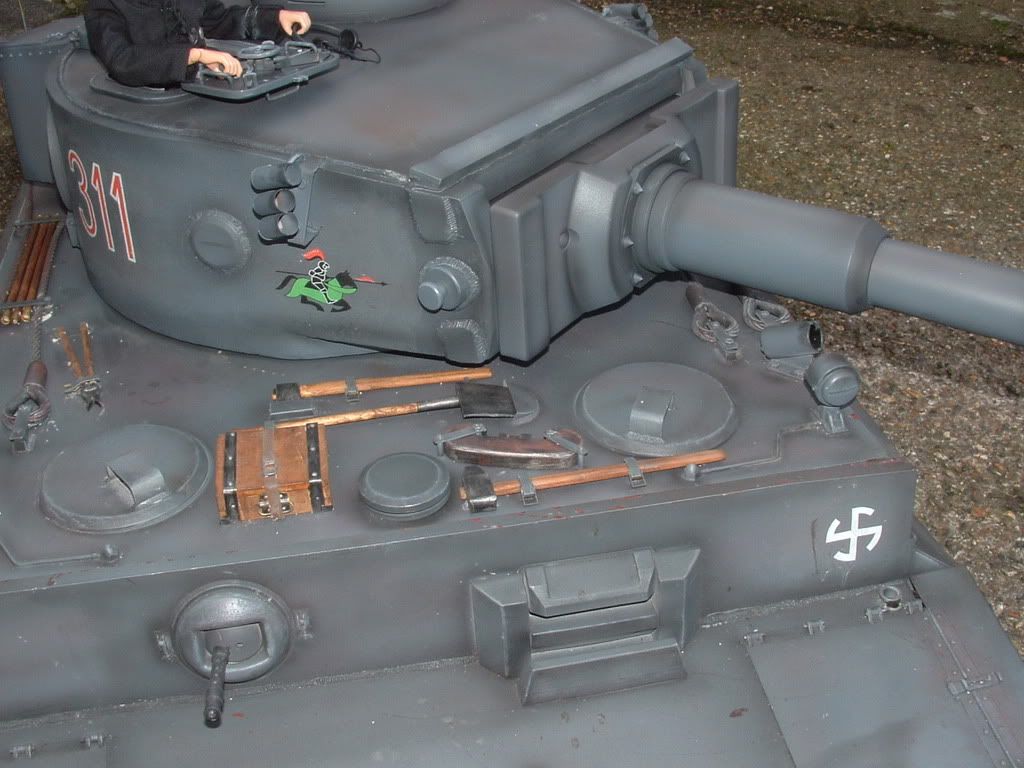
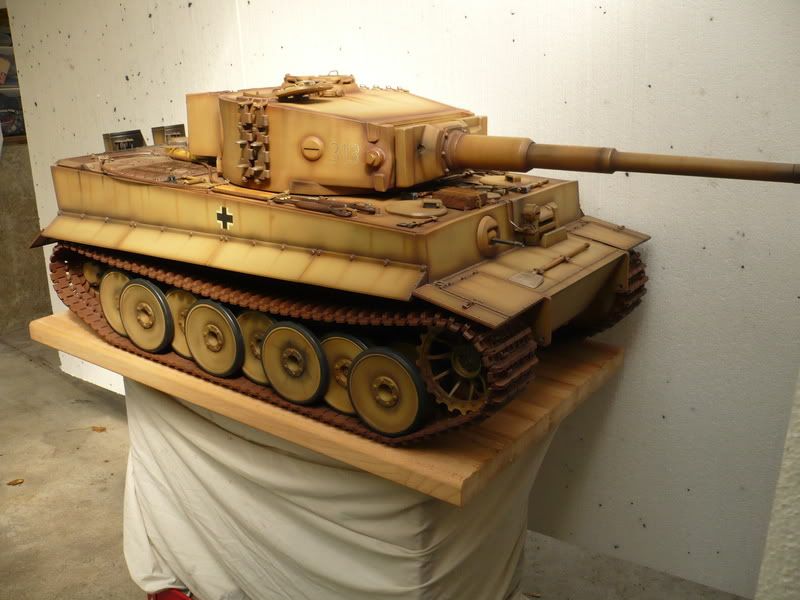
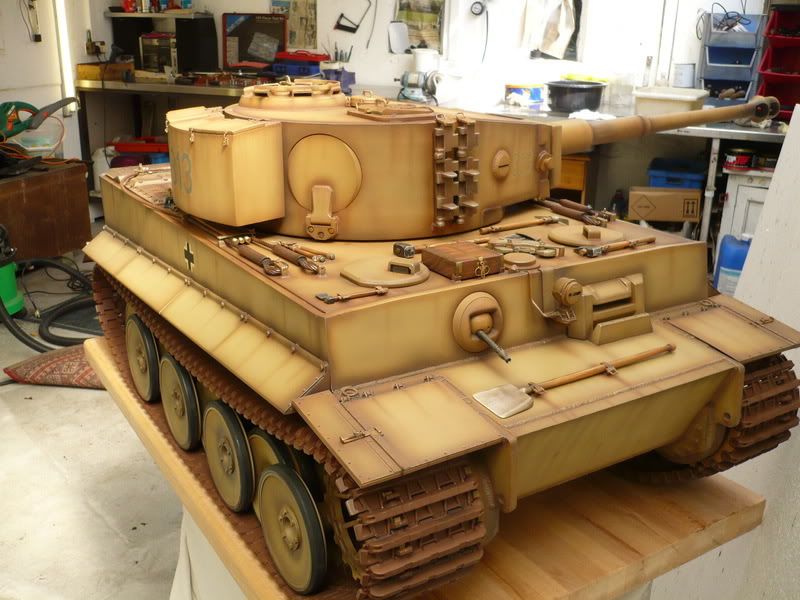
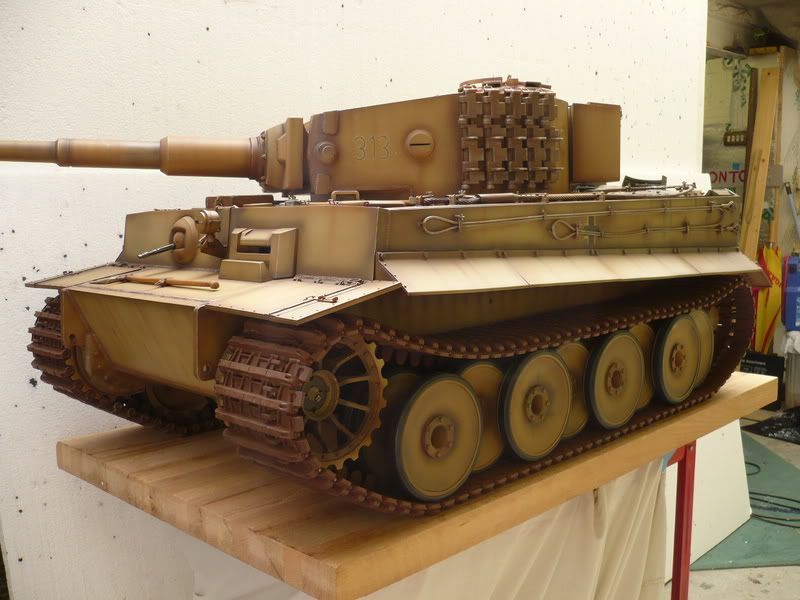
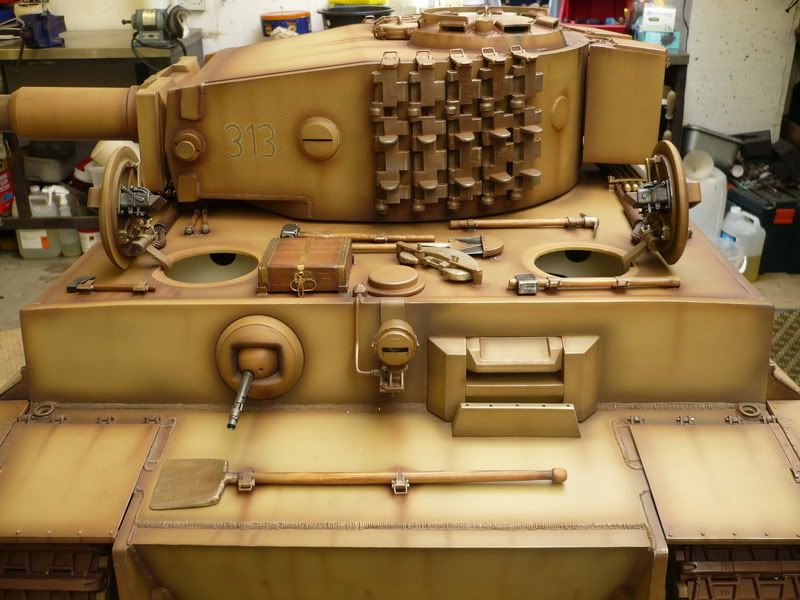
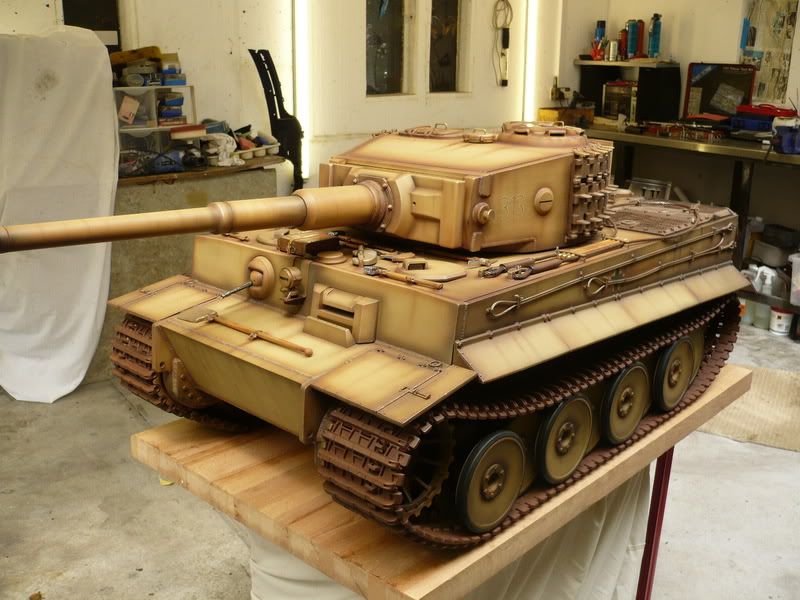
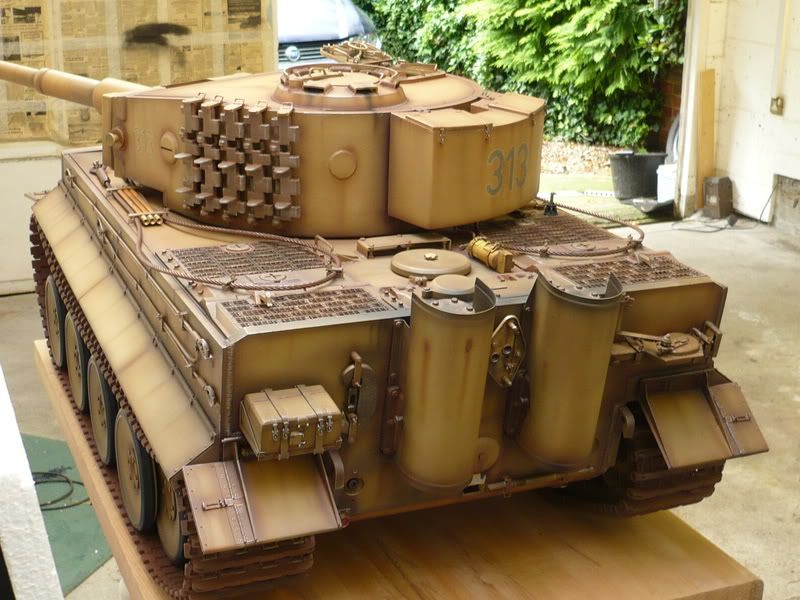
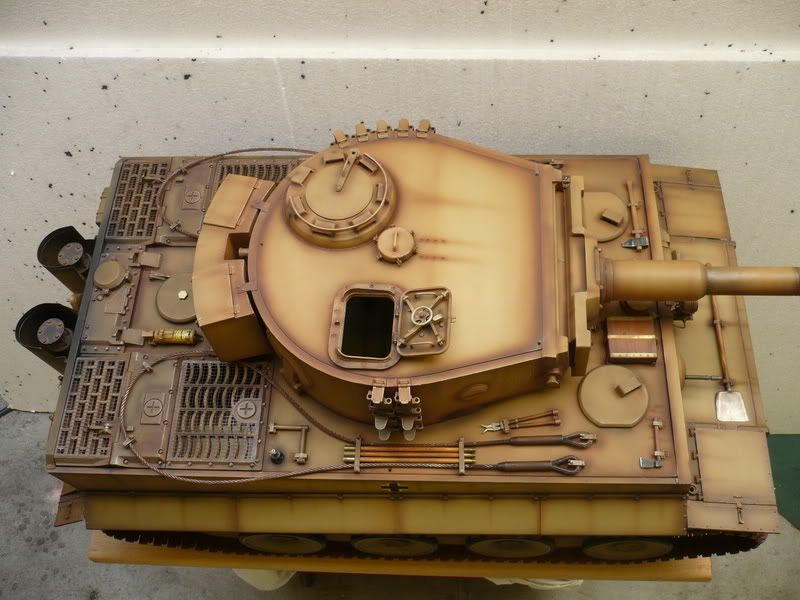
here are the near-final pictures of the Tiger. All electrics need fitting and a list of small items, U shakles, aerial tube, mg mount etc still to be fitted.
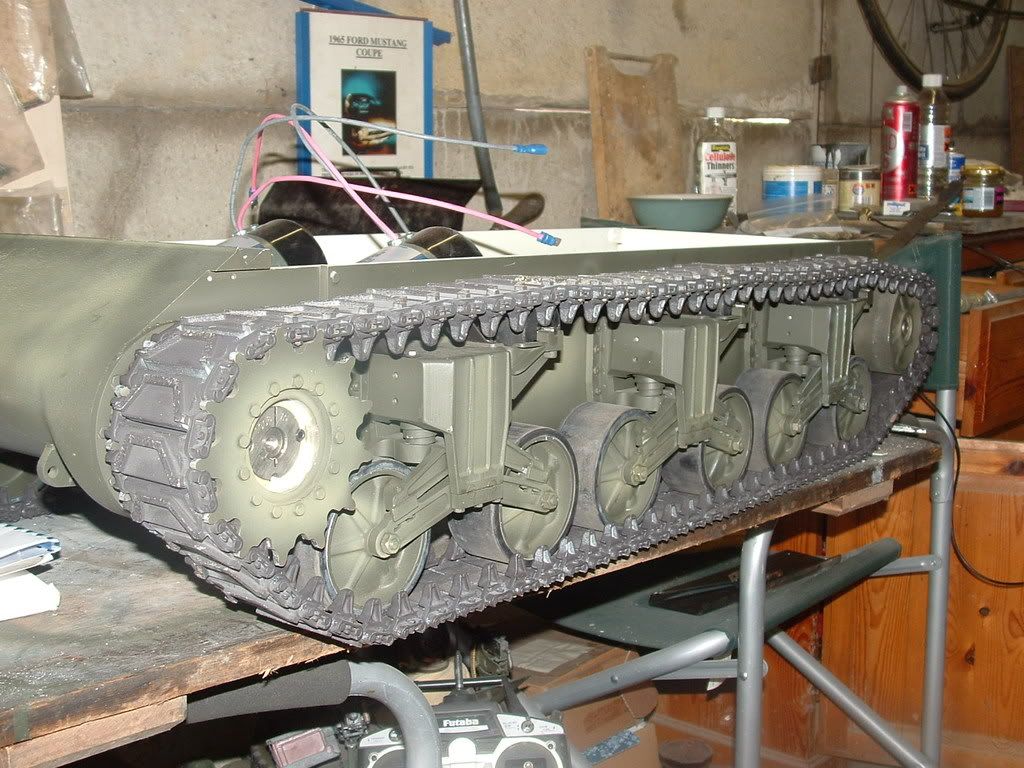
Ive made a start on the early tiger hull, Which has been alot easier than the mid tiger. A bit more tinkering with the mid tiger will see it finnished.
Very much enjoyed dale jordans and david grey's build. And the postings sofar.
Ive made a start on the early tiger hull, Which has been alot easier than the mid tiger. A bit more tinkering with the mid tiger will see it finnished.
Very much enjoyed dale jordans and david grey's build. And the postings sofar.
-
Dale jordan
- Posts: 1456
- Joined: Fri Jul 13, 2007 1:10 am
- Location: Port Macquarie Australia
- Been liked: 514 times
- Contact:
Simon you should be very proud of the work you have done on your machine . I can see some realy nice after market parts on your tiger . I don't know what we would do without these guys parts . Simon do you have a photo of your tiger before you started the re build . So you have a early tiger to do next !! Sounds like Double trouble ??? . Is it in parts or is it a rebuild as well ?? . Dale
-
Allan Richards
- Posts: 743
- Joined: Thu Jul 12, 2007 10:34 am
- Location: Kent
- Been liked: 10 times
-
simon_manning
- Posts: 2061
- Joined: Fri Nov 02, 2007 8:51 pm
- Location: new forest,hampshire,u.k.
- Been liked: 1767 times
thanks for your kind comments,because of time limitations and a lack of engineering skills and equipment i have used the after market suppliers a lot, their knowledge has been a massive help not to mention the uplift it gives the kits. Now the King Tiger has been released i am having a set of photos taken for my wife to remember who i am
-
Allan Richards
- Posts: 743
- Joined: Thu Jul 12, 2007 10:34 am
- Location: Kent
- Been liked: 10 times