John's Late Tiger 1
-
John Fitzsimons
- Posts: 1813
- Joined: Tue Dec 14, 2010 3:11 pm
- Location: IRELAND,Dublin/Meath
- Has liked: 5 times
- Been liked: 624 times
- Contact:
Thanks again everybody for the input. I have rounded th turret base a little and refitted the bullet guard with just enough space for the turret to clear it.
That has made a lot more space for the cleaning rods and tow ropes. Steve , I had an idea that was the case with positioning of the cleaning rod holder. I had noticed in some photos that the retainer went out over the deck weld lines. Should have plenty of clearance now. I doubt that I will use the kit fittings. I do like the kit tow ropes though with a little modification.
Now that I have mentioned the deck weld line, is it better to make it on the aluminium side armour or on the steel deck?
Again thanks for all the help, much appreciated.
-
Tim Bowman
- Posts: 1762
- Joined: Fri Jul 13, 2007 4:53 am
- Location: Northern California
- Been liked: 177 times
- Contact:
Hi John
In regards to the deck welds, I'll be placing the two side welds on the deck and the front weld on the small flat area on the rear side of the front hull plate(just in front of the actual deck).
Kind regards
Tim
In regards to the deck welds, I'll be placing the two side welds on the deck and the front weld on the small flat area on the rear side of the front hull plate(just in front of the actual deck).
Kind regards
Tim
"So long as one isn't carrying one's head under one's arm, things aren't too bad." – Erwin Rommel
-
John Fitzsimons
- Posts: 1813
- Joined: Tue Dec 14, 2010 3:11 pm
- Location: IRELAND,Dublin/Meath
- Has liked: 5 times
- Been liked: 624 times
- Contact:
-
John Fitzsimons
- Posts: 1813
- Joined: Tue Dec 14, 2010 3:11 pm
- Location: IRELAND,Dublin/Meath
- Has liked: 5 times
- Been liked: 624 times
- Contact:
Back to tank building at last. While waiting on the arrival of my bumpstops from Steve along with a few other important little items I decided to have a go at some zimmerit. Got so far then ran out of milliput.
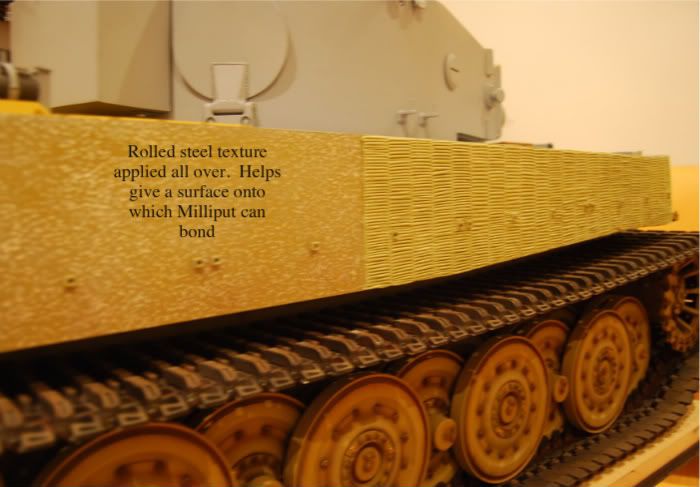
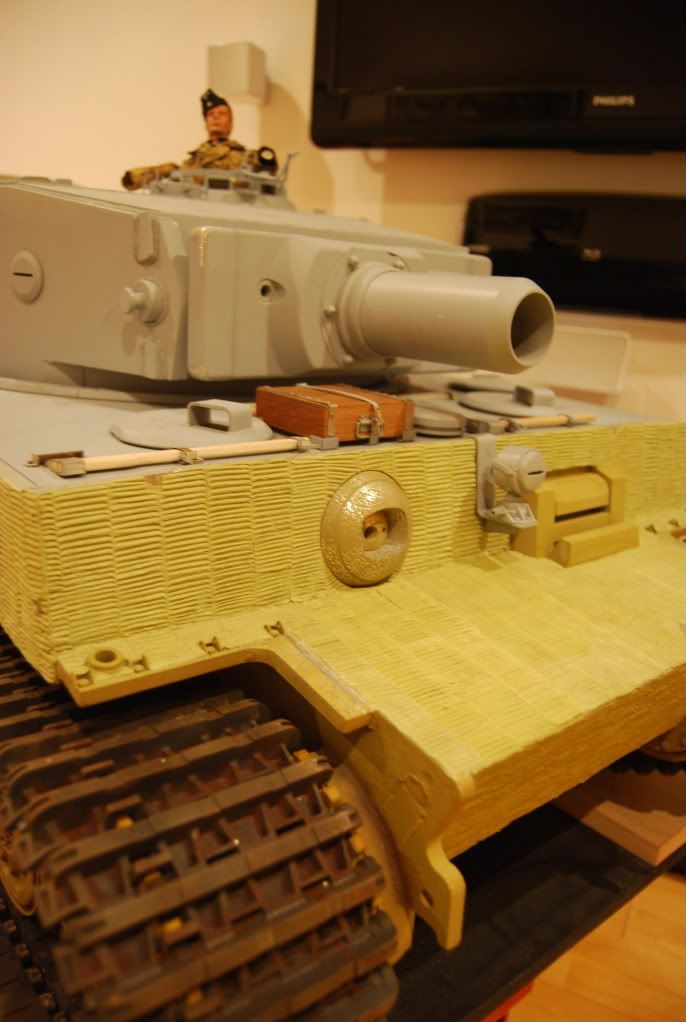
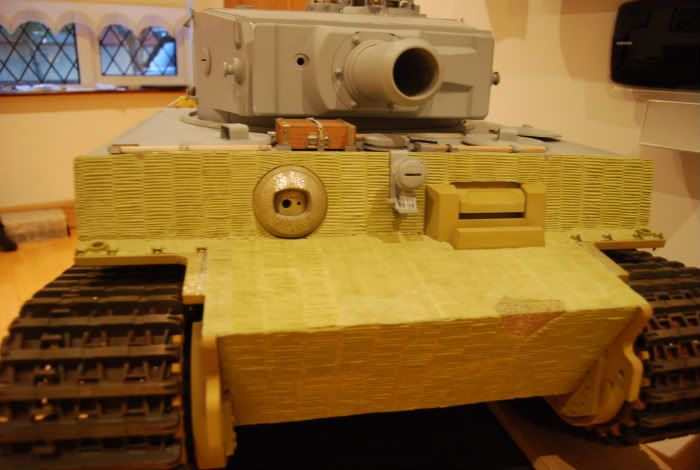
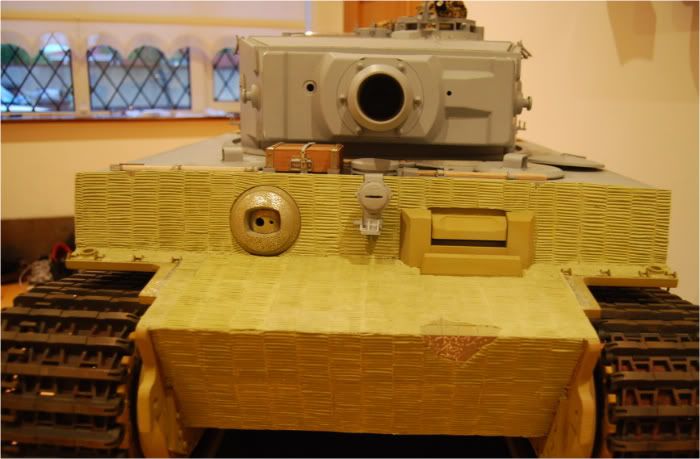
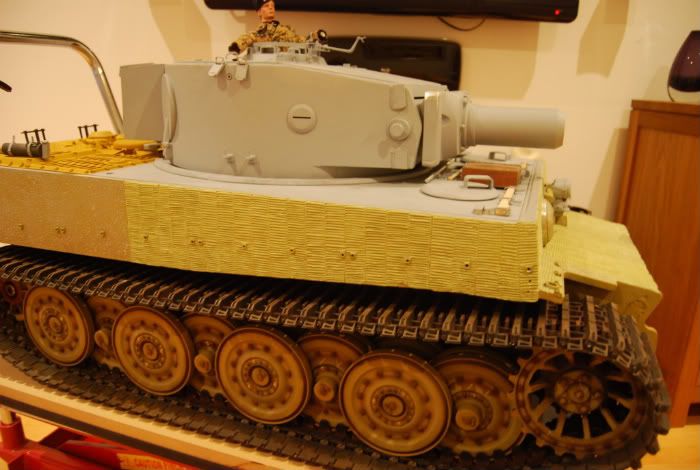
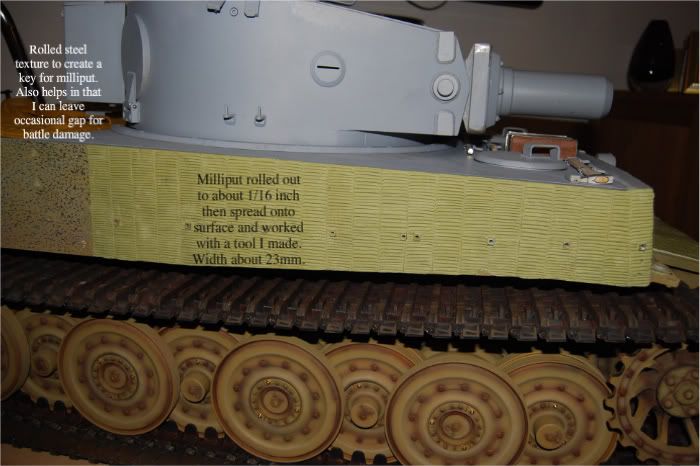
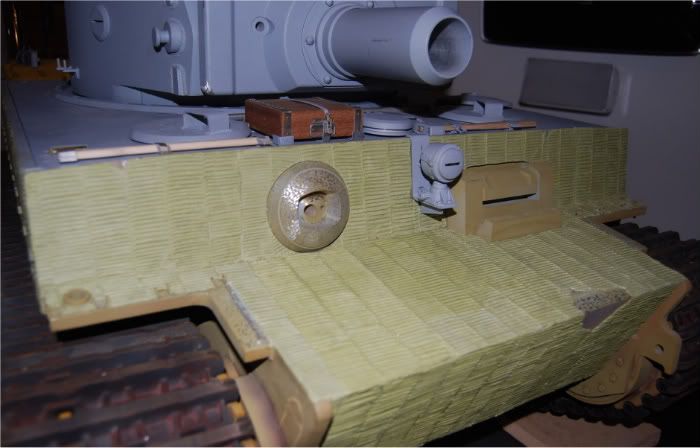
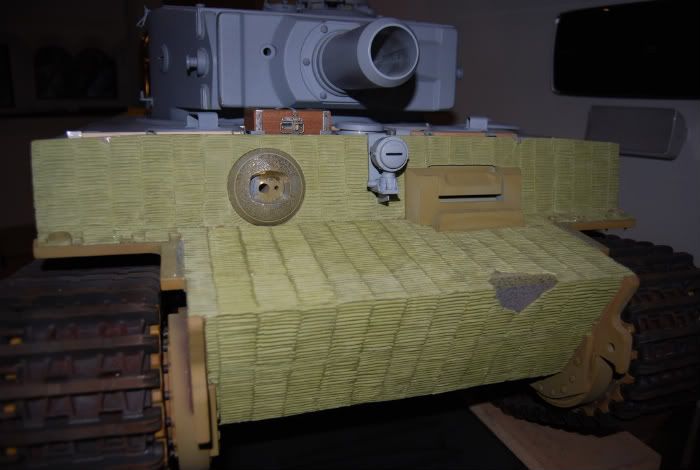
Not sure if application is as it should be but best I could manage. More milliput on order.


Not sure if application is as it should be but best I could manage. More milliput on order.
-
John Fitzsimons
- Posts: 1813
- Joined: Tue Dec 14, 2010 3:11 pm
- Location: IRELAND,Dublin/Meath
- Has liked: 5 times
- Been liked: 624 times
- Contact:
-
Kent Wiik
- Posts: 425
- Joined: Sat Dec 04, 2010 11:18 am
- Location: Northern Sweden
- Has liked: 6 times
- Been liked: 194 times
Hi John,
Outstanding work with the zimm, well done!

...that zimm is post war as the Tiger was restored in the 60-70-ties.
Please never use restored tanks as raw model how they looked in WW2.
However in this case Tiger I did have zimmerit behind the bin as this photo shows:

Quite roughly made but it is there.
Kind regards
Kent
Outstanding work with the zimm, well done!
One might say yes because the Saumur Tiger I has zimm there but...John Fitzsimons wrote:I have a question about the turret zimmerit. Was zimerit applied behind the storage bin on the back?

...that zimm is post war as the Tiger was restored in the 60-70-ties.
Please never use restored tanks as raw model how they looked in WW2.
However in this case Tiger I did have zimmerit behind the bin as this photo shows:

Quite roughly made but it is there.
Kind regards
Kent
It´s all in the details!
-
Phil Woollard
- Posts: 4268
- Joined: Mon Mar 01, 2010 4:48 pm
- Location: Cornwall
- Has liked: 2259 times
- Been liked: 7147 times
So you could say that if no bin was fitted or had been removed the area was zimmerited, but if a bin was fitted there is no reason to zimmerit behind so it would not have be covered, so if you have chosen to fit a bin don't as there is no point, and if you have not fitted a bin then do zimmerit.Well that clears that up!
Mechanical engineer.
2 Youtube channels, Phil Woollard and Magpiespyro. Facebook/ Phil Woollard.
Commission builds considered. Pm for my email.
2 Youtube channels, Phil Woollard and Magpiespyro. Facebook/ Phil Woollard.
Commission builds considered. Pm for my email.
-
John Fitzsimons
- Posts: 1813
- Joined: Tue Dec 14, 2010 3:11 pm
- Location: IRELAND,Dublin/Meath
- Has liked: 5 times
- Been liked: 624 times
- Contact:
Thanks Kent. Your thumbs up means a lot. Another batch of milliput arrived today so I can finish both sides while researching the rear. I have some pictures of the rear plate but as you say some restored vehicles may be inaccurate. I have also put some thought into the turret zimmerit and will try a few tools to get close to the correct finish.
Hi Phil. I have a turret bin fitted. I will see how the zimmerit goes. At the moment I like putting it on but but by the time I get to the turret I might feel different.
Hi Phil. I have a turret bin fitted. I will see how the zimmerit goes. At the moment I like putting it on but but by the time I get to the turret I might feel different.
-
John Fitzsimons
- Posts: 1813
- Joined: Tue Dec 14, 2010 3:11 pm
- Location: IRELAND,Dublin/Meath
- Has liked: 5 times
- Been liked: 624 times
- Contact:
Some more milliput zimmerit added. hardened nicely. Really tough. The colour is just an undercoat prior to base coat of Tamiya Dark Yellow.
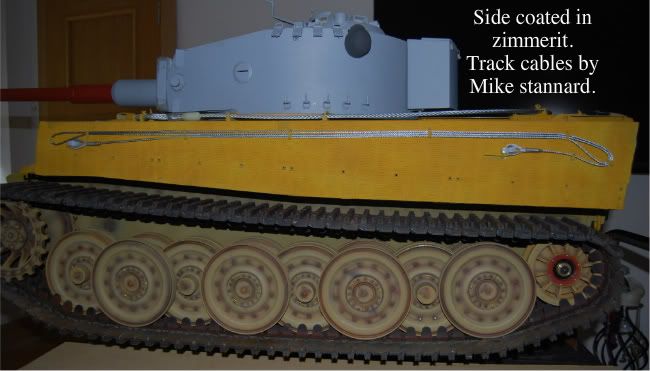
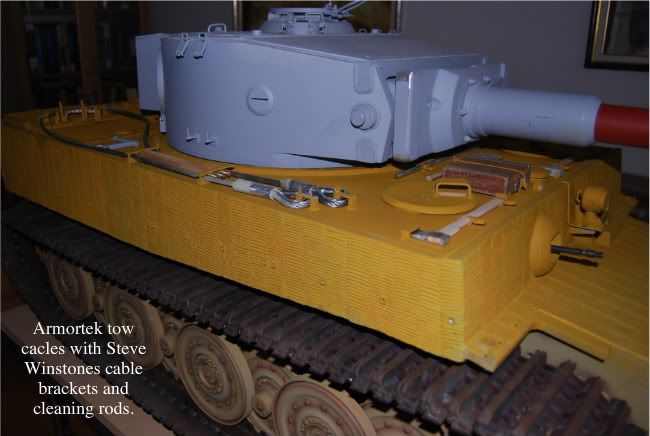
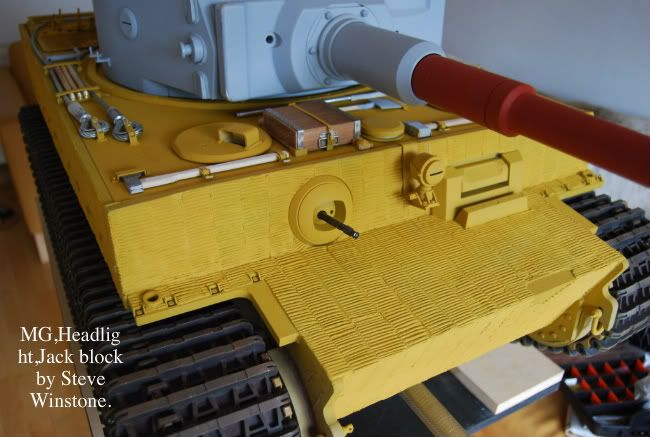
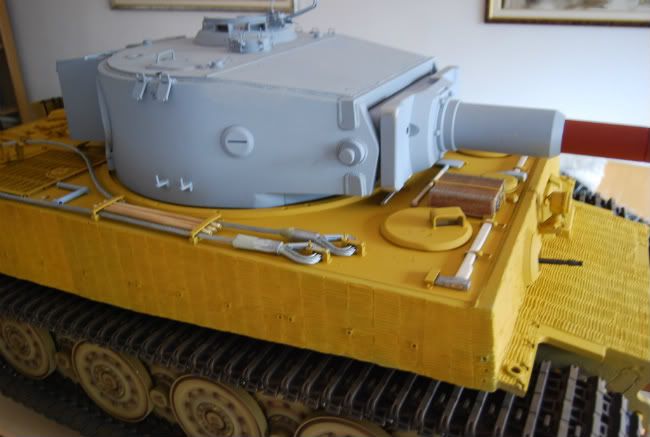
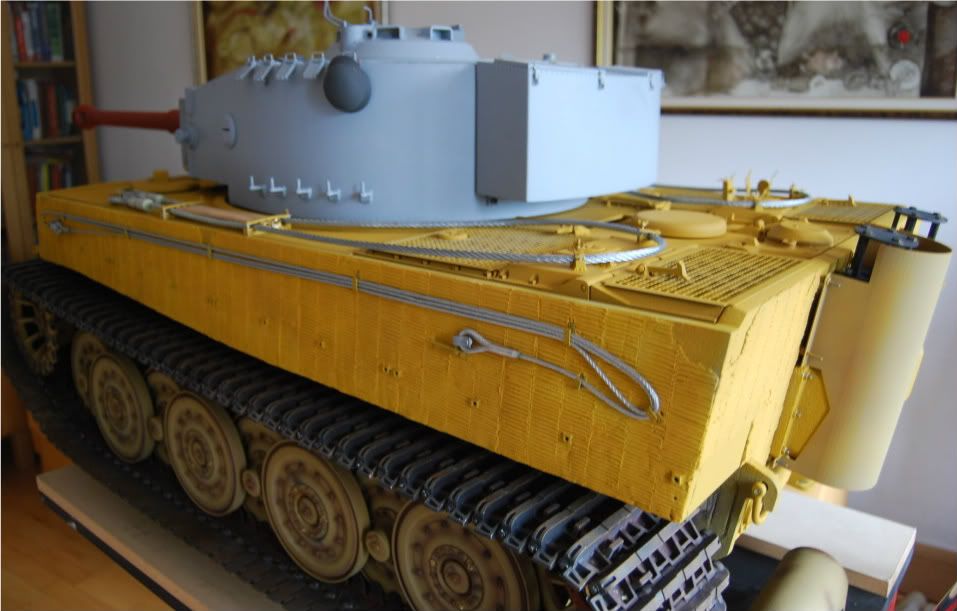
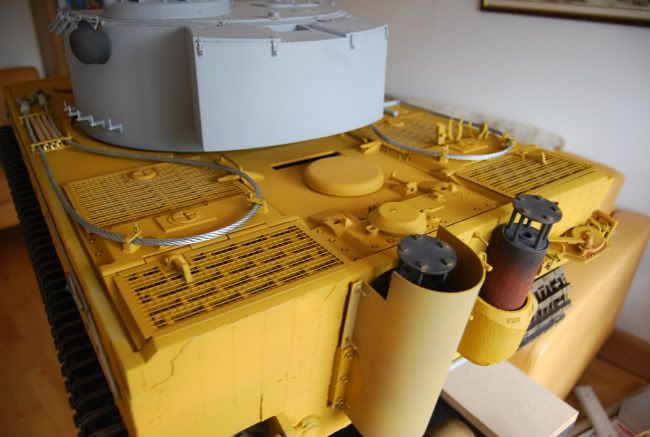
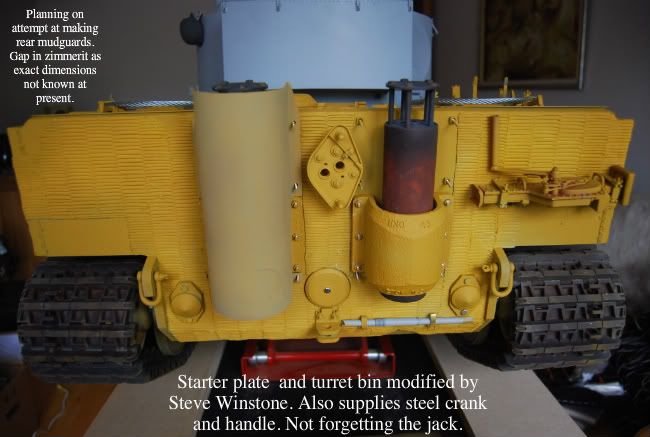
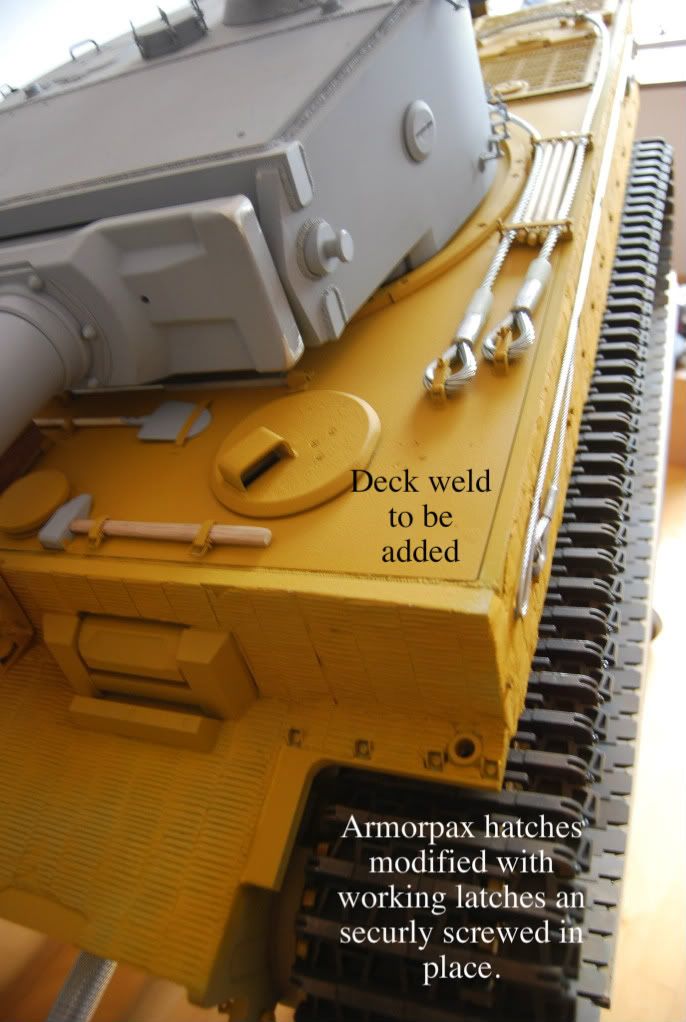
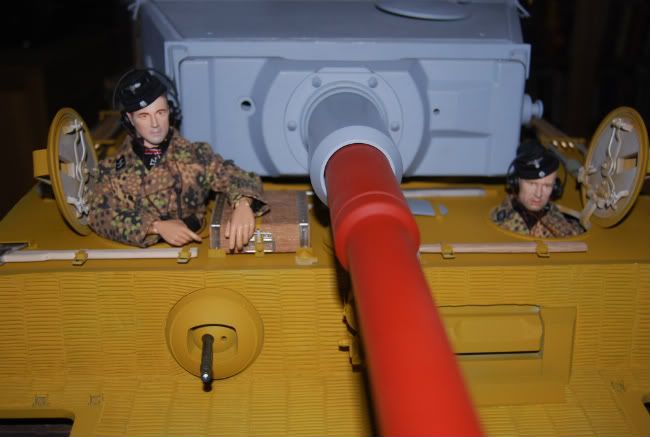
Still lots of work to do on the hull. Have Nice new bump stops from Steve/Tim. One I have correct location I will add bump stops and fit motors.
If any body can help source some suitable hex screws to attach side mudguards I would be greatful. I think 3-34 are a nice side but I have only found 1/2 inch length and need longer.
-
Mike Kasputis
- Posts: 104
- Joined: Thu Jul 26, 2007 2:17 am
- Location: Maryland, USA
- Been liked: 54 times
-
Tim Bowman
- Posts: 1762
- Joined: Fri Jul 13, 2007 4:53 am
- Location: Northern California
- Been liked: 177 times
- Contact:
- Robert E Morey
- Posts: 2295
- Joined: Wed Jul 18, 2007 12:59 am
- Location: Seattle, WA USA
- Has liked: 122 times
- Been liked: 753 times
-
Christoffer Ahlfors
- Posts: 683
- Joined: Sun Feb 14, 2010 5:19 pm
- Location: Stockholm, Sweden
- Has liked: 703 times
- Been liked: 306 times
If not having to rethread has a value, may I suggest Dieter Knupfer:
http://www.knupfershop.de/shop/index.ph ... p_tpl=main
Here is what they look like on mine:


I used the "niedriger Kopf" (low profile head) variety.
Superb finish on the material and Dieter is a charm to work with.
How did you make the latches work?
Cheers,
/Chris
http://www.knupfershop.de/shop/index.ph ... p_tpl=main
Here is what they look like on mine:


I used the "niedriger Kopf" (low profile head) variety.
Superb finish on the material and Dieter is a charm to work with.
How did you make the latches work?
Cheers,
/Chris
A little too much is about right...
-
John Fitzsimons
- Posts: 1813
- Joined: Tue Dec 14, 2010 3:11 pm
- Location: IRELAND,Dublin/Meath
- Has liked: 5 times
- Been liked: 624 times
- Contact:
Thanks for the comments.
Mike, I have that size screw that you used but not long enough to pass through mudguard,standoff and hull. I might drill into inside of the hull tomake the nut reach the screw. Will open up tonight and have a second look. Somtimes things that do not fit at 3am fit fine in daylight.
Chris, thanks for the link. I will check it out. Work on the hatches. I will post somthing on that. Very easy, just used 3 copper rivets and one small screw.
Bob, I wll add periscopes. Will have a go at making my own but if not successful will save pocket money and get some of Mike Stannards. I have his loaders periscope.
Plenty of jobs to finish before I get to the turret. Next job is to add the new bump stops.
I want to add a bar to the front of the hull to hold the spare tracks also.
- Rich Stinchcomb
- Posts: 67
- Joined: Sun Jul 15, 2007 2:38 am
- Location: Connecticut, USA
- Has liked: 3 times
- Been liked: 1 time
Re:
Mike Kasputis wrote:Zimmerit is looking great.
I used 3-48 X 1/2" bolts for my side fenders and they worked good, have a look at my post on page 3 and you can see them.
I used the same bolts but 1/4" long. First I drilled out the hole in my steel standoff's with 1/8" drill and used thread lock to secure a section of 1/8 brass tube in the hole. A Dremel cut/smoothed down the brass tube flush with the standoff. Then tapped the inside of the tube to 3-48.
"All you saw in your imagination was the muzzle of an 88 behind each leaf." - British Tank Commander Andrew Wilson
