Lovely job Phil, do you have a table lift....I was wondering how you will move your Comet down to floor level.
I have recently purchased a lift....the wife requires the dinning table for Christmas......I could just decorate the tank with lights.....no....ok will move said tank.
I am fitting the hatch doors....some filing...then a nice close fit. The quality of the parts is excellent
Phil are you painting your tracks?....mick
A34 COMET
-
phil fitzpatrick
- Posts: 2020
- Joined: Sat Dec 12, 2009 3:38 pm
- Location: Sambourne uk
- Been liked: 223 times
Tracks
Thanks Mick 
I didnt get my little table lift until I saw it being recommended,I was well
underway then,on top of my B&Q work mate.
I had to get my son to come over and help me stretch the ends of the track together(111 Links).
When I'm on the ground I will proberbly be able to take a link out like
John did and adjust from there,my son will give me a lift down with it.
It will be a bet heavier still by then.
The Lift will certainly come in handy later thou gh
gh
I painted my panzer tracks with red oxide,then light grey then a little bit of over spray with the same colour as the camaflauge,and when it had run
arround the patio a few times the tracks got their own shiny metal
highlights and looked pritty good.
Especialy the tangs that stick upinto the wheels,I left the teps bare metal
then a little bit of the red oxide showing and then the grey and yellow,so
it looked worn and a bit of rust.
But I have given it a lot of thought and left it for the moment,although
I will wip round the track pins with a bit of grey to match the track,
because the track pins are very brightly plated.
There was plenty of filing when I did my hatches,but I was determined
not to get it just nice.
You need to keep on the good side of your wife so give her the table back for a bit.
Cheers
Phil
I didnt get my little table lift until I saw it being recommended,I was well
underway then,on top of my B&Q work mate.
I had to get my son to come over and help me stretch the ends of the track together(111 Links).
When I'm on the ground I will proberbly be able to take a link out like
John did and adjust from there,my son will give me a lift down with it.
It will be a bet heavier still by then.
The Lift will certainly come in handy later thou
I painted my panzer tracks with red oxide,then light grey then a little bit of over spray with the same colour as the camaflauge,and when it had run
arround the patio a few times the tracks got their own shiny metal
highlights and looked pritty good.
Especialy the tangs that stick upinto the wheels,I left the teps bare metal
then a little bit of the red oxide showing and then the grey and yellow,so
it looked worn and a bit of rust.
But I have given it a lot of thought and left it for the moment,although
I will wip round the track pins with a bit of grey to match the track,
because the track pins are very brightly plated.
There was plenty of filing when I did my hatches,but I was determined
not to get it just nice.
You need to keep on the good side of your wife so give her the table back for a bit.
Cheers
Phil
-
phil fitzpatrick
- Posts: 2020
- Joined: Sat Dec 12, 2009 3:38 pm
- Location: Sambourne uk
- Been liked: 223 times
Tracks to Paint or not to Paint
Hi Mick
Thanks for your post earlier,you have convinced me to stop Dithering
about and yes my tracks are coming off now I know they fit all right and
easy enough with the mudguards on.
When they go back on I will also be reversing the tracks so that the big
head of the pin is on the inside,because except for the split pin it looks
better as the pictures in the Armor Photogallery Book.
Every thing has a colour.
So yes I am going to colour them and let wear and tear do the rest.
Have a look in the Armortek Owners Section.
Go to find the posting "Rusty situation for the debates
Then at Allan Websters's posting follow his link to "Rusted Tracks.
Have a read of Kent Wiik's posting and he says the German tracks were
painted and it wore off in time.
But then go to David Da Costa's posting and look at his photo's of the
before and after of his Panzer 111 Tracks.
The finished article is brilliant
I'm not saying I've got the skills to match that but I've got the determination.
I was studying the colour photo's in the Armor Photogallery and I thoght
that the green on the inside of the tracks might be over spray,but it cant be because it would look stripped like a pedestrian crossing.
A job for Christmas
Cheers
Phil
-
robert michael hilton
- Posts: 377
- Joined: Sat Apr 03, 2010 3:23 pm
- Location: Welshpool, Powys
All good Phil.....thanks for the advice on the 'tracks'.
On the hatch fitting, I adjusted the front deck bracket 'down' a mil and found that the two hatch doors made a lovely fit, without to much filing. I was wary of driving the hatch door pin fully home before checking all was well. Once the pin is located it's quite a job to remove it.
I have ordered some 10ba screws for the wheel hub covers and sprockets.
I had a quiet moment yesterday evening and came to wandering just how many Comets are presently under construction? Just a thought.
Mick
-
phil fitzpatrick
- Posts: 2020
- Joined: Sat Dec 12, 2009 3:38 pm
- Location: Sambourne uk
- Been liked: 223 times
Hatches
Hi Mick
Glad you have got on well with your hatch doors,I got round to doing my
bolts for the road wheels and Idler over the week end.
Cheers
Phil
Glad you have got on well with your hatch doors,I got round to doing my
bolts for the road wheels and Idler over the week end.
Cheers
Phil
-
Dennis Jones
- Posts: 893
- Joined: Wed Feb 04, 2009 11:19 am
- Location: Poole, Dorset
- Has liked: 10 times
- Been liked: 224 times
When trial fitting the front hatch doors I used a track pin as it's the right diam and easy to pull out when fitting.
I think there must be quite a few building the Comet because as a previous Panzer builder I notice that section of the forum has gone very quiet of late.
Going up to the Model Engineering Exhibition at Sandown Racecourse on Saturday (weather permitting) would normally go on Friday but I have to be Father Xmas at a local toddlers group (my annual task) on Friday morning. Anybody else going to the Exhibition ?
Dennis.
-
phil fitzpatrick
- Posts: 2020
- Joined: Sat Dec 12, 2009 3:38 pm
- Location: Sambourne uk
- Been liked: 223 times
Hatch hinges
Now why couldnt I think of that one?
The best ideas are usually the simplest Dennis and its deffinately a good un
Cheers
Phil
The best ideas are usually the simplest Dennis and its deffinately a good un
Cheers
Phil
-
robert michael hilton
- Posts: 377
- Joined: Sat Apr 03, 2010 3:23 pm
- Location: Welshpool, Powys
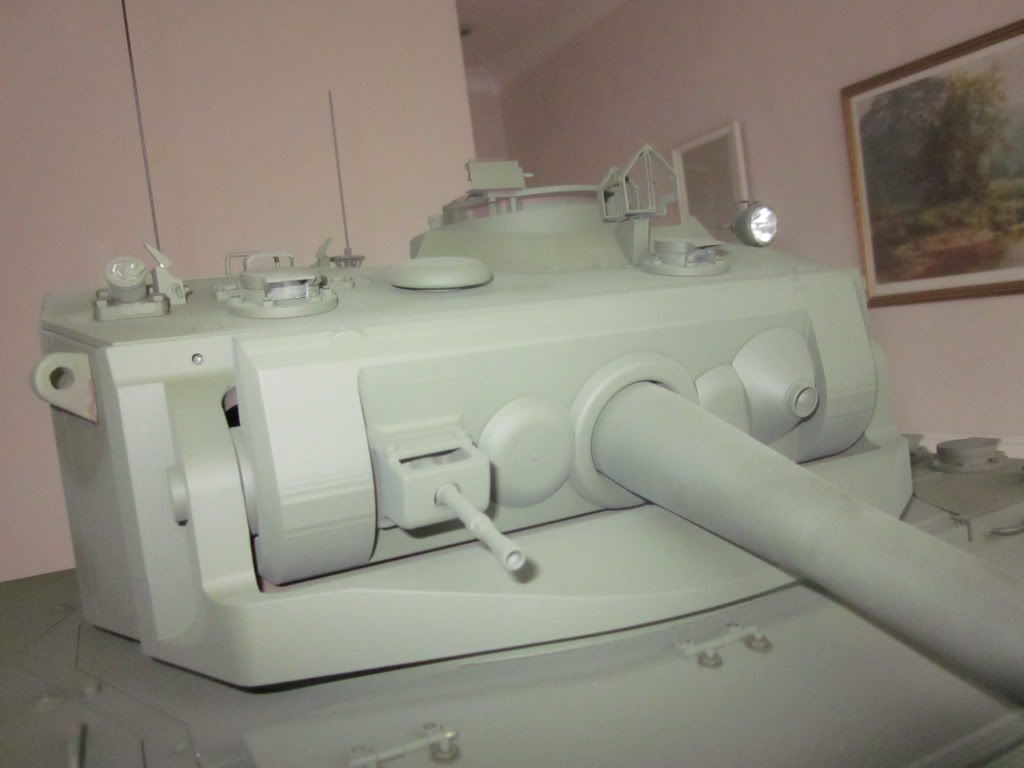
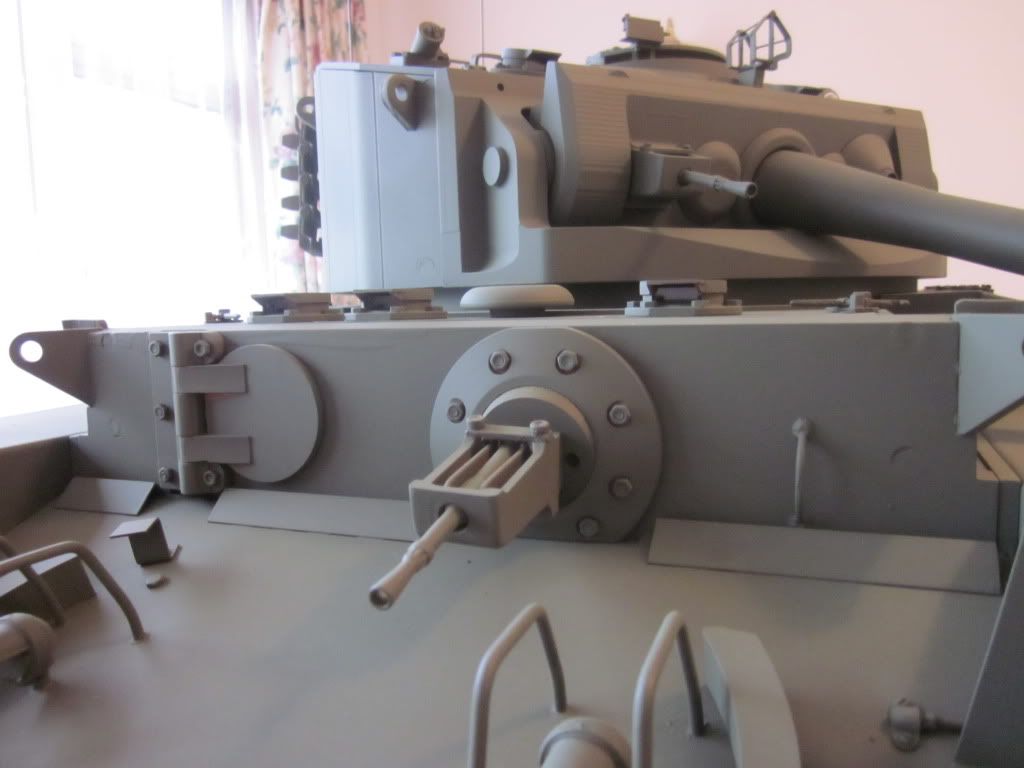
Phil....is the metal angle L shape strip, and brackets ,on the rear of the exhaust box....your own additions, and also I can't find the small bars, that hold the front, drivers door hatch fastener, in the open position. They sit just behind the large 'lift' brackets.
I know you are fitting various additional items to you Comet.
I am organizing the Armorpax parts ready to fit....there must be millions....mick
I know you are fitting various additional items to you Comet.
I am organizing the Armorpax parts ready to fit....there must be millions....mick
-
phil fitzpatrick
- Posts: 2020
- Joined: Sat Dec 12, 2009 3:38 pm
- Location: Sambourne uk
- Been liked: 223 times
Detail Parts
Hi Mick
Yes they are all add on extra bits I made.
The angle and brackets at the back were just B&Q bits,the brackets just
cut from aluminium U channel shaped and sloted these brackets would
have had an "L" shaped fastener out of square metal threaded one end for
a nut and held the bar that went across the bottom of each Normandy
cowl(I havent added them bits yet.
The part that fits on the front for the Armorpax latch is just cut down from
some 1/2 inch square aluminium I had and cut and shaped with a slight
bend at the front,notched and glued to the front plate in the right position.
Some of the Armorpax bits are very small and a real challenge but look
great when all together.
I have managed to get them all working how they should.
Give us a shout if you get stuck on any and I will eplain how I got round
any tricky bits.
Cheers
Phil
-
robert michael hilton
- Posts: 377
- Joined: Sat Apr 03, 2010 3:23 pm
- Location: Welshpool, Powys
Thanks Phil, I thought you may have made these items.....I started to spray the Armorpax parts....then changed my mind.....and will fit as much as I can together on the bench.....I have a horrible feeling I may lose the tiny parts in the carpet while moving between the office/small bedroom/my workroom, into the garage for spraying.
It's cold in the garage.....as I said to the wife.....quote: "I am just going outside, I may be some time", unquote, Now....who said that?
It is really quite strange, how nothing much seems to happen, with the Comet build, then suddenly the parts come to life and everything takes shape. Loving it.....mick
-
phil fitzpatrick
- Posts: 2020
- Joined: Sat Dec 12, 2009 3:38 pm
- Location: Sambourne uk
- Been liked: 223 times
Armorpax Parts
Hi Mick
I do each stage seperate on a tray with a decent lip round the edge and
paper towl to keep em still.
Murpy's Laws
What can fall on the floor will fall on the floor
What falls on the floor will land in full view where you cant possibly see it,
or spring into the most inaccessable place.
I've been using a water based all metal primer from B&Q same colour as
red oxide,and with thin coats no brush marks show up and the parts are
textured anyway.
Cheers
Phil
-
phil fitzpatrick
- Posts: 2020
- Joined: Sat Dec 12, 2009 3:38 pm
- Location: Sambourne uk
- Been liked: 223 times
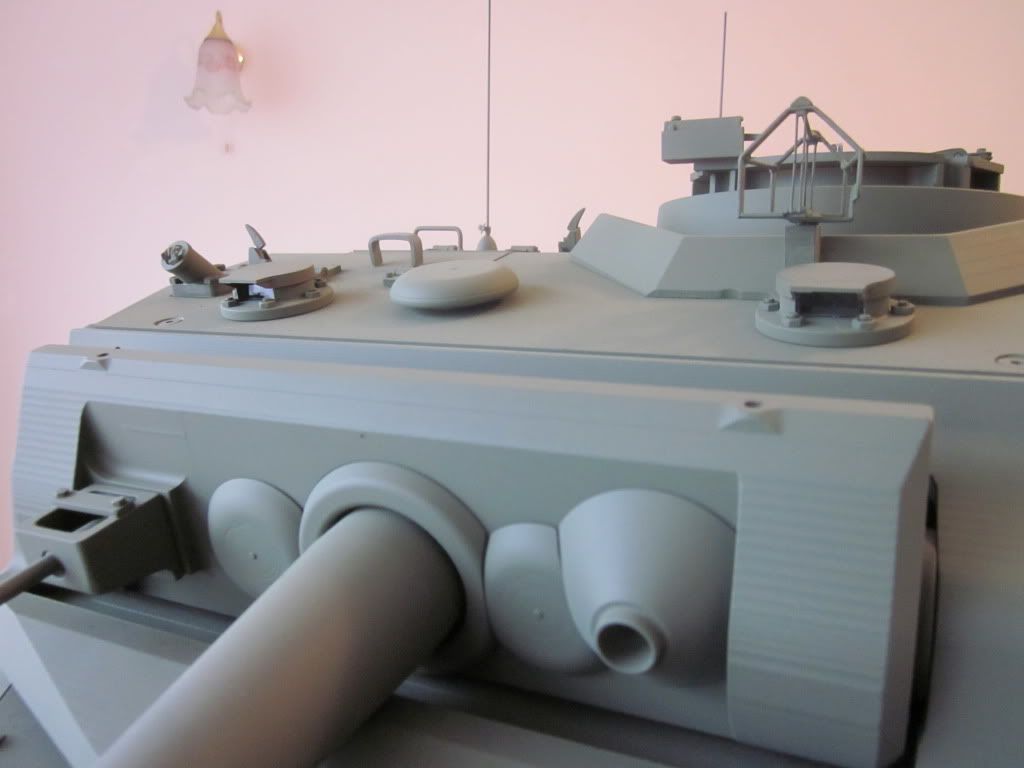
Periscopes
Loaders and Gunners Turret Periscopes with prism's fitted and covers
Drivers and Gunners Pericope's

Loaders and gunners Periscopes
Drivers and Gunners Pericope's
Loaders and gunners Periscopes
-
phil fitzpatrick
- Posts: 2020
- Joined: Sat Dec 12, 2009 3:38 pm
- Location: Sambourne uk
- Been liked: 223 times
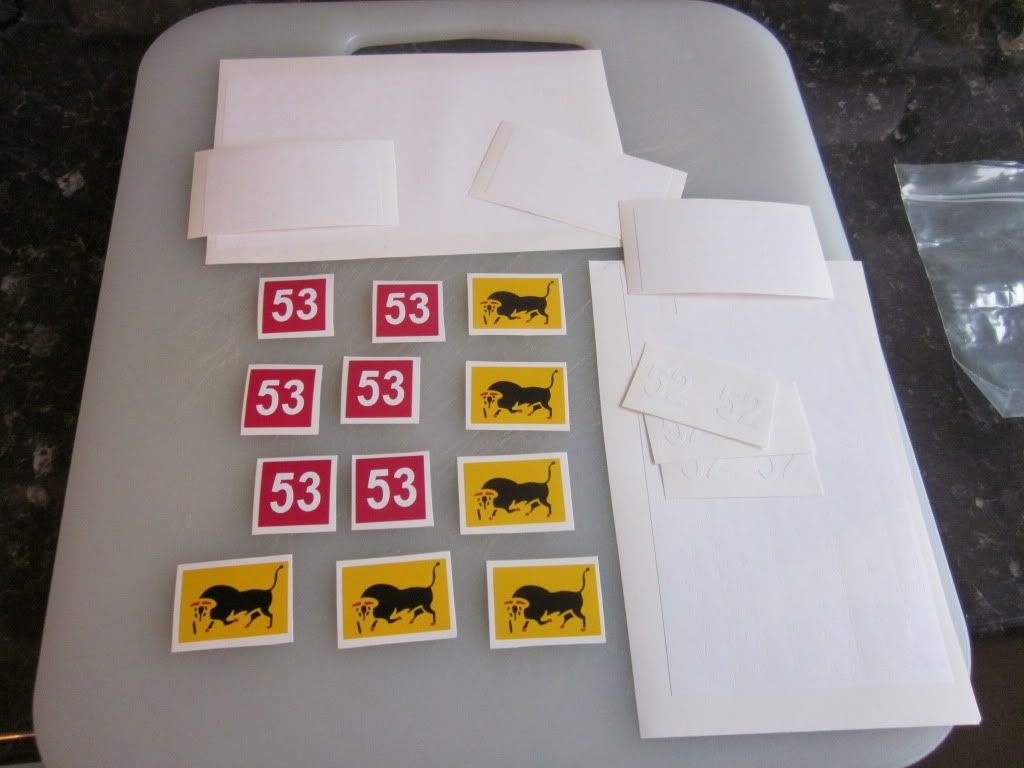
Comet Decals
My Comet Decals came today,the Bull my white number on Red and
some white numbers and letters for the Tank Identification and Name.
Cheers
Phil
some white numbers and letters for the Tank Identification and Name.
Cheers
Phil
-
Derek Attree
- Posts: 1305
- Joined: Thu Jul 12, 2007 12:44 pm
- Location: london
- Has liked: 219 times
- Been liked: 199 times
-
phil fitzpatrick
- Posts: 2020
- Joined: Sat Dec 12, 2009 3:38 pm
- Location: Sambourne uk
- Been liked: 223 times
Decals
Hi Derek
I have put a sepperate posting called Comet decals in the Comet area of the
Forum to explain how I went about getting my sizes and photo's for the artwork and where I got them from,which included the numbers and
letters in white which didnt show up in the photo.
Cheers
Phil
I have put a sepperate posting called Comet decals in the Comet area of the
Forum to explain how I went about getting my sizes and photo's for the artwork and where I got them from,which included the numbers and
letters in white which didnt show up in the photo.
Cheers
Phil