
panther build.. at last!
-
simon_manning
- Posts: 2061
- Joined: Fri Nov 02, 2007 8:51 pm
- Location: new forest,hampshire,u.k.
- Been liked: 1767 times
-
Paul Morris
- Posts: 1559
- Joined: Thu Jul 12, 2007 4:44 pm
- Location: North Lancs
- Been liked: 68 times
Hi Simon.
Even so far the model is a credit to you, I can see the time you have taken with the wheels alone, you will be rivaling your King Tiger I can see it coming. Keep up the good work..it will be a showstopper when complete.
Best wishes Paul and Vinnie
Even so far the model is a credit to you, I can see the time you have taken with the wheels alone, you will be rivaling your King Tiger I can see it coming. Keep up the good work..it will be a showstopper when complete.
Best wishes Paul and Vinnie
Paul's Tank Workshop. Complete Tank builds and re builds zimmerit and paint to museum quality standard. pjtigerman@aol.com
01524 720977
https://www.facebook.com/PaulsTankWorkshop
01524 720977
https://www.facebook.com/PaulsTankWorkshop
-
Steve Norris
- Posts: 1231
- Joined: Thu Jul 12, 2007 11:42 am
- Location: Manchester
- Has liked: 8 times
- Been liked: 701 times
-
simon_manning
- Posts: 2061
- Joined: Fri Nov 02, 2007 8:51 pm
- Location: new forest,hampshire,u.k.
- Been liked: 1767 times
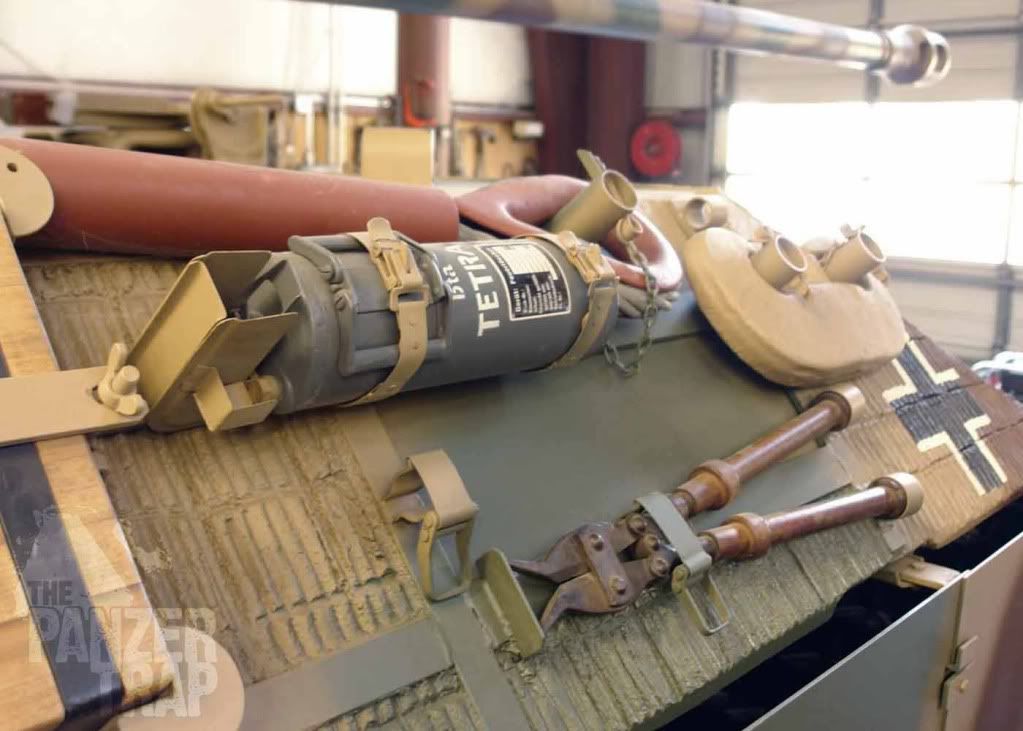
made a bit more effort in sub zero workshop, even the heater could'nt cope,paul this build requires a small zimmerit job, don't laugh when you see it! steve i have been using pro modeller washes and tamiya paints,the worn look comes from giving the paint a little rub with my finger or a tiny wire brush, thanks for the input, simon.


-
Paul Morris
- Posts: 1559
- Joined: Thu Jul 12, 2007 4:44 pm
- Location: North Lancs
- Been liked: 68 times
Hi Simon.
No chance of any laughter while watching your progress the work you have done so far is superb always interesting to see your progress, looking forward to the next chapter.
Best wishes Paul
No chance of any laughter while watching your progress the work you have done so far is superb always interesting to see your progress, looking forward to the next chapter.
Best wishes Paul
Paul's Tank Workshop. Complete Tank builds and re builds zimmerit and paint to museum quality standard. pjtigerman@aol.com
01524 720977
https://www.facebook.com/PaulsTankWorkshop
01524 720977
https://www.facebook.com/PaulsTankWorkshop
-
Tim Bowman
- Posts: 1762
- Joined: Fri Jul 13, 2007 4:53 am
- Location: Northern California
- Been liked: 177 times
- Contact:
Hi Simon
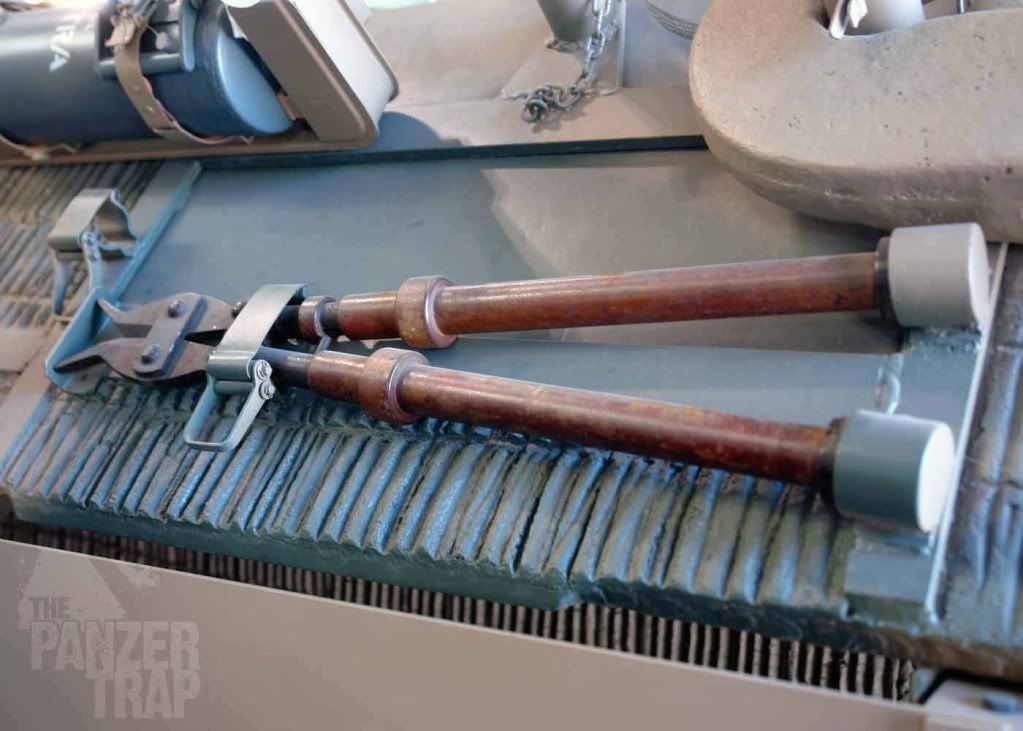
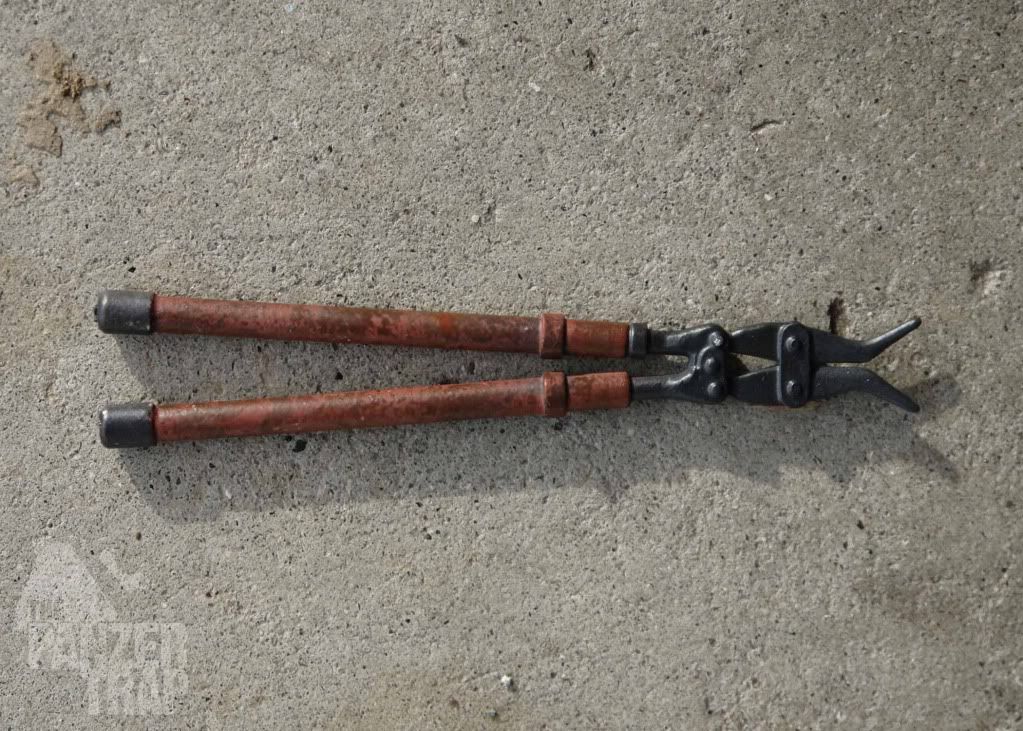
Enjoying every photo! One thing I noticed(not meant to be nit-picky or negative comment) is the wire cutters. Below are some photos of the real thing. The handles are made from a Bakelite-type material as opposed to wood. If you need a better photo of them, I can take one.
I tried the same method used on my Panthers periscopes. Base coat of primer red, mottled with rust/black mixture.

Keep up the great work!
Tim
Enjoying every photo! One thing I noticed(not meant to be nit-picky or negative comment) is the wire cutters. Below are some photos of the real thing. The handles are made from a Bakelite-type material as opposed to wood. If you need a better photo of them, I can take one.
I tried the same method used on my Panthers periscopes. Base coat of primer red, mottled with rust/black mixture.
Keep up the great work!
Tim
"So long as one isn't carrying one's head under one's arm, things aren't too bad." – Erwin Rommel
-
simon_manning
- Posts: 2061
- Joined: Fri Nov 02, 2007 8:51 pm
- Location: new forest,hampshire,u.k.
- Been liked: 1767 times
great pictures tim and thank you, once i have the hull all complete i will go back over the paint and make changes, colours, shades, bits i'm not happy with, the spade handle to me looks the wrong colour, the photos i've put on the forum always show more white .it must be the lighting in my workshop. good to know the build keeps you interested and others, i like getting referance photos and build tips. regards simon.
-
Stephen White
- Site Admin
- Posts: 3114
- Joined: Sat Oct 11, 2008 7:05 pm
- Location: Dorset
- Has liked: 1038 times
- Been liked: 2111 times
- Contact:
Simon
Glad you've enjoyed using the Promodeller wash. The results look stunning. They've now introduced a line of pigments and I used the dark dirt to do the jacking block on my Pz III. Very pleased with the results if used in moderation. It's hard to be restrained in weathering when it's so satisfying.
All the best.
Stephen
-
simon_manning
- Posts: 2061
- Joined: Fri Nov 02, 2007 8:51 pm
- Location: new forest,hampshire,u.k.
- Been liked: 1767 times
-
Tim Bowman
- Posts: 1762
- Joined: Fri Jul 13, 2007 4:53 am
- Location: Northern California
- Been liked: 177 times
- Contact:
-
Kent Wiik
- Posts: 425
- Joined: Sat Dec 04, 2010 11:18 am
- Location: Northern Sweden
- Has liked: 6 times
- Been liked: 194 times
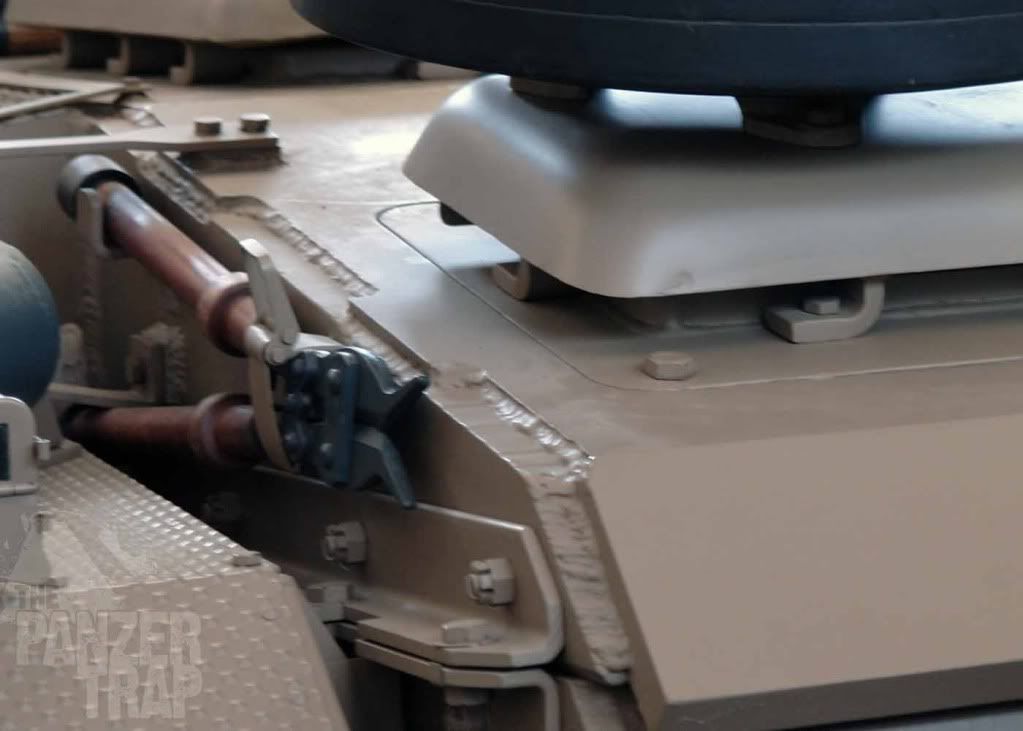
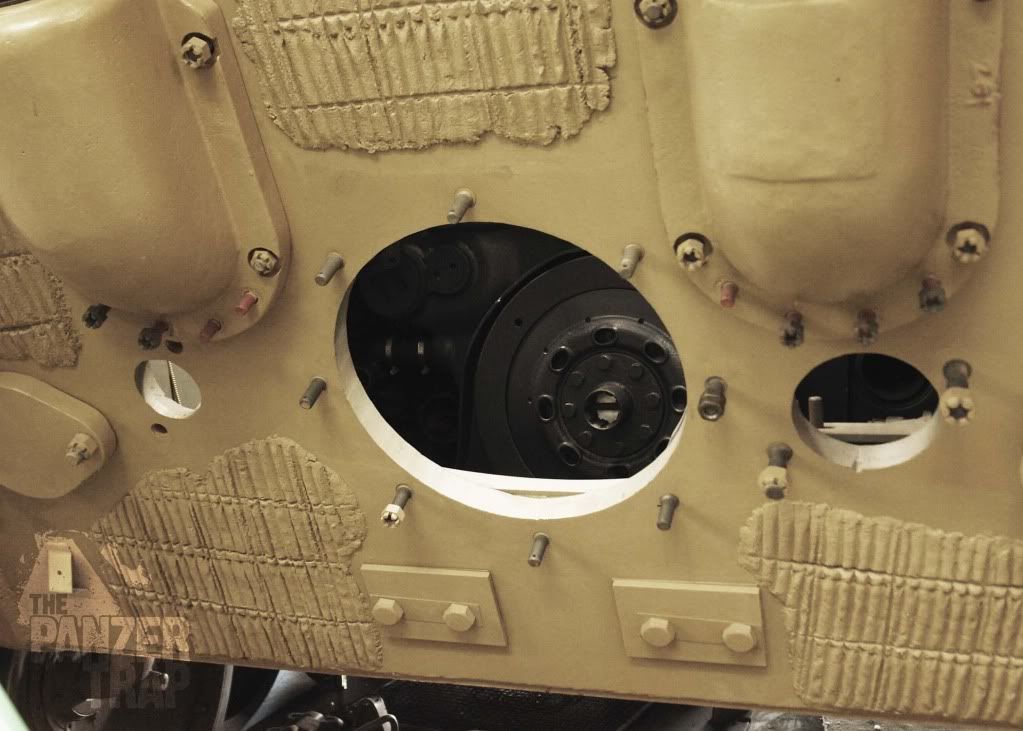
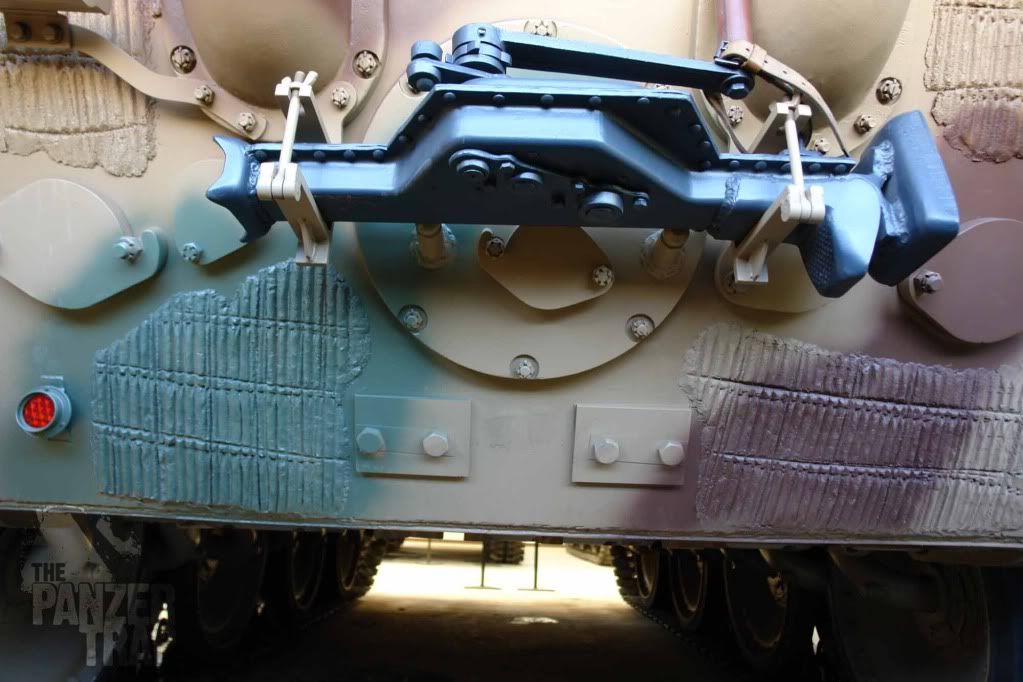
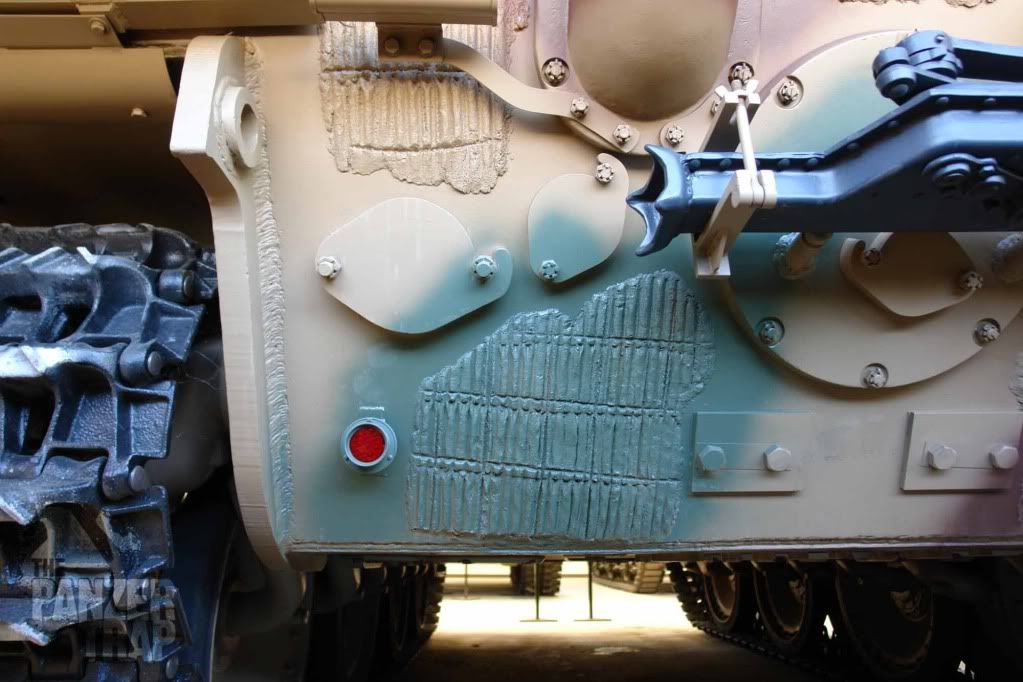
Hi Simonsimon_manning wrote:could someone please tell me, does the tow bracket/ round starter plate on the rear hull shown in my photo, is it fixed with castle nuts, many thanks simon
Those nuts were "normal" nuts + a split pin.
Yes, some in museum restored Panther has castle nuts but that is wrong.
Please look at the 2 photos below taken from Panther manuals.


Hope this was of use.
Kind regards
Kent
-
leesellars
- Posts: 934
- Joined: Thu Jul 12, 2007 11:19 am
- Location: Nottingham
- Has liked: 2 times
- Been liked: 15 times
Hello Kent
Your Knowledge is always of help.
Lee
Your Knowledge is always of help.
Lee
http://www.Facebook.com/newthorpemodels
Dont hit me so early in the morning with those negative waves.
Listen carefully i shall say this only once.
If its not broke dont fix it.
Ich Hatt Einen Kameraden
Dont hit me so early in the morning with those negative waves.
Listen carefully i shall say this only once.
If its not broke dont fix it.
Ich Hatt Einen Kameraden
-
simon_manning
- Posts: 2061
- Joined: Fri Nov 02, 2007 8:51 pm
- Location: new forest,hampshire,u.k.
- Been liked: 1767 times
-
simon_manning
- Posts: 2061
- Joined: Fri Nov 02, 2007 8:51 pm
- Location: new forest,hampshire,u.k.
- Been liked: 1767 times


-
simon_manning
- Posts: 2061
- Joined: Fri Nov 02, 2007 8:51 pm
- Location: new forest,hampshire,u.k.
- Been liked: 1767 times
