Has anyone tried constructing the turret yet...?
-
Pete Mallett
- Posts: 133
- Joined: Tue Jul 21, 2009 4:17 pm
- Location: Oxford
- Been liked: 11 times
- Contact:
Has anyone tried constructing the turret yet...?
Whilst the paint is drying on my lower hull I had a go at the turret to pass the time. For those of you who have yet to get there...interesting times lay ahead of you. I fear my turret and my barrel and muzzle break will all require a trip back to the factory. I'll have another go at it tomorrow when I'm fresh and post an update then.
-
Mark Love
- Posts: 8
- Joined: Wed Aug 18, 2010 9:04 pm
- Location: Manchester
-
Armortek

- Site Admin
- Posts: 2936
- Joined: Tue Jul 10, 2007 10:30 am
- Location: Winchester, England
- Been liked: 3705 times
Hi Gents
I have just tried a couple of parts from the remaining stock. The assembly of the muzzle brake onto the barrel is tight. We make all these barrel threads tight to keep the authorities happy about the ease of disassembly issue on the blank firer. They will go together a lot easier if you file around the outside of the thread on the barrel, thus reducing the diameter a little. Thoroughly clean and drench in WD40. They will then go together just fine. Don't try to do it dry because they will bind up and destroy the threads.
I'm afraid I don't understand the general comment about the turret assembly, I am not aware of any issues other than a fastener issue where countersunk screws have been supplied and they should be cap heads. The cap are available if anyone requires them.
Hope this helps
Mark
Armortek
-
Pete Mallett
- Posts: 133
- Joined: Tue Jul 21, 2009 4:17 pm
- Location: Oxford
- Been liked: 11 times
- Contact:
I've managed to get the muzzle break on by doing just that, taking a needle file to the end of the barrel and simply cleaning up the thread. Presumably the thread was cut on a lathe and just needed cleaning up.
Haven't got back to the Turret yet but it would appear that my side plates don't bend in far enough to meet the turret floor at the back. Once put together there is a kick out of a couple of mm which seems to have several knock on effects on screw location, especially on the top screws on the back plate. This also causes issue with the roof plate aligning with the holes. As I say I haven't had time to get back to it today, the wife has had me doing other stuff, but I should find 30 minutes after lunch on Sunday to have another go at it then.
Rgds
Pete
-
phil fitzpatrick
- Posts: 2020
- Joined: Sat Dec 12, 2009 3:38 pm
- Location: Sambourne uk
- Been liked: 223 times
Turret
Hi Guy's
Thanks for the info Mark on the Turret screws and Barrel threads,saved
a bit of head scratching
I had already primed and undercoated my front back and sides.
So I found some M6 x 10mm for the front to base(just had to clean out
one hole with a 6mm tap).
I had already got some M4 x 10 cap heads so I used them on the sides
and it goes together very well,including the top lining up nicely.


Sorry about the quality of the pics,the bed room lights are too dim.
Thanks for the info Mark on the Turret screws and Barrel threads,saved
a bit of head scratching
I had already primed and undercoated my front back and sides.
So I found some M6 x 10mm for the front to base(just had to clean out
one hole with a 6mm tap).
I had already got some M4 x 10 cap heads so I used them on the sides
and it goes together very well,including the top lining up nicely.
Sorry about the quality of the pics,the bed room lights are too dim.
-
phil fitzpatrick
- Posts: 2020
- Joined: Sat Dec 12, 2009 3:38 pm
- Location: Sambourne uk
- Been liked: 223 times
Turret
Hi Guys
Took some better photoe's of the turret this morning in the day light
I used M6 x 10 cap heads front to base and M4 x 10 cap heads sides
and rear at the bottom
2 front turret brackets I used the M4 x 20 caps supplied to front and
M4 x 8 caps to the side of front brackets and to rear brackets.
It went together easy with the caps and every hole lines up for the
turret top
Cheers
Phil
-
John Davie
- Posts: 114
- Joined: Wed Jan 13, 2010 8:55 am
- Location: Ampthill, Bedfordshire
- Been liked: 15 times
Just started on my turret and it seems to go together OK. The front, sides and rear all pull on on the bolts to a good fit. The mantlet fittings slot in after a little fine cleaning and the front will need some light relieving on the left for the pivot bush to fit snugly and allow the mantlet in.
John
John
-
Pete Mallett
- Posts: 133
- Joined: Tue Jul 21, 2009 4:17 pm
- Location: Oxford
- Been liked: 11 times
- Contact:
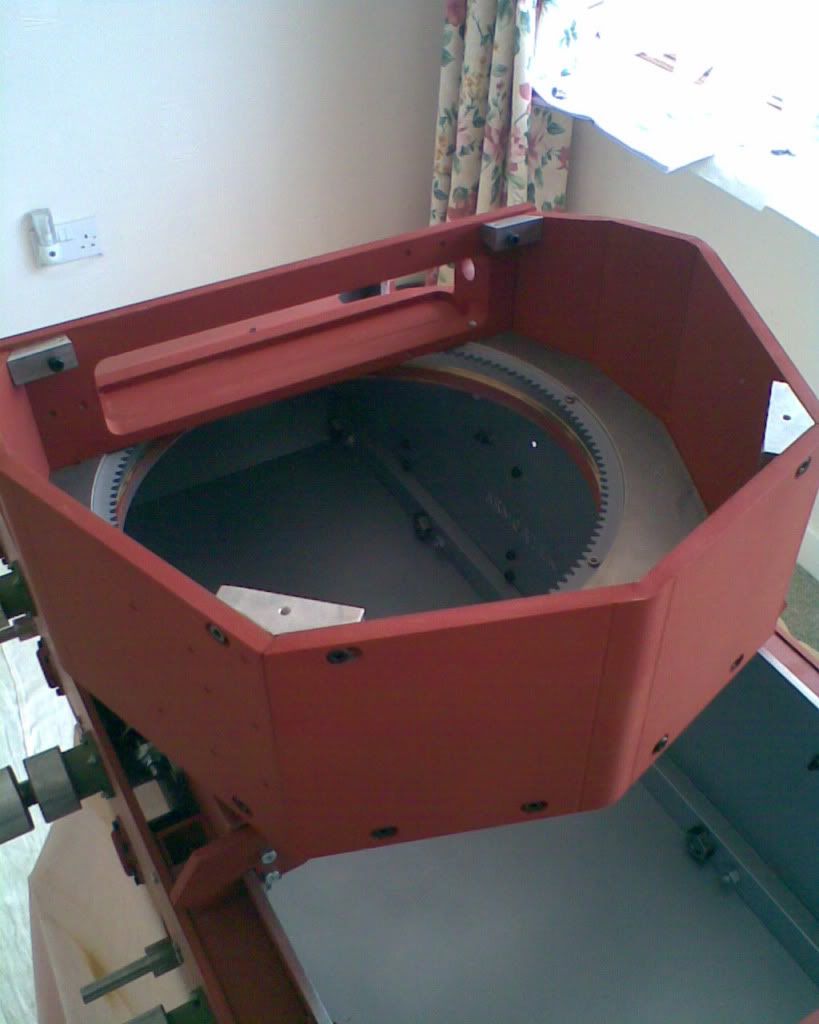
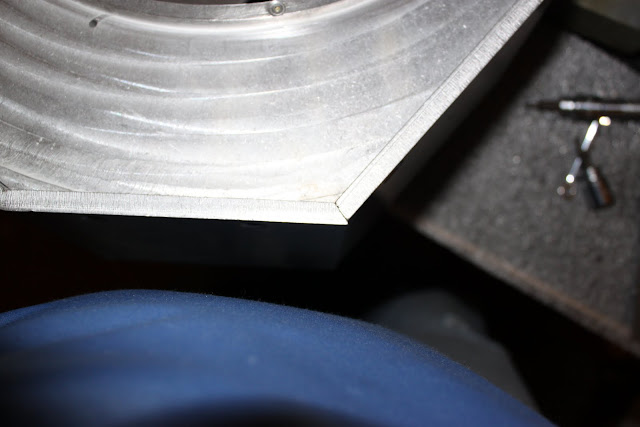
OK, so following the instructions in the manual I constructed the turret on the base plate and then brought the roof to check alignment. The following pictures show what I'm seeing...


The first four pictures show the alignment of the screw holes in the roof plate, also note the back-plate of the turret protrudes by quite a few mm.
The next picture show the left-rear of the turret, again note the overlap of the rear-plate with the side plate.

Whilst the right-rear seems to fit much better, see below.

The top, left-rear screw wouldn't go in as it seemed to foul on the lip of the hole, see below.

These last two pictures show are attempting to show the 2mm (or more gap) that occurs between the side plates and the base


The first four pictures show the alignment of the screw holes in the roof plate, also note the back-plate of the turret protrudes by quite a few mm.
The next picture show the left-rear of the turret, again note the overlap of the rear-plate with the side plate.
Whilst the right-rear seems to fit much better, see below.
The top, left-rear screw wouldn't go in as it seemed to foul on the lip of the hole, see below.
These last two pictures show are attempting to show the 2mm (or more gap) that occurs between the side plates and the base
-
Pete Mallett
- Posts: 133
- Joined: Tue Jul 21, 2009 4:17 pm
- Location: Oxford
- Been liked: 11 times
- Contact:
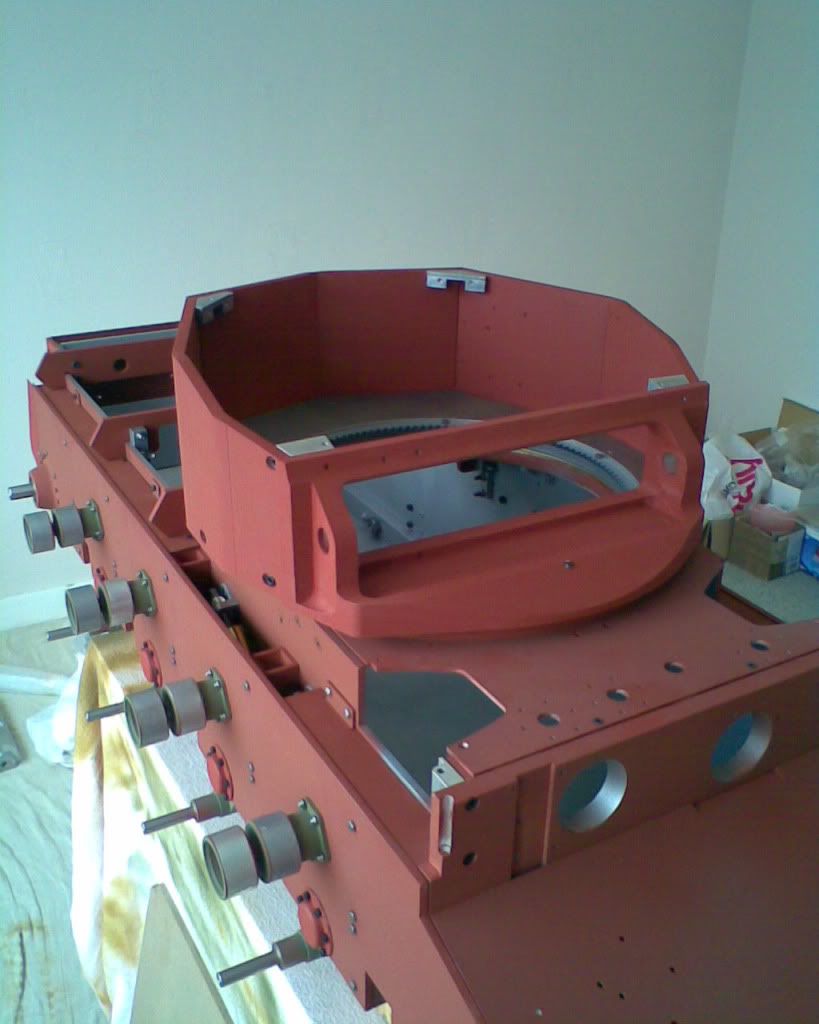
My second attempt at the turret wasn't anymore successful...
I tried a new tack, and left the back plate of the turret off until after I'd fitted the roof plate. With the turret brackets at the back loosely fitted I attached the roof and beginning to tighten a little. I then added the back plate and tightened somemore. Here's the net result.


Suggestions on a postcard please?
I tried a new tack, and left the back plate of the turret off until after I'd fitted the roof plate. With the turret brackets at the back loosely fitted I attached the roof and beginning to tighten a little. I then added the back plate and tightened somemore. Here's the net result.
Suggestions on a postcard please?
-
Pete Mallett
- Posts: 133
- Joined: Tue Jul 21, 2009 4:17 pm
- Location: Oxford
- Been liked: 11 times
- Contact:
-
Pete Mallett
- Posts: 133
- Joined: Tue Jul 21, 2009 4:17 pm
- Location: Oxford
- Been liked: 11 times
- Contact:
-
John Davie
- Posts: 114
- Joined: Wed Jan 13, 2010 8:55 am
- Location: Ampthill, Bedfordshire
- Been liked: 15 times
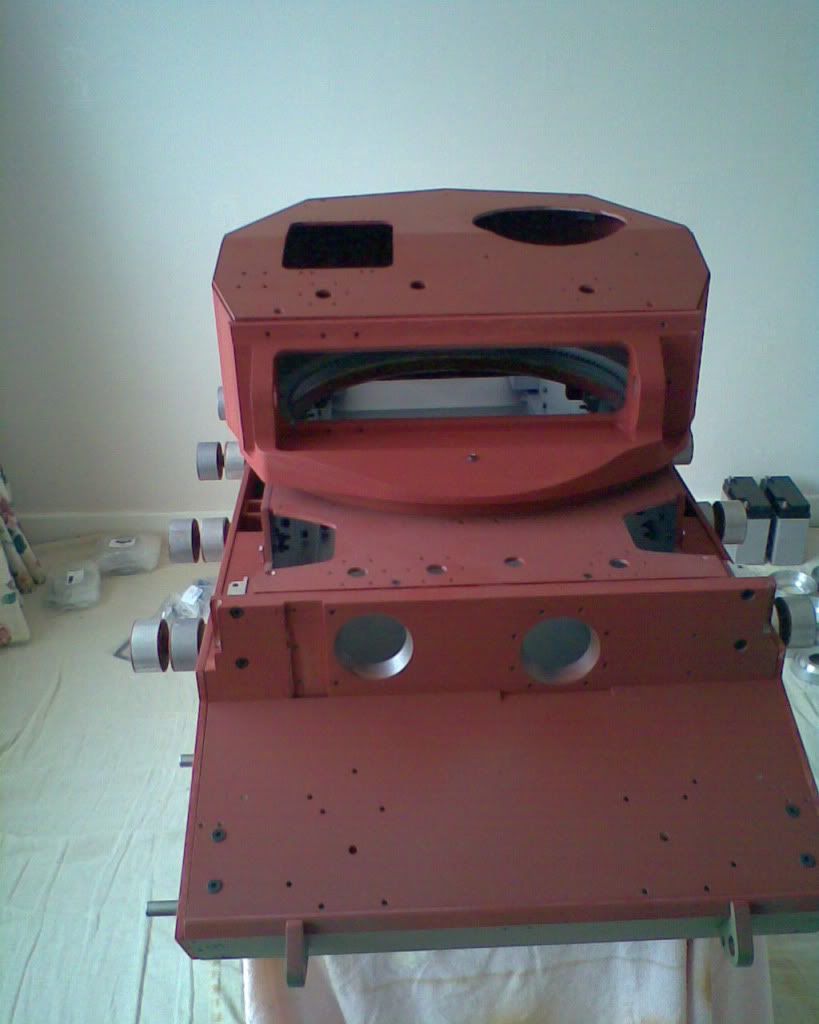
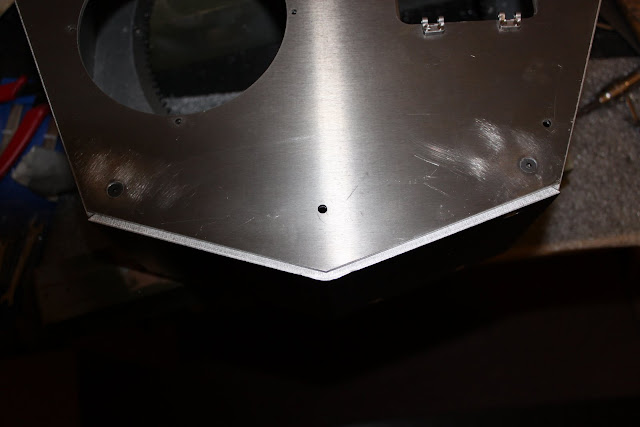
Hi Pete,
Here's some piccys of how I have got mine together, there is a slight overlap on the outside of about 1.5mm evenly on each side. I would think this is down to it not being a 45 degree angle as the inside edge seems to meet perfectly. I will probably just file it down before putting a weld line down, although only the bottom inch will be visable when the panier is on.
John
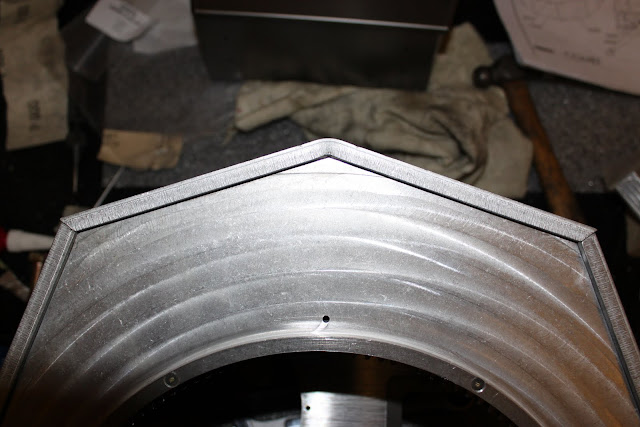
-
Armortek
- Site Admin
- Posts: 2936
- Joined: Tue Jul 10, 2007 10:30 am
- Location: Winchester, England
- Been liked: 3705 times
-
Pete Mallett
- Posts: 133
- Joined: Tue Jul 21, 2009 4:17 pm
- Location: Oxford
- Been liked: 11 times
- Contact:
-
Pete Mallett
- Posts: 133
- Joined: Tue Jul 21, 2009 4:17 pm
- Location: Oxford
- Been liked: 11 times
- Contact:
