The M2x6 bolt stated is correct, the manual doesn't show the M2 nut on the reverse.
Dave's Tiger I (Early) Kit Build Thread
-
Sean-Armortek

- Posts: 15
- Joined: Thu Oct 14, 2021 6:52 am
- Has liked: 6 times
- Been liked: 20 times
Re: Dave's Tiger I (Early) Kit Build Thread
Hello Dave
The M2x6 bolt stated is correct, the manual doesn't show the M2 nut on the reverse.
The deck plate was meant to be just plain drilled holes, I accidently tapped those M3 as an added feature, apologies if that's caused you any confusion.
The M2x6 bolt stated is correct, the manual doesn't show the M2 nut on the reverse.
The deck plate was meant to be just plain drilled holes, I accidently tapped those M3 as an added feature, apologies if that's caused you any confusion.
-
Dave Goodwin

- Posts: 106
- Joined: Sat Oct 21, 2023 3:01 pm
- Location: Vermont, USA
- Has liked: 25 times
- Been liked: 113 times
Re: Dave's Tiger I (Early) Kit Build Thread
Thanks for the reply Sean. Why would that not have been drilled at M2 rather than M3? Is there some particular way we're supposed to be mounting the headlamp base in the larger hole?
-
Dave Goodwin
- Posts: 106
- Joined: Sat Oct 21, 2023 3:01 pm
- Location: Vermont, USA
- Has liked: 25 times
- Been liked: 113 times
Re: Dave's Tiger I (Early) Kit Build Thread
Looks like there might be a misprint in the build guide on Step 27. Assembling the turret deck rope clamps, the guide calls for an M2.5x12 CSK for the threaded post and an M2.5x16 CSK for the attachment to the deck. That appears backward to me. With the folding top of the clamp at 90 degrees to the body, that M2.5x12 does not stick through the top plate far enough to put a nut on it. The M2.5x16 also seems way too long for the mounting screw. Even the M2.5x12 hangs down below the deck plate quite a distance. I think I am going to build these clamps with those screws swapped.
-
Adrian Harris

- Posts: 4907
- Joined: Thu Jul 12, 2007 10:46 pm
- Location: Berkshire (UK)
- Has liked: 1182 times
- Been liked: 1378 times
Re: Dave's Tiger I (Early) Kit Build Thread
It's tricky comparing manuals from different production runs but the Tiger 131 kit used M2.5x12 for the threaded post on both the large and small clamps. The large rope clamp used M2.5x10 CSK bolts to hold them to the front deck and the small rope clamp used M2.5x20 CSK bolts to hold them to the engine deck covers.
Adrian.
Adrian.
Contact me at sales@armortekaddict.uk for details of my smoker fan control module
-
Dave Goodwin
- Posts: 106
- Joined: Sat Oct 21, 2023 3:01 pm
- Location: Vermont, USA
- Has liked: 25 times
- Been liked: 113 times
Re: Dave's Tiger I (Early) Kit Build Thread
Thanks Adrian. I haven't Loctited these in as yet so I can always switch it back, but that M2.5x12 just seems way too short at first glance, and the x16 really hangs down below the turret deck. I'm going to leave them as I have switched them for now and I will dig out the rope and see how it fits in the clamp. Perhaps the clamp needs to close down past 90 degrees, in which case the x12 might be OK.
I have to admit, I don't understand what they are doing on this turret deck plate. These rope clamps all call for M2.5 screws, yet the holes in the plate are at least M3 in diameter. The screw fit is extremely sloppy and the little M2.5 nuts want to tip into the hole unless you get them precisely centered. I may end up putting a washer on them since the screws are long anyway. The M2 screw and nut for the headlamp bases is an even worse fit in the M3 holes there. The only thing I can think of is it may be faster and easier in production to drill one size hole, but meh...
I have to admit, I don't understand what they are doing on this turret deck plate. These rope clamps all call for M2.5 screws, yet the holes in the plate are at least M3 in diameter. The screw fit is extremely sloppy and the little M2.5 nuts want to tip into the hole unless you get them precisely centered. I may end up putting a washer on them since the screws are long anyway. The M2 screw and nut for the headlamp bases is an even worse fit in the M3 holes there. The only thing I can think of is it may be faster and easier in production to drill one size hole, but meh...
-
Dave Goodwin
- Posts: 106
- Joined: Sat Oct 21, 2023 3:01 pm
- Location: Vermont, USA
- Has liked: 25 times
- Been liked: 113 times
Re: Dave's Tiger I (Early) Kit Build Thread
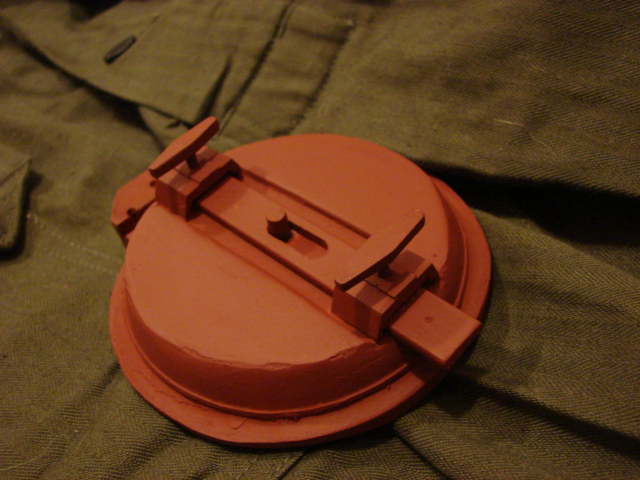
Starting on some of the turret assembly and one part has me wondering. What do folks do with the large escape hatch. There seems to be no retention mechanism, and as it is hinged, it seems like it's just going to want to crash open with a good bump. Do you just loctite this in permanently? Anyone aware of any aftermarket parts that might contain a latching mechanism?
-
Damon Resch
- Posts: 94
- Joined: Fri Jun 17, 2022 10:49 pm
- Location: South Central Pennsylvania
- Has liked: 600 times
- Been liked: 55 times
Re: Dave's Tiger I (Early) Kit Build Thread
East Coast Armory makes an escape hatch, looks like the locking mechanism is part of the entire hatch, worth asking him.
https://www.eastcoastarmory.com/german_ ... C00029.JPG
https://www.eastcoastarmory.com/german_ ... C00029.JPG
-
John Fitzsimons
- Posts: 1699
- Joined: Tue Dec 14, 2010 3:11 pm
- Location: IRELAND,Dublin/Meath
- Has liked: 1 time
- Been liked: 365 times
- Contact:
Re: Dave's Tiger I (Early) Kit Build Thread
It's always been the same with this hatch. I am working on my hatch at the moment. I should have some details on how i fix it soon. I am working on the hatch from the 2005 release so it's a low quality cast piece. Might end up making a complete hatch bot it's asking a lot from my little lathe.Dave Goodwin wrote: ↑Wed May 08, 2024 6:23 pmStarting on some of the turret assembly and one part has me wondering. What do folks do with the large escape hatch. There seems to be no retention mechanism, and as it is hinged, it seems like it's just going to want to crash open with a good bump. Do you just loctite this in permanently? Anyone aware of any aftermarket parts that might contain a latching mechanism?
If interested in any parts used in my builds contact me at johnfitzsimons@msn.com for a price list.
http://www.armortek.co.uk/Forum3b/viewt ... f=4&t=4770
https://youtube.com/@16rctankworkshop-y ... TlMwTalnX5
http://www.armortek.co.uk/Forum3b/viewt ... f=4&t=4770
https://youtube.com/@16rctankworkshop-y ... TlMwTalnX5
-
Dave Goodwin
- Posts: 106
- Joined: Sat Oct 21, 2023 3:01 pm
- Location: Vermont, USA
- Has liked: 25 times
- Been liked: 113 times
Re: Dave's Tiger I (Early) Kit Build Thread
Another parts-related question. Anyone got any suggestions for appropriately scaled shackles for the front and rear of the Tiger? I don't like having those bare holes there. 
-
Damon Resch
- Posts: 94
- Joined: Fri Jun 17, 2022 10:49 pm
- Location: South Central Pennsylvania
- Has liked: 600 times
- Been liked: 55 times
Re: Dave's Tiger I (Early) Kit Build Thread
Mark Lawson makes the shackles. Beautiful work. He’s on the forum. Link to his ad in craftsman market place:
viewtopic.php?t=9820
viewtopic.php?t=9820
-
Dave Goodwin
- Posts: 106
- Joined: Sat Oct 21, 2023 3:01 pm
- Location: Vermont, USA
- Has liked: 25 times
- Been liked: 113 times
-
Dave Goodwin
- Posts: 106
- Joined: Sat Oct 21, 2023 3:01 pm
- Location: Vermont, USA
- Has liked: 25 times
- Been liked: 113 times
Re: Dave's Tiger I (Early) Kit Build Thread
Got to opening and examining the Option Pack shipment and, I have to admit, I am a bit underwhelmed.
The new Power Module looks decidedly amateurish compared to the older one. I guess the newer one has some design improvements, like separately fused outputs, but is this seriously the best they could do for packaging? Truly ugly, with a bunch of stuff sticking out all over the place, the battery indicator just floating loose on two wires. It seems like it's going to make for one messy-looking installation...
On the drive front, there's now a second pair of taper lock bushings to contend with on the belt pulleys, with the accompanying alignment requirements and concerns. I'm not sure why the drive system couldn't have been engineered with sufficient precision to use a fixed-geometry design.
Well, guess I'll install it all and see what happens. I can always look to find an older system and swap it out if desirable.
The new Power Module looks decidedly amateurish compared to the older one. I guess the newer one has some design improvements, like separately fused outputs, but is this seriously the best they could do for packaging? Truly ugly, with a bunch of stuff sticking out all over the place, the battery indicator just floating loose on two wires. It seems like it's going to make for one messy-looking installation...
- power module.JPG (64.65 KiB) Viewed 184 times
Well, guess I'll install it all and see what happens. I can always look to find an older system and swap it out if desirable.
-
Armortek

- Site Admin
- Posts: 2804
- Joined: Tue Jul 10, 2007 10:30 am
- Location: Winchester, England
- Been liked: 3034 times
Re: Dave's Tiger I (Early) Kit Build Thread
Thanks for your constructive post as always Dave.
With regards to the questions that you asked yesterday via your emails:
- Use loctite 480 for part CE0491 into part ce1409
- CE0491 should sit flush with th efront face of CE1409
- CE1409 should be secured into CE2407. If the cone head bolts are not sufficient use loctite 638
I look forward to reading that you are actually enjoying the build at some point.
Armortek
-
Brian Ostlind

- Posts: 1455
- Joined: Sat Oct 28, 2017 6:56 am
- Location: Oregon, USA
- Has liked: 954 times
- Been liked: 2028 times
Re: Dave's Tiger I (Early) Kit Build Thread
Honestly looks good to me! Looking forward to my new options.
Re: Dave's Tiger I (Early) Kit Build Thread
Hello Dave,
The reason for changing from the red box power modules to the latest release was time frame, The red boxes were a very time consuming item to make and put together, The latest power module are more off the shelf item, Still have to make all the wiring and assembly them but a much quicker item to release, The idea of the loose battery voltage indicator was that you can place the display were you want so it can be seen, Making any wiring look neat and tidy is difficult but can be done by using cable tyraps, tyrap blocks and spiral band etc.
The option packs are a very time/labour consuming part of the kits to put together, So anything we can do to speed production up is to aid the time period the customer has to wait, We are trying (not enough hours in the day), And by all means feel free to come in and give me a hand,
Kind regards, Chris.