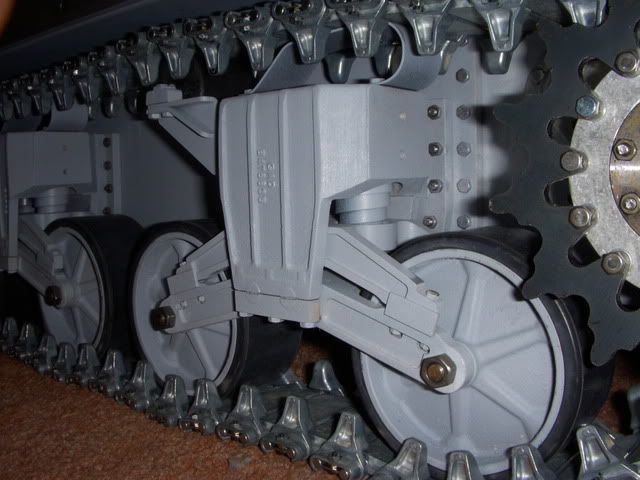
Thanks for the kind words, my sherman bogies have had a lot of work they are the same as yours Bob, with brass upper bearing to ride on the slide pad. thanks to both of you for the info you provide on the forum.
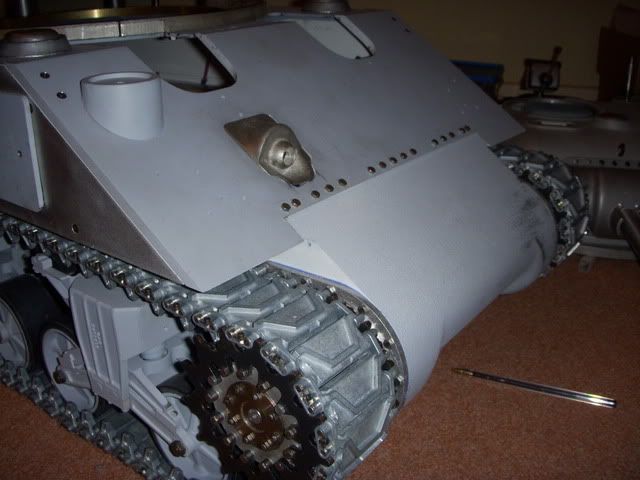
To make it ride a bit better you have to put a chamfer on the inside of the drive sprokets. just beds the track in faster aswell.
Lee
http://www.Facebook.com/newthorpemodels Dont hit me so early in the morning with those negative waves.
Listen carefully i shall say this only once.
If its not broke dont fix it.
Ich Hatt Einen Kameraden
Hi Lee
I will consider adding a slight angle to inside edge of sprocket after a few test runs, i have added m3 washers to pack out sprocket slightly
Thanks David
Hi David,
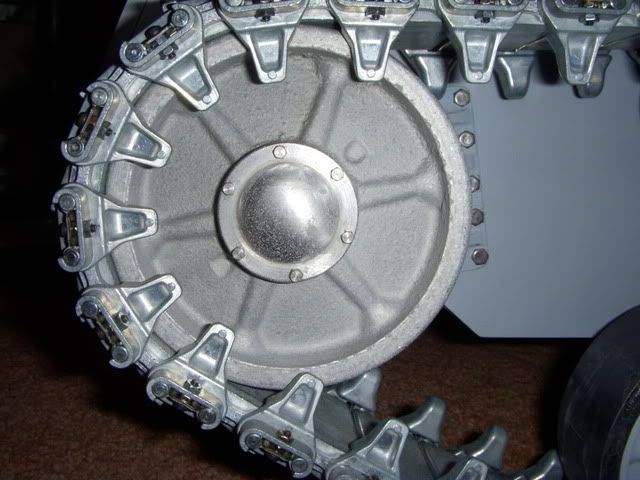
Nice model. Like the idler hub cap retaining nuts especially!
Not sure why you think you need to pack out the sprockets. Any pinching of the tracks gets rubbed out (literally) after a couple of hours running. You are also adding another variable to keeping the tracks centred on the running gear and parallel to each other.
PM me if you want an exhaustive list of mods for the running gear.
cheers, Fabrice
Hi fabrice
Thanks for the comments, the packing out of the sprockets was a tip that David ward did to his sherman to prevent the tracks riding up the sprocket, is this mod worth including ?
Any initial stickiness disappeared from my model after a few runs. I have also had to take a link out of both sides to keep the tracks tight when on the flat. Track adjustment should be done with the tank fully loaded up to its standard "kerb weight" ie with batteries and turret fitted.
The original M4A3 was run with very tight tracks. the max full scale deflection being 3/4 inch between the sprung steel track-return skids. But bear in mind the original track was "live" with rubber bushes resisting the tendancy to sag, unlike our "dead",ie floppy, kit tracks.
The two key mods that I and others have used is to skim a little material from the inside of the sprocket drum, Mark has offered to do this for customers without machining facilities, and secondly to use countersunk socket screws on the inner sprocket to improve clearance to the main drive housing. I would also suggest running a deburring tool over the edges of the laser cut steel sprockets which are a tad sharp. This only applies to the edges coming into contact with the softer alloy track parts.
PM me you your email address and I can send photos of my mods. A picture being worth several thousand words here.
Cheers, Fabrice
Hi Fabrice
One of the first mods i made wes to replace hex head with countersunk socket screws on the inner sprocket to improve clearance, the clearance of the inside drum seems ok, maybe this mod was done by the previous owner, the laser cut steel sprockes are sharp, i will try and get hold of a deburring tool .
And the build continues after a 15 year gap! I managed to buy my Sherman back 4 years ago now. Roy did a superb job finishing the model to a good standard.
I have since fitted sound and a BEC as charging the small batteries to power the RC is a pain, also fixed a few things, and a recent upgrade was a Bob Morey tow hitch(very nice) but now I'm fitting a set of duck bills, opening up the sprocket to receive will be required. This model has been a favorite of mine as it was the first model that I modified/copied the other builders (Dale and Bob)
A new paint job to make it like the the real tank pictured,and some modifications to the cupola are on my schedule
Yes they add something extra - these were made by Chris Fry, probably 10 years back! he had intentions to use them, but in the end was surplus to requirements due to selling the model.