Faux tool latches - how too 101
Posted: Wed Nov 12, 2008 5:43 am
I thought I would share a simple technique to make reasonable (I think) looking but non working, durable (Pseudo-scale) tool clamps for detailing our models. The clamps are primarily for German vehicles although allied vehicles used clamps like this as well.
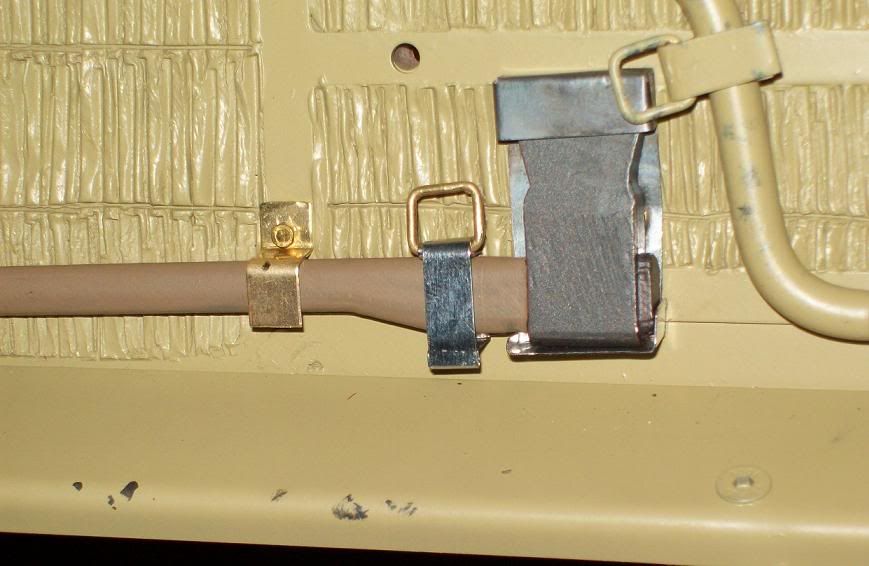
This is not intended to be the end-all way to make these, but a simple guide for those who want to experiment. These clamps are also only intended for scrutiny at standoff distance (3-5 feet for me) not the ultimate in 100% accuracy. One final note, while there is no substititute for real working latches for ultimate wow factor, some may prefer a not so delicate (or expensive) alternative to real working latches. Those short of cash to buy real ones (like me) or who like to tinker (also like me) and who don't have the patience to make real latches (yup like me ) may find the following article useful.
First the tools:
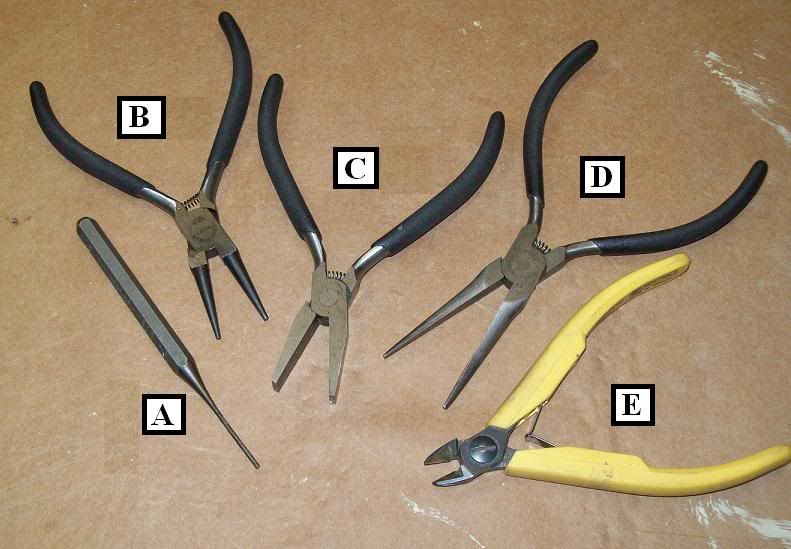
Simple set of hand pliers and a pin punch (for a mandrel) is all that is needed to form the clamps. Of course a sheet metal shear (to cut strips) a soldering torch, files, jewelers hand saw, and small hammer are also handy.
The pliers:
A) Pin punch -aka round bending mandrel
B) Chain pliers - smooth round jaws, for making curved bends
C) Flat jaw pliers - for 90 degree bends, jaws are smooth, no teeth to scratch sheet metal.
D) Needle nose flat jaw pliers - for 90 deg bends, and narrow bends, jaws are also smooth.
E) Cutters
Materials:
Aluminum, up to .020" thick, easy to work, soft, cannot be soldered easily, looks good when paint chips off (like steel).
Tin, up to .020" thick, used in this example article, soft, easy to work, can be soldered, looks good when paint flakes off.
Brass, up to about .015" thick, harder than alum and tin, can be soldered, doesn't look so good when paint chips, but my prefered material as it holds it shape better than alum or tin.
How to:
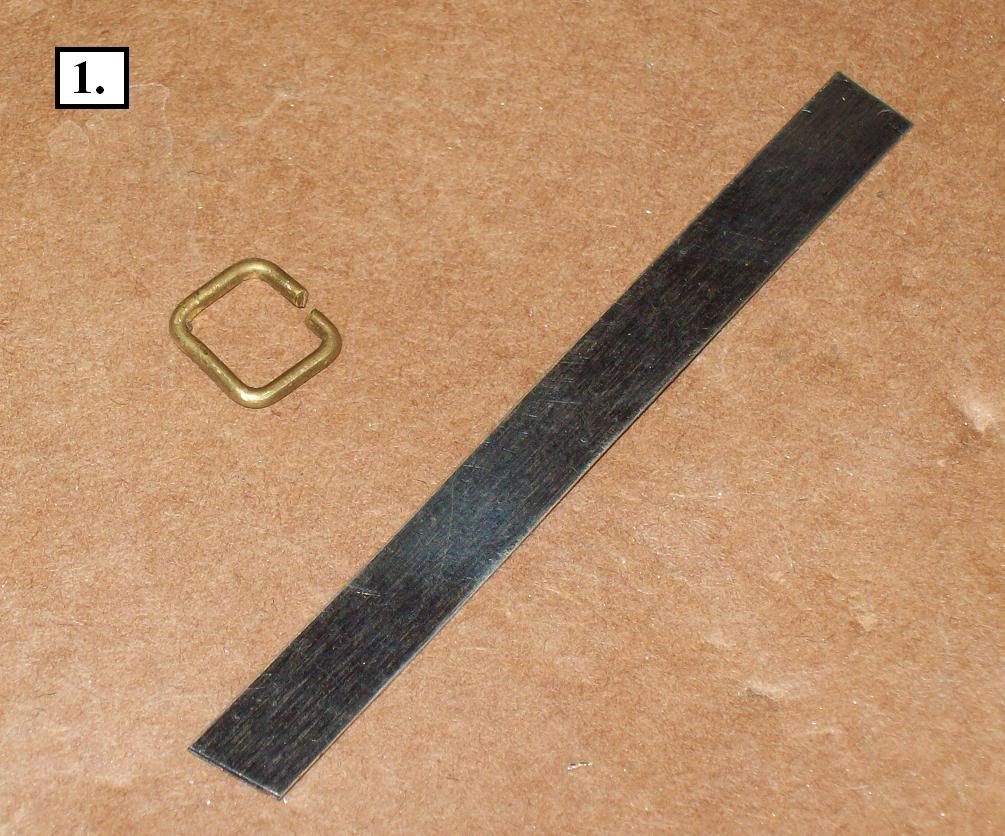
1) Cut or buy strip to size preferred. Make square ring from .03 brass wire using "D" pliers to form ring. Strip should just fit between ring.
Making nice looking square rings takes some practice and trial and error - I still have not mastered it yet.
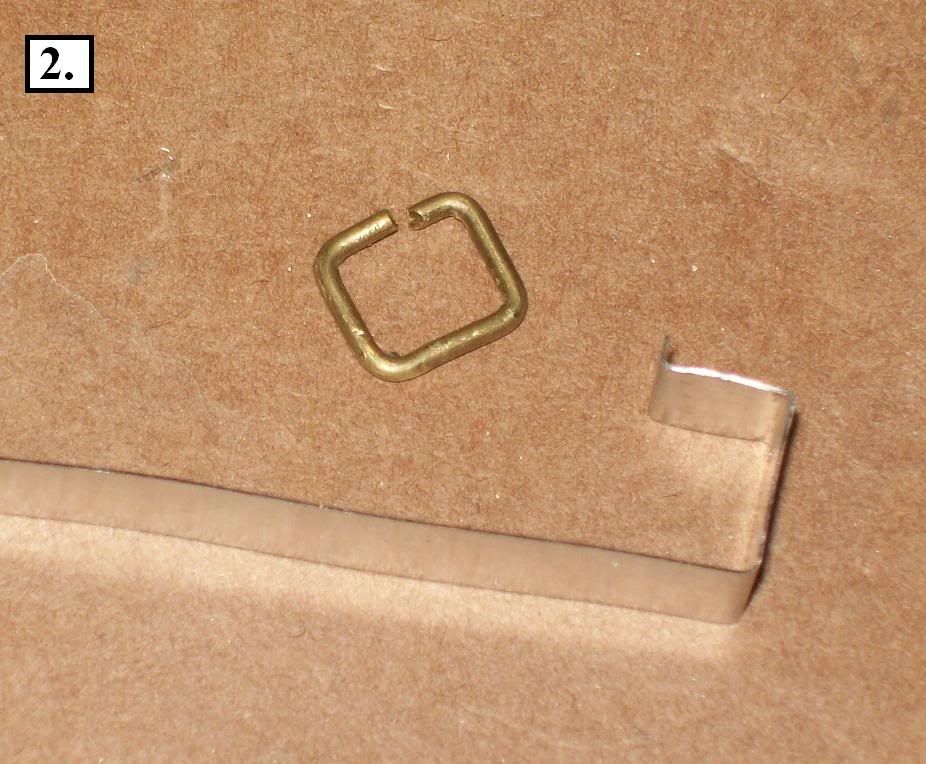
2) Form a tiny 90 deg lip at the end of the strip using either "C" or " D" pliers. Then form strip into a "U" just slightly wider and higher than tool to be held in clamp.
3) Using pin punch as a mandrel, bend the end opposite the lip formed in 2). The tops of the lip and bend should be approx the same height.

4) Place ring into curved bent region, and trim off excess materials using cutters (E). Place nipped ends of ring into trough of strip so that the cut ends will not show.

5) Fold material around ring with flat pliers to trap ring in place.

6) Select another strip of material the same width as your first peice to be the cover strap. Bend a lip in one end using flat pliers and a third piece of material to gage the thickness of the lip. The material should just fit into the bent lip.

7) Using the chain pliers (B) and pin punch mandrel (A) bend another curve in cover strap. Use the tool bracket you just made to gage the size. Trim off excess material once cover strap is correct length.

8. If you bent the metal correctly the cover strap should snap in place over the bracket and stay in place. This is a bit challenging to get right, but tin can be bent and unbent until you get it right. tin is quite soft and deforms easily so don't give up - you can always start over

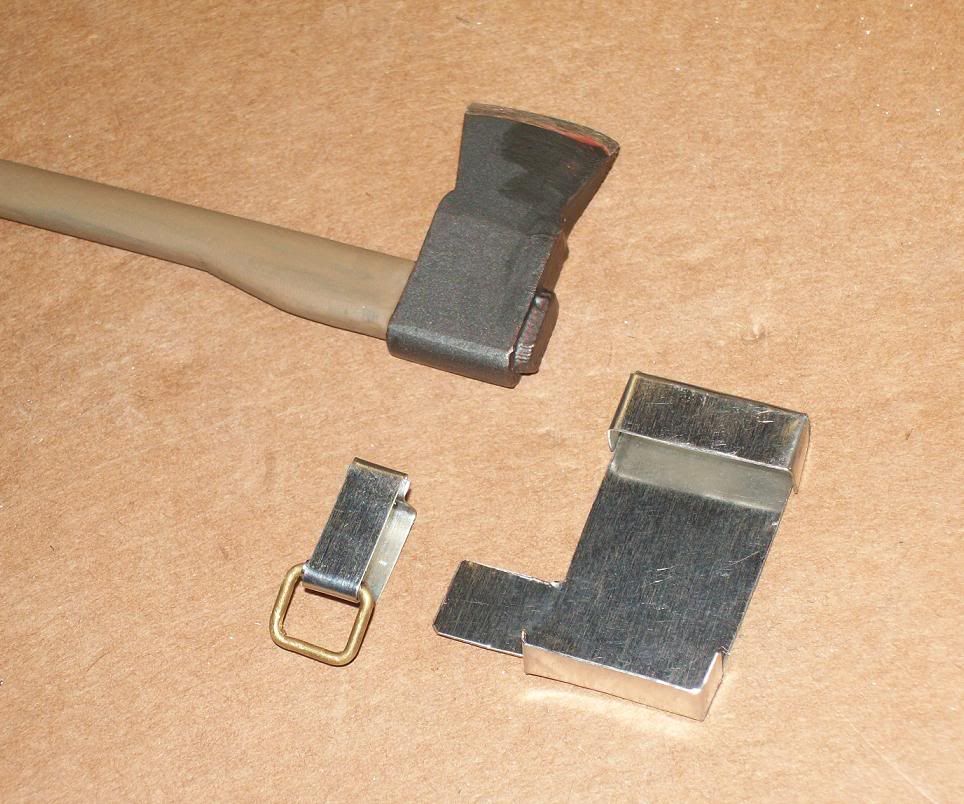
9) Heres tool bracket parts prior to being soldered together.

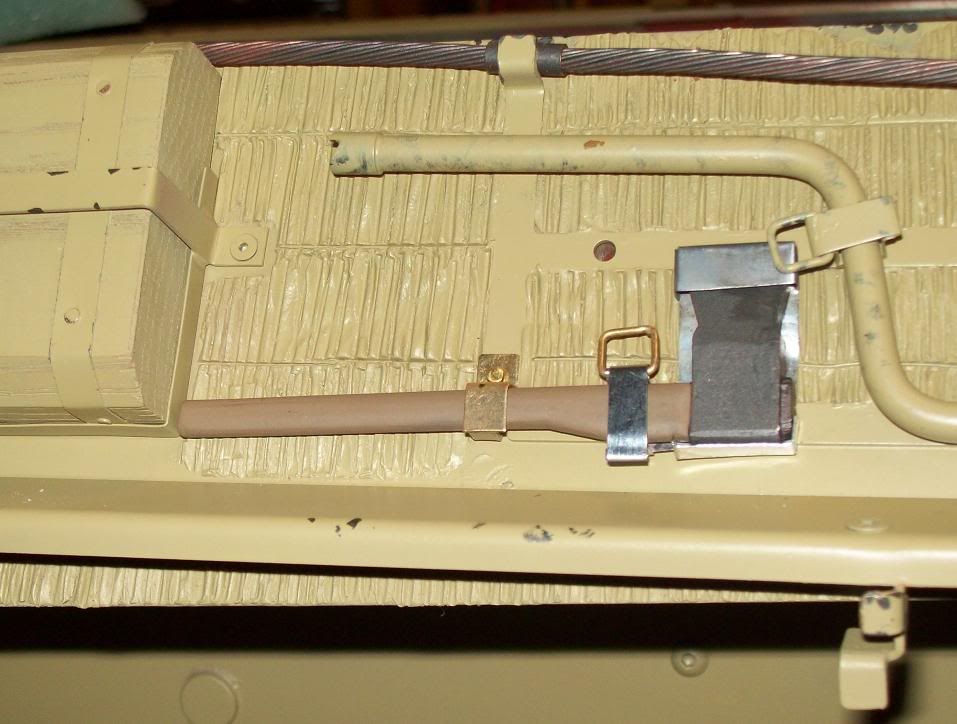
10) Once soldered together the piece can be test fit to the vehicle (Panther in this case). There is a flat head screw just behind the axe that holds the bracket in place. The "L" shaped brass piece will help hold the axe in place as well.

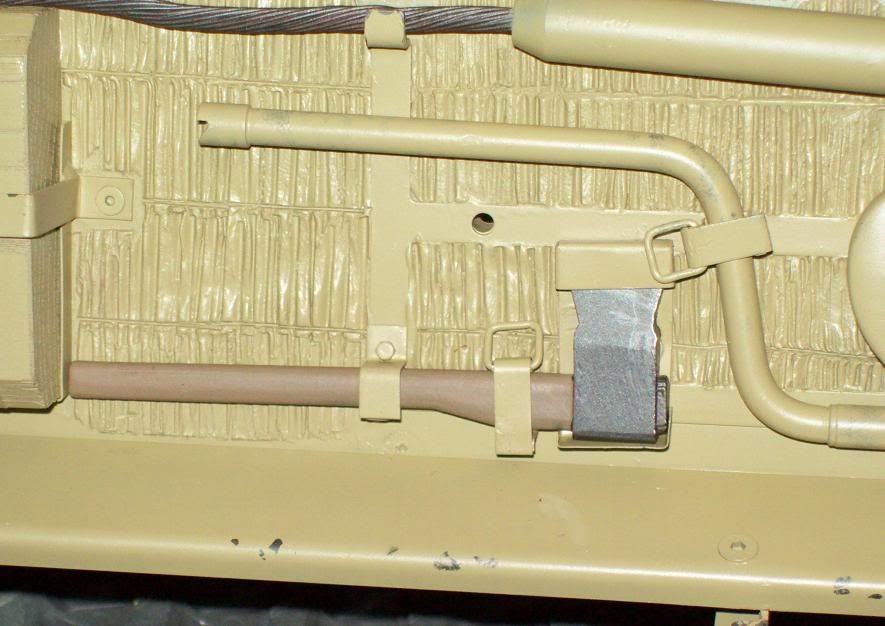
11) Dissassemble, prime and paint your piece and re-install it. Then stand back and admire your work!
Enjoy , and give it a try!

This is not intended to be the end-all way to make these, but a simple guide for those who want to experiment. These clamps are also only intended for scrutiny at standoff distance (3-5 feet for me) not the ultimate in 100% accuracy. One final note, while there is no substititute for real working latches for ultimate wow factor, some may prefer a not so delicate (or expensive) alternative to real working latches. Those short of cash to buy real ones (like me) or who like to tinker (also like me) and who don't have the patience to make real latches (yup like me
First the tools:
Simple set of hand pliers and a pin punch (for a mandrel) is all that is needed to form the clamps. Of course a sheet metal shear (to cut strips) a soldering torch, files, jewelers hand saw, and small hammer are also handy.
The pliers:
A) Pin punch -aka round bending mandrel
B) Chain pliers - smooth round jaws, for making curved bends
C) Flat jaw pliers - for 90 degree bends, jaws are smooth, no teeth to scratch sheet metal.
D) Needle nose flat jaw pliers - for 90 deg bends, and narrow bends, jaws are also smooth.
E) Cutters

Materials:
Aluminum, up to .020" thick, easy to work, soft, cannot be soldered easily, looks good when paint chips off (like steel).
Tin, up to .020" thick, used in this example article, soft, easy to work, can be soldered, looks good when paint flakes off.
Brass, up to about .015" thick, harder than alum and tin, can be soldered, doesn't look so good when paint chips, but my prefered material as it holds it shape better than alum or tin.
How to:
1) Cut or buy strip to size preferred. Make square ring from .03 brass wire using "D" pliers to form ring. Strip should just fit between ring.
Making nice looking square rings takes some practice and trial and error - I still have not mastered it yet.

2) Form a tiny 90 deg lip at the end of the strip using either "C" or " D" pliers. Then form strip into a "U" just slightly wider and higher than tool to be held in clamp.

3) Using pin punch as a mandrel, bend the end opposite the lip formed in 2). The tops of the lip and bend should be approx the same height.

4) Place ring into curved bent region, and trim off excess materials using cutters (E). Place nipped ends of ring into trough of strip so that the cut ends will not show.

5) Fold material around ring with flat pliers to trap ring in place.

6) Select another strip of material the same width as your first peice to be the cover strap. Bend a lip in one end using flat pliers and a third piece of material to gage the thickness of the lip. The material should just fit into the bent lip.

7) Using the chain pliers (B) and pin punch mandrel (A) bend another curve in cover strap. Use the tool bracket you just made to gage the size. Trim off excess material once cover strap is correct length.

8. If you bent the metal correctly

9) Heres tool bracket parts prior to being soldered together.


10) Once soldered together the piece can be test fit to the vehicle (Panther in this case). There is a flat head screw just behind the axe that holds the bracket in place. The "L" shaped brass piece will help hold the axe in place as well.


11) Dissassemble, prime and paint your piece and re-install it. Then stand back and admire your work!

Enjoy , and give it a try!