I little tip for all those pots that get stuck lids, simply turn the pot to be used upside down for few hours before use, let the solvent base inside dissolve the set paint for you
My Sherman - a 14 year project
-
Phil Woollard
- Posts: 4217
- Joined: Mon Mar 01, 2010 4:48 pm
- Location: Cornwall
- Has liked: 2223 times
- Been liked: 6945 times
Re: My Sherman - a 14 year project
Very interesting thread, keep it coming! interesting that my pla printer managed to print the Chieftain barrel insert with great detail.
I little tip for all those pots that get stuck lids, simply turn the pot to be used upside down for few hours before use, let the solvent base inside dissolve the set paint for you
I little tip for all those pots that get stuck lids, simply turn the pot to be used upside down for few hours before use, let the solvent base inside dissolve the set paint for you
Mechanical engineer.
2 Youtube channels, Phil Woollard and Magpiespyro. Facebook/ Phil Woollard.
Commission builds considered. Pm for my email.
2 Youtube channels, Phil Woollard and Magpiespyro. Facebook/ Phil Woollard.
Commission builds considered. Pm for my email.
-
simon_manning
- Posts: 1998
- Joined: Fri Nov 02, 2007 8:51 pm
- Location: new forest,hampshire,u.k.
- Been liked: 1574 times
Re: My Sherman - a 14 year project
Nice to see the project coming to life again, add's another level of interest on the Forum, there has not been a lot of Sherman building on here lately, keep at it Bob, regards simon manning.
-
Derek Attree
- Posts: 1242
- Joined: Thu Jul 12, 2007 12:44 pm
- Location: london
- Has liked: 213 times
- Been liked: 151 times
Re: My Sherman - a 14 year project
Hi Bob
Nearly bought a Sherman before going for the Panther G about 15 years ago when Mark and Gill
just were taking over the company.
Wish I had done as they never released the model again in that set up.
Dont like the look of the firefly.
So part of the reason I bought my Lee as its the same sort of footprint.
Love the parts you are making keep it up.
regards
Derek
we must stop making stupid predictions
-
Robert E Morey

- Posts: 2253
- Joined: Wed Jul 18, 2007 12:59 am
- Location: Seattle, WA USA
- Has liked: 103 times
- Been liked: 701 times
Re: My Sherman - a 14 year project
Phil, Derek, Simon - thanks for looking and for the encouraging comments. Its great to see some progress on this sorely neglected model.
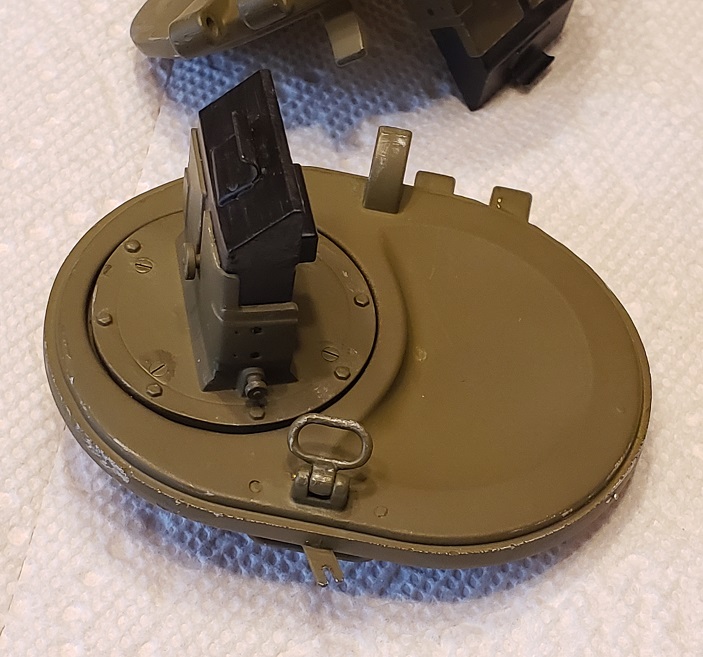
Some more bits added. Got the Lazy Susan bearing fitted under the deck plate. Very smooth rotation now, just need to fit the tooth ring for the drive motor:
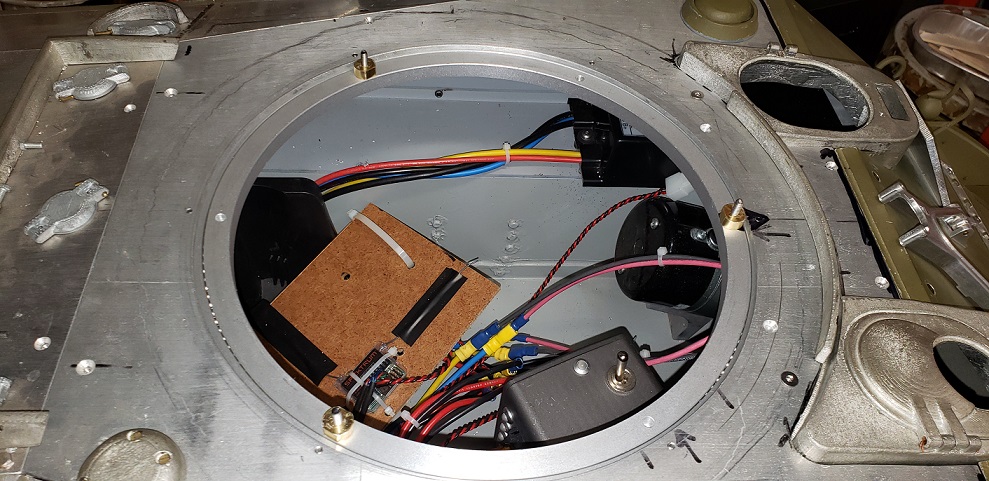
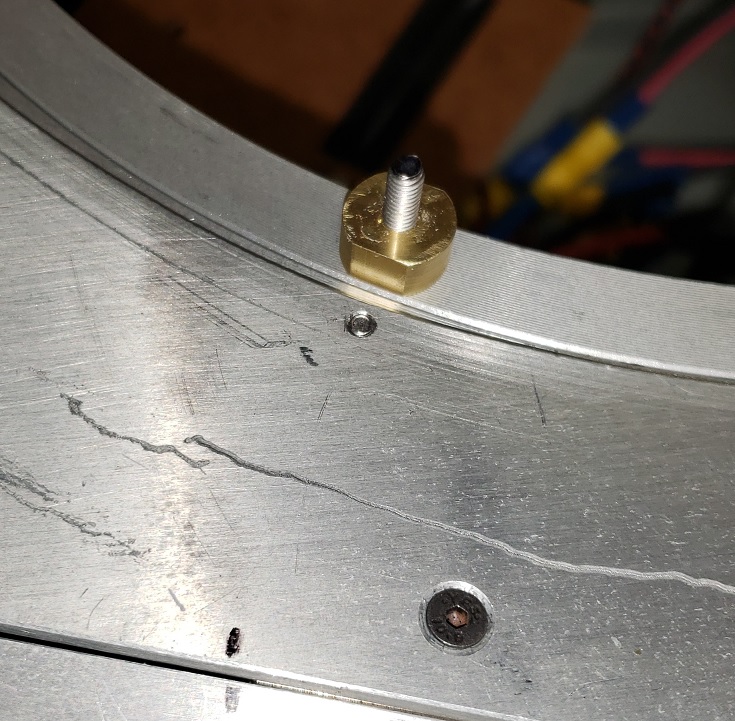
Close up of the mounting block - spacer. Screw is M4 from below. The brass block spaces the turret and provides 3 location for mounting. Only 2 location are used with wingnut for holding turret on. The front acts only as a pin since the hole is directly under gun barrel (cannot be reached easily).
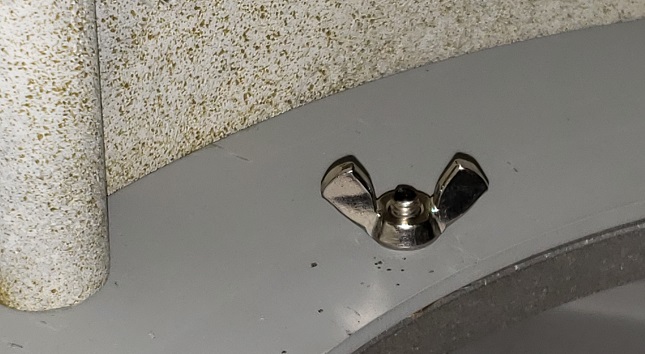
Inside turret - 2X M4 wing-nut to hold turret to ball race.
Made a new CDR's MG mount from brass to replace the kit part:

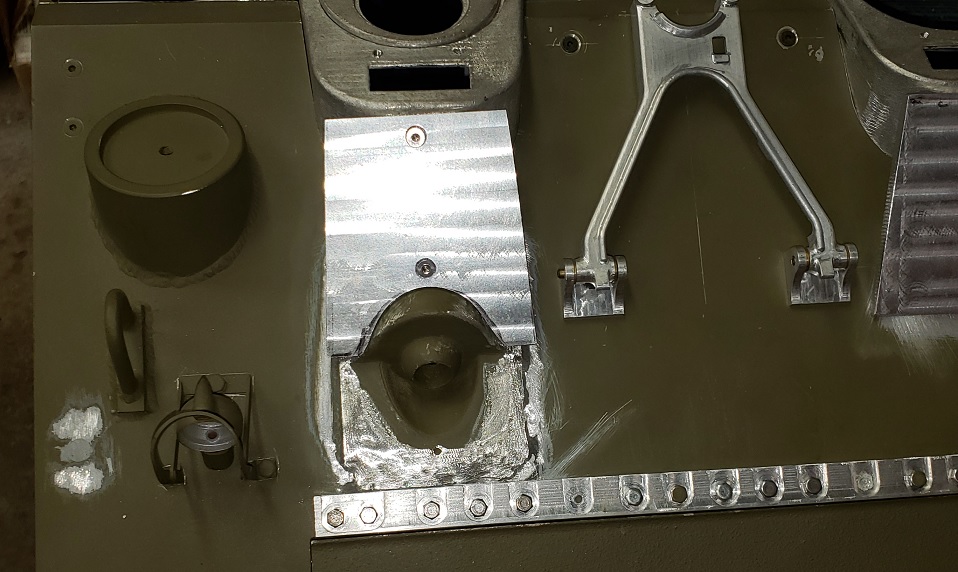
Decided to improve the look of the hull MG mount by removing some material:
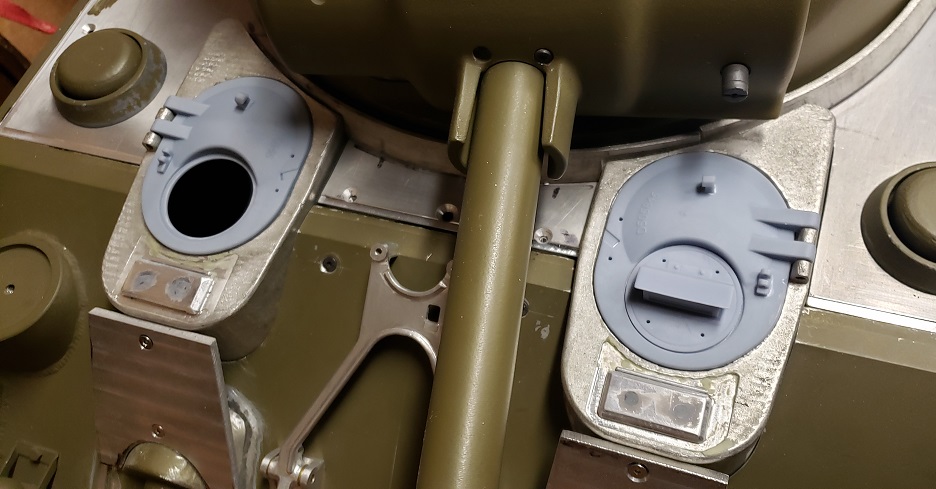
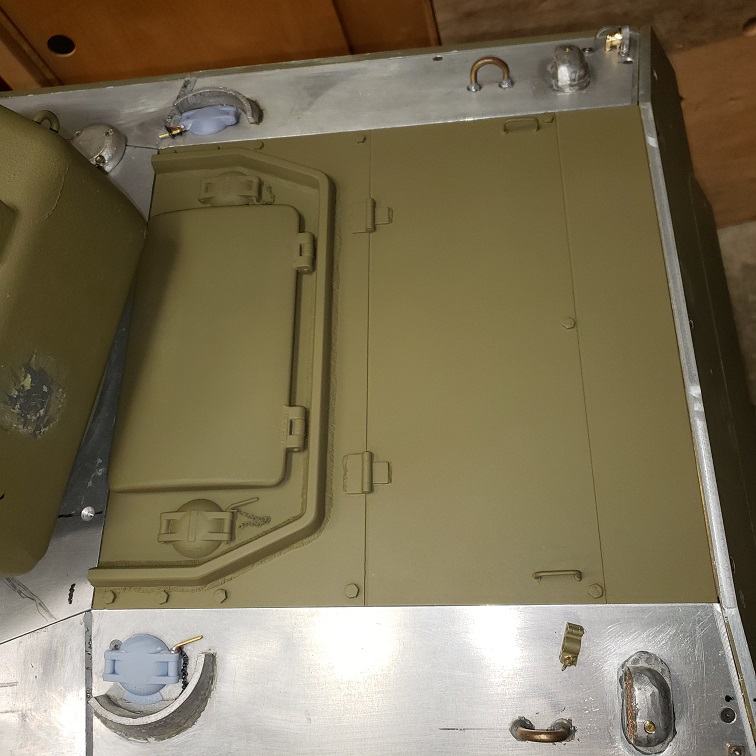
Made some periscope covers for the front locations on sponsons. Will 3D print some scopes for the hatches for driver and MG gunner. Haven't decided whether to keep the kit white metal drivers hatches or print new ones.
Hopefully more to see and show soon.
Best regards,
B
Some more bits added. Got the Lazy Susan bearing fitted under the deck plate. Very smooth rotation now, just need to fit the tooth ring for the drive motor:
Close up of the mounting block - spacer. Screw is M4 from below. The brass block spaces the turret and provides 3 location for mounting. Only 2 location are used with wingnut for holding turret on. The front acts only as a pin since the hole is directly under gun barrel (cannot be reached easily).
Inside turret - 2X M4 wing-nut to hold turret to ball race.
Made a new CDR's MG mount from brass to replace the kit part:
Decided to improve the look of the hull MG mount by removing some material:
Made some periscope covers for the front locations on sponsons. Will 3D print some scopes for the hatches for driver and MG gunner. Haven't decided whether to keep the kit white metal drivers hatches or print new ones.
Hopefully more to see and show soon.
Best regards,
B
-
Robert E Morey
- Posts: 2253
- Joined: Wed Jul 18, 2007 12:59 am
- Location: Seattle, WA USA
- Has liked: 103 times
- Been liked: 701 times
Re: My Sherman - a 14 year project
Hello AT forum. Posting a little more progress on Sherman detail parts. I've been printing some of the smaller detail parts with pretty good results.
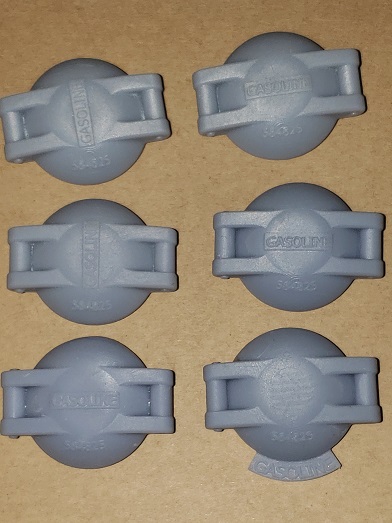
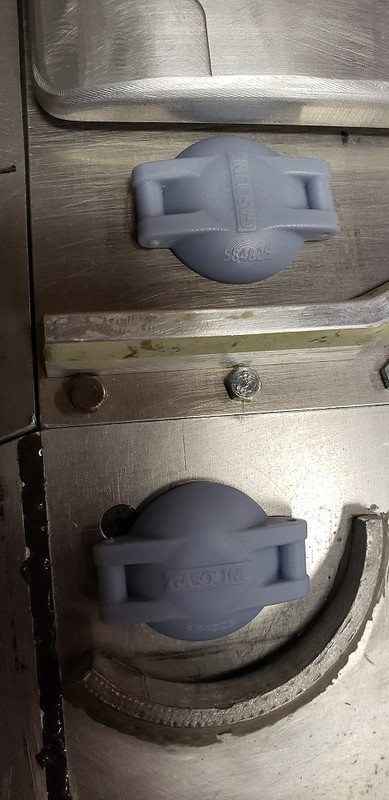
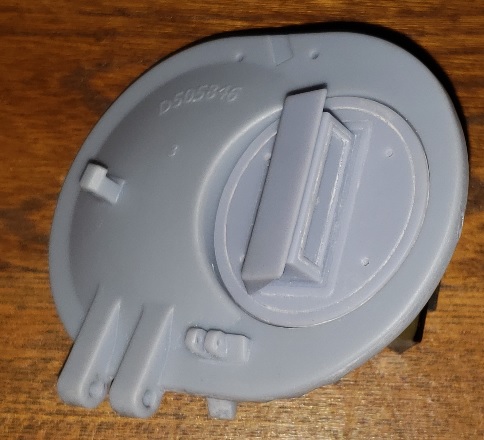
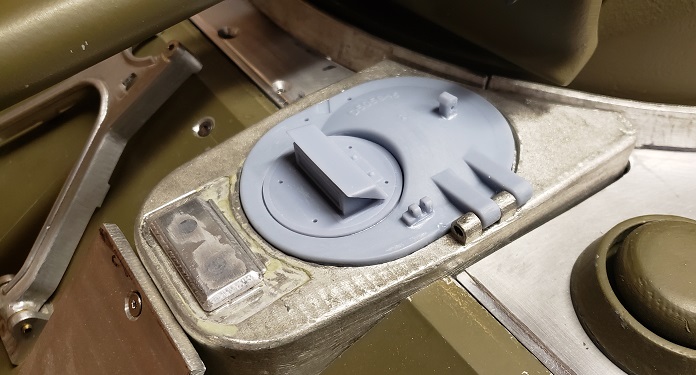
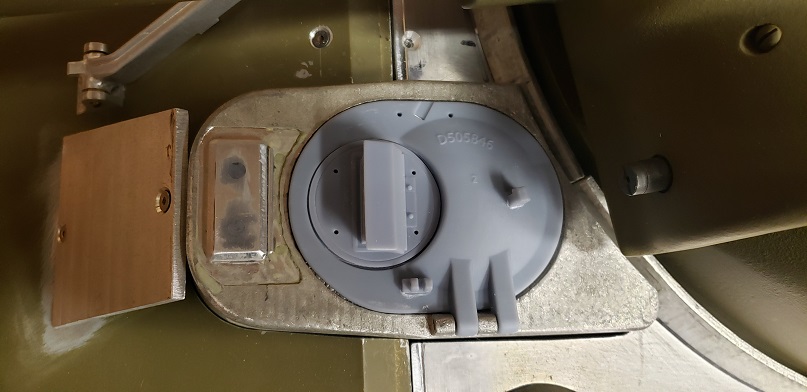
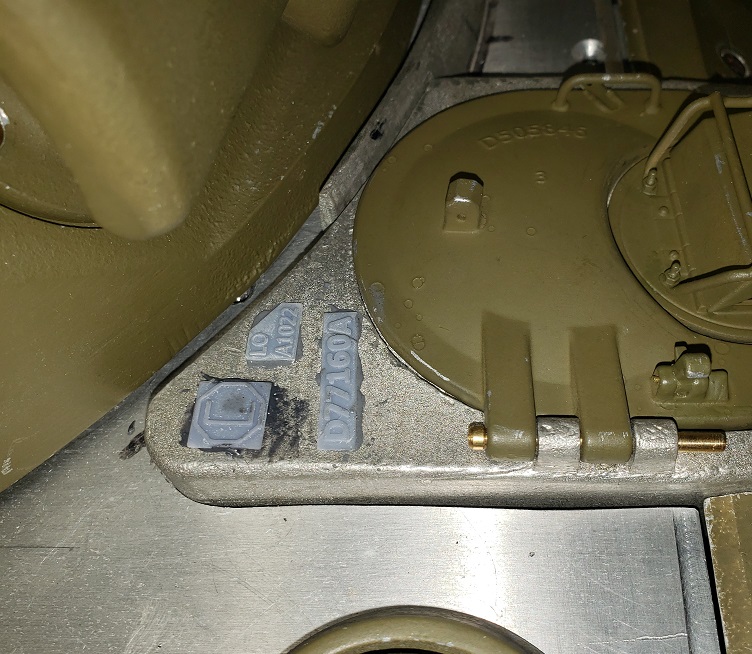
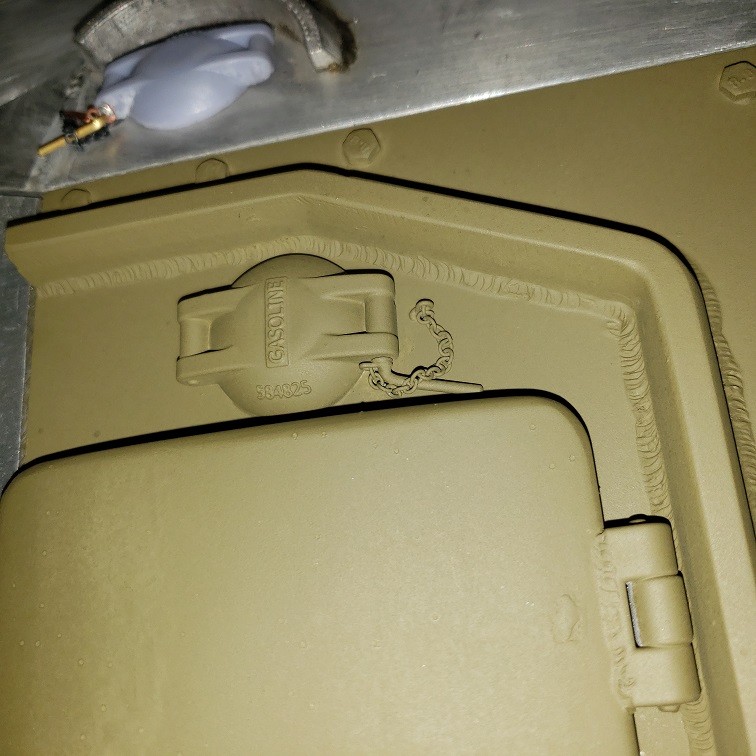
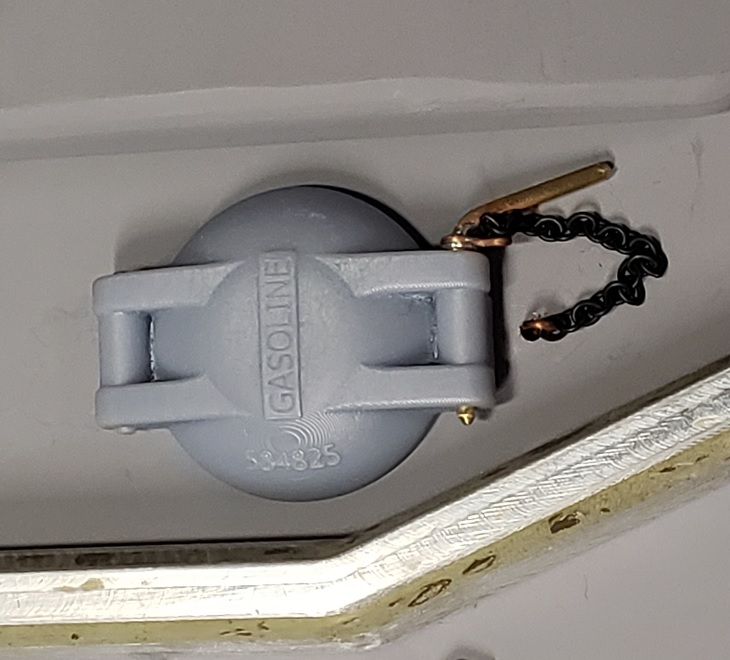
Gas caps of all kinds. Experimenting with printing text on the parts with good results.

Designing the M4 air cleaner boxes for the back end. The detail bits will be printed. The square box will be Aluminum tube.

Took a crack a designing the drivers hatches. I like the kit metal ones, but they need quite a bit of parts and detail added, so may use these printed ones. If I break one, I can print another.
Hatch with my lower periscope installed:
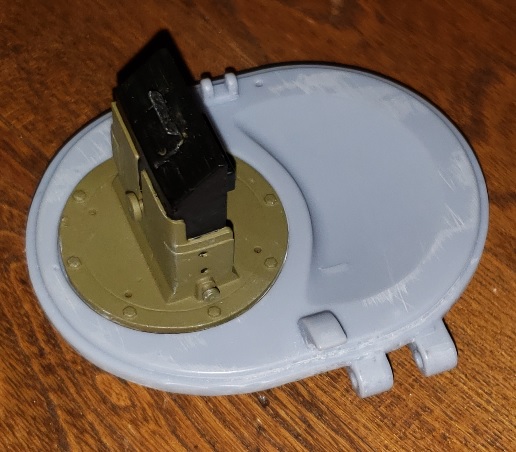
With upper periscope installed:
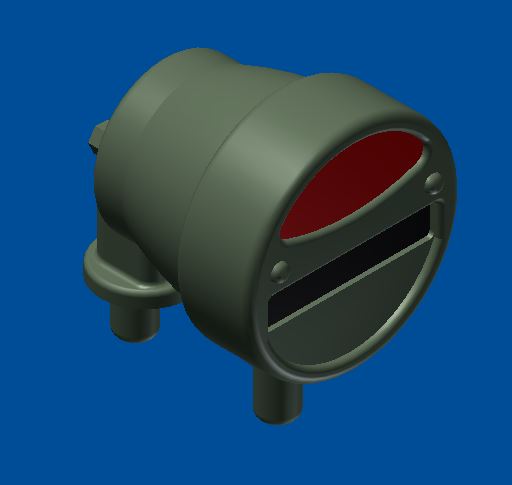
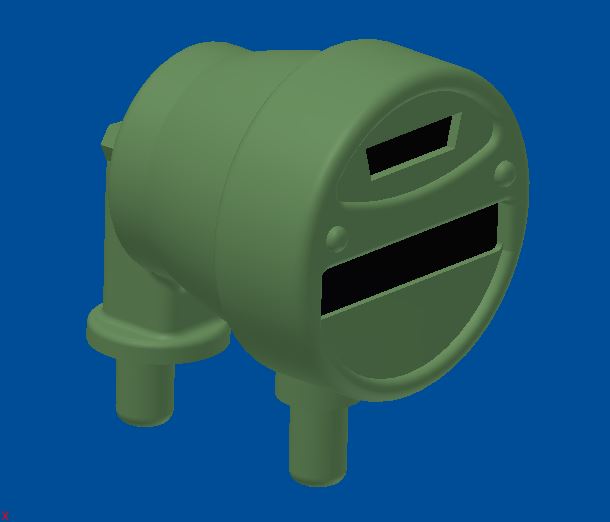
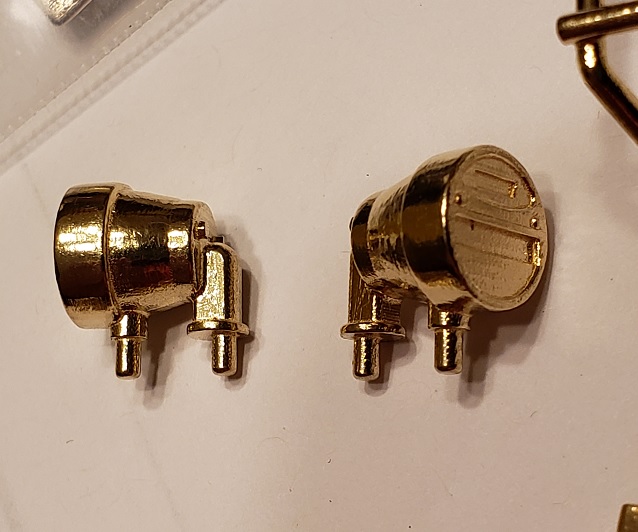
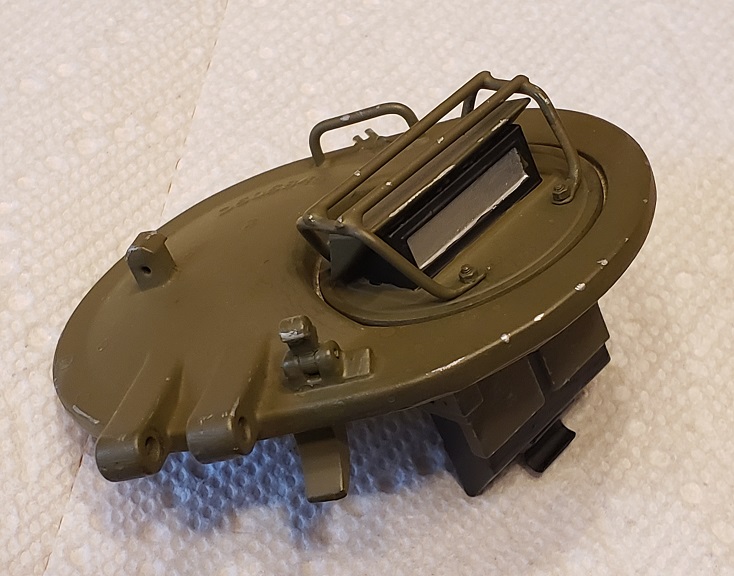
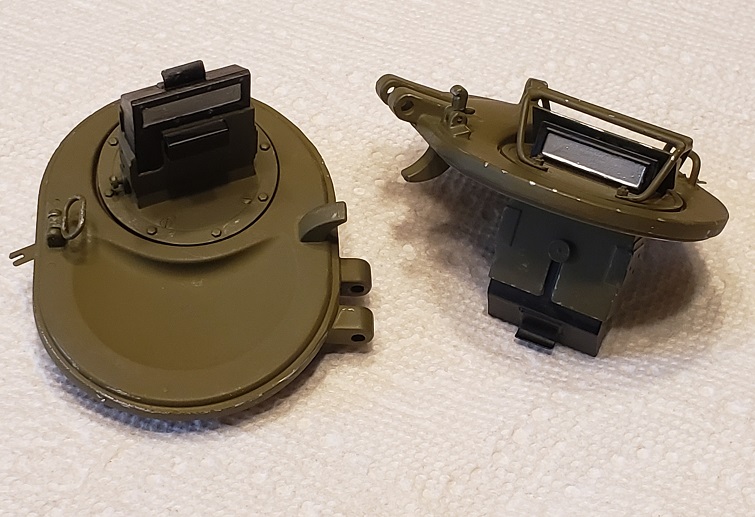
Test printing some parts from Shapeways in Brass. We'll see how they come out. I can make the Periscope guards - they are just very time consuming. Always wanted to try their printed - brass lost wax process. Note the rear lamp housings have an extra pin for mounting support - the original housing only mounted from rear. I didn't want these to be too fragile.
Till next time, stay safe everyone.
B
Gas caps of all kinds. Experimenting with printing text on the parts with good results.
Designing the M4 air cleaner boxes for the back end. The detail bits will be printed. The square box will be Aluminum tube.
Took a crack a designing the drivers hatches. I like the kit metal ones, but they need quite a bit of parts and detail added, so may use these printed ones. If I break one, I can print another.
Hatch with my lower periscope installed:
With upper periscope installed:
Test printing some parts from Shapeways in Brass. We'll see how they come out. I can make the Periscope guards - they are just very time consuming. Always wanted to try their printed - brass lost wax process. Note the rear lamp housings have an extra pin for mounting support - the original housing only mounted from rear. I didn't want these to be too fragile.
Till next time, stay safe everyone.
B
Last edited by Robert E Morey on Sun Sep 13, 2020 10:36 pm, edited 1 time in total.
-
Adrian Harris

- Posts: 4906
- Joined: Thu Jul 12, 2007 10:46 pm
- Location: Berkshire (UK)
- Has liked: 1181 times
- Been liked: 1378 times
Re: My Sherman - a 14 year project
Loving those parts 
Your lettering came out very nicely. What layer size were you using ?
Adrian.
Your lettering came out very nicely. What layer size were you using ?
Adrian.
Contact me at sales@armortekaddict.uk for details of my smoker fan control module
-
Robert E Morey
- Posts: 2253
- Joined: Wed Jul 18, 2007 12:59 am
- Location: Seattle, WA USA
- Has liked: 103 times
- Been liked: 701 times
Re: My Sherman - a 14 year project
Hi Adrian,
Thanks! I think so too. Really nice on the Elegoo. Layer height 0.04mm. Text height (from or into surface) 0.25-0.30 mm, Text size 1.5 - 2.5mm high.
Getting ready to try the water washable stuff on the next prints.
BR
B
Thanks! I think so too. Really nice on the Elegoo. Layer height 0.04mm. Text height (from or into surface) 0.25-0.30 mm, Text size 1.5 - 2.5mm high.
Getting ready to try the water washable stuff on the next prints.
BR
B
-
Robert E Morey
- Posts: 2253
- Joined: Wed Jul 18, 2007 12:59 am
- Location: Seattle, WA USA
- Has liked: 103 times
- Been liked: 701 times
Re: My Sherman - a 14 year project
Few more progress pictures of the Sherman hatches. Coming out nice with paint. Next detail part will be functional tow hitch.
Hatches with details added and some paint:
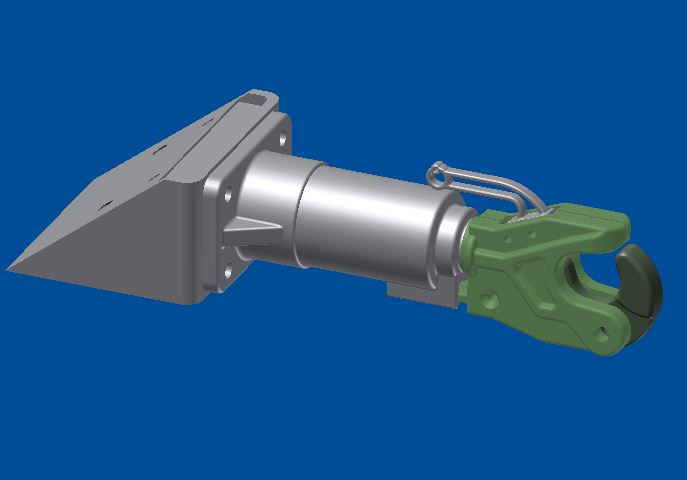
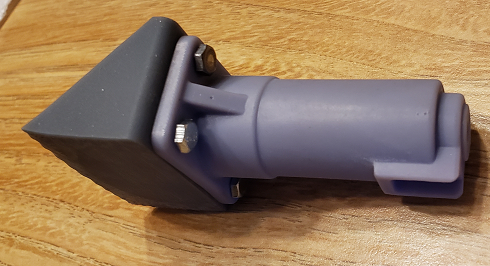
Tow hitch CAD and prototype parts:
Till next time, happy building!
B
Hatches with details added and some paint:
Tow hitch CAD and prototype parts:
Till next time, happy building!
B
-
Robert E Morey
- Posts: 2253
- Joined: Wed Jul 18, 2007 12:59 am
- Location: Seattle, WA USA
- Has liked: 103 times
- Been liked: 701 times
Re: My Sherman - a 14 year project
Hi all,
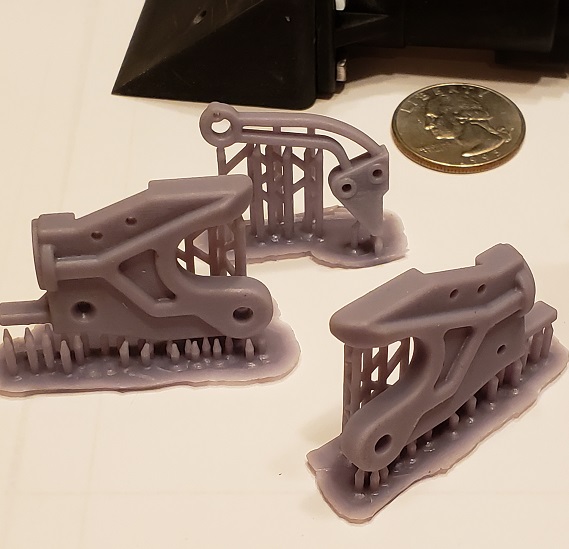
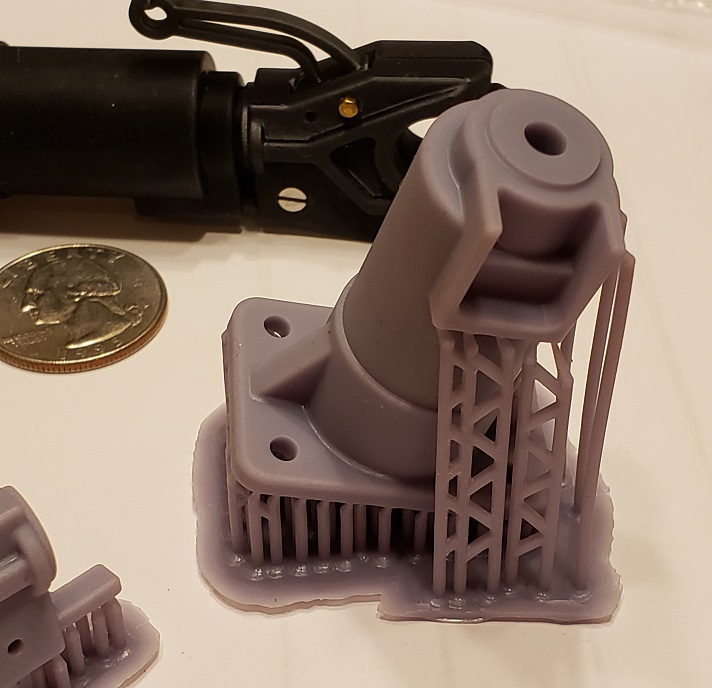
A few new updates on the printed tow hitch prototype. Finally got the design how I want it. Also included some "as printed" images for interest.
Hitch closed:
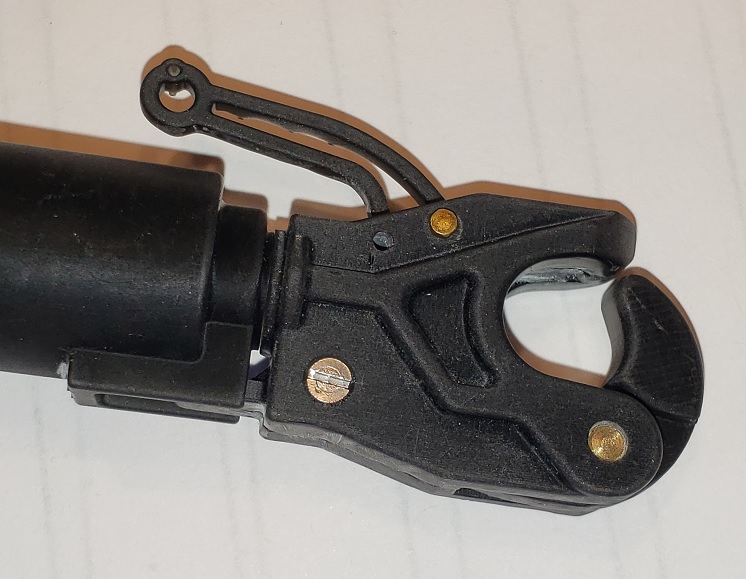
Hitch opened:
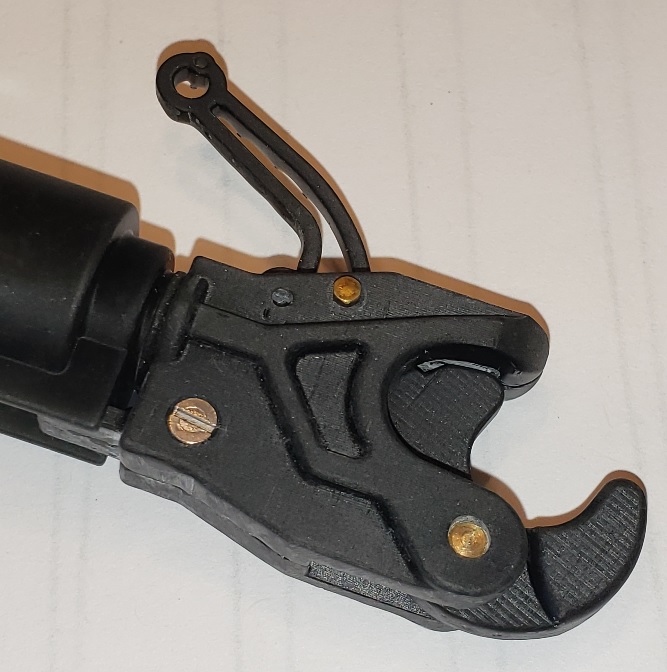
Overall assembly:
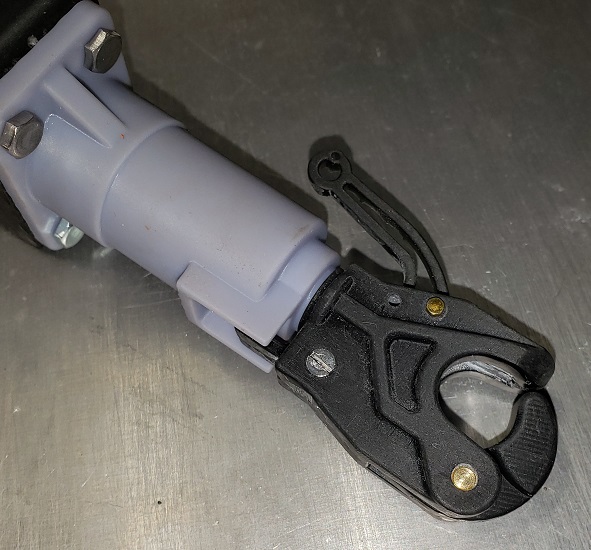
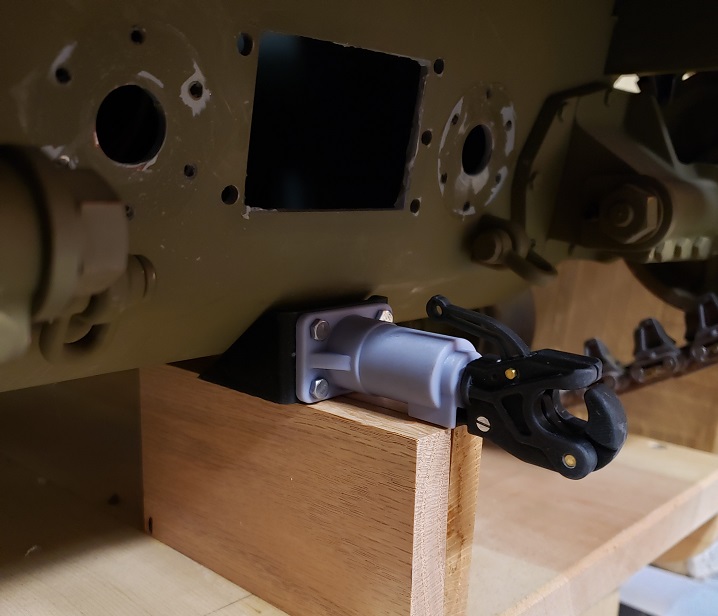
Test fit on rear of model:
As printed parts:
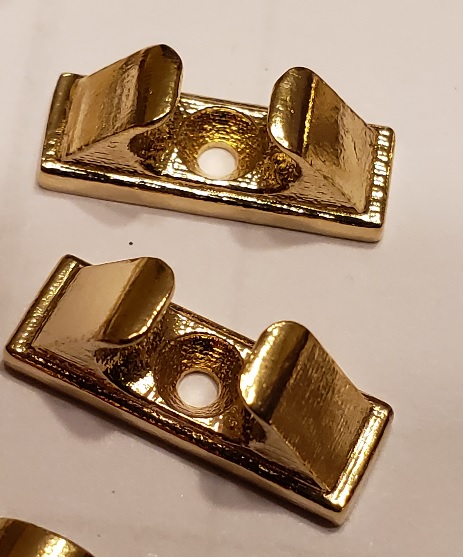
Nice detail brass printed parts from Shapeways. Actually these are investment cast from 3D printed wax models.
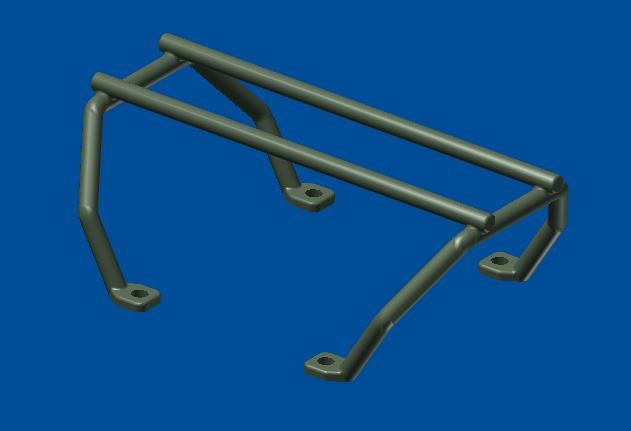
Periscope guards:
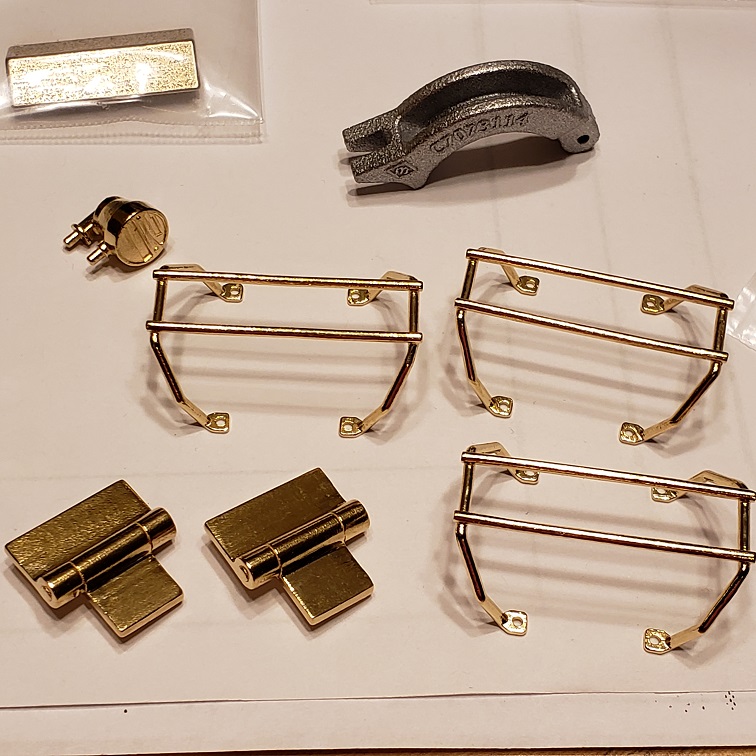
Tow Cable cleats:
Tow cable blocks assembled:
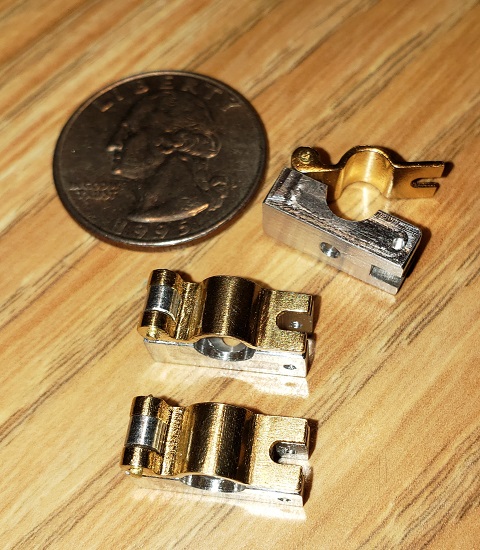
Rear tail lamps - non functional:
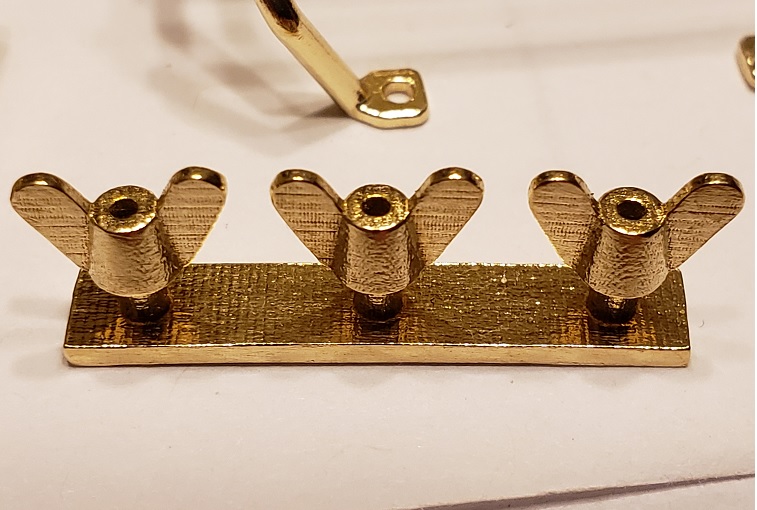
Mini wing nuts. Still need to drill and tap:
Till next time, thanks for looking.
Bob
A few new updates on the printed tow hitch prototype. Finally got the design how I want it. Also included some "as printed" images for interest.
Hitch closed:
Hitch opened:
Overall assembly:
Test fit on rear of model:
As printed parts:
Nice detail brass printed parts from Shapeways. Actually these are investment cast from 3D printed wax models.
Periscope guards:
Tow Cable cleats:
Tow cable blocks assembled:
Rear tail lamps - non functional:
Mini wing nuts. Still need to drill and tap:
Till next time, thanks for looking.
Bob
-
Christoffer Ahlfors
- Posts: 659
- Joined: Sun Feb 14, 2010 5:19 pm
- Location: Stockholm, Sweden
- Has liked: 681 times
- Been liked: 268 times
-
Steve Norris
- Posts: 1201
- Joined: Thu Jul 12, 2007 11:42 am
- Location: Manchester
- Has liked: 8 times
- Been liked: 642 times
Re: My Sherman - a 14 year project
Robert
Those brass parts are fantastic, great idea 3D printing the masters.
Regards
Steve
Those brass parts are fantastic, great idea 3D printing the masters.
Regards
Steve
-
Robert E Morey
- Posts: 2253
- Joined: Wed Jul 18, 2007 12:59 am
- Location: Seattle, WA USA
- Has liked: 103 times
- Been liked: 701 times
Re: My Sherman - a 14 year project
Happy Thanksgiving to all in the USA. Greetings to everyone else - stay safe and warm and Covid free! Some updates for my Sherman.
Finally finished the 3D printed hatches. Ready to install:
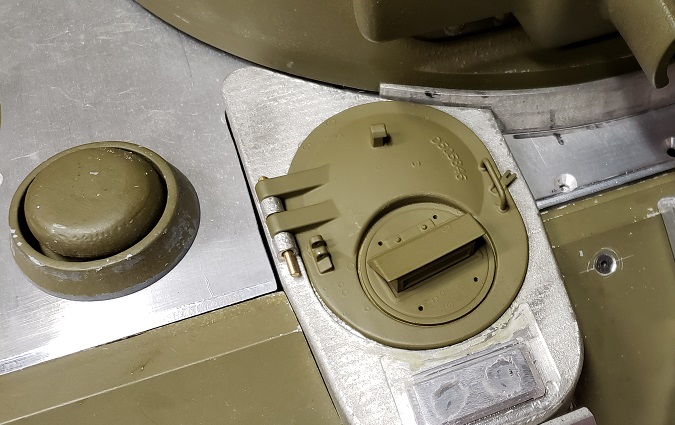
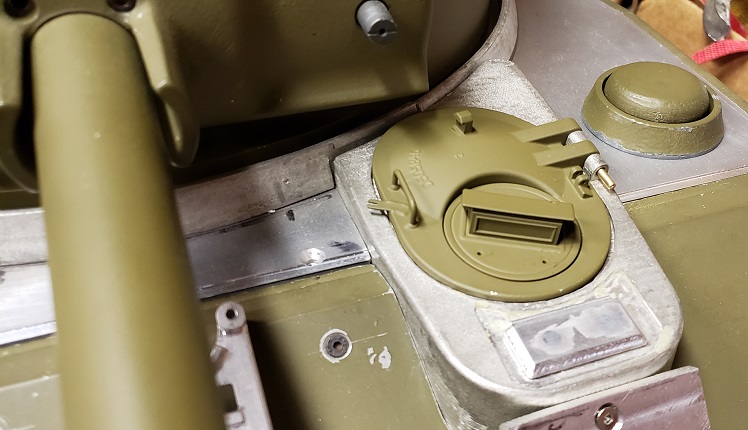
Added some casting numbers:
Some printed gas caps. They really look good once painted.
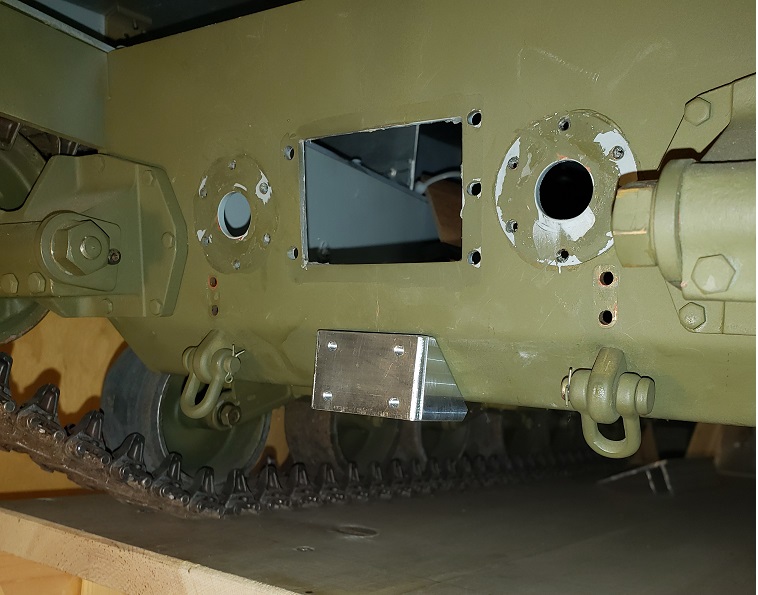
Made a mount for the rear hitch and moved the tow shackle mounts:
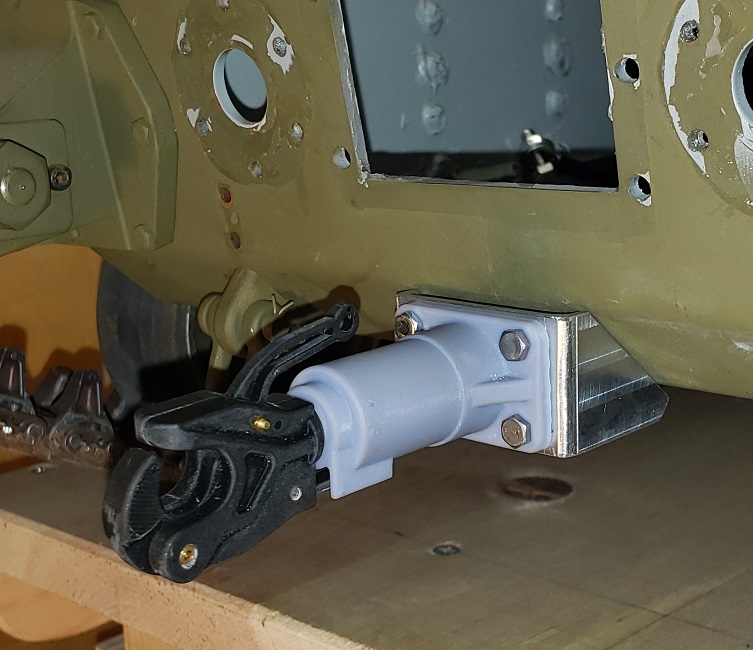
With prototype hitch installed. Will make this all in metal.
New rear deck as converted to M4:
New 3D printed rear lamps and new steel guards:

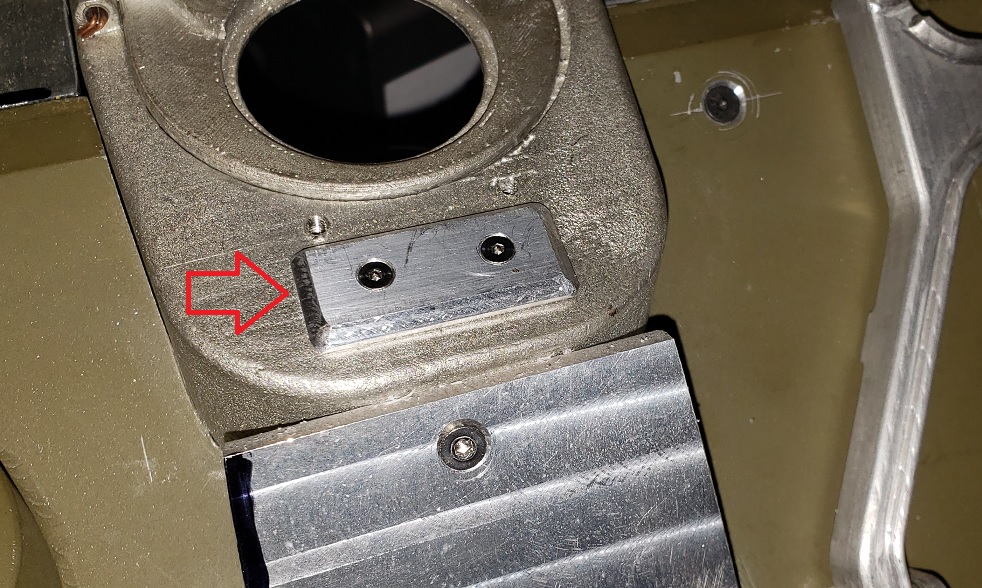
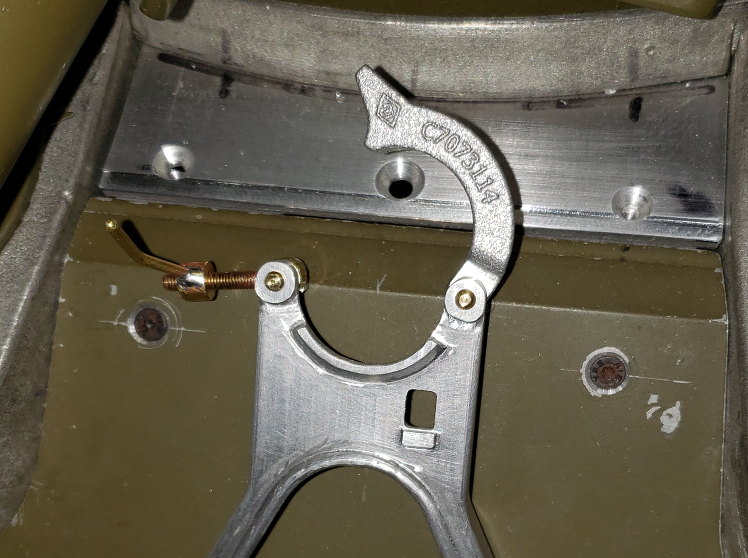
Finished the gun travel lock:
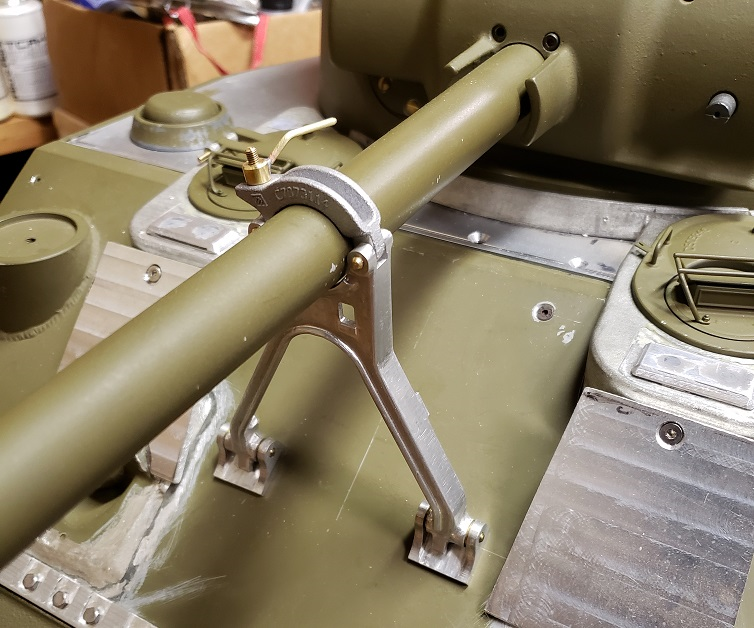
Close up of 3D printed aluminum barrel lock part:
Till next time, stay busy and keep building <tanks>.
B
Finally finished the 3D printed hatches. Ready to install:
Added some casting numbers:
Some printed gas caps. They really look good once painted.
Made a mount for the rear hitch and moved the tow shackle mounts:
With prototype hitch installed. Will make this all in metal.
New rear deck as converted to M4:
New 3D printed rear lamps and new steel guards:
Finished the gun travel lock:
Close up of 3D printed aluminum barrel lock part:
Till next time, stay busy and keep building <tanks>.
B
-
simon_manning
- Posts: 1998
- Joined: Fri Nov 02, 2007 8:51 pm
- Location: new forest,hampshire,u.k.
- Been liked: 1574 times
Re: My Sherman - a 14 year project
Great work Robert, these 3d printed parts are really helpful, they are turning up more and more in builders project's, very time saving and accurate, i like the look of them, regards simon.
-
Stephen White
- Site Admin
- Posts: 3100
- Joined: Sat Oct 11, 2008 7:05 pm
- Location: Dorset
- Has liked: 977 times
- Been liked: 2045 times
- Contact:
Re: My Sherman - a 14 year project
Bob, you've certainly put Turkey Day to good use. As Simon says, the 3D printing is catching on and you've got very skillful eye. The details look superb. It still feels a bit like "cheating" though, despite the skill that goes into the design work. It's a bit like autopilots in aviation. I always wanted to fly manually and with the more challenging old aircraft. Must be mad. 3D is the way ahead. Regards. Stephen
-
Vince Cutajar
- Posts: 2148
- Joined: Wed Nov 15, 2017 1:43 pm
- Location: Malta
- Has liked: 717 times
- Been liked: 1700 times
Re: My Sherman - a 14 year project
I consider 3D printing as the latest tool in a modeller's tool box. I remember many years ago when CNC started getting in home workshops, many people thought that it was cheating. Now if you are lucky to have it in your home workshop, it it considered as another tool. One uses these tools as and when required depending on the situation. Just like autopilots. If you are doing a private flight on a small airplane it is a very satisfying feeling flying it manually but if one is doing a commercial flight on the large aircraft it is not even allowed to start the flight without at least one operable autopilot. Think busy airports like Heathrow, Frankfurt or New York.
As Stephen said a certain amount of skill is required to use these new tools.
Vince
As Stephen said a certain amount of skill is required to use these new tools.
Vince