This week between slouching on the couch, watching Youtube and working nights, thought I'd make a start on the vexing triangle bins mod.
This mod discussed on Greg's Chieftain 36 topic, it try's to dodge the bullet of hours of hard work calving the upper armor plate that Greg accomplished exquisitely.
That would be the proper way to do it. But my excuse is simply. "I don't want to"
The upper armor on the real tank extends quite some way beyond the triangular bin towards the rear with a rolled cast edge, the model to be correct would need an extensive addition to casting which becomes pointless unless your going for Cat6+.
What ever happens with either mod, a modified triangular bin or a complete new one would need constructing, so this mod I'm showing hits both birds with one stone.
To simplify construction, I glued and where possible screwed parts together. That means anyone who wants to try it can do it without a welder.
All you need is a two ton press (small table vice) suitable glue epoxy, some wood strips,hammer to beat it, tin snips, files, drill, small drill bits and a couple of plasters for the fingers (sharp edges).The thin steel plate came from redundant video player boxes and an old tower system.
(My motto: Don't throw stuff like old PC's and Video players away, keep and hoard them in the attic for that rainy day!)
Using the original box as a former makes it easier to form the new bin, it took a couple of goes to get reasonable back plate fit.
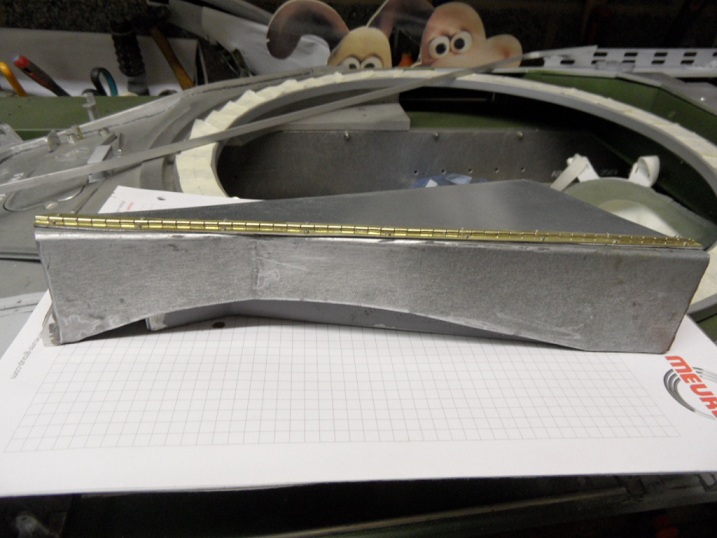
I started with the left hand triangular bin first and had to strip off the furniture built previously, then used it as a former to support the thin sheet plate. Lid made to size and hinge fitted. Half round alloy will form the ribs.
Some parts fitted to the tank previously will need moving but I think it'll be worth it.
Where I want to be.
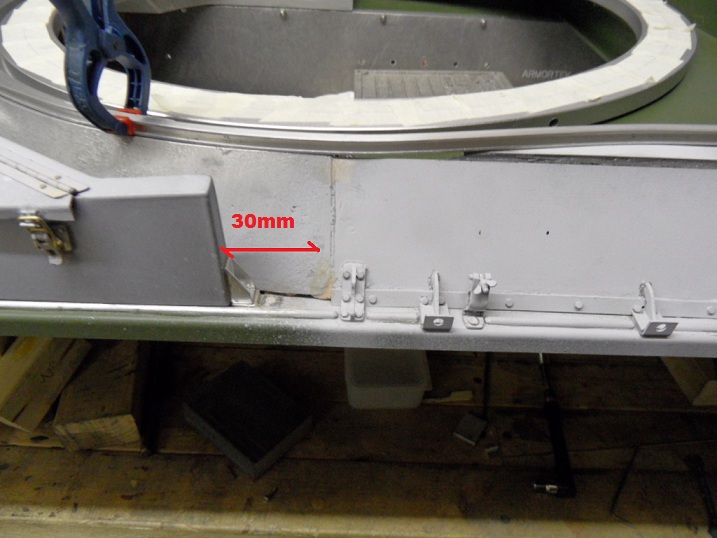
- SAM_3660.JPG (170.97 KiB) Viewed 3270 times
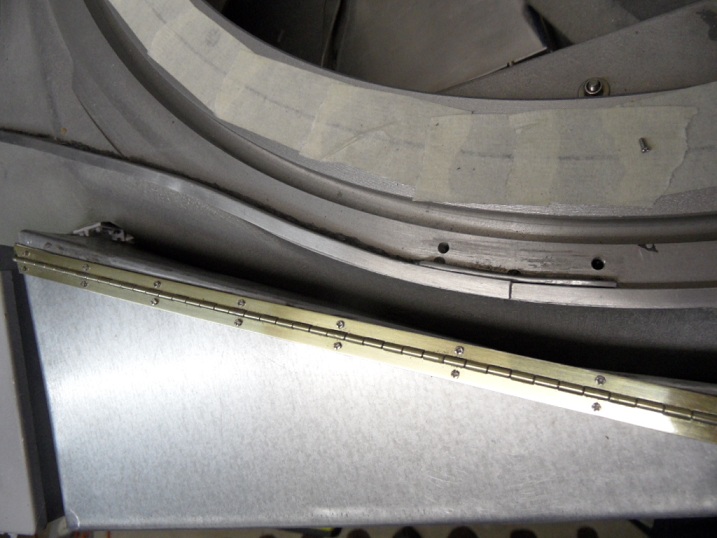
Estimate cut for rear plate
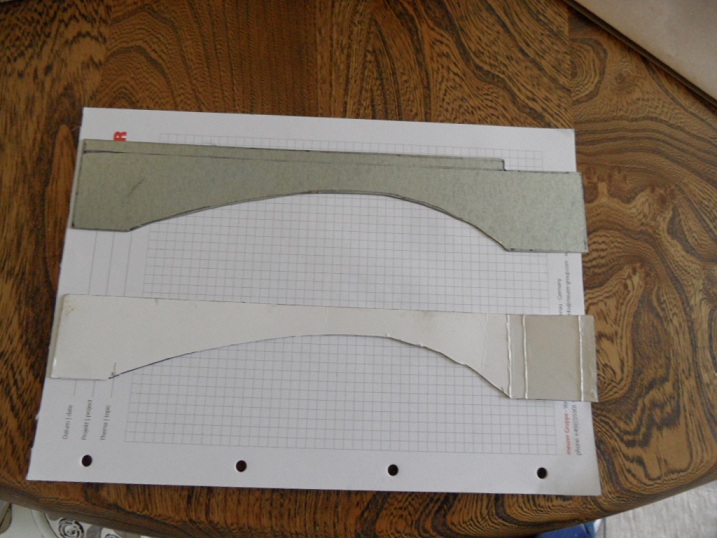
- SAM_3665.JPG (179.87 KiB) Viewed 3270 times
Until it's glued up it's tricky to know if its a good fit.
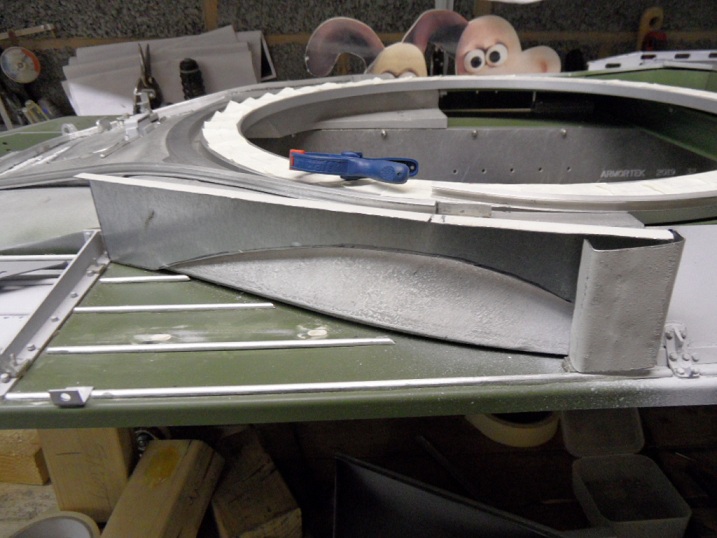
- SAM_3666.JPG (184.97 KiB) Viewed 3270 times
Front outside edge has a thin skin plate to hide the joint. But I didn't like the cut out at the back at this time, having too bigger gap between the upper armor plate so I cut off and made slightly different version of the back plate.

- SAM_3671.JPG (130.05 KiB) Viewed 3270 times
That should hold it.
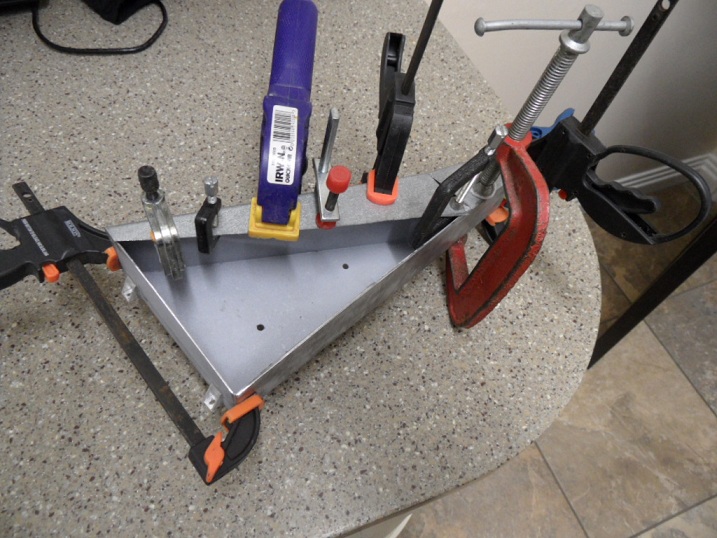
- SAM_3672.JPG (221.05 KiB) Viewed 3270 times
Easy to see the front edge plate, skinned to hide the joint, no filler needed.

- SAM_3677.JPG (183.74 KiB) Viewed 3270 times
Seeing the box from the other cut out side.
- SAM_3674.JPG (169.63 KiB) Viewed 3270 times
Unless you know, looking behind it's hard to tell.
- SAM_3676.JPG (173.89 KiB) Viewed 3270 times
Reverse tardis. A lot smaller on the inside.
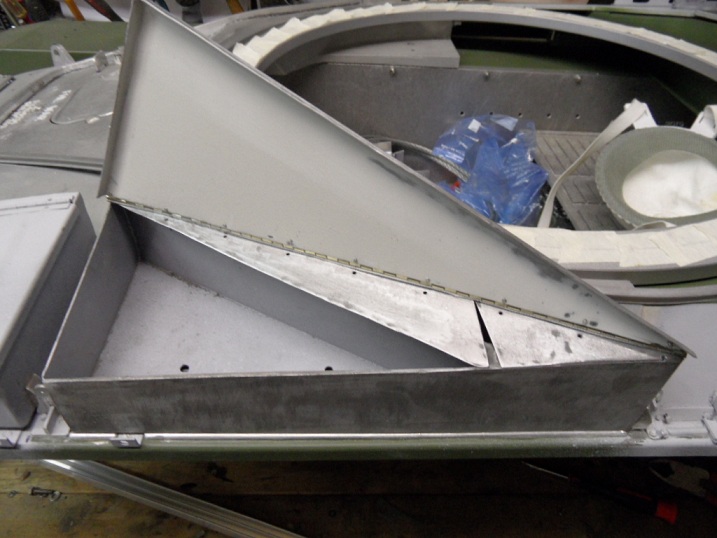
- SAM_3678.JPG (171.7 KiB) Viewed 3270 times
Getting there, ribs need gluing and shaping.
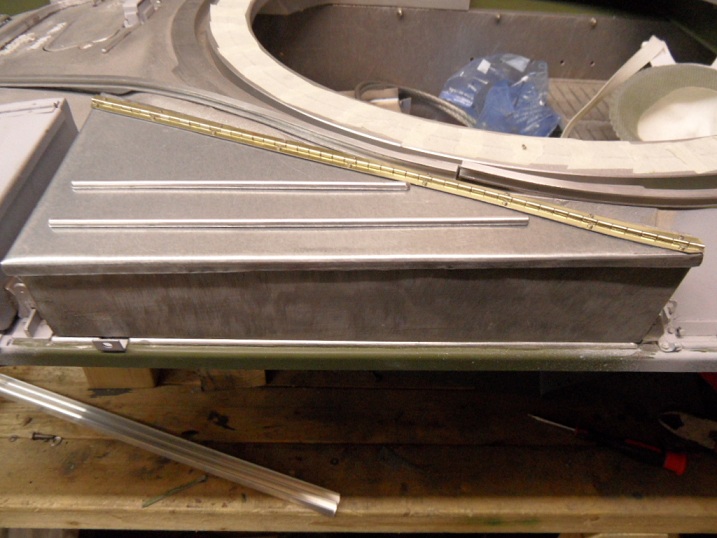
- SAM_3677.JPG (183.74 KiB) Viewed 3270 times
