Page 4 of 5
Re: Marcus's 25 pounder
Posted: Mon Jun 11, 2018 2:56 pm
by Marcus Kwa
Robert:
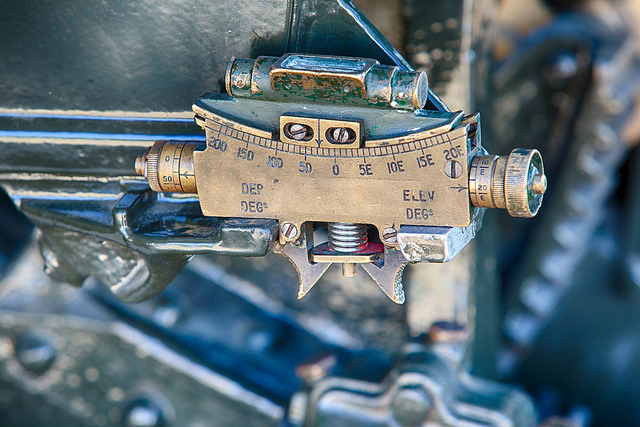
I have a clinometer as paper weight on my desk! The wonders of brass, even for a prolonged time into the dirt it cleans up very nicely!
The only difference for use on the 25 pdr is the clamp (spring catch) on the underside of the clino meter, on the vickers it was presumably bolted.
Keep watching a mini clino is also on my to-do list!
Bob:
Thanks for the tips, corrosive eh? I'll give them a good scrub!
Marcus
Re: Marcus's 25 pounder
Posted: Wed Jun 13, 2018 10:42 am
by Marcus Kwa
The new axle arrived (thanks Monique)! The axles of the new batch of 25pdr kits are tapered whereas the old batch of kits have a straight one. Since the axle is steel doing the taper myself could have taken ages (without a lath), glad that Armortek did the hard work for me.......
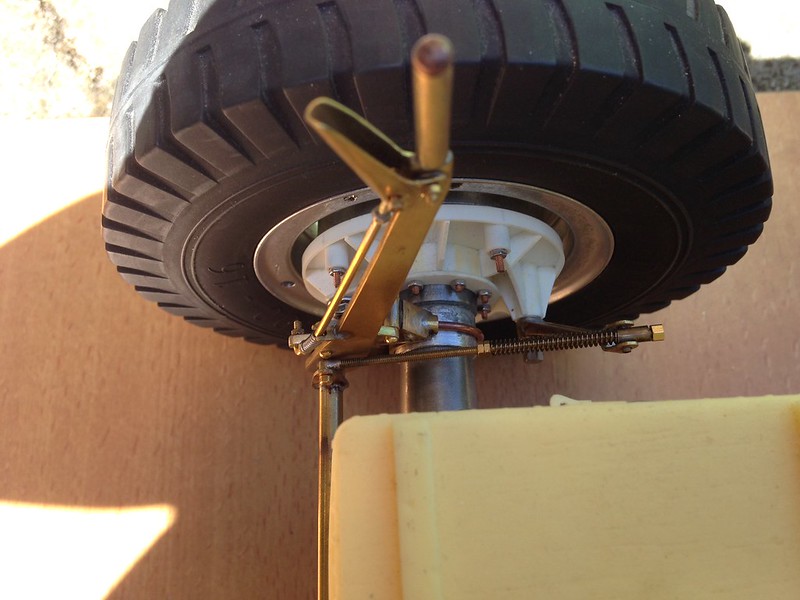
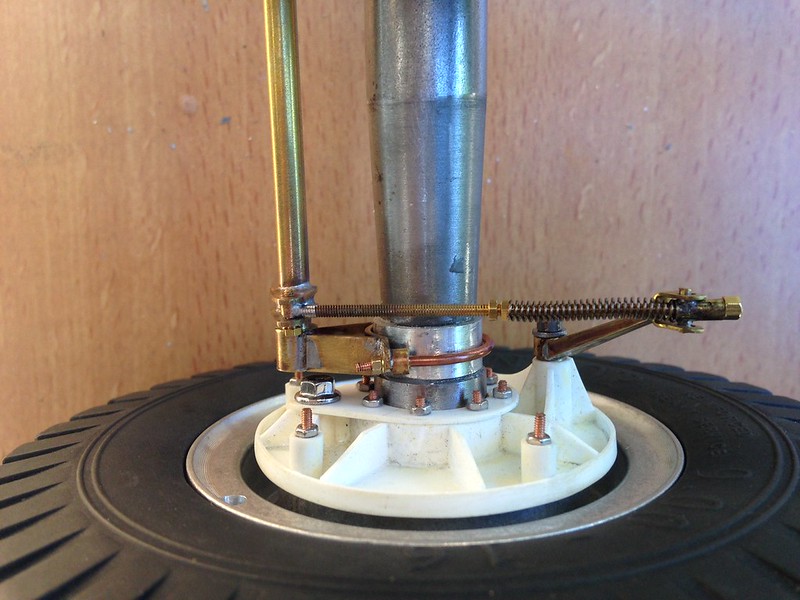
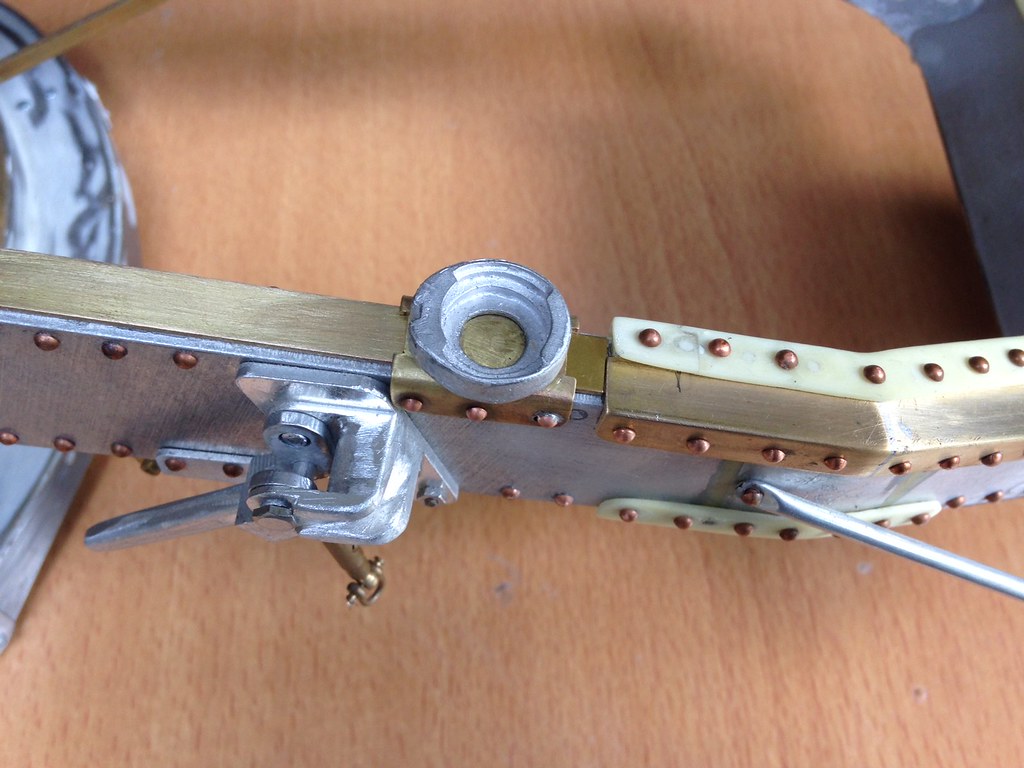
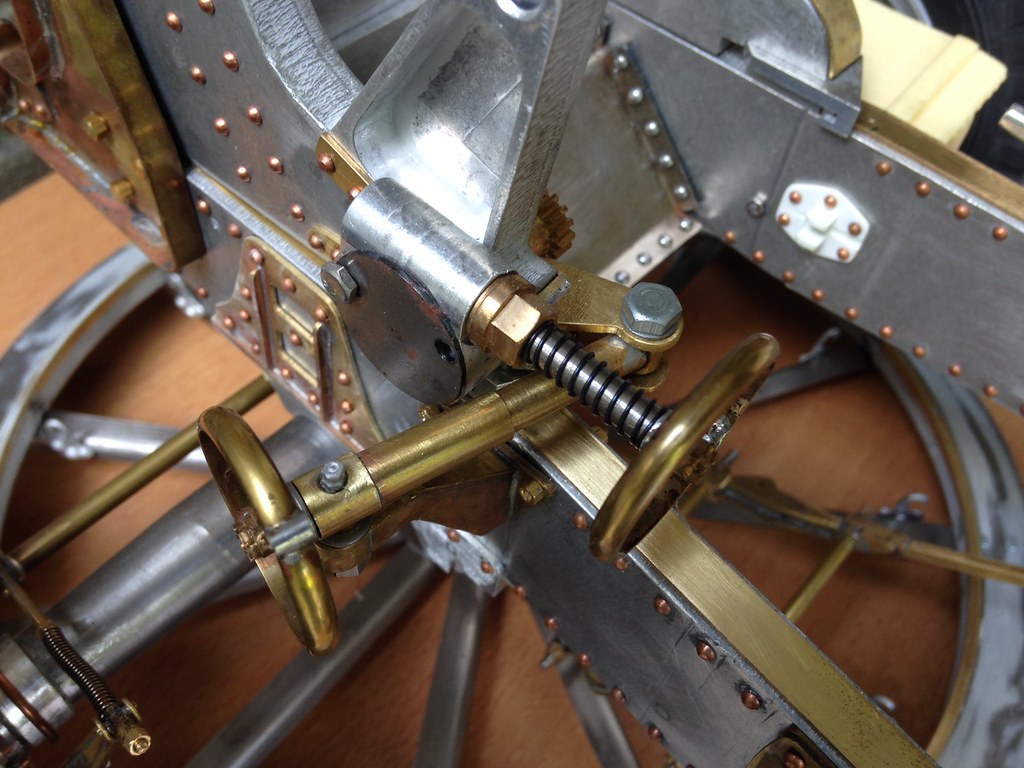
I re-did the styrene brake system I made for a brass one which is much more stronger. On this brass version the ratchet and ratchet release handle on the brake lever can be operated:
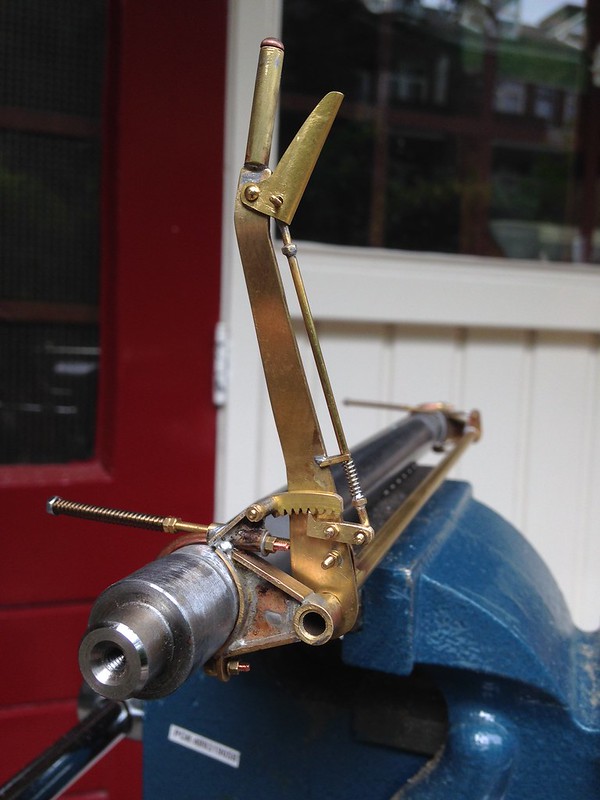
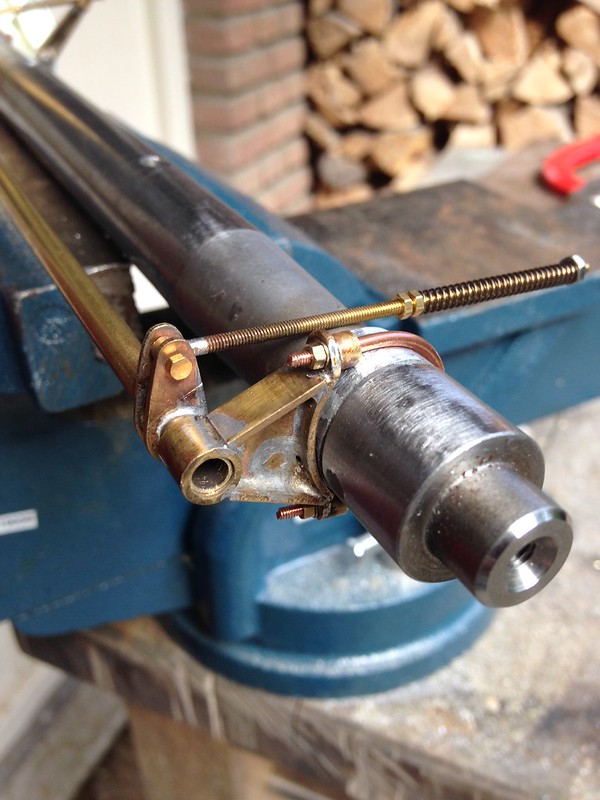
The rod on the left will be connected to the brake actuation arm on the brake drum:
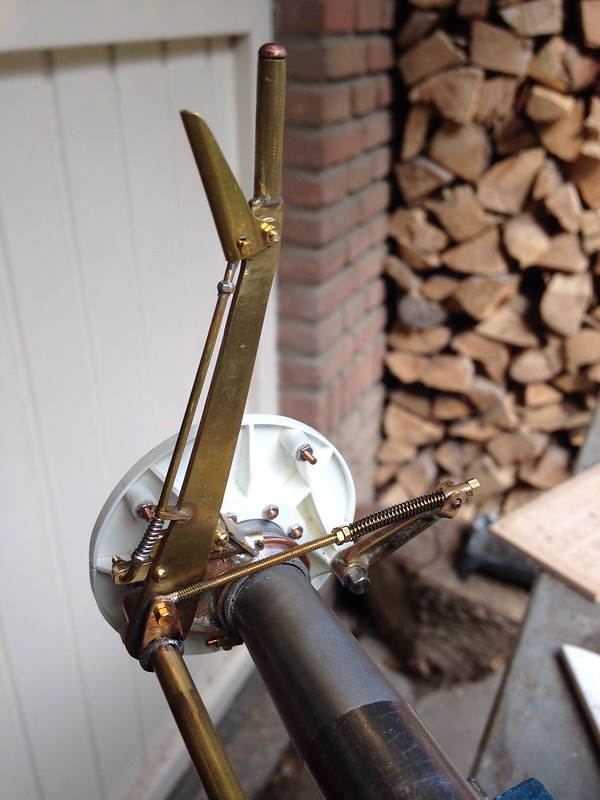
The right hand side only consists of a bearing point and an actuator rod:
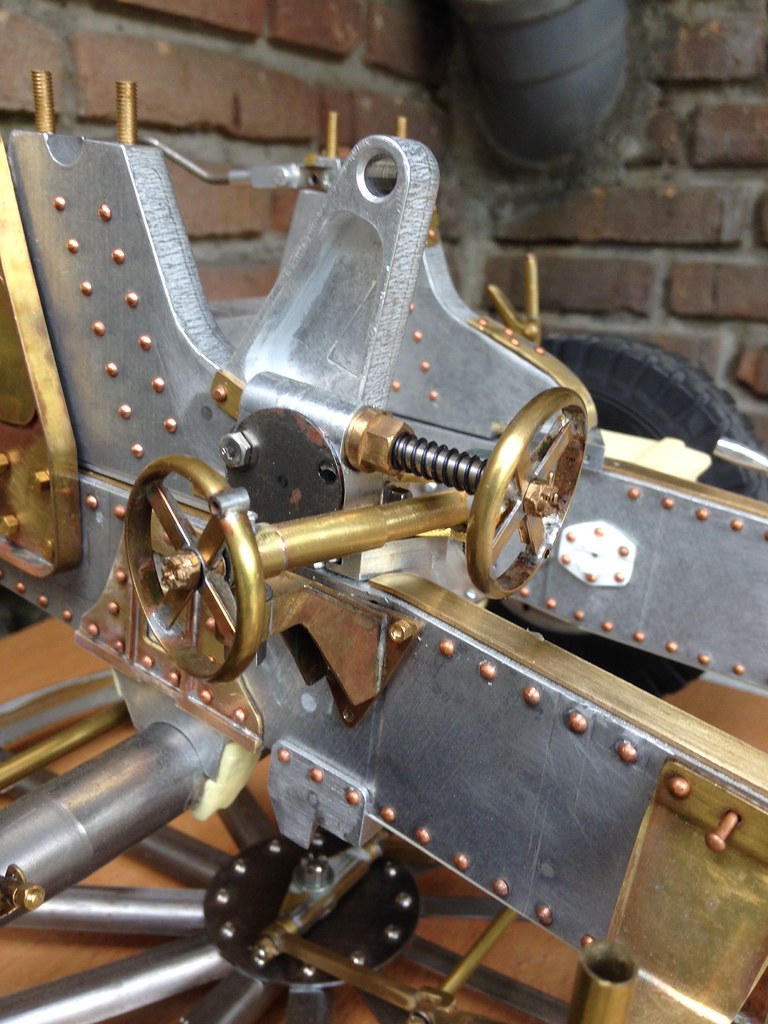
With wheels fitted:
Working on the sight and ranging system at the moment, I'll keep you posted!
Marcus
Re: Marcus's 25 pounder
Posted: Wed Jun 13, 2018 11:41 am
by Phil Woollard
Excellent brass work Marcus, it looks really good, regards Phil.
Re: Marcus's 25 pounder
Posted: Fri Aug 17, 2018 11:37 am
by Marcus Kwa
The sight and gunlaying system on the 25pdr is quite unique and quite complicated to reproduce......
I had build a styrene version (using as much kit parts as possible to speed up the build) but when starting one in brass I could not resist the urge to make it as close to the original as possible.
I finally sourced the 25 pdr handbook and user manual to find out how the thing actually worked and how the parts were arranged. Also of great help was a restoration project of a 25 pdr on the 'Maple Leaf Up' site:
http://www.mapleleafup.net/forums/showt ... estoration
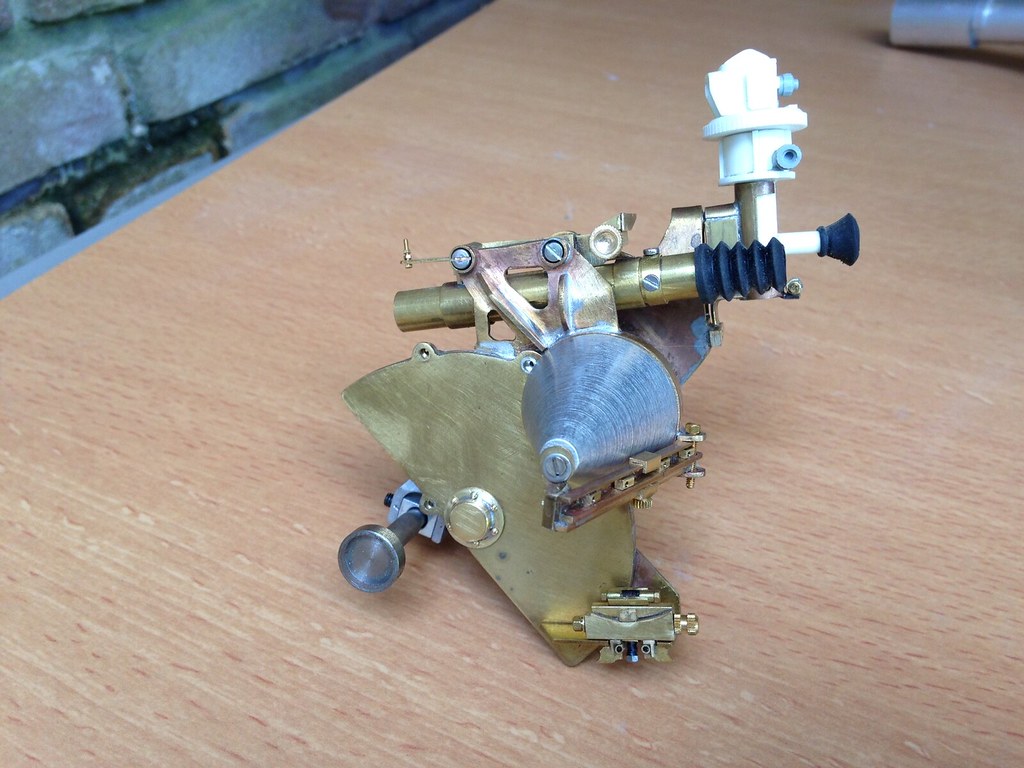
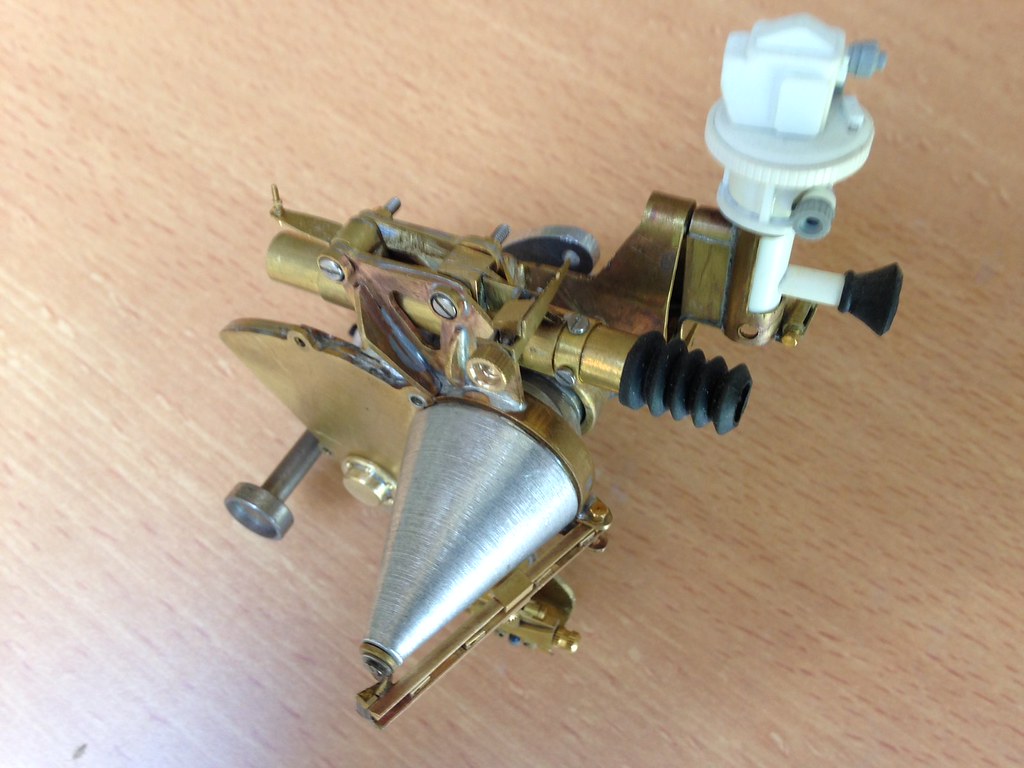
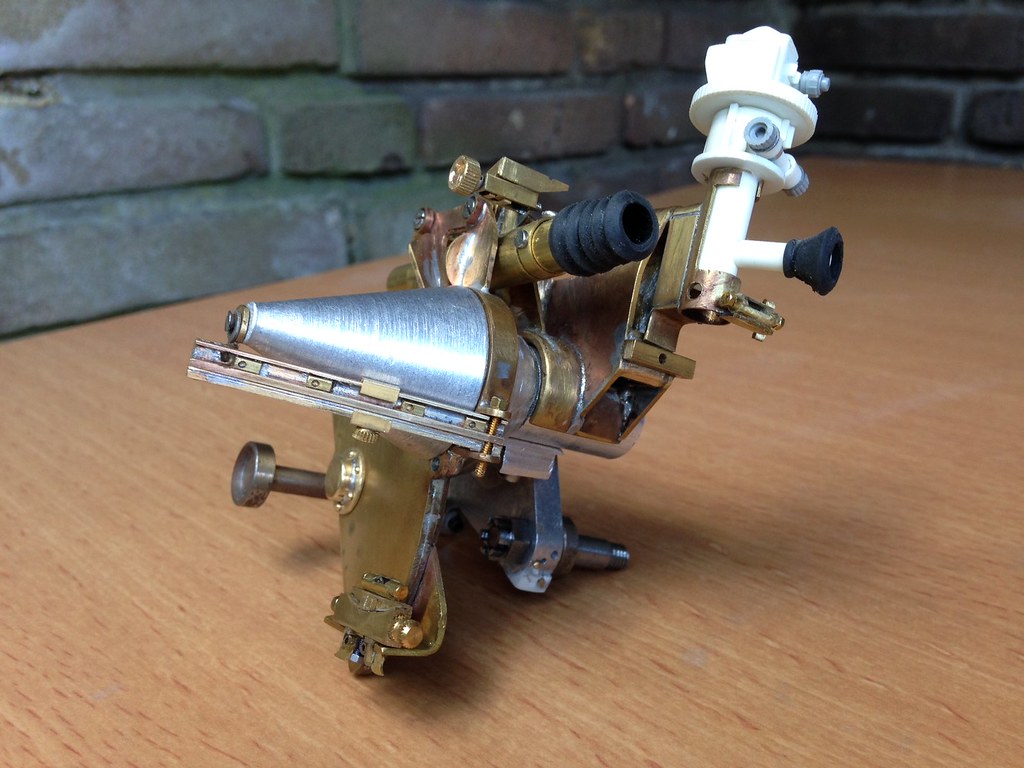
The separate components:
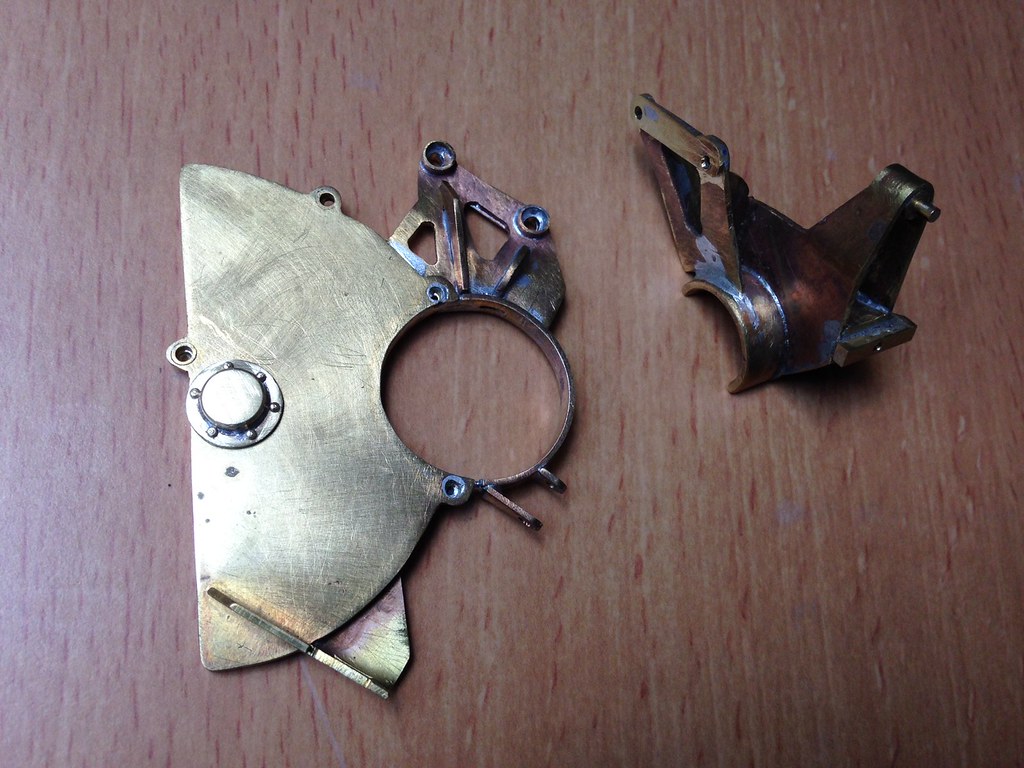
The two above parts are one single casting on the real gun, and are joined with a conical part (in the kit this is part of the ranging cone). Still have to find a conical brass shape to connect the two separate parts.
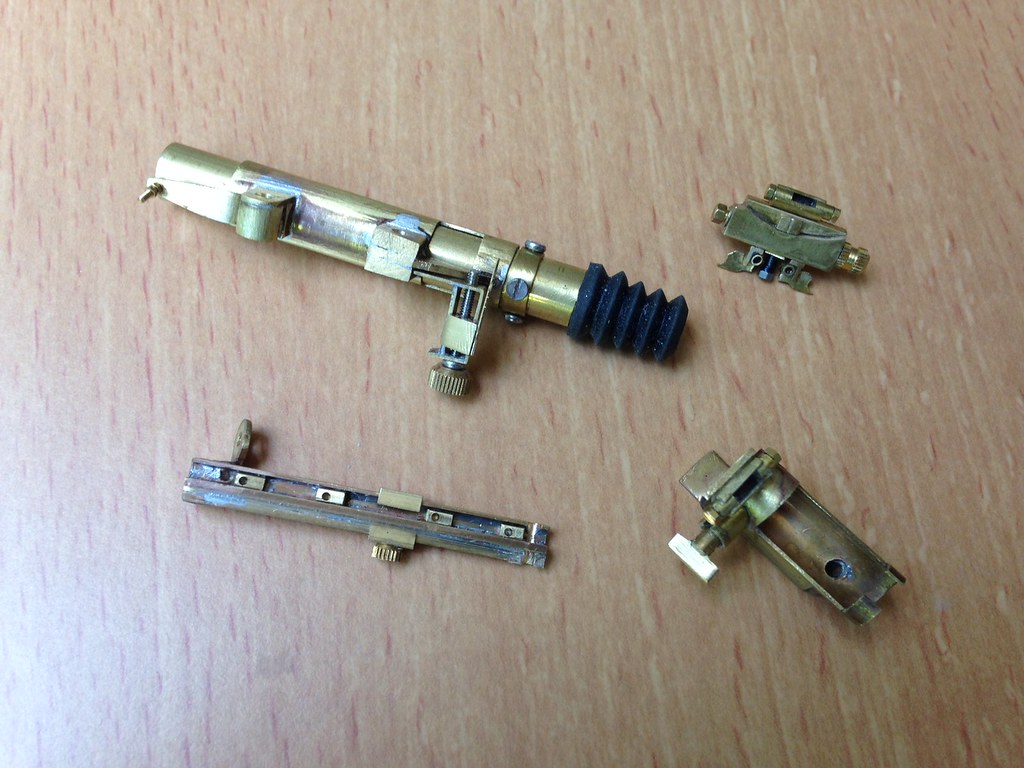
Clockwise: direct fire sighting telescope No. 41 with iron sights attached, clinometer, dial sight bracket and ranging/charge ruler.
Took some (well actually a lot) time but I am very happy with it!!
Marcus
Re: Marcus's 25 pounder
Posted: Fri Aug 17, 2018 12:41 pm
by Marcus Kwa
Parallel to the sight system I tackled the barrel and breech block. The kit barrel is about 25mm to short, this is most notable on the part of the barrel protruding past the gun cradle. The muzzle brake was initially almost in line with the cap on the gun cradle. A piece of aluminium tube of 20mm was added to the barrel and ground flush:
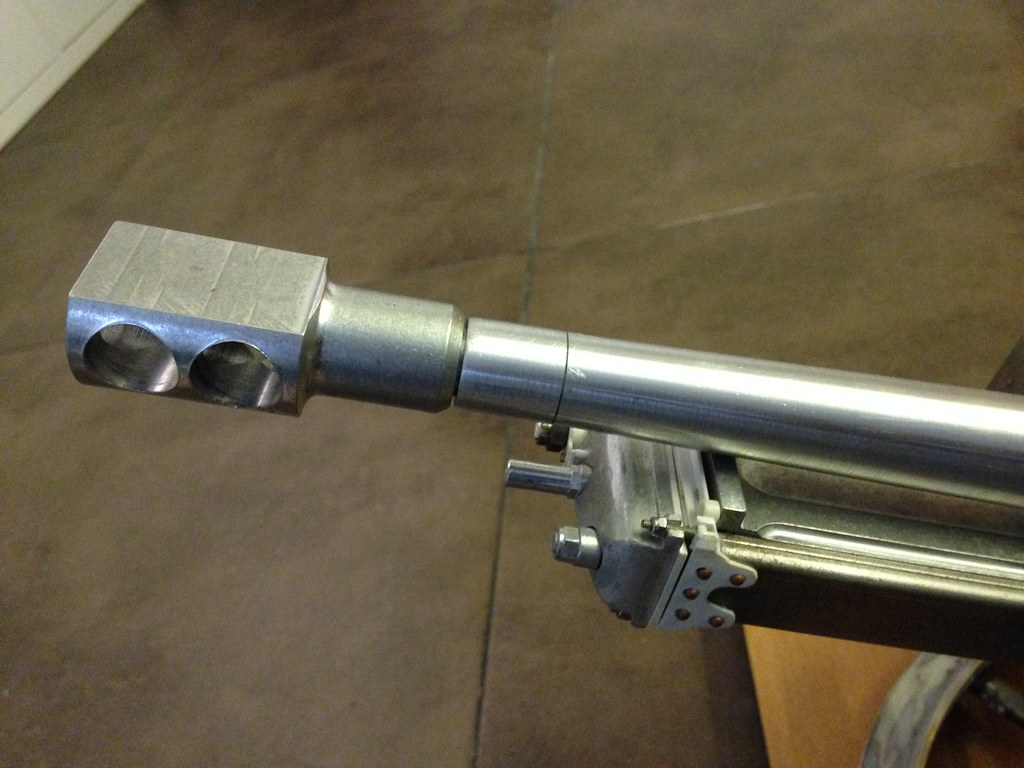
The last 5mm was added to the breech side of the barrel, actually I replaced a large part of the rear of the barrel with a 32mm aluminium tube. Not only to lengthen the barrel but also to accommodate the breech insert with enlarged chamber to be able to feed Dave's shells and my own shell casings. Incidentally the brass plug supplied in the kit has the correct outer dimensions of the shell casing.
New holes were drilled and tapped to fit the counter weight. The splice will be hidden under the barrel clamp.
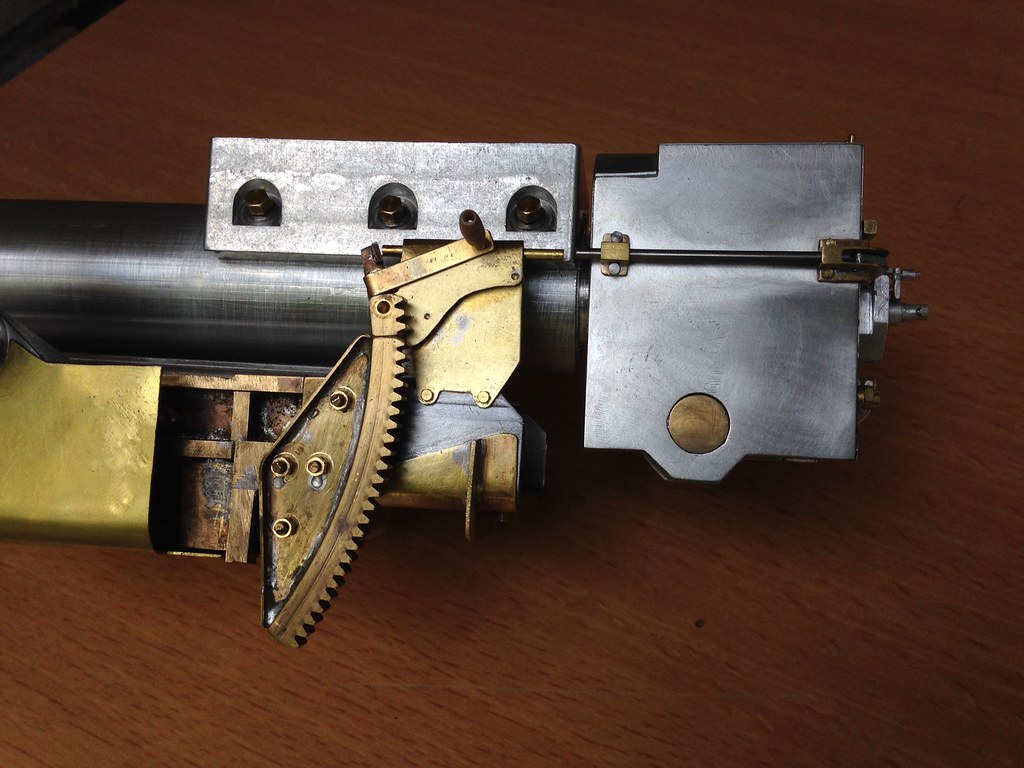
The breech block with the enlarge chamber, I had to add some spacers to have it fit inside the new barrel tube, the small square on the breech block is for the future cocking mechanism:

The breech was laminated with 0.3mm thick aluminium plate to eliminate the splices of the kit parts, the breech block axle was added and the breech reinforced where the axle pierced the lower part of the breech (bump just below the axle).
Breech handle:
Breech open, note handle locking boss:
The breech block was profiled/angled on the back and since I had to enlarge the breech block opening for the shell casing the front got the cut-out also present at most of the actual guns:
The slit visible on the back of the block is for the new breech actuation cam:
Cheers,
Marcus
Re: Marcus's 25 pounder
Posted: Fri Aug 17, 2018 2:53 pm
by florian rudolf
WOW du bist ja nicht ganz dicht... Was ein Wahnsinn!!!
Sorry, don't explain... What an awesome Model. Can't believe that work...
Re: Marcus's 25 pounder
Posted: Fri Aug 17, 2018 7:03 pm
by Jeffrey Goff
Superb work Marcus, it will be a masterpiece
Regards Jeff
Re: Marcus's 25 pounder
Posted: Tue Aug 28, 2018 11:31 am
by Marcus Kwa
Finished the breech! The striker box was added to the breech block. The T-handle on the striker box is the striker handle, with on its left the safety switch (in the up position: fire) and at its right the retaining catch plunger for the removal of the striker box from the breech block.
At the bottom of the breech block the cocking levers were added: the opening and closing of the breech block automatically cocks the gun hence the linkage to the breech operating handle axle (I did not attempt to reproduce that......

).
In the making are the firing handle and its mounting plate to the gun slide.
Cheers!
Re: Marcus's 25 pounder
Posted: Thu Aug 30, 2018 12:28 pm
by Marcus Kwa
The firing handle and its support plate were added to the gun slide:
It is connected to the slide by two bolts at the bottom of the support plate and a bolt to the elevation quadrant.

I added Dave's air pump support bracket (air pump to fill up recuperator of recoil system), it is a beautiful cast and complicated piece incorporating the flanges to lock the air pump case onto:
I also revisited the slewing arm and replaced the kit part by two telescoping tubes, with the treaded section hidden inside. With one of Dave's grease nipples as a cherry on top:
And I have to check if all rivets are still secure I see.......

Re: Marcus's 25 pounder
Posted: Thu Aug 30, 2018 8:06 pm
by Dave Backway
Hi Marcus,
Amazing details and brass work, I'm looking forward to further details
Regards
Dave
Re: Marcus's 25 pounder
Posted: Mon May 13, 2019 2:36 pm
by Marcus Kwa
Finally some time to do some building!
I started with some small things to get back in the saddle. I have now almost replaced all the styrene bits with brass ones. The mounting brackets of the slide cap:

After these came together quite nicely, time for some more challenging stuff. I changed the angle of the capsquares on the saddle: the kit has them horizontal but they are actually perpendicular to the saddle support beam (indicated by the diagonal line of rivets). On the pics below the left side has been converted, the right one is still unchanged.

I did cut a small part from the front, keeping the cut line through the centre of the trunnion, and glued it to the rear of the capsquare as visible in the photo below. The brass reinforcement covers the splice on the outside, it will be visible on the back but here it will be obscured by the cradle and barrel.

I further added a bracket for Dave's oiler.
The finished gun cradle, with slide and barrel fitted. I had to make a new eye to fix the cut-off gear rod to, the eye is brazed to the brass reinforcement.

.
Cheers,
Marcus
Re: Marcus's 25 pounder
Posted: Mon May 13, 2019 6:55 pm
by simon_manning
Great work, very nice. regards simon manning.
Re: Marcus's 25 pounder
Posted: Tue May 14, 2019 11:39 am
by Marcus Kwa
Thanks Simon!
The trunnions are connected to the gun cradle with a large box structure:[

The front part is not flat but tapered and of welded construction:

The box has a cut-out for the elevation quadrant:

Further detailing of the front cap of the gun cradle, with Dave's hinged access door:

Added the muzzle brake securing bolt and its locking tab:

Marcus
Re: Marcus's 25 pounder
Posted: Tue May 14, 2019 2:44 pm
by Kevin Hunter
It's good to see you back Marcus. Your detail work is amazing.
Re: Marcus's 25 pounder
Posted: Thu May 16, 2019 5:46 am
by Robert E Morey
Lovely work Marcus. Really eye candy details. I love the brass parts.
Best regards,
Bob