Armorpax's 25 Pounder

All topics related to Armortek's 25 Pdr
Post Reply
Dave Dibb (Armorpax)
Posts: 1154
Joined: Thu Jul 12, 2007 6:03 pm
Location: Hampshire
Has liked: 115 times
Been liked: 1098 times
Contact:

Re: Armorpax's 25 Pounder

Post by Dave Dibb (Armorpax) »

Hi Marcus,

Not noticed any problem with mine. Nothing on the shield fouls and it elevates OK.

Rest of your Christmas present is going in the post tomorrow :wink:

Best regards

Dave
www.armorpax.net

There used to be a nice banner here till Photobucket lost everything.............................

Marcus Kwa
Posts: 176
Joined: Wed Nov 13, 2013 6:22 pm
Been liked: 39 times

Re: Armorpax's 25 Pounder

Post by Marcus Kwa »

Excellent timing Dave, the last rivet is in :D :D :D ! Time for the ultimate details!
I'll update my own post shortly (with the holidays ended there just does not seem any time left anymore....... :roll: ).

Cheers,

Marcus

Dave Dibb (Armorpax)
Posts: 1154
Joined: Thu Jul 12, 2007 6:03 pm
Location: Hampshire
Has liked: 115 times
Been liked: 1098 times
Contact:

Re: Armorpax's 25 Pounder

Post by Dave Dibb (Armorpax) »

Hi All,

While I'm waiting for moulds to cure I've modified the other Traversing ring bracket so it fits over the new Handspikes as per the original. It also mounts the opposite way round.

Its a very simple mod, I've cut away the existing aluminium frame to leave just the pivot housing then glued this to a simple two piece plasticard bracket. I've shortened the pin but put it through the plasti card to make it a bit stronger.

Best regards

Dave

Image
Image
Image
Image
Image
www.armorpax.net

There used to be a nice banner here till Photobucket lost everything.............................

Terryaidanclarke
Posts: 9
Joined: Fri Feb 14, 2014 11:13 pm

Re: Armorpax's 25 Pounder

Post by Terryaidanclarke »

What size copper rivets are supplied with the kit, and what size rivet snap would I need so that the rivet can be 'domed' on the other end. Sorry to seem so thick, but being new to modelling, engineering was never my forte. So if now and then I ask what might seem a stupid question, forgive me and I know you'll help out as much as you can.
Terry.

Marcus Kwa
Posts: 176
Joined: Wed Nov 13, 2013 6:22 pm
Been liked: 39 times

Re: Armorpax's 25 Pounder

Post by Marcus Kwa »

Hi Terry,
I asked the same question and found the tools required quite expensive and for most of the parts in the kit the tool could not be used due to there not being enough space to work around with the tool!! The ones recommended are called rivet squeeze tools.
Most of us will probably glue most of the rivets in place (I did, and it is a pain to remove them: so super glue will do the trick.....) :D
For the parts that need some extra strength I used M2 button head hex (or Allen) screws which have the same size head as the rivets. If the hex hole in the head bothers you you can close it after fastening with a drop of glue. The M2 button head hex screws can be found on ebay: Bolt Base and Screws&More.

Best regards,

Marcus

Terryaidanclarke
Posts: 9
Joined: Fri Feb 14, 2014 11:13 pm

Re: Armorpax's 25 Pounder

Post by Terryaidanclarke »

Thanks Marcus, your a star.
It's just that when I look at the rear of the shield, it looks a bit messy and doesn't look quite right. I think I'm going to remove all the shield rivets and go with the way you suggest. Dome heads on both sides will I feel look more pleasing on the eye. I've sent away for the upgrade kit.
I think I started like a bull at a gate, lol, so on reflection I think I will strip down any fitting I have done , and then do a bit more studying before I 'attack' it again. I'm more than grateful for any advice I am given along the way,(just think of me as a child who needs guiding ) lol.
I'm of an age where I'm not easily put off. So feel free to let me have it when I cock up. Lol.
Regards Terry.

IAN HINKS
Posts: 86
Joined: Tue Aug 13, 2013 5:45 pm

Re: Armorpax's 25 Pounder

Post by IAN HINKS »

Hi All,
After reading the latest posts I thought it appropriate if I continue the thread with queries of my own. I hope you don't mind me piggy backing Dave. I think you will agree it is relevant to your topic.
I have not used resin parts before and so would like to get tips and pointers on how best to go about incorporating your upgrade items into my gun build. What is the best way of removing items from the sprue? Are files and sanding papers OK for cleaning up? For preparing and cleaning will soapy water degrease the resin parts and is there any surface prep required before applying undercoats and top coats? Lastly for now what adhesive should I use to bond the parts to the steel and aluminium parts of the gun kit?
It goes without saying I welcome any information from any interested parties and would not be surprised if there are others out there with similar questions.I have enjoyed reading all the threads on the various builds and look forward to reading more. I hope to incorporate some of the ideas and suggestions into my own build and trust you will forgive my poaching.
Happy building,
Ian.

Marcus Kwa
Posts: 176
Joined: Wed Nov 13, 2013 6:22 pm
Been liked: 39 times

Re: Armorpax's 25 Pounder

Post by Marcus Kwa »

Terry,
Be warned! It is addictive! :D
For the gunshield I glued the stiffeners to the shield first with epoxy glue. Then cut the rivets till the stud left was only as high as the plate thickness and did the same for the back (stiffener) side, result: rounded heads on both sides!!! The begin and end rivet I replaced with a button head bolt just to be sure! For the gun frame I did cut one side of the rivets a bit shorter as the rivets are a bit too long to fit the frame thickness from both sides.
For the traversing platform I used button head bolts al the way.

Feel free to open a new thread any time, though Dave probably would not mind hitchhiking on his thread it is easier for others to find certain topics like the fixing of the rivets :idea:

Cheers,

Marcus

Terryaidanclarke
Posts: 9
Joined: Fri Feb 14, 2014 11:13 pm

Re: Armorpax's 25 Pounder

Post by Terryaidanclarke »

The way to go Marcus , I've striped the kit right back now, taken all components off the framework.
Even took the Wing brackets off so they can be relocated as per Dave's advice. ( do you drill another hole for the wing rods?, and your right the rivets are a pig to undo. Will start giving the trail legs a good rub down as well as everything else. Then wait for the upgrade kit to arrive. Jumping well ahead, do you prime and paint by brush or do you spray,?.

Dave Dibb (Armorpax)
Posts: 1154
Joined: Thu Jul 12, 2007 6:03 pm
Location: Hampshire
Has liked: 115 times
Been liked: 1098 times
Contact:

Re: Armorpax's 25 Pounder

Post by Dave Dibb (Armorpax) »

Hi All,

Most of the smaller parts on the casting blocks that have a thin carrier can be removed with a sharp craft knife or scalpel (which I use). Score along the carrier till the part is free rather than cutting straight through. Parts can then be cleaned up with needle files, a knife and I use sponge sanding blcoks as well.

The large flat back parts should not need too much sanding and I recommend a sheet of wet and dry flat on the bench then sand the part in a circular motion. This prevents rounding of the underside and gives a nice flat finish. Same principle applies to the boxes with the larger casting blocks. You can cut away some of the block if its big enough, if not steady sanding in a circular motion till its done. Keep checking so you dont go too far.

For the best results stick to slow and steady rather than hacking loads off with power sanders.

When drilling and sanding resin make sure you are in a well ventilated area and I would recommend a dust mask. The sanded resin is a very fine powder and gets everywhere. Don't do it in the living room :D

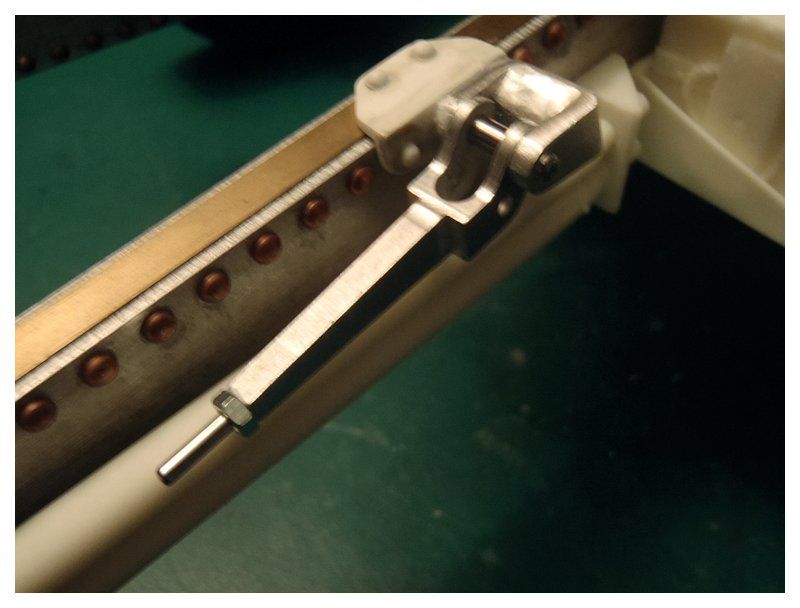
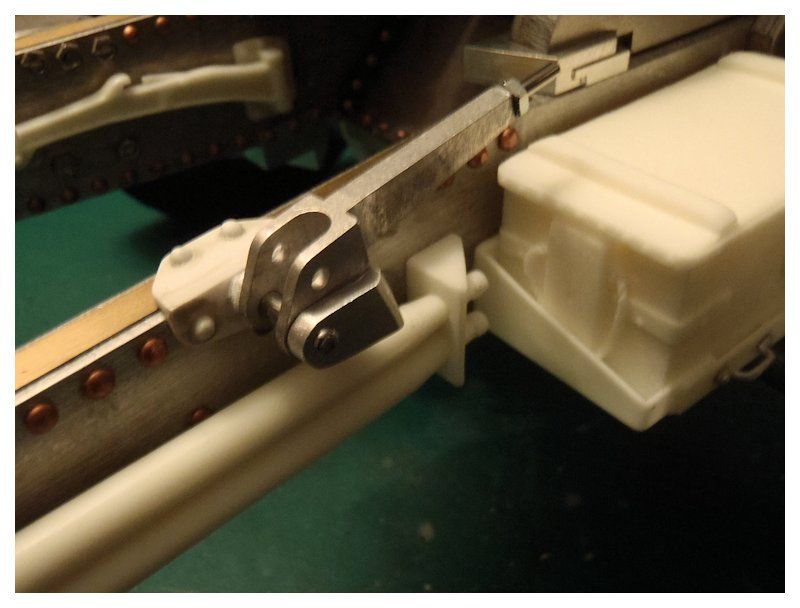
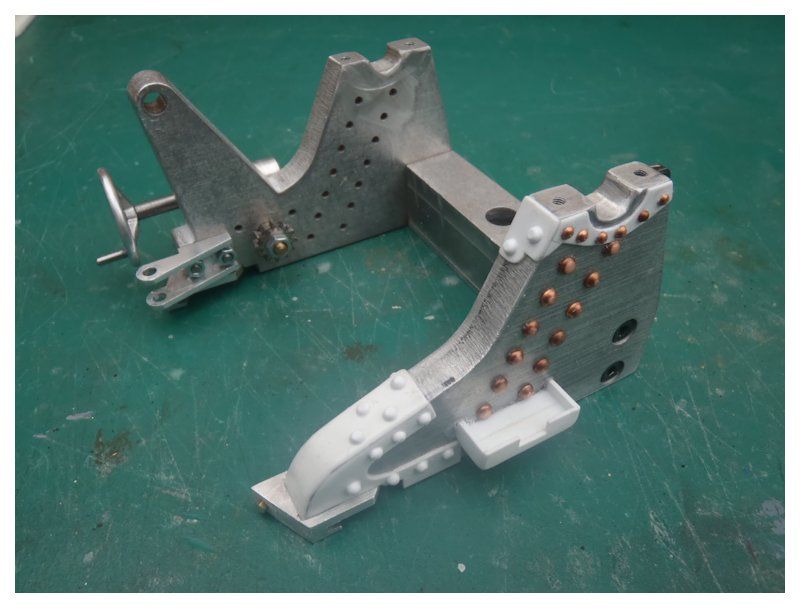
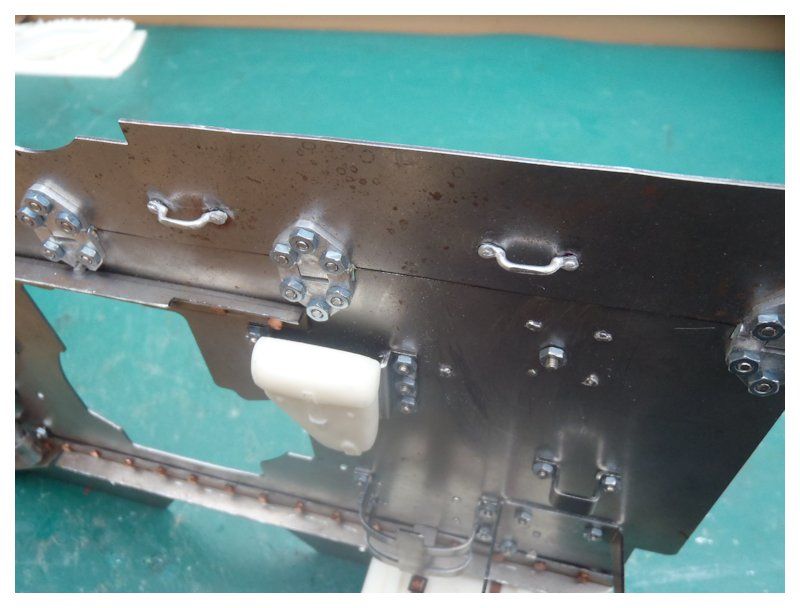
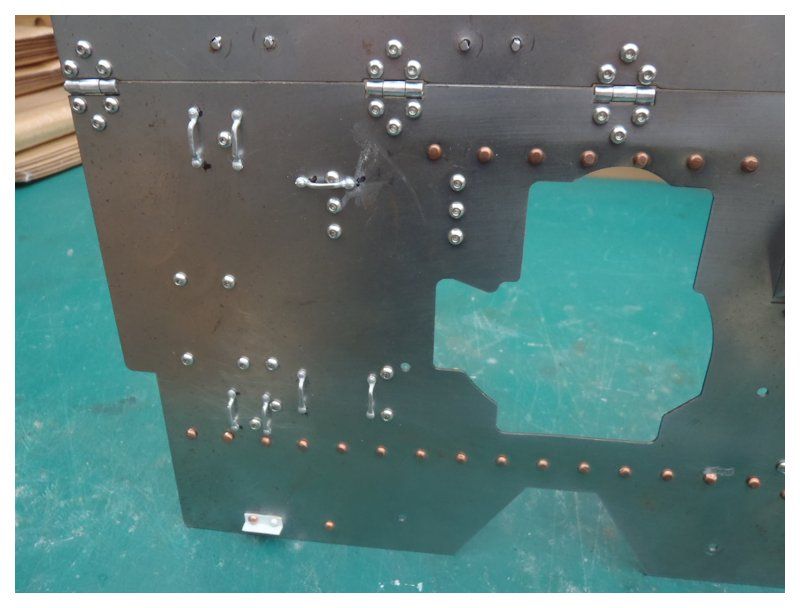
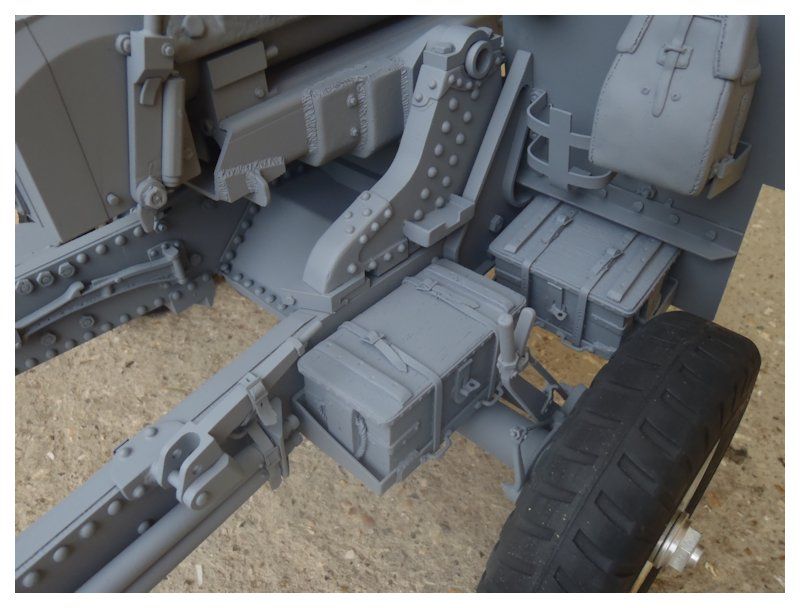
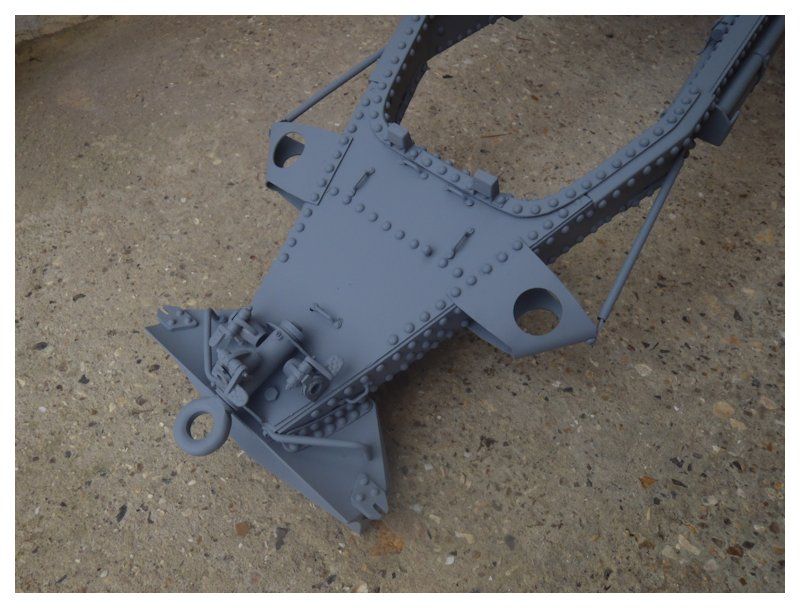
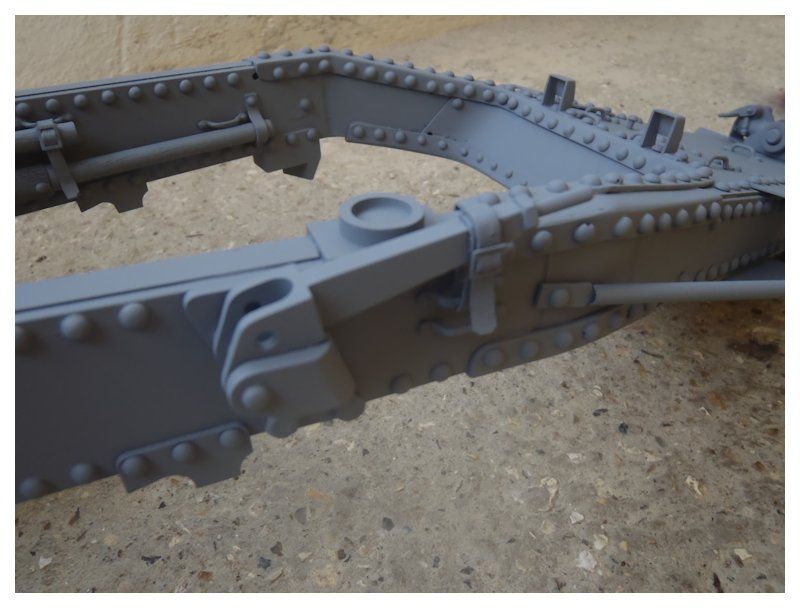
I use normal superglue for most parts but you can also use epoxy like Aralidite for a stronger bond. On things like the rear trail sole plate I cut off 4 of the rivet heads, drilled it and used 4 of the copper rivets to make it a little stronger as the rear of the gun is less protected than other parts.

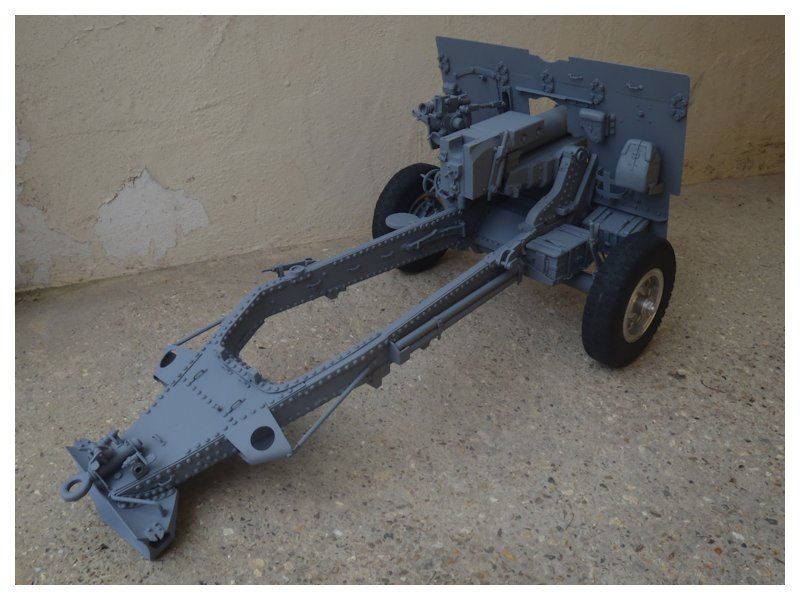
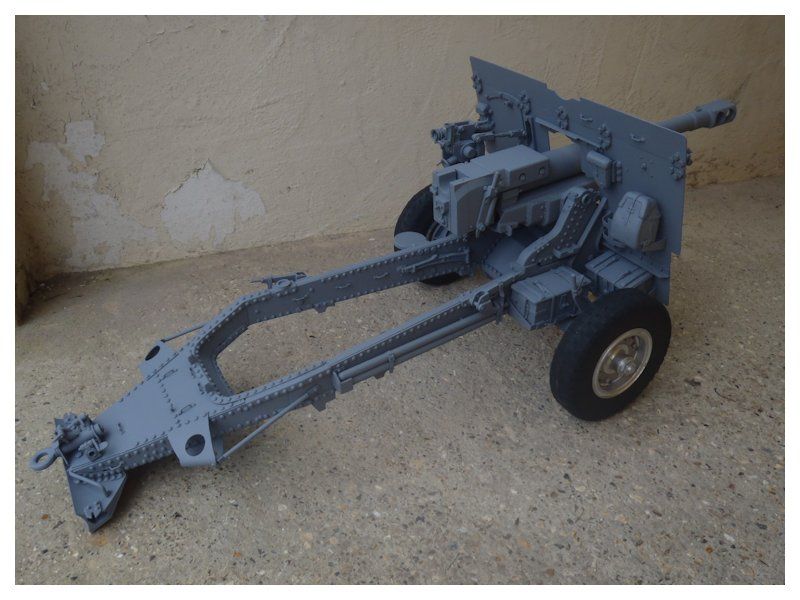
I use no release agents when casting and prime my resin parts straight from the moulds with Halfords grey primer.

Best regards

Dave
www.armorpax.net

There used to be a nice banner here till Photobucket lost everything.............................

Dave Dibb (Armorpax)
Posts: 1154
Joined: Thu Jul 12, 2007 6:03 pm
Location: Hampshire
Has liked: 115 times
Been liked: 1098 times
Contact:

Re: Armorpax's 25 Pounder

Post by Dave Dibb (Armorpax) »

Hi Terry,

I cut the wing rods then slid the the halves into a piece of aluminium tube to make it longer and look better. I used the original fixing holes.

Best regards

Dave
www.armorpax.net

There used to be a nice banner here till Photobucket lost everything.............................

Dave Dibb (Armorpax)
Posts: 1154
Joined: Thu Jul 12, 2007 6:03 pm
Location: Hampshire
Has liked: 115 times
Been liked: 1098 times
Contact:

Re: Armorpax's 25 Pounder

Post by Dave Dibb (Armorpax) »

Hi All,

Added a little detail to the gun sight and finished off the trunion support plate detail. Also added the last tie downs to the gun shield.

I will be priming the main components later todat with luck.

Best regards

Dave

Image
Image
Image
Image
Image
www.armorpax.net

There used to be a nice banner here till Photobucket lost everything.............................

Dave Dibb (Armorpax)
Posts: 1154
Joined: Thu Jul 12, 2007 6:03 pm
Location: Hampshire
Has liked: 115 times
Been liked: 1098 times
Contact:

Re: Armorpax's 25 Pounder

Post by Dave Dibb (Armorpax) »

Hi All,

Main assemblies primed. I have a little more to do on the front of the sheild and the wheel hubs but getting there.

Best regards

Dave

Image
Image
Image
Image
Image
Image
Image
Image
Image
Image
Image
Image
www.armorpax.net

There used to be a nice banner here till Photobucket lost everything.............................

Marcus Kwa
Posts: 176
Joined: Wed Nov 13, 2013 6:22 pm
Been liked: 39 times

Re: Armorpax's 25 Pounder

Post by Marcus Kwa »

Now that is progress!! That is a very smooth primer finish, Halfords primer you said? Not much time lately to work on my 25pdr...... :( . Then it is always nice to see the progress made by others!!!
Seems to me the only part still missing is the oil can :wink:

Best regards,

Marcus
Last edited by Marcus Kwa on Sun Mar 02, 2014 5:45 pm, edited 1 time in total.

Ian Rodney
Posts: 480
Joined: Thu Jul 05, 2012 6:39 am
Been liked: 53 times

Re: Armorpax's 25 Pounder

Post by Ian Rodney »

Hi Dave,

Great to see those new detailed parts on your gun sight and trunnion plate. Will you be offering any of these and other parts like you did before!

Also your 25 pounder looks very good now that you have added primer in these latest pics.

Cheers
Ian
from Glasgow.

Post Reply