Armorpax's 25 Pounder

All topics related to Armortek's 25 Pdr
Post Reply
Dave Dibb (Armorpax)
Posts: 1154
Joined: Thu Jul 12, 2007 6:03 pm
Location: Hampshire
Has liked: 115 times
Been liked: 1098 times
Contact:

Armorpax's 25 Pounder

Post by Dave Dibb (Armorpax) »

Hi All,

I've made a start. The edges of the counter weight block have been rounded off and I will add cast texture later. Right now I want everything staying shiny :-)

I've also filed more detail into the breach block and added a small pin to act as back stop for the Breach lever. I haven't figured how to spring load this so it stays closed yet but I am working on it.

I will be adding further small details to the breach as I progress.

Best regards

Dave

Image
Image
Image
Image
Image
Image
Image
Image
www.armorpax.net

There used to be a nice banner here till Photobucket lost everything.............................

Carl Puckett
Posts: 10
Joined: Mon Nov 18, 2013 8:00 pm

Re: Armorpax's 25 Pounder

Post by Carl Puckett »

I'll definately be watching this build with great interest.

Can I ask what reference material you are using?

Dave Dibb (Armorpax)
Posts: 1154
Joined: Thu Jul 12, 2007 6:03 pm
Location: Hampshire
Has liked: 115 times
Been liked: 1098 times
Contact:

Re: Armorpax's 25 Pounder

Post by Dave Dibb (Armorpax) »

Hi Carl,

There are two pretty good walkrounds on the net, just type in 25 pounder and they come up in the images option. I've also got one just up the road at Fort Nelson.

Best regards

Dave
www.armorpax.net

There used to be a nice banner here till Photobucket lost everything.............................

Dave Dibb (Armorpax)
Posts: 1154
Joined: Thu Jul 12, 2007 6:03 pm
Location: Hampshire
Has liked: 115 times
Been liked: 1098 times
Contact:

Re: Armorpax's 25 Pounder

Post by Dave Dibb (Armorpax) »

Hi All,

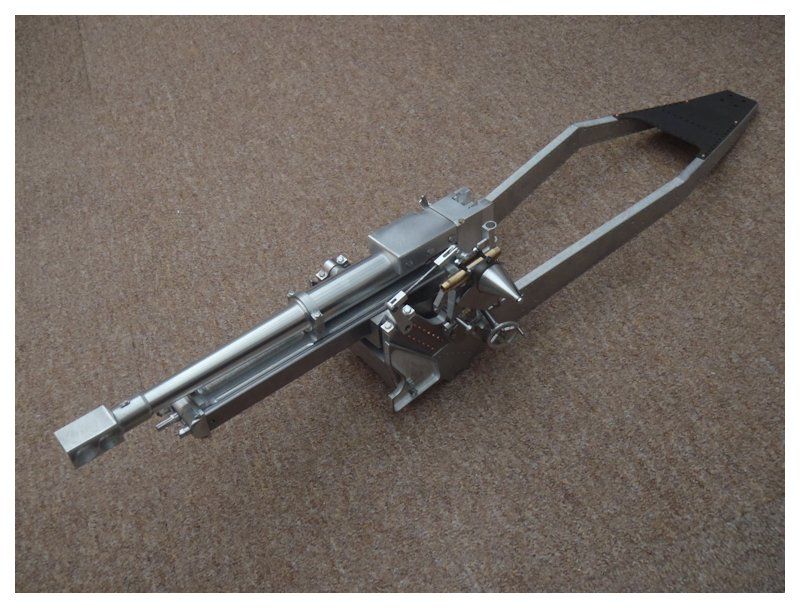
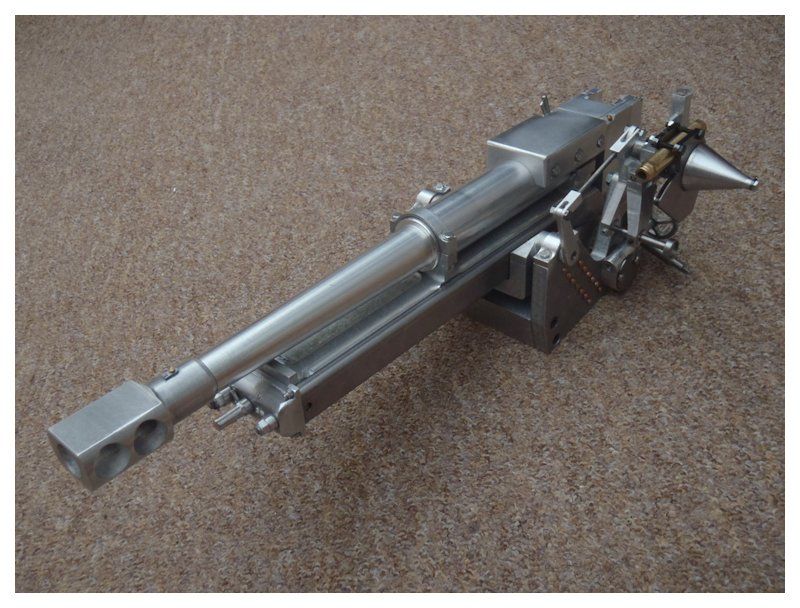
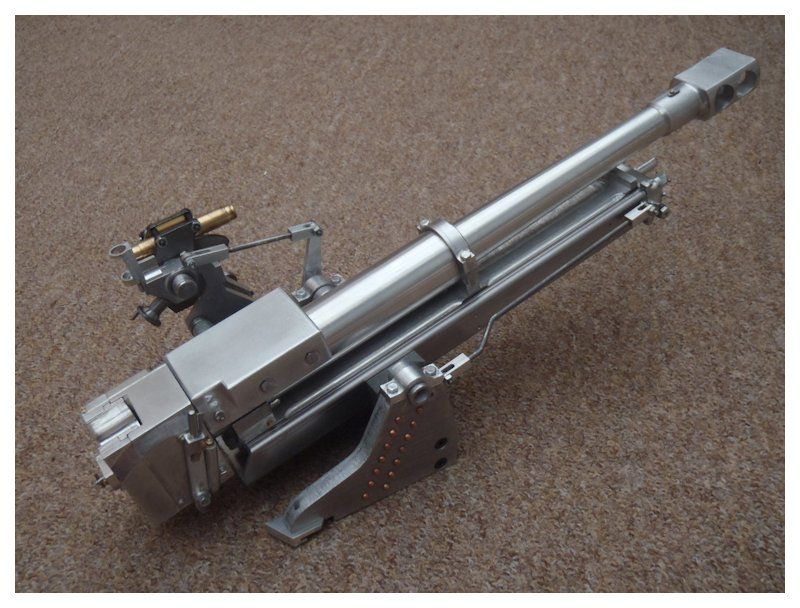
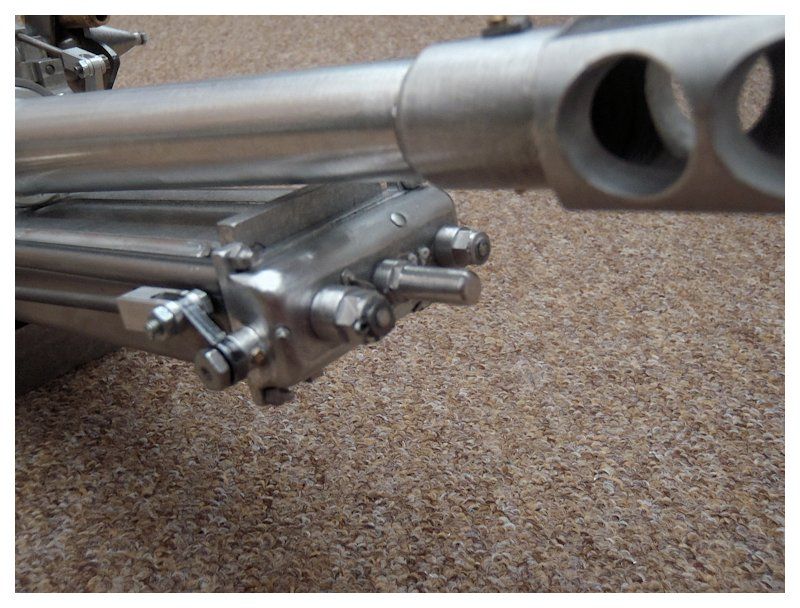
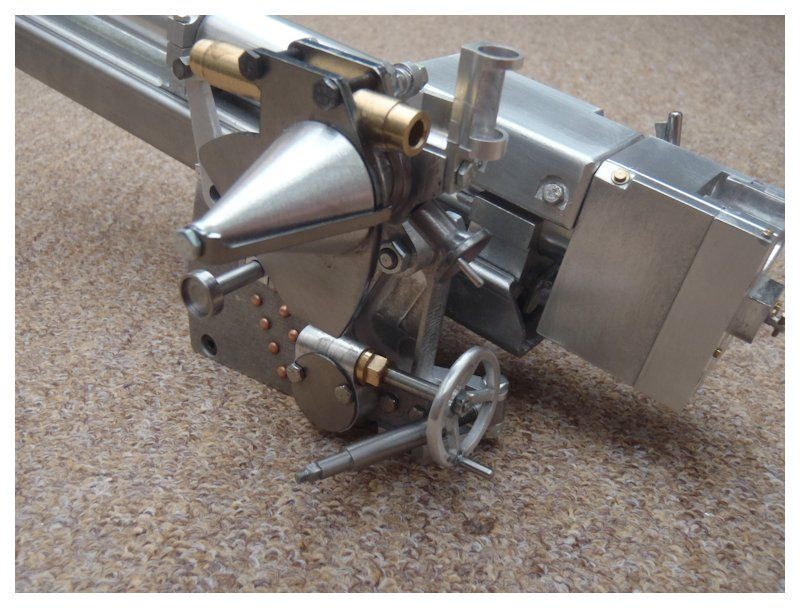
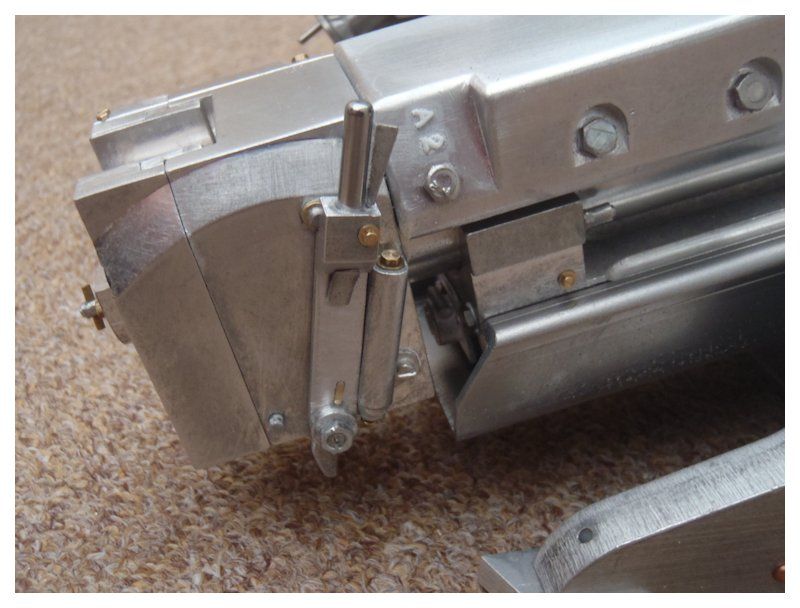
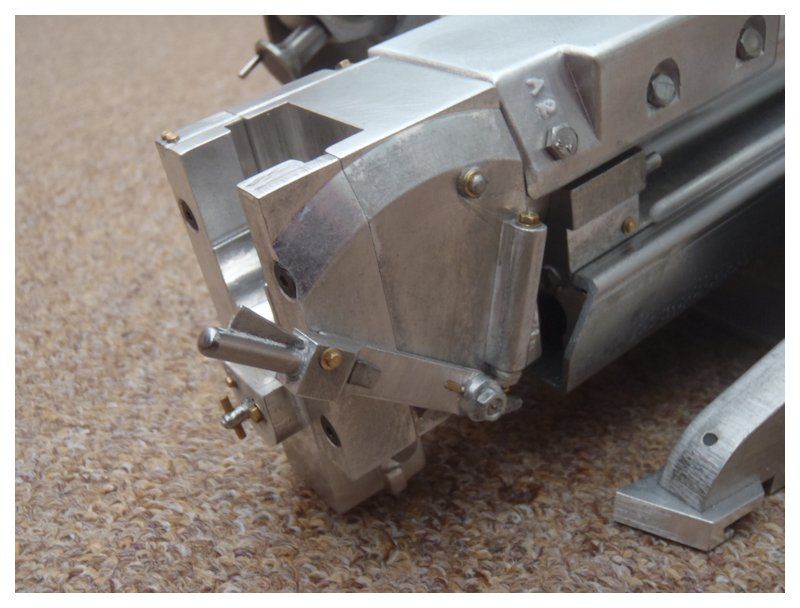
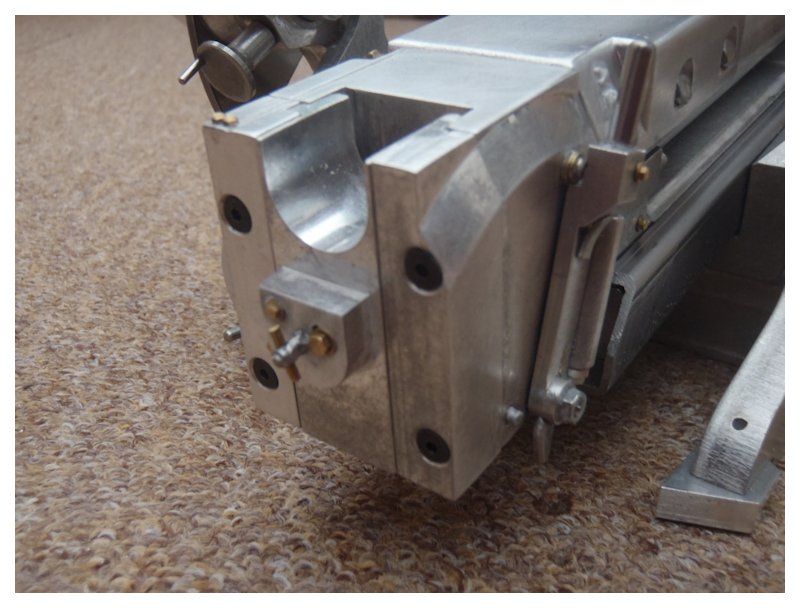
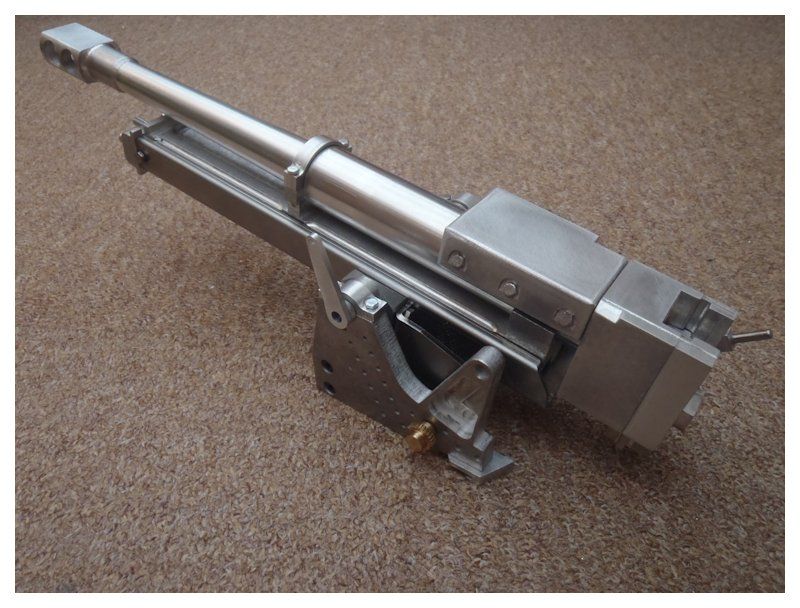
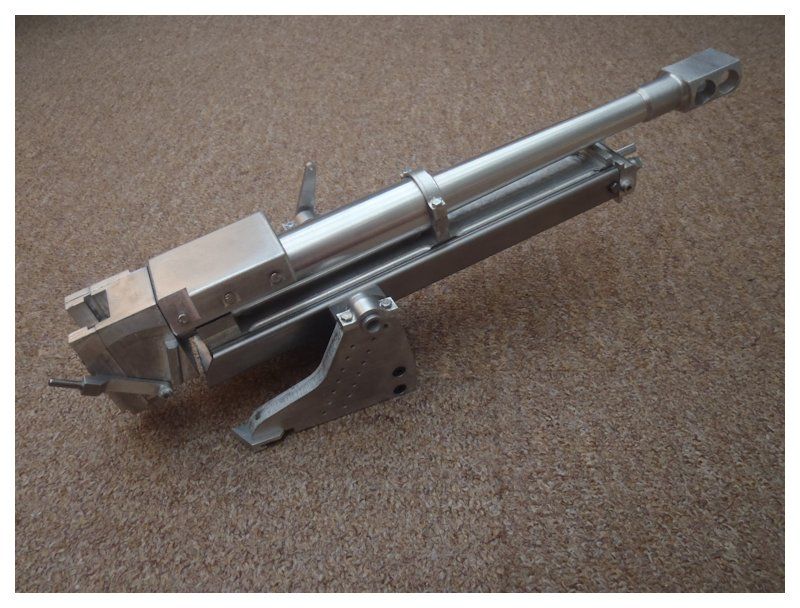
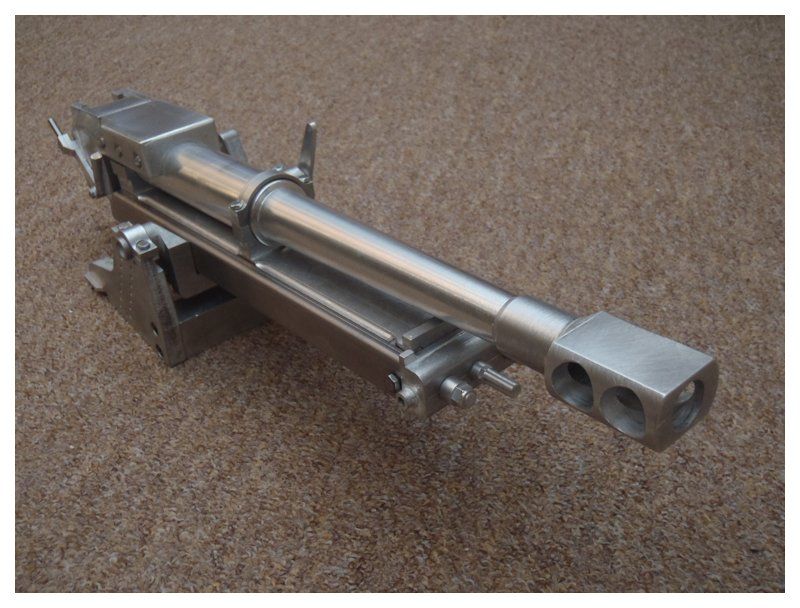
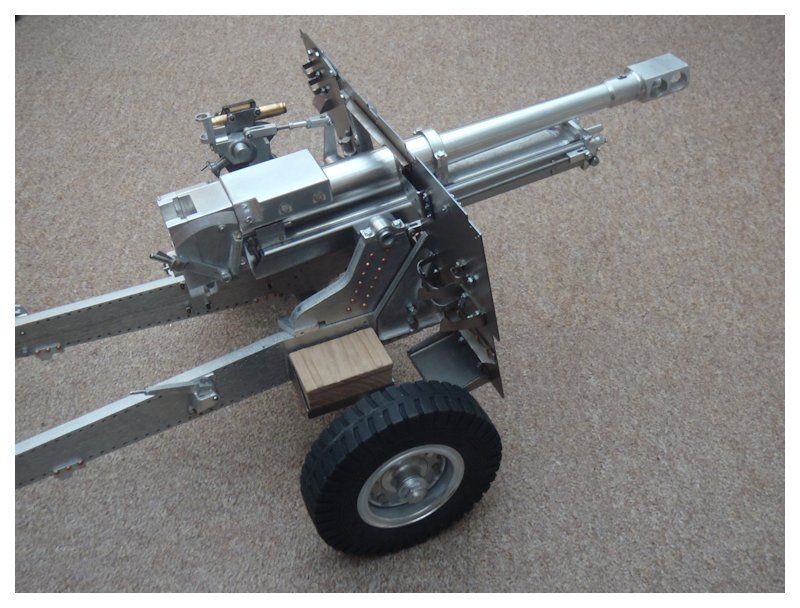
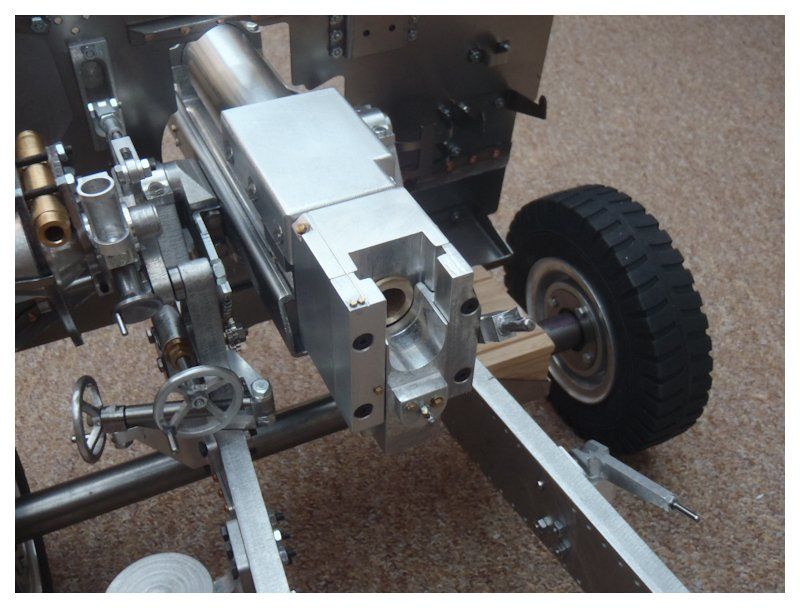
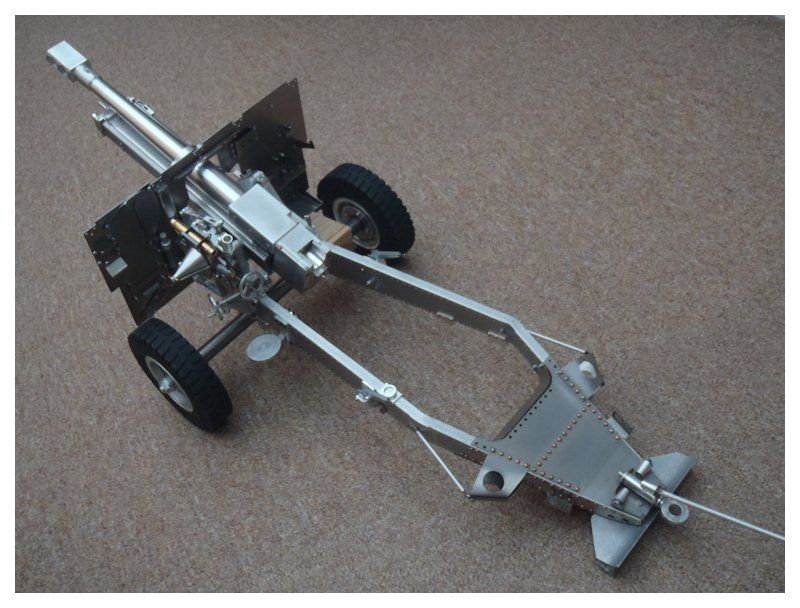
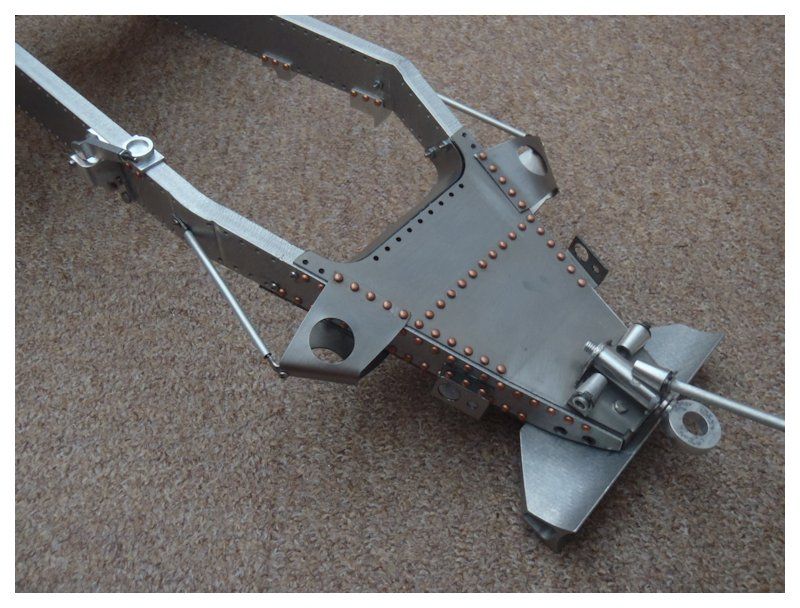
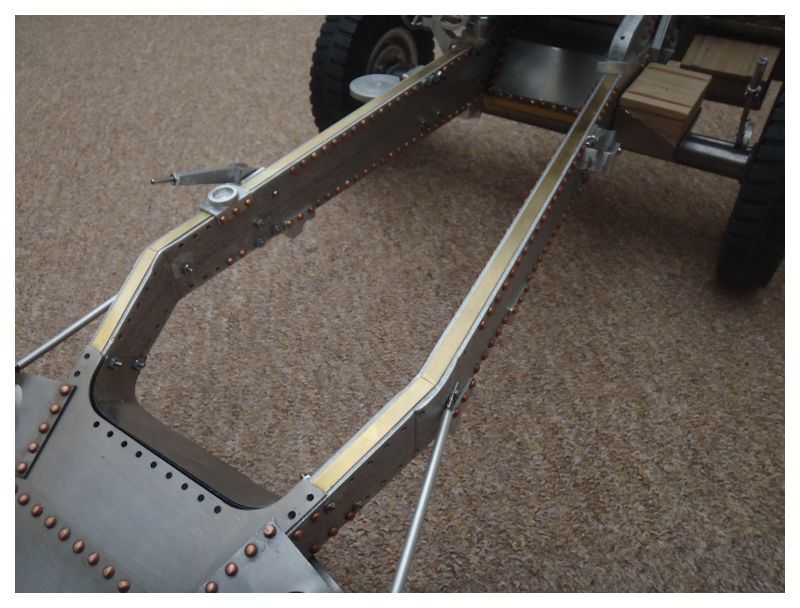
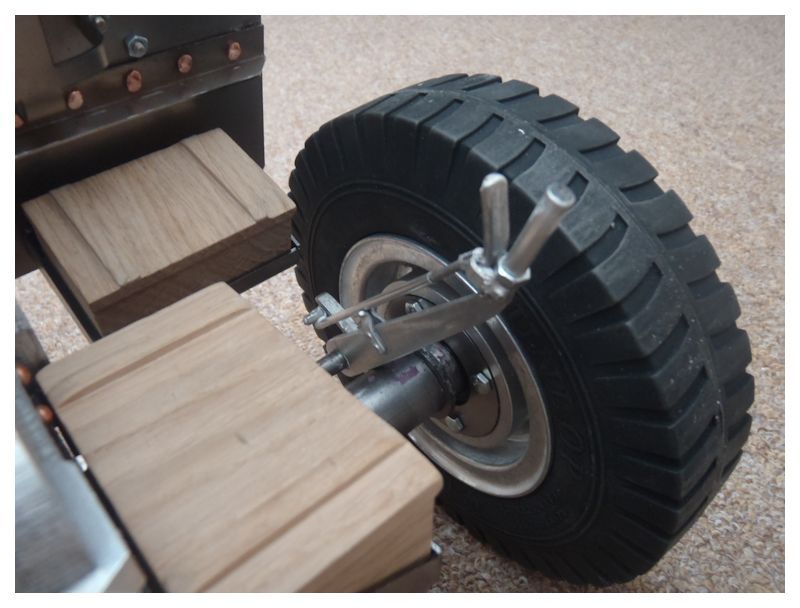
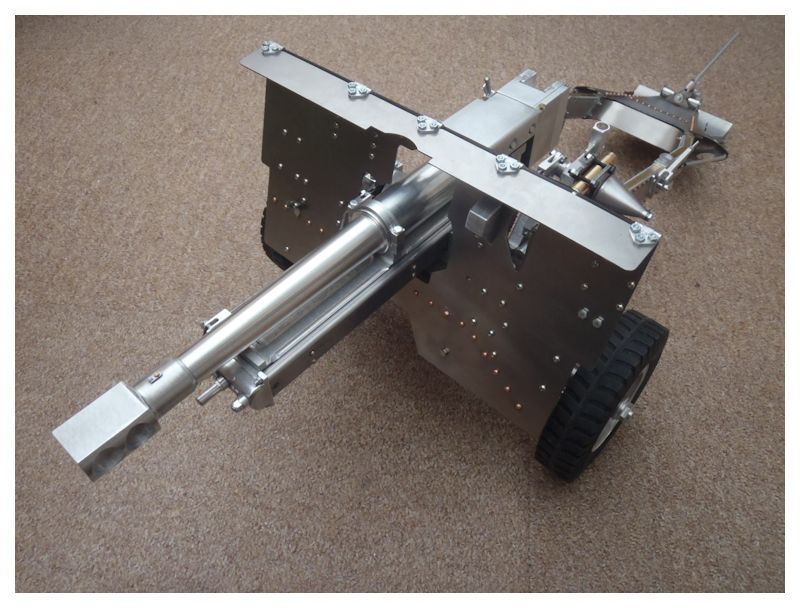
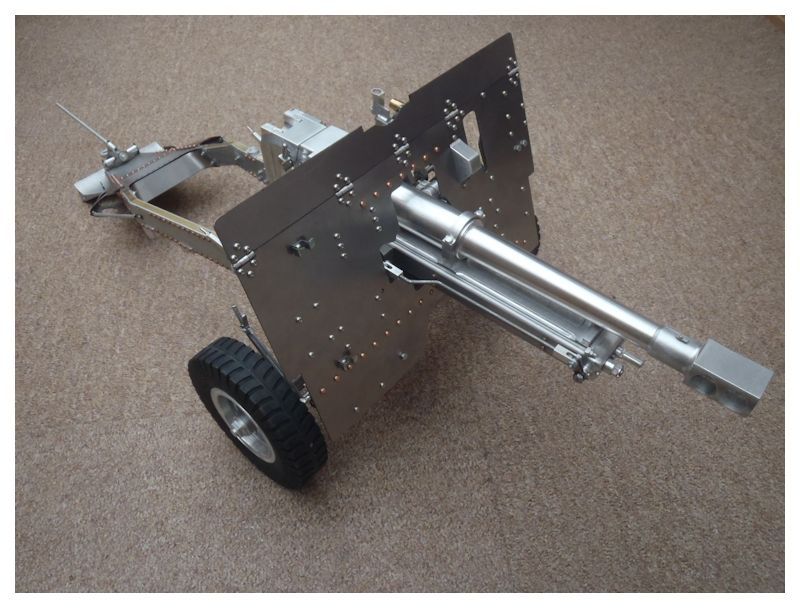
I've followed Leon's lead and reshaped the elevating wheels, I've also re-profiled the recoil slide nose casting.

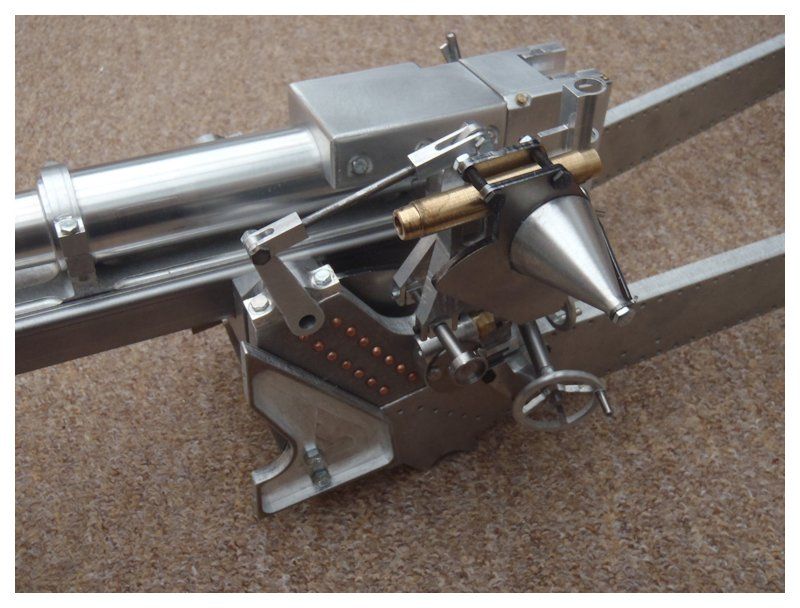
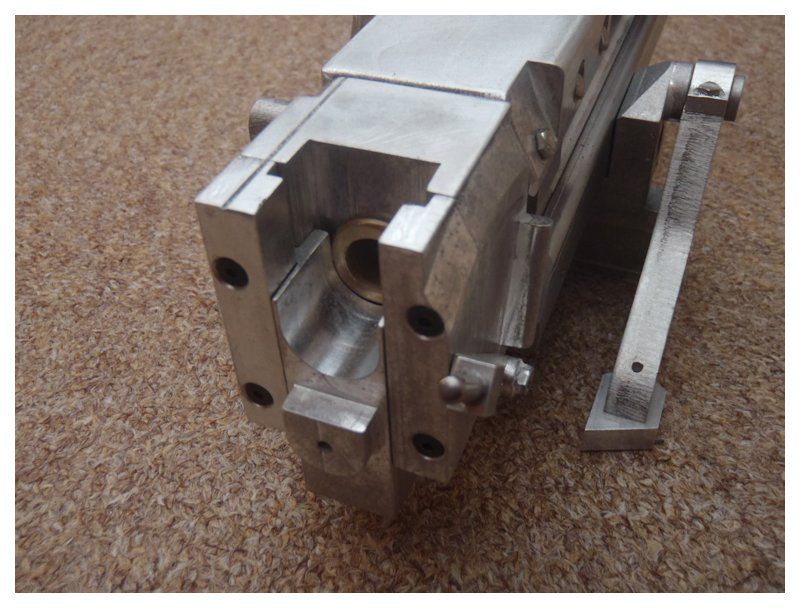
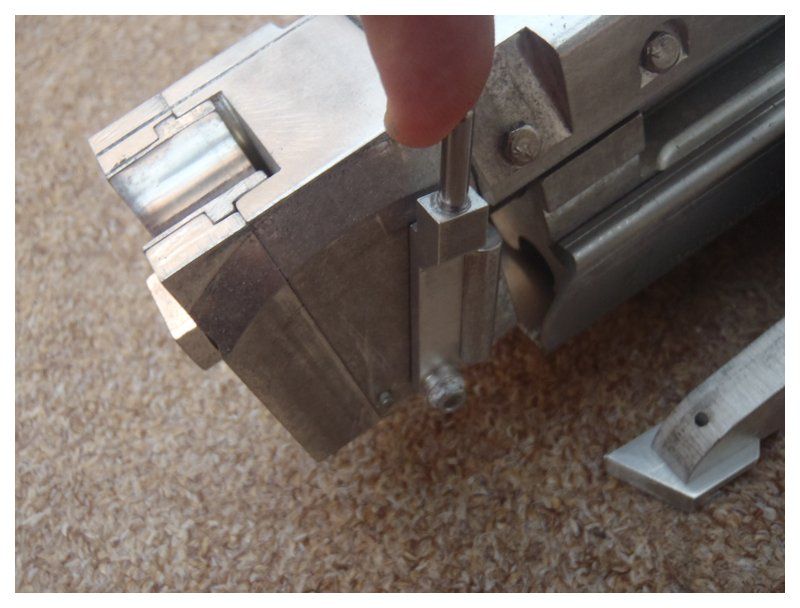
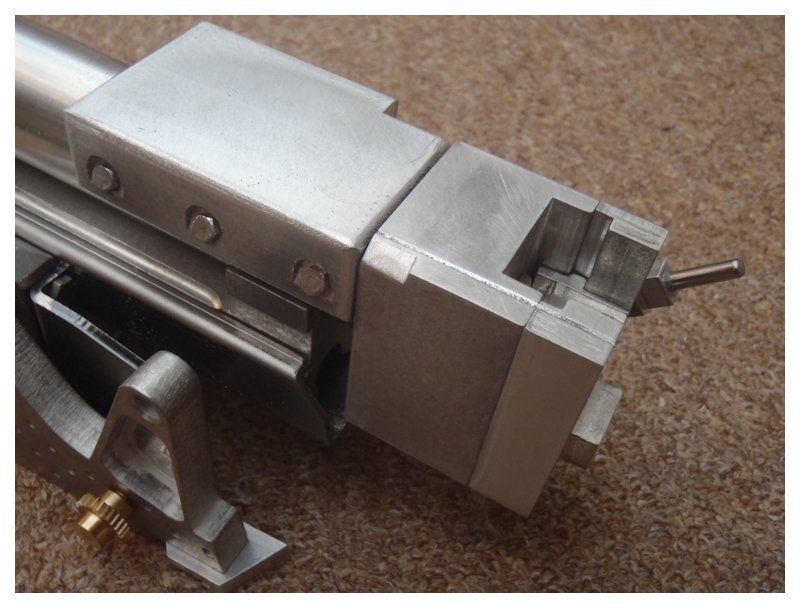
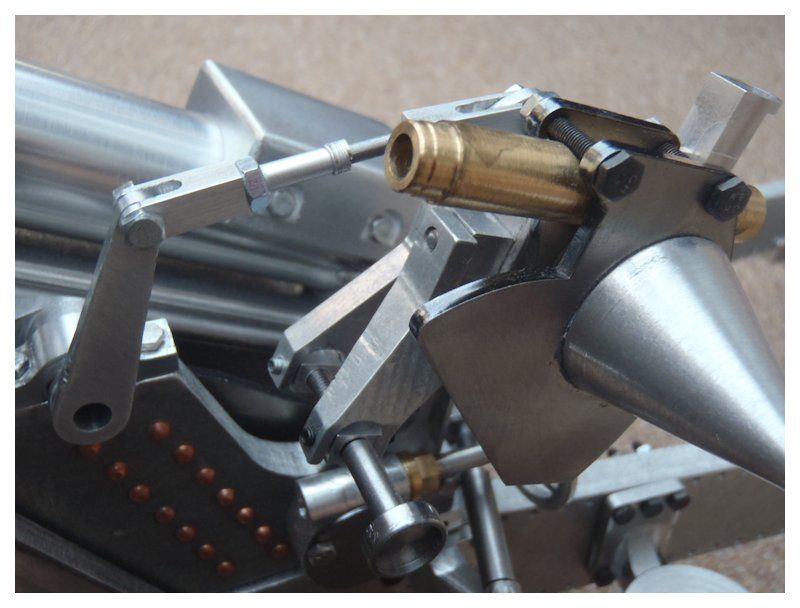
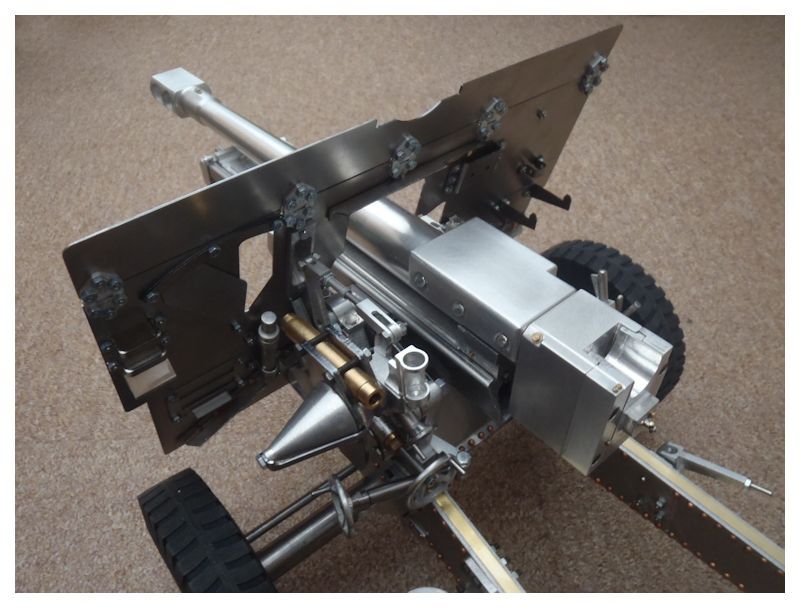
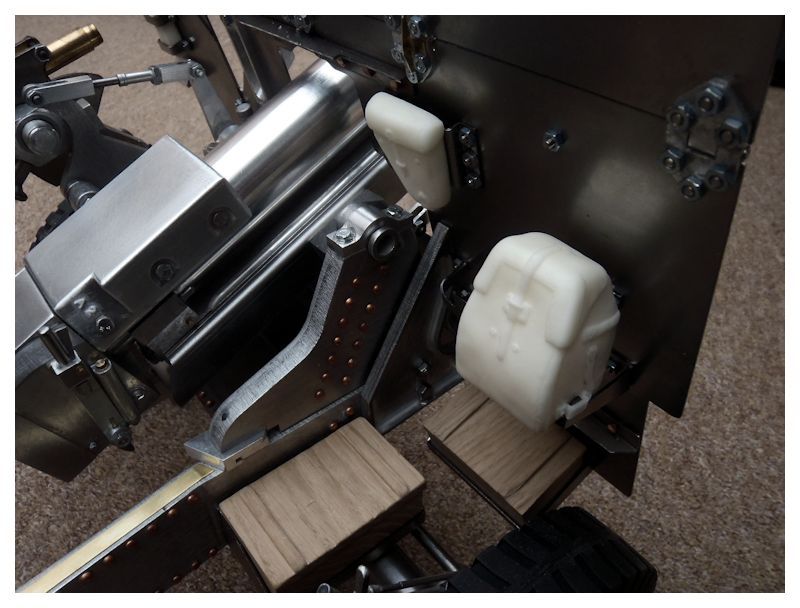
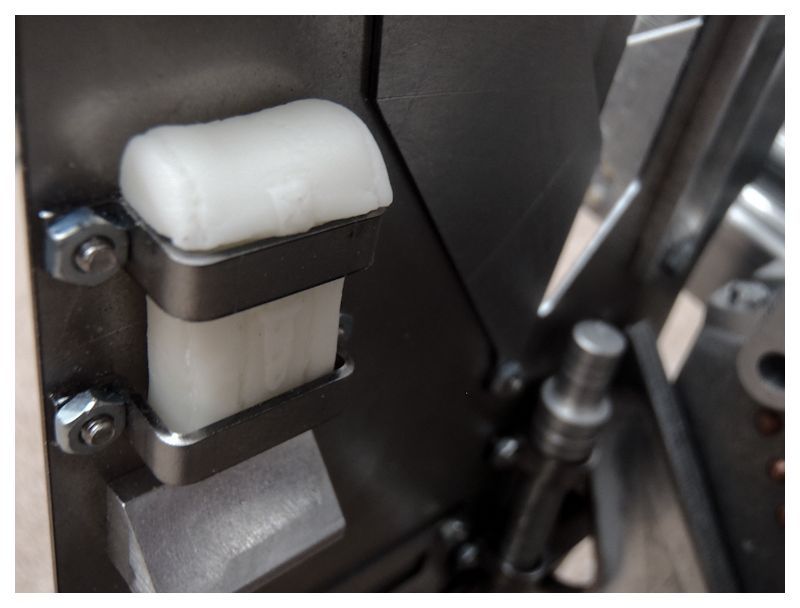
I have been hanging on to all sorts of little left over parts from the old Spearhead models and these have found a use in the detailing of the nose casting and breach block. The breach handle has been detailed and lots of lubricating points and adjusters added from EKP brass bolts.

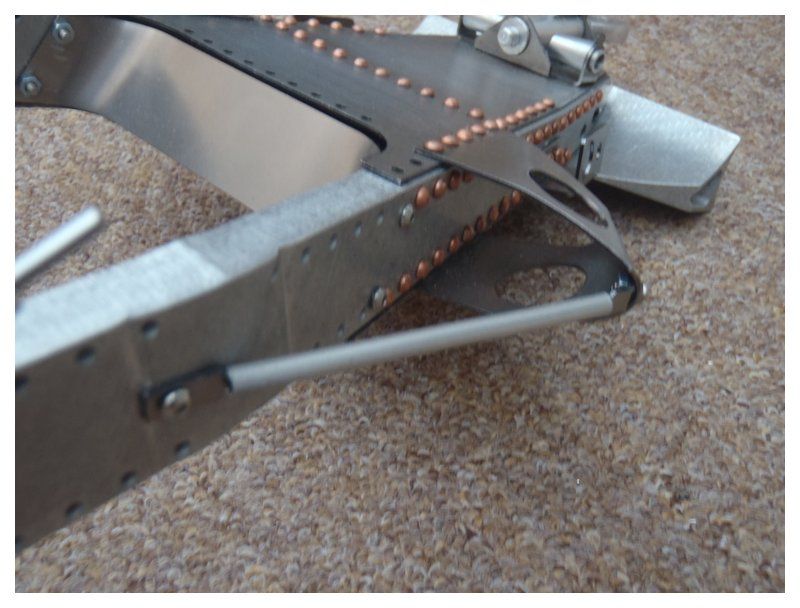
It would probably be easier to make some of the parts from plastic but I am trying to keep as much of the model in metal as possible.

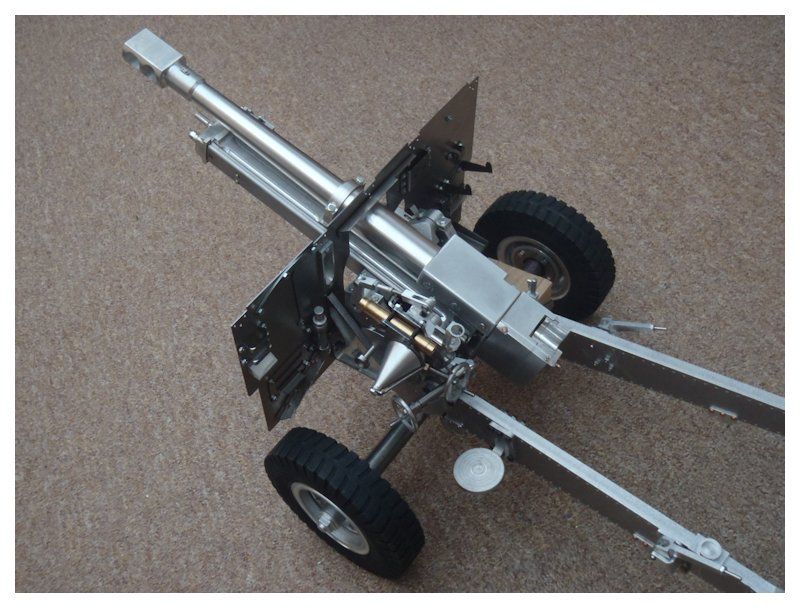
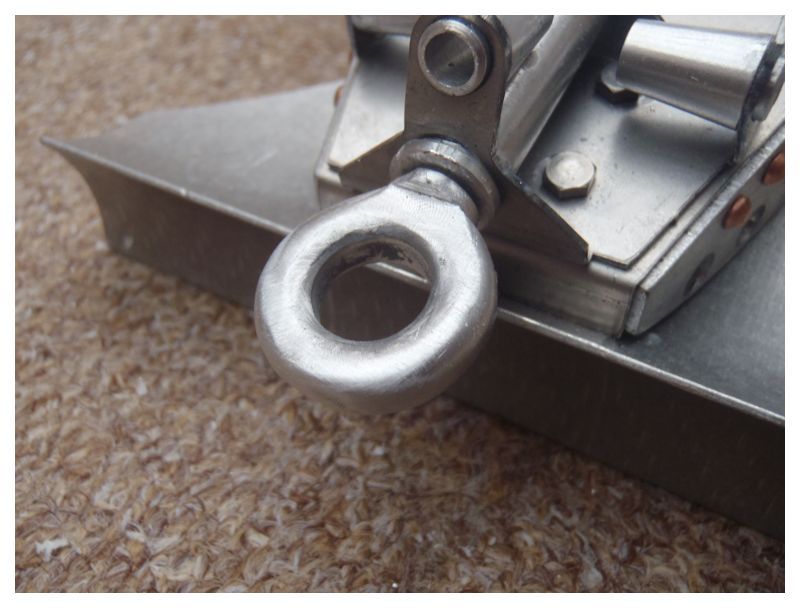
I have settled for a friction lock on the breach handle and have just put the elevation mechanism together. The elevation works perfectly and I am sure the slew will also once assembled.

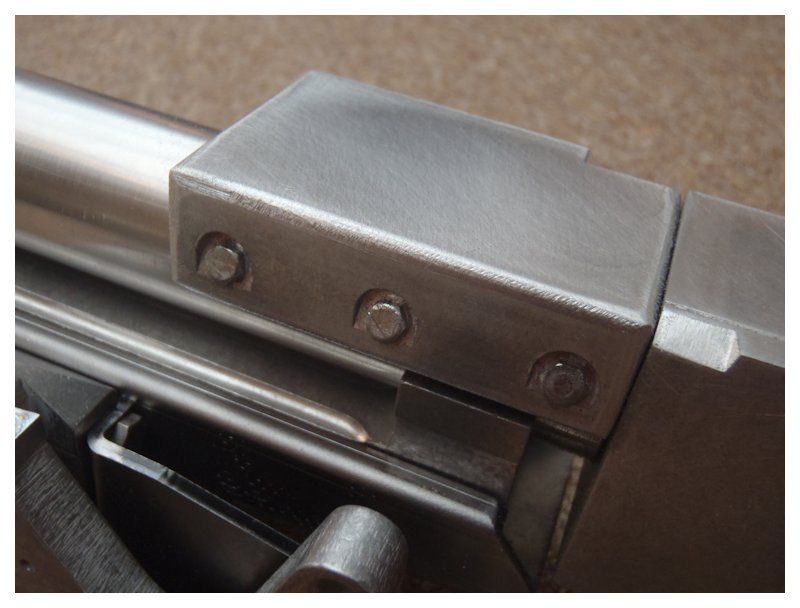
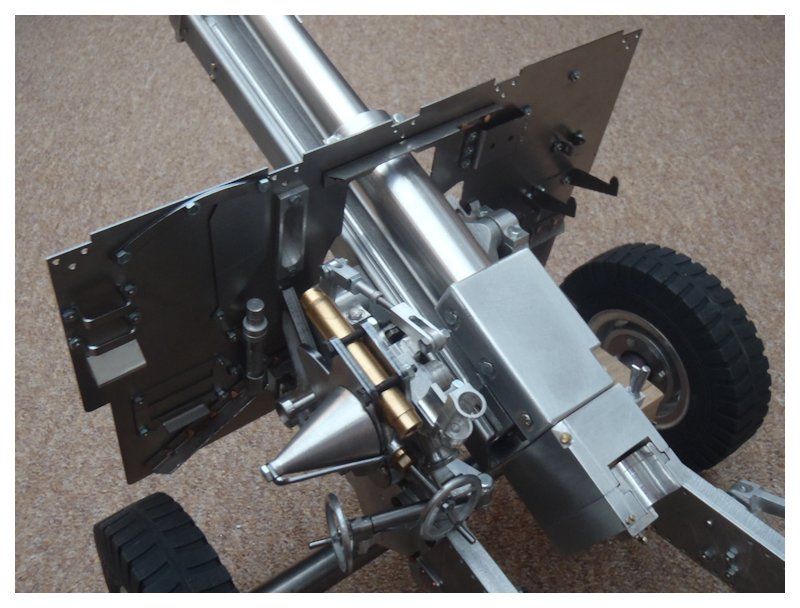
So far I have found my normal model making kit of needle files, scalpel, small vice and Dremel to be sufficient for most of what is shown. The only exceptions are I have used a larger engineering vice and full size files for re-profiling the breach counter weight and a full size hacksaw to modify the slide so it sits further forward over the recoil slide nose.

The Dremel is not proving up to the job of drilling the recoil slide for the bolts I want to add so that will have to be done with a pillar drill.

Best regards

Dave

Image
Image
Image
Image
Image
Image
Image
Image
Image
Image
www.armorpax.net

There used to be a nice banner here till Photobucket lost everything.............................

Ian Rodney
Posts: 480
Joined: Thu Jul 05, 2012 6:39 am
Been liked: 53 times

Re: Armorpax's 25 Pounder

Post by Ian Rodney »

Hi Dave,
Thanks for answering my question on upgrades, but I like what your doing to your 25prd kit.
All those nice wee details, keep the pics coming!

Cheers
Ian

Leon Benjamins
Posts: 85
Joined: Fri Oct 11, 2013 5:03 pm
Location: Dedemsvaart, The Netherlands

Re: Armorpax's 25 Pounder

Post by Leon Benjamins »

Nice work Dave!

Btw, the US tie downs I ordered from you will be used for the big beams:
Image

If they are the right size.. :lol:
Why did the kamikaze pilots wear helmets?

Dave Dibb (Armorpax)
Posts: 1154
Joined: Thu Jul 12, 2007 6:03 pm
Location: Hampshire
Has liked: 115 times
Been liked: 1098 times
Contact:

Re: Armorpax's 25 Pounder

Post by Dave Dibb (Armorpax) »

Hi Leon,

I'd guessed as much and I will be using the same!

I'd thought about doing the recess but without a mill I think thats a non starter for me.

Best regards

Dave
www.armorpax.net

There used to be a nice banner here till Photobucket lost everything.............................

Leon Benjamins
Posts: 85
Joined: Fri Oct 11, 2013 5:03 pm
Location: Dedemsvaart, The Netherlands

Re: Armorpax's 25 Pounder

Post by Leon Benjamins »

I'm adding brass sheets, 0.3mm thick.
Maby thats an option :)

Needs some sanding work on the other components, but not that much.
Why did the kamikaze pilots wear helmets?

Carl Puckett
Posts: 10
Joined: Mon Nov 18, 2013 8:00 pm

Re: Armorpax's 25 Pounder

Post by Carl Puckett »

I'm adding brass sheets, 0.3mm thick.

That was my exact thoughts, for insidee and out.

Dave Dibb (Armorpax)
Posts: 1154
Joined: Thu Jul 12, 2007 6:03 pm
Location: Hampshire
Has liked: 115 times
Been liked: 1098 times
Contact:

Re: Armorpax's 25 Pounder

Post by Dave Dibb (Armorpax) »

Hi All,

Although I am adding a few small additions the kit build continues pretty well straight from the box. I will probably add and tweak a few parts once done but want to show what can be done straight from the box with very minor extras.

I've added two extension springs under the main slide to keep it forward but still allow it to be drawn back. These are fixed to a curtain wire hook drilled and screwed into the front nose block and a rivet either side drilled and glued into the slide itself.

The rear bars have been cut in the middle then sleeved with K&S aluminum tube to better represent the full size pieces. I've also added a little K&S tubing to the sight connecting rod to improve its look.

I have started on the front shield and have used the 2.5 dome head screws and rivets supplied as per the kit instructions. The rivets are soft copper and its the first time in over 30 years my old riveting hammer and snaps have come out!

I will probably add a few more rivets and tie downs to the front shield but to be fair it looks pretty good just as it is.

Best regards

Dave

Image
Image
Image
Image
Image
Image
Image
Image
Image
www.armorpax.net

There used to be a nice banner here till Photobucket lost everything.............................

Paul Morris
Posts: 1559
Joined: Thu Jul 12, 2007 4:44 pm
Location: North Lancs
Been liked: 68 times

Re: Armorpax's 25 Pounder

Post by Paul Morris »

Hi Dave.

Nice tidy job there mate I do like this kit 8)
Cheers Paul. :wink:
Paul's Tank Workshop. Complete Tank builds and re builds zimmerit and paint to museum quality standard. pjtigerman@aol.com
01524 720977
https://www.facebook.com/PaulsTankWorkshop

Iacopo Di Giampietro
Posts: 226
Joined: Fri May 11, 2012 9:14 pm
Been liked: 48 times

Re: Armorpax's 25 Pounder

Post by Iacopo Di Giampietro »

Very Very nice: congratulations Dave! :wink:

Dave Dibb (Armorpax)
Posts: 1154
Joined: Thu Jul 12, 2007 6:03 pm
Location: Hampshire
Has liked: 115 times
Been liked: 1098 times
Contact:

Re: Armorpax's 25 Pounder

Post by Dave Dibb (Armorpax) »

Hi All,

Rather than add side plates I've added 1/4" brass strip to the top of the rails to represent the various plate joints. I needed to raise the level to match the kit rear plate for the extra angles to sit right, that will be added later around this area.

Front shield assembly is finished and I've added the brake parts. The brake lever has again been detailed with odd off cuts of old white metal parts and K&S aluminum tube.

I have not figured out yet how to make the big curved angle to go round the joint between the side frames and rear plate which is why this area has not yet been riveted.

Best regards

Dave

Image
Image
Image
Image
Image
Image
www.armorpax.net

There used to be a nice banner here till Photobucket lost everything.............................

Dave Dibb (Armorpax)
Posts: 1154
Joined: Thu Jul 12, 2007 6:03 pm
Location: Hampshire
Has liked: 115 times
Been liked: 1098 times
Contact:

Re: Armorpax's 25 Pounder

Post by Dave Dibb (Armorpax) »

Hi All,

The resin sight bag, holster etc cleaned and added, think I know where they came from :wink:

I've used the sanding wheel in the Dremel and rounded off the towing eye.

Best regards

Dave

Image
Image
Image
Image
Image
www.armorpax.net

There used to be a nice banner here till Photobucket lost everything.............................

Marcus Kwa
Posts: 176
Joined: Wed Nov 13, 2013 6:22 pm
Been liked: 39 times

Re: Armorpax's 25 Pounder

Post by Marcus Kwa »

Great to see so many parrallel builds!!! I am mirroring most of your modifications.
Your brake lever looks great, I am busy at the moment to build the brake drums on the wheels. These should hide the 4 bolts on the inside of the wheel hub. By the way, I exchanged the wheel bolts by studs (actually m3 grub bolts) and added nuts as on the actual piece.

I have also added strips on the top of the frame to simulate the sections of the rivetted box but used plastic strips. I have to admit it does look a lot better by keeping it all metal but I am not very assorted in metal supplies!

The 'big curved angle to go round the joint between the side frames and rear plate' is a tough one! I tried heating and bending some copper angles but the bend is to sharp and big to do without the material tearing. I might try cutting the upper flange and then soldering triangles in the gaps. These I will try to make in metal due it having more strength (When I have recovered my courage I will try again, at the moment I am focusing on the brake drums...... ) Very curious how you will tackle this part!!!

Post Reply