2006 Panther rebuild

Forum for discussion relating to the Panther
Post Reply
John Grima
Posts: 250
Joined: Sun Jul 15, 2007 2:54 pm
Location: USA
Been liked: 48 times
Contact:

2006 Panther rebuild

Post by John Grima »

Hi Guys, a few weeks ago I was contacted by a client to finish off his armortek Panther G. His tank was a 2006 first generation kit, He purchased the kit when it was first released and hired a 1/6 model maker to build the model for him. After about 6 years the model never progressed past the point in these images.

Image

Image

Image

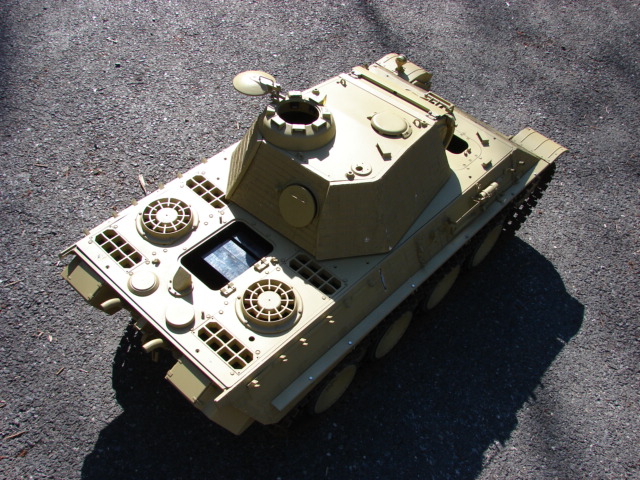
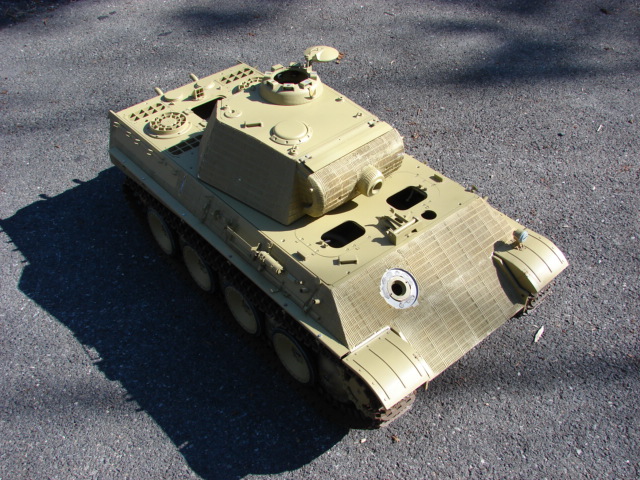
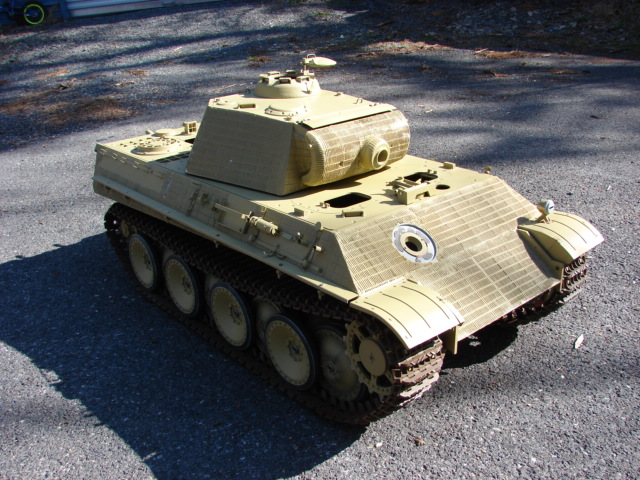
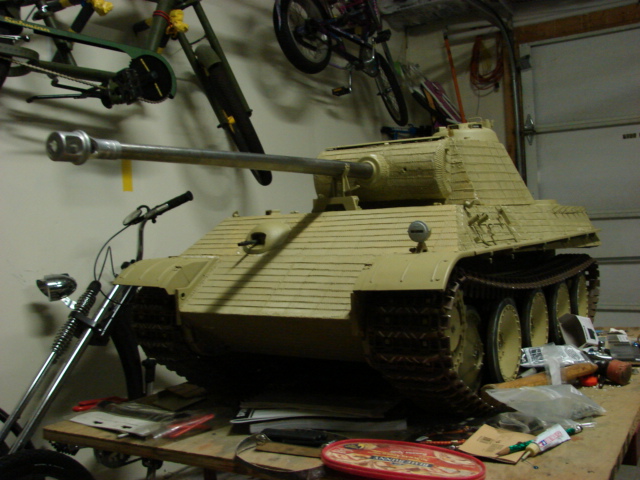
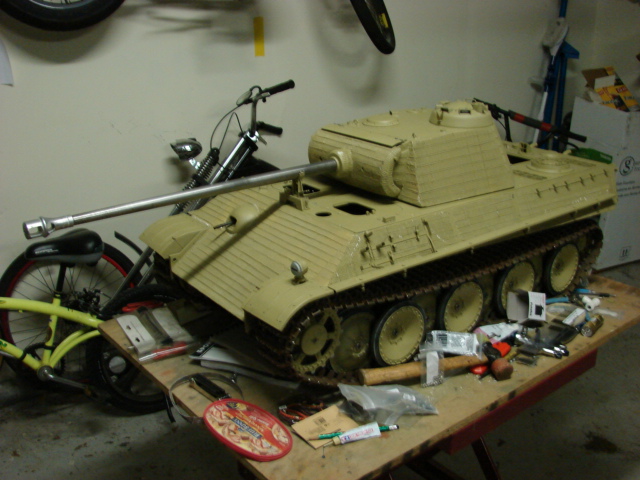
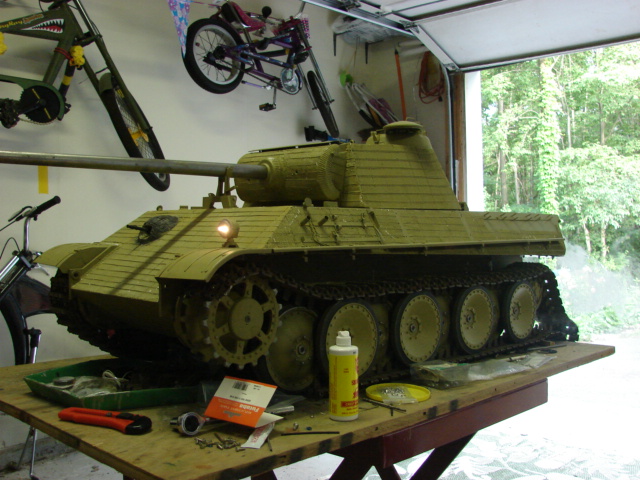
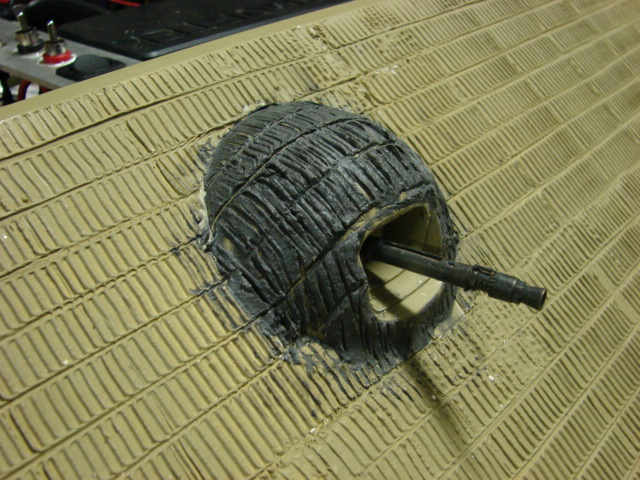
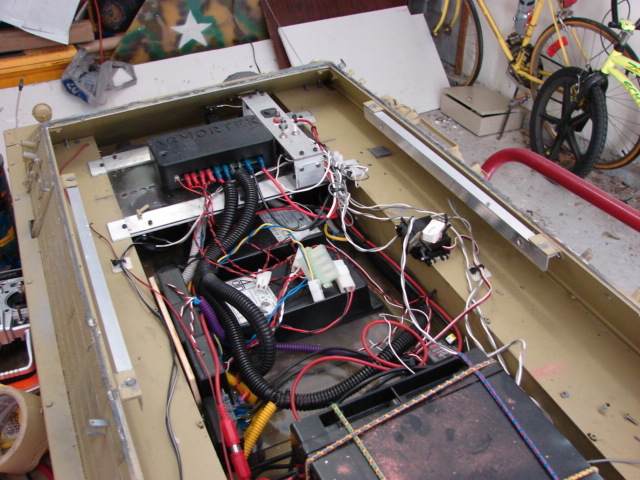
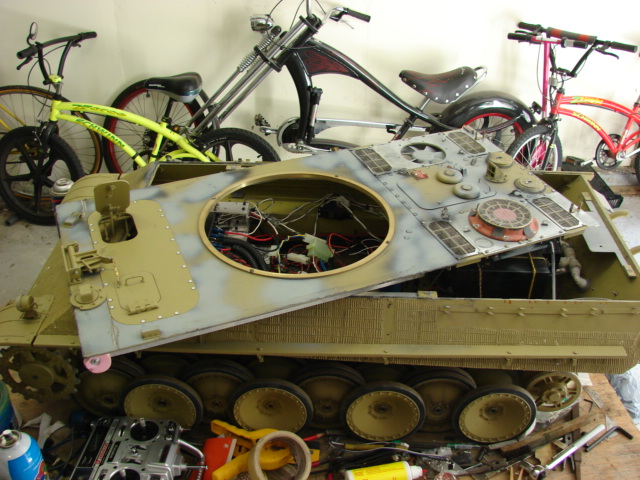
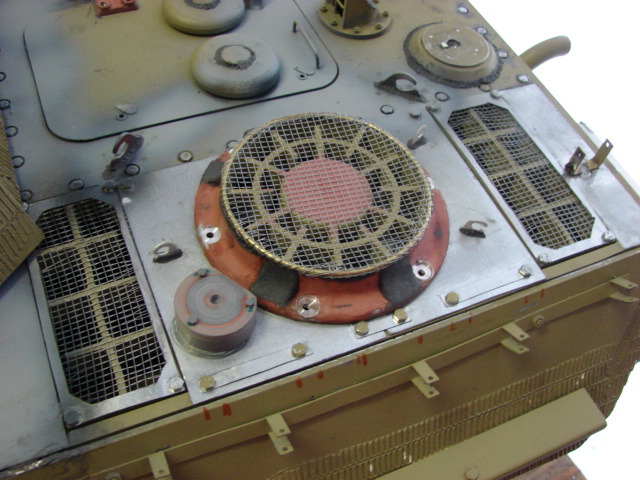
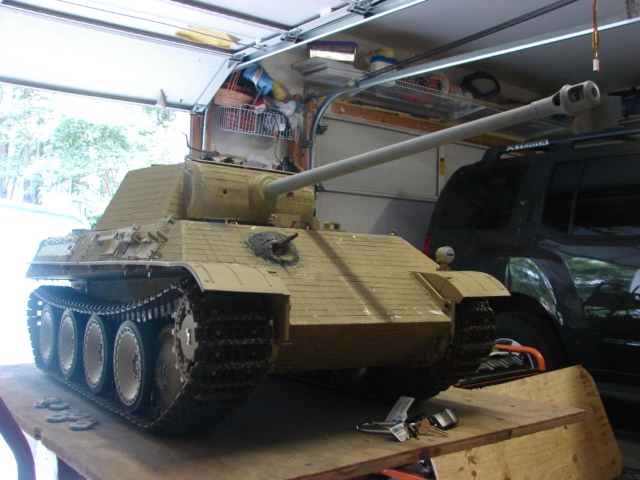
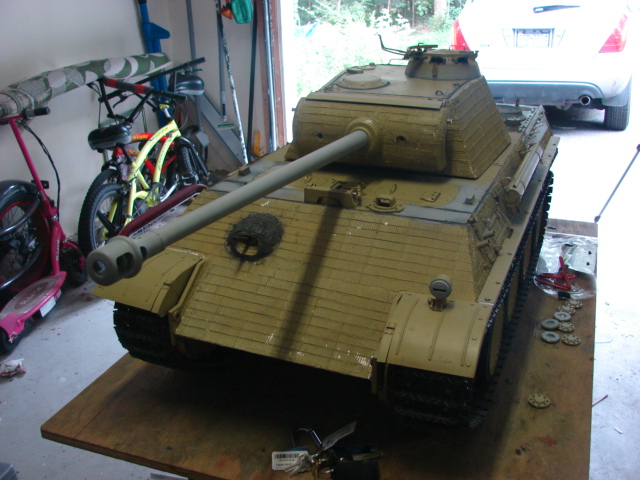
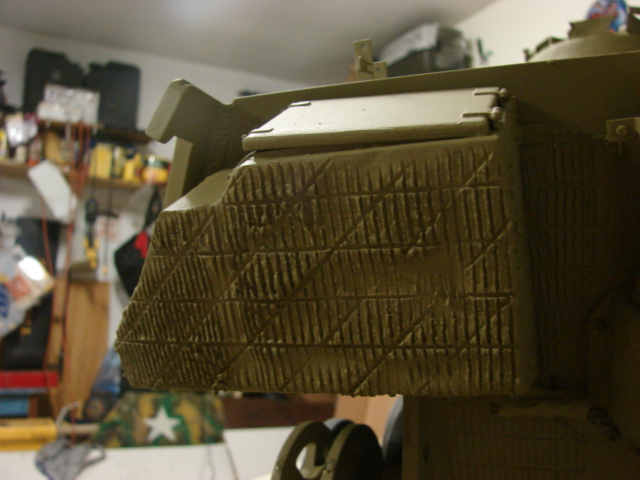
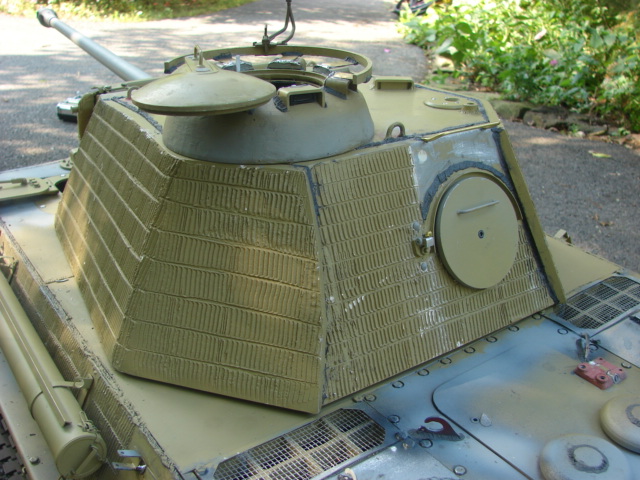
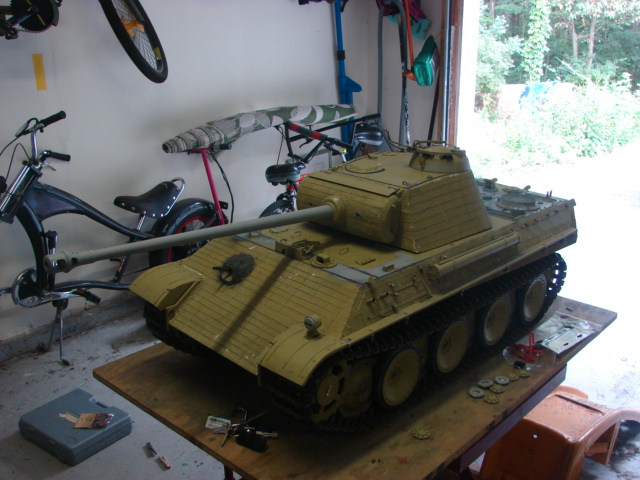
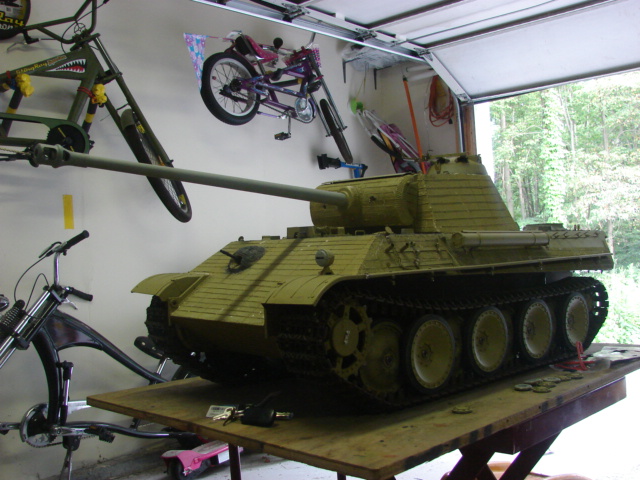
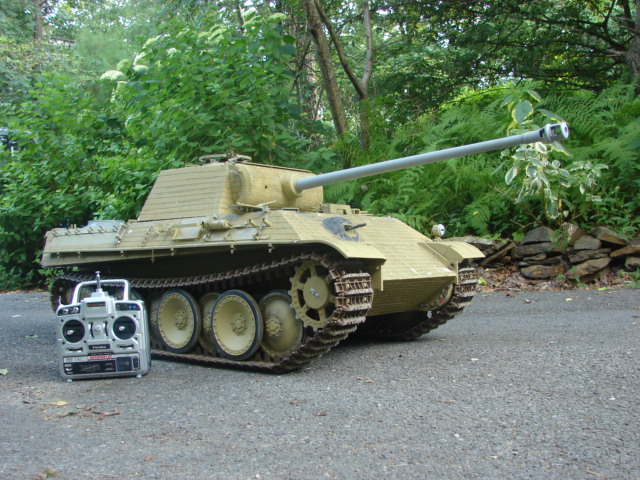
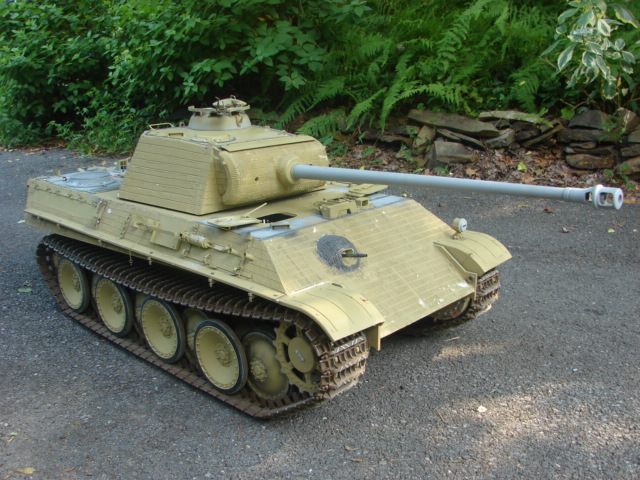
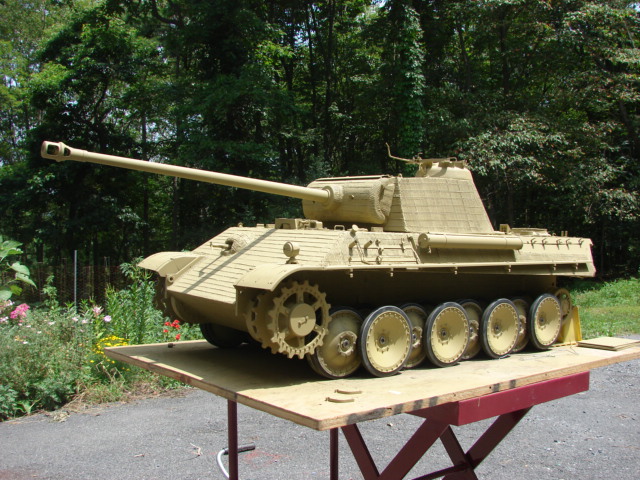
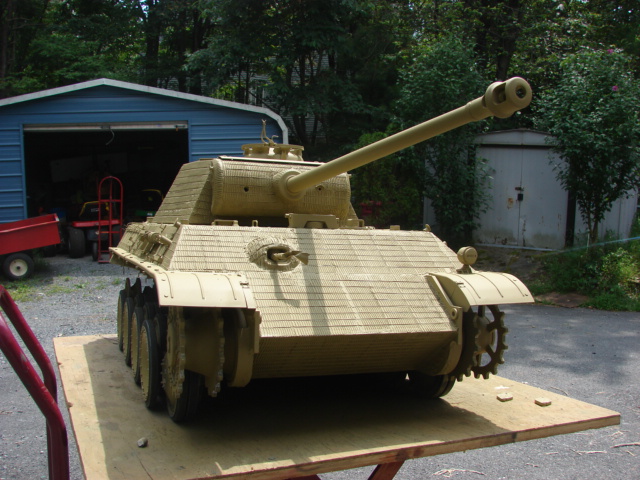
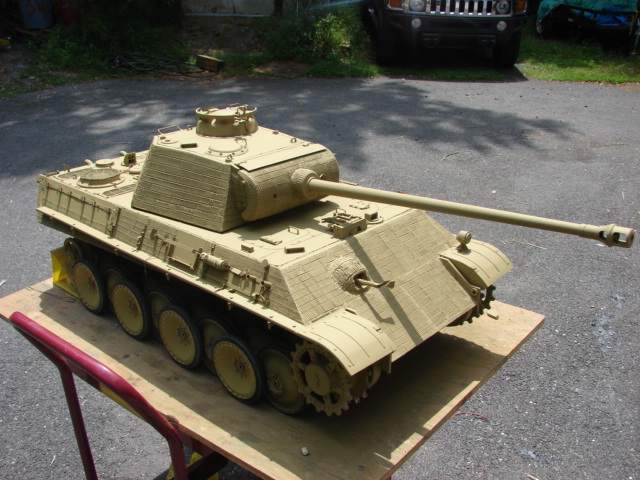
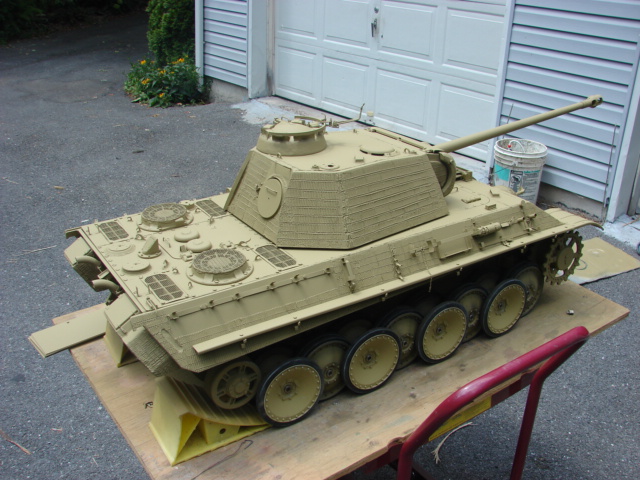
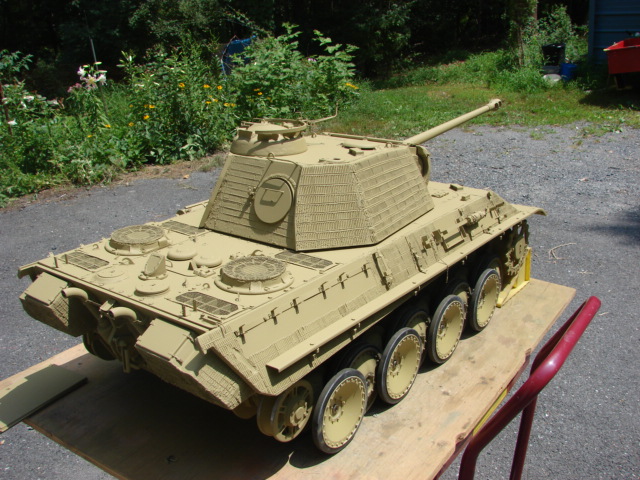
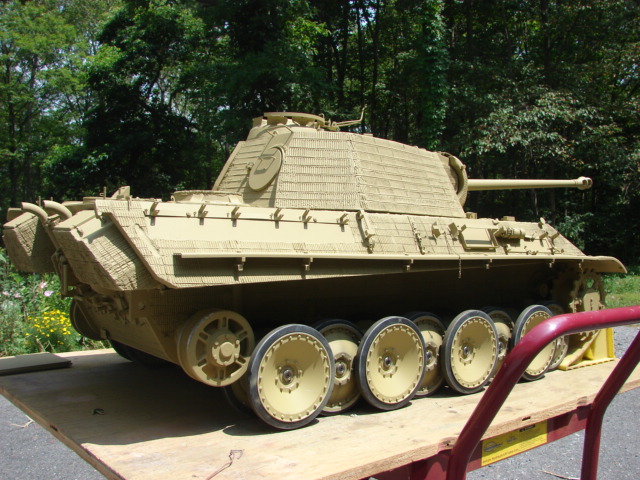
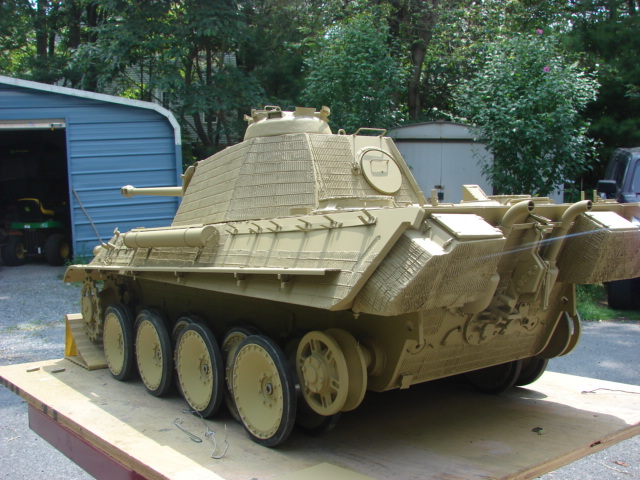
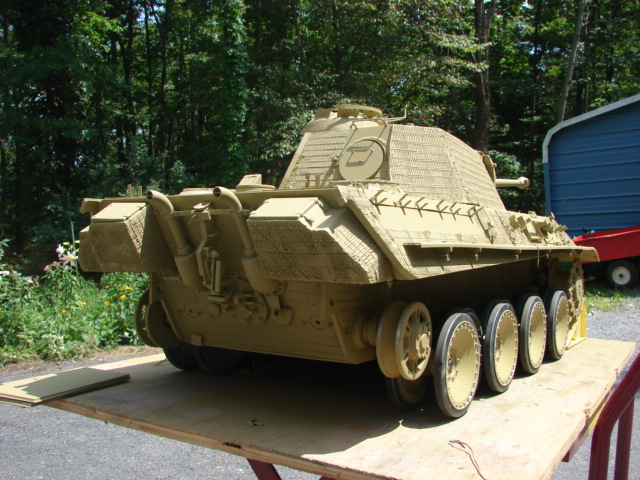
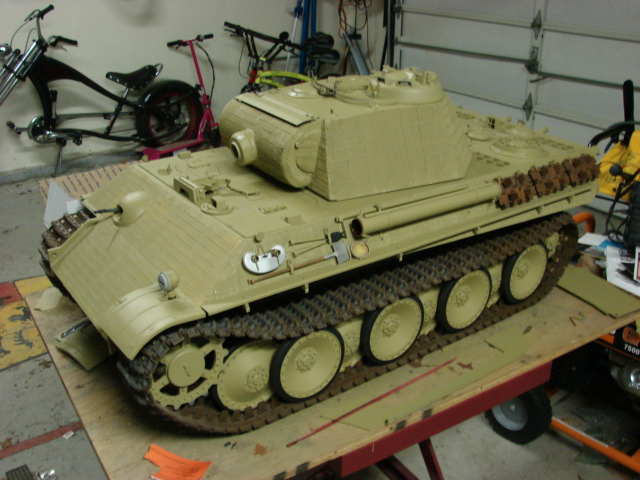
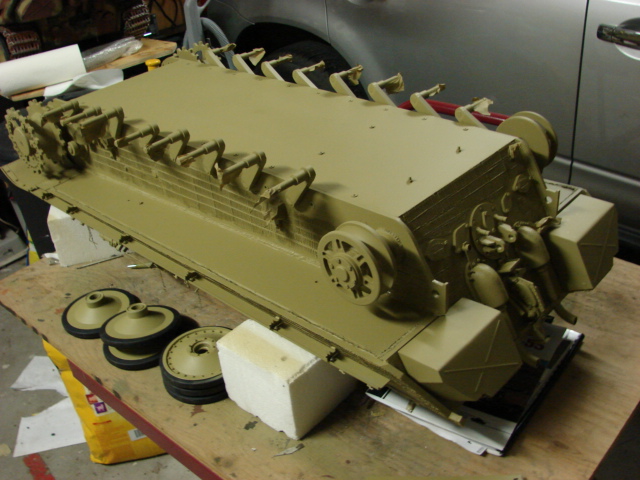
The model maker added the zimmerit, and lots of after market parts from 6th Scale Icons, and completed most of the exterior detailing.

Image

Image

Image

Image

Image

Image

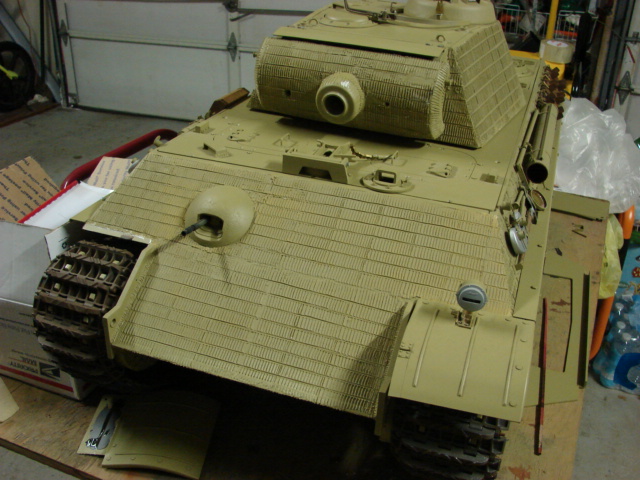
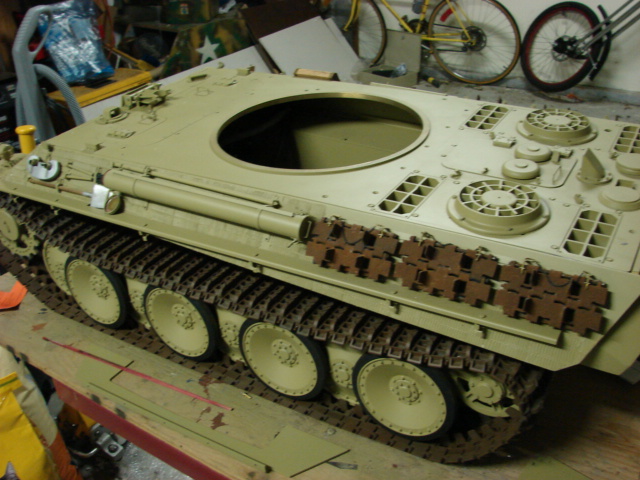
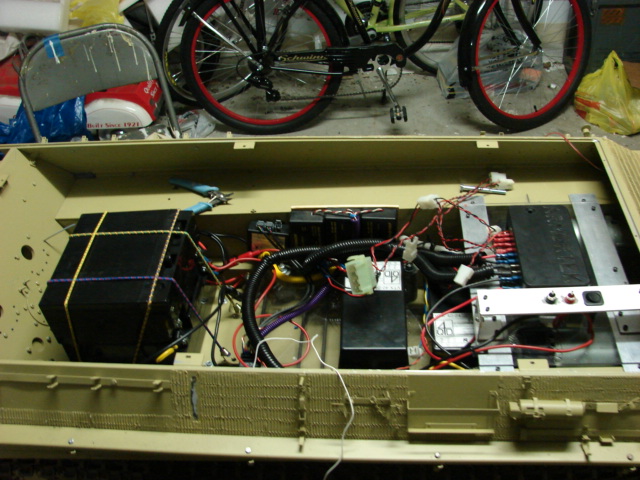
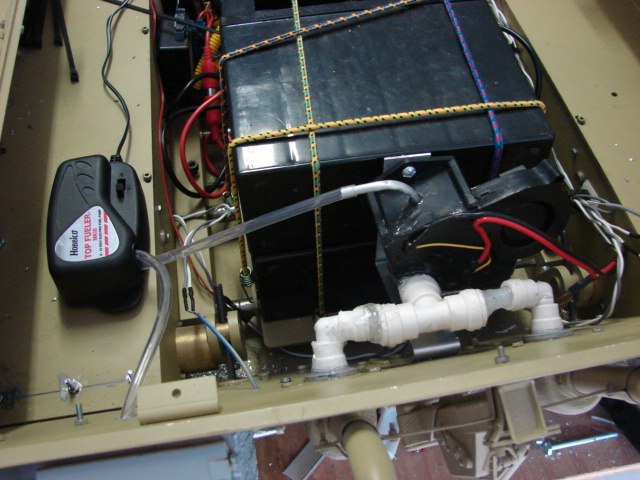
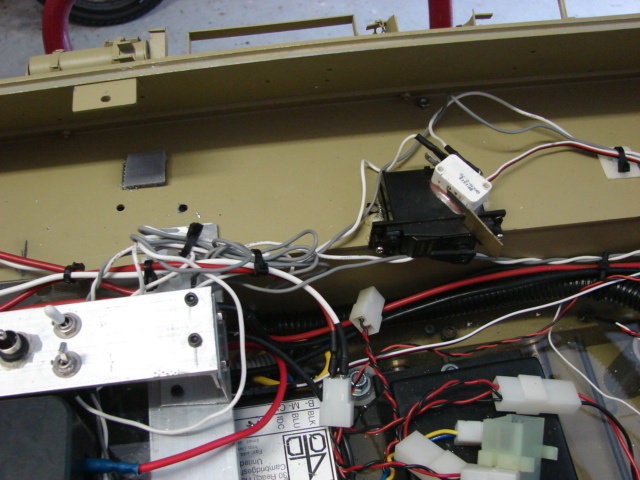
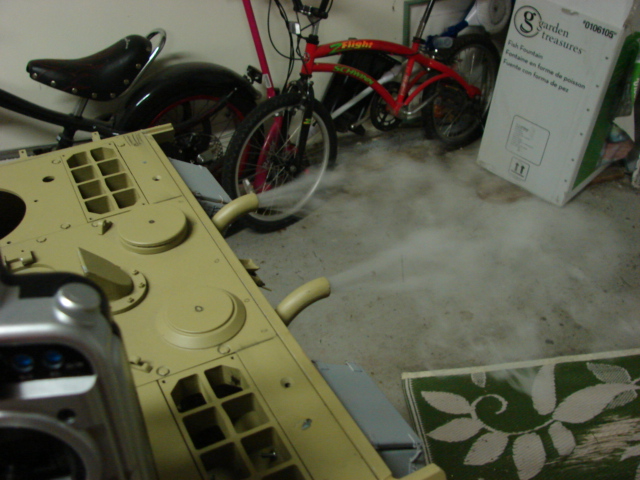
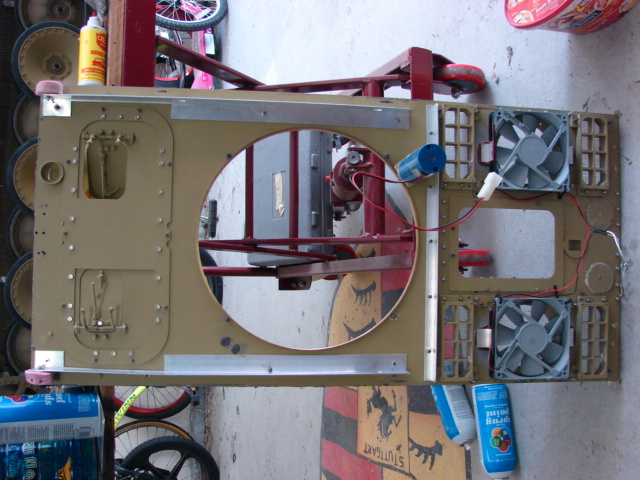
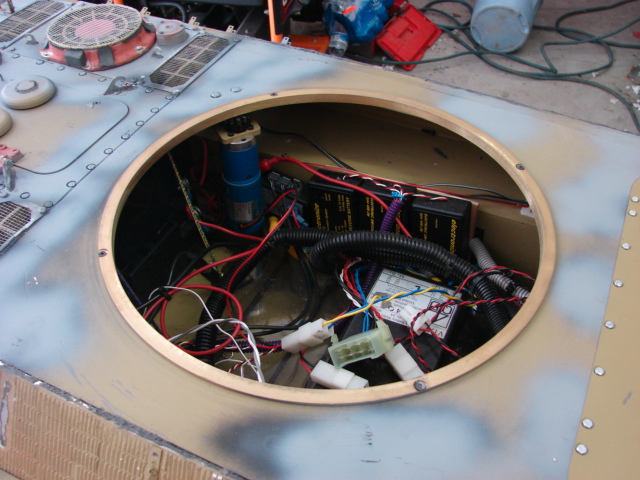
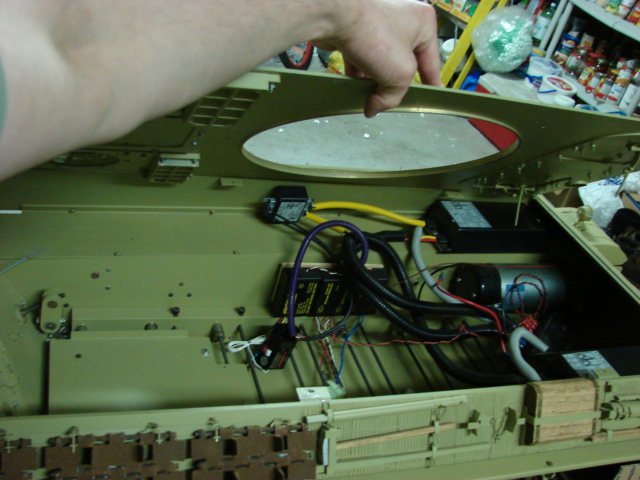
The builder never completed the RC work, and from what I can tell the model has never been tested or driven.

Image

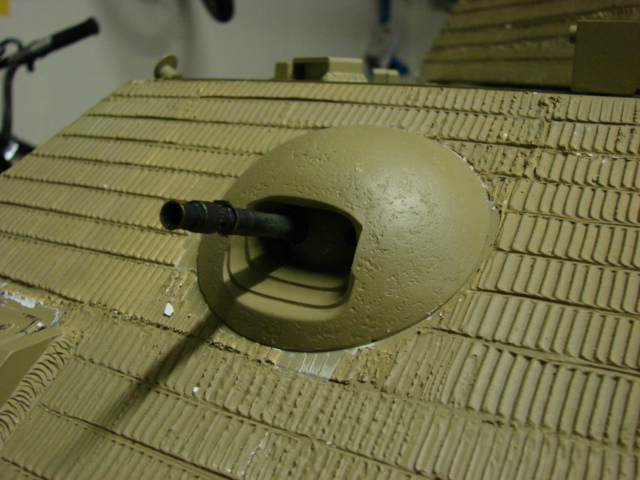
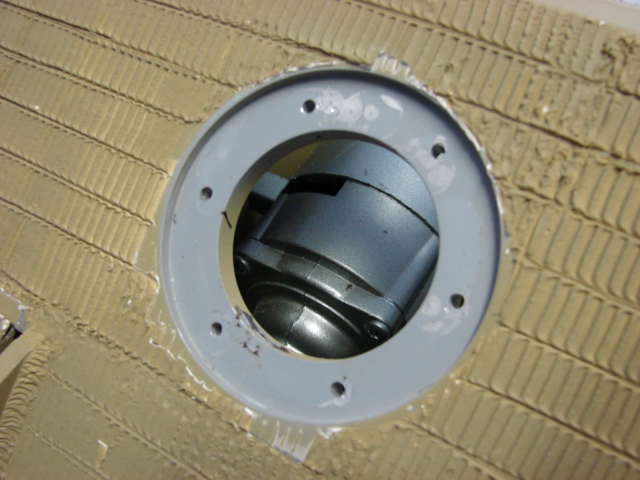
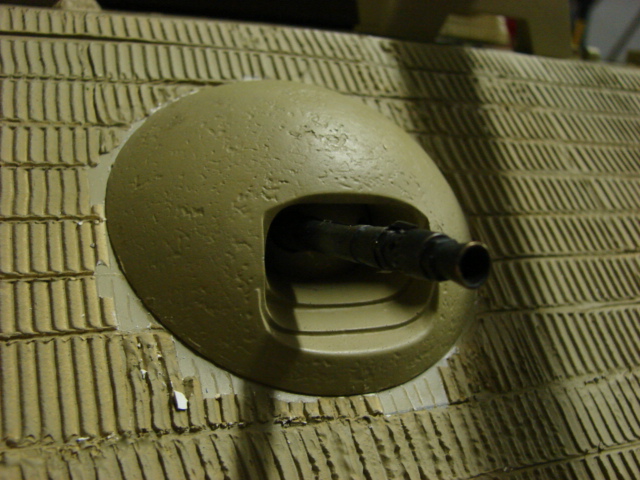
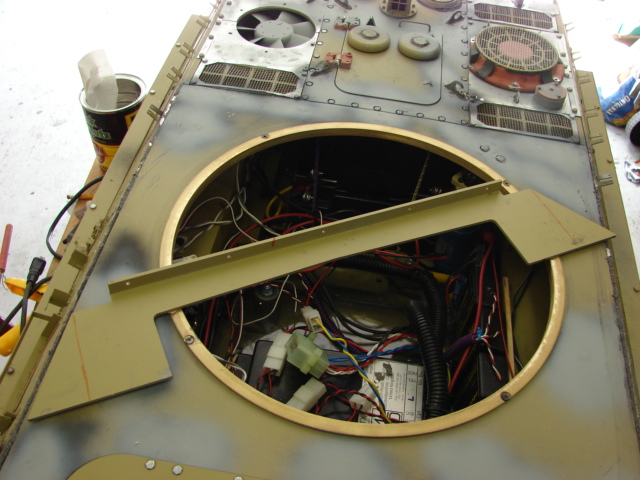
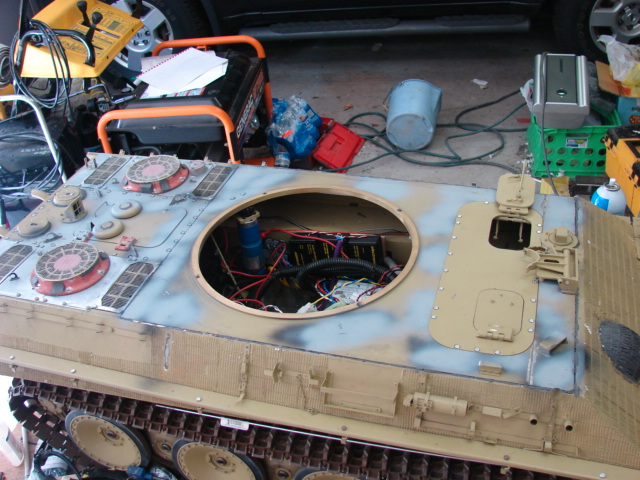
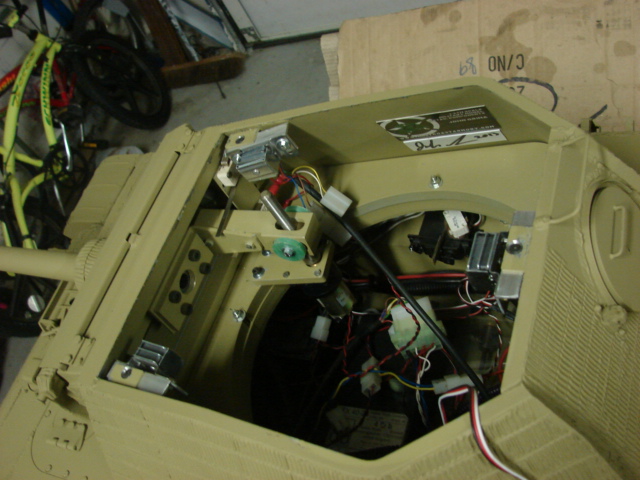
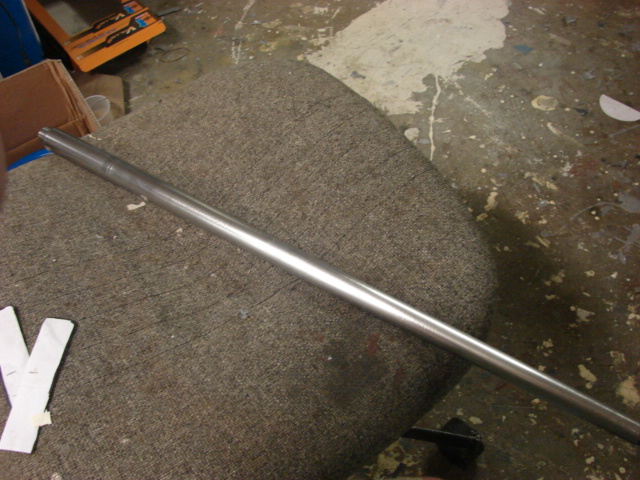
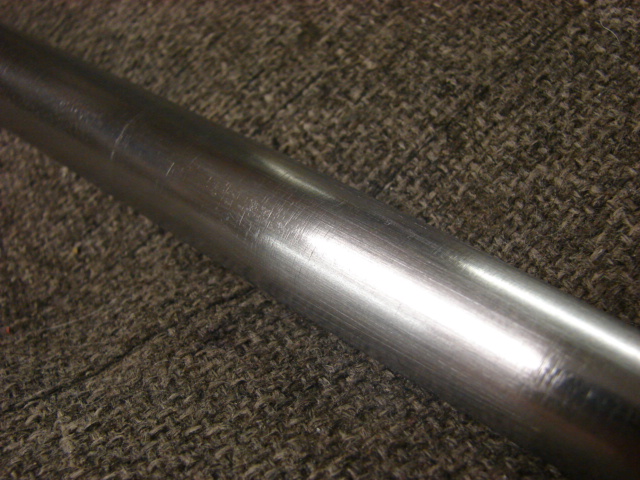
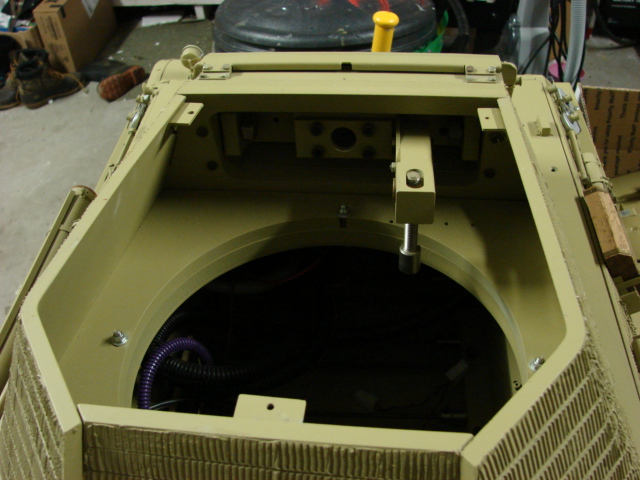
The turret's machinery was also never completed, and it is missing the gun barrel and muzzle brake.

Image

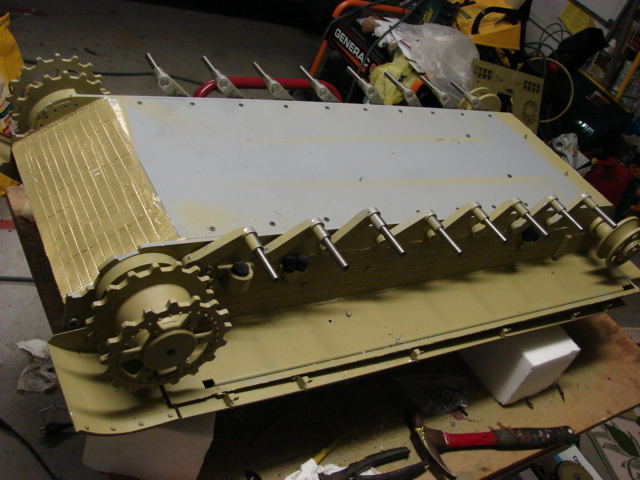
Before I was able to start on the model I had to inspect the suspension and running gear to check to see if it was assembled properly. It was lucky that I did so because in the condition that the model was is in... it would have broken down, or would have had serious damage happen to the drive train and the running gear.

The shoddy workmanship would include, loose wheel retaining bolts, improperly mounted sprockets / final drive mounts, improperly mounted torsion bars, loose bolts...etc.

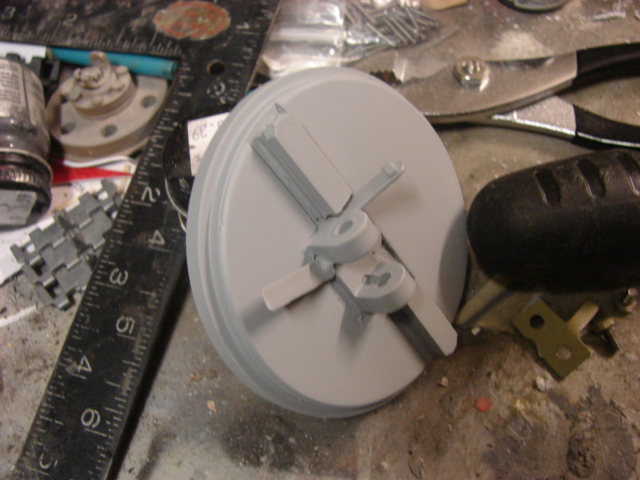
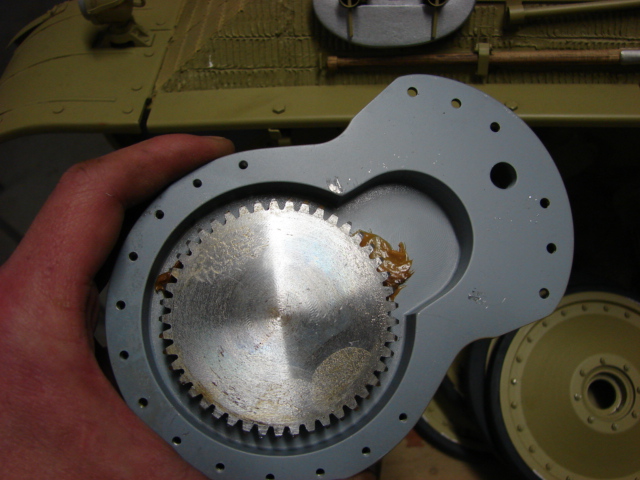
To correct these issues I needed to unassemble the model. Starting with the sprockets.

Image

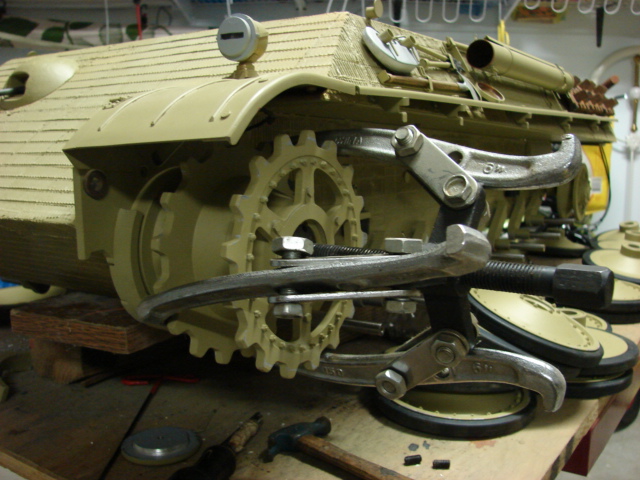
After the sprockets were removed you you can see that the builder failed to properly lubricate the final drives.

Image

Image

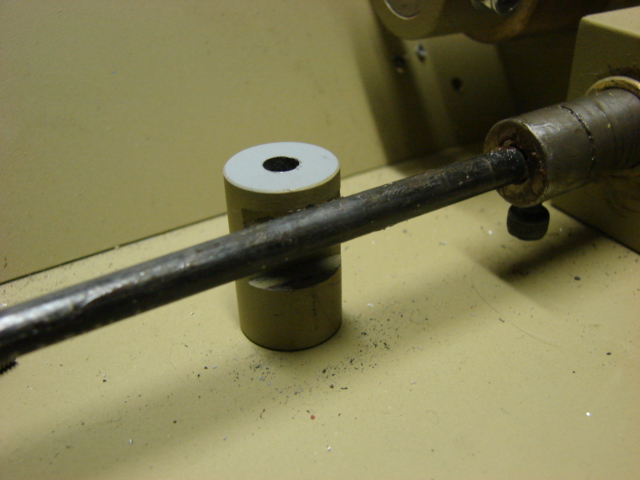
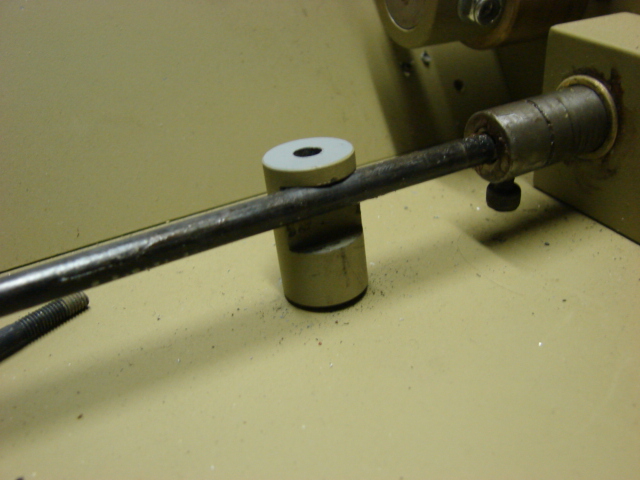
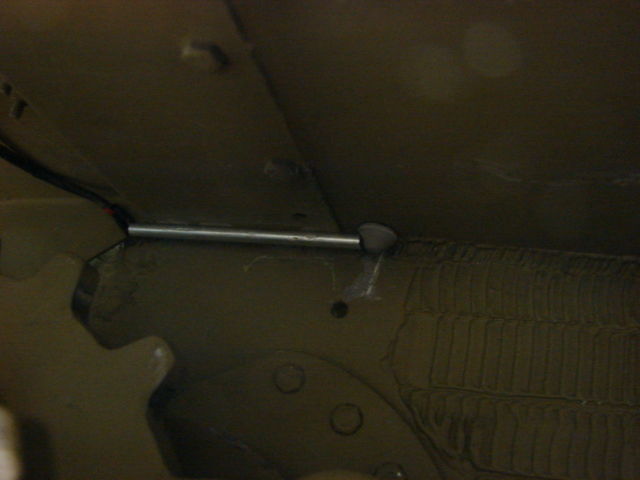
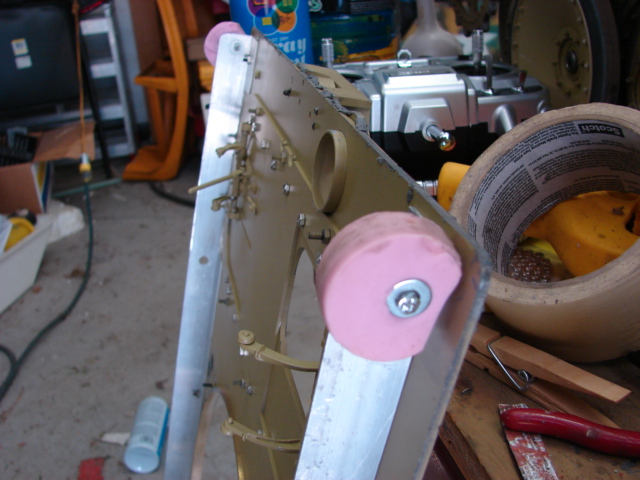
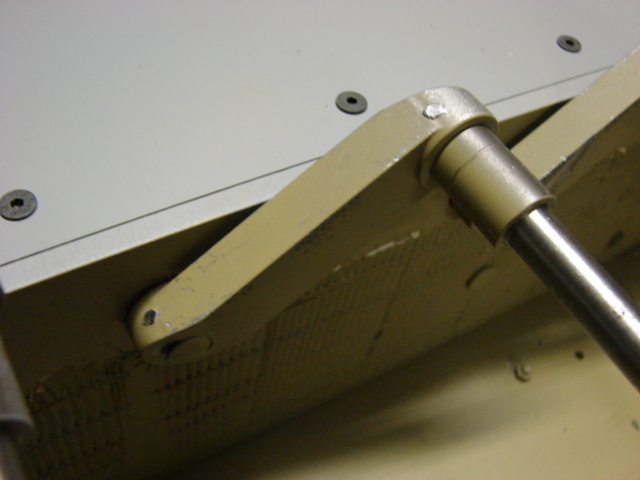
On the swing arms the builder failed to lock the axles. Because of this the axles would have the chance to unscrew themselves while the tank would be diving, and would cause such problems as misaligned wheels to suspension sag.

To fix the problems I drilled wholes through the swing arms and inserted a small pin. After the pin is expanded the axles will never be able to unscrew. After the pinning the swing arms were remounted.

Image

Image

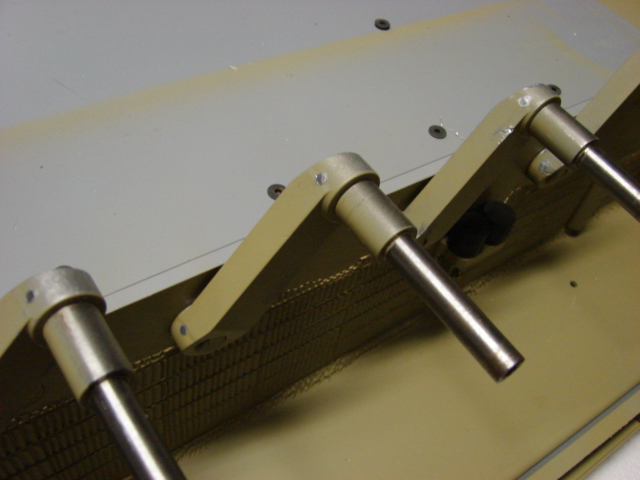
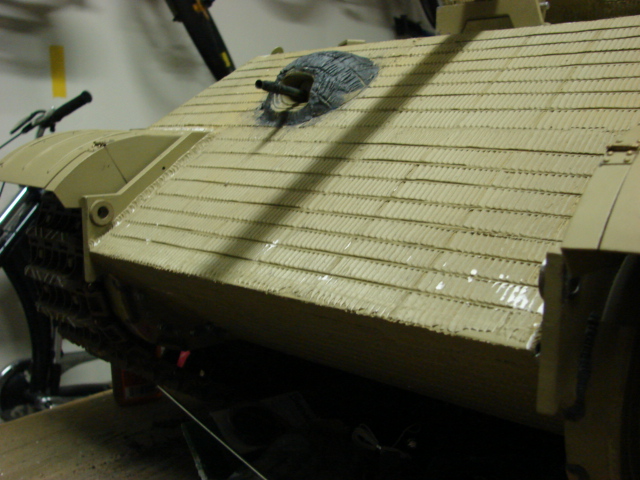
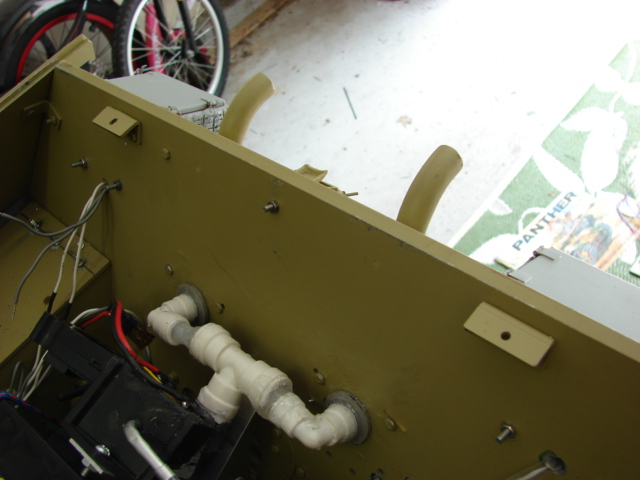
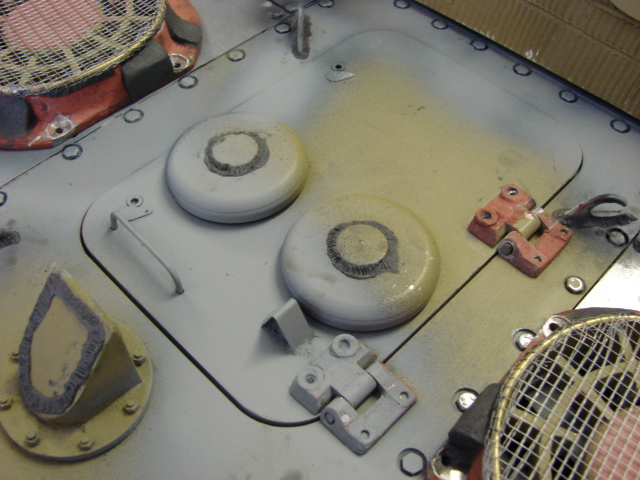
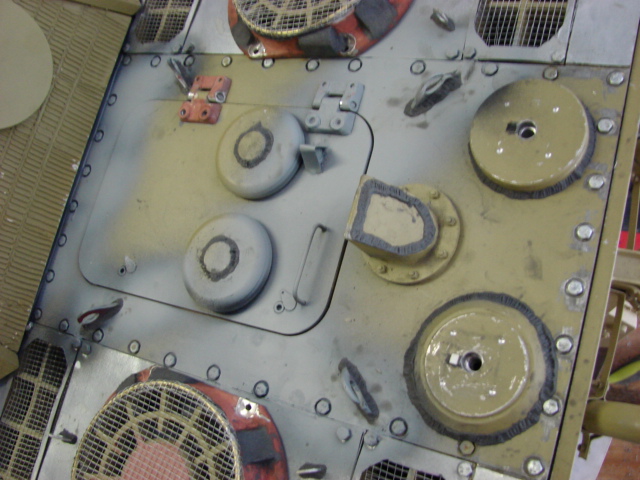
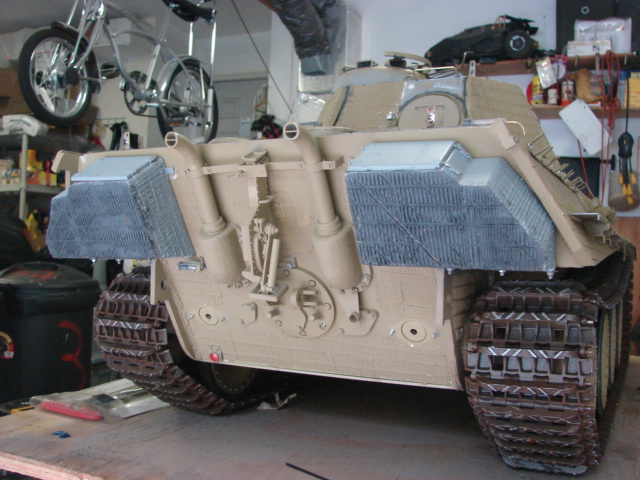
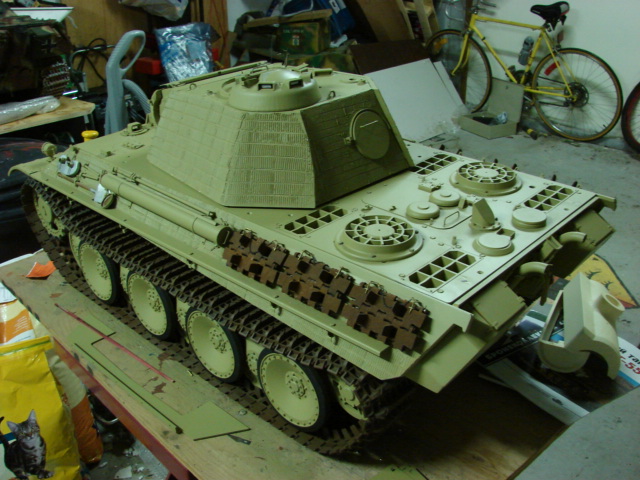
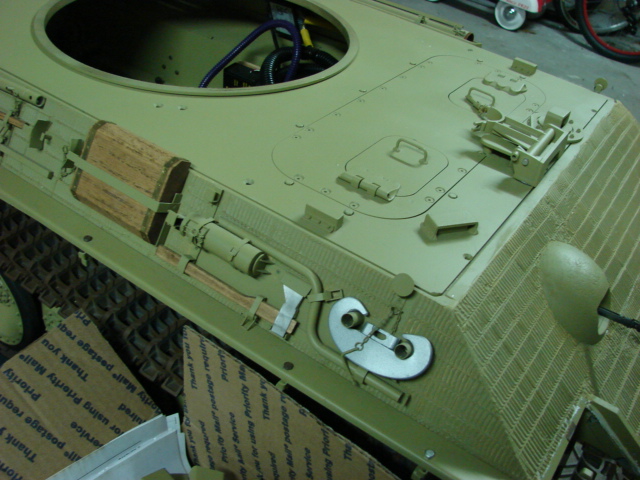
The builder also failed to paint the lower hull, and failed to properly prime and paint the swing arms.

Image

Image

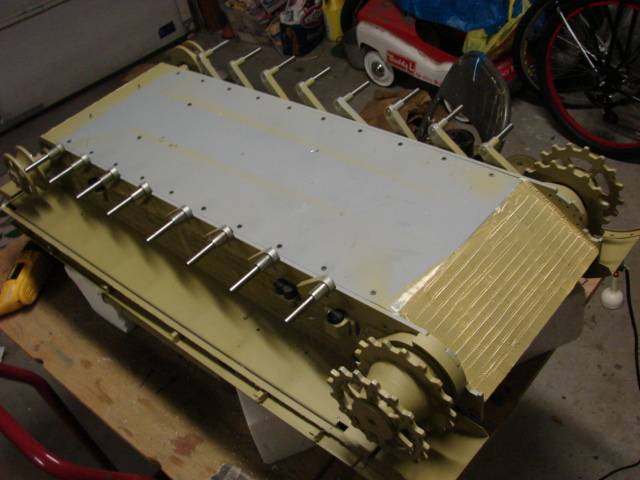
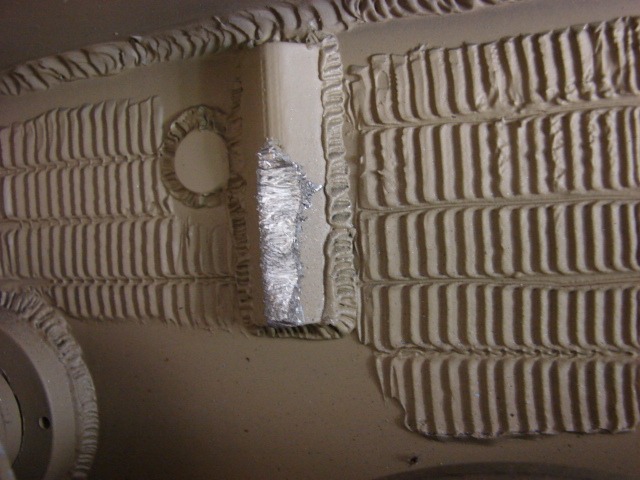
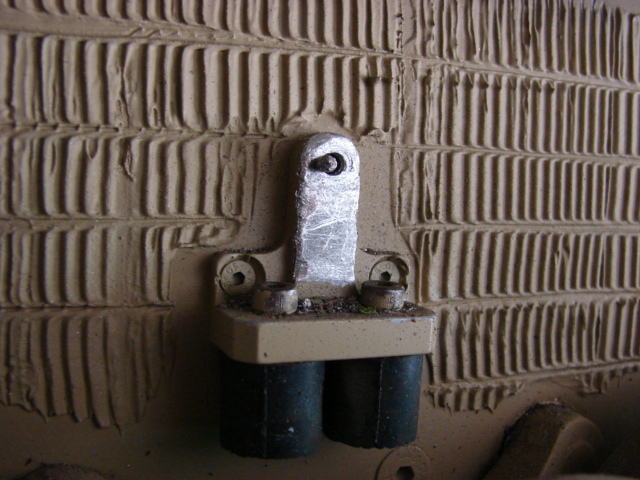
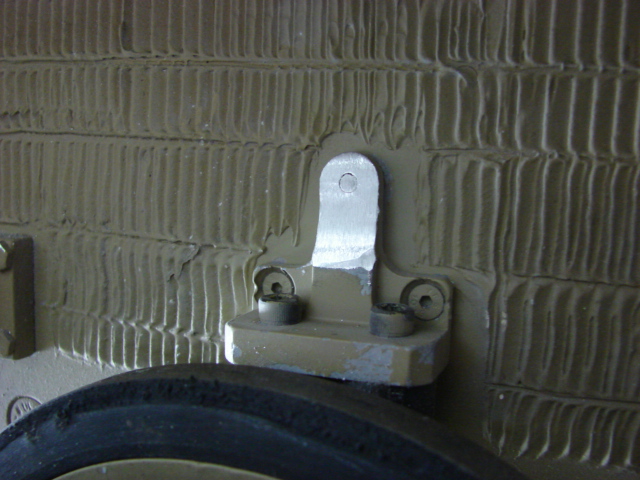
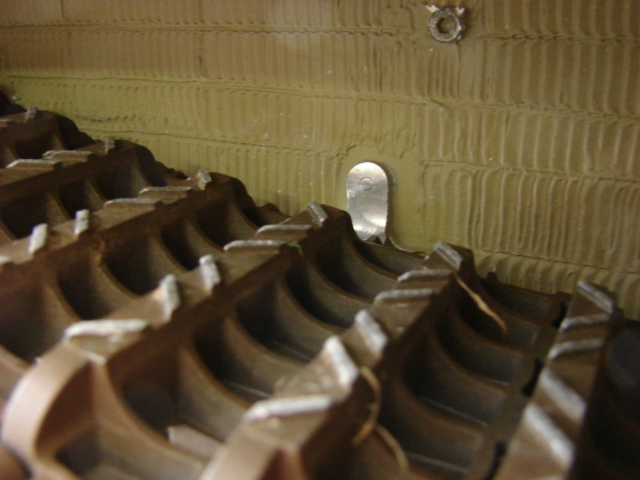
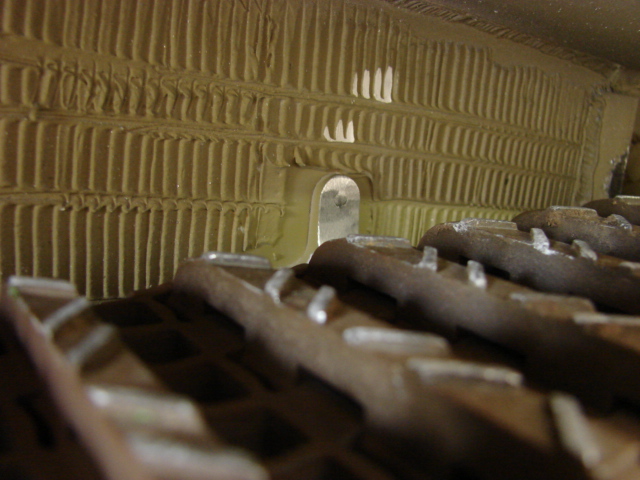
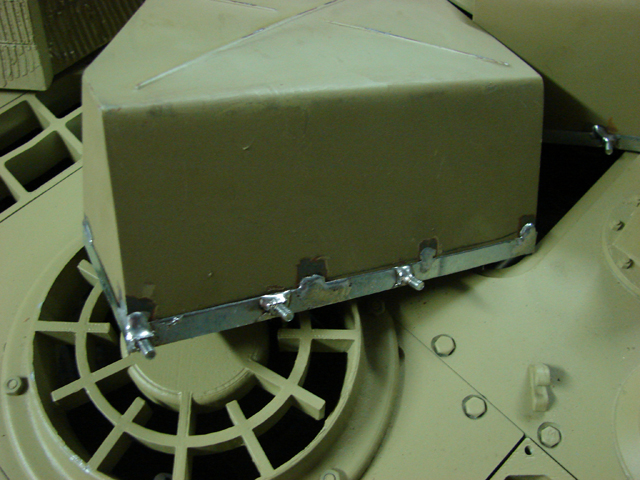
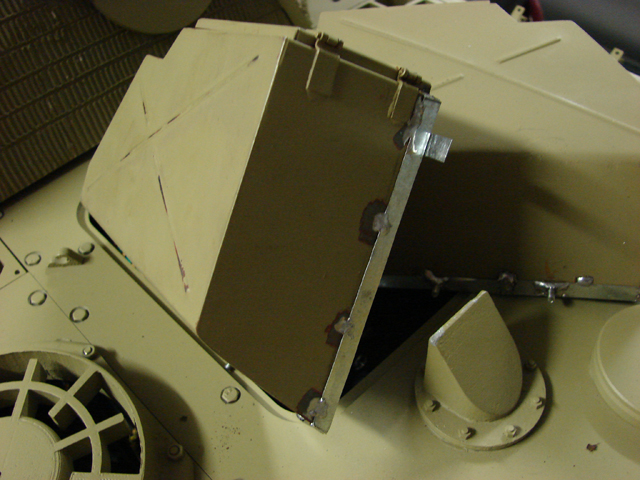
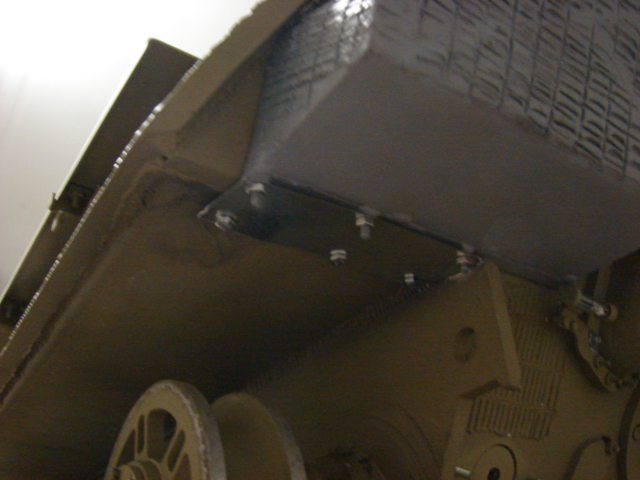
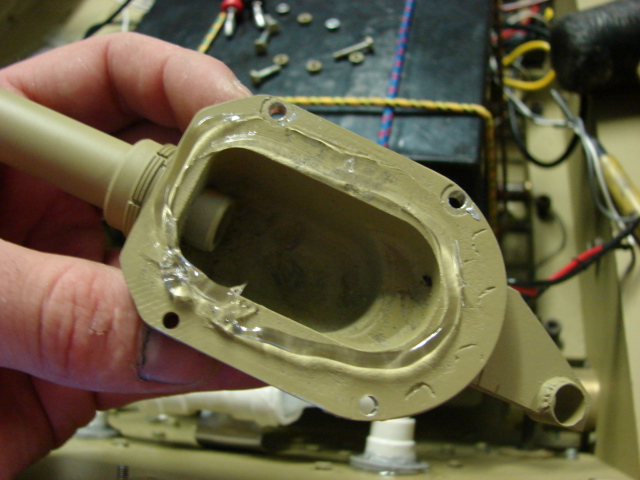
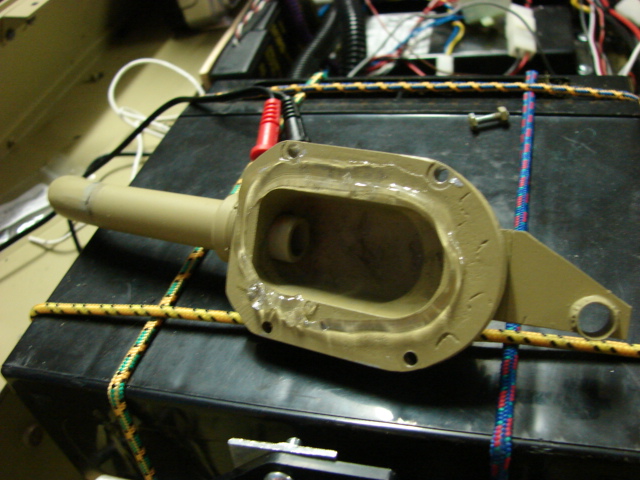
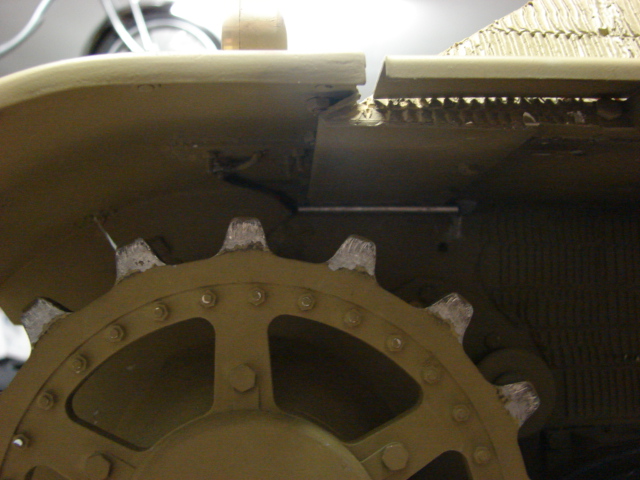
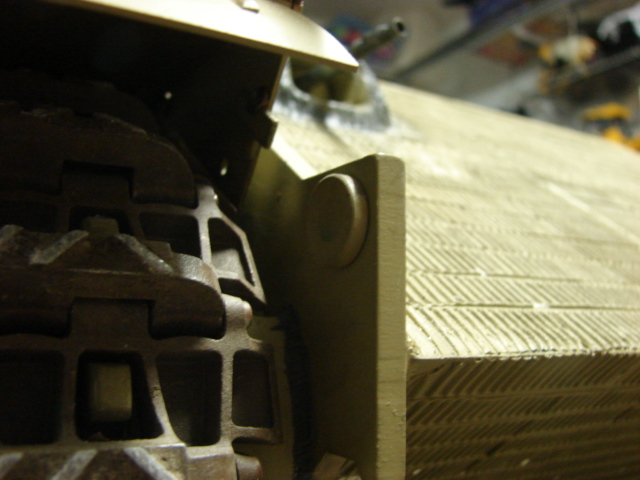
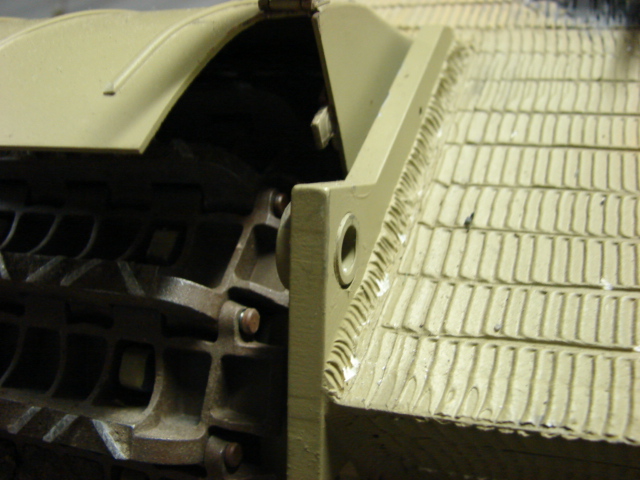
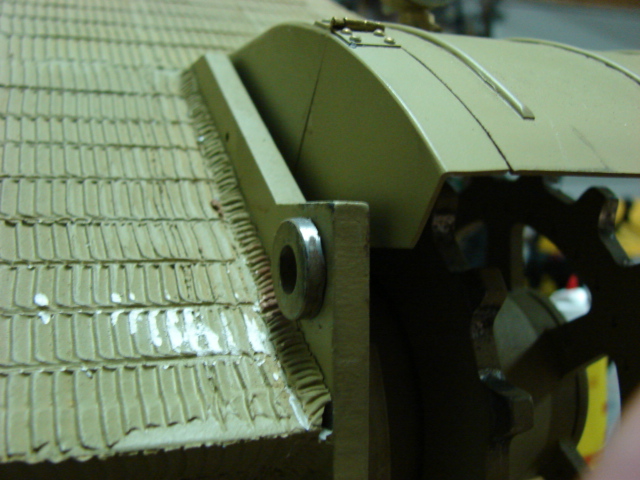
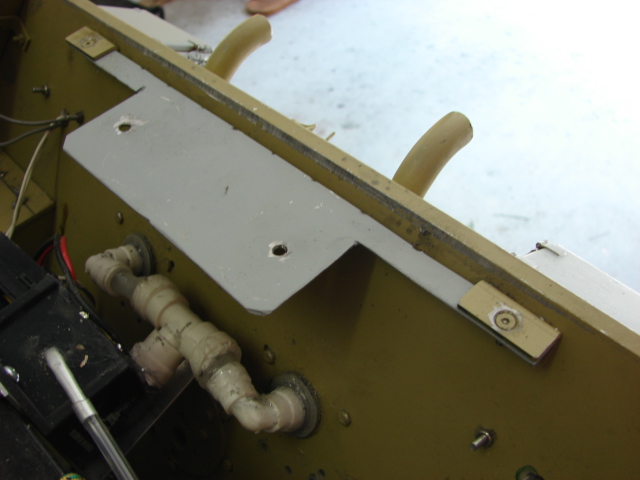
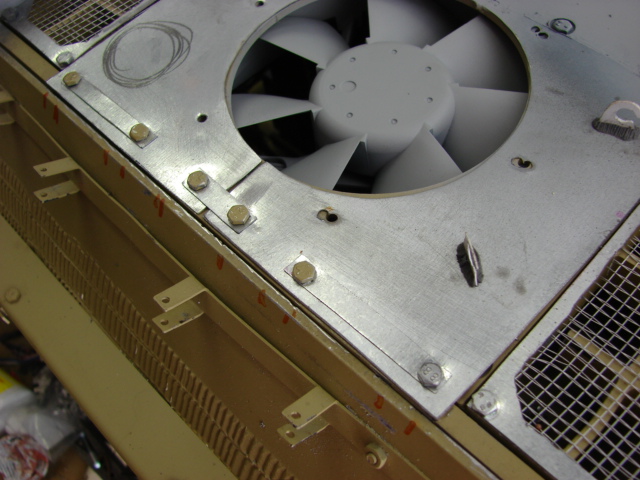
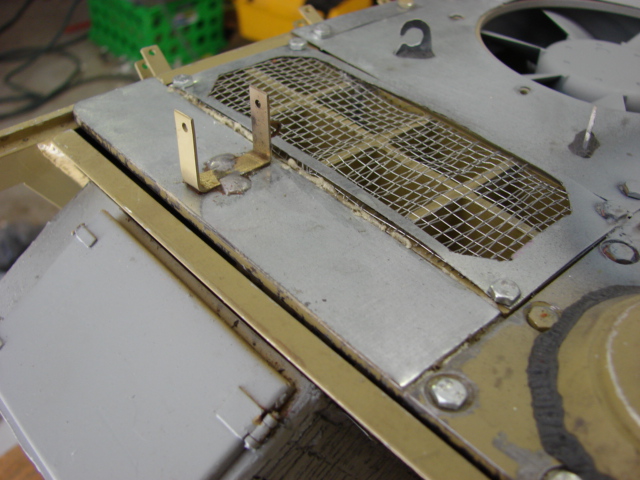
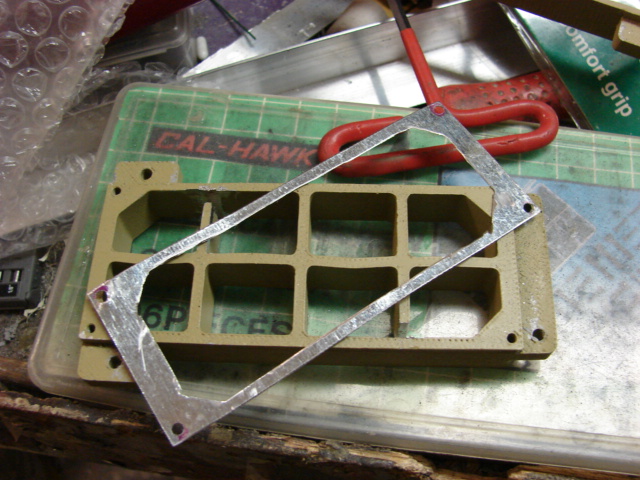
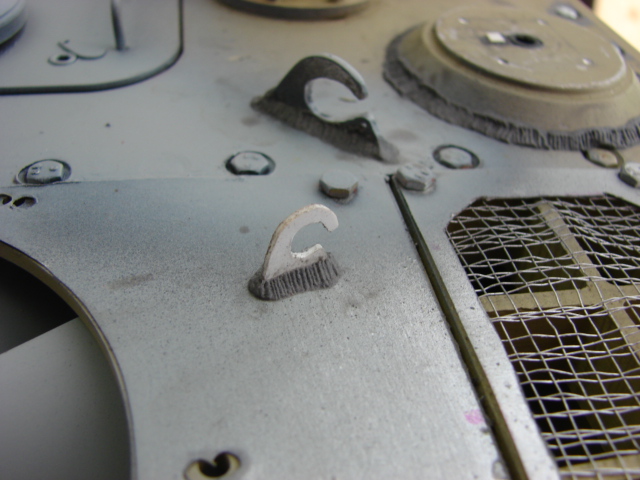
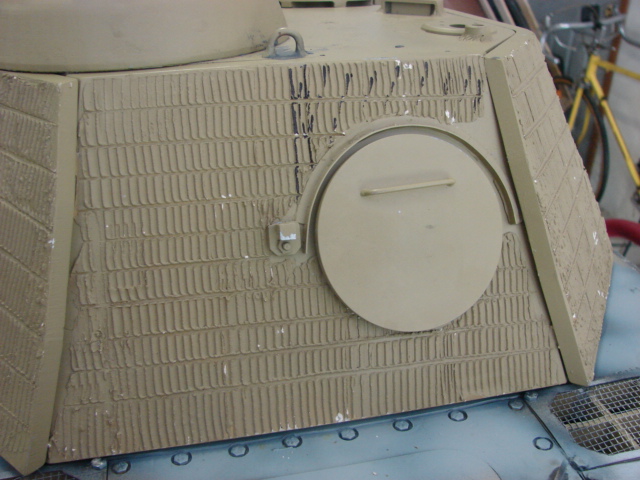
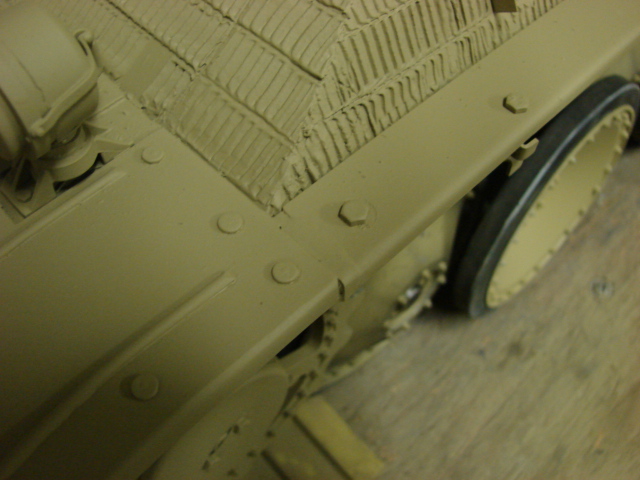
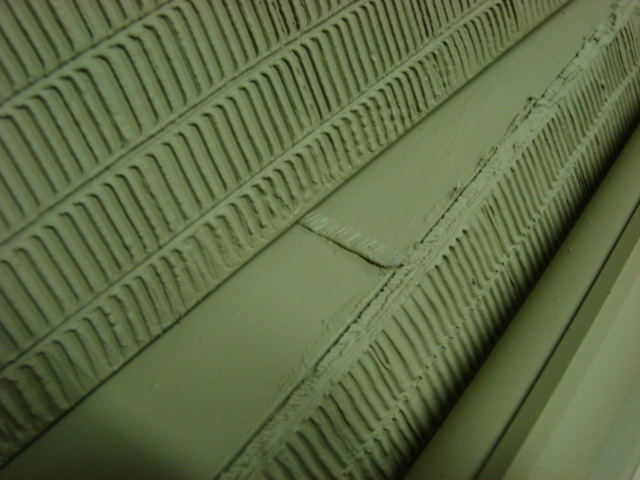
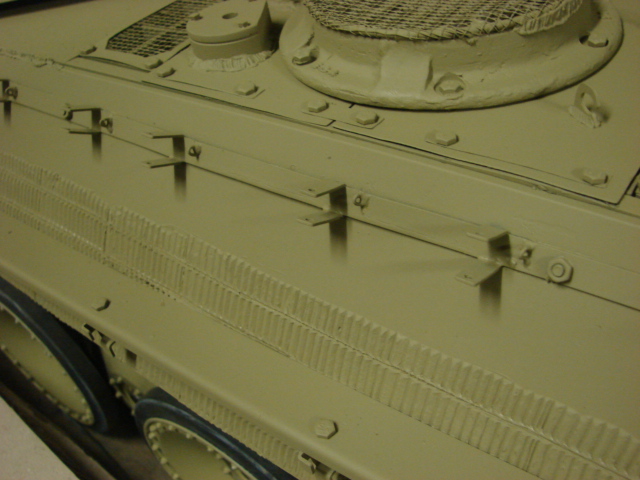
Another area that was missed by the builder was the gaps on the sponson. These gaps are present because of the way the panels are laser cut and folded.

Image

Image

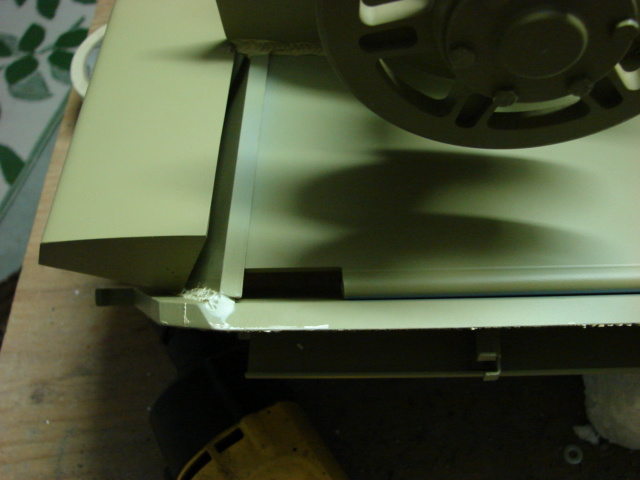
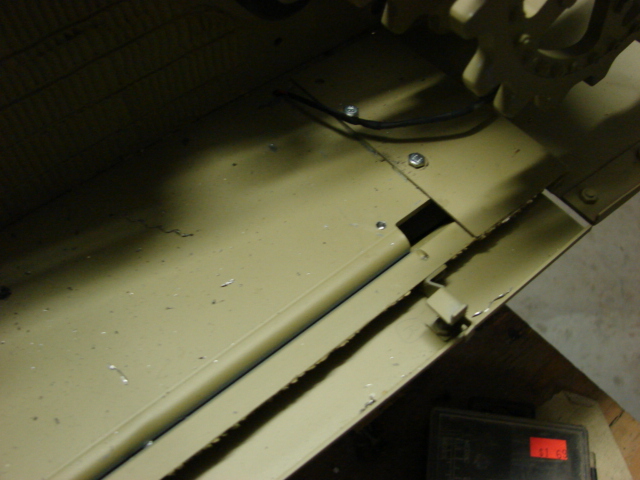
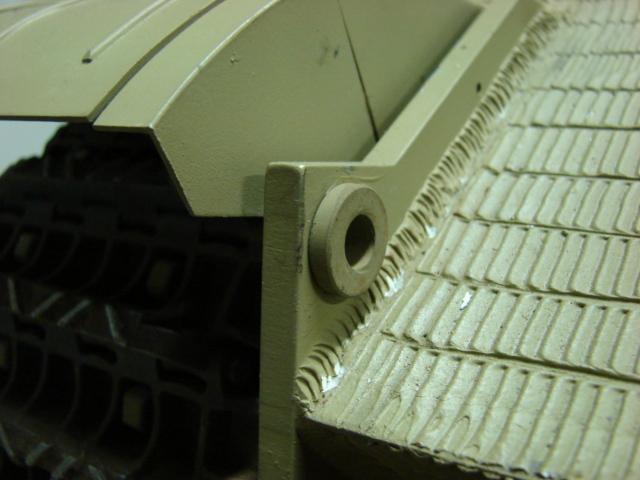
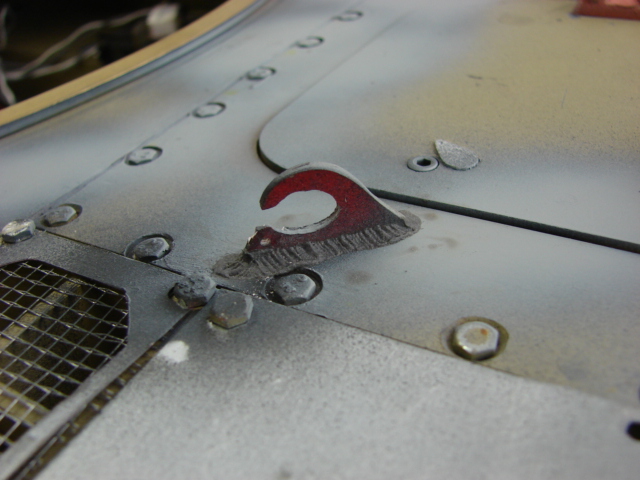
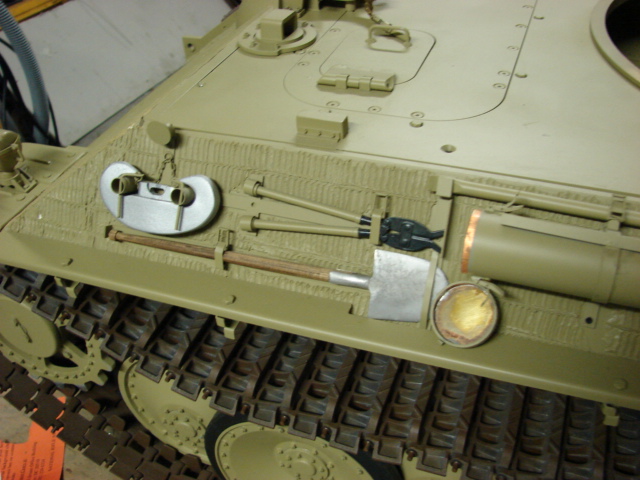
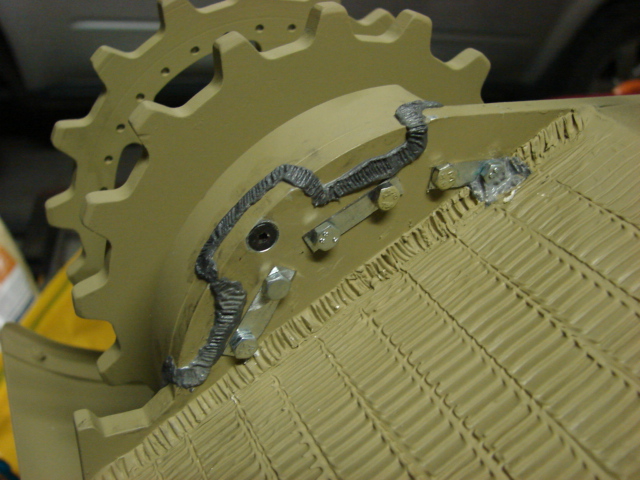
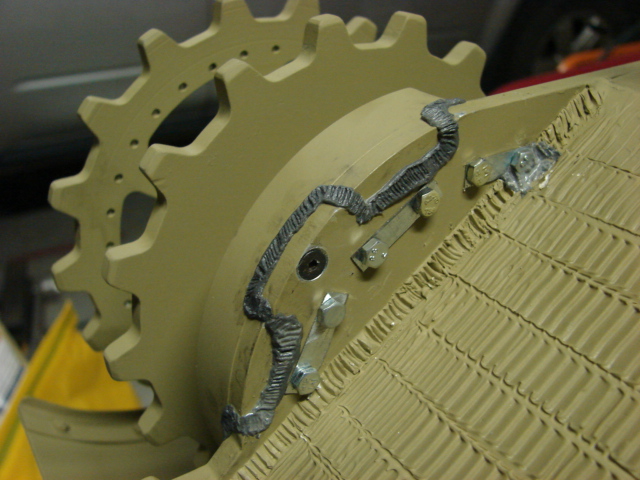
These gaps were filled, and blended. Also weld beads were sculpted into the seams as well as the areas that were missed by the builder.

Image

Image

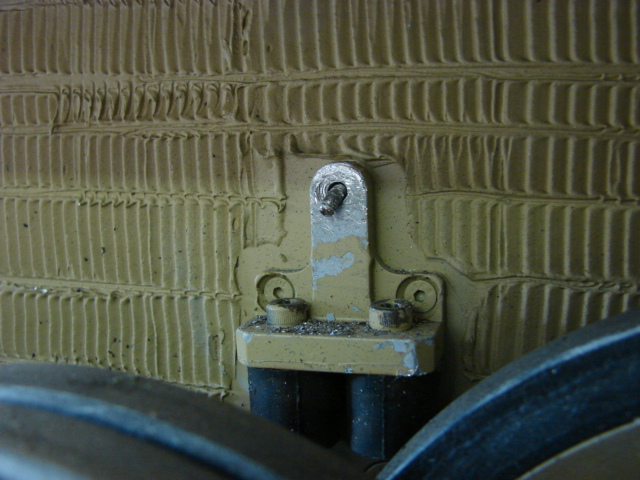
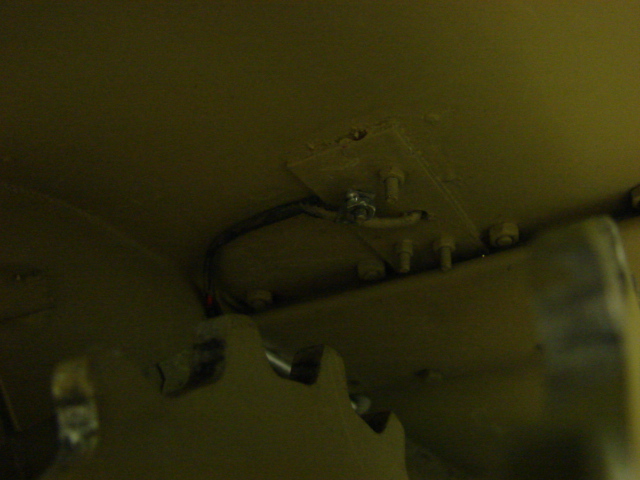
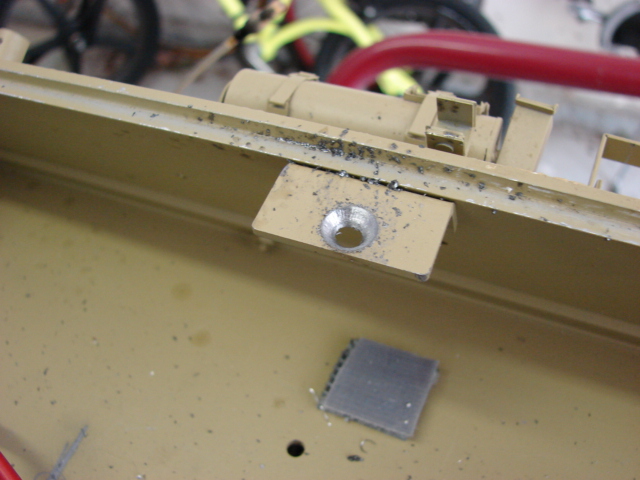
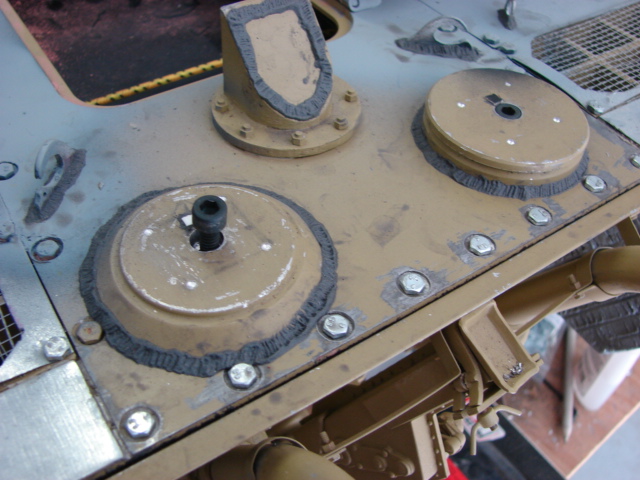
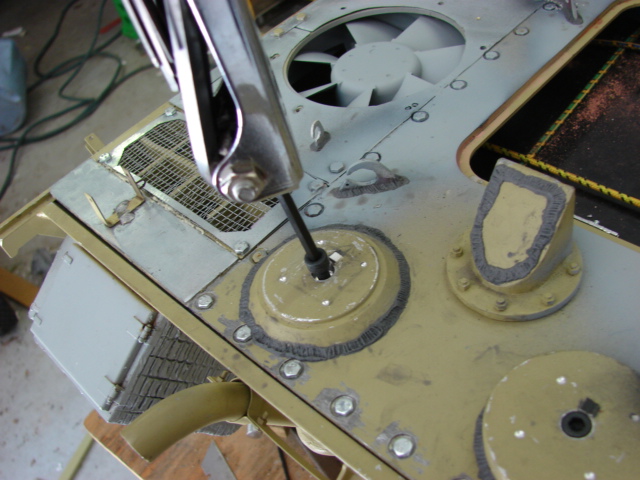
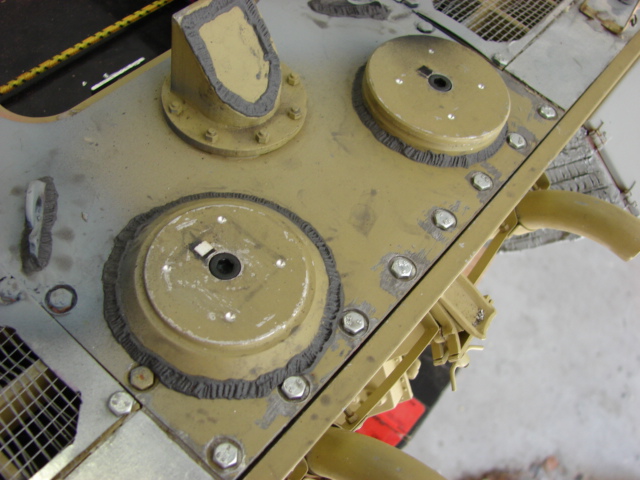
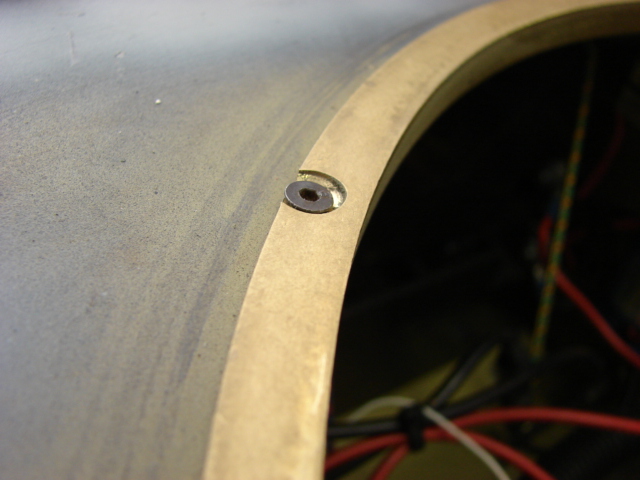
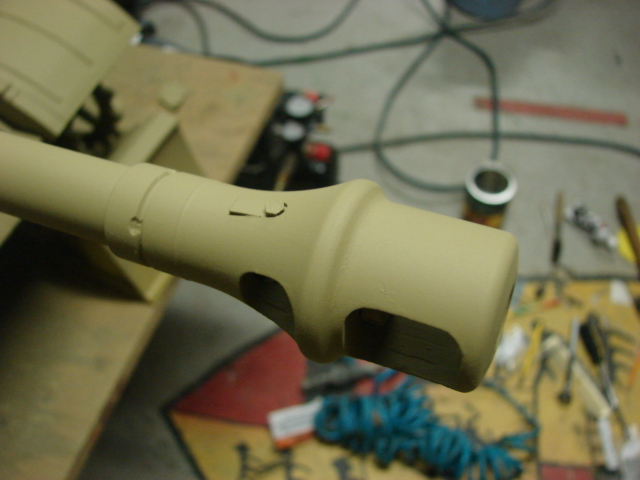
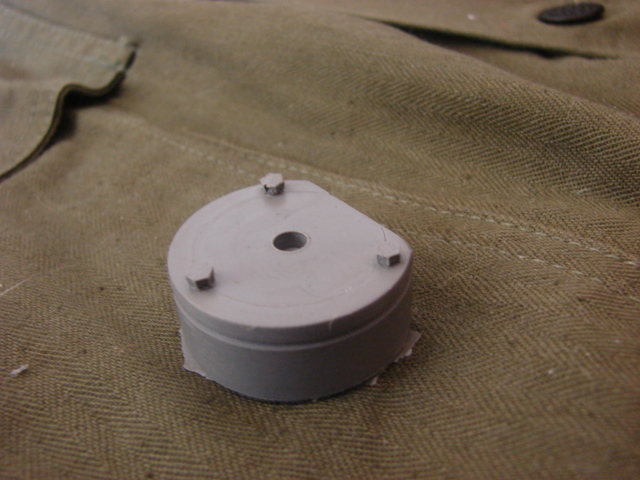
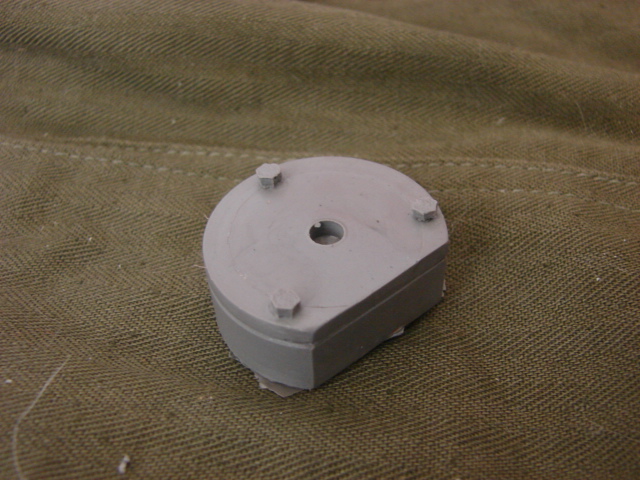
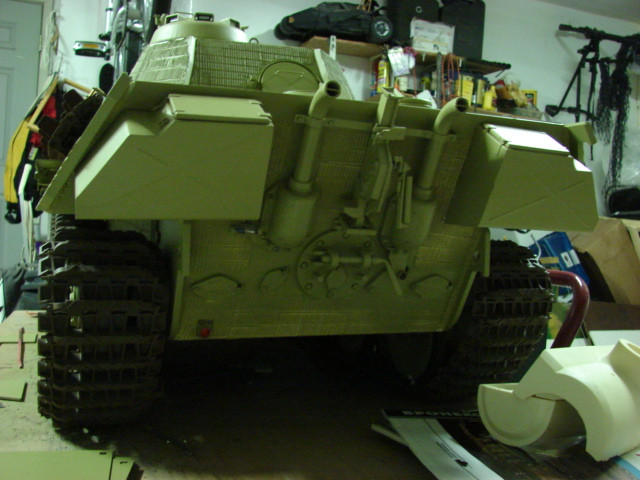
On the front final drive mounts I added the missing final drive mount bolt, tension straps, welds. and I replaced the armored collar hex bolt with a counter sunk bolt. This bolt was then blended into the tank via body work (not shown)

Image

Image

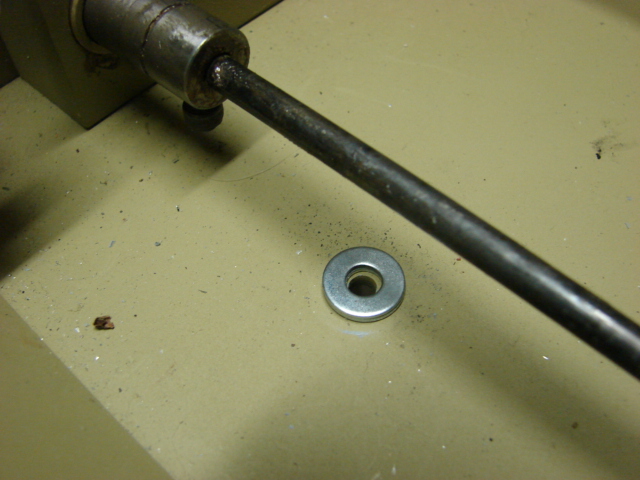
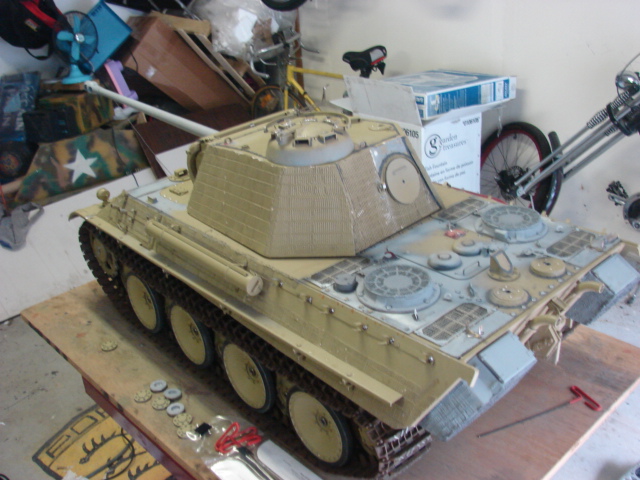
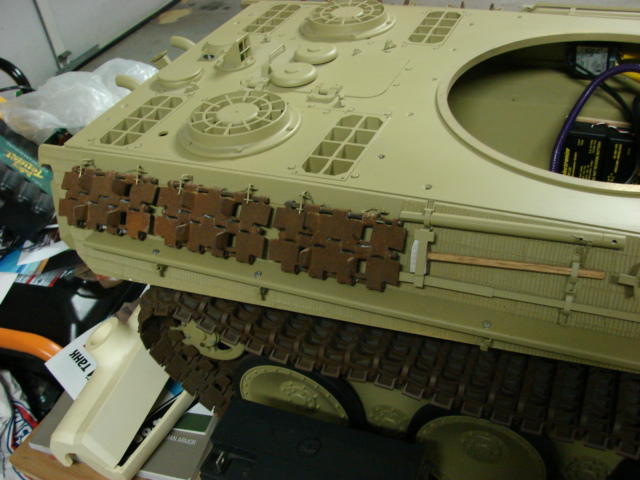
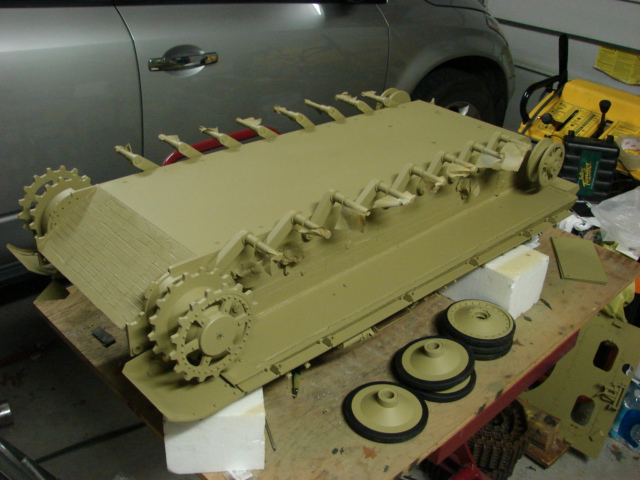
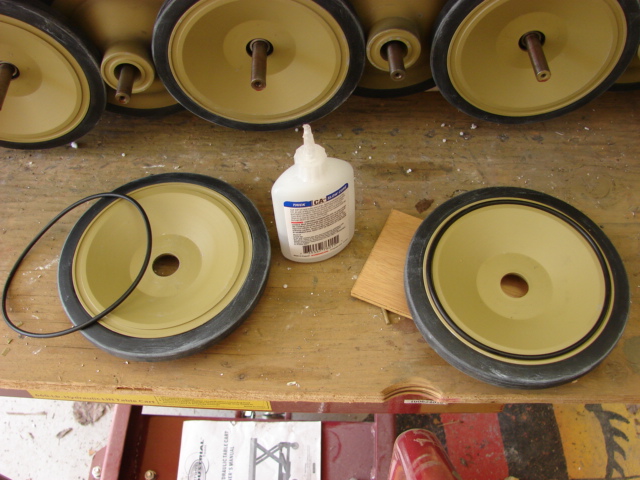
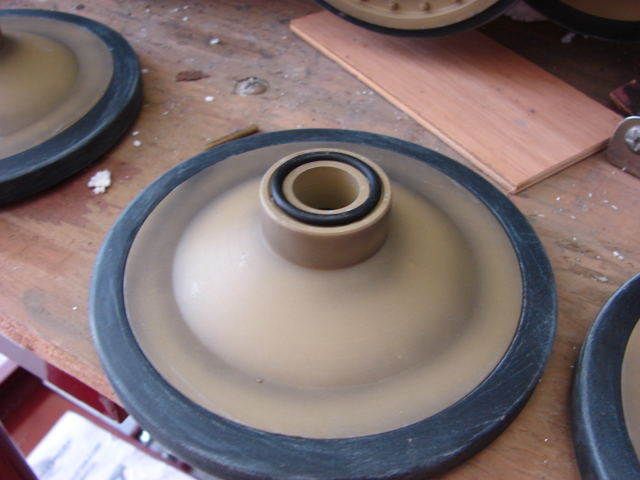
After the revisions were completed I remounted the wheels. Prior to mounting the wheels I added their weathering, since these areas will be very difficult to paint when assembled and mounted. Like the real tank the wheels are mounted in layers

Image

Image

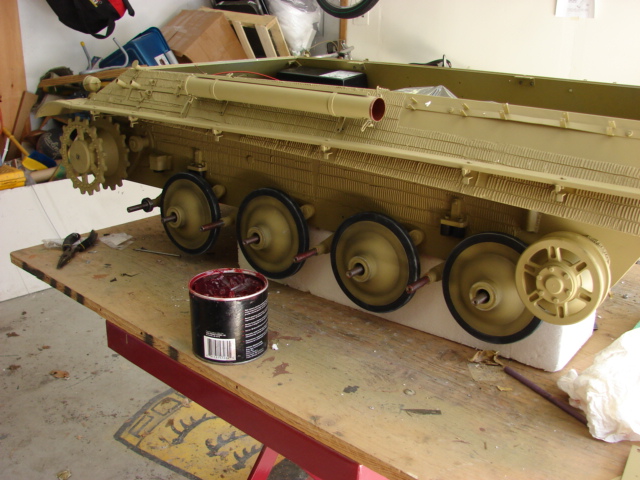
One unique feature about the kit is that the wheels have O ring that give a secure sealing between the wheels. To aid in the mounting I used four small drops of CA to tack the O ring to the wheel, so that when mounting the O rings won't fall out.

Image

Image

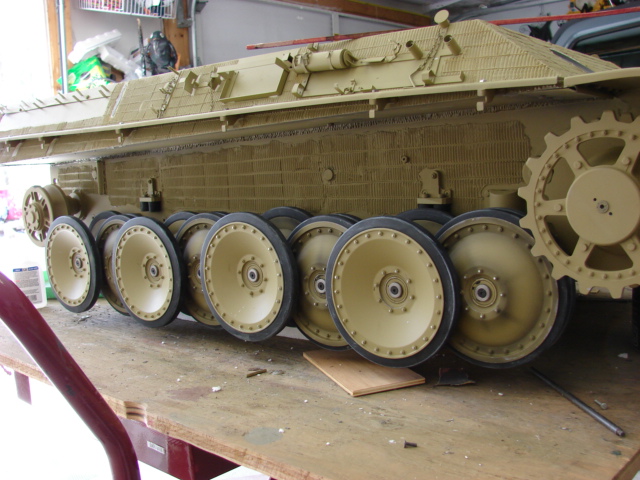
After the wheels were mounted. I used thread lock to help prevent the bolts from getting loose.

Image

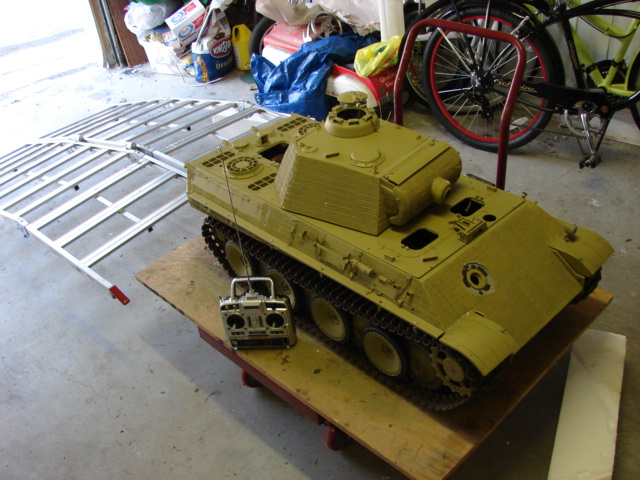
Two Youtube videos were created,

One showing the model when I first got in the shop,

The other showing the mistakes, and the work required to correct the issues:

Images were also posted on facebook: https://www.facebook.com/EastCoastArmory

I'm also looking for a replacement gun barrel and muzzle brake. If anyone has one, or knows where I can acquire one PM me.

For this build I will now be focusing on getting the model to run, and the functions. More to come

Fabrice Le Roux
Posts: 394
Joined: Thu Jul 12, 2007 8:57 pm
Location: London UK
Been liked: 14 times

Re: 2006 Panther rebuild

Post by Fabrice Le Roux »

John,

The taper bush must have been very seized to require an automotive hub puller! :shock:

Has your client chosen a final cammo scheme and unit?

cheers Fabrice

John Grima
Posts: 250
Joined: Sun Jul 15, 2007 2:54 pm
Location: USA
Been liked: 48 times
Contact:

Re: 2006 Panther rebuild

Post by John Grima »

Fabrice, It was very stiff even with the removal of the grubs...I guess after 6 years of sitting still the parts seized to each other.

He has a camo pattern in mind, but right now that is one topic that is at the end of my to do list for this build.

As a quick update I got the model up and running now and I took the tank out for a quick spin.

Image

Image

It felt good to see a model that was dead for so many years come back to life.

Image

The model ran well, but I need to remove a few links off the track for it to run better.

Image

Image

A youtube video was also made showing the tank's maiden drive.

Armortek Panther Ausf.G Project Video #3 (First test drive) - YouTube

I will now be working on the model's interior electronics and equipment mounts. I will also be working on some of the extra functions i.e smoke lights MG...etc More to come.

Kent Wiik
Posts: 425
Joined: Sat Dec 04, 2010 11:18 am
Location: Northern Sweden
Has liked: 6 times
Been liked: 194 times

Re: 2006 Panther rebuild

Post by Kent Wiik »

Hi John,

Thanks for showing us this, very interesting.
I can only imagine this Panther owners feeling not having a perfect commission build after all those years and $...
But now she is in good hands.

I tried once helping the SD-man avoiding some silly errors when the build was up on his site but in vain. :(
As you are now at it will you change the direction of the front/rear lift bosses please?
They shall be from the inside out and not from the outside in.
As they are now the front fenders point upwards.

Image

Image

Kind regards
Kent
It´s all in the details!

Steve Norris
Posts: 1231
Joined: Thu Jul 12, 2007 11:42 am
Location: Manchester
Has liked: 8 times
Been liked: 701 times

Re: 2006 Panther rebuild

Post by Steve Norris »

Hi John,
Looks like you have all the aftermarket parts needed to produce a top quality build.
I noticed on the video that there appeared to be some restriction and snatching when driven forward, It would be worth checking for any interfearance between the track top run and the long vertical leg of the bump stops. This can be more pronounced with loose tracks.
Regards
Steve

John Grima
Posts: 250
Joined: Sun Jul 15, 2007 2:54 pm
Location: USA
Been liked: 48 times
Contact:

Re: 2006 Panther rebuild

Post by John Grima »

Thanks for the input guys,

Kent, Thanks for the heads up on the bosses. I noticed the error when I got the model and I will be switching them once I start with the external details after the model's functions are all wrapped up.

As with all of my projects I always post progress images, if you see anything I miss please let me know so i can deal with it. After all of the frustration that the customer went through with the other builder...he deserves a quality build.

Steve, Your right...the bump stop brackets are pretty scratched and scuffed. I will grind / sand them down right away.

I also noticed another issue with the rear wheel when I drive that tank at speed the rear wheel gets pulled upward. My guess is that it has to do with the severe looseness of the tracks. I noticed that the wheel would go up when the track links would kink or bind. I will be tightening up the tracks some more. If the problem persists I might need to check the Tbar further. Any suggestions?

Steve Norris
Posts: 1231
Joined: Thu Jul 12, 2007 11:42 am
Location: Manchester
Has liked: 8 times
Been liked: 701 times

Re: 2006 Panther rebuild

Post by Steve Norris »

Hi John.
I just noticed the rear wheels lifting, check that your torsion bars are not loose in the axle or support beam, as supplied the torsion bars are held by M4 grub screws but I replace these with M4 cap heads to get extra torque .
Hope this is of help
Regards
Steve

John Grima
Posts: 250
Joined: Sun Jul 15, 2007 2:54 pm
Location: USA
Been liked: 48 times
Contact:

Re: 2006 Panther rebuild

Post by John Grima »

Thanks for the tips Steve, shortly after your post I checked out the swing arms and nothing was loose or out of place. I did track down the issue and I mentioned it below.

About a week ago I was able to get a replacement gun and muzzle direct from armortek. The parts simply tread on and install in seconds. Acquiring the parts was also very easy and illustrates armortek's good customer service.

Image

Image

After the last test drive I noticed that the tracks were too loose and that the rear wheel on the left hand side would be pulled upward when the model would be driving. All of these hick ups needed to be corrected before I would be able to continue on the model.

For the tacks a few links were moved from each side, and the rear idler was tightened.

The tracks were also making contact with the bump stop mount and the rear pin rerailer. Some of the fasteners that were mounted by the other guy were ripped off by the track.

Image

Image

Image

Image

To correct this I ground the impacted areas down with a mini hand held belt sander until the mount was no longer able to make contact with the track.

Image

Image

Image

After some more investigation I realized that the reason why the wheel was being pulled upward was because of the battery tray. When mounting the tray the previous builder mounts the tray directly on top of the bar. By doing this the bar was strangled and most of the springing power of the bar was not being utilized. This made the swing arm weaker and would be able to pull upward much easily.

What suffocated the bar was the battery tray mounts. The kit supplied mounts have a slot machined into them to allow the clearance for the Tbar. The problem is that the mount itself is too short and instead of clearing the bar it clamps over it.

Image

Image

To fix the issue I simply added some washers to each of the mounts. With the addition of the washers the tbar is untouched and the wheel no longer gets pulled upward.

Image

Image

After the running gear was tweaked the model now runs really smooth and without any issues.

After the model was test driven and the track was adjusted it was time to focus on the interior machinery mounts.

Image

Because of the torsion bars the last builder mounted the speed controllers to the front sponsons. Because of this and the batteries in the rear there is no place to mount the power dist. box which is also the power switch.

This layout is unacceptable as it is impossible to mount the switch to a location that is accessible. To correct this I had to redesign the interior layout. The speed controllers were moved from the sponsons to the bottom of the hull. To do this I had to fabricate a new hull floor. For the floor I used an elevated Lexan panel. The lexan panel was elevated by several turned PVC columns.

Image

To avoid the fasteners from getting loose nylock nuts were used to hold everything together. With the new floor I now had lots of room to mount the speed controllers and other machinery.

Image

For the power switch / control box I wanted to mount it under the front hatches so you can get easy access to the hatch. To mount the box here I had to first fabricate up a mount out of aluminum and lexan.

Image

Image

Image

under the radio operator's hatch I designed a recharge system for the model. The recharge system uses jacks and a cut off switch. To recharge the model simply plug the jacks to the color coded ends, and hit the switch.

Image

Image

Image

Just like with the power switch the recharge system was designed to be operated by lifting the front hatch

Image

Image

After the mounts were competed I was able to re install the bow MG34 ball mount. The mount itself is an aftermarket resin unit (armorpax) that is nicely done and detailed.

Image

The builder used glues to mount the unit to the model instead of fasteners. Because of this it popped off earlier in the build. Before I was able to remount the ball I had to first chip the chunks of glue off the armored plate. Once removed I marked and drilled the holes into the ball...and remounted it via fasteners.

Image

After the mount was reinstalled I hooked the ball up to a servo and the ball can now pivot via the radio control.

Image

An update video was created and, more images were posted on the facebook page.


https://www.facebook.com/EastCoastArmory

I will now be focusing on the smoke and the lighting. Once those are complete I can then turn my attention to the top deck. More to follow.

John Grima
Posts: 250
Joined: Sun Jul 15, 2007 2:54 pm
Location: USA
Been liked: 48 times
Contact:

Re: 2006 Panther rebuild

Post by John Grima »

I'ts been a while since I had any update but I have now completed more of the build.

Image

I completed the model rear hull bins.
Image

The aftermarket bins are very nice but are missing the mounting strip details that are found on the bins side and thread mounts on the bins bottoms. The strips were all fabricated out of sheet metal and were soldered on.

Image

Image

Image

Image

After the strips were fabricated the bin surfaces were covered in zemmerite and were mounted

Image

Image

Image

Along with the bins the zemmirite was also added to the bow MG ball

Image

The Model's smoke system was added. For the smoke system I used my usual layout which is a harbor models smoke generator, and an on board refueling pump system.

Image

The unit was hooked up to one of the radio functions and to activate the generator I fabricated a simple remote activation switch,

Image

Image

Image

The refueling hose is concealed in the left hand storage bin. To refuel the system simply lift open the bin door and pull out the hose to begin refueling.

Image

While installing the smoke system I removed the already mounted exhaust stacks to add a bead of silicone. The silicone prevents any smoke to seep out through the joint of where the stack connects to the hull.

Image

Image

In addition to the smoke I also added connected the lighting. The model had a Steve Winston Brass Bosche Headlight and tail light mounted.

Image

Image

Image

The light sets come with a 12V bulb and only need to be connected to the circuit. The previous builder did extend the wire on the head lamp, but didn't connect them to any circuit. Good thing that it was not done because he unknowingly had the two positive and negative leads on the wires touching each other, which means that if connected to a circuit would have shorted out and possibly burned out the bulb :(.

He also had the wires enter the model in an incorrect way, not only was the layout inaccurate but would not have lasted long because the track and track debris would have ripped the wiring out. On the Panther series the headlight cable ran under the front fender and along the sponson until it entered the sponson top. The cover cap and conduit were fabricated out of turned resin and aluminum.

Image

Image

to keep the power cable away from the track as much as possible I fabricated a small metal clamp that mounts to the headlight mounting fasteners. The clamp will prevent the shrink tube protected wires from drooping or dangling over the running track. Combined with the rest of the cable running along the side of the sponson debris snagging should be minimized as much as the real vehicle. Also the original builder's cable hole was plugged and deleted.

Image

The two lights were then connected together and to a switch. Since they are 12V they can be hooked up to the rest of the tank's functions on the main power box. Because of this there are no other batteries to worry about replacing or charging. Also because of the 12V the lights are very bright...perfect for night driving.

Image

Image

Image

The lights themselves are controlled by a simple switch mounted in the other rear storage bin.

Image

As what was brought to my attention by Kent, The other guy mounted the front tow hook boss backwards.

Image

Image

The parts were firmly mounted to the model with epoxy, After a little motivation with a blowtorch, a punch and a hammer the boss was removed and remounted in the correct direction.

Image

Image

Image

A video update was added to youtube which shows the mentioned above more in detail,
http://youtu.be/02t1X6gLhrI

also more pics can be found on the facebook page,
https://www.facebook.com/EastCoastArmory

With the completion of the above functions I can now focus on the upper deck mounting and details. More to come!

John Grima
Posts: 250
Joined: Sun Jul 15, 2007 2:54 pm
Location: USA
Been liked: 48 times
Contact:

Re: 2006 Panther rebuild

Post by John Grima »

More progress was made to the model and I now have most of the upper deck completed.

Image

The kit was designed to have the upper deck mounted permanently to the body via fasteners located on the the upper hull and interior.

Image

Image

Because of the batteries I needed to made the upper hull removable. To make the upper hull removable I modified the original kit mounts to adapt the new mounting system.

Image

For the side mounting I borrowed the mounting system from Steve Norris's king tiger build. The system utilizes several lengths of angled aluminum. The braces run along the upper lid and the side hull and allow a single bolt to hold the sides together.

Image

Image

Image

Image

Image

Image

For added support to mount on the rear deck I used a technique that I used on my BRA Jagdpanther. The setup utilizes the two access plates on the rear portion of the panther.

Image

The two plates were removed off the top deck and were reworked by having their hole detailing added. Along with the small details I drilled out the center mounting bolt which is found on the plates. On the real tank the bolt looks similar to an allen cap screw. So in addition to adding detail the screw also holds the deck to the tank.

Image

Image

Image

Image

For the front I fabricated two rubber discs from old molds to act as bump stops. These rubber discs grab onto the front armored plate and secure the front portion of the plate to the model without any fasteners.

Image

On the rear portion of the interior the kit was designed to have a large steel bulk head mounted. The bulkhead is intended to prevent the lid to bounce or flex with the added weight of the turret. The bulkhead is designed to be installed and not removed.

Image

Instead of using this bulk head I replaced it with a section of angle aluminum. The aluminum is lighter, has a narrow profile, but is also strong ans was mounted to the holes that were on the upper deck that were intended for the kit supplied version.

Image

On the top deck I was able to mount on the turret bushing.

Image

Like with all my armortek builds I secure the bushing to the top deck via countersunk fasteners. With this mod you will never have to worry about the ring popping off, or sticking to the turret. As the build progresses I will add grease to the bushing for added performance.

Image

After the ring was mounted I mounted the turret turner motor / gearbox.

Image

While I was trying to mount the motor I noticed that the motor did not fit onto the location where the it was supposed ti be mounted. To resolve the issue I remounted the turret tuner to the opposite side of the tank, taking careful measurements to get the exact same location so the gears would properly mesh.

Image

While I was testing the turret I soon noticed that the gear was slipping. To resolve the issue I epoxied, steaked, and pinned the gear to the collar and spindle. For the pin I placed the pin far below the portion of the gear that makes contact with the turret. I also made sure that the pin was flush with the hole. After these mods the problem was eradicated.

Image

All holes for both the turret turner mount and the hull fastener mounts were deleted and sanded flush via body work.

Image

The front hatch plate was also remounted to the model. The original builder used allen screws for the mounting of the hatch plate, while having exposed hex bolts visible for the hatch plate mounting plate.

Image

I simply swapped the hex bolts for the counter sunk allen bolts, and covered up the unneeded bolts with the body work blending them into the body.

Image

The rear of the model was also worked on. This portion of the model required the most amount of work. On the first generation armrotek panthers The kit supplied engine deck has many inaccuracies. Notably the grill area and the wrong number of bolts on the engine access plate.

Image

Image

To correct the grill area I skinned the area with sheet steel. The sheet metal was cut to the correct dimensions and, were also cut in sections as on the real tank. They were mounted to the model via fasteners along with the fastener securing plates. Skin plates were also fitted to the rear grill filler plates.

Image

Image

Because of the new fasteners added to the fan area I had to cut notches into the side plate to allow the fasteners to clear the hull.

Image

Image

The grills themselves were reworked in having their sections cut from the base (as per the real vehicle) and having thier grenade mesh covers scratch built

Image

Image

Image

The fan grill also had it's segments cut, grenade grills mounted. They also had their cast texture added along with the missing casted in block details sculpted on with epoxy.

Image

Image

The engine hatch had some revisions made to the hinges. The hinges were the right size, but their shape and cast texture was revised and added.

Image

the engine access plate itself had it's missing seam lines added via a dremel, and had the correct number of bolts added to the plate. The holes for the bolts that were in the wrong locations were deleted.

Image

The engine panel and grill plate lift hooks were also added and were all scratch built out of styrene.

Image

Image

Like on my Jagdpanther and King tiger builds I added two PC fans to the fan locations on the upper deck. The fans are full function and both add detail element to the model, but also pump cool air into the tank cooling down the electronics.

Image

Image

Image

Image

Image

Because the deck is removable I connected a quick release jack to the fans and the rest of the tank's circuit

Image

The final detail that I added to the deck was the addition of the fuel breather valve. The breather valve is a resin casting and is offered on the ECA catalog.

Image

Image

Two youtube videos were added which show and describe more of the progress.


Also more pics of the build were posted on the ECA facebook page
https://www.facebook.com/EastCoastArmory

With the body now complete I will now focus on the turret. Once the turret is done I'll turn my attention to the tool posts and the tank will be ready for painting :) . More to come!

John Grima
Posts: 250
Joined: Sun Jul 15, 2007 2:54 pm
Location: USA
Been liked: 48 times
Contact:

Re: 2006 Panther rebuild

Post by John Grima »

Thanks guys, I made the last of the mods completing the tank

Image

Image

On the turret I completed the gun elevation system. The previous builder partially assembled the system, never completed or tested it.

Image

Image

The kit supplied parts were added and with out any issues. The other builder left out the retention discs which keeps the brass slide mount from rotating in the elevation mount. Two new discs were fabricated out of plastic and were mounted.

Image

The only mod that was made was to the limit switch. Because of the shape of the angular turret it is very difficult to fit the limit switches to the turret with the wire connector in the way, to fix this I soldered a piece of brass to the contact in a 90 degree angle. This redirects the connector thus making room for the switches in the tight turret space.

Image

Image

For the turret roof the kit is designed to be bolted to the turret with counter sunk fasteners to brackets on the tank's interior.

Image

Image

The system is very easy and works if you want the roof to be affixed as one piece, but on this model I wanted the client to have access into the tank from the roof. To do this I designed the roof to be remove able. To do this I utilized cabinet magnets and mounted them to the turret brackets. Since the turret roof is a steel plate it locks on very securely, but can re popped off if needed.

Image

Image

Image

While working on the turret roof I was able to concentrate on the copula. The other guy failed to complete the copula, and the parts that he did complete on it (MG rail) were only glued on and literally crumbled in my hand.

Image

After the copula Disassembled itself I was able to rebuild the copula scratch building all of the missing interior detailing and external detailing.

Image

Image

Image

Image

Image

On the AA MG rail I re assembled the unit by first soldering brass strips to the periscope guard covers, small brass pins were drilled and soldered to the strip ends. Matching holes were then drilled into the bottom of the rail, so the rail can be glues and plugged into these pins. This was done because the ring on the panther kit is made out of Aluminum.

Image

Image

Image

On the backs of the guards the rear walls were fabricated out of sheet metal and were also soldered onto the guards. Both the welds and cast texture were added and sculpted to the copula.

Image

The hatch was designed to be affixed to the turret via a long hex bolt. The bolt was replaced by a pinned steel shaft. On the bottom portion of the hatch interior hinge detailing was fabricated. On the hatch exterior two resin detail discs were fabricated and added to their proper locations.

Image

Image

Image

On the rear loader's hatch the other guy left this hatch stock. The kit supplied hatch was a basic hatch that is missing the interior and front locking details.

Image

Because of time limits I was not able to fully rework the hatch, but I was able to add several faux locking details to the interior and the lock key to the exterior.

Image

Image

Another mod that was made to the rear portion of the turret the other guys zemmirite coating was removed over the section over the loaders hatch, and the rear zemm coating on the rear bins was altered. Both of these mods were done at the client's request.

Image

Image

Image

Image

It was also at this stage that I mounted the gun and muzzle. As I mentioned earlier the other guy "lost" the barrel and I was able to acquire a new barrel from armortek themselves. The barrel and brake are nicely done out of CNCed steel and aluminum.

Image

Image

Image

Image

The barrel has some small tool marks, these marks are easily sanded down with some sand paper.

Image

The muzzle brake mods include being hollowed out, had it's baffle rings added (fabricated out of PVC), and had it's locking tab well machined and details fitted.

Image

Image

Image

On the rear portion of the hull I added the antenna base mount. The mount is a resin casting and is now available on panther product line.

http://eastcoastarmory.com/panther.htm

Image

Image

Image

On the front portion of the tank there was a small gap in between the front fender and the side skirt mount fender. a strip of steel was added which connected to the two fenders. To eliminate the gap I bent a small strip of brass and soldered it to the side fender thus removing the gap.

Image

weld details were added to the top deck, which were missing from the stock kit.

Image

Image

The last thing that was added to complete the tank was to repair and to remount the tool posts that crumbled off when the build first started. in addition to remounting the posts I added the missing chain hooks to the track racks. These mounts were soldered to the steel mount. The chains will be added after the tank is painted / weathered.

Image

After these steps were completed the model was now ready for paint.

Image

Image

Image

After the tank was ready I took the tank out for one last test drive to double check and to verify if the functions work.

Image

Image

Image

Image

After the test drive the model was washed and once dry was painted in it's base of Dunkelgelb

Image

Image

Image

Image

Image

Image

Image

Image

More progress pics were posted on the facebook page, http://www.facebook.com/EastCoastArmory

Also two new update videos were added to youtube including the test drive footage.


The tank is now getting it's spots, then the weathering. More to come!

martin pitcairn
Posts: 172
Joined: Thu Jul 12, 2007 5:53 pm
Has liked: 787 times
Been liked: 8 times

Re: 2006 Panther rebuild

Post by martin pitcairn »

just like buses you wait ages for a great panther to come along and then there are 2! great build john, lots of detailed pictures and build tips, well done

Post Reply