Page 1 of 7
Early Panther Ausf G Idler Wheel
Posted: Fri Jul 20, 2007 4:05 am
by Tim Bowman
Gentlemen,
In the next week I will be finalizing the 3D file for my early style rear idler and will be doing the first SLA part. From there any final changes will be made and I will then be producing either Direct Metal Printing or Rapid Castings of the part depending on which is more cost effective.
I'm also looking at other methods.
I wanted to post this even though its still in its very early development stage to see if any other Panther owners would be interested. If so I can plan accordingly with a limited part run.
I know it's not perfectly accurate at the moment as it's basically a rough sketch I did. Any input for accuracy corrections is of course welcome.
I have also begun on several other early production Ausf G replacement parts.
Thanks
Tim

latest revision
Posted: Fri Jul 20, 2007 10:27 am
by Kent Wiik
Tim, you saved my day!

Count me in for a pair please.
Will study your sketch and post comments later.
Any plans of making the early G cast armor guards for exhaust pipes and the pipes?
If so count me in there as well.
Interested in everything you might come up with

Cheers
Kent
Posted: Fri Jul 20, 2007 4:26 pm
by Roland Wallick
Looks good so far Tim. I will look at my drawings and photos later. I will be watching with interest.
Roland
Posted: Fri Jul 20, 2007 5:26 pm
by Kent Wiik
Tim, the idler in your sketch looks good!
The only (very minor) thing I have seen in that the grease nipple is more visible on the real thing and has some kind of a pin on top.
One other thing is the bolt heads - just a tiny bit smaller ones would be perfect.

Cheers
Kent
Posted: Fri Jul 20, 2007 7:02 pm
by Tim Bowman
Hi Kent and Roland,
Thanks for the input.
I couldn't tell from all the photos I looked at if the grease nipple base was cylindrical(as I drew it) or more of a block with a hole in the top. Maybe it varied depending on who produced it. I will make it more pronounced. Also the spoke thickness varied..some look almost blade-like as in your photo and others have more of a flat, thicker profile. I will also be adding a radius to the center ring. I'll post images of the first proto part as soon as I am able.
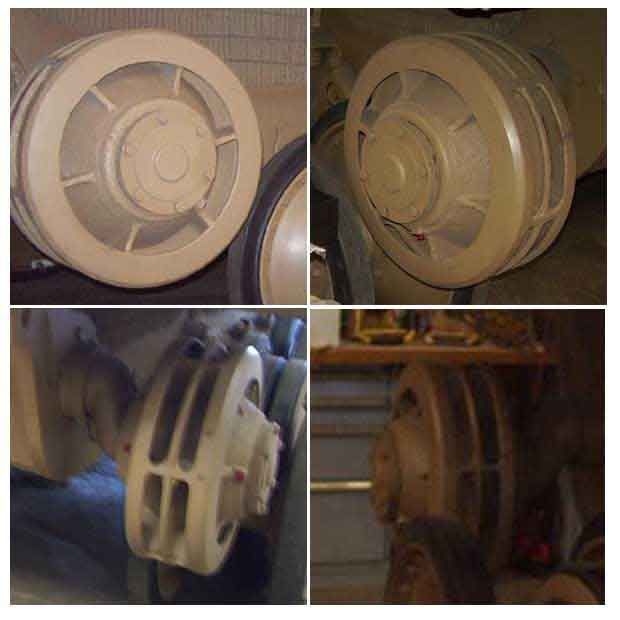
Yes, one of the other parts I am doing is the cast exhaust guards along with the full-round gun mantel. Depending on how these go, I am planning on producing several other large and small upgrade items that are not yet available. Below are some photos of the real idler.
Tim
Posted: Sun Jul 22, 2007 3:07 am
by Rich Stinchcomb
Pictures of the grease fitting on the Aberdeen Ausf G early idler:


Posted: Sun Jul 22, 2007 5:50 pm
by Tim Bowman
Rich,
Thank you very much! It doesn't get any clearer then that!!
Thanks again
Tim
Posted: Mon Jul 23, 2007 1:18 pm
by Roland Wallick
Thanks Rich, saves me from searching through my photos. Rather than a grease fitting, Id say that is an oil drain plug.
Posted: Mon Jul 23, 2007 3:54 pm
by Will Roberts
Hello Tim,
I would certainly be interested in any Early G parts you produce. I have bitten the bullet and had my mantlet de-Chinned in order to represent a Panther from Kampgruppe Peiper in the Ardennes. I may go for the steel-wheeled version since the Late Tiger wheels have the same diameter bearings. Depends on the price of the wheels though ! Please produce the parts before the Dollar recovers

.
All the best,
Will.
Posted: Mon Jul 23, 2007 11:01 pm
by Tim Bowman
Hi Will,
KG Peiper? That'll be great! I posted info on another thread regarding Panther camo schemes for the LAH in the Ardennes. Looks like the book is first in a series and will be a great source of info.
http://www.rzm.com/books/afv/duel.cfm
At the rate we are going, I don't think you'll have to worry about the dollar recovering. Hopefully, for my sake it does..an Armortek late Tiger sure would be nice!
Should have first sample idler parts this week. Cast exhaust guards are soon to follow.
I'll post images as soon as I have parts
Regards
Tim
Posted: Tue Jul 24, 2007 1:38 pm
by Will Roberts
Hi Tim,
The book Duel in the Mist I have had pre-ordered from Amazon in the U.K for two months but it is still not in print yet. The scheme I am going to do is overall Red-oxide primer with Olivgrun and Dunkelgelb cammo. According to Jentz and Zaloga the Mann factory was issued a directive in October 1944 not to paint in overall Dunkelgelb but leave in Primer before applying the Cammo at the factory. With the early G parts, no Zimm, the Ardennes Cammo and Peiper in the Commanders seat (yeah I know he travelled in an SPW !) my Panther should be unique.
Cheers,
Will.
Posted: Wed Jul 25, 2007 2:51 am
by Tim Bowman
Will,
Peiper only switched to an SPW(Diefenthal's) after the radio in his Panther stopped working so your's is actually an accurate representation.
Sounds like it will be really great!
I can't wait to see it.
Tim
Posted: Sun Jul 29, 2007 2:12 pm
by Kent Wiik
Roland Wallick wrote:Thanks Rich, saves me from searching through my photos. Rather than a grease fitting, Id say that is an oil drain plug.
Hi Roland,
No that is a grease nipple.
Look at this German instruction drawing from the excellent book "Der Panzer-Kampfwagen Panther und seine Abarten" by Spielbergar and Doyle (Motor buch Verlag) page 140:

"Druckschmierköpfe" is free translated to English "Pressure grease head".
Tim, can’t wait to see new photos of your idler
Cheers
Kent
First test samples
Posted: Tue Jul 31, 2007 7:14 pm
by Tim Bowman
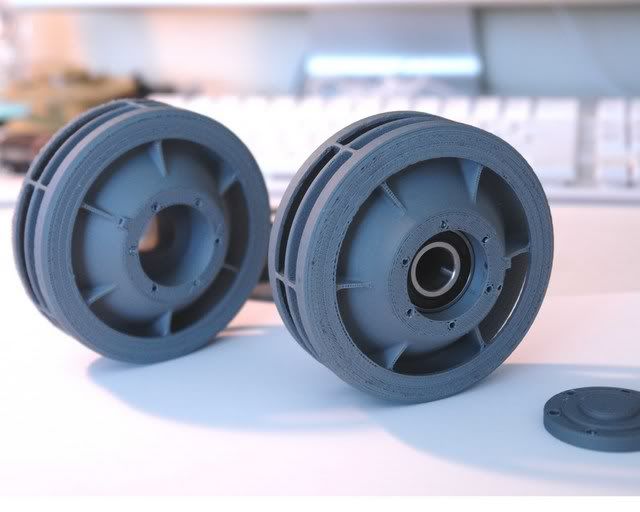
Hi all,
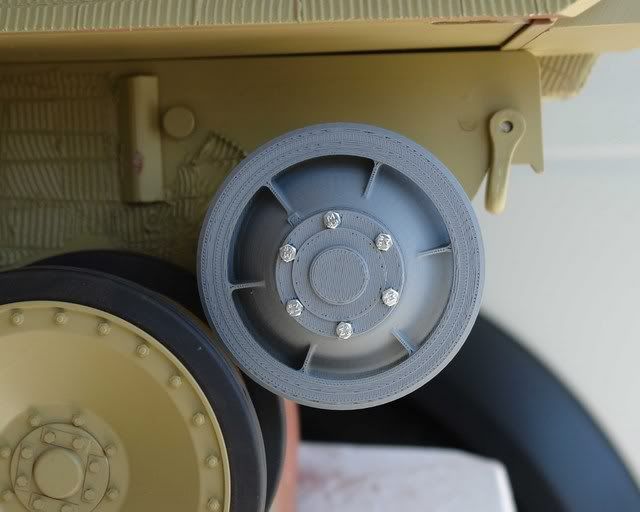
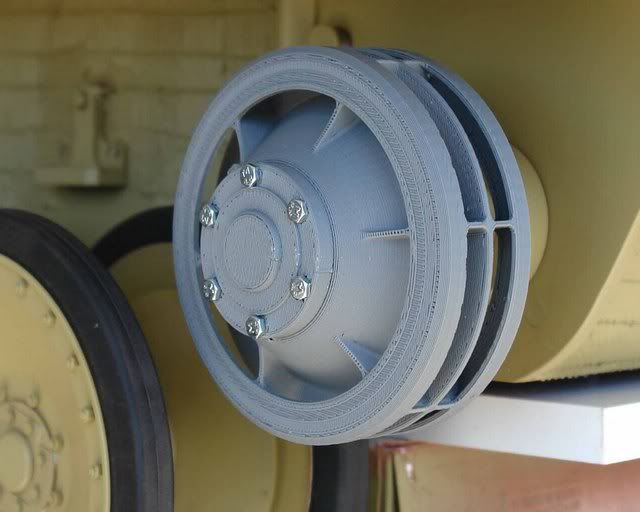
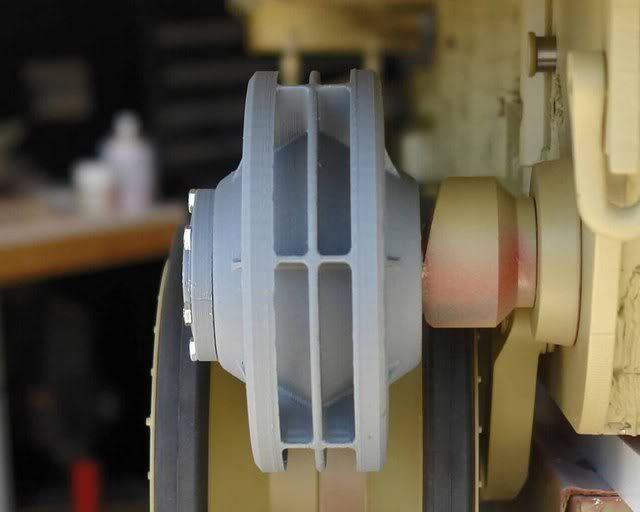
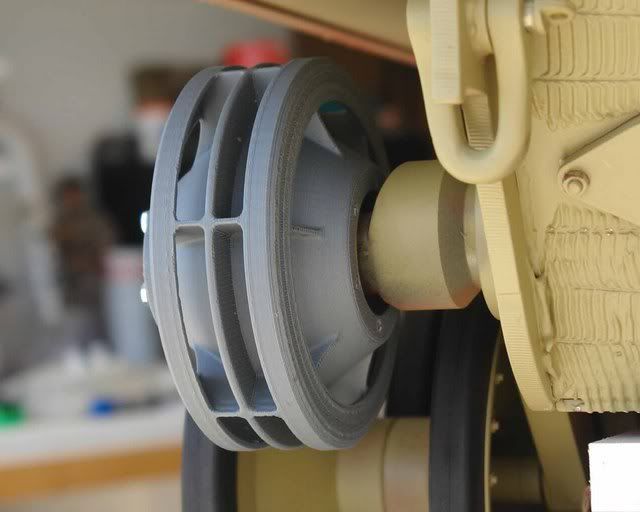
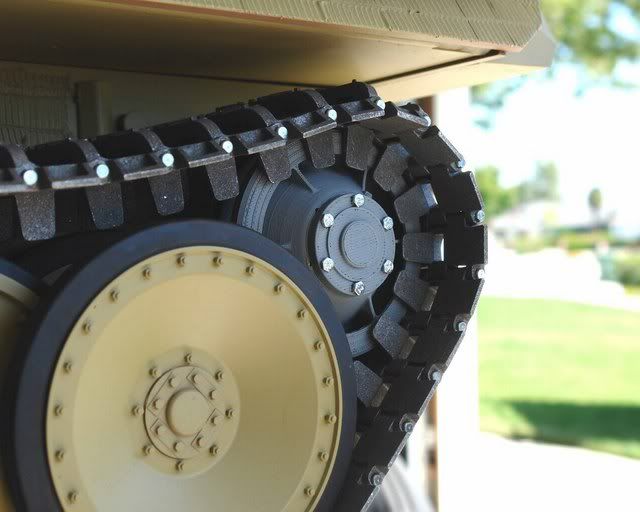
Here are some pictures of the very first 3D printed parts. Please note they were done rapidly(meaning very rough). They were just for me to check sizing, fit and overall look on my Armortek Panther. Also, the grease fitting cap is not shown attached just the base is present.
I would of liked to clean these up a bunch before even posting, but I'll be traveling and I'm sure some of your were as anxious as me to see em. So I thought I'd post them.
Will follow up shortly with more info
Thanks for your patience.
Tim
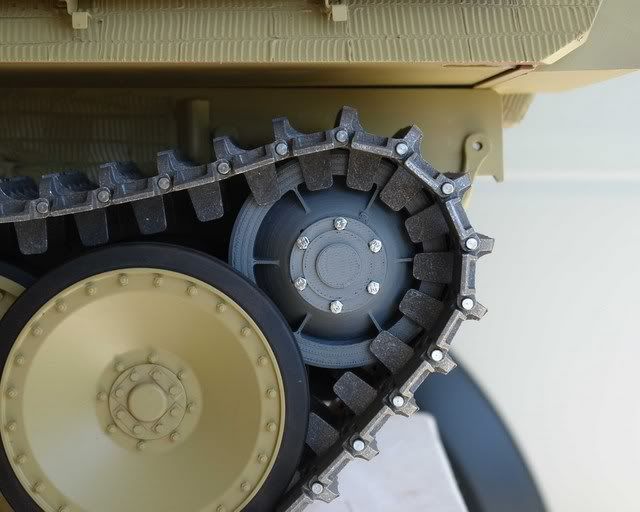
Posted: Tue Jul 31, 2007 9:54 pm
by Kent Wiik
Yes,
I love it!
But Tim please can you make the 6 bolts a little bit smaller.
The bolt heads is to big compare with the real ones seen in Rich photos above (posted Jul 22, 2007 3:07am).
Thanks for posting - really appreciate it and your effort making them.
Cheers
Kent