Build Problems And How To Deal With Them?
Posted: Mon Jun 13, 2011 11:59 am
On these boards, there are many tanks being built to an extremely high standard, and there are many helpful tips included in these builds when it comes to making our tanks look realistic.
But, as a newcomer to this hobby, I've come across a fair few problems that many others must have had, but hardly any mention is ever made, if at all, concerning these problems, and how to get around them.
I find that the instruction book, is not as clear as it could be in some sections, and I find myself scratching my head in frustration, trying to work out how parts go together.
Here's a classic example:-
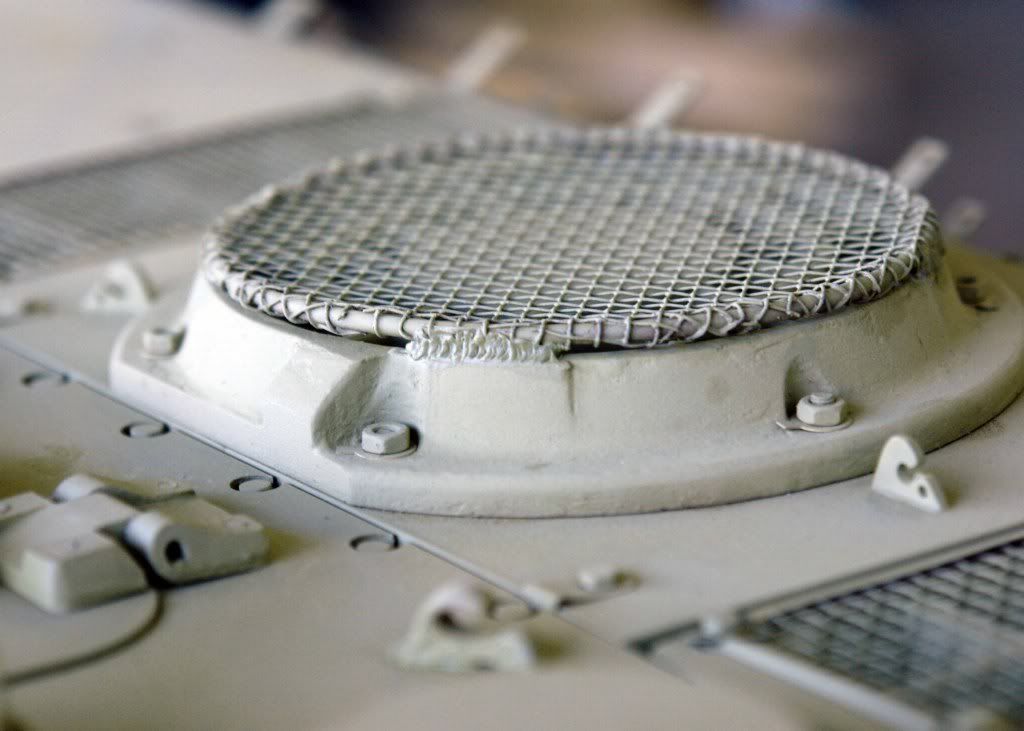
Page 24 - Pack 9 Deck Detail Parts
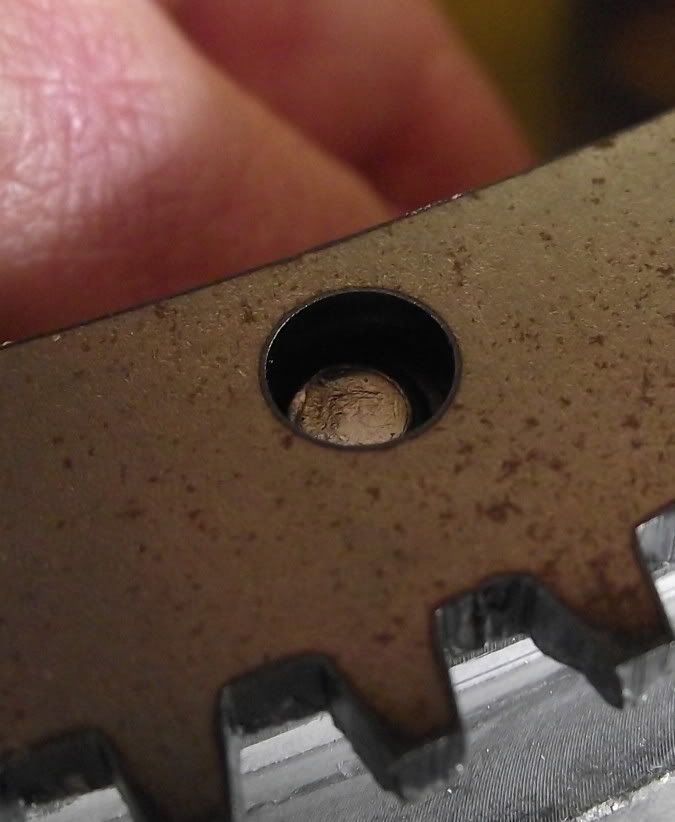
According to the instruction book, the Fan Grill(CH0642) and the Fan Cover(CH0627), are fitted to the fan cases, using M3x6 Hex bolts.
There is no mention of how many fasteners are used, so I assume it is 1 per fan, as there is a hole in the centre of the grills.
Where does the bolt go?

There is no hole in the centre of the Fan Case.
Another problem that I've come across, that I can find no mention of, is that the two cast parts that make up the main gun Mantlet, (CH0438 and CH0409) have holes that don't line up, by about 1.5-2mm.
The instructions say to 'File any extra clearance that may be required on these sand cast items', but I cannot get inside the outer mantlet to file away, as it is virtually inaccessible, and I'm loath to file as much as 2mm from the inner mantlet, as that seems a lot to take off from one part.
How did you guys get around that problem, as I can find no mention of this in any other posts?
The Turret Ring (CH0405), is an extremely tight fit when placed into the Turret Bearing(CH0117).
So tight in fact, that it is impossible to rotate the ring in the bearing by hand.
When the weight of the turret is on there, will it then rotate ok?
Does the tightness of these parts, not put too much stress on the motor and Ring Gear?
Are they supposed to be this tight? It's not mentioned anywhere.
I've had a few other times when I've been stuck, but managed to bodge/work my way around it eventually, but as a newbie to these kits, with absolutely no engineering skills whatsoever, I do find the instructions could be a little clearer in some areas.
I'm not trying to be negative here, I'm just trying to highlight some of the things that I've had problems with, and that no one else seems to mention, either in the build threads or elsewhere.
This place is a font of knowledge, so let's see more posts on how to get around those little frustrations that one (especially newbies), can come across while building one of these lovely kits.
Ta for reading.
But, as a newcomer to this hobby, I've come across a fair few problems that many others must have had, but hardly any mention is ever made, if at all, concerning these problems, and how to get around them.
I find that the instruction book, is not as clear as it could be in some sections, and I find myself scratching my head in frustration, trying to work out how parts go together.
Here's a classic example:-
Page 24 - Pack 9 Deck Detail Parts
According to the instruction book, the Fan Grill(CH0642) and the Fan Cover(CH0627), are fitted to the fan cases, using M3x6 Hex bolts.
There is no mention of how many fasteners are used, so I assume it is 1 per fan, as there is a hole in the centre of the grills.
Where does the bolt go?
There is no hole in the centre of the Fan Case.
Another problem that I've come across, that I can find no mention of, is that the two cast parts that make up the main gun Mantlet, (CH0438 and CH0409) have holes that don't line up, by about 1.5-2mm.
The instructions say to 'File any extra clearance that may be required on these sand cast items', but I cannot get inside the outer mantlet to file away, as it is virtually inaccessible, and I'm loath to file as much as 2mm from the inner mantlet, as that seems a lot to take off from one part.
How did you guys get around that problem, as I can find no mention of this in any other posts?
The Turret Ring (CH0405), is an extremely tight fit when placed into the Turret Bearing(CH0117).
So tight in fact, that it is impossible to rotate the ring in the bearing by hand.
When the weight of the turret is on there, will it then rotate ok?
Does the tightness of these parts, not put too much stress on the motor and Ring Gear?
Are they supposed to be this tight? It's not mentioned anywhere.
I've had a few other times when I've been stuck, but managed to bodge/work my way around it eventually, but as a newbie to these kits, with absolutely no engineering skills whatsoever, I do find the instructions could be a little clearer in some areas.
I'm not trying to be negative here, I'm just trying to highlight some of the things that I've had problems with, and that no one else seems to mention, either in the build threads or elsewhere.
This place is a font of knowledge, so let's see more posts on how to get around those little frustrations that one (especially newbies), can come across while building one of these lovely kits.
Ta for reading.