Page 1 of 2
Panther in for service
Posted: Tue Mar 23, 2010 1:32 am
by Tim Bowman
Hi everyone
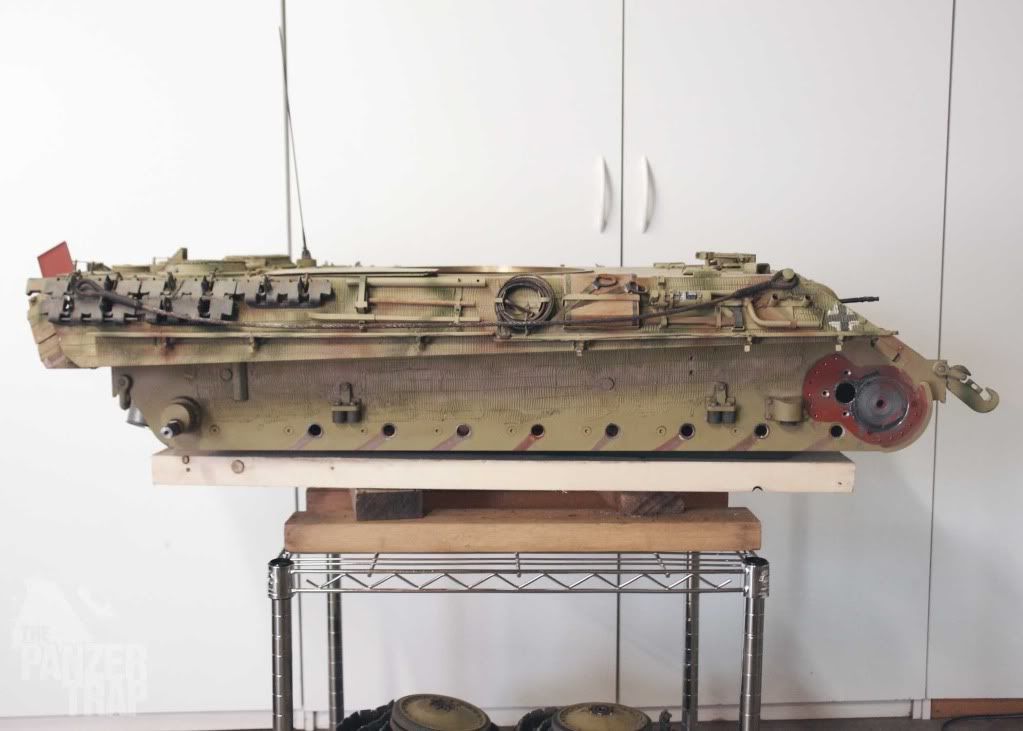
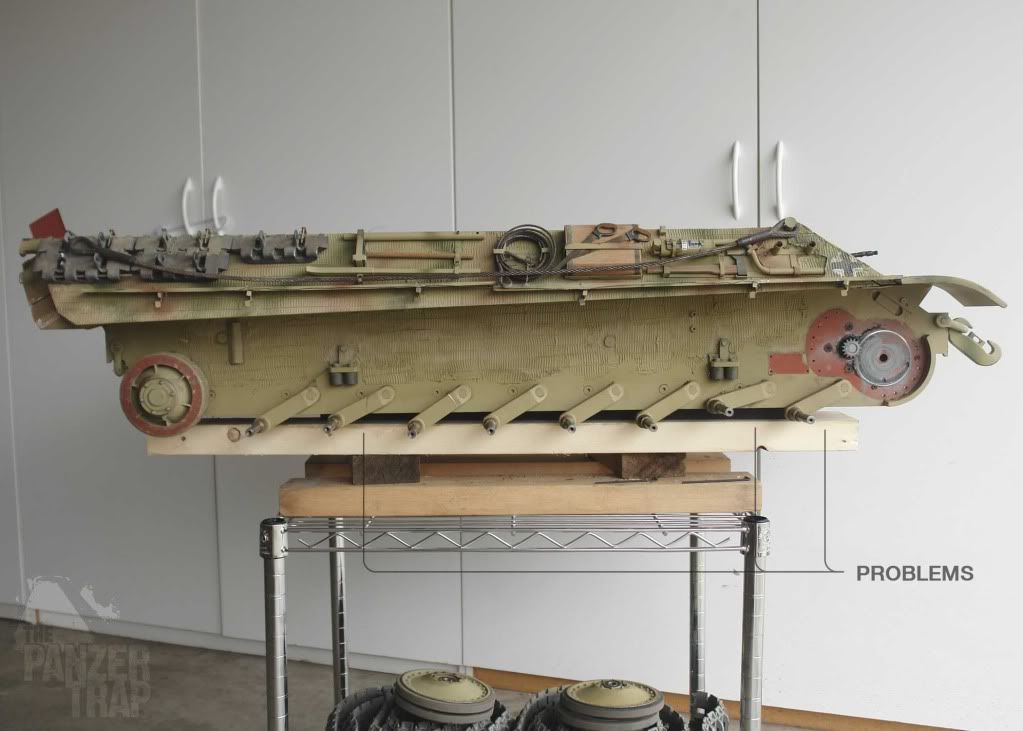
On my last run, the Panther had a serious suspension problem and it was a good excuse for me to get it back on the rack for a suspension overhaul. My Tiger's suspension was very easy compared to what I have gone through with the Panther. A
ll due to my hasty assembly and NOT the kit. I guess that's why Mark wrote that part about taking your time with this part of the assembly in big bold letters in the instructions.
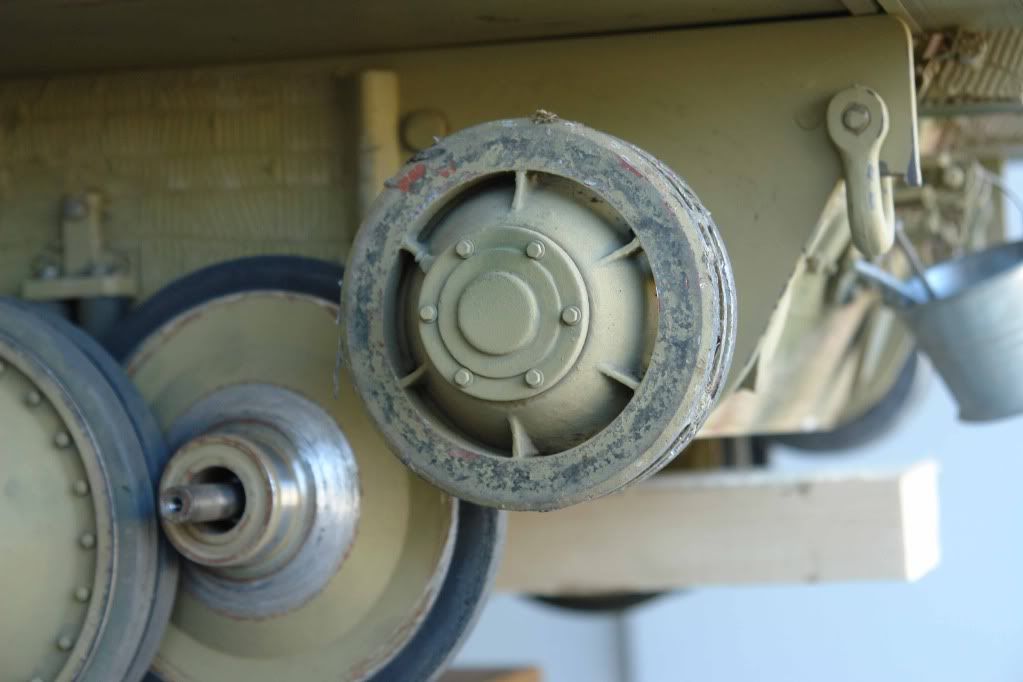
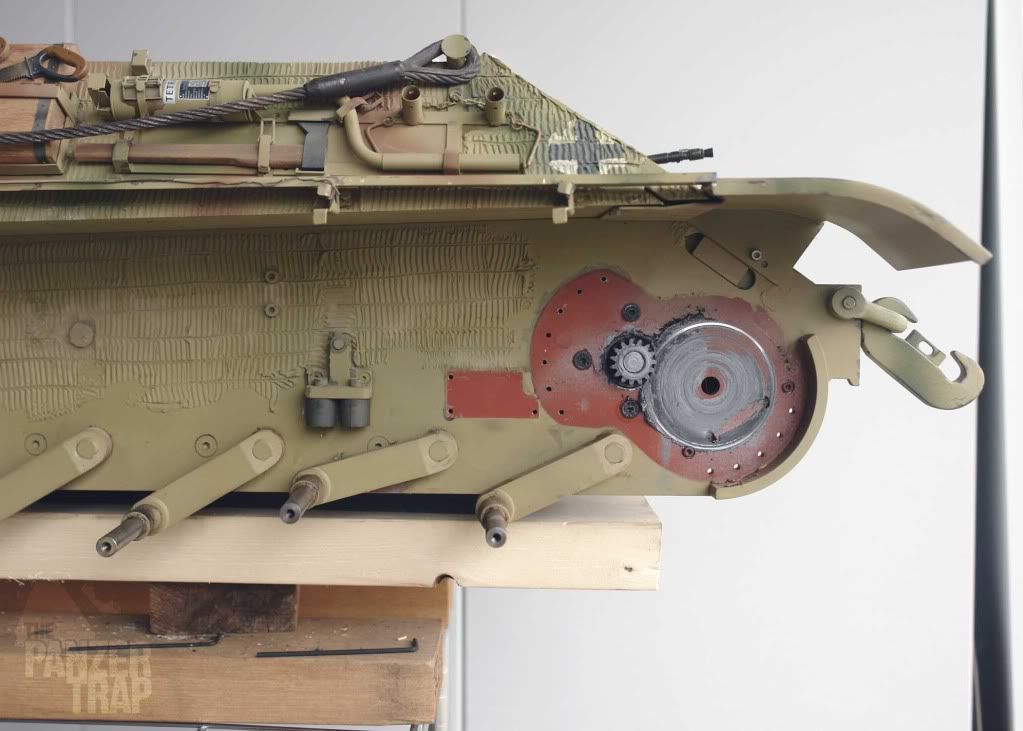
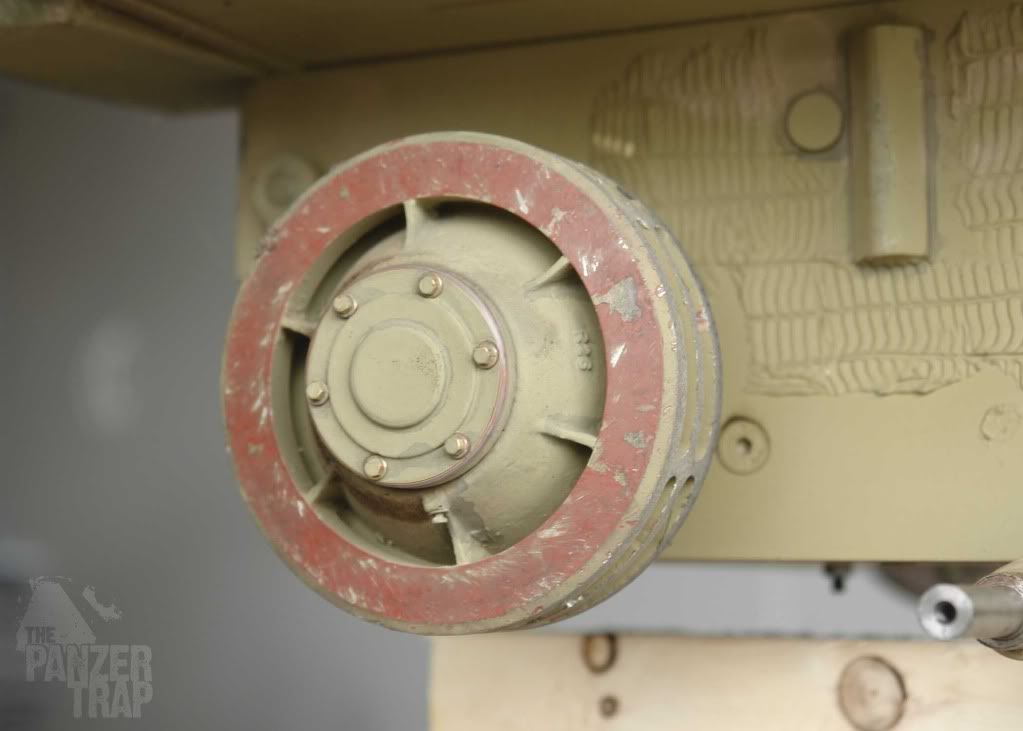
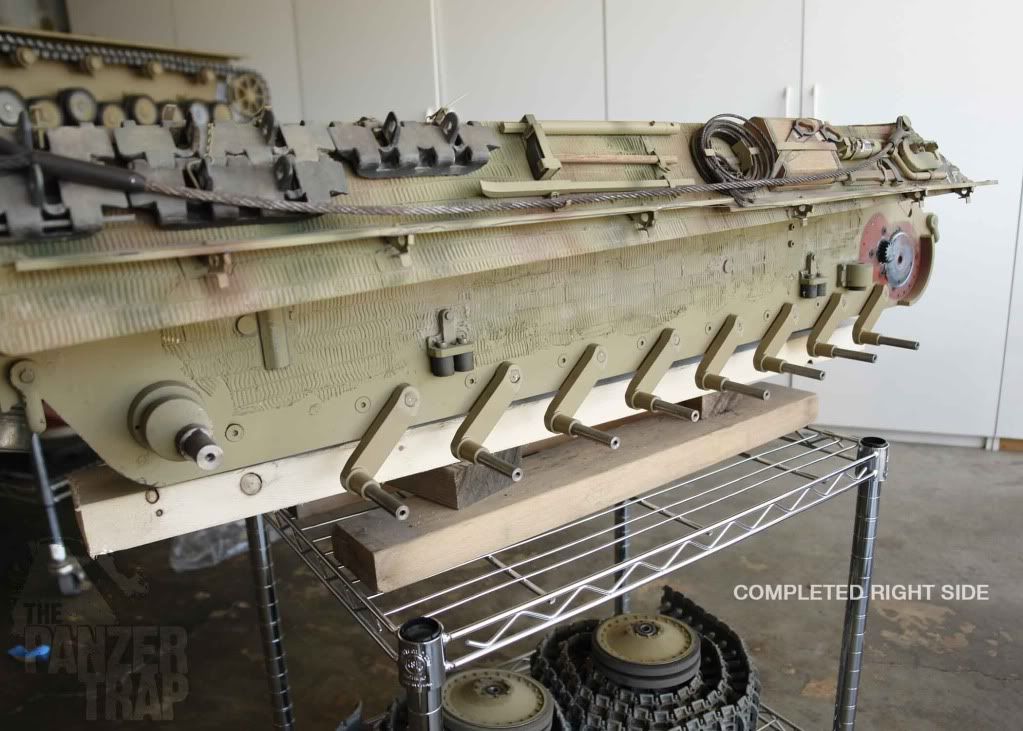
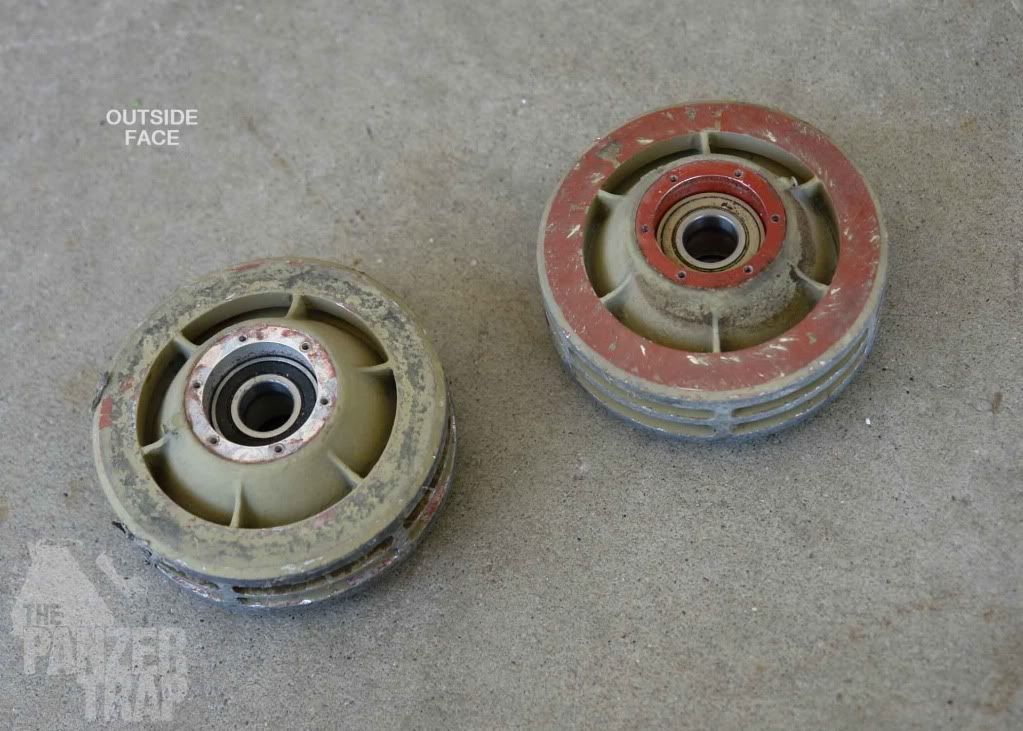
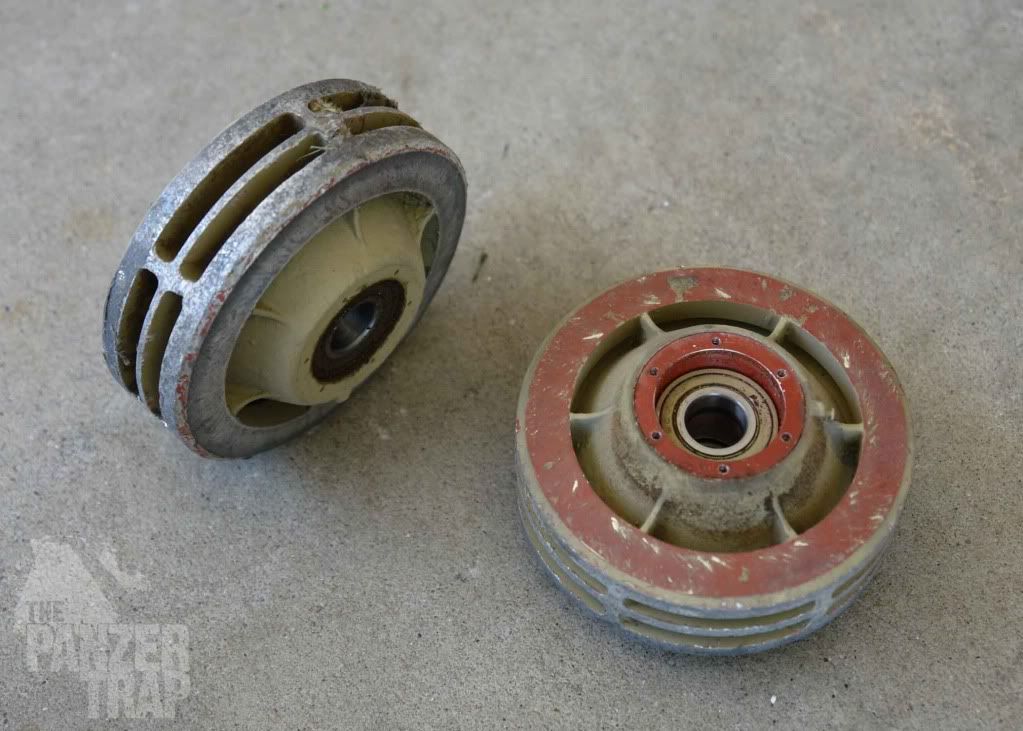
Some photos of wear and tear. The good news is that both idler wheels I designed are holding up very well including the resin detail hub inserts. They are untouched by the track horns. The right side idler was worn down to red primer whereas this side was not.
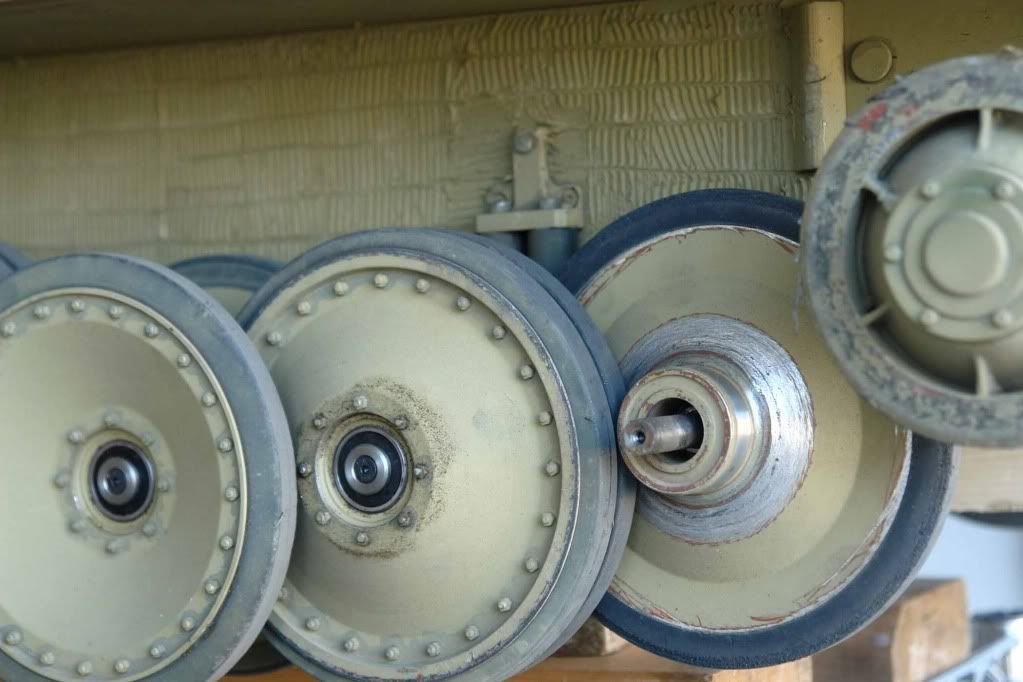
Several of my wheels had been polished by the tire from the next wheel like the photo below.
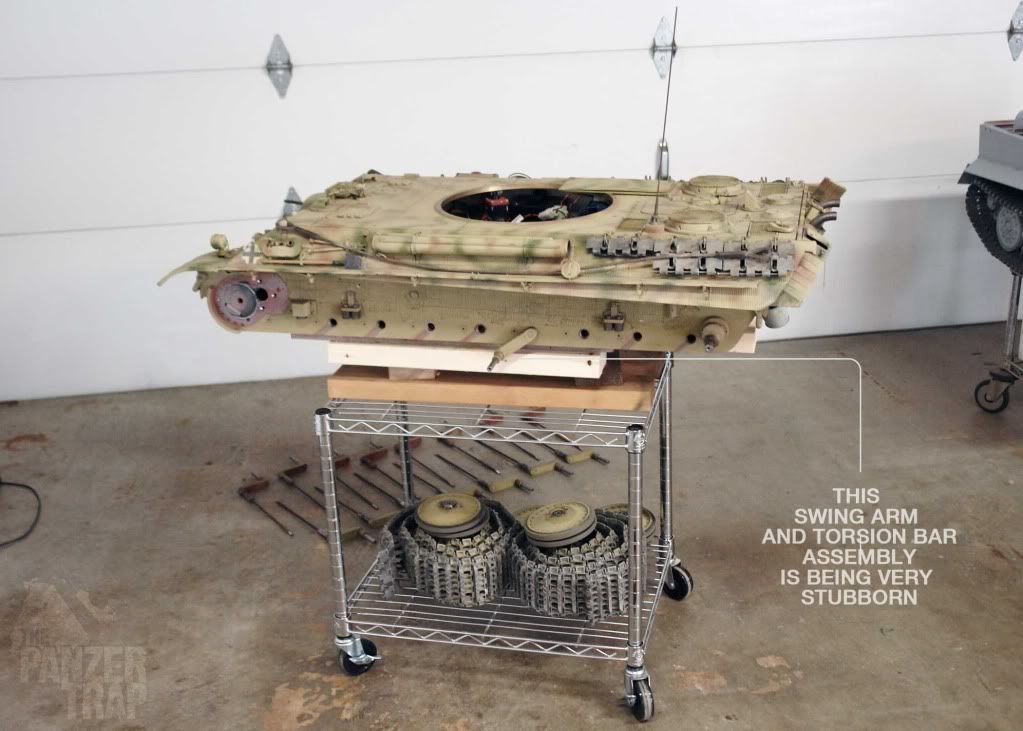
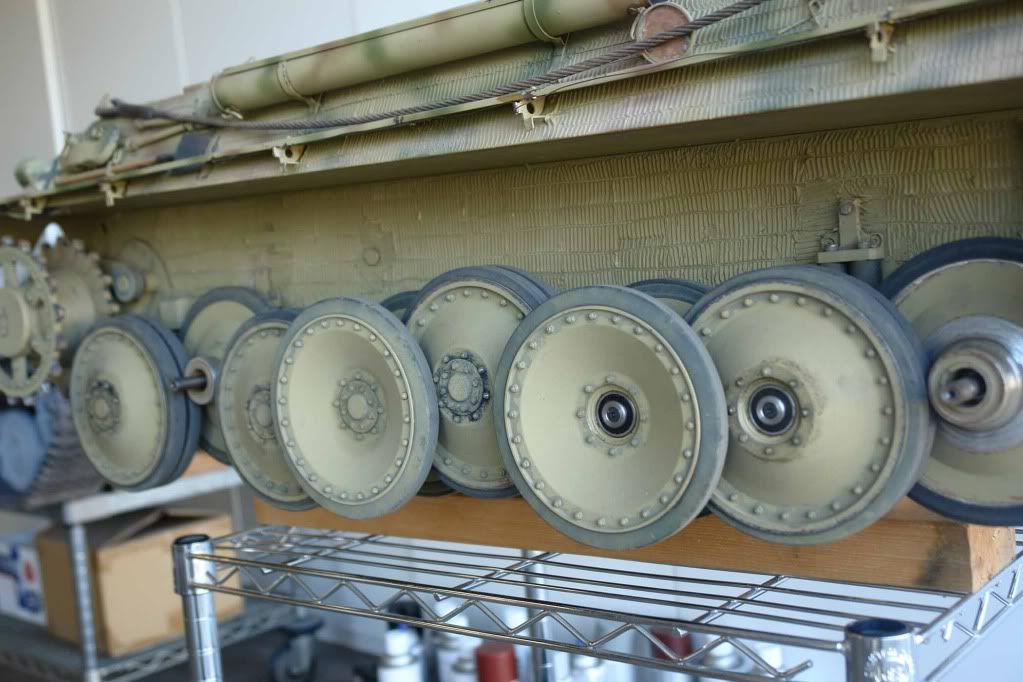
In this photo, the two wheels/swing arms giving me trouble can be seen # 2 and #5.
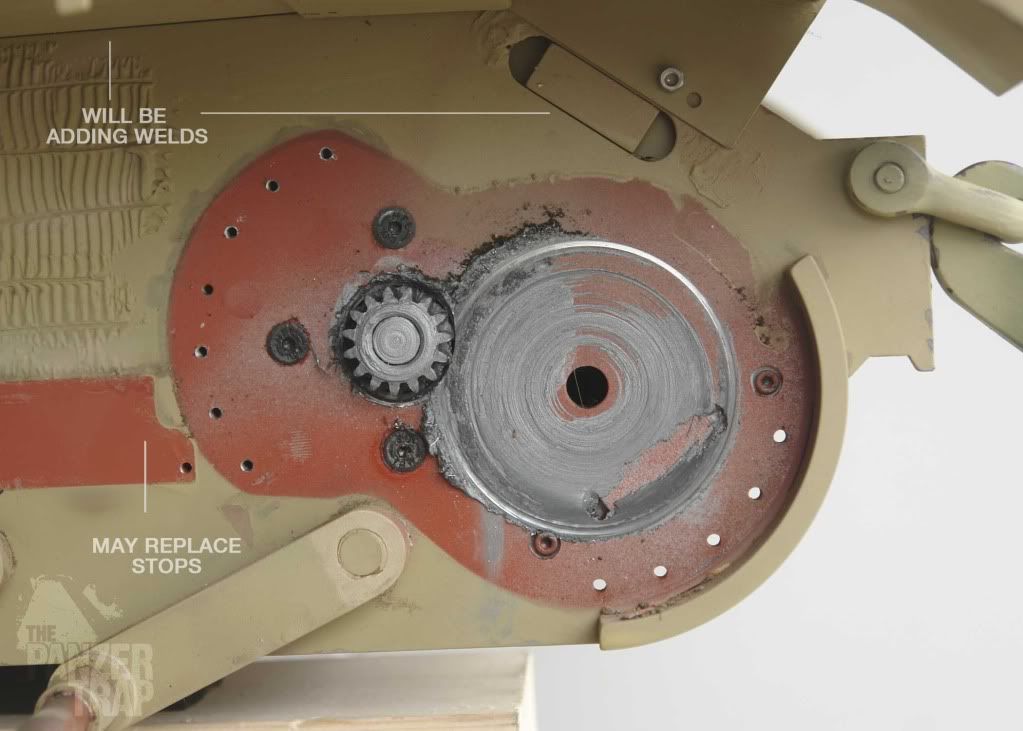
Interesting wear on the inside of the drive sprocket.

This may give me the opportunity to add corrected bump stops and add welds on the pannier I left off during this build too.

Tim
Posted: Tue Mar 23, 2010 8:40 am
by Adrian Harris
Some interesting photos Tim
Is there room to ease the wheels further apart or is the rubbing "prototypical"

Adrian.
Posted: Tue Mar 23, 2010 10:40 am
by Derek Attree
Hi Tim
This rubbing of the wheels happend on the real thing too.
it was obvious form lots of my Panther books.
The 2 wheels riding high are probably due to the torsion bars
twisting or the screws coming slightly loose on the flats.
I had to re-do mine after its first run.
Derek
Posted: Wed Mar 24, 2010 5:55 am
by Tim Bowman
Thanks Adrian and Derek.
I'll be stripping the Panther's running gear soon and re-doing the torsion bars and some swing arm assemblies. Derek, you are exactly correct about the two wheels that are riding high.
What can I say, I had a feeling this day would come.

The Tiger suspension was done carefully and should be quite resilient. I purchased a mill and a lathe half way through the Panther build and it is making some things so much easier on the Tiger.
Thanks again for the comments.
Kind regards
Tim
Posted: Wed Mar 24, 2010 5:03 pm
by Allan Richards
Tim,
I don't have a Panther and cannot say from first hand experience what the problem of rubbing might be. The odd wear on the sprocket looks as though it could be from a slight miss alignment of the sprockets with the road wheels. When I built my Tiger I made sure that the wheels were spaced with the track to run nicely between the horns and either side of the horns as necessary and took every opportunity to remove any slack or wobble from the wheels. I think you will find that the supension will settle with age and is not a build fault. My Tiger has settled more at the rear where the heavy batteries are. I am sure with a lathe and mill at your disposal you will make a first class job of rectifying the issues.
This all said tanks are high maintenance machines and these models exhibit this trait as well.
Posted: Sat Apr 03, 2010 7:38 pm
by Tim Bowman
Thanks Allan
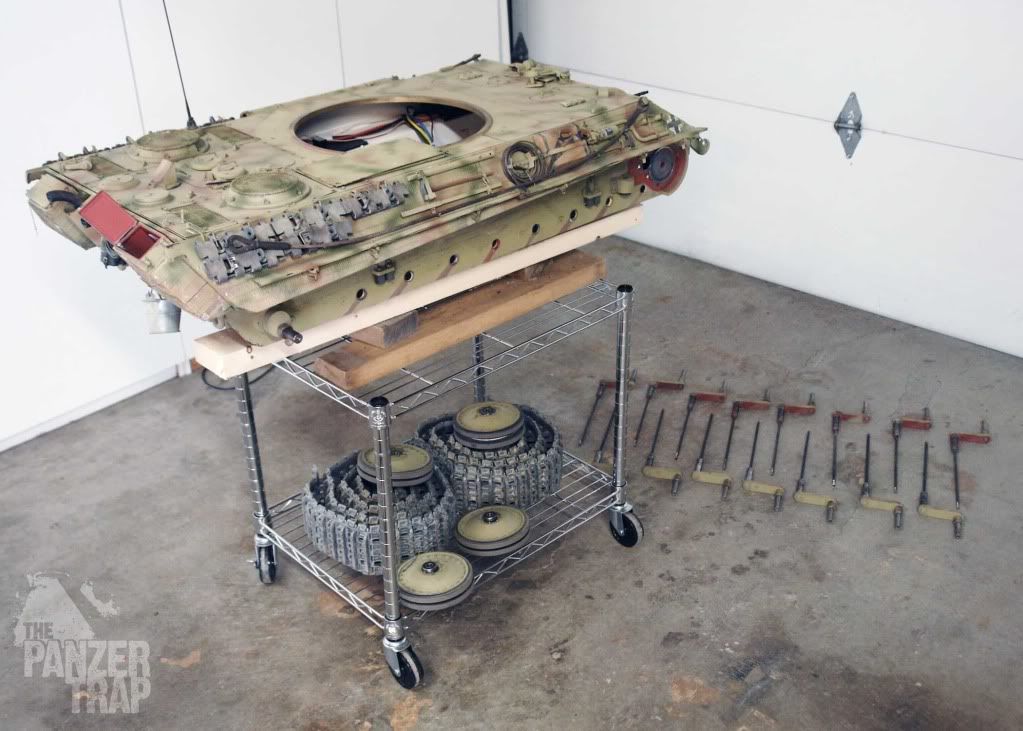
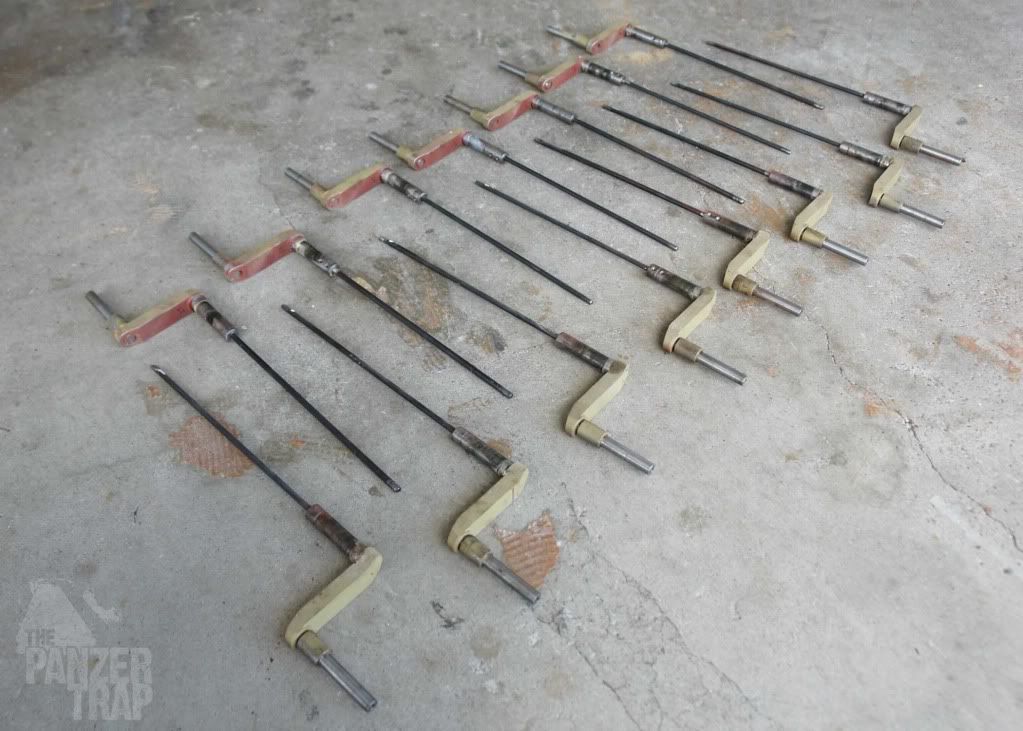
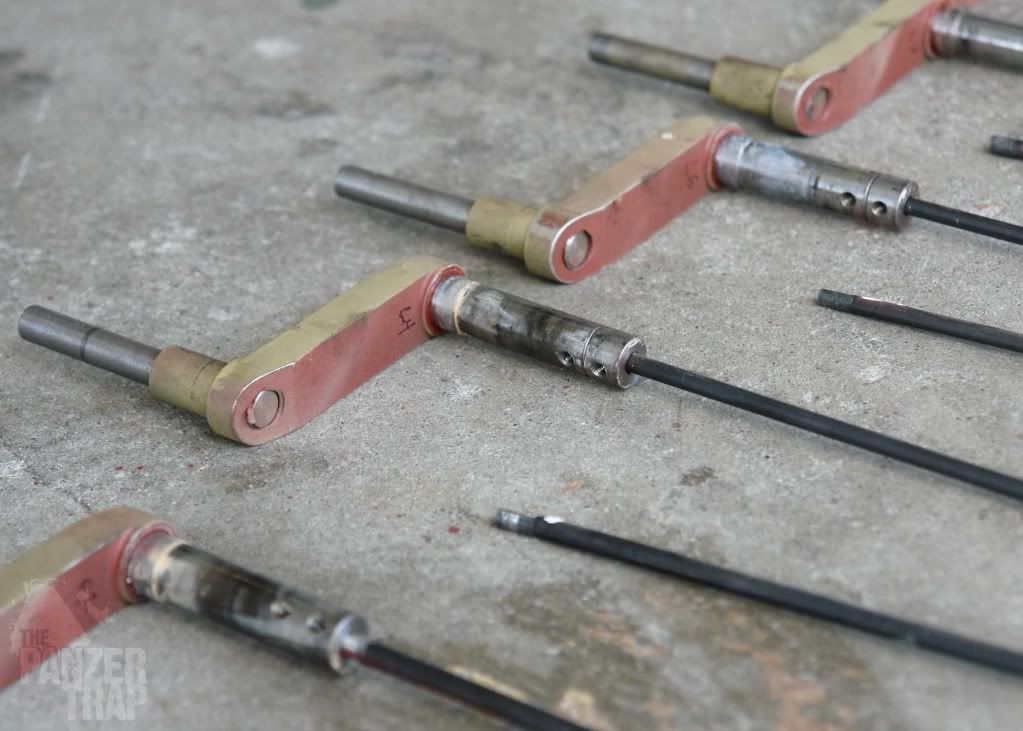
Stripping of parts continued this morning. Motor removal and torsion bar/swing arm removal is next.Some photos below(not sure how interesting they are but thought I'd document this anyways.)
Tim
Posted: Sun Apr 04, 2010 1:01 am
by Tim Bowman
Posted: Sun Apr 04, 2010 2:07 pm
by Kent Wiik
Interesting photos Tim, thanks for posting.
You will end up assembling your Panther twice before I have assembled my hull...
Keep telling us how to do it right so I only have to do it once

Kind regards
Kent
Posted: Mon Apr 05, 2010 6:26 pm
by Allan Richards
Tim,
Interesting stuff. I notice that the main sprocket gear has rubbed the hull sides slightly and caused some scuffing. On the Tiger I have there is nothing apart from the bearing fit preventing axial float of the shaft. I made up a spacer to go between the tapered bush and the outer bearing to control float. Alternatively you could take some mesurments and make a teflon or nylon stud to fit in the back of the gear to run against the hull side and prevent end float. I also stuffed the final drive gearbox full of grease. With the torsion bars I ground the flat such that it was at least the same width as the grub screw ends and I used serated cup head screws which seem to hold most firmly of all the screws I tried.
Posted: Mon Apr 05, 2010 7:31 pm
by Armortek
Hi All
The idea of using a nylon, teflon or bronze thrust washer to act against the face of the gear wheel is a good one. The placing of a spacer between the back of the taper lock bush and the outer bearing is a real "no no". Taper bush manufacturers specifically instruct users not to do this, because it prevents correct installation of the bush as they recommend. You are supposed to tighten the screws and then tap the bush up the shaft and into the taper bore to fully seat it, before retightening the screws. Clearly you can not do this with a spacer behind the bush.
When we first started using these bushes we did not think that this was particularly important, however, experience has proved otherwise and we have had failures reported due to this very issue.
If you are going to fill the case with grease you must ensure that it is spotlessly clean and sealed where the drive gear goes in. If not, you will end up with a case full of grinding paste and the gears will wear prematurely. Once again we have seen this on a number of "high mileage" Tiger 1 tanks. Much better to use a thin coat of dry film lubricant called DFSM or an open gear grease. Both of these products are available world wide from Rocol. Best advice remains simple. Unless you intend to do an awful lot of running, dont apply grease, leave them dry.
I am going to copy this into the "official technical advice section" because we feel it is important that everyone is given the benefit of the last five running experience. I realise that this "official advice" does not feel correct, but experience has shown it is really quite important.
Thanks for reading through this extended rant!
Mark
Posted: Tue Apr 06, 2010 9:17 pm
by Fredrik Jorgensen
Hi Tim...
Man thats a sad story to see it break down.
However if you have a lathe you can do a grid and secure it with a C-clip i think they are called Stefan did it on his Tiger and i hope i dont have to do it on my KT. Look in his gallery and you see what i meam.
I think as mark have explained a bushing aint a good idea.
Best regards
Fredrik
Posted: Wed Apr 07, 2010 4:04 am
by Tim Bowman
Allan, Mark and Freddie
Thank you for the informative posts. Very much appreciated.
I think I should make it clear, as I tried in my first post, This was completely the builders(my) fault.and not the engineering or design of the kit. I rushed the assembly of the suspension and have tried rectifying without completely pulling it apart to do it "the right way" hoping it would be good enough. This post was not and is not intended to suggest there is something wrong with the kit. There's not.
Again, my late Tiger's suspension went together easy and fast with the help of my mill and each torsion bar is rock-solid.
As far as the drive gear rubbing on the hull, I am not too bothered by it but will look into the great suggestions above. I'll clean it up and remove the synthetic grease I applied as recommended.
Many thanks all and hope to have some photos of the Panther reassembled and in running order in the near future.
Happy tanking
Tim
Posted: Thu May 20, 2010 2:21 am
by Tim Bowman
Wahoo! A nice box showed up today containing the parts for the Panther as well as all the goodies to get the Tiger 1 rolling under its own power.
Will attempt to get the Panther back on its tracks this weekend.
A big thank you to Gill and Armortek et al.
kind regards
Tim
Posted: Sun May 23, 2010 10:19 pm
by Tim Bowman
Hi everyone
More of this boring thread.

I spent most of yesterday and part of today completing the suspension swing arm/torsion bar assemblies using the new parts Gill sent last week. I am happy to say both sides are now completed and all fasteners are loc-tighted in position. Hopefully I will never have to touch them again.
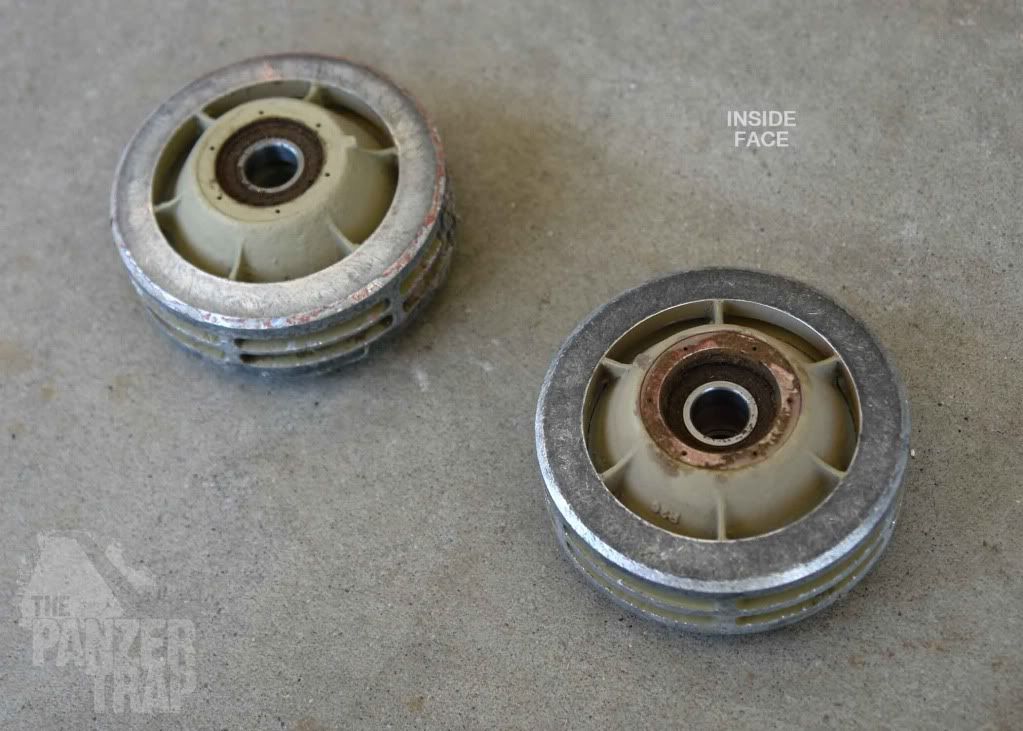
One thing I found is that on many of the swing arm/axel assemblies I had not completely tightened down the axle(at the time I thought I did) and this is what was causing misalignments. I think this is why my idlers were worn more on the inside face then the outer face.
Idlers and sprockets are mostly back on and wheels and tracks will go on tonight. Only drew blood on one finger so far.

swingarms and bottom edge of hull have a nice new coat of dark yellow paint.
regards
Tim
Posted: Sun May 23, 2010 11:09 pm
by Rocky Sembritzky
One thing I found is that on many of the swing arm/axel assemblies I had not completely tightened down the axle(at the time I thought I did) and this is what was causing misalignments. I think this is why my idlers were worn more on the inside face then the outer face.
Tim,
I noticed this while doing the assembly on my Tiger. I had to use a tap and die a few times as some of this was caused by threads that were "banged" up. In the end I put them in a 6" vice wrapped in a towell and cussed a lot, but they are all snug now.
Rocky
PS, check your e-mail