Page 1 of 8
M7 Priest
Posted: Sun Sep 13, 2009 6:45 pm
by Dave Dibb (Armorpax)
Hi All,
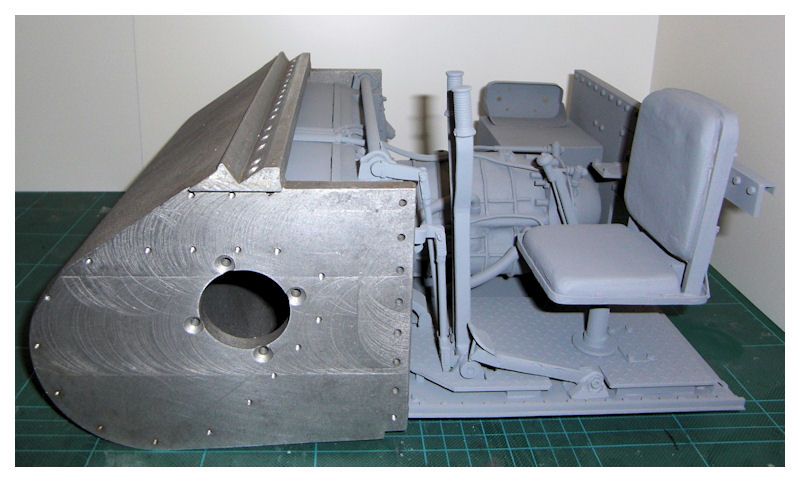
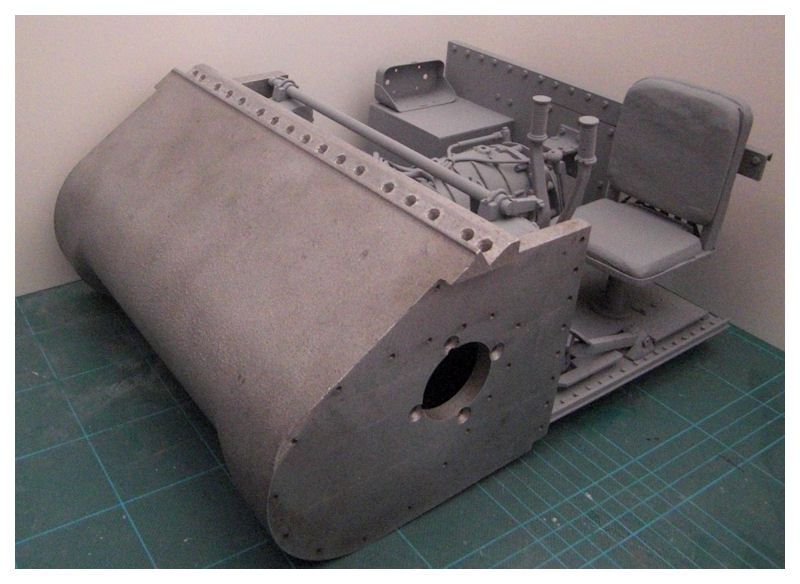
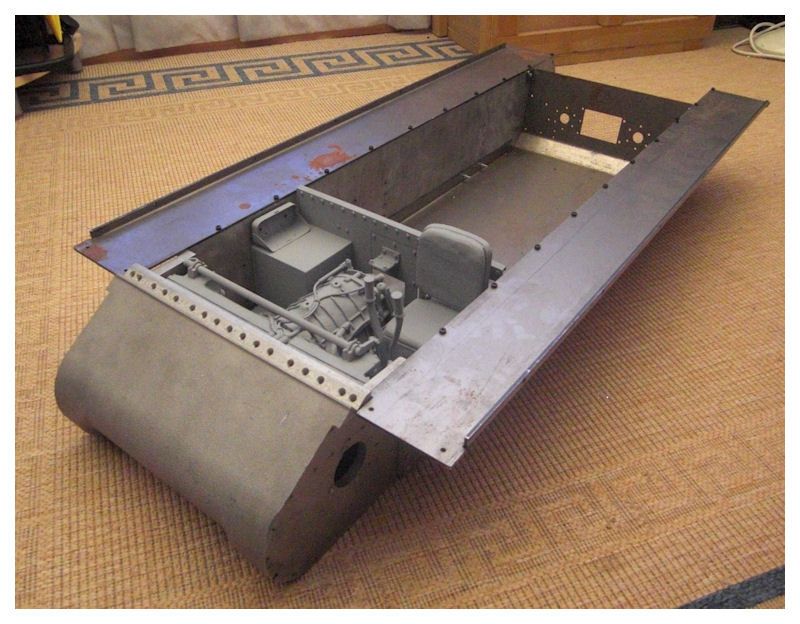
Well I can finally post something other than update parts. I picked up the Sherman drive casing yesterday and after showing Mark the setup he has come up with a solution to the drive and exposed interior.
Having built the interior without seeing the drive casing I was relieved that after a couple of minutes with the dremel and a slight easing of the front resin castings it dropped straight in.
This is going to be a partial scratchbuild around a number of the basic Sherman parts. Once I have the rest of the hull plates I can start on the gun platform.
Cheers
Dave

Posted: Sun Sep 13, 2009 9:32 pm
by Tim Bowman
Dave,
Super duper cool! 
It's nice to see you posting a project here.

Kind regards
Tim
Posted: Sun Sep 13, 2009 10:18 pm
by Robert E Morey
Dave,
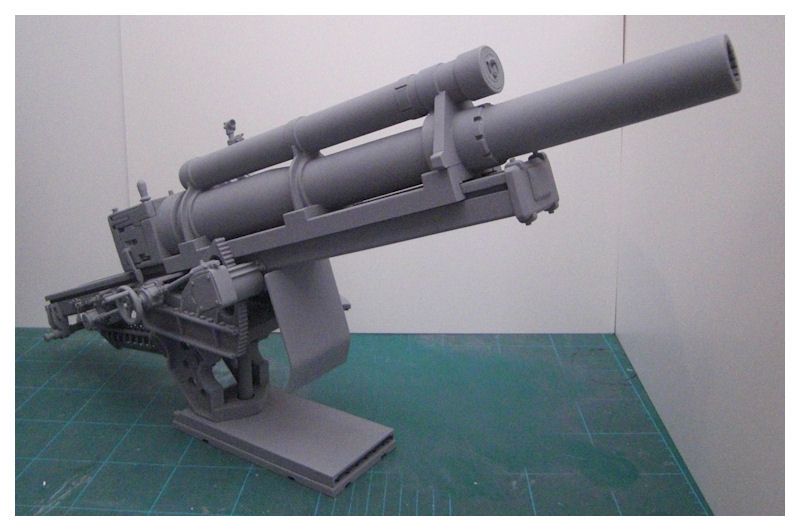
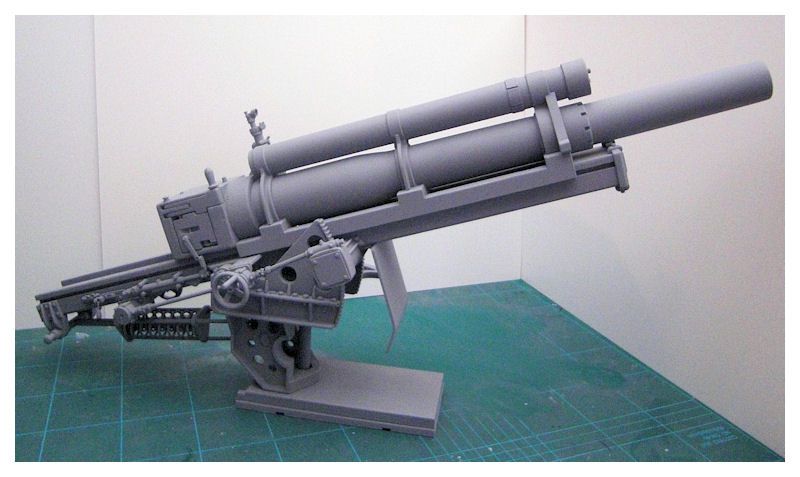
I saw some of your progress on the Armorpax forum. Thanks for posting here too! That is some seriously nice detail work - amazing! It looks like there will be no room for motors, so sadly no rc? That will be one heavy static model. But a beauty all the same. Great job on the 105mm and tranny case. Wow!

Sorry to hear about Spearhead as well. They (you guys) made some really great models. I hoped to have a hetzer someday, but my finances a bit of a bind lately.
Bob
Posted: Sun Sep 13, 2009 10:30 pm
by Dave Dibb (Armorpax)
Robert E Morey wrote:Dave,
I It looks like there will be no room for motors, so sadly no rc? That will be one heavy static model.
Hi Bob,
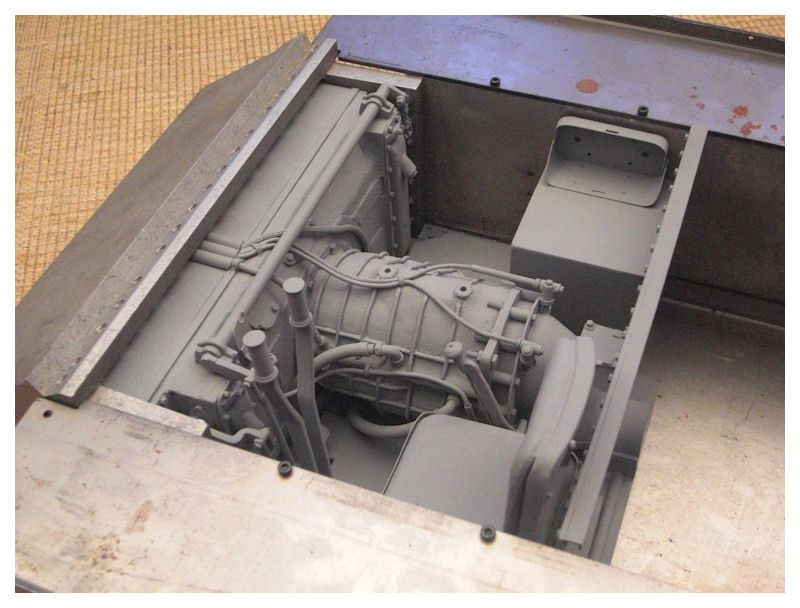
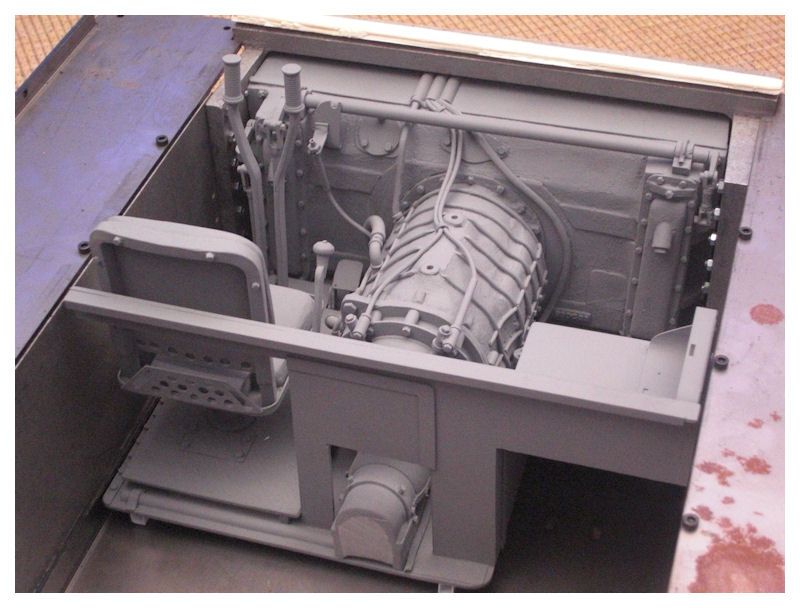
Motors under the gun platform, gear boxes fitted in the diff case, 2 x 8mm shafts runing through the drivers compartment being the only non scale bit. I was originally looking at chain drives either side with a slight loss of detail but Mark came up with the drive solution yesterday.
It will be a full runner

Cheers
Dave
Posted: Mon Sep 14, 2009 12:43 am
by Fabrice Le Roux
Dave,
Good to see you again yesterday. Your M7 parts are top notch, and underline the huge untapped potential of the Sherman kit for conversion.
BTW I am just grateful to Armorpax not to have to scratch build every itty bitty little detail.
Keep up the good work.
Cheers,
Fabrice
Posted: Mon Sep 14, 2009 8:16 pm
by Robert E Morey
Dave,
Thats great news! Full RC Priest will be amazing! Great job working out the details. Please keep posting your progress here!
Posted: Wed Sep 16, 2009 7:32 pm
by Paul Morris
Hello Dave.
It was good to meet you last Saturday mate and have a chat about things, well done again on the priest, i can certainly say it looks just as good "in the flesh" so to speak

.
Cheers Paul
Posted: Fri Jan 01, 2010 1:17 pm
by Dave Dibb (Armorpax)
Hi All,
Happy New Year. Finally got round to putting the Sherman hull together, now I have something I can build on!!
Cheers
Dave

Posted: Fri Jan 01, 2010 1:34 pm
by Derek Attree
Hi Dave
That is going to be one sweet model.
Derek
Posted: Sat Jan 02, 2010 4:59 pm
by Tim Bowman
Awesome! 
I agree with Derek.
Tim
Posted: Sat Jan 02, 2010 5:33 pm
by Dave Dibb (Armorpax)
Hi All,
Here's one for all you metal tank veterans, what do you clean the metal work with before painting and what primer do you use?
Also do you treat the light surface rust or just polish it out.
Cheers
Dave
Posted: Sat Jan 02, 2010 10:02 pm
by Robert E Morey
Hi Dave,
Your M7 is going to be an exciting model to watch. Unbelievable detail on the tranny housing. Fantastic job so far.
I would sand off the rust on steel parts prior to painting with a 3M Scotchbright pad or sand paper. Then prime with Rustoleum, Krylon or automotive type primer. I prefer grey primer for American vehicles.
Prior to painting I wipe down all steel parts with solvent (denatured) alcohol, mineral spirits, or laquer thinner (wear gloves) to remove the processing oils etc on the surface of the steel. Any good solvent that doesn't leave an oily residue can be used to clean the parts. Turpentine, Kerosine and WD40 will leave a residue and are not recommended prior to paint. Alum parts I just wash with soapy water and tooth brush to remove the polishing residue from the vibratory deburr process. Once dry they are ready to primer.
Hope that helps, Bob
Posted: Sat Jan 02, 2010 11:57 pm
by Fredrik Jorgensen
Dave thats a awesome piece.
I use acetone for cleaning and a s Bob said scotchbrite (red one)
then acetone again.
Last i do the hull and parts with sandpaper 120 then cloth wipe it then acetone or any spirits to clean the surface.
Then etch prime it if its aluminium, i heared from a old car painter that etch primer works very good on steel aswell.
then i just base coat it thin.
Looking forward to this priest!!
Freddie
Posted: Thu Jan 07, 2010 8:21 pm
by Sarah Frazer
Dave Dibb (Armorpax) wrote:Hi All,
Here's one for all you metal tank veterans, what do you clean the metal work with before painting and what primer do you use?
Also do you treat the light surface rust or just polish it out.
Cheers
Dave
Hi Dave,
If you go to a car paint supplier you will be able to get some 'Panel Wipe', which is available in 5L containers for about £9. This is what the car body shops use to clean the car surface prior to painting. If you are using cellulose paints then that will be a good place to get your cellulose thinners (anti-bloom) for about £10 per 5L tin.
Regards,
Sarah
Posted: Thu Jan 07, 2010 9:23 pm
by Dave Dibb (Armorpax)
Thanks all for the advice, I'm just having too much fun out on empty snow covered roads to concentrate on the model at the moment
, but once the slush stage gets here will be back on to it
Cheers
Dave