Page 1 of 3
Mid Tiger rebuild and paint.
Posted: Tue Jun 02, 2009 2:24 pm
by Paul Morris
Hi fellas.
Not done a build description befor so thought i would have a go This is a previously owned Tiger 1 that i am giving a birthday to for a customer, the tank is going to depict Tiger number "007" of the Stabskompanie, SS sPzAbt 101 {501} spring 1944... as reviewed on pages 80 -81 in the "Modellers guide to the Tiger tank" let me know if its of any interest. Below are 2 pics of how the Tiger looked when it arrived at my house.
[

img]
[

/img]
As you can see it had an overall green paint scheme which it turned out had been very heavily applied so, as i do not have any grit blasting facilities to hand it was out with the paint stripper

[

/img]
[

img][/img]
This is not a job i would recomend ...as its no fun.
[

img]
[

/img]
The tank when finished will not be exactly as it is in the book, as i have been asked to put some extra pcs on including a spare track bar across the front lower glacis plate. The stripping is now just about complete with only a few side skirts left to do so hopefully now the interesting bits can be started.
More pics to follow.
Cheers Paul
Posted: Wed Jun 03, 2009 10:34 am
by Kent Wiik
Hi Paul
Thanks for sharing as I love building sagas with photos

Nice Tiger as well with some nice aftermarket items like Vince’s good looking internal hull supports.
Sorry for saying this Paul but SS sPzAbt 101 #007 was a Late Tiger made in February 1944 and had steel wheels

The author to "Modellers Guide" also noticed his error and writes about it on page 135.
For those interested here is a link on this subject:
http://www.network54.com/Forum/47207/me ... bably+fake
Maybe a switch to #131 in the same unit.
Almost the same as in the Modellers guide but no BefehlsTiger.

Look forward to see more of your build.
/Kent
Posted: Wed Jun 03, 2009 4:44 pm
by Paul Morris
Hello Kent.
I wondered how long it would take you

i have of course pointed these things out prior to starting the job but "the customer is always right" and the tank on pages 80 and 81 is what i have asked to copy and that is what i will be doing, the last 007 i did for Dave was a late version.
Cheers Paul
Posted: Wed Jun 03, 2009 5:44 pm
by Tim Bowman
Hi Paul
Steel wheels or not, It's great to see another Tiger 1 build on the forum!!! Looking forward to seeing more of it as you progress.
Kind regards
Tim
Posted: Thu Jun 04, 2009 2:28 pm
by Paul Morris
Thanks Tim.
Paul
Posted: Mon Jun 08, 2009 11:03 pm
by Paul Morris
Hi Fellas.
Well finally put the paint stripper away
and started to do the interesting stuff again, heres a few more pics of my slow progress.
[

img]
[

/img]
I turned up the lifting lugs for the armored exhaust covers added some casting numbers and a cast tecture.
[

img][/img]
I did a new starter handle from brass, and i also made the access hatches on the belly plate as they wer missing, never fitted i also made a set of working fuel caps i know Vince made these for the mid Tigers along time ago but i don't think he will mind and they just add that little bit extra to the tank.
I will take a couple more pics this week as i have them fitted now onto the hatches.
Hope you like.
Cheers Paul

Posted: Tue Jun 09, 2009 11:56 pm
by Robert E Morey
Paul,
Whoooeeee that is an aweful color of green on them wheels! Glad your going to repaint her. Great looking details being added. I look forward to the seeing the repainted and updated version!
Bob
Posted: Wed Jun 10, 2009 4:25 pm
by Paul Morris
Hi Fellas.
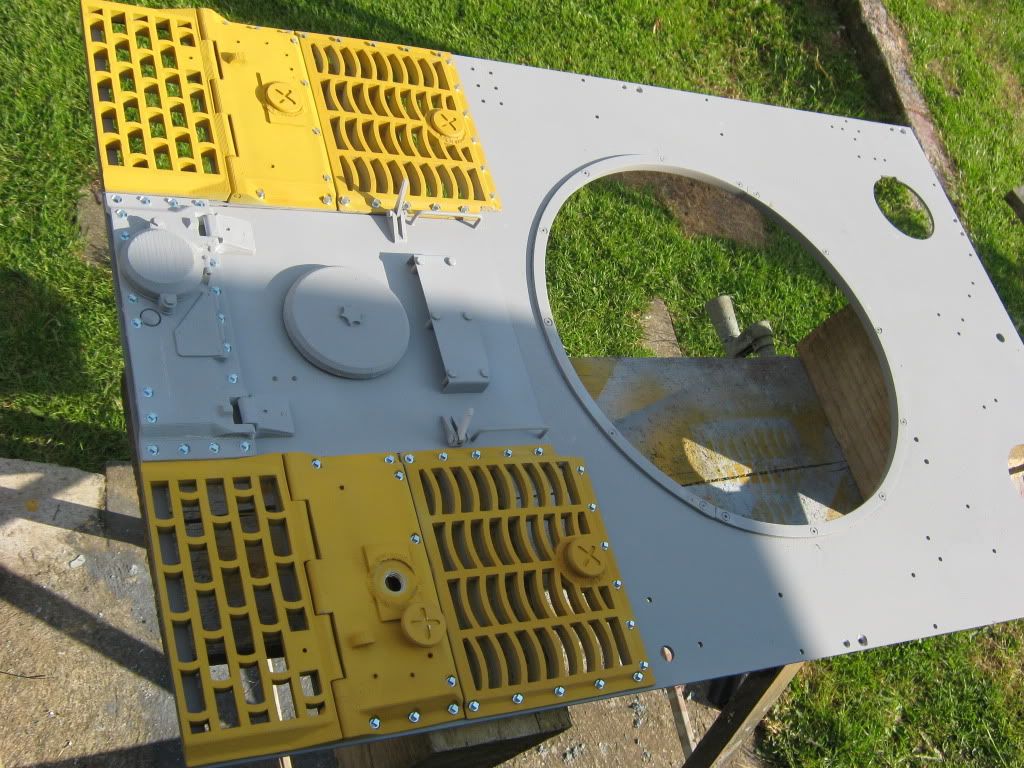
A little bit more progress, got the working fuel caps fitted and the deck in primer, and square headed deck bolts fitted.
[

img]
[
/img]
[

img]
Now ready for some more zimmerit i think and then wheel painting.
Cheers Paul
[/img]
Posted: Wed Jun 10, 2009 5:43 pm
by Kent Wiik
Nice progress Paul!
But only the upper (near the turret) located caps were for fuel.
The other pair was for water to the radiators.
May I ask why the welds around them? The real thing was without.
A bad thing having them welded when you run out of gas...

Can’t wait to see it with zimmerit.
Keep up the good work!
Kent
Posted: Wed Jun 10, 2009 5:47 pm
by Richie Wignall
Maybe the fitter was haveing a bad day?

anyway looks well to me,as allways, paul does top marks on his tanks, keep it up.
richie
Posted: Wed Jun 10, 2009 6:01 pm
by Paul Morris
Sorry Kent.
Its called Human error i will correct it, as for the fuel caps that is simply what i was calling them collectively.
Paul.
Posted: Mon Aug 03, 2009 5:49 pm
by Tim Bowman
Hi everyone
I was looking through reference books while planning my rear plate detailing and stumbled on these. Remembering Paul,s picture, I thought it was interesting and worth posting. I'm posting these simply as interesting reference.
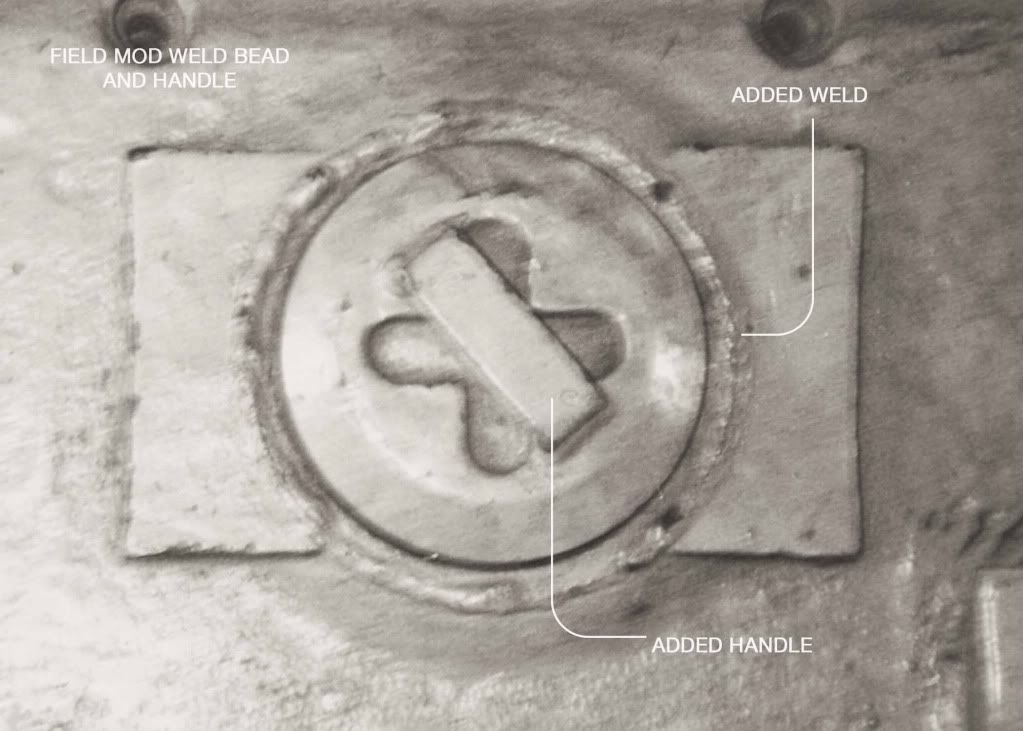
I'm not sure if the perimeter weld bead was to reduce spillage or something? Was it only done on the fuel filler cap and not water? Who knows.
regards
Tim
Posted: Sun Aug 09, 2009 9:24 am
by Paul Morris
Hello Tim.
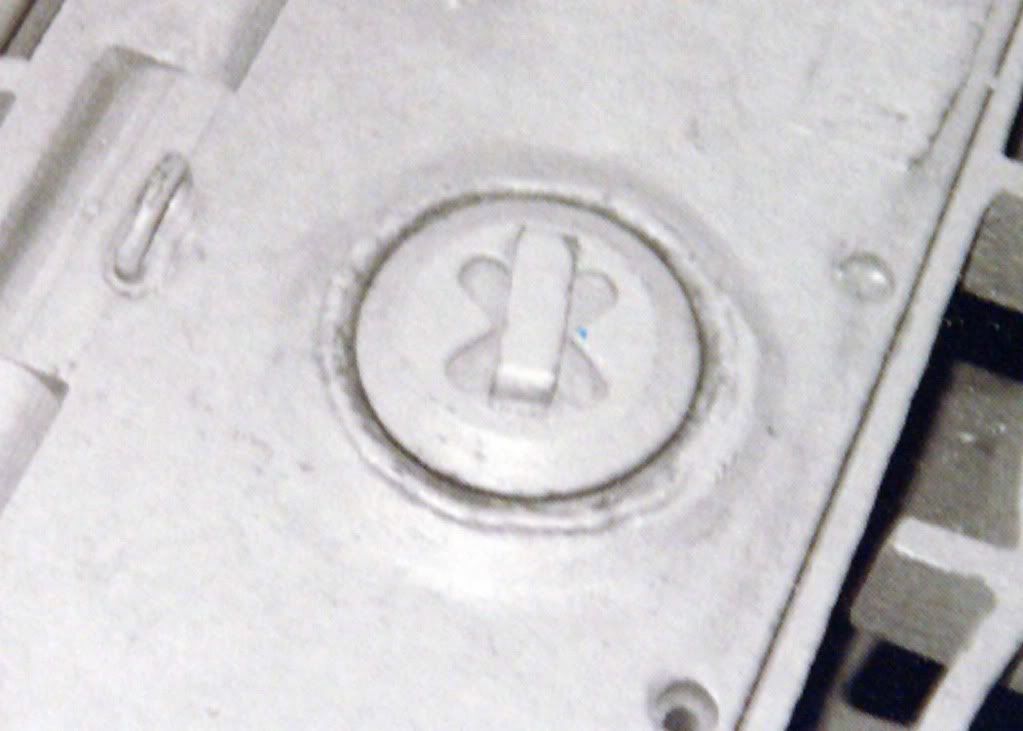
Thanks for that, the weld shown in your photo's is where i put it on the model i am doing...as you say who knows, i have removed it now but maybe it should be put back on? i made up the filler caps in seperate parts, the female fits into the deck sections and then the threaded removeable plug male part goes into that, i placed the welds around the female pc's not as was suggested round the cap itself! as i did not know wether or not on the real thing the caps were done this way or perhaps that the deck castings were machined to accept them?? perhaps someone could clear this up?
Cheers Paul
Posted: Sun Aug 09, 2009 11:57 am
by Kent Wiik
Oh sorry but I missed Tim’s find and yes I look like all 4 caps had a soft/smooth weld

Sorry Paul for misleading you.
Has found some other photos of the Saumur Tiger clearly showing welds.


Again, sorry Paul.
But even the sun has spots and remember that knowledge has its price
Cheers
Kent
Posted: Sun Aug 09, 2009 7:48 pm
by Stewart Ashton
Hi Paul,
I am in no way an expert on tigers or the various welds depicted in the photographs but an outsiders view (like me) would point out the angle of the cone shaped part of the filler cap looks similar to that of the weld angle

Which would sugest to me that the weld was added to help deflect small arms fire thus avoiding damage to the filler caps
Just my view on it and Tims pictures appear to support my theory

Of course I may be wrong and slide back under the rock whence I came
Regards Stewart

Ps Paul your fuel carrying trailer is superb