Page 1 of 2
Firefly Radio Box Details
Posted: Sun Nov 23, 2008 11:31 pm
by Allan Richards
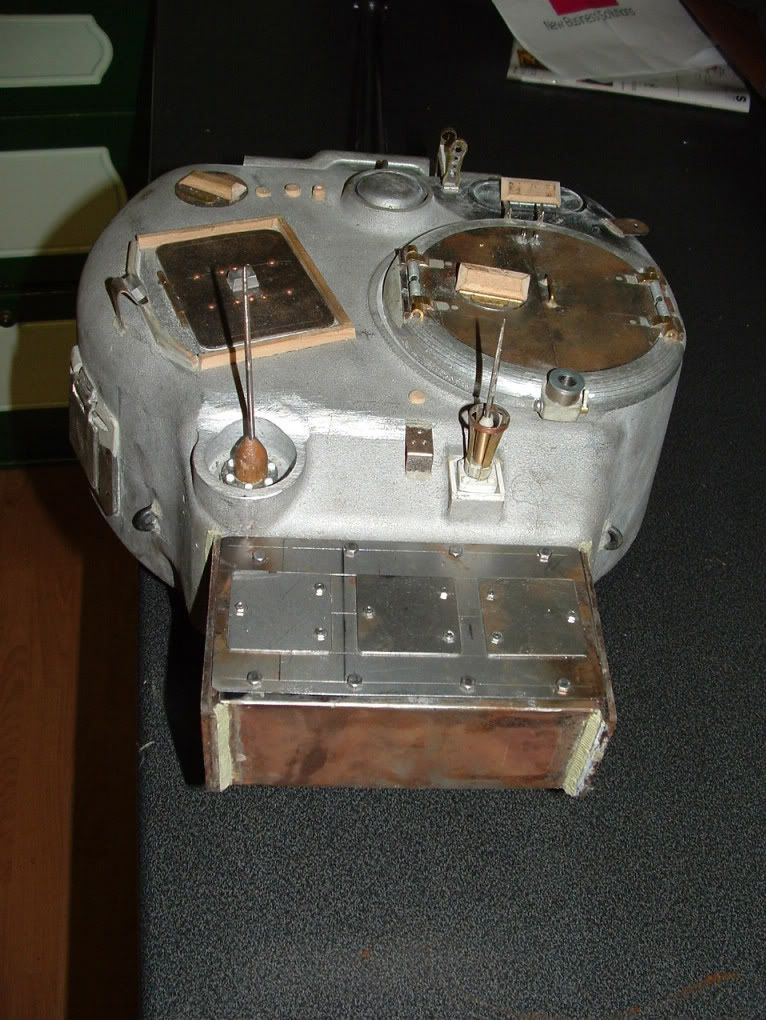
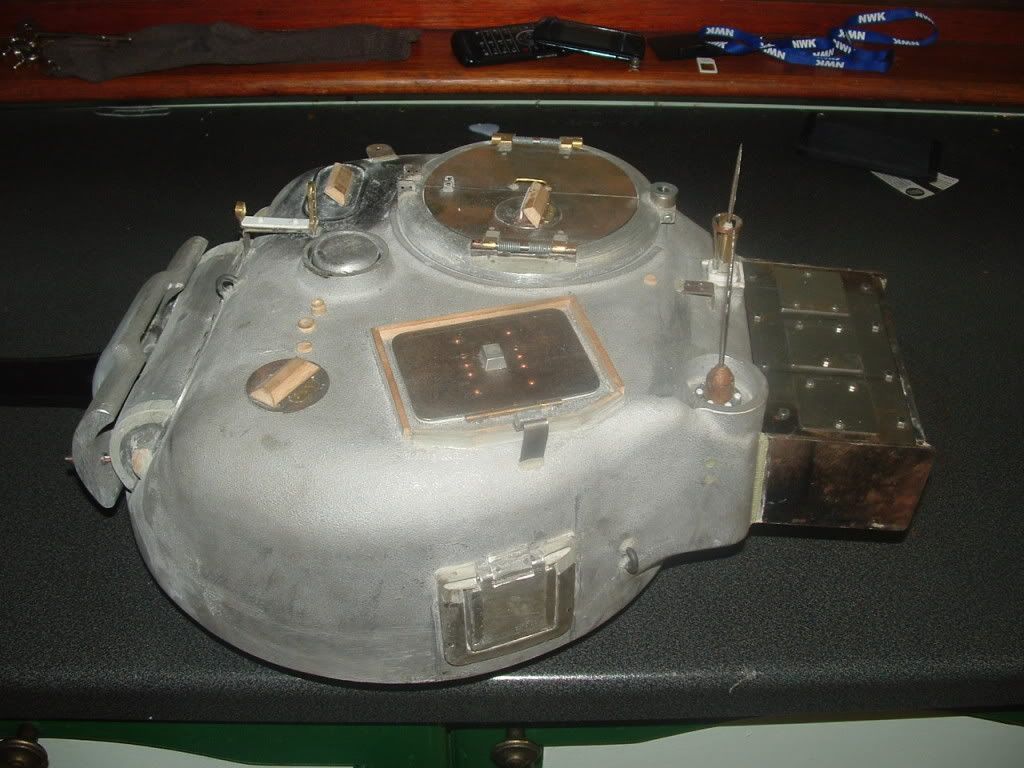
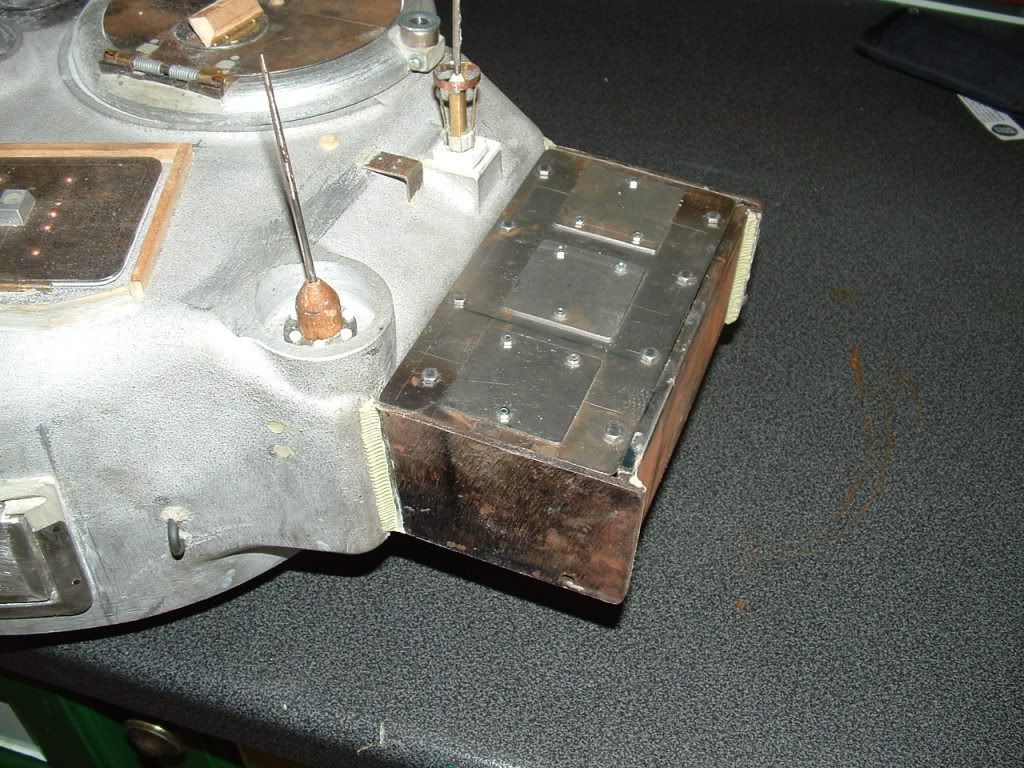
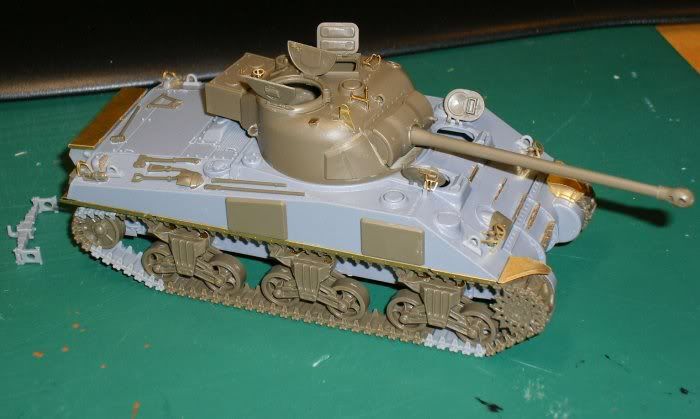
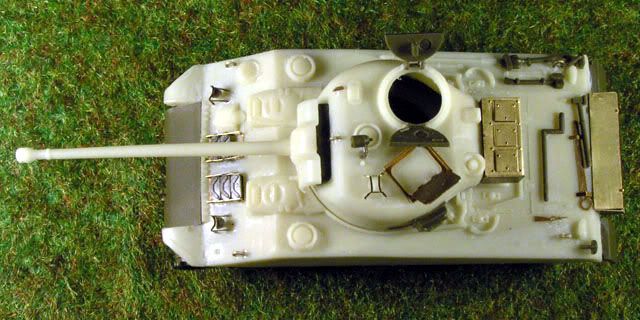
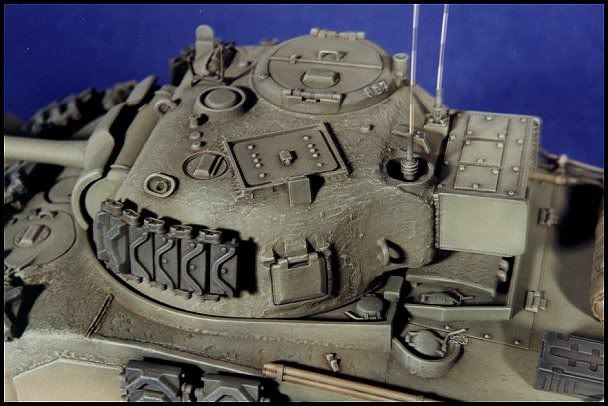
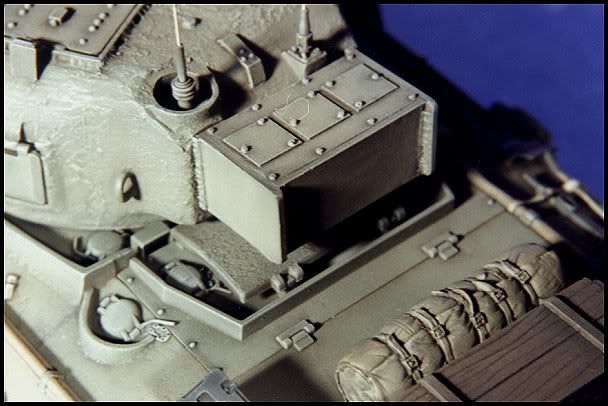
Can anyone help with detail photos of the top of the radio box on the rear of the Sherman Firefly turret? There are a couple of photos of models included to give an idea of what I'm after. In the book on the Polish Firefly's it shows eight hold down bolts on the top plate and three discs (like the top photo) The discs work out about 30mm dia at 1/6th scale and appear to be plain discs. On lower model below there are three squares with some detail on them. This looks better and I am tempted to follow this example. Out of interest what are these three things anyway?
Posted: Sun Nov 23, 2008 11:48 pm
by Tim Bowman
Hi Allan
Definitely make the square ones.

As the radio box was welded on, I would guess they are simply access panels to the radios?
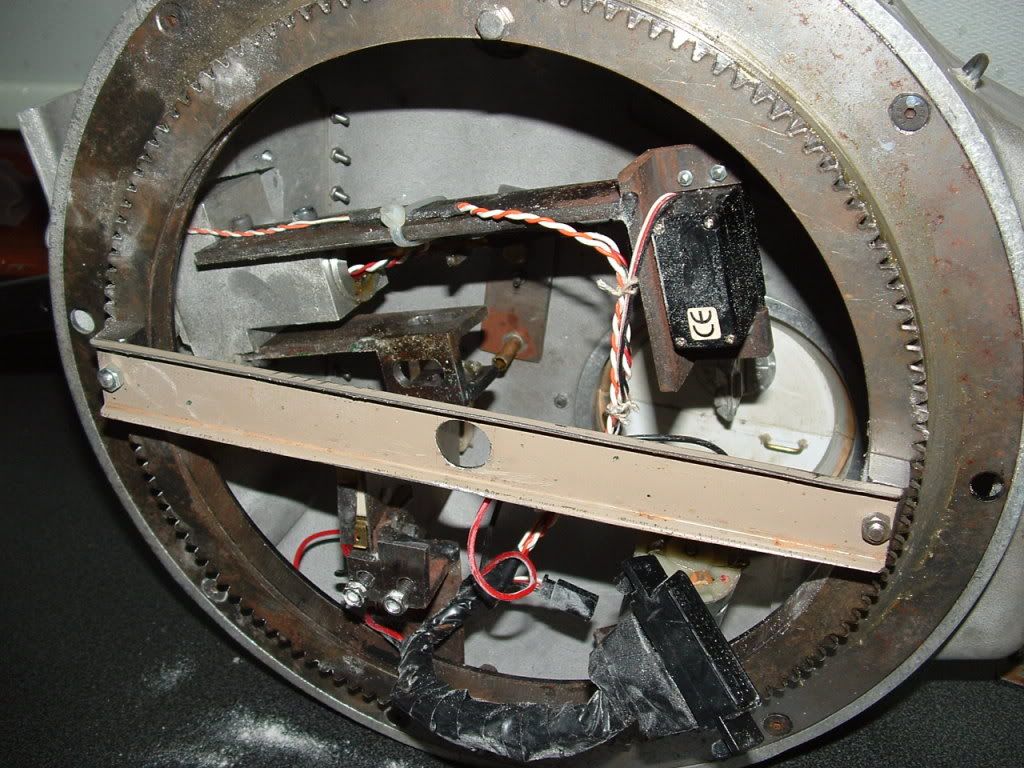
Model by Andrew Dextras

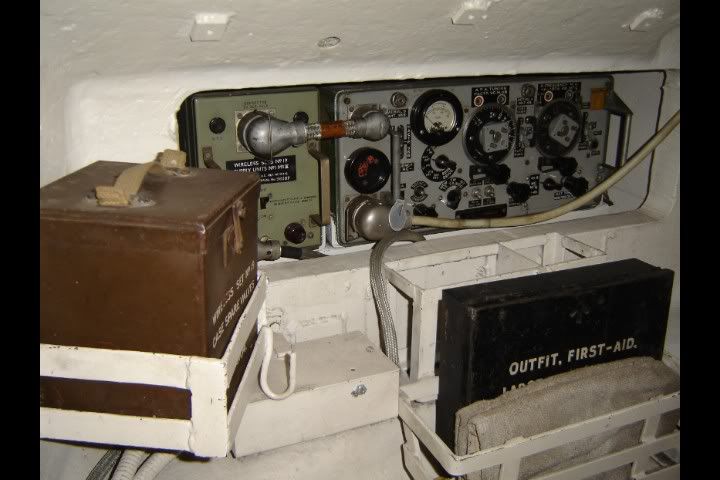
Interior view of radios.
Firefly Shermans are way cool!
Kind regards
Tim
Posted: Mon Nov 24, 2008 7:20 pm
by Allan Richards
Tim,
Thanks for the photos. First off, Andrew Dextras model is really well painted. I guess that the square panels are for access, but it seems strange that the top plate is bolted on but also fitted with these panels. Its a complicated way to go. I will make the square panels as its easier for me plus they have the additional detail of the three bolts on each plate. The story seems further complicated by the fact that the radio units could be removed into the turret for maintenance, so why any access in the top plate at all?
Firefly Radio Box
Posted: Tue Nov 25, 2008 8:01 pm
by Will Roberts
Hello Allan and Tim,
According to David Fletcher in Military Ordnance Special Number 19 about the Firefly he says that the designers of the Firefly turret originally intended the armoured box to counterbalance the weight of the 17 pdr Gun and only later was it decide to mount the radio in it. The lid on the box was removable to facilitate the "dropping in" of the radio and the rough opening in the turret rear was to enable the radio operator and commander to "reach through to check the dials and twiddle the knobs".
I expect the 3 rectangular panels allowed for the access the various maintenance points on the radio set to replace valves or remove antennae cables which were generally placed in the most inconvenient places without having to remove the whole lid. Being of thin plate they may have also been removed to allow the radio to cool down. I have found no definitive reason. A case of speak to a veteran I suppose.
Kind regards,
Posted: Tue Nov 25, 2008 10:11 pm
by Allan Richards
Posted: Tue Nov 25, 2008 11:40 pm
by simon_manning
THE BOX LOOKS GOOD,IT DOES GIVE THE TURRET A LOT MORE DETAIL ,YOUR CORRECT ITS TO COLD.
SIMON MANNING
Posted: Wed Nov 26, 2008 5:09 am
by Robert E Morey
Allan,
Great looking radio box and turret details. When painted it will look fantastic! Keep up the great work! And keep us posted on your progress.
Its time to invest in a propane garage heater!
Bob
Posted: Wed Nov 26, 2008 7:33 am
by Derek Attree
Hi Alan
Looking good and yes it is too cold to do anything.
I want to finish painting and I wonder if the paint would dry in the cold
If you put a heater on you get damp on everything its a pain..

Derek
Posted: Wed Nov 26, 2008 7:53 am
by Jeffrey Goff
Hi Allan, that turret is looking great, you have put a lot of thought and effort into this, and it shows, I know what you mean about the cold, I do my building in a shed at the bottom of the garden.
regards
Jeff
Posted: Wed Nov 26, 2008 8:26 am
by David Ward
Hello Allan
There are a couple of inside shots of a radio box in my Sherman gallery, page's 4 and 5. To access the inside of a 19 set the radio was pulled out of its case using the two handles on the front. Same for the power supply box with the rotary inverter in it.
David
Posted: Wed Nov 26, 2008 9:02 am
by Allan Richards
All,
Thanks for the comments, like the railways "we're getting there"
Derek,
I know what you mean with painting but I have had most success with warming the items you want to paint first. When I do the turret I will bring it indoors and warm it by the boiler then paint it in the garage and return it to the house as soon as the paint is touch dry. It smells a bit with the cellulose paint but "Er indoors" has to put up with that, after all I do pay the mortgage!!
Posted: Wed Nov 26, 2008 9:19 am
by Allan Richards
Dave,
Thanks for pointing out the detail photos in your gallery, I didn't think to look at these.
Posted: Wed Nov 26, 2008 9:19 am
by Derek Attree
Hi Alan
Same smell as nail varnish that she puts on in the bedroom perhaps I can paint the tank up there

Derek
Posted: Wed Nov 26, 2008 10:18 am
by Kent Wiik
Allan, that is one good-looking Firefly turret!
All that x-tra detailing makes it a very interesting model.
I like the idea of convert the Sherman to the sexier Firefly

Keep up the good work
Kent
Posted: Fri Nov 28, 2008 8:46 am
by Ian Rodney
Hi All,
I liked the interior shot of the Sherman turret, (thanks Tim) could not help but notice a First Aid Box that was just below the radio gear.
I have one one these First Aid Boxes back home, and taken photos of them.
Anyone interested in receiving a pic or two, just give me your email address.
I'm not quite sure how to attach the pics of the First Aid Box onto the FORUM PAGE!....Can anyone show me, remind me of how you do this again?
Cheers
Ian
from Glasgow, Scotland