Steve,s Panther build

Forum for discussion relating to the Panther
Post Reply
Steve Norris
Posts: 1231
Joined: Thu Jul 12, 2007 11:42 am
Location: Manchester
Has liked: 8 times
Been liked: 701 times

Post by Steve Norris »

A bit more progress.

Image

Suspension added, Not sure if the arm angle is too great yet as there is more movement in each arm with the new double torsion bars.

Image

Lots of torsion bars !

Image

The only change i have made to the suspension set up is to replace the supplied M4 grub screws with M4-6 cap heads allowing a much greater tightening torque to be applied.

Regards

Steve

simon_manning
Posts: 2050
Joined: Fri Nov 02, 2007 8:51 pm
Location: new forest,hampshire,u.k.
Been liked: 1715 times

Post by simon_manning »

the zim and hull side look superb steve,another notch upwards, changing the grub screws is a good idea too, regards simon/

Steve Norris
Posts: 1231
Joined: Thu Jul 12, 2007 11:42 am
Location: Manchester
Has liked: 8 times
Been liked: 701 times

Post by Steve Norris »

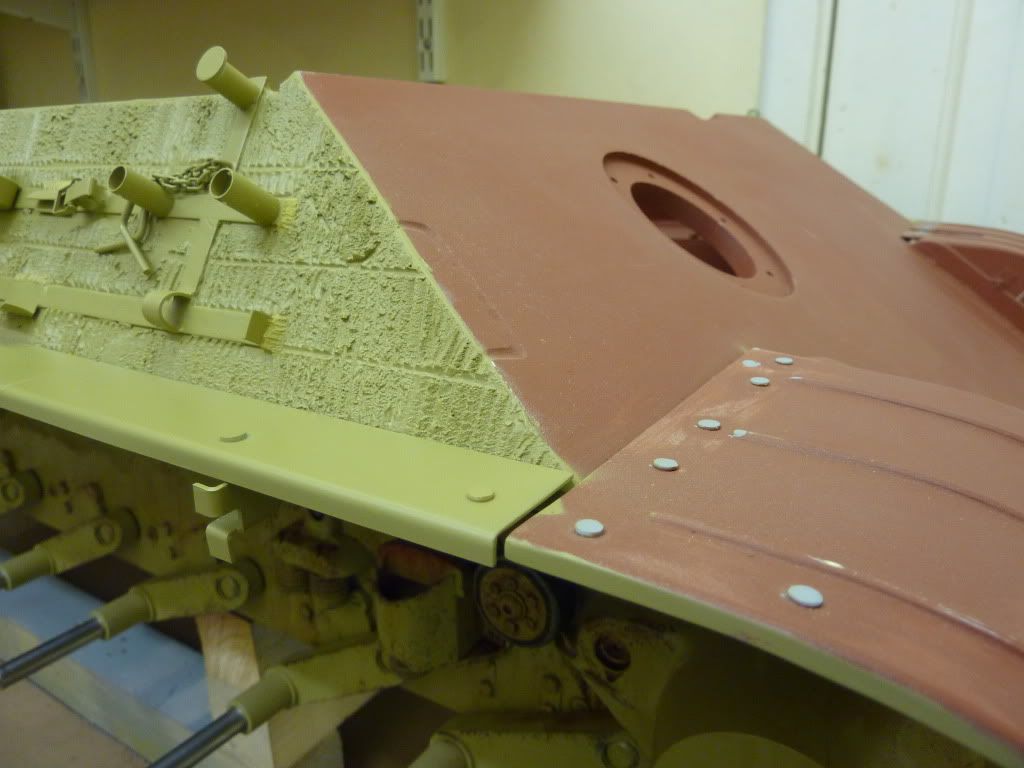
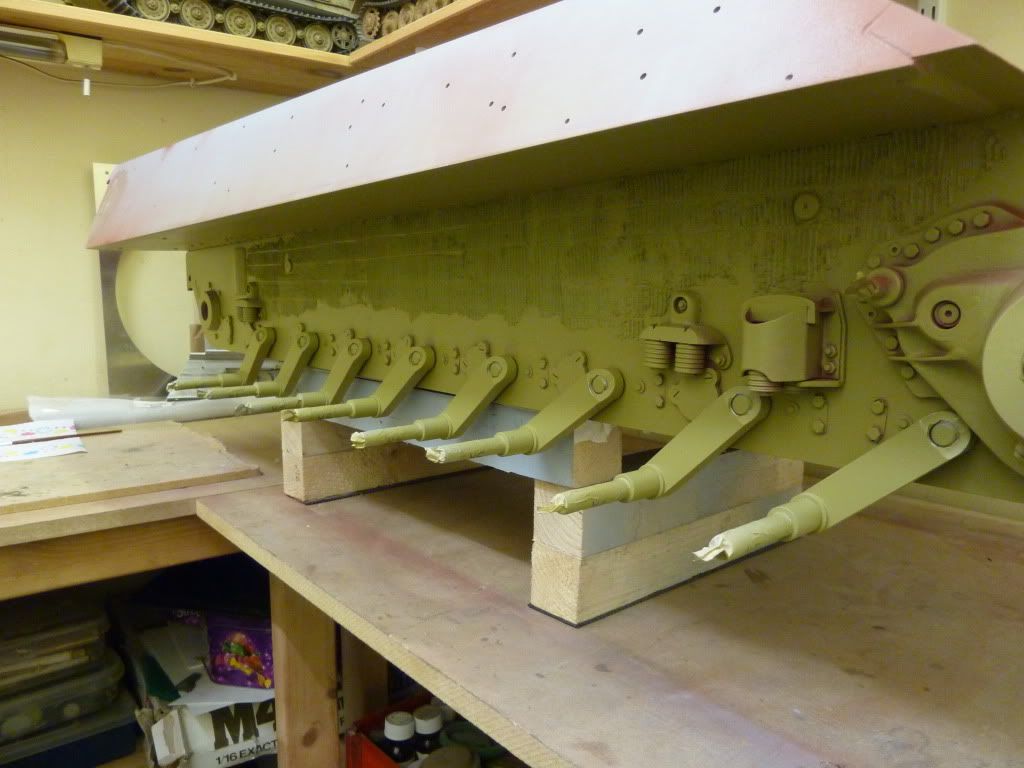
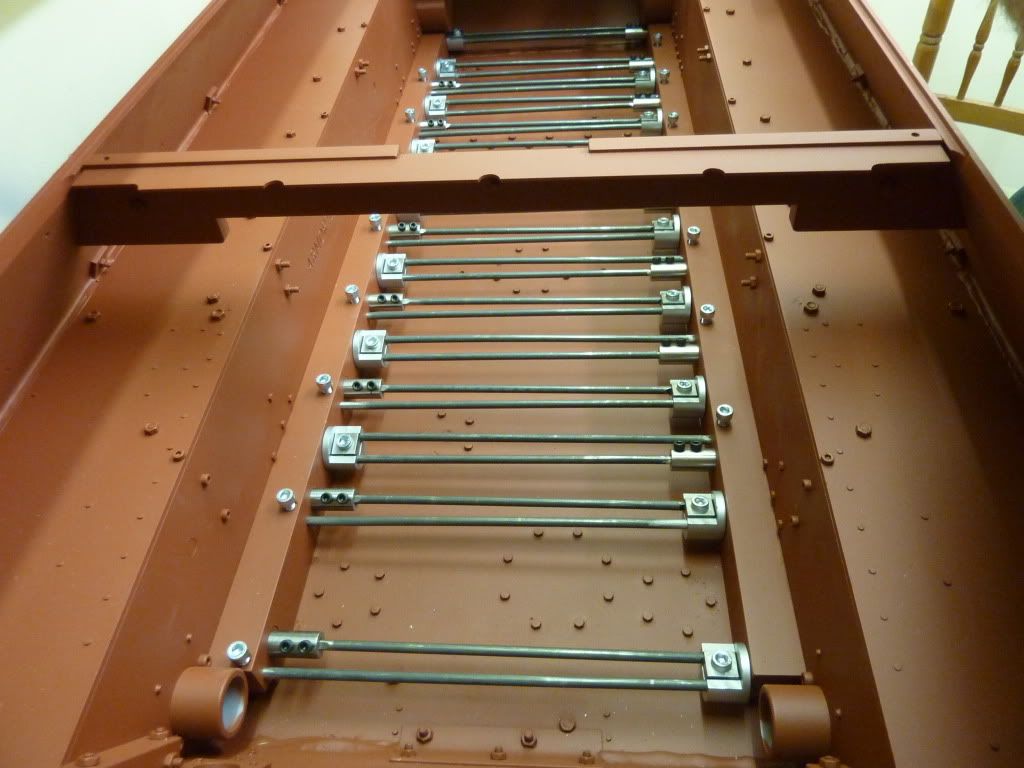
The next bit. Mudgaurds


Image

This is what is supplied in the kit, A bit of work required.

Image

Image

Image

Image

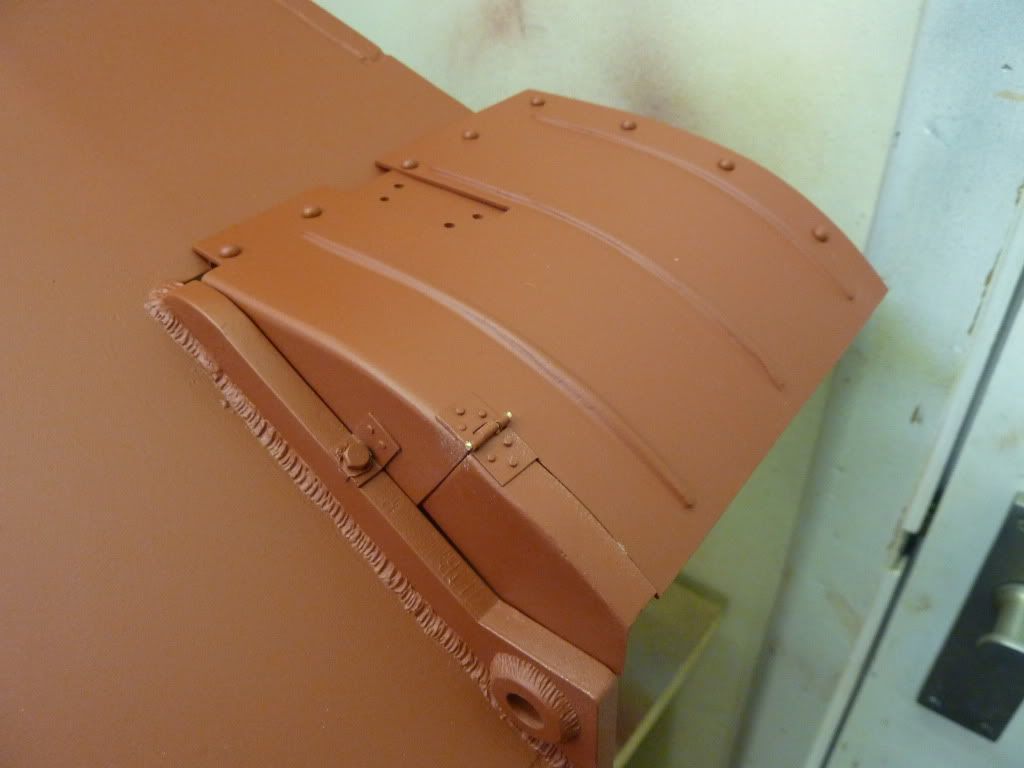
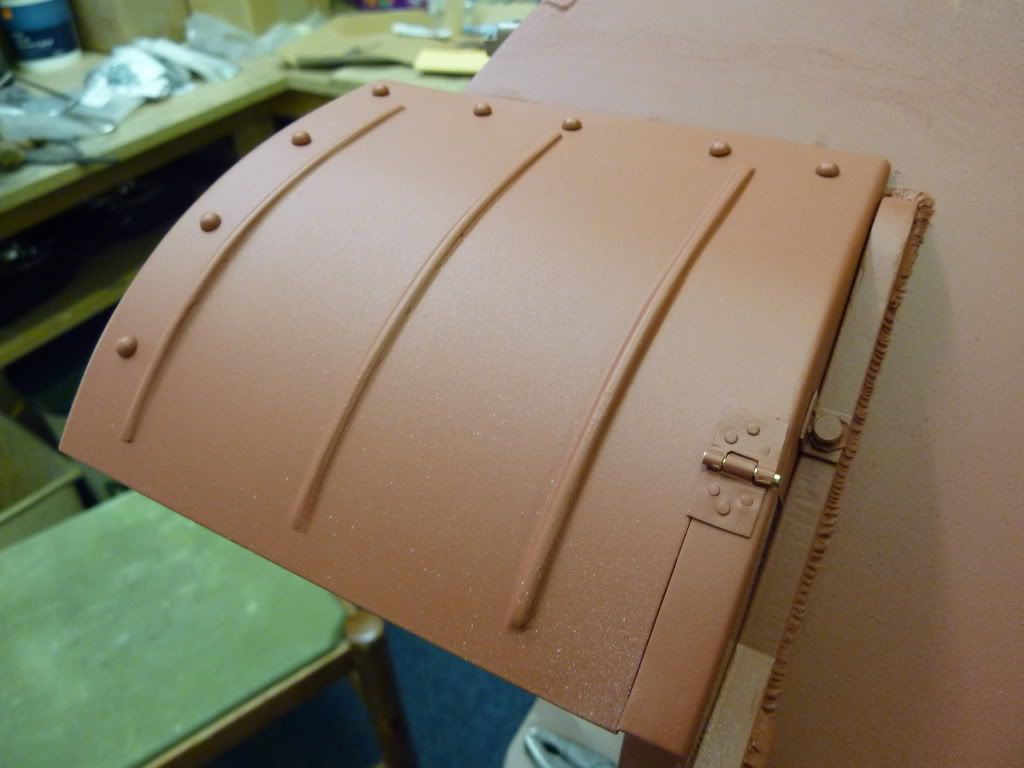
And after a bit of work this is how they look.
Heres a list of what i did.
1, Braze the folded flap and file to a nice round edge.
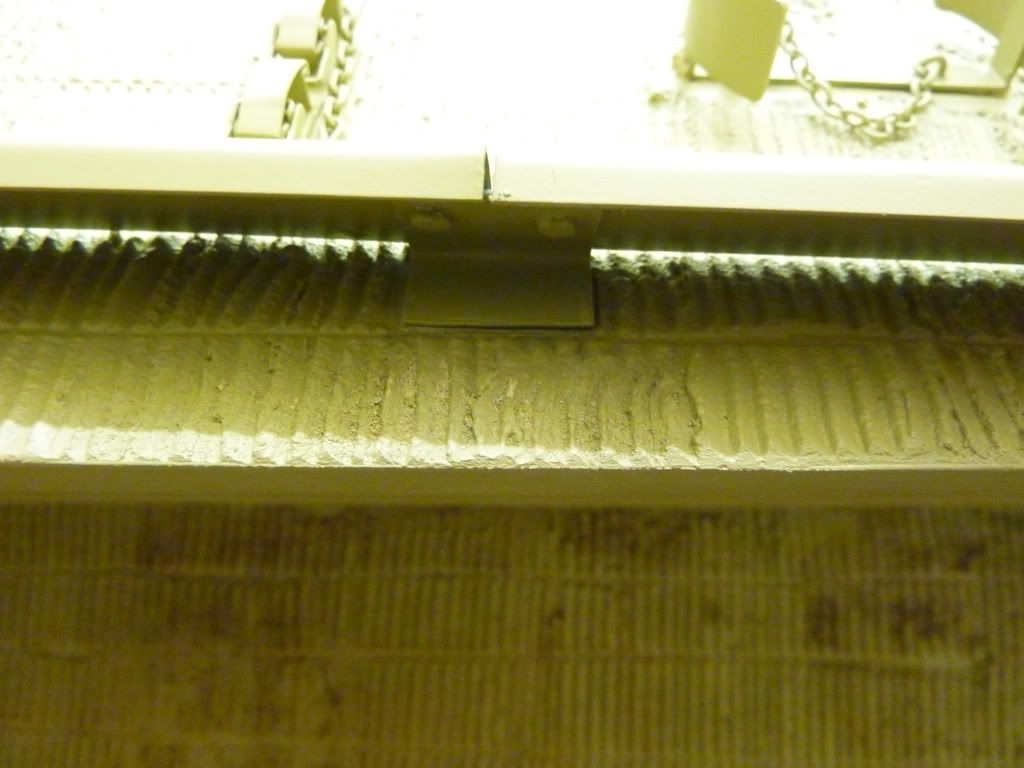
2,Braze a edge strip to the outside edge of each mudgaurd.
3, Add 3 half round brass strips to each mudgaurd.
4, Shorten each mudgaurd so that they end in line withe the hull side plates.
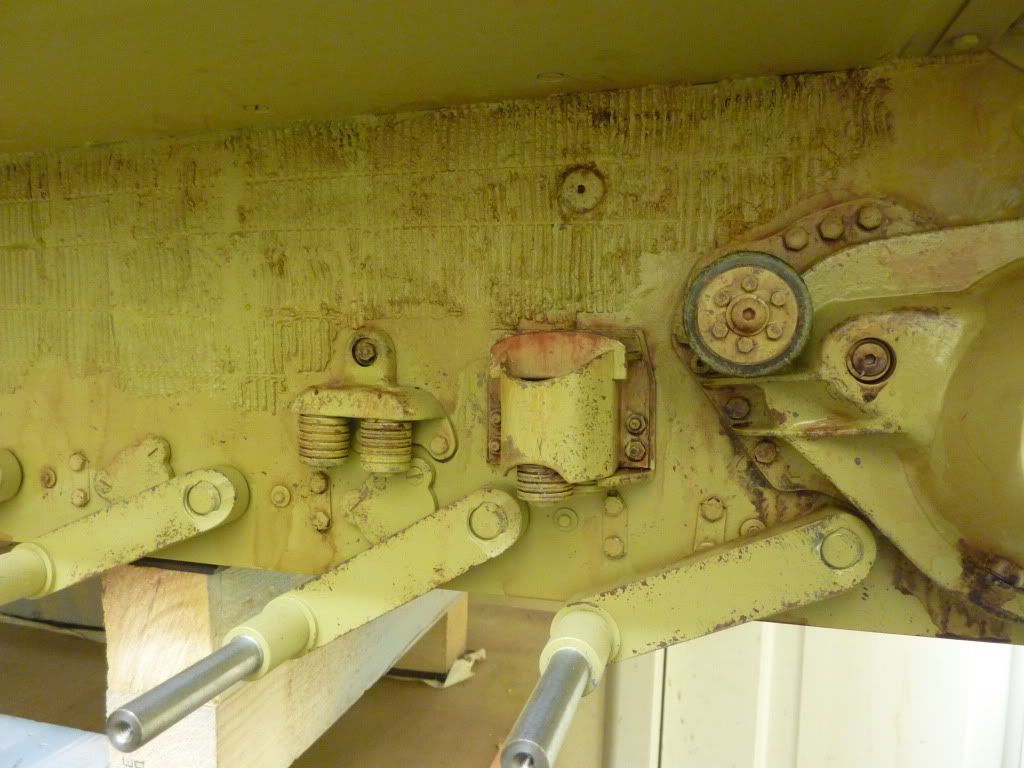
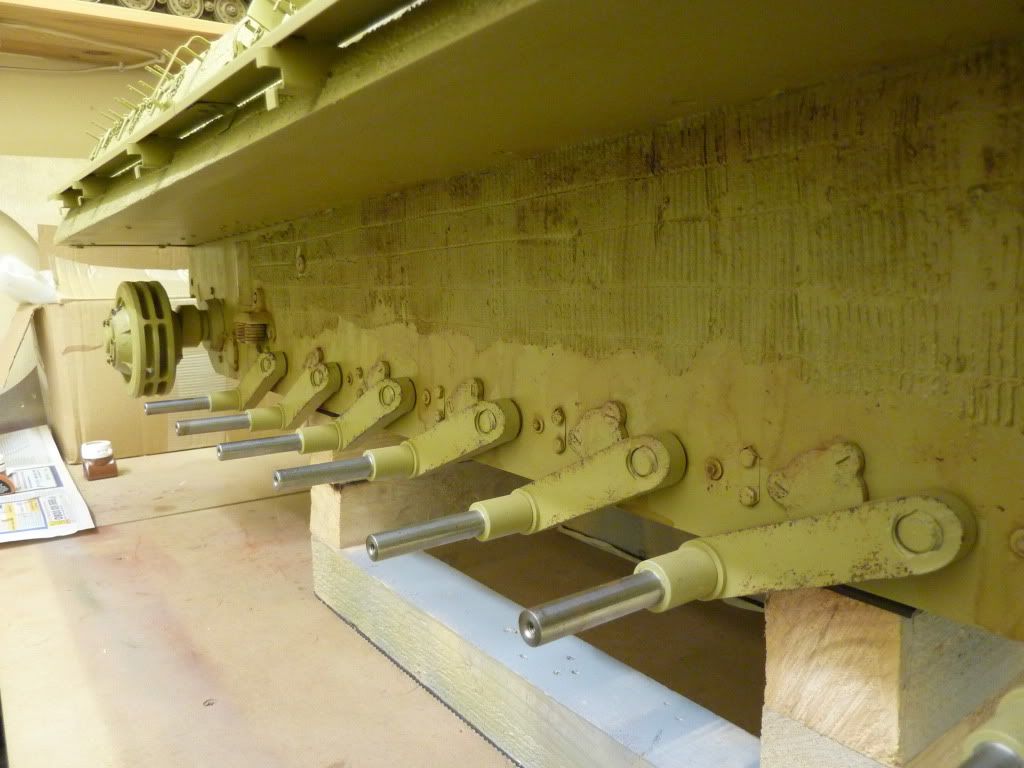
5, Make mounting brackets for each mudgaurd.
6, Cut the mounting slot for the headlight in the left mudgaurd.
7, Rivet the mudgaurd to each mounting bracket.
8, Add aditional rivet detail.
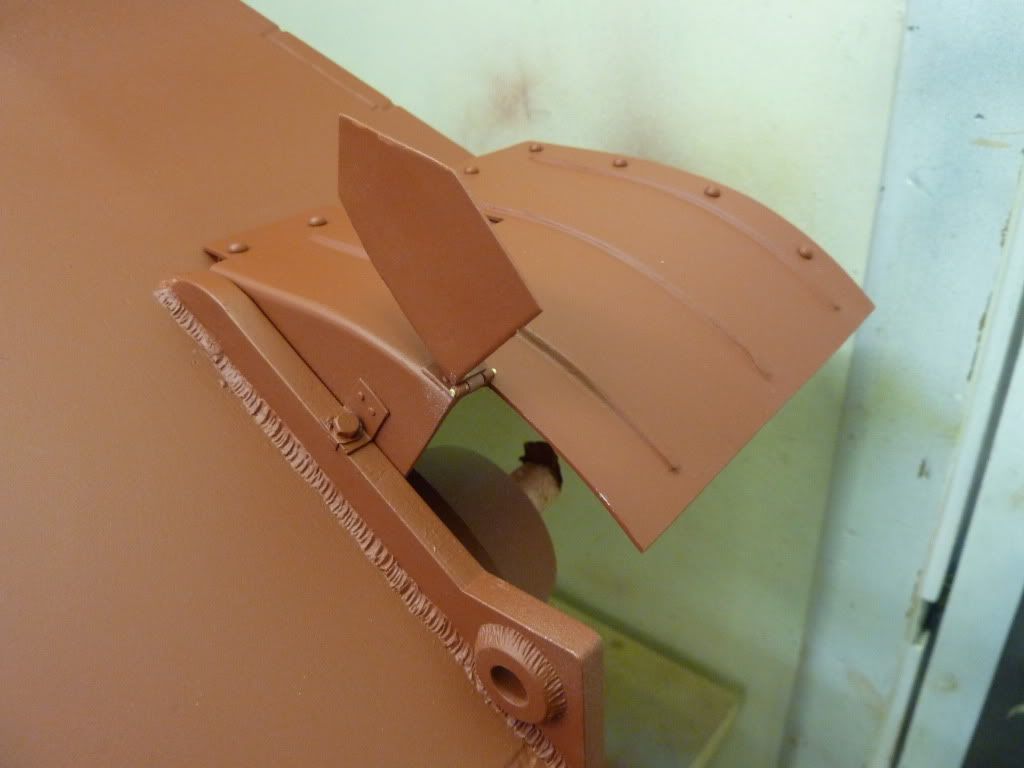
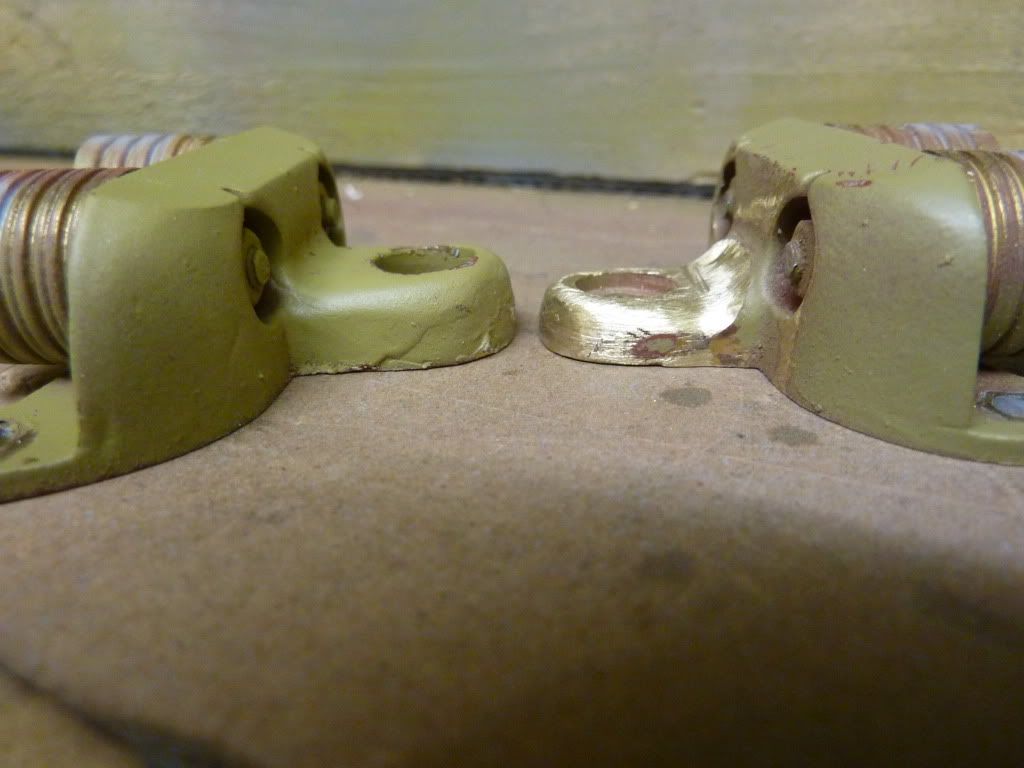
9, Make the 2 hinged pieces and the hinges and rivet in place.
10,Add side brackets.
11, Last item was to extend the upper part of the hull side plates upwards and add a curve (this may not be neccessary as i have seen photos that also show a flat top as supplied).


Image

Image

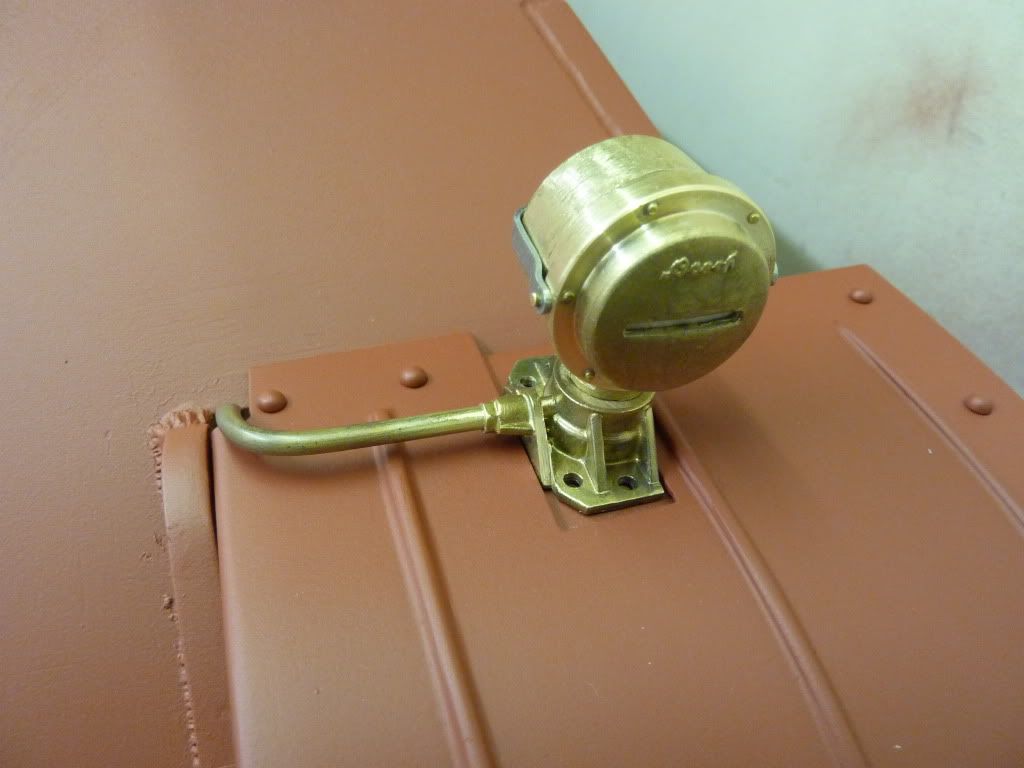
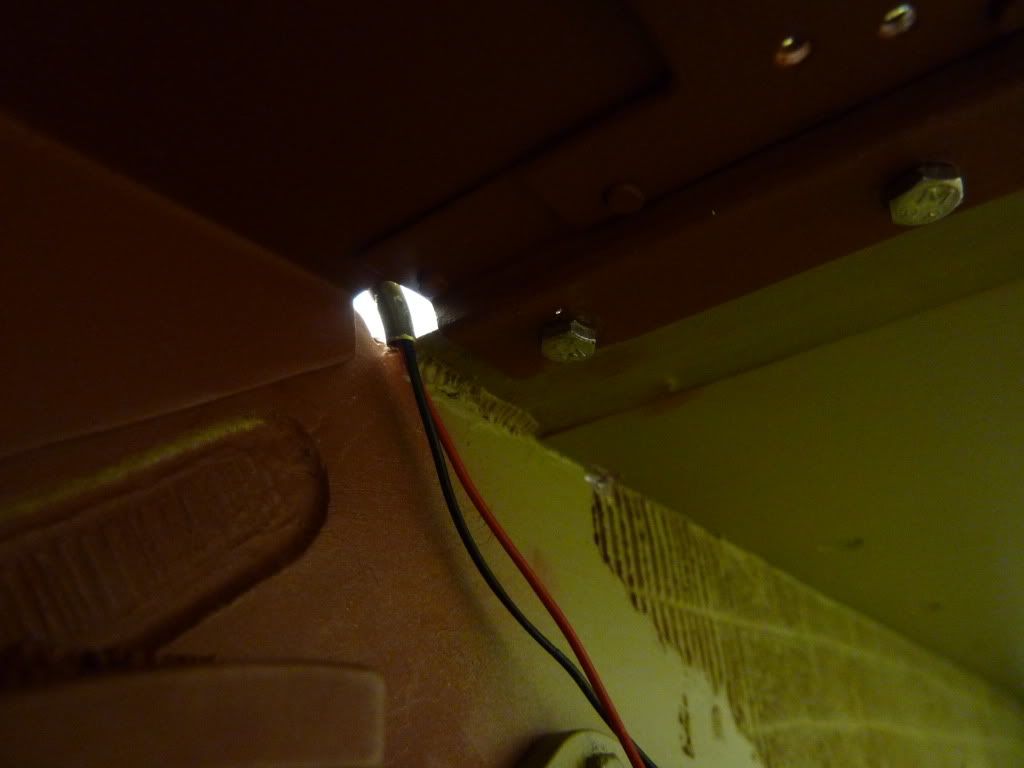
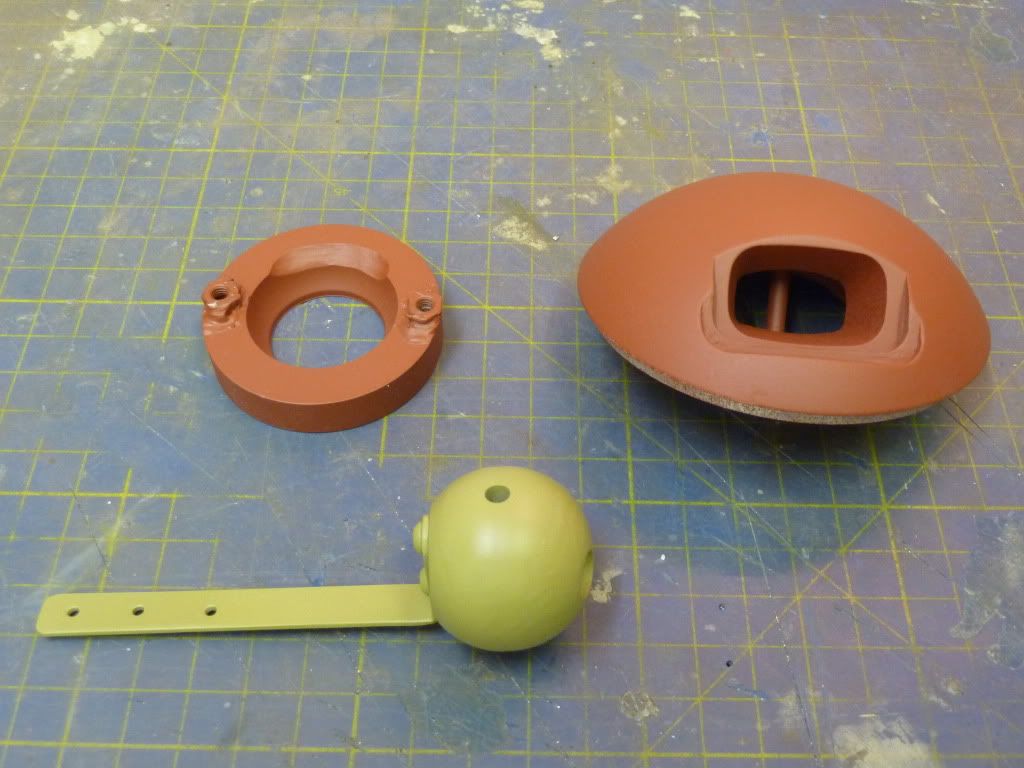
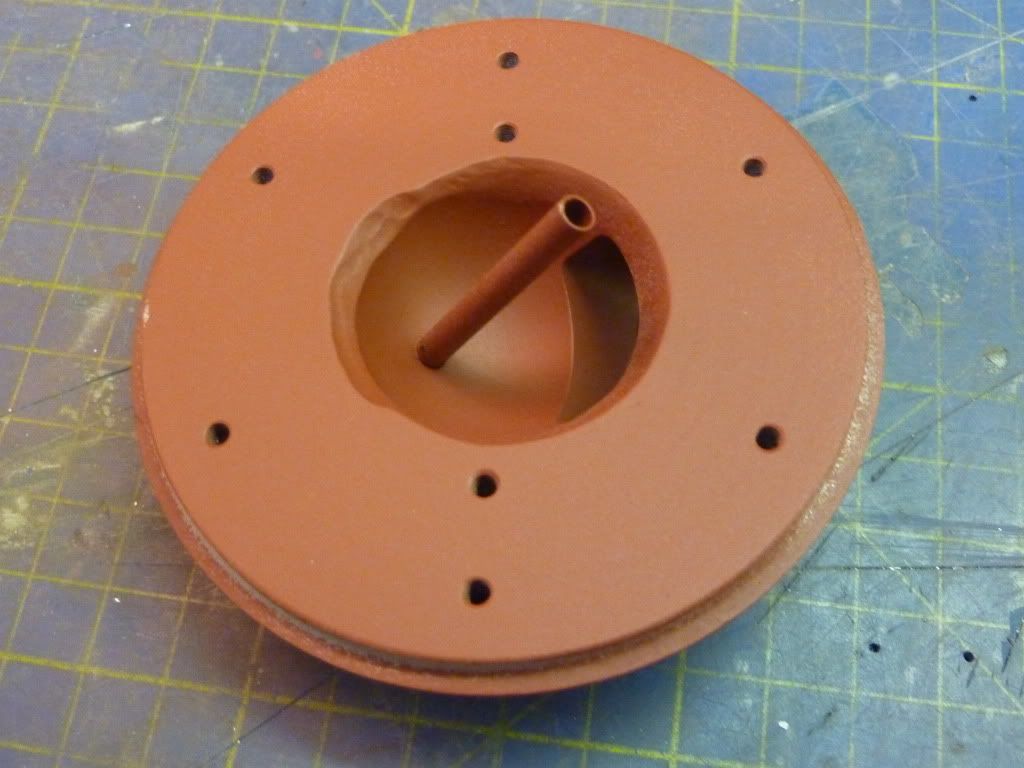
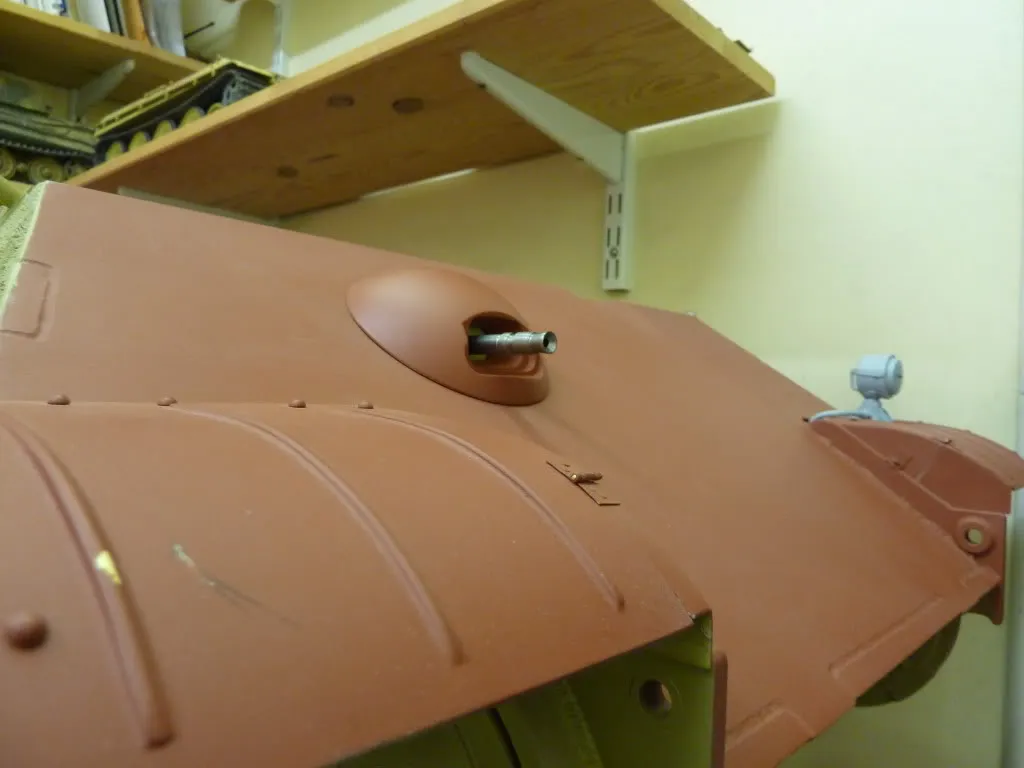
Finally, i have modified the headlight so that the wiring now goes through a conduit and under the hull sponson.

Thats all for now.

Regards

Steve

User avatar
Robert E Morey
Posts: 2331
Joined: Wed Jul 18, 2007 12:59 am
Location: Seattle, WA USA
Has liked: 137 times
Been liked: 803 times

Post by Robert E Morey »

Steve,
Fantastic work on the hull, the details look great. Makes me want to go back and add more detail to mine. Keep up the great work.
Best regards,

simon_manning
Posts: 2050
Joined: Fri Nov 02, 2007 8:51 pm
Location: new forest,hampshire,u.k.
Been liked: 1715 times

Post by simon_manning »

those mudgaurds are a lot of work, but the level of this build they had to be done, another masterclass, keep it coming steve, regards simon manning.

Tim Bowman
Posts: 1762
Joined: Fri Jul 13, 2007 4:53 am
Location: Northern California
Been liked: 177 times
Contact:

Post by Tim Bowman »

Just outstanding Steve!

Best regards
Tim
"So long as one isn't carrying one's head under one's arm, things aren't too bad." – Erwin Rommel

Steve Norris
Posts: 1231
Joined: Thu Jul 12, 2007 11:42 am
Location: Manchester
Has liked: 8 times
Been liked: 701 times

Re: Steve,s Panther build

Post by Steve Norris »

After reading Paul Willis, post on his Panther track snapping trouble i have decided to revisit my suspension set up and check for any potential fouls. My initial build has the swing arms fitted with 3 shims at each position which i think may result in to high a ride height,


Image

I have removed 1 shim from each location and hopefully this will give the correct ride height.

The other change i have made was to reduce the thickness of the upper leg of the 4 small bump stops supplied by Steve Winstone, Hopefully this will prevent the track jamming against the stop.

Image

Below is a shot of the Bovinton Panthers bump stop, note that the track is clear of the upper leg.

Image.

Hope this helps

Steve

Kent Wiik
Posts: 425
Joined: Sat Dec 04, 2010 11:18 am
Location: Northern Sweden
Has liked: 6 times
Been liked: 194 times

Re: Steve,s Panther build

Post by Kent Wiik »

Hi Steve,

Nice move with the bump stops.
I have done exactly the same with my own set from Steve.

Kind regards
Kent
It´s all in the details!

Steve Norris
Posts: 1231
Joined: Thu Jul 12, 2007 11:42 am
Location: Manchester
Has liked: 8 times
Been liked: 701 times

Re: Steve,s Panther build

Post by Steve Norris »

Hi Kent.
Great to hear that someone else has also had the same idea, Its always a bit worrying when hacking large chunks of expensive add ons but hopefully should be worth the effort.
Regards
Steve

John Fitzsimons
Posts: 1841
Joined: Tue Dec 14, 2010 3:11 pm
Location: IRELAND,Dublin/Meath
Has liked: 5 times
Been liked: 715 times
Contact:

Re: Steve,s Panther build

Post by John Fitzsimons »

Great work on those mudguards. Hope the bumpstops are OK now.

John

Steve Norris
Posts: 1231
Joined: Thu Jul 12, 2007 11:42 am
Location: Manchester
Has liked: 8 times
Been liked: 701 times

Re: Steve,s Panther build

Post by Steve Norris »

A bit more work today,
I have carried out some modification work to the ball MG mount to allow it to be easily rotated using a servo.
I drilled through the ball mount and added a pivot pin to the housing so that the ball will now only move in azimuth.
I also added a lever arm that will eventually be moved by the servo.
Armortek have done a very good job on the mount itself and very little work is requied on it only rounding off of some of the sharp edges.
I also added a couple of spacers (M4 nuts) to the ball retaining ring and scolloped out a couple of areas in the mount and retainer to allow some additional clearance.


Image

Image

Image

Image

Regards

Steve

Tim Bowman
Posts: 1762
Joined: Fri Jul 13, 2007 4:53 am
Location: Northern California
Been liked: 177 times
Contact:

Re: Steve,s Panther build

Post by Tim Bowman »

Hi Steve

Looking very very good! 8)

best regards
Tim
"So long as one isn't carrying one's head under one's arm, things aren't too bad." – Erwin Rommel

Steve Norris
Posts: 1231
Joined: Thu Jul 12, 2007 11:42 am
Location: Manchester
Has liked: 8 times
Been liked: 701 times

Re: Steve,s Panther build

Post by Steve Norris »

Time for another build post !

All wheels have had their studs fitted and the hub caps have had their studs fitted along with Mike Stannards lock tabs.
I have also added the center bolt to the hub caps

Image

During the Armortek open day and subsequent visit to Bovington i noticed a number of improvements that i could carry out on the mudguards, I replaced all the snap head rivets with mushroom head rivets in the front mudguards, I also repositioned and replaced the rivets that join the mudguard sections together. Finally i replaced the mudguard mounting bolts with some very nice scale fasteners that Simon Manning kindly sent me.

Image

Another job i carried out on the mudguards was to add the attachment brackets to the rear section and to the join between the front and rear sections.

Image

The final bit of mudguard work was to add the two welds that join the three sections of each mudguard together to form one half of the total length.

Image

I have also started to carry out some weathering of the lower hull before the wheels go on. I wanted to try and reproduce something close to the effect that Simon Manning has achieved on his superb Panther, I am reasonably pleased with the result but sadly i cannot claim that i am the new paint master. If anyone has any constructive comment on how the paint my be improved it would be appreciated.

Image

Image

Thats all for now

Regards

Steve

Roy Pickavance
Posts: 147
Joined: Thu May 21, 2009 8:48 pm
Location: Haslingden,Lancashire
Contact:

Re: Steve,s Panther build

Post by Roy Pickavance »

Hi Steve,
This is a fantastic build, One of the best on this or any forum.
It looks like a 1/1 too me.
Keep up the posts and see you soon i hope.
Best regards Roy
It could be worse, It could be Tuesday.

simon_manning
Posts: 2050
Joined: Fri Nov 02, 2007 8:51 pm
Location: new forest,hampshire,u.k.
Been liked: 1715 times

Re: Steve,s Panther build

Post by simon_manning »

in the fear of repeating myself, once again very nice indeed, it looks like it could be a gem!, love the detail. regards simon manning.

Post Reply