Page 5 of 10
Re: Schwerer Panzerkraftwagen
Posted: Mon Aug 01, 2022 4:24 pm
by Robert E Morey
Amazing details on the rear door. Great work!
Bob
Re: Schwerer Panzerkraftwagen
Posted: Mon Aug 01, 2022 6:33 pm
by Oliver Brüninghaus
Hello Derek,
Hello Robert,
Thank you very much for your compliments.
Sometimes when building a model you stumble upon interesting details that you delve deeper and deeper into.
In the case of the door, I worked out the function piece by piece from pictures.
During the reconstruction some things made sense that were were still unclear to me before.
Best regards
Oliver
Re: Schwerer Panzerkraftwagen
Posted: Sat Aug 06, 2022 6:58 pm
by Oliver Brüninghaus
.
January 2020
Weathering rear door and to take decision
I used the door to get some practice in weathering with oils. If it doesn‘t turn out nice, no one will notice with the door closed

After all these years of building, a decision was now due.
Will it be a girl (with Lewis Guns in the sponsons)
or a boy (with the two six pounder guns) or, in other words - take the easy way out or instead of the following diversions?
The Female Beute Tank would be easy to build as the Sponsons do not need to be changed apart from a few minor tweaks. It is pretty different with the Male Sponsons of the Beute Tank. In male Beute Tanks, the gun has been exchanged for a Maxim Nordenfeld. This involves a minor diameter armor and additional armor plates to cover the resulting new gap.
Of course, the model‘s gun should also be able to perform all the movements of the motion pack. For this task my workshop seems to be a little underequipped.
Nor Lathe or mil, only a 55 year old Bosch drill from 1956 and a Dremel have to manage the upcoming works.
To get the first impressions and collect some ideas I assembled the Sponsons according to the build manual.
Regards
Oliver
.
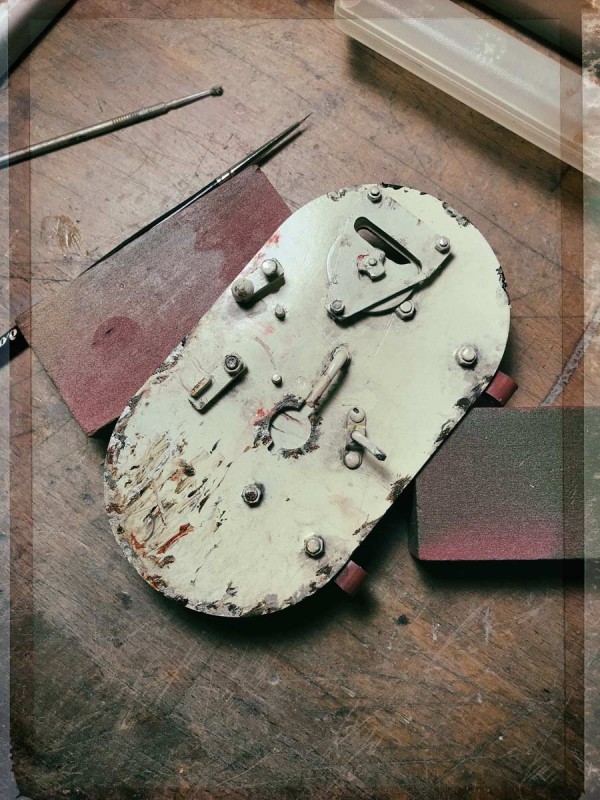
- an interim result that is not yet satisfactory
.
.
Re: Schwerer Panzerkraftwagen
Posted: Sat Aug 06, 2022 7:13 pm
by Phil Woollard
Just keep applying the weathering and then rub it off until your happy with it Oliver.
When you rub it away you can't get to the awkward areas like around the fittings and that is just what you want.
Re: Schwerer Panzerkraftwagen
Posted: Wed Aug 10, 2022 7:20 pm
by Oliver Brüninghaus
Thank you Phil,
the advice of an experienced model builder is always particularly valuable.
I had not tried this way yet and will see how this effect rounds the picture with the many layers of oil paint.
Greetings
Oliver
Re: Schwerer Panzerkraftwagen
Posted: Sat Aug 13, 2022 7:50 pm
by Oliver Brüninghaus
.
February 2020
Take the long way home ... ... ...
Okay - after about 5 years of building, it does not matter now how long it takes to complete the model. So it was off to the next tempting revision...
A lot of planning, some improvising and the right raw material turned the idea into a plan.
It will be a boy !!!!
The tubes that will one day become the smaler gun shields are closed at the bottom with an aluminium plate. The ball bearings fit into the intended receptacle for the cannon and a peg holds the barrel slightly rotatable in the ball bearings. Some fretwork was necessary. If you don‘t have a milling machine, you have to do it by hand.
Finally everything fits together and the drum turns easily and without resistance.
Best Regards
Oliver
.
.
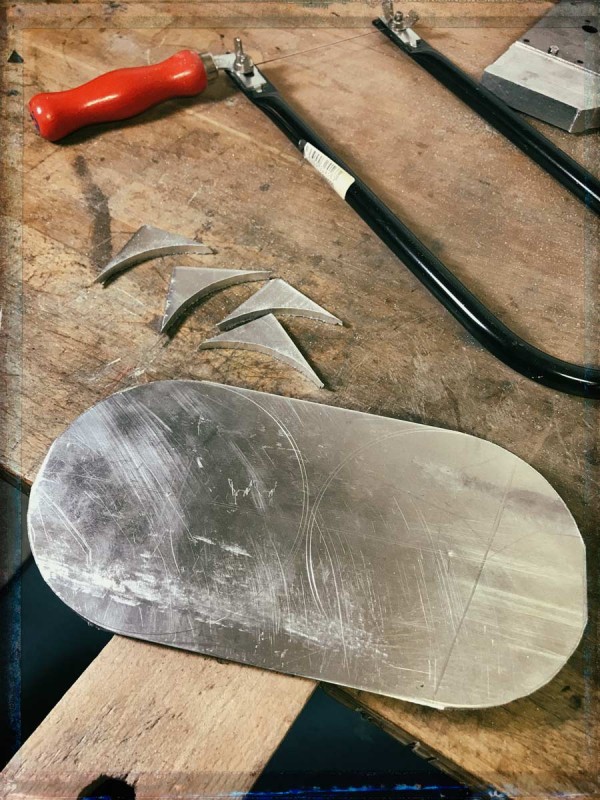
- Aluminium for the base plates.
.
.

- The smaller diameter is clearly visible at a distance from the original armour.
Re: Schwerer Panzerkraftwagen
Posted: Sat Aug 13, 2022 8:57 pm
by Phil Woollard
Nicely done my friend!
Re: Schwerer Panzerkraftwagen
Posted: Tue Aug 16, 2022 4:47 pm
by Oliver Brüninghaus
Thank you Phil.

Re: Schwerer Panzerkraftwagen
Posted: Fri Aug 26, 2022 4:39 pm
by Oliver Brüninghaus
.
March 2020
Reworking the „Kugelblende“ gun shield
The pandemic took place and I used the additional time at home to accelerate the progresses on the build.
The gun recoil also had to be reworked. Drilling and patient filing were necessary here – a somewhat more tedious job.
The cut-outs in the gun shield were also not as easy to make as planned, as the 5 mm aluminum is not always easy to work within the curves. With patience and a lot of manual work, I also completed this construction section after a few weekends.
The base plate is bolted to the gun shield via four screws and glued. This creates a very stable and durable unit that does not come loose due to temperature fluctuations.
Best regards
Oliver
.
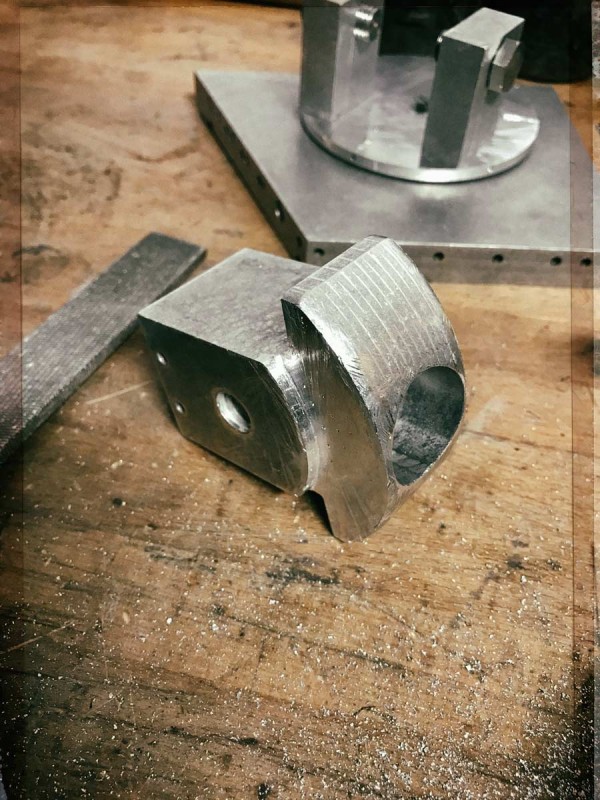
- Revised gun recoil
.
.
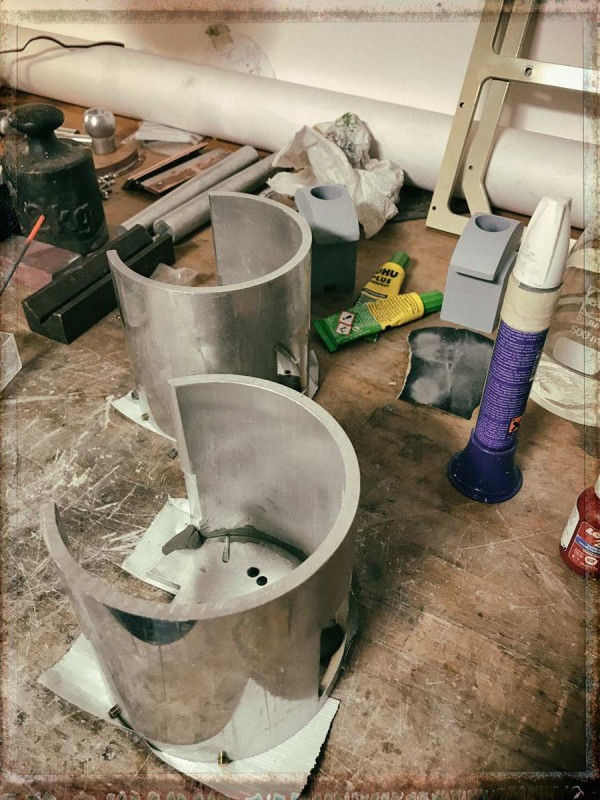
- bolted and glued base plate
.

- test fitting
.
Re: Schwerer Panzerkraftwagen
Posted: Sat Aug 27, 2022 10:41 pm
by Robert E Morey
Those sponson turret and guns are awesome! Nice addition Oliver!
Best regards,
Bob
Re: Schwerer Panzerkraftwagen
Posted: Mon Aug 29, 2022 12:38 pm
by Oliver Brüninghaus
Thank you Bob,
on the MK IV "Beute-Tanks", the British 6pounder guns were replaced by German quick firing 57mm Maxim-Nordenfelt guns. The information on this is very sparse but with comparison and searching I was finally able to find some interesting clues to the conversion.
Best Regards
Oliver
Re: Schwerer Panzerkraftwagen
Posted: Fri Sep 02, 2022 7:33 pm
by Oliver Brüninghaus
.
March/April 2020
Sponsons test assembly
The construction of the cannons was optimised until they were very smooth-running.
Then the servos and linkages for the movements could be adapted to the new construction.
Everything had to be tested and optimized repeatedly so that the servos needed little force to reach all positions.
Best regards
Oliver
.
.
Re: Schwerer Panzerkraftwagen
Posted: Fri Sep 16, 2022 5:02 pm
by Oliver Brüninghaus
.
April 2020
Additional armor
After the mechanics moved very smoothly, the additional armour plates were made.
I still had a 1 mm copper sheet in stock, which was easy to process and solder for these components.
Best regards
Oliver
.
.
.
.
Re: Schwerer Panzerkraftwagen
Posted: Fri Sep 23, 2022 7:37 pm
by Oliver Brüninghaus
.
May/June 2020
Getting things together
For the sponsons, I filled the curved plates of the walls a little bit to get a sharper edge of the armor plates to each other.
When all components worked safely, I painted them individually. The assembly of the „german influenced sponsons“ was again in accordance with the building instructions. In addition and according to the original tanks, more rivets and screws were added that were not previously foreseen in the model.
Best regards
Oliver
.
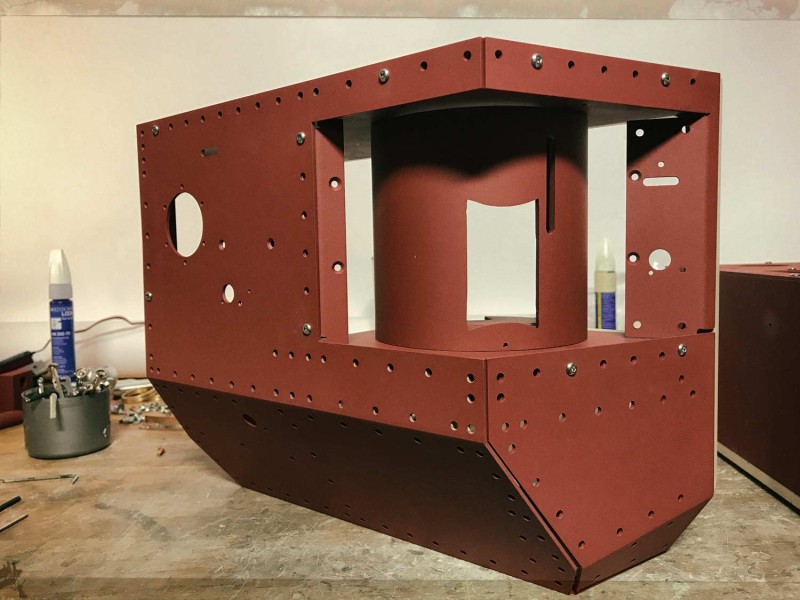
- sharper edges for the armor plates
.
.
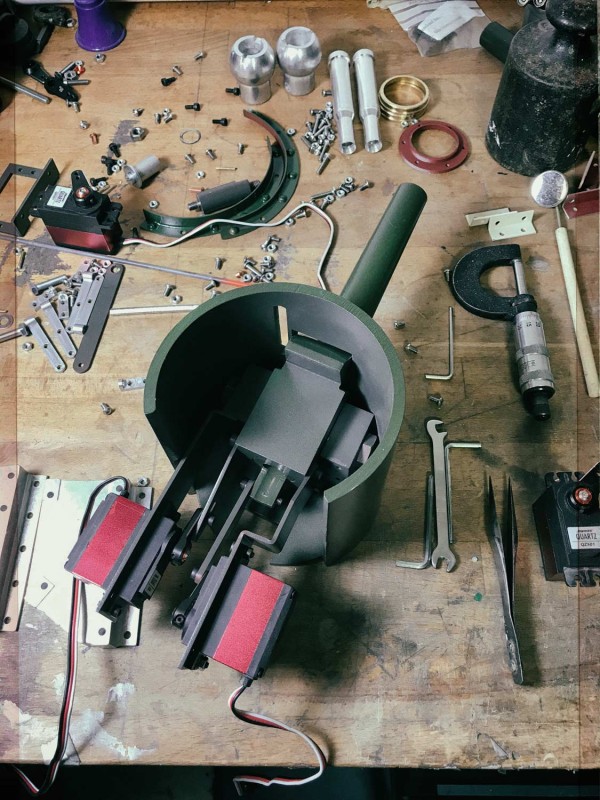
- a new fast servo for a quick recoil
.
.
.
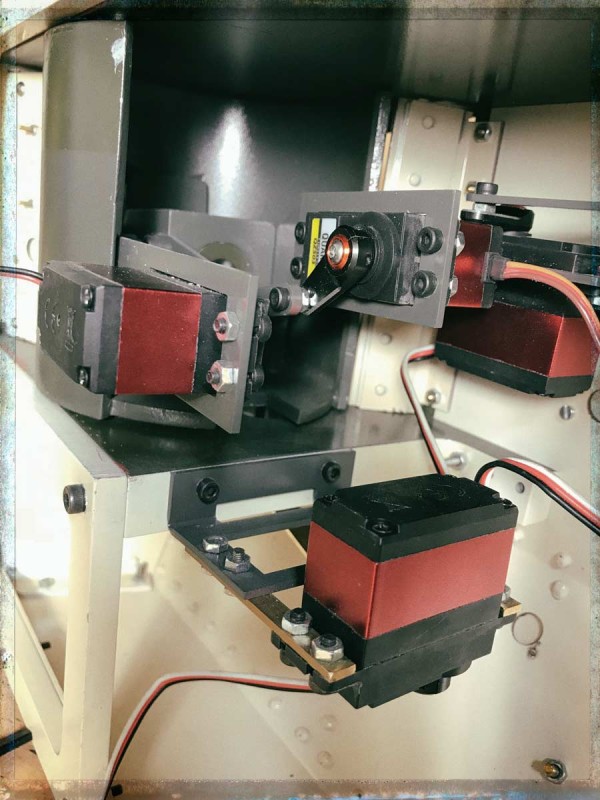
- only a few small changes were necessary for the linkage
.
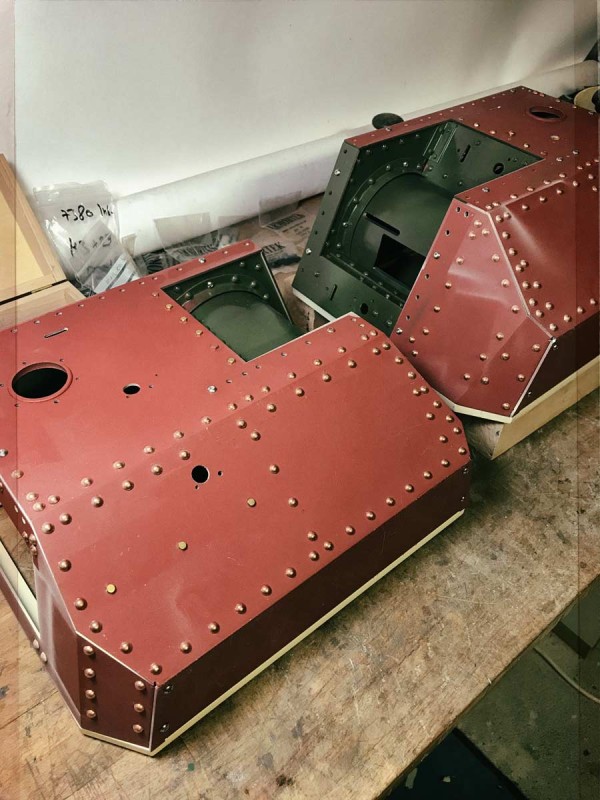
- a few more rivets and screws have been added to match the original more closely
.
.
Re: Schwerer Panzerkraftwagen
Posted: Fri Sep 23, 2022 8:08 pm
by Phil Woollard
Entertaining as usual