Page 5 of 6
Posted: Sat Jan 29, 2011 8:32 pm
by John Grima
Thanks guys,
Lee, with the paints I use the Varnish is not needed.
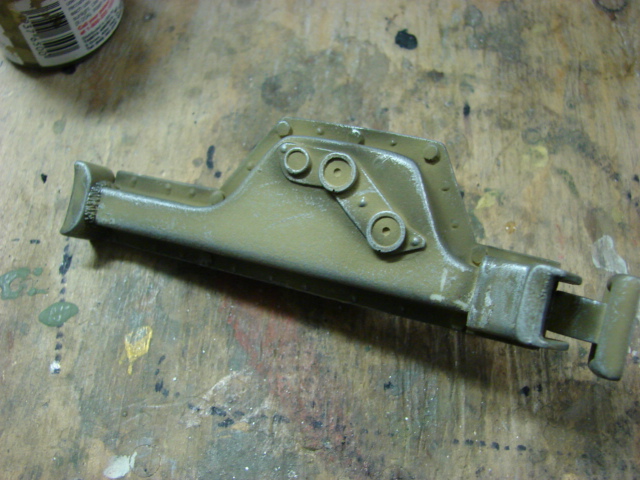
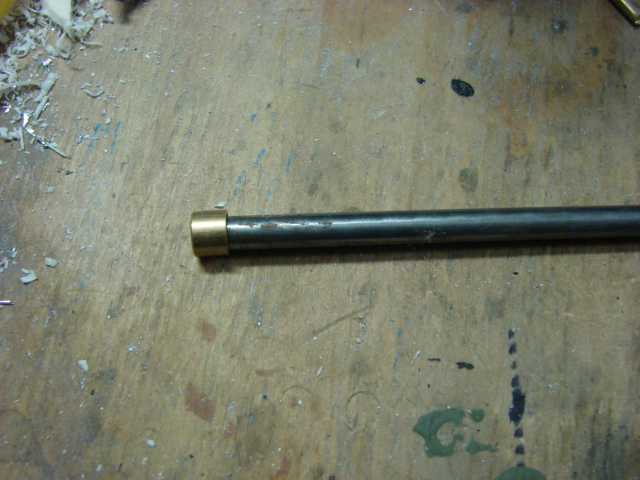
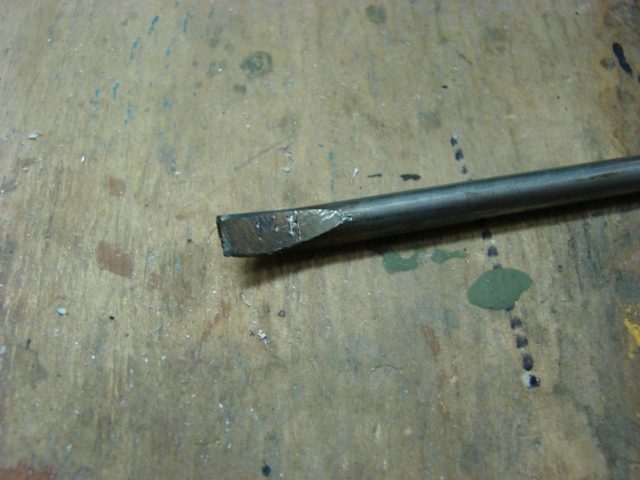
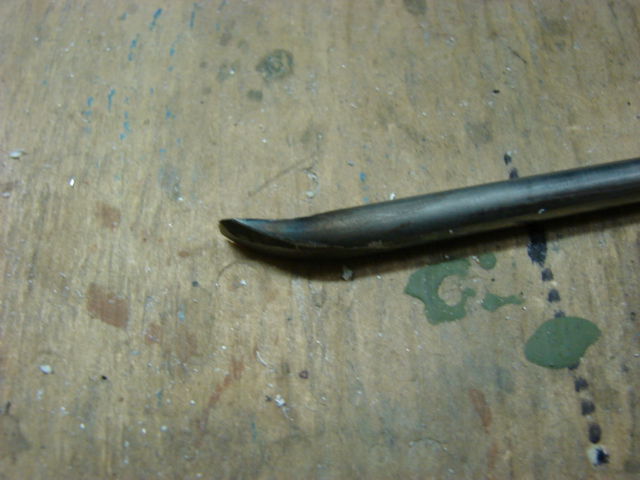
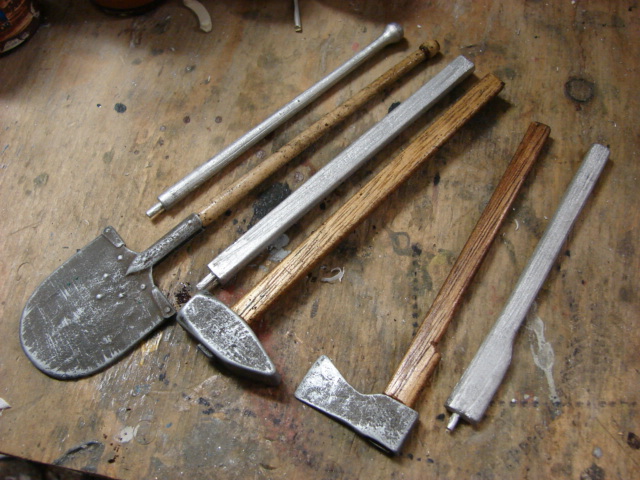
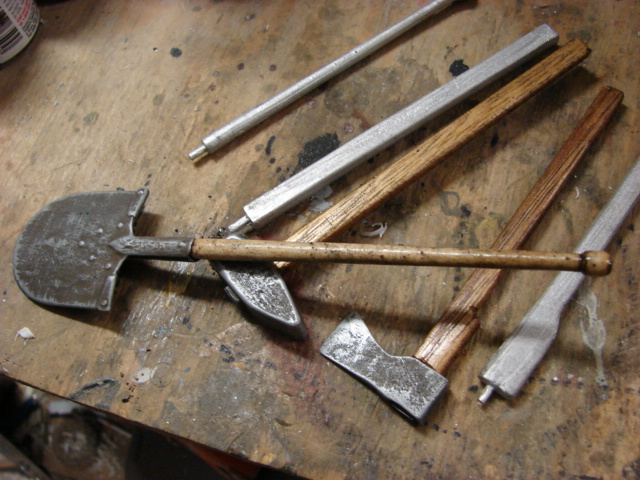
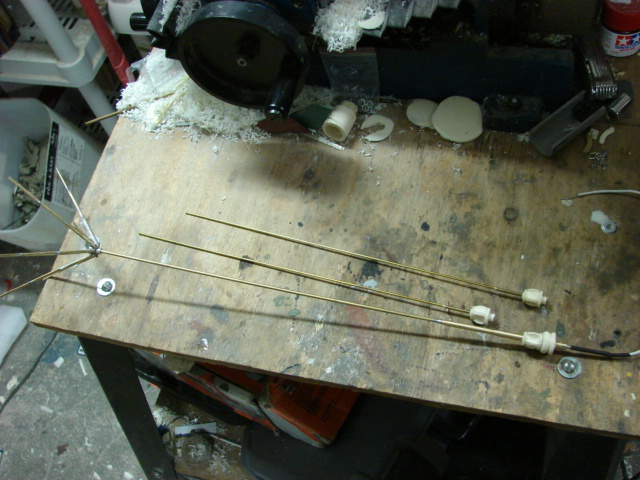
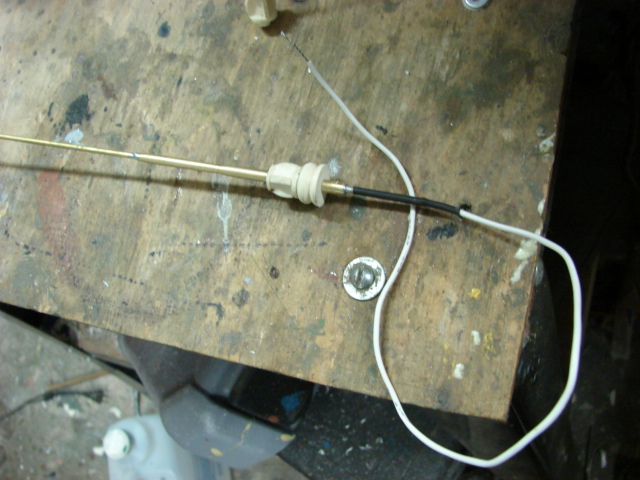
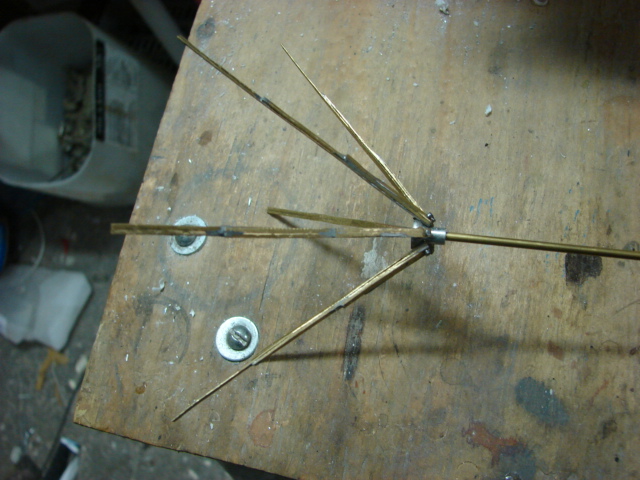
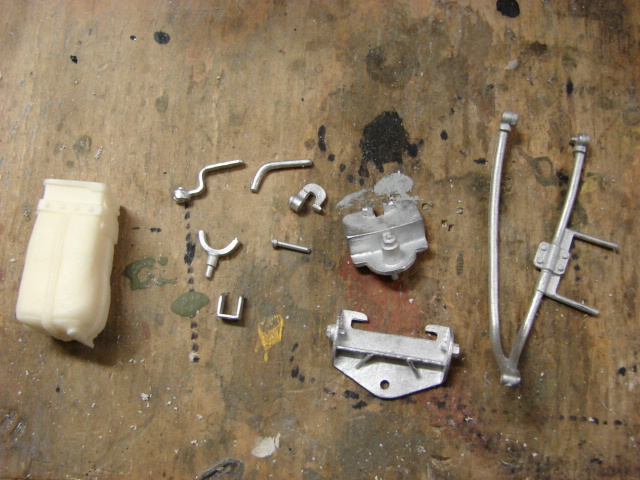
I'm currently working on the tools. I should have them ready and installed by early next week.
Posted: Sat Jan 29, 2011 10:56 pm
by leesellars
Hello John
What paints are you useing. I use Tamiya and vallego.
lee
Posted: Thu Feb 03, 2011 1:42 am
by John Grima
Posted: Thu Feb 03, 2011 7:29 am
by Luca Fossa
Hi John
Excellent work and beautiful painting job and weathering, i like it.
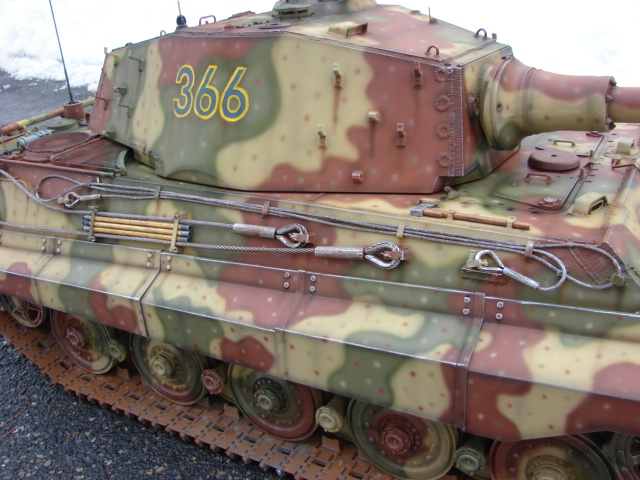
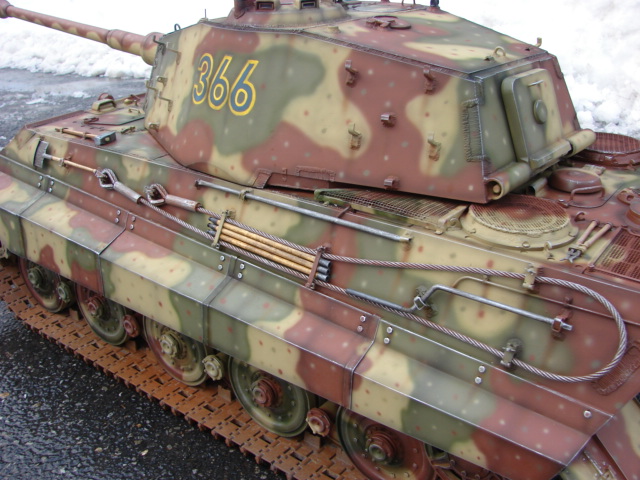
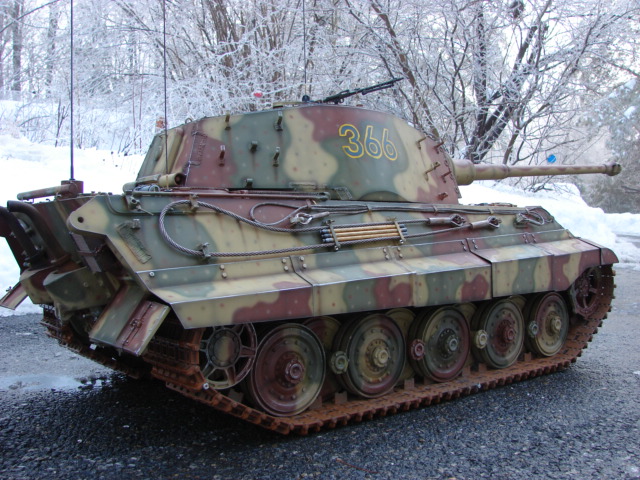
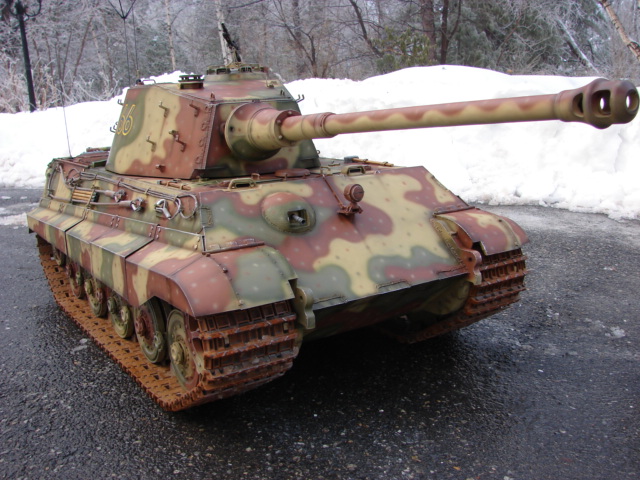
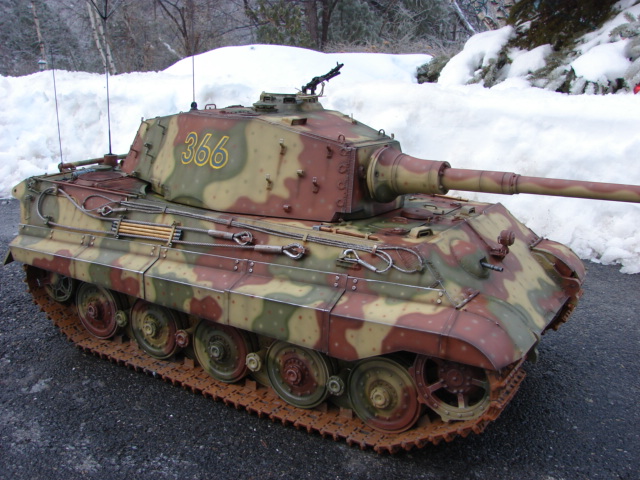
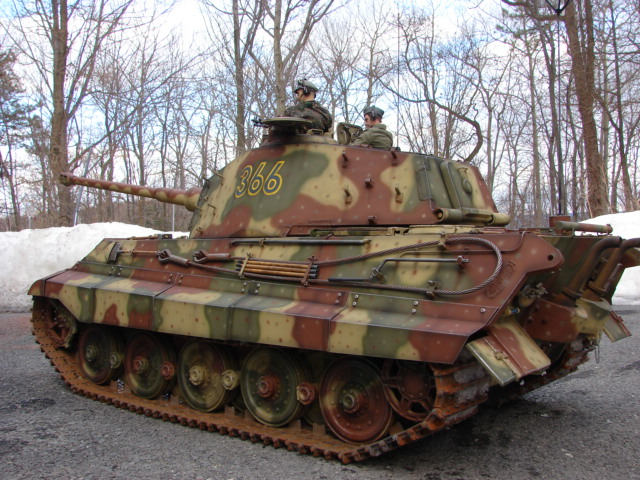
Just let me tell the number on the turret, altough perfectly realized, is quite strange, it means the 6th tank of the 6th battailon, 3th company, a bit unusual to be a "command" tank .
Cheers
Luca
Posted: Thu Feb 03, 2011 8:55 am
by Kent Wiik
Hi John,
Wow very, very nice!
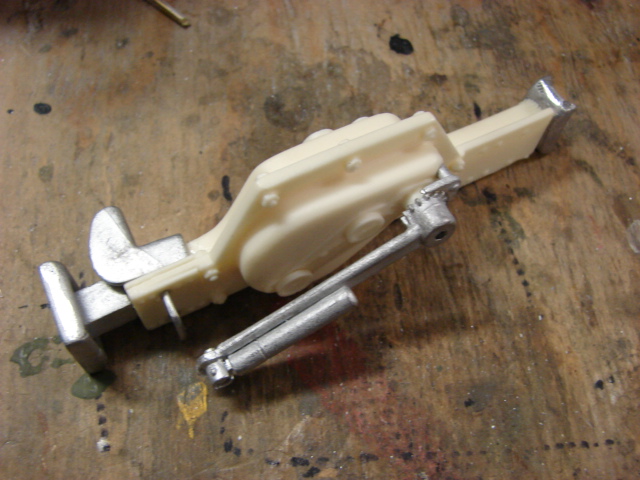
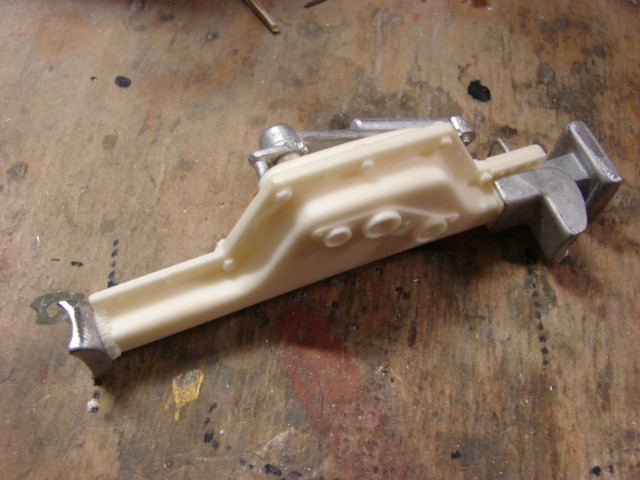
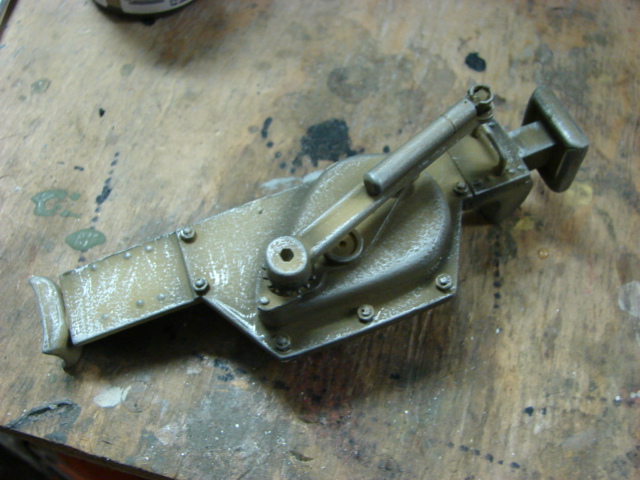
You are a skilled model builder and painter, love the paint job on the tools and replace the white metal handles was a good move, well done I am impressed.
How do you create the worn out paint/metal surface? Drybrushing or something else? Please tell, looks fantastic.
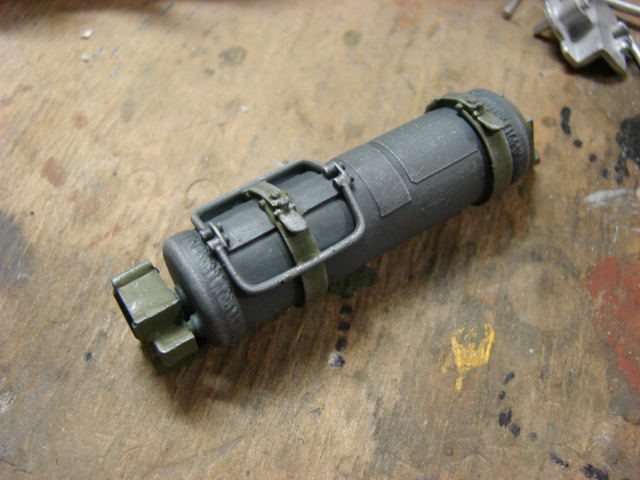
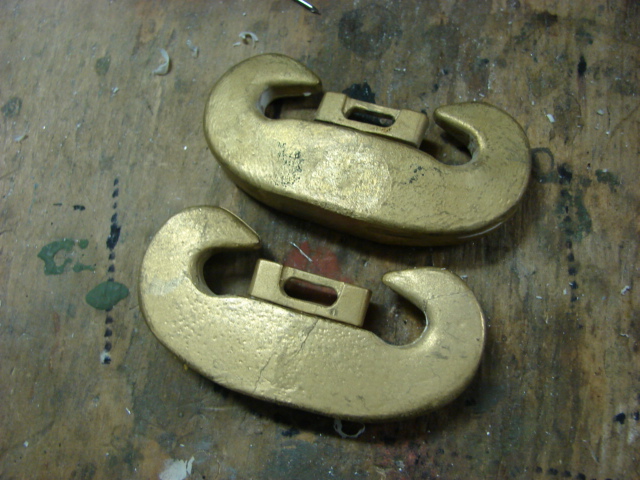
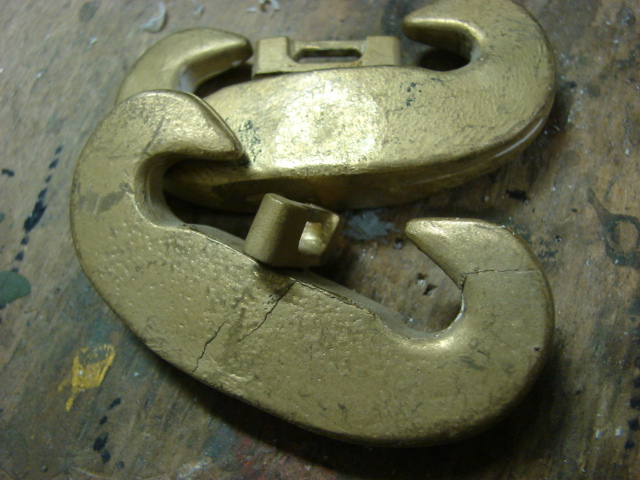
One minor thing...the jack is a 10T and KT had 20T.
http://www.panzerbasics.com/index_files ... t/jack.htm
Today only Steve makes a decent 20T jack and I have often wonder why no one else has bother to make one in white metal/resin as all information about it is there on the Panzer Basics website.
I mean with all those Panthers, Tiger I and KT out there it must be a market for them...hint, hint

Look forward to see the MG34 issue, I assume you will make the correct MG34T and not a standard MG34?
Kind regards
Kent
Posted: Thu Feb 03, 2011 4:06 pm
by Tim Bowman
Hi John
Thanks for sharing this excellent build with detailed photos along the way. As always, I am amazed at your speed of each project you do, the number of parts you make and the end result. The finished Tiger II looks great and the scenery you have photographed it in could not be more perfect for that tank.

Awesome video. Would love to see yours and Simon's in column formation on that video. That would be great!
Thanks again
Tim
Posted: Thu Feb 03, 2011 5:21 pm
by Robert E Morey
John,
Absolutely stunning job. I have to agree with the others, the snow setting is awesome for this model. The details you have added are a great example of what can be done to the stock model. One of the best ambush paint jobs I've seen. Your build is a great reference for all KT owners.
Another excellent addition to your incredible collection of vehicles,
Kind regards, Bob
Posted: Thu Feb 03, 2011 6:49 pm
by martin pitcairn
John,
what a fantastic job you have made of this tank. It has been a real joy to watch this build, some of your work has been the best i have seen, the other thing with this build has been is a great show case of what can be done with the basic kit and the supplied parts. i realy want to thank you for the step by step photo's and descriptions of what you have done. you should be realy proud of what you have built!
Posted: Thu Feb 03, 2011 7:04 pm
by Antony Rowley
Luca Fossa wrote:Hi John
Excellent work and beautiful painting job and weathering, i like it.
Just let me tell the number on the turret, altough perfectly realized, is quite strange, it means the 6th tank of the 6th battailon, 3th company, a bit unusual to be a "command" tank .
Cheers
Luca
It must be just made up (To confuse the enemy) as Tiger Battalions only had 14 tanks per company and only 3 companies plus 3 command tanks - 45 tanks.
Anyway, your Tiger II looks stunning, one of the best so far. Well done.
BTW Armorpax do a great MG34T too but I'm sure you knew that anyway.
Posted: Thu Feb 03, 2011 7:28 pm
by peter karlsson
hi john!!!
REALY AMAZING WORK ON THAT KT

good insperation source for my own kt build in the future
thanks again john for a wonderfull time to follow your build
kind regards peter(peppe)
Posted: Thu Feb 03, 2011 10:55 pm
by Steve Norris
Hi John.
Its been a pleasure watching your build and the completed tank is the best KT i have seen.
Well done.
regards
Steve
Posted: Thu Feb 03, 2011 11:07 pm
by simon_manning
thats a lot of effort standing there john, it looks good, great use of the standard parts, amazing how quick you constructed the kit, no easy task! regards simon manning.
Posted: Mon Feb 07, 2011 2:00 pm
by Per Sonnervik
Hi John,
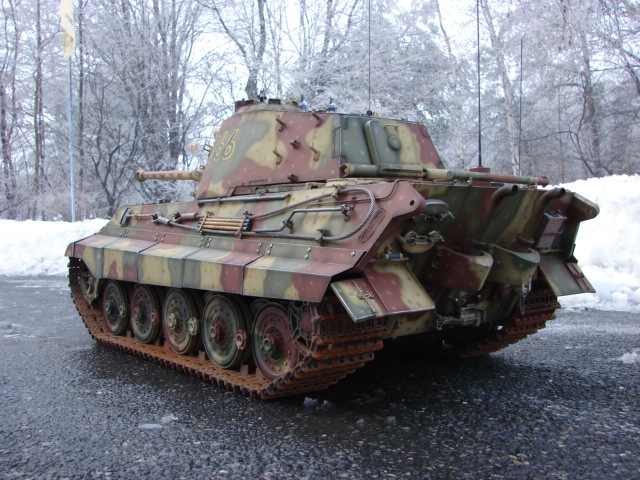
Nice build and paint job indeed. I wonder one thing; did you set the torsion bars according to the instructions regarding the angle?
I think the model needs to be lowered quite a lot to get the look of the real thing, see here;

compare your model to the real thing;

/Per Sonnervik
Posted: Tue Feb 08, 2011 5:26 am
by John Grima
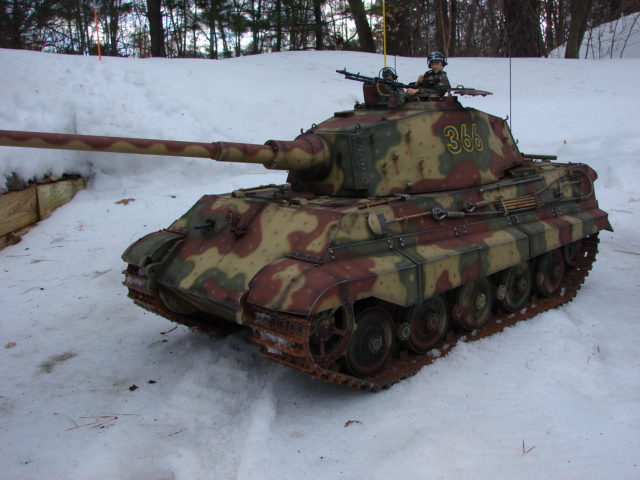
Thanks everyone, as for the numbers the numbers are not based on an actual vehicle. The numbers represent that the tank is my 3rd armortek model, and the 66 is the armortek production number.
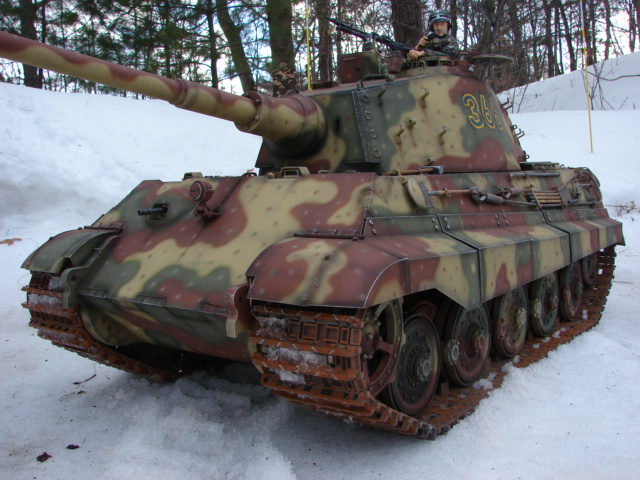
As for the tank's height I followed the armortek instructions very closely. If you look at your posted image you will see that the sprocket and the wheel hubs line up very closely to my model. What you see differently in the images is the idler position. The idler is in its current position because of the track tension that works best for me. When building the tank I first had the idler at the location it is in the real image and I was not pleased with the tank's performance.
I finished the tank over the weekend, but I have yet to have ample weather to take some decent out door images

. Hopefully I will be able to take some out door shots by the end of the week.
Posted: Tue Feb 15, 2011 12:58 am
by John Grima
Kent Wiik wrote:Hi John,
Wow very, very nice!
You are a skilled model builder and painter, love the paint job on the tools and replace the white metal handles was a good move, well done I am impressed.
How do you create the worn out paint/metal surface? Drybrushing or something else? Please tell, looks fantastic.
One minor thing...the jack is a 10T and KT had 20T.
http://www.panzerbasics.com/index_files ... t/jack.htm
Today only Steve makes a decent 20T jack and I have often wonder why no one else has bother to make one in white metal/resin as all information about it is there on the Panzer Basics website.
I mean with all those Panthers, Tiger I and KT out there it must be a market for them...hint, hint
Look forward to see the MG34 issue, I assume you will make the correct MG34T and not a standard MG34?
Kind regards
Kent
Kent, Thanks for the heads up on the jack. I just might take you up on your hint
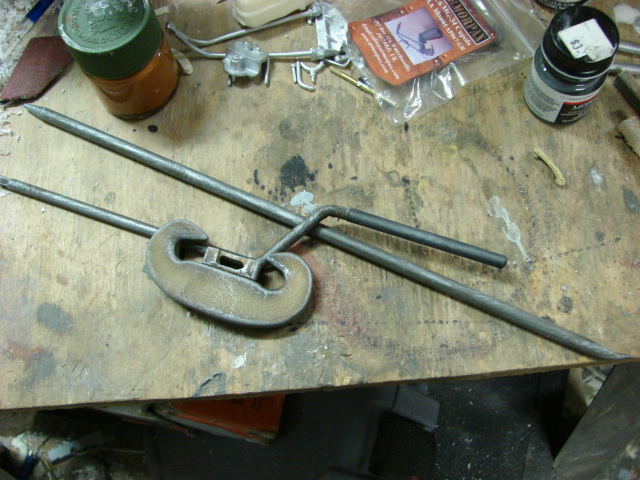
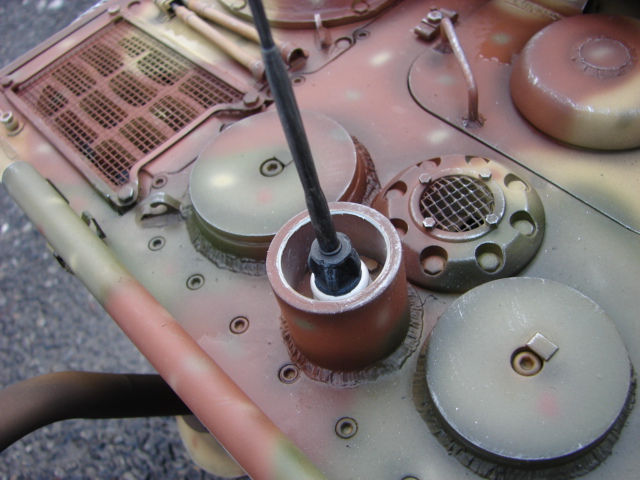
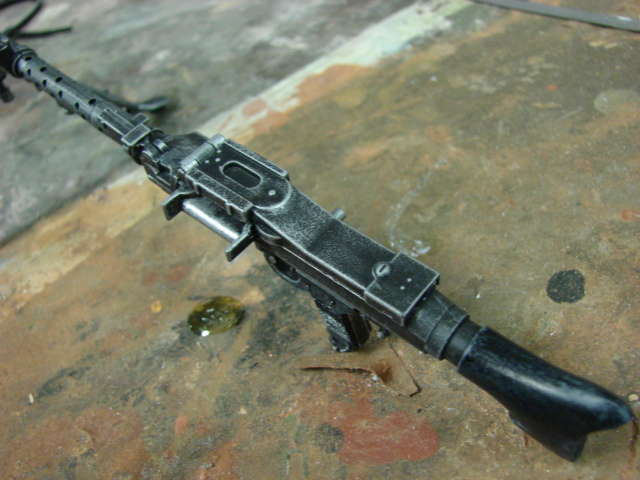
As for the scratch steel weathering I use simple old school silver paint dry brushing.
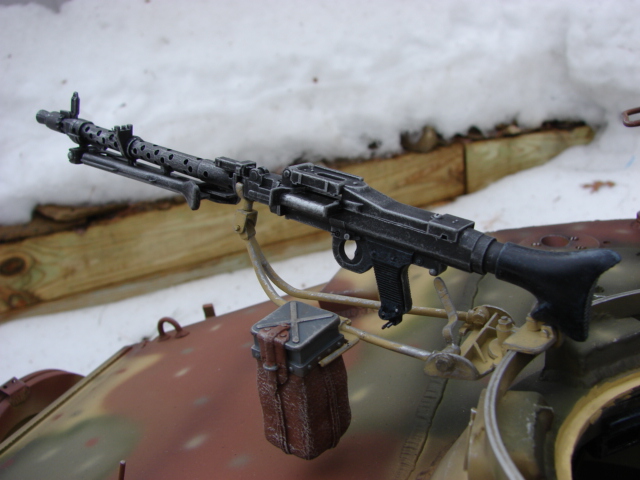
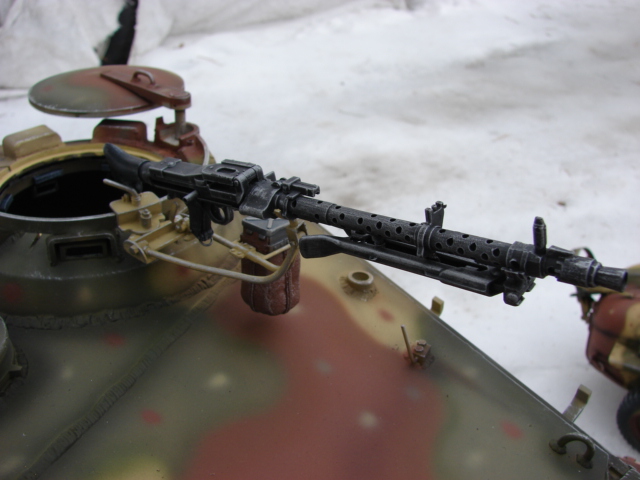
For this tank I will use the standard MG34, As I have seen it used in an image, plus the MG34 is such an elegant and classy weapon that looks well for this tank.
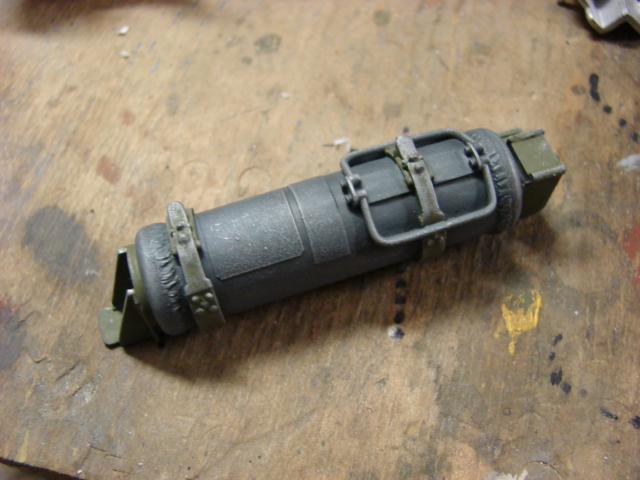
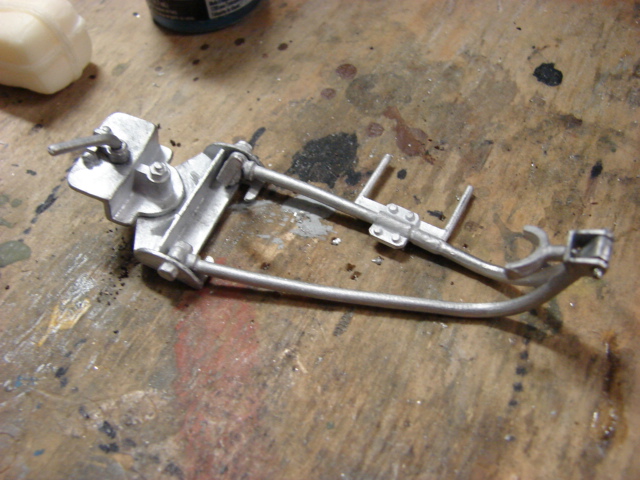
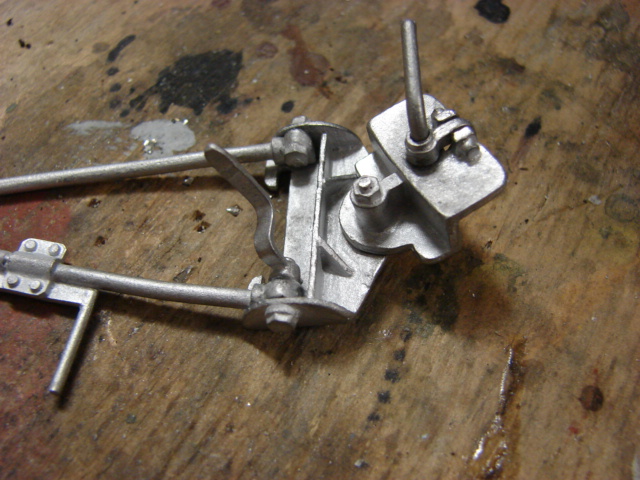
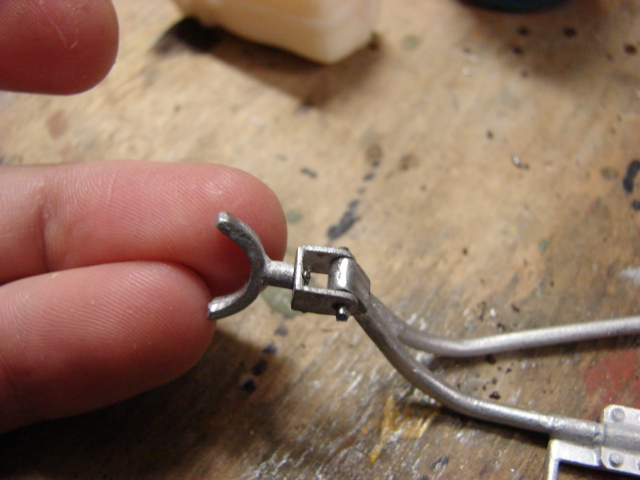
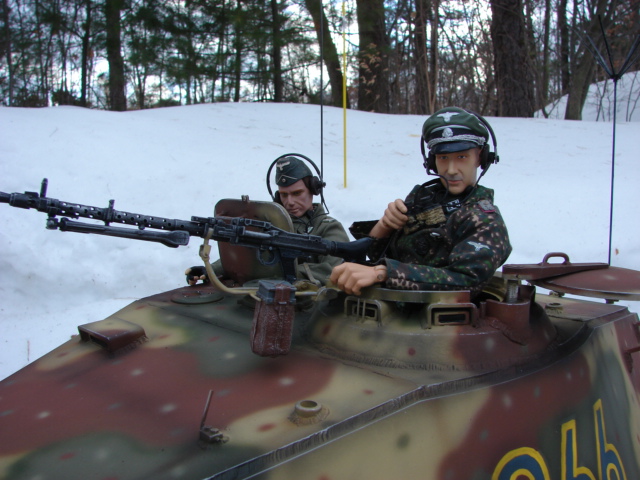
Thanks guys, The tank's MG34 and MG34 ammo bag have been painted and have been added to the model. The tank is now 100% complete!!!!
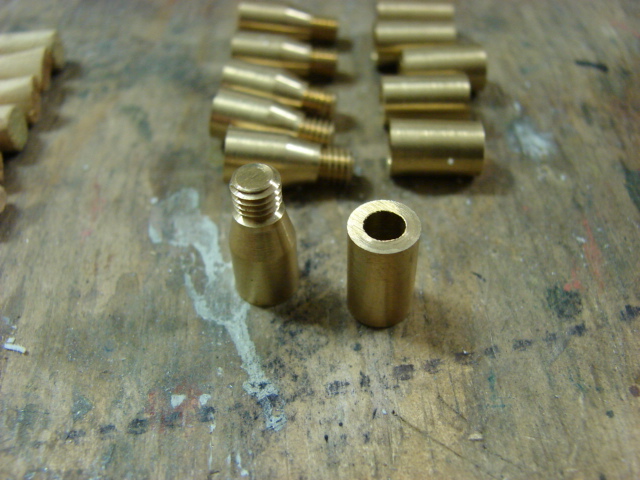
I have also added the rest of the resin king tiger parts to the product line
http://eastcoastarmory.com/germanparts.htm

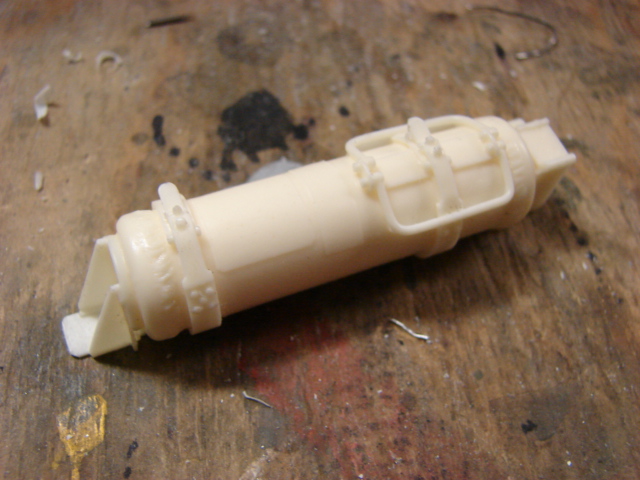
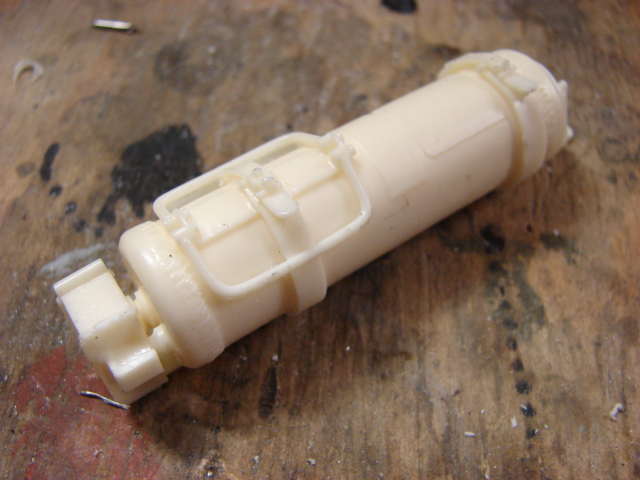
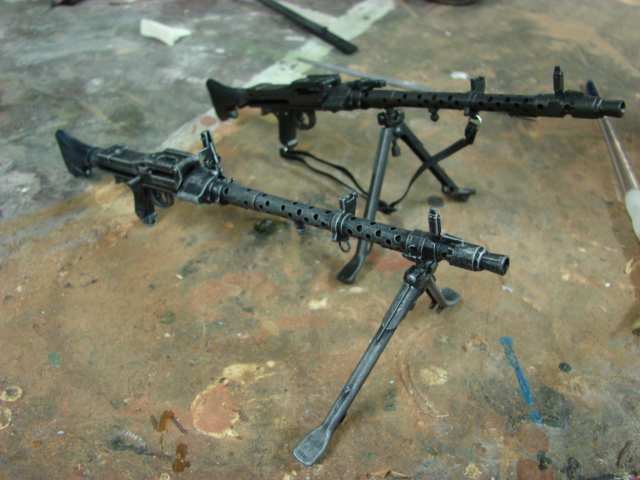
For the tank's MG34 I used the new tooling 21C MG34 set that was released a number of years ago. The gun itself is nicely detailed, and is nice out of the box.
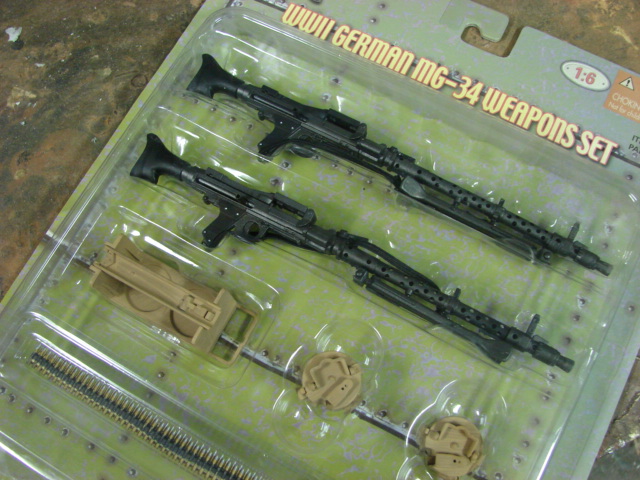
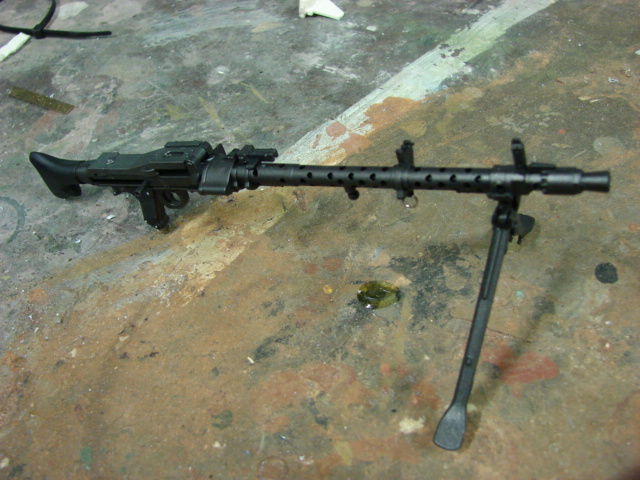

To improve the gun I eliminated the seam running down the barrel and gave the gun a nice repaint and weathering.
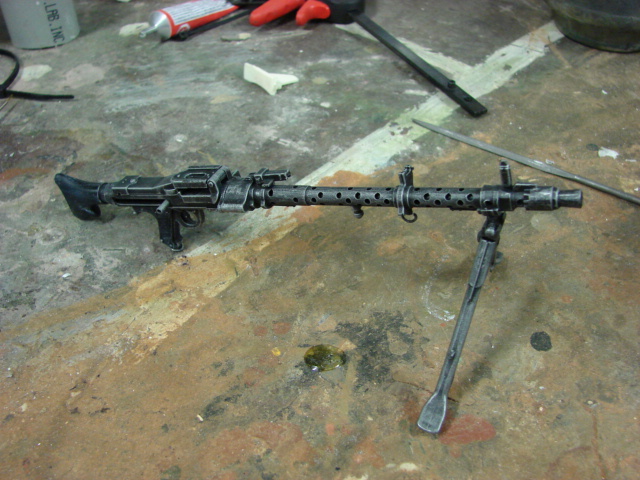
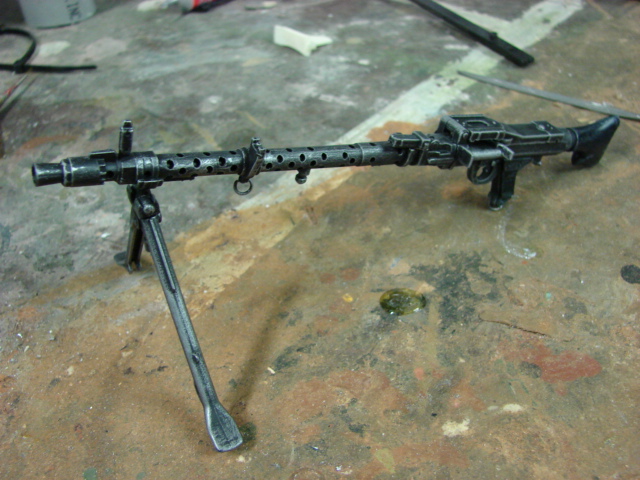
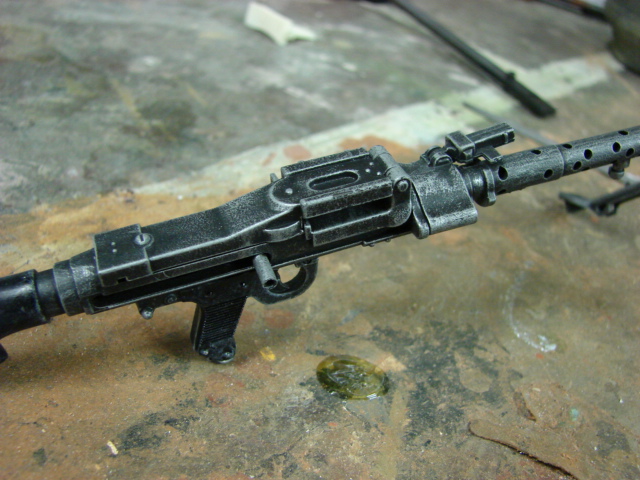
The gun was an easy fit to the armorpax gun mount.
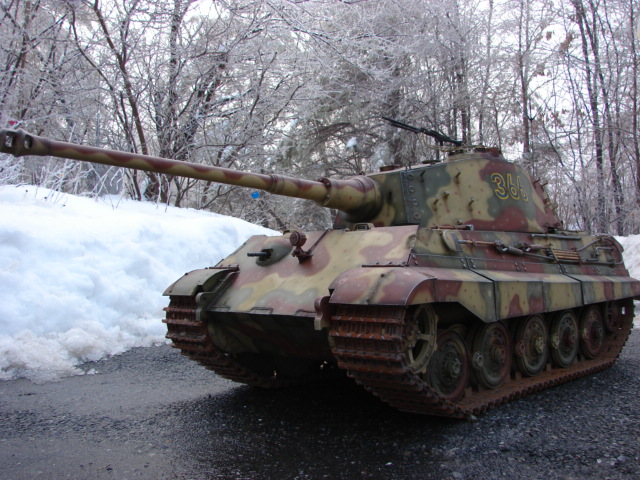
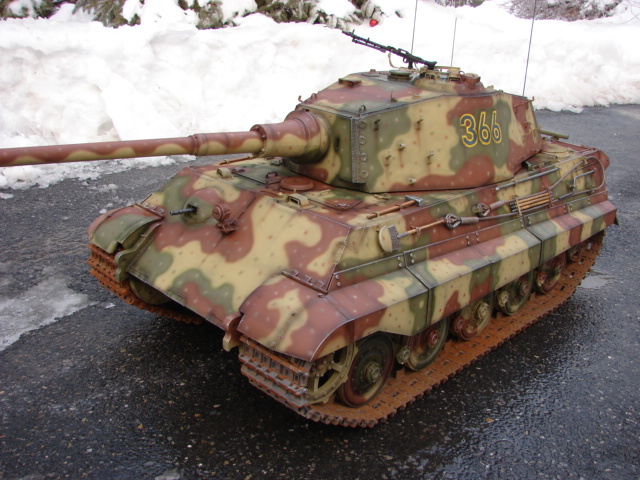
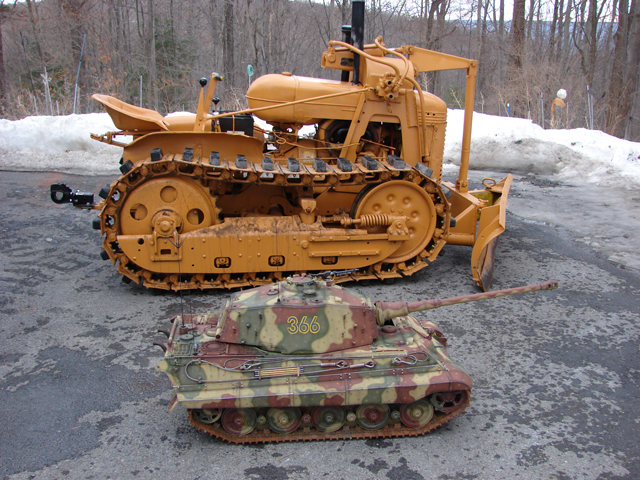
I took advantage of the moderately warm temperature and took some out door shots of the finished King tiger and my newly finished DML schwimmwagen.
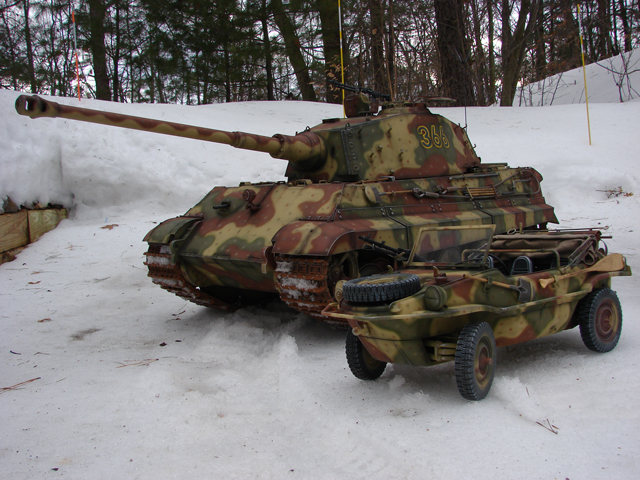
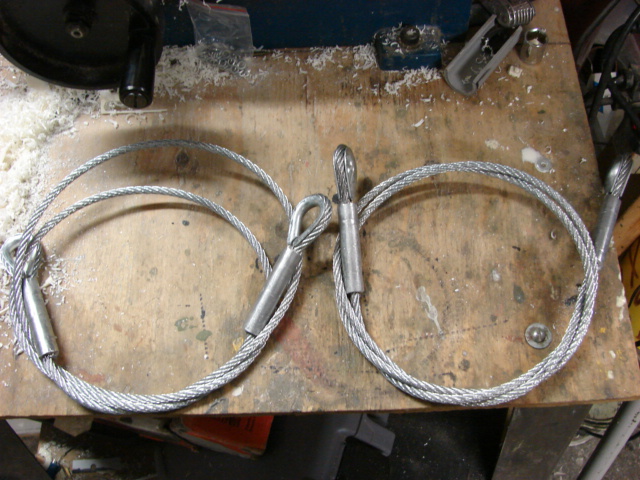
In the rare case the tank ever breaks or gets bogged down I can always tow it with this back up plan. It's not an M88, but it will do the job .
Now that the tank is complete I will be creating the gallery web page. Once complete I will be able to start on my next tank!